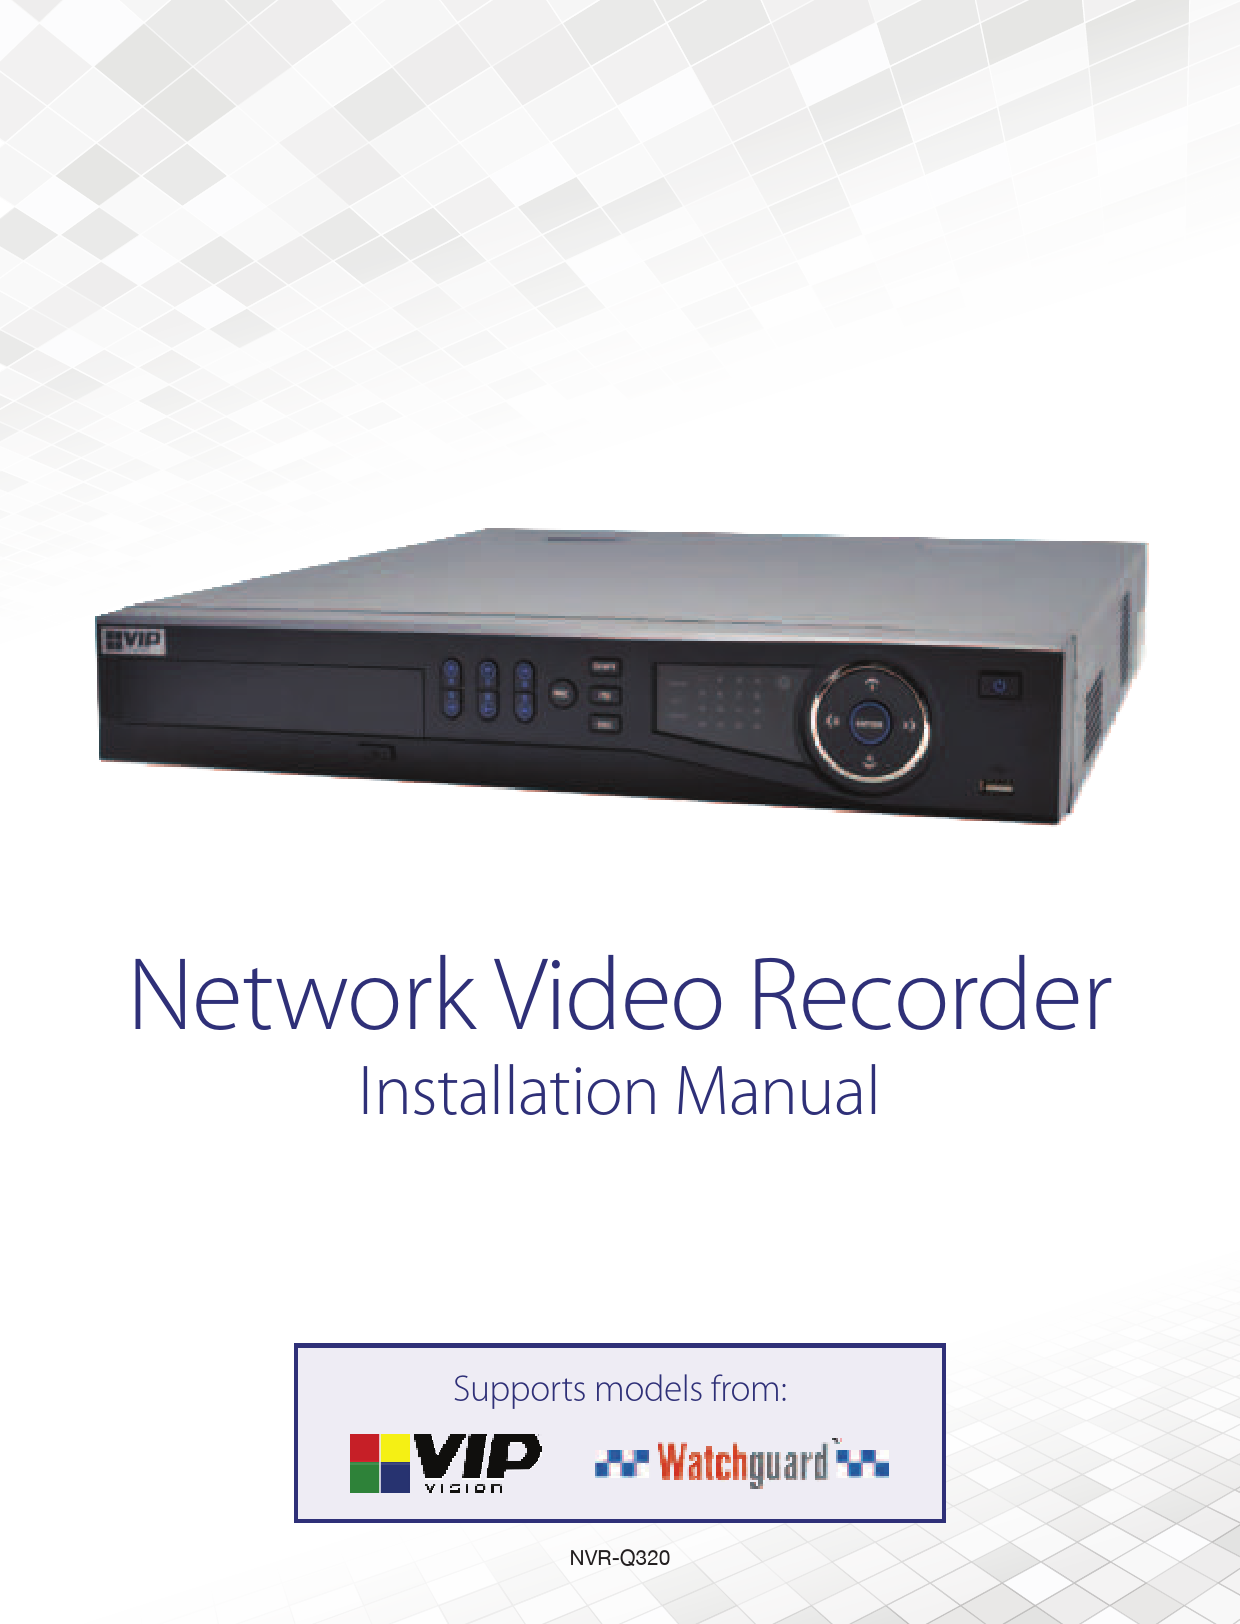
Instruction Manual for VIP VISION models including: NVR-Q320, Network Video Recorder
Index of /wp-content/uploads/2020/07/
2 NVR Quick Start Guide - Version: NVR-Q320 1. Pre-Installation • Do not place cords from the NVR where they can be pinched or stepped on. • Do not place heavy objects on cords, or cover cords with rugs or carpet.
Network Video Recorder Installation Manual Supports models from: NVR-Q320 1. Pre-Installation Thank you for purchasing this Network Video Recorder. This install guide covers basic setup, installation and use of your surveillance system. For detailed technical support and software downloads, visit our Help Centre at: help.c5k.info Note: This guide references the latest version of the NVR firmware (as of June 2020). Some images and instructions may differ depending on firmware version. help.c5k.info 1.1 Pre-Installation Safety Information Before connecting your NVR (network video recorder) or cameras, please ensure the following safe installation guidelines are adhered to. · Do not place cords from the NVR where they can be pinched or stepped on. · Do not place heavy objects on cords, or cover cords with rugs or carpet. · Do not expose the NVR to excessive heat or moisture. · Leave at least 50mm of space between the NVR and other objects to allow ample air circulation. · Never immerse any component in water and do not spray cleaners or solvents on the cameras. · Shut down and unplug the recorder before cleaning. When cleaning, use a damp, lint-free cloth only. · Service of your NVR or surveillance cameras should only be handled by qualified technicians. We recommend only using Surveillance-grade HDDs with your NVR, such as Seagate Skyhawk or WD Purple. These HDDs are built to handle the heavy workload of 24/7 recording; standard HDDs may encounter performance issues. 1.2 Connecting your NVR and Cameras The following section will detail connecting the NVR and surveillance cameras. It is recommended that cameras and connections are tested before mounting. If there is no image, an error message or dark screen when first connecting cameras, see Troubleshooting in Section 8 in this guide. Refer to 1.3 NVR Rear Panel & Setup Diagram for full NVR & system diagrams. Refer to rear panel diagram Fig 1.1 or your NVRs diagram/dimensions for input and output locations. 1. Connect the cameras to the NVR: Using CAT5e/CAT6 LAN cables, connect cameras to the built-in PoE Ports on the back of the NVR. No additional power is required for the cameras. 2. Connect network switches to the NVR: Connect any network switches to the LAN ports on the back of the NVR. NOTE: Connect to a LAN (Ethernet) port, NOT a PoE port. 3. Connect a display: Using an HDMI or VGA cable, connect a monitor or television (not included). 4. Connect the mouse: Connect the USB mouse to the rear USB port, saving the front port for easy USB backup. 5. Connect to your local network: Using the included Ethernet patch cable, connect to your switch or router. 6. Connect NVR power: Plug in the supplied AC power cord to the rear of the NVR. Upon activating power, LED lights at the front of the NVR should turn on and the NVR will sound on startup. The NVR will then run your surveillance user interface. Cameras will be detected automatically. This completes a successful first boot of your surveillance system and you may begin configuring surveillance cameras. 2 NVR Quick Start Guide - Version: NVR-Q320 1.3 NVR Rear Panel & Setup Diagram NOTE: Your NVR (network video recorder) model may differ - a 16 channel NVR is shown below. Video Inputs: PoE/ePoE network ports for camera data & power Audio: 1x channel RCA input/2x channel output for microphone/loudspeaker VGA: Video output for older monitors 100~240VAC: Power input LAN: Network (Ethernet) Ports USB: Connect HDMI: HDMI video Alarm: External mouse or backup output for modern alarm trigger device monitors & TVs input/output Fig. 1.1: NVR Rear Panel Diagram Remote View via Mobile PoE Network IP Cameras Switch (via PoE Switch) Internet Connection IP Cameras (Direct PoE) Power Cable Network (CAT5E/6) HDMI / VGA USB Router LAN PoE Power Input Monitor or NVR Fig. 1.2: System Setup Example Visit help.c5k.info for more information and support Mouse 3 2. Installing Cameras 2.1 Maximising Camera Effectiveness To maximise the effectiveness of your surveillance cameras, follow these guidelines for camera mounting. · Avoid pointing cameras directly in front of large objects, including walls & eaves. When infrared turns on in at night or in low-light, it may be reflected back into the camera, resulting in an over-bright image. · Avoid pointing cameras directly at light sources. · Consider how the sunlight changes during the day. Mount your camera where sunlight has minimum impact. · Consider your local and state laws before installing your cameras. This may affect where you point your surveillance cameras. · Avoid direct exposure to weather. If possible, mount under an eave or awning. While the cameras are water- resistant, rain on the lens will affect image quality. · Ensure the mounting surface thickness can support triple the weight of the camera. · Do not mount the camera behind glass as this can reduce performance and usability of surveillance in both day & night images. · Light levels should be approximately the same between the camera and the targeted area. · Do not place camera or cabling near high voltage wires or other sources of electrical interference. 2.2 Mounting Surveillance Cameras 1. Loosen the camera mount assembly by adjusting the locking screw with the included wrench. 2. Mark the screw position on the mounting surface. 3. Drill mounting holes for the wall plugs. 4. Drill a larger hole (approx. Ø10mm) so the camera cable can pass through the mounting surface. 5. Pull the cables through the building walls/ceiling from the camera to the recorder. 6. Connect the camera LAN cables, ensuring your camera is sealed away from rain and dust. If installing in an area where moisture exposure is possible, seal power and video connections with self-amalgamating tape (not included). 7. Affix the camera to the mounting surface using the supplied screws and wall plugs. 8. Reassemble the camera, loosely locking the enclosure using the locking screw and wrench. 9. Connect the LAN cable back to the NVR and view the video feed. 10. Adjust your camera to the desired position. 11. Tighten the locking screw(s) to complete mounting. NOTE: To adjust the angle of cameras with tri-axis mounting, simply loosen the locking screw(s) to adjust your camera's position, then tighten again once finished. 4 NVR Quick Start Guide - Version: NVR-Q320 2.2 Mounting Surveillance Cameras (continued) NOTE: Diagrams shown below assume camera to be mounted on masonry. Cameras mounted on drywall (gyprock, plasterboard, etc.) will require special mounting screws or toggles (not included). Diagrams are examples only - screws and other physical components may vary depending on your camera model(s). Camera Self-tapping screws Wall plugs Cables Base Surface Fig. 2.1: Mounting diagram for fixed bullet Cables Surface Wall plugs Pedestal Self-tapping screws Camera Allen key Locking screw Locking screw Fig. 2.2: Tri-axis fixed bullet adjustment Locking screw Enclosure Fig. 2.3: Mounting diagram for fixed dome Fig. 2.4: Tri-axis fixed dome adjustment Visit help.c5k.info for more information and support 5 3. NVR and Camera Configuration 3.1 First Boot and Startup Wizard After successful connection and boot of your NVR, you will be taken through first-time setup for your surveillance system. Here you will configure system security and begin customising your NVR, including setting camera encoding options, record scheduling, network setup and remote view configuration. USB keyboards are supported, but not required; an on-screen keyboard will appear when needed. NOTE: Each setting shown in the Startup Wizard can be modified later via the NVR Main Menu. See the Menu Quick Guide in Section 6 or see the full user manual for more information. Following the prompts, complete each section in the Startup Wizard, as detailed below: 3.1.1 Startup Wizard When the NVR is powered up for the first time or the NVR is restored to factory settings, the Startup Wizard will be displayed. Users can set common NVR functions by following the procedures step-by-step 3.1.2 Securing your NVR In the Startup Wizard, you will be prompted to change the admin user password. This is to prevent unauthorised remote access via the Internet to your NVR. 1. Enter a strong admin user password, using letters, numbers & symbols. Confirm this password. 2. (Recommended) Enter a Prompt Question (password hint). 3. (Optional) Draw an Unlock Pattern for quick unlocking. 4. (Recommended) Enter an email address to be used for password resets. 5. (Recommended) Enter security questions/answers to be used if the admin password is forgotten. Note that answers are case-sensitive. NOTE: Email address password resets require a mobile phone with the DMSS app. This can be downloaded for free from the App Store / Google Play. NOTE: We strongly recommend setting up email password reset and security questions. If the password is forgotten and no recovery method is set up, the recorder will need to be sent back to the supplier for a system reset, which will incur a fee even if the system is still within the warranty period. Fig. 3.1: Enter Password screen. 6 Fig. 3.2: Password Protection screen. NVR Quick Start Guide - Version: NVR-Q320 3.1 First Boot and Startup Wizard (continued) 3.1.3 Automatic Updates Here, you can choose whether you want your system to Auto-check for updates. This feature will notify you whenever a new firmware update is available and downloads it. For compatibility with future cameras and to receive security updates, we recommend automatic updates be turned on. To enable & disable Auto-check or to manually check for updates, go to the Upgrade page at: Main Menu -> Operation -> System Maintain -> Upgrade NOTE: Automatic updates require an internet connection. Fig. 3.3: Auto-check for updates 3.1.4 General NVR Setup You will now be directed to General setup. Here you can confirm basic options of your NVR. By default, your NVR is set to have 5 minutes of instant replay and will logout automatically after 10 minutes. You can also change mouse sensitivity and confirm date & time. Default settings are adequate to get started, we recommend checking the following: 1. In the General menu, assign a name to your NVR by changing the Device Name field. 2. Confirm the settings and click next to go to the Date & Time menu. This will directly affect recording, footage search & playback. You can optionally enable NTP to ensure time is correct (this requires an internet connection). 3. Users in NSW, VIC, SA, TAS and ACT will need to enable DST (Daylight Saving Time). Adjust Start Time & End Time settings according to your region and the year. NOTE: Daylight Saving Time begins at 2am on the first Sunday in October, when clocks are put forward one hour. It ends at 2am (which is 3am Daylight Saving Time) on the first Sunday in April, when clocks are put back one hour. Fig. 3.4: General setup section Visit help.c5k.info for more information and support Fig. 3.5: Date & Time setup 7 3.1 First Boot and Startup Wizard (cont.) 3.1.5 Configuring TCP/IP, P2P, and Remote View NOTE: For the following section, please ensure the LAN (Local Area Network) is connected to your router or switch and that your Internet connection is available. Also, have your Internet connected phone or tablet ready for configuring surveillance remote view. Network setup will be prompted next, enabling you to connect your NVR to the Internet. First ensure that your NVR is connected to your switch or router via the included CAT5 cable (detailed in Section 1.3). For the simplest setup we recommend using DHCP to connect to the Internet. You will then be prompted to configure P2P for remote view on your device. 1. In the TCP/IP section, see Fig. 3.6. The IP address of the NVR will be shown. 2. Select and enable DHCP (Dynamic Host Configuration Protocol). 3. Should you wish to use a static address, contact your Internet administrator for details. 4. Click Apply to continue. 5. Click Enable to enable P2P remote view. 6. NVR Status should read Online. This indicates an active Internet connection. (This may take a few minutes). 7. Scan the left QR code, Cell Phone Client, or search your App Store to download the DMSS app. Fig. 3.6: TCP/IP setup section settings (example only) Fig. 3.7: P2P setup section, with QR codes (example only) 8 NVR Quick Start Guide - Version: NVR-Q320 3.1 First Boot and Startup Wizard (cont.) Remote View: Adding NVR via QR Code The following details remote view configuration via the DMSS app (Apple iOS / Android) on your device. Depending on the device or app version, menus may function or appear slightly different to those explained below. 1. Go to the Home screen. 2. To add your NVR by QR Code, select the Button and then select SN/Scan. 3. Scan the Device SN QR code that you see in the P2P section (Fig. 3.7). 4. Optionally, select Manually Enter SN to type in the device SN (serial number) to manually add device. 5. Select the Device Type as NVR. 6. Choose a name for your NVR in Device Name. 7. Enter the Username and Password for your NVR. The default username is admin and the password is what was set in Section 3.1.2 8. Tap "Save". Fig. 3.8a: Home Screen Fig. 3.8b: QR Scan Remote View: Enabling Push Notifications After adding your Recorder to your iOS / Android device, the next step is to enable notifications. This will allow you to receive & respond to surveillance app alerts on your device. 1. Go to the Home screen. 2. Select the ... Button on the device to add push notifications for. 3. Select Device Details. 4. Select Notifications. 5. Toggle Alarm Notifications to ON (blue). 6. Tap on the notifications you wish to receive and enable them. E.g. To enable notifications for Low HDD Space: Tap Disk Alarm, then enable Low Space. 7. Tap "Save". Fig. 3.8c: Manual S/N Fig. 3.8e: Device Details Fig. 3.8d: Add Device Fig. 3.8f: Alarm Notification Visit help.c5k.info for more information and support 9 3.1 First Boot and Startup Wizard (cont.) 3.1.6 Configuring Surveillance Cameras After configuring remote view, the Startup Wizard will take you to the Camera List menu. This menu will display all detected cameras. Users can also add cameras manually. Cameras that are connected will automatically be displayed. Fig. 3.9: Camera List Device search: Search all network cameras in the same network segment. To add a camera, double click on the camera list or check the box then click Add button. See 3.3 Manually Addressing IP Cameras via Switch for details. Initialize: Used to configure manually added cameras. To add manually with known IP address: 1. Type the camera's IP address in the box left of the Search button, then click Search. 2. Alternatively, you can click the Manual Add button and input the camera's IP address and password. Channel: The camera's channel number. Status: Camera connection status. Red circle = camera is offline. Green circle = camera is online. IP Address: Network camera's IP address. Port: The port number of the network camera. 3.1.7 Configuring Recording Schedules Finally, you will be prompted to setup your Schedule for recording. Here you can define the recorded footage schedule in the Record menu (Fig. 3.10), and the recorded image snapshot schedule in the Snapshot menu. By default, cameras are set to non-stop Regular recording (24 hours a day, 7 days a week). Motion detection recording is not set by default. Schedules can be set in hourly periods for individual days for each camera, with colour-coded options for: · Regular (green) for all regular recording. · MD (yellow) for recording on motion detection. · Alarm (red) for recording on triggering an integrated alarm. · MD & Alarm (orange) for simultaneous alarm/motion detection recording. · IVS (blue) for recording on triggering IVS (Intelligent Video Surveillance) such as a virtual tripwire. · POS (purple) for point of sale transactions. We recommend adding MD & Alarm & IVS to all channels to accompany your regular recording. 10 NVR Quick Start Guide - Version: NVR-Q320 3.1 First Boot and Startup Wizard (cont.) Fig. 3.10: Recording Schedule Setting Motion Detection & Intelligent Recording 1. Click the Channel drop down to select All cameras. 2. In the days column, toggle the All check box to simultaneously set recording schedule parameters for every day of the week. 3. Check the yellow MD check box to select motion detection recording. 4. Click the schedule to fill in areas for motion detection recording. We recommend a 24/7 schedule to mirror the Regular recording schedule (Fig. 3.10). 5. Repeat steps 3 & 4 with the blue IVS check box to set intelligent recording (tripwire, face detection, etc). 6. Click Apply to the confirm recording schedule changes and move on to Snapshot Schedule. Setting Snapshot Schedule The Snapshot Storage Schedule is configured similarly to the Recording Schedule. For consistency between recording and snapshots, we recommend using the same settings used for the Recording Schedule. You have now set up motion detection & intelligent recording. This will be beneficial when it comes to searching footage in playback (Section 4.0). This can be edited any time from Main Menu -> ManagementStorage -> Schedule. Fig. 3.11: Snapshot Schedule Note: For instructions on how to configure MD / IVS etc., see 6.3 Motion Detection & 6.4 Tripwire & IVS Setup. Visit help.c5k.info for more information and support 11 3.1 First Boot and Startup Wizard (cont.) 3.1.8 Completed Setup Startup setup is complete. Below is an example of a View 8 Liveview setup. Before mounting cameras, familiarise yourself with the user interface and menu layout. Camera Number Camera Status Icons Camera Name Right-click Menu: · Main Menu · Search Playback · PTZ/Focus Control · Viewing Options · Sequence · Smart Tracking · Custom Split · Camera List · Manual Record · Preview Mode · Auto Focus · Image Snapshot Fig. 3.12 View 8 Liveview screen with right-click menu open. Liveview Controls · Double-click on a camera window to make it full-screen; double-click again to return to normal view. · Right-click to access the right-click menu. · From the right-click menu, click Main Menu to access most configuration settings. Main Menu Controls · Mouse wheel scroll to view more menu options. · Left-click to enter a menu. · Right-click to return to the Main Menu / return to the Liveview screen from the Main Menu. 3.2.1 Camera Quality & Bit Rate After the Startup Wizard has been completed, you can make adjustments to the camera settings via the Encode menu From the Main Menu go to the Management section at the bottom and click Camera. Each camera features a Main Stream for high quality streaming to the NVR; and a Sub Stream for low quality, low data streaming to your remote view phone or tablet. You can configure both of these streams for each individual camera, so you can choose to prioritise quality for important cameras and recording time for others. 12 NVR Quick Start Guide - Version: NVR-Q320 3.2 Configuring Surveillance Cameras 3.2.2 Encode Setting Definitions You can configure a number of settings to achieve greater image performance or increased record time, including: Type: This dropdown menu switches between encode settings for Regular and MD (Motion Detection). Different encode settings can be separately set for each type of recording mode (Standard camera streams will use Regular settings, while camera streams with Motion Detection enabled will use MD settings). Bit rate: The rate at which video data travels from the camera to the recorder, measured in Kilobits per second. This directly determines the quality of the video stream and how much capacity footage will occupy on the hard drive. Bit Rate Type: How bit rate is controlled. By setting CBR (constant bit rate), the camera bit rate is pre-defined and camera quality is constant no matter what is being captured. By setting VBR (variable bit rate), the camera uses a low bit rate when there is little scene activity and switches to a high bit rate when there is more activity. CBR ensures constant quality, whilst VBR conserves hard drive capacity in times of low activity. Compression: The compression technology used when encoding footage for storage on a hard drive. H.265 is the most efficient at compressing footage for storage on your hard drive and will provide the most total record time. Resolution: The camera's image resolution; dictates the size of captured images. A high set resolution means larger pictures captured by the camera each frame, which means higher required bit rate & hard drive storage capacity. Frame Rate (FPS): Frames per second, or, the number of images that make up each second of video captured by the camera. A high frame rate means more data per second is captured by the camera and sent to the recorder, this requires a higher set bit rate & hard drive storage capacity. Encode Menu From the Main Menu select Management-Camera, then the Encode tab. · In the Encode menu, select each camera channel and set desired encoding options (Fig. 3.15, see suggestions Fig. 3.16) Snapshot Menu From the Main Menu select Management-Camera, then select the Encode tab. · In the Snapshot menu, you can configure the NVR to record image snapshots to be taken at Timing intervals, based on the Snapshot Recording Schedule (see 3.1.7 Configuring Recording Schedules), or on Trigger, via camera motion detection. · This creates image files alongside your recorded footage. Fig. 3.13: Example encode settings for channel 1 (Quality Optimised 8MP, H.265 system) Visit help.c5k.info for more information and support 13 3.2 Configuring Surveillance Cameras (cont.) 3.2.3 Example Encode Settings Below are suggested camera stream values to be set for individual cameras. This shows quality optimised values & maximum recording-time optimised values. NOTE: To conserve mobile data usage while using remote view, 320Kbps Bit Rate is recommended for Sub Streams. Field Resolution Frame Rate Bit Rate Type Bit Rate Quality Optimised Main Stream Sub Stream 3840 * 2160 720 * 576 7fps 7fps CBR CBR 6144Kbps 1536Kbps Recording Time Optimised Main Stream Sub Stream 3840 * 2160 720 * 576 7fps 7fps VBR VBR 2048Kbps 320Kbps Fig. 3.14: Suggested camera stream values to be set for individual cameras. 3.3 Manually Addressing IP Cameras via Switch This section covers how to add additional IP cameras that are connected to the NVR via network switch. 3.3.1 Initialising and Manually Addressing IP Cameras 1. From the Live View screen, right-click and select Camera Registration. 2. Select Device Search. 3. Tick every camera that you wish to initialise, then click the Initialize button. 4. You will be brought to an Enter Password screen. Tick Using current device password and email info, then click Next. 5. Enter the IP Address, Subnet Mask and Default Gateway, then click Next. (NOTE: When initialising more than one camera, the last section of the IP address will be incremented by the Incremental Value.) 6. Click Finished. 7. Select the Cameras you wish to add, then click Add. 8. The cameras should now be displayed from Live View. Fig. 3.15 Camera Registration 14 NVR Quick Start Guide - Version: NVR-Q320 3.4 Configuring Storage Settings 3.4.1 Configuring Basic Storage Settings Here, you can configure the settings for situations when the HDD is full, file size/time length of recorded video, and the settings for auto-deleting old files. To configure basic storage settings, from the Main Menu select Management-Storage, then select the Basic tab. · HDD Full: Configure the settings for when all the read/write discs are full, and there is no more free disc. · Pack Mode: Configure the time length and file length for each recorded video. · Auto-Delete Old Files: Configure whether to delete the old files or not. If yes, also determines how many days of footage are deleted. Click Apply to save settings Fig. 3.16: Storage Settings Visit help.c5k.info for more information and support 15 4. Footage Playback 4.1 Accessing Stored Footage To access footage playback, select the Playback button from the Main Menu. Stored footage can be accessed by searching by date and refined by footage type (Regular, Motion Detection, Alarm, etc). The below image details the playback interface with footage selected. After locating desired footage, you can immediately backup the video by using the playback menu. See Section 5.1.1 for more information. Camera Display Source Select Date Select Smart Search View Select Playback Controls Footage Timeline Fig. 4.1: Four camera view simultaneous footage playback. Backup Controls Timeline Zoom 16 NVR Quick Start Guide - Version: NVR-Q320 4.1 Accessing Stored Footage (cont.) 4.1.1 Playback Footage by Date 1. Ensure that the correct HDD is selected and that REC checked in Source Select. 2. Using the Date Select calendar, choose your date for footage playback. A coloured dot icon indicates stored footage is available for that day (Fig. 4.2). Sun Mon Tue Wed 1234 Fig. 4.2: Data Select calender, with Sun, Mon & Tue selected. 3. Select the cameras to be viewed. The screen will automatically split depending on the amount of cameras selected. 4. The Footage Timeline should populate with stored footage, indicated by coloured bars in the timeline. Click anywhere on the timeline to begin footage playback. Other cameras will automatically sync their playback to the selected camera. 5. For greater precision playback control, zoom in on areas using the Timeline Zoom, up to 30 minutes. 6. Using the Playback Controls, you can speed up or slow down playback, place marks on key footage times and take snapshots. 4.1.2 Playback Footage by Smart Search NOTE: Smart search requires motion detection to be recorded to function. You can only Smart Search playback footage one camera at a time. If Smart Search is not functioning, check Section 6 for troubleshooting. 1. As detailed in the previous section, use Date Select to locate your desired date for footage playback, and choose a single camera only in View Select. 2. Click anywhere on the Footage Timeline to begin playback. Then select the Smart Search button . 3. A grid will appear overlaid onto your camera playback. Highlight an area of interest on the grid. This will define the motion detection area that is used by Smart Search. 4. Select the Smart Search button again to begin playback of all motion detected events in the area you selected. By configuring your recording schedule for motion detection and by using Smart Search, you can quickly find the footage you require. For Footage Backup, proceed to Section 5. Visit help.c5k.info for more information and support 17 5. Footage Backup & Viewing 5.1 Backup Footage to USB Should you wish to preserve recorded footage before it is overwritten, you will need to perform a footage backup. Footage can be exported from your NVR in a .DAV or .MP4 file. A .DAV file will require conversion for sharing, whereas an .MP4 file is compatible with most video players on Windows or Mac PCs. Each file type is covered in Section 5.2. There are two different ways to backup footage to USB: via the Playback menu through searching playback footage; and by performing a direct backup via the Backup menu. Both are accessed via the Main Menu. File selection (.DAV/.MP4) is only available in the Backup menu. Backup in Playback Menu outputs .DAV files only. Note: When backing up footage to an external HDD, it will first need to be formatted by selecting the "Format" button. This will clear all data on the external HDD. 5.1.1 Backup Footage via Playback Menu Using the Playback Menu, find start/end points of backup footage by using playback video as a reference. 1. As detailed in Section 4, locate the footage you wish to backup. Select the desired camera in single view mode. 2. Using the Footage Timeline, click the approximate desired time for your backup video start point. Selecting the Clip Button on the Backup Controls (Fig. 5.1), this will set your start point. 3. Again, using the Footage Timeline, click the approximate desired time for your backup video end point. Select the Clip Button again to set your end point. 4. Select the Save Button to open the Backup menu. 5. This process can be repeated to add more clips from different channels. 6. Plug in your USB device, exiting any automated prompts, and select Backup to begin backup. 5.1.2 Backup Footage via Backup Menu Using the Backup Menu, specify start/end dates & times across multiple cameras simultaneously. This is useful for large footage export, such as full days. 1. Select Backup from the Main Menu, or, insert your USB device and select File Backup. 2. Here, you can select the Type of footage to backup (default: All), the Start Time and End Time and what Record Channels to backup video from. 3. Selecting Search will populate the list with individual video clips ready for backup. Clips can be added or removed from the backup process using the check box. 4. Select Start to begin backup. NOTE: Regular type footage (R) will be split into in one hour segments, unless Motion Detection type footage (M) was recorded. Storage capacity is also shown. Ensure you have the required storage to accept the backup video. Fig. 5.1: Backup Controls in Playback Menu. 18 Fig. 5.2: Backup Menu NVR Quick Start Guide - Version: NVR-Q320 5.2 Viewing Footage on a Computer The following details instructions for viewing footage on Windows or Mac personal computers. Video conversion may need to take place for viewing on other devices, eg: smartphones, tablets, etc. Now that you have backed up footage to a USB in .DAV / .MP4 format, you are ready to view it on a personal computer. · .DAV footage can be viewed using the Smart Player Lite program and cannot be played on mainstream media players without file type conversion. · Smart Player can export your videos to .AVI file type to be viewed using another media player such as Windows Media Player & VLC Media Player · .MP4 footage can be directly viewed using most players, including Windows Media Player & VLC Media Player 5.2.1 Viewing .DAV Video Files on PC with Smart Player Lite Note: Smart Player Lite is automatically copied onto the USB device when performing footage backup from the NVR. 1. To view .DAV footage in Smart Player Lite, either click the Add Files or drag & drop the file onto a selected play window. button and select the file from your USB, 2. Using the .DAV file, Smart Player Lite adds functionality similar to your NVR in footage playback, such as synchronous playback of multiple channels. 3. Open the Options menu . Here, you can set the directories and formats for saved snapshots (.BMP/.JPG) and videos (.DAV/.AVI). You can also adjust video aspect ratio and other options. 4. You can export clips by pressing the Record button once to begin recording, then again to end recording. 5. Similarly, you can take snapshots by pressing the Snapshot button once. Fig. 5.3: Footage playback using the included Smart Player Lite for Windows Visit help.c5k.info for more information and support 19 5.2 Viewing Footage on a Computer (cont.) If you want to play the video on a different device that does not have Smart Player program, select Export Type as .AVI. File type .mp4 can be viewed on a wider range of devices, however you cannot choose to export files as .mp4 on the Smart Player program. You must export files as .mp4 via the recorders back up menu. Fig. 5.4: Exporting footage to .AVI File on Smart Player program 5.2.2 Viewing .MP4 Video Files The .MP4 file format is a common video format, compatible with Windows Media Player and most other video players. .MP4 videos can also be played by VLC Media Player. This free open source player is available across many platforms, including: · Desktop: Windows, Mac OS and Linux · Mobile: Android and iOS 1. Access your USB device and open your backup .MP4 footage video using one of the media players mentioned above. 2. .MP4 files cannot be viewed using Smart Player Lite. They do not retain time/date data like .DAV files. The included Smart Player Lite is for Windows only. Smart Player Lite is for viewing recorded footage only. For CCTV liveview from your PC, use SmartPSS or Smart Player (MacOS). SmartPSS (Windows) Smart Player (MacOS) 20 NVR Quick Start Guide - Version: NVR-Q320 6. Intelligent Functions NOTE: Before enabling IVS or AI features, ensure that you have configured IVS recording schedules (refer to 3.1.7 Configuring Recording Schedules), or these functions will not work. There are 2 different ways AI can processed - By Camera or By Device. By Camera mean the AI processing takes place in the camera itself. By Device means the recorder is processing information, not the camera. Please note that only select cameras and recorders support AI functions. AI lets your CCTV system go beyond surveillance, delivering advanced & powerful detection tools. When properly configured, these functions can alert you to suspicious activity in real time via email/smartphone notification and let you easily search through surveillance footage via event history. Below will explain the different types of AI functions. Keep in mind that functions are camera and recorder specific. · Face Detection Face Detection will trigger whenever any face has been detected. Best suited for use directly above entry doors. · Face Recognition Trigger events upon detecting specific pre-determined faces from a face database. Face Detection must be used in conjunction with Face Recognition, · Tripwire A virtual line is drawn over the camera image. If it gets broken, an event will be triggered. Suitable for both indoor and outdoor locations, with the camera mounted up high, looking down. * Perimeter Protection can also be applied to Tripwire, distinguishing vehicles and cars. · Intrusion A virtual area is drawn over the image. If it gets broken, an event will be triggered. Suitable for both indoor and outdoor locations, with the camera mounted up high, looking down. * Perimeter Protection can also be applied to Intrusion, distinguishing vehicles and cars. · Abandoned A virtual area is drawn over the image. If an object gets left in the area and event will be triggered. · Fast-Moving A virtual area is drawn over the image. If a fast-moving object is detected, an event will be triggered. Best suited for outdoor environments such as driveways. · Crowd Gathering Estimation A virtual area is drawn over the image. If a group of people is detected entering the area, an event will be triggered. · Missing A virtual area is drawn over the image. If an object is missing in the area, an event will be triggered. · Loitering - A virtual area is drawn over the image. If someone is standing in the area for a set amount of time an event will be triggered. Best suited to a shop. · People Counting Used to count the number of people going through a specific area and providing statistics. Best suited to a busy environment such as a train station, or shop entry. · ANPR Automatic License Plate Recognition Used to trigger events after a number plate is detected. To properly configure an IVS function, there are several sections of this manual to follow: · 3.1.7 Configuring Recording Schedules to enable Motion Detection & IVS recording. · 6.1 Mounting Surveillance Cameras to ensure cameras are optimally mounted to perform their function. · 6.3 Motion Detection / 6.4 Tripwire & IVS Setup / 7.1 Face Detection & Recognition, depending on which function(s) are being used. · 7.4 AI Trigger Actions to set which Trigger Actions are activated in response to events. Visit help.c5k.info for more information and support 21 6.1 Mounting Surveillance Cameras for AI Functions When using AI features, correct camera mounting is crucial for AI triggers to be reliably received. Use the information below to mount the cameras correctly. 6.1.1 Mounting for Face Detection/Recognition When using face detection and/or face recognition, the camera will need to be dedicated to the task. It will need to be focused on the entry point to the premises, not covering a wide area. When installing the camera it is vital to ensure that scene is well lit. Avoid light coming from the back or sides of the scene. Recommended Mounting Distance 3.6mm 2.0MP IP camera Parameter Height (H) Horizontal Distance (D) Degrees Recommend Value 2.5m 6m 15° ° H D 6.1.2 Mounting for ANPR Fig. 6.1: Face Detection mounting diagram When using ANPR, the camera will need to be dedicated to the task. It will need to be focused on the entry point to the premises, not covering a wide area. For example, it can be used in a driveway at an electric gate, or at a shopping center with a boom gate. The camera needs to get a clear image of the number plate, with the vehicle at a standstill. At night, light emitted from the infrared illumination LEDs on the camera must reflect from the number plate and return into the camera lens. If the angle is too sharp, the light will bounce away from the lens and the number plate will not be readable. At the same time, you must ensure that the camera is mounted in a location where it is not subjected to the direct beam from the vehicle headlights for long enough to get an image halogen lights will overwhelm the image sensor resulting in glare that cannot be corrected by the software highlight compensation. ANPR Camera Mounting From center of driveway Parameter Height (H) Horizontal Distance (D) Degrees (°) Recommend Value 2.5m 6m 10° 22 ° H D Fig. 6.2: ANPR mounting diagram NVR Quick Start Guide - Version: NVR-Q320 6.1 Mounting Surveillance Cameras for AI Functions (cont.) 6.1.3 Mounting for People Counting When installing a camera for use with people counting, the camera must be looking top down. The doorway must be no more then 3m wide. If the doorway is wider then 3m, a second camera may be required. People Counting Distance from Floor 2MP 3.6mm IP Camera Parameter Height (H) Recommend Value 3m Fig. 6.3: People Counting camera view example 6.1.4 Mounting for Tripwire, Intrusion, Missing, Abandoned, Fast Moving, and Loitering When installing a camera for use with any of the above functions, the camera will need to positioned looking over the area. When the trigger area is drawn, it should not be around the edges of the image, as this will cause inconsistent triggers. Fig. 6.4: Tripwire camera view example Fig. 6.5: Intrusion camera view example Visit help.c5k.info for more information and support 23 6.2 AI Live View AI Face Detection & Recognition results can be displayed in real-time on the Live View screen. This will show every face that is captured by the AI system, and additionally, if Face Recognition is activated, compare it to faces in the database and show comparison results (with accuracy %). Enabling AI Mode in Live View 1. While on the Live View screen, right-click to open the menu. 2. Hover over Preview Mode. 3. By default, the General Preview Mode is enabled. Select AI Mode. 4. If AI & IVS have been configured correctly, live face capture results should now be displayed on the right side of the screen. Fig. 6.6: AI Mode in Live View Menu Fig. 6.7: Live playback with Face Detection info on right panel 24 NVR Quick Start Guide - Version: NVR-Q320 6.3 Motion Detection NOTE: Before enabling motion detection, ensure that you've configured MD & Alarm recording schedules (refer to to 3.1.7 Configuring Recording Schedules). 6.3.1 Enabling Motion Detection 1. From the Main Menu, select Alarm. 2. Select the Video Detection tab and then the Motion Detect Tab. 3. Select the channel you want to Enable motion detection on with the drop down menu. 4. After this you can choose to toggle motion detection sensitivity and area by selecting Region Settings. 5. You can also configure what actions are taken once the IVS event is triggered. 6. Click Apply to confirm settings. Fig. 6.8: Motion Detection Screen 6.3.2 Smart Motion Detection Note: Smart Motion Detection is only applicable to AI cameras with Perimeter Protection. Smart Motion Detection allows the NVR to identify and differentiate vehicles and people from other moving objects. To enable it, follow the same steps for Motion Detection outlined above, then do the following: 1. Return to the Main Menu and select AI. 2. Select Parameters -> SMD 3. Select the Channel to apply Smart Motion Detection for, then click Enable. 4. Set a Sensitivity level, then which Effective Targets will trigger it (Humans, Vehicles or both). Visit help.c5k.info for more information and support 25 6.4 Tripwire & IVS Setup NOTE: Before enabling Tripwire or another IVS feature, ensure that you have configured IVS recording schedules (refer to 3.1.7 Configuring Recording Schedules). 6.4.1 Tripwire Setup 1. From the Main Menu, select AI -> Parameters -> Smart Plan. 2. Select a channel with IVS functionality. Click the icon then Apply to enable the IVS. 3. Select the IVS tab. Select the same camera channel, then click Add button at the bottom. This will create a new IVS setting (Tripwire by default). 4. Click the Draw button to open the Draw screen (Fig. 6.10). Fig. 6.9: Parameters Smart Plan screen. Fig. 6.10: IVS setup screen. 5. Left-click on the screen to start drawing the Tripwire line. Left-click again to finish the line (optionally, you can add additional corners to the line by continuing to leftclick). Right-click to finish placing the line. 6. When using select functions such as Tripwire, In the top left window, you can alter the Direction that the line must be passed from to activate the event, as indicated by the arrow going across the line (A to B, B to A, or both ways). 7. (NOTE: This step requires an AI camera.) AI Recognition enables Perimeter Protection when using Tripwire or Intrusion functions. This will recognise and differentiate between people, vehicles and other moving objects. Turn the option On to enable this function. 8. Click OK to finish. 9. Click the Trigger Button to bring up the Trigger menu, configuring what actions are taken once the IVS event is triggered. (Refer to 7.4 AI Trigger Actions). 10. Click the Enable box to turn on the IVS rule. 11. Click Apply to save changes. If done correctly, you will see the Tripwire in live view. Fig. 6.11: Tripwire Draw menu. 6.3.2 Intrusion/Abandoned/Missing Setup Intrusion, Abandoned Object and Missing Object are all set up in similar ways to Tripwire - simply select which IVS you want to set up from the Type dropdown menu (Fig. 6.10). 26 NVR Quick Start Guide - Version: NVR-Q320 7. AI Face Detection 7.1 Face Detection & Recognition 7.1.1 Enabling Face Detection by Device 1. From the Main Menu, select AI -> Parameters -> Face Detection. Select the channel you want to set up face detection for. 2. Select the Enable button. 3. Select Rule to adjust the minimum and maximum face detection size. The minimum and maximum value will depend on how far away the camera is from the faces that are getting captured. In most cases, this setting does not require adjustment. 4. Select Apply. 5. Refer to 7.4 AI Trigger Actions for further trigger settings. Fig. 7.1: Face Detection Parameters menu Visit help.c5k.info for more information and support 27 7.2 Face Detection & Recognition (cont.) Used in conjunction with Face Detection, Face Recognition can detect people that have been added to a "Face Library", and trigger events off this. Generally, this function is used to trigger an action on the recorder when a person in a predetermined face list is seen. Before enabling Face Recognition, ensure that Face Detection is setup first. 1. From the Main Menu, select AI -> Database -> Face Library. 2. Select Add. Give the Face Library a name, and then select OK. Fig. 7.2: Face Library menu 3. Select Parameters -> Face Recognition. 4. Select the channel you wish to setup Face Recognition on. Select Enable. 5. Select Target Face Database Setting and select the Face Library you created. Select OK. 6. Select Common Mode or Stranger Alarm. Common Mode will detect faces in the Face Library and Stranger Alarm will detect people not in the Face Library and mark them as strangers. 7. Configure trigger settings to suit requirements (Refer to 7.4 AI Trigger Actions). 8. Select Apply to save your changes. Fig.7.3: Face Recognition menu 28 NVR Quick Start Guide - Version: NVR-Q320 7.3 Adding Faces to the Face Library 7.3.1 Method 1 - Add from a Captured Face Detection 1. Ensure AI Preview mode is configured as per section 3.1 2. Once a face appears in the list you would like to add to the Face Library, double click on it, and select Add to Human Face Database. 3. Enter the details of the person and select the Face Library you would like to add the face too. 4. Select OK. Fig. 7.4: Add to Human Face Database window 7.3.2 Method 2 - Manual Photo Upload via USB Flash Drive This method is useful if multiple faces are being added to the face database. You can also choose to import the faces and data, by naming the images files, explained below: Name#SGender#BBirthday#NCountry#TIDType#MIDNo.#AAddress.jpg Gender: 1 Male, 2 Female / Identity: 1 Identity Card, 2 - Passport, 3 Military Office Passport Example: John#S1#B19900101#NAustralia#T1#M123456789#1 Smith St Sydney 2000 NSW.jpg 1. Save the face/faces to a .jpg image file on a USB Flash drive. 2. Insert the USB Flash Drive into a free USB Port on the NVR. 3. From the Main Menu, select AI -> Database -> Face Library. 4. Select Details. 5. Select Batch Register, then select File or Folder, and select the photos you wish to upload. 6. The recorder will then upload the files. Once complete, press Search to update the Face Library 7. Select the Edit icon next to the faces that have been added, to update name and other details. Fig. 7.5: Face details menu 7.3.3 Deleting Faces from Face Library To remove a face from a face library, select AI -> Database -> Face Library. Select the Details button in the face library to view the faces that have been added to it. Select the face you wish to delete, then select Delete. Visit help.c5k.info for more information and support 29 7.4 AI Trigger Actions The options below the enable button on the Parameters tab configure the actions taken after an event has been triggered such as face detection, or tripwire. 1. Period - Sets the times of day that the event will trigger (always on by default). 2. Alarm Out - Sets an external alarm to activate whenever a face is detected. 3. Latch Time - Sets how long the system waits after a trigger before detecting again (10 seconds by default). 4. Alarm Upload - Updates the alarm system status on the network (Unused for this system). 5. Send Email - Notifies a specified email address whenever the event is triggered (Requires internet connection & setup) 6. Record Channel - Sets which camera to record to when the event is triggered. 7. Post-Record - Sets the amount of time recorded after the event is triggered. 8. PTZ Activation - Set PTZ behaviors in response to a event trigger, such as selecting a Tour to perform, etc (For use with PTZ camera(s) only). 9. Buzzer - Sets the NVR to beep whenever an event is triggered 10. Voice Prompts - Plays a designated .wav file in response to an event trigger. This can be imported via a USB flash drive to the NVR. 11. Click Apply to save changes. Fig. 7.6: Trigger Actions menu 30 NVR Quick Start Guide - Version: NVR-Q320 8. Troubleshooting This concludes the Quick Start Guide covering the basic functionality of your surveillance system. Should you encounter any difficulties with your setting up and using your system, please first refer to the tables below. Area NVR Security Setup Changing General Settings NVR Network Setup P2P & Remote View Setup Configuring Cameras Changing Recording Schedule Accessing Playback Footage Backing Up Footage Intelligent Function Setup Menu Navigation Main Menu -> Management-Account -> Security Main Menu -> Management-System -> General Main Menu -> Management-Network -> TCP/IP Main Menu -> Management-Network -> P2P Main Menu -> Management-Camera -> Camera List Main Menu -> Management-Storage -> Schedule Main Menu -> Playback Main Menu -> Backup Main Menu -> AI -> Parameters -> Smart Plan Guide Ref. Section 3.1.2 Section 3.1.4 Section 3.1.5 Section 3.1.5 Section 3.1.6 Section 3.1.7 Section 4 Section 5 Section 6 Problem · The NVR won't power on. · · The NVR is not being displayed · on the monitor. · · · Cameras aren't displaying live · video. · · The NVR is not recording video. · · · Motion is not being detected or recorded by the NVR or unable · to Smart Search. · · Cannot connect to NVR on · smartphone or tablet. · · · The recorder will not detect a USB device for backup. · · · Face Detection / IVS features are not working correctly. · · Troubleshooting Guide Ref. Ensure that the power cable is firmly connected to the recorder & wall socket. Confirm that there is power from the outlet. Section 1.2 Ensure the display cable is firmly connected to the recorder & monitor. Ensure you have selected the correct input on your monitor. Reset the NVR resolution by powering on the unit while holding SHIFT. Test the recorder's display output with different monitor. Section 1.2 Ensure that you are not in playback mode, right mouse click to exit. Ensure the camera is connected to the CAT5e or CAT6 cable, and the camera has been terminated to TIA-568A or TIA-568B Standard. Swap with known working cables and cameras to test. Section 1.2 Check Storage -> Record is set to "Auto". Check if the HDD is installed and properly connected. - Check that the recording method you have chosen to implement is in use. Check that motion detection is enabled by navigating to Main Menu -> Alarm | Alarm -> Video Detection -> Motion Detect. The Enable check box should be switched on for all relevant channels. Ensure that a period has been selected in the Recording Schedule for motion detection recording and that the period is filled in yellow. Check motion sensitivity and adjust motion detection area, see: Main Menu -> Alarm -> Video Detect: Motion Detect -> Region Settings Section 3.1.7 Ensure that the NVR & device are connected to the Internet and that the connection is strong enough to receive video (min. 3G speeds). Check that P2P is Online in Network -> P2P. If offline, turn DHCP on. Ensure that the admin password is correct in the DMSS app Ensure the extra stream settings are set to recommended settings. Section 3.1.5 If a USB device is detected but you are unable to backup footage to it, format it by using the Format button on the Backup page. NOTE: This will erase all data on the USB Ensure that the USB device is formatted to FAT32 or NTFS. Try using another USB flash drive to test compatibility. Section 5.1 Check that Smart Plan is enabled. Ensure that IVS (blue) recording schedules have been set up in Schedule. Ensure that Enable has been checked for each rule on the IVS screen. Section 3.1.7 Section 6.3 Visit help.c5k.info for more information and support 31 All products, designs and software may be subject to change without prior written notice. Information, layout and graphics presented in this guide are the property of their respective owners. See www.c5k.info for more information.