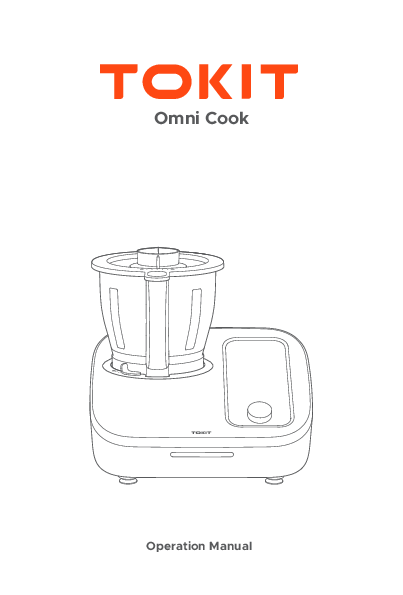
TOKIT Omni Cook
Operation Manual
01 Important Safeguards
When using electrical appliances, basic safety precautions should always be followed, including the following:
- Read all Instructions.
- Portable – To protect against risk of electrical shock do not put (state specific parts in question) in water or other liquid.
- Close supervision is necessary when any appliance is used by or near children.
- Portable – Unplug from outlet when not in use, before putting on or taking off parts, and before cleaning.
- Avoid contacting moving parts; keep hands, hair, clothing, as well as spatulas and other utensils away from beaters during operation to reduce the risk of injury to persons, or damage to the mixer.
- Remove beaters from lock ring before washing.
- Do not operate any appliance with a damaged cord or plug or after the appliance malfunctions or has been damaged in any manner. Return appliance to the nearest authorized service facility for examination, repair, or adjustment.
- The use of attachments not recommended or sold by the manufacturer may cause fire, electric shock, or injury.
- Do not use outdoors.
- Portable – Do not let cord hang over edge of table or counter.
- Hand-held, other than cordless types – Do not let cord contact hot surface, including the stove.
- Keep hands and utensils away from moving blades or discs while processing food to reduce the risk of severe injury to persons or damage to the food processor. A scraper may be used but must be used only when the food processor is not running.
- Blades are sharp. Handle carefully.
- To reduce the risk of injury, never place cutting blade or discs on lock ring without first putting bowl properly in place.
- Be certain cover is securely locked in place before operating appliance.
- Never feed food by hand. Always use food pusher.
- Do not attempt to defeat the cover interlock mechanism.
- Do not fill the bowl above the marked maximum fill line (or rated capacity) to avoid risk of injury due to damage to the cover or bowl.
- Do not touch hot surfaces. Use handles or knobs.
- To protect against electrical shock, do not immerse cord, plugs, or (state specific part or parts in question) in water or other liquid.
- Unplug from outlet when not in use and before cleaning. Allow to cool before putting on or taking off parts.
- Do not let cord hang over edge of table or counter, or touch hot surfaces.
- Do not place near a hot gas or electric burner, or in a heated oven.
- Extreme caution must be used when moving an appliance containing hot oil or other hot liquids.
- Always attach plug to appliance first, then plug cord into the wall outlet. To disconnect, turn any control to off, then remove plug from wall outlet.
- Do not use appliance for other than intended use.
- SAVE THIS OPERATION MANUAL PROPERLY.
02 Product Overview
2.1 Parts & Accessories
Diagram showing the TOKIT Omni Cook appliance and its various parts, with numbers indicating each component.
| Part Number | Part Name |
|---|---|
| 1 | Main engine frame |
| 2 | Lock ring |
| 3 | Mixing bowl body |
| 4 | Sealing ring |
| 5 | Mixing blade |
| 6 | Mixing bowl lid |
| 7 | Measuring cup |
| 8 | Whisk |
| 9 | Scraper |
| 10 | Simmering basket |
| 11 | Condensation tray |
| 12 | Main body of steamer |
| 13 | Septum |
| 14 | Steaming rack |
| 15 | Steamer lid |
| 16 | Tea spoon set |
Function Descriptions:
| Part | Function |
|---|---|
| Mixing bowl | Use the Mixing bowl in combination with the mixing blade set for cooking and processing food materials. |
| Mixing bowl lid | Use the Mixing bowl lid to seal the Mixing bowl so that no juice/liquid will splash during its operation. The center of the lid has an inlet opening for putting ingredients or materials into the mixing bowl. This can be done during the cooking process. |
| Measuring cup | Use the measuring cup to measure ingredients and seal the inlet opening on the mixing bowl lid. |
| Main engine frame | The main engine frame is the main component of the Omni Cook and contains an SMR motor and other mechanical components to provide core functions. |
| Mixing blade set | Use the mixing blade set in combination with the mixing bowl to stir/mix/shred/grind food materials. |
| Steamer set (ordered separately) | Use the steamer set for steam cooking. |
| Simmering basket | Use the simmering basket to steam food, or process soft/fragile ingredients, or use it as a strainer to filter fruit or vegetable juices. |
| Whisk | Use the whisk to whip cream or as an egg beater. |
| Scraper | Use the scraper to clean off any food materials adhering to the inner wall of the mixing bowl. |
| Tea spoon set | Use the Tea spoons to measure liquid or powder ingredients. |
2.2 Touch screen
Diagram illustrating the TOKIT Omni Cook touch screen interface, showing the Menu bar, Display page, Parameter config panel, and Control knob.
2.2.1 Menu bar
Select a desired cooking mode from the mode menu; select your favorite recipe from the recipe menu; carry out basic configurations of the device through the setting menu.
2.2.2 Parameter config panel
The parameters to configure are: Time, Temperature, and Speed (mix speed/reverse speed). Touch the Parameter Configuration icon to access the corresponding parameter configuration, and then, adjust the parameter setting by turning the control knob. Scroll the screen up/down to minimize the panel.
2.2.3 Control knob
Turn the device off by pressing the control knob for 3 seconds. Change the parameter configuration or skip to the next step in a smart recipe by turning the control knob; start or pause the current cooking operation by clicking the control knob shortly.
2.3 Instructions for the use of parts
2.3.1 Mixing bowl
Use the Mixing bowl to process or cook food materials. It consists of a stainless-steel container, a mixing bowl lid, and a blade set. The Omni Cook can only be started for cooking after the mixing bowl has been properly placed in the main engine frame. Please follow the procedures below:
Diagram showing how to align and lock the mixing bowl into the main engine frame, and how to push the safety lock leftwards to dismount.
- Align the mixing bowl vertically with the dock of the main engine frame, with the handle facing towards the front. Press the mixing bowl downwards until a click is heard, which confirms that the mixing bowl has been completely locked to the main engine frame.
- To dismount the mixing bowl, push the safety lock leftwards while lifting the mixing bowl.
CAUTION
For your safety and a better cooking experience, please read the following contents carefully:
- Place the Omni Cook on a clean, flat, and steady surface.
- Avoid placing the Omni Cook close to the edge, otherwise, it may drop due to possible movement or collision during its operation.
- Do not place it on cooking stoves (high-temperature area, ceramic cooktop, induction cooker, etc.) or on a hot or heated surface, but keep it away from any fire sources.
- Do not place it under any furniture (rack, cupboard, etc.) since the steam generated during food processing may damage the furniture.
2.3.2 Mixing blade set
Please disassemble the mixing blade set separately for cleaning and drying before cleaning the mixing blade set and mixing bowl, and then assemble it properly for next use. The mixing blade set is used for stirring/shredding/mixing/grinding food. It must be properly assembled and locked securely with the lock ring, otherwise, accidental injury may be caused. Please follow the procedures below:
Diagram showing the components of the mixing bowl assembly (measuring cup, lid, sealing ring, mixing blade, mixing bowl body, lock ring, handle block) and illustrating how to rotate the lock ring anti-clockwise to unlock.
- Grip the mixing bowl handle, and ensure that its open side is upward.
- Rotate the lock ring anti-clockwise to unlock it, while leaving the mixing blade in the mixing bowl for the time being.
- Carefully pinch the handle block at the top of the mixing blade and pull it (together with the sealing ring) out of the mixing bowl.
- The mixing blade is sharp. Please be careful not to cut yourself when cleaning the mixing blade set. Wipe off water from the blade set after cleaning.
- Carefully pinch the handle block at the top of the mixing blade and align it with the sealing ring to the opening at the bottom of the mixing bowl. Then, mount it into the bottom opening until the sealing ring touches the bottom of the mixing bowl.
- Mount the lock ring from below through the drive shaft of the mixing blade to the mixing bowl and rotate it clockwise until the mixing blade set is securely locked.
CAUTION
For your safety and better cooking experience, please read the following contents:
- The mixing blade set has sharp blades; please be careful not to cut yourself when mounting/dismounting/handling/cleaning it.
- Never touch the blades of the mixing blade set.
- Always dismount the mixing blade set with the opening of the mixing bowl facing upwards; avoid dropping the mixing blade set, otherwise, it may cause blade deformation and injury.
- Do not put your hand into the mixing bowl before it has been removed from the main engine frame.
- Make sure the mixing bowl and the mixing blade set have been fully cooled down before dismounting the mixing blade set from the mixing bowl. Residual heat after cooking could cause scalding.
- Mount the mixing blade set carefully and properly, and regularly check its service condition and the contact of the sealing ring with the bottom of the mixing bowl.
CAUTION
- When mounting the mixing blade set, make sure the sealing ring properly fits the drive shaft.
- Make sure the sealing ring is intact. If the sealing ring is damaged, the main engine frame could be damaged as a result of liquid leaking in.
- Before cooking, ensure that the mixing blade set is properly mounted and securely locked.
2.3.3 Mixing bowl lid
The Mixing bowl lid is used to seal the Mixing bowl. For your safety, please only start the Omni Cook when the mixing bowl lid has been properly placed and locked. Please follow the procedures below:
Diagram showing how to place and lock the mixing bowl lid onto the mixing bowl, and how to unlock it by turning the handle counterclockwise.
- Place the mixing bowl lid on the mixing bowl, push it down with both hands to ensure a secure fit of the mixing bowl lid with the mixing bowl.
- Turn the handle of the mixing bowl lid clockwise to lock the mixing bowl lid and the mixing bowl handle until you hear a click.
- Please ensure that the mixing bowl lid is locked with the mixing bowl handle. The locking of the mixing bowl lid and the mixing bowl rim needs to be secure and free of tilting.
- When you want to remove the mixing bowl lid, turn the handle of the mixing bowl lid counterclockwise to unlock the mixing bowl lid, then, lift the mixing bowl lid by gripping its handle.
CAUTION
For your safety and better cooking experience, please read the following contents:
- Never force to open the mixing bowl lid, for this may damage the lock on the mixing bowl.
- To guard against scalding caused by splashing of hot food materials, do not open the mixing bowl lid during cooking.
- Be careful when opening the mixing bowl lid at the end of cooking, since the mixing bowl may contain residual high-temperature steam that could cause scalding.
- Please regularly check the sealing ring of the mixing bowl lid for any signs of damage.
2.3.4 Steamer set (ordered separately) / Simmering basket
The steamer set and simmering basket are used for steaming food. The steamer set consists of a steamer lid, a steaming tray, a septum, a steaming pot, and a condensation tray. This assembly can be directly mounted onto the mixing bowl lid. During the cooking process, steam flows into the steamer via the inlet opening on the mixing bowl lid to steam the food. Please follow the procedures below:
Diagram showing the components of the steamer set (steamer lid, steaming rack, septum, main body of steamer, steaming pot, handle) and the simmering basket.
- To use the steamer set for steam cooking, simply mount its bottom into the docking slot on the top of the mixing bowl lid.
- To use the simmering basket for steam cooking, place it into the mixing bowl and fill it with food materials.
- The steamer set can be freely arranged to meet your cooking requirements.
- If you want to collect the condensation from the steamer, put the condensation tray between the bottom of the steam cooker and the mixing bowl lid; if you want the condensation to flow into the mixing bowl, simply remove the condensation tray.
CAUTION
For your safety and better cooking experience, please read the following contents:
- Arrange the food materials evenly in one layer inside the steamer, with the total weight of the food materials, plates, and dishes not exceeding 2 kg.
- Be careful not to get scalded when removing the steamer set or the simmering basket from the steaming pot.
- Make sure that there is enough water inside the mixing bowl to prevent dry burning and damaging the device.
- Clean the steamer assembly and simmering basket in a timely manner after each use to ensure the mesh is not blocked by food.
- It is not possible to leave the measuring cup on the mixing bowl lid while using the steamer set. Please do not try to mount it by brutal force.
- Keep an eye on the condensation tray and make sure the condensation is not overflowing. In general conditions, the tray can accommodate all condensation generated during approximately an hour of steaming.
2.3.5 Measuring cup
The measuring cup is used for sealing the inlet opening on the mixing bowl lid to curb heat dissipation and prevent splashing of food mixture and liquid. It can also be used for measuring liquid. If you simply want to add a small amount of liquid into the mixing bowl, there is no need to remove the measuring cup. Simply pour the liquid onto the mixing bowl lid, and it will flow into the mixing bowl via the gap between the measuring cup and the mixing bowl lid. To add more liquid or solid food materials, please follow the procedures below:
Diagram of the measuring cup.
- Press the control knob once to pause the cooking progress, then hold the measuring cup by its wall and lift it up to remove it.
- Add food materials or other ingredients to the mixing bowl.
- Align the measuring cup with the opening of the mixing bowl lid and press it down to mount it.
- Press the control knob a second to resume cooking.
CAUTION
- The mixing bowl may contain residual high-temperature steam after cooking. Please be careful not to be scalded by the steam when opening the mixing bowl lid.
- Never remove the measuring cup during the cooking process under normal circumstances. However, some recipes require the removal of the measuring cup to ensure the release of surplus steam. Please refer to the actual recipes for further details.
2.3.6 Scraper and tea spoon set
The scraper is used for removing mixed or cooked food materials from the mixing bowl and emptying the mixing bowl. The tea spoon set can also be used for measuring small quantities of powder or liquid ingredients. The spoons have the following capacities: 10 mL, 5 mL, 2.5 mL, and 1.25 mL, respectively. When using the accessories of Omni Cook, please observe the following points:
Diagram of the scraper and the tea spoon set with capacity markings.
CAUTION
- No accessory can be used for any purpose other than those specified herein.
- Never leave the scraper and tea spoon(s) in the mixing bowl during cooking.
- Please check the conditions of the accessories regularly and replace damaged ones in a timely manner.
2.3.7 Whisk
The whisk is used for whipping cream or beating egg liquid. It can also be used for ensuring even mixing of the ingredients at a low stirring speed, thus preventing food materials from adhering to and scorching on the bottom of the mixing bowl. Please follow the procedures below to mount/dismount the stirring rod:
Diagram of the whisk with labels "Lifter" and "Whisk".
- Mount the whisk on the mixing blade set by inserting it into the gap between the crossed blades, and gently rotating it until it is fixed. Please ensure that it cannot be pulled out vertically easily.
- Nip the lifter, gently rotate it, and pull it upwards.
CAUTION
- Do not use the whisk at a mixing speed higher than Speed 5.
- Do not use the whisk and the simmering basket at the same time.
- Do not mount/dismount the whisk during its operation of the device.
- Do not use the whisk in a high-temperature dry burning environment.
03 Quick Start Guide
3.1 First start
Insert the power plug into a 120V AC socket. Switch the Omni Cook on, and the display panel will display the launch screen.
3.2 Start and shutdown
Startup: Connect the Omni Cook to power source, and the display panel will automatically display the splash screen.
Shutdown: Press and hold the ON/OFF button until a shutdown prompt appears; click CONFIRM on the screen to shut down the device.
Reminder: By default, after 10 minutes of idle state, the display panel of the device will go off and automatically enter the SLEEP mode.
3.3 Initial configuration
During the initial startup, the device will display the Welcome page. Please follow the instructions on that page to complete the initial configuration, by simply following the instructions displayed on the screen. During its operation, turn the control knob to proceed to the next step; once the configuration is completed, you will access the homepage.
You can modify the configuration later by changing the configurations on the [SETTING] menu.
Wi-Fi connection: Select the correct Wi-Fi connection, enter the password, and then press "CONNECT" to start connection. You can find the Wi-Fi function in the [SETTING] menu.
3.4 Emergency stop
Diagram showing the TOKIT Omni Cook appliance with an arrow pointing to the ON/OFF button on the main engine frame, indicating the emergency stop function.
When an unexpected emergency situation occurs during the device is in operation, you may stop the device immediately by pressing the ON/OFF button at the right side of the main engine frame. Or you may suspend current cooking progress by pressing the control knob, and press the control knob again to resume previous cooking program.
04 Operating Instructions
4.1 Basic Settings
Cooking parameters, including time, temperature, and mixing speed, can be configured before and during cooking. Parameter configuration can be set by tapping the icons for Time, Temperature, or Speed at the bottom section of the screen. Then, settings can be adjusted by rotating the control knob. Once the parameter configuration has been completed, cooking can be started by pressing the control knob. You can find more recipes developed by professional chefs from the Recipes page in the menu bar or by using the search function (on the upper right of the screen). Please follow the instructions to operate the Omni Cook for cooking.
4.1.1 Set Time
Diagram of the touch screen interface showing the Time configuration settings.
- Press the Time configuration icon to access the Time setting.
- Turn the control knob to set up the cooking time.
CAUTION
Notes for time configuration:
- The preset time can be modified at any time during the cooking process (with the exception of a few specific modes). To do so, click the Time configuration icon, and then turn the knob to select the desired cooking time. The device will continue cooking in accordance with the latest time settings to the end.
- Before the expiry of the preset time settings, you can press the control knob to suspend the operation of the device and add cooking ingredients at any time during the cooking process, then, press the control knob again to resume the operation. The device will carry on cooking with the original preset time settings.
- To terminate the cooking, click the Time configuration icon and turn the control knob until time setting displays 00:00.
4.1.2 Set Temperature
Diagram of the touch screen interface showing the Temperature configuration settings.
- Press the Temperature configuration icon to access the temperature setting.
- Turn the control knob to set up or adjust the cooking temperature.
CAUTION
Notes for temperature configuration:
- The cooking temperature can be preset or modified at any time during the cooking process (with the exception of a few specific modes).
- If you do not require any heating functions, please leave the temperature value setting at ---.
4.1.3 Set mixing speed
Diagram of the touch screen interface showing the Mixing speed configuration settings.
- Press the mixing speed configuration icon to access the mixing speed settings.
- Turn the control knob to adjust the mixing speed.
- By turning the control knob anti-clockwise, adjust the speed from 0 for reverse rotation. Reverse rotation using the back of the blades to gently stir or mix food materials.
CAUTION
Notes for the configuration of the mixing speed:
- The mixing speed can be preset or modified at any time during the cooking process (with the exception of a few specific modes).
- Once the cooking time and mixing speed have been properly configured, the device can be started.
- Before setting the mixing speed, please ensure that the mixing bowl has been properly mounted on the main engine frame and that the mixing bowl lid is properly placed and locked up with the mixing bowl.
- There are 20 mixing speeds and 10 reverse speeds available to choose. Turn the control knob clockwise to adjust the mixing speed and anti-clockwise to adjust the reverse speed.
- Do not use a high speed when the cooking temperature is above 60°C, otherwise, you might be at the risk of scalding as a result of overflow.
4.2 Preset Modes
A variety of cooking modes have been preset with the Omni Cook to meet your specific needs. These cooking modes are available in the homepage, include weighing mode, turbo mode, kneading mode, ice shaving mode, juicer mode, grinding mode, mincing mode, shredding mode, pre-cleaning mode, steam cooking mode, stewing mode, etc. Using the mincing mode as example, please follow the procedures below:
Diagram showing the mixing bowl being filled with food and the Omni Cook appliance.
- Clean the meats and cut into small pieces of approx. 1-2 cm. Then, put them into the mixing bowl. Be careful not to exceed the 2.2L maximum level mark on the mixing bowl.
- Mount the mixing bowl onto the main engine frame, close the mixing bowl lid and ensure that the mixing bowl and the lid are both properly locked.
- Turn on the device, and then select the "Mincing Mode" from the Mode list in the homepage. Press the knob, and the device will operate in accordance with the preset program and automatically stop upon completion of the program. Press the control knob to suspend the operation of the device while it is operating.
- When the process is complete, dismount the mixing bowl from the main engine frame and remove the mince with the scraper.
CAUTION
Notes about the mincing mode:
- Remove tendons, bones, skin of meat, and also defreeze frozen meat before processing.
- The mincing mode is not suitable for processing hard food materials, such as frozen meat, ice cubes, and large bones.
- During the mincing process, the device may experience shaking, so please do not leave it unattended.
- If food material adheres to the wall of the mixing bowl or if shaking is too violent, shut down the device immediately. Rebalance the food materials to ensure even distribution in the mixing bowl and restart the mincing process.
Weighing
The weighing mode can be chosen from the Mode list in the homepage to weigh food materials and other ingredients. Please follow the procedures below:
Diagram of the touch screen interface showing the weighing function with a weight display of "0 g".
- Mount the mixing bowl into the main engine frame, click to select the Weighing mode from the Modes list.
- Put food materials or ingredients into the mixing bowl for weighing. The weight will be displayed on the screen.
- Press the knob to reset to Zero and then weigh another food material or ingredient. This weighing process can be repeated until the cumulative weight reaches the maximum limit of 5,000 g or other preset value.
CAUTION
Notes on the weighing mode:
- The weighing mode has to be accessed only when the device is not currently in any other operation.
- When using the weighing mode, please ensure that the device is placed on a horizontal and flat workbench, otherwise, the results of the weighing may be inaccurate.
- To exit the weighing mode, simply click the "X" icon on the upper right corner of the Weighing page.
| Mode | Function | Important notes |
|---|---|---|
| Manual control | In Manual control, you can configure the cooking time, temperature, and mixing speed on your demand. Note: With Manual control, the maximum cooking time is 99 minutes, the maximum cooking temperature is 180 °C, and the maximum mixing speed is 10. |
When you are unfamiliar with the operation of this device, you are recommended to follow the procedures and settings in the recipes from your Omni Cook to ensure proper operation of the device for cooking. |
| Weighing mode | Weighing food materials | Press the control knob to reset to Zero. |
| Turbo mode | Crushing food fast | In this mode, the configurations are preset to particular parameters and not adjustable; Press the Turbo mode icon again to exit this mode; To avoid any unpredictable situations, do not leave the device unattended when using this mode. During its operation, please ensure that the mixing bowl lid is in place and the measuring cup has been properly mounted. |
| Kneading mode | Kneading dough | Cooking temperature and mixing speed are fixed, and not adjustable in this mode. Ingredients can be added via the inlet opening on the top of the mixing bowl lid, for example, to add water. |
| Ice shaving mode | Crushing ice, you can select coarse ice or fine ice | The cooking temperature is locked and not adjustable in this mode. During its operation, please ensure that the mixing bowl lid is in place and the measuring cup has been properly mounted to prevent crushed ice from splashing. |
| Juicer mode | Extracting juice from fruits/vegetables that are rich in water. | The cooking temperature is locked and not adjustable in this mode. During its operation, please ensure that the mixing bowl lid is in place and the measuring cup has been properly mounted to prevent liquid from splashing and overflowing. |
| Grinding mode | Grinding cereal and pulverizing food materials | The cooking temperature is locked and not adjustable in this mode. You are recommended to cut the food materials into small pieces for better and more thoroughly uniformly grinding of the food materials. |
| Mincing mode | Preparing minced meat and crushing food materials | The cooking temperature is locked and not adjustable in this mode. This mode is not suitable for food materials with higher hardness or higher water content, e.g., frozen meat, fruit. |
| Shredding mode | Shredding larger food materials | The cooking temperature is locked and not adjustable in this mode. During its operation, please ensure that the mixing bowl lid is in place and that the measuring cup has been properly mounted to prevent food materials from overflowing. |
| Pre-cleaning mode | Pre-cleaning the mixing bowl before manual cleaning | The recommended amount of water for pre-cleaning shall not exceed the 1L mark. During its operation, please ensure that the mixing bowl lid is in place and the measuring cup has been properly mounted. |
| Steaming mode | Steaming or boiling food materials Note: When using the Steaming mode, the power rate may vary with the current input voltage. Higher voltage will generate more power output. |
Cooking temperature and mixing speed are locked and not adjustable in this mode. In this mode, the mix blade remains still and does not rotate; this mode is suitable for boiling brittle food materials (e.g., dumpling, tofu, etc.) or steaming food materials, but not suitable for any steaming and boiling operation with liquid other than water (e.g., stewing meat). |
| Stewing mode | Stewing food materials | The mixing blade rotates intermittently in this mode to avoid over-stirring food materials. This mode is suitable for prolonged stewing of food materials (e.g., stewing meat and making soup). |
Note: Due to product improvements and upgrades, there may be differences in the names of modes between the physical product and the schematic diagram, and those in the physical product may be subject to modification from time to time. Please visit the official website of TOKIT GLOBAL for further information.
4.3 Cloud Recipe
For your better cooking experience with the Omni Cook, you can access your smart guided recipes by clicking the Recipe menu in the upper left corner of the screen or by performing the recipe search by clicking the Search bar in the upper right corner of the screen and entering key words.
4.4 Cleaning and maintenance
4.4.1 Cleaning
- Before your first use of the product, please completely clean and rinse all assemblies and accessories that may contact with food materials.
- After each use, please wash all parts and wipe off water after washing.
- Between two cooking procedures or after cooking, you can use the "Pre-cleaning" mode to wash the mixing bowl. You can find this mode in the Mode homepage.
- To clean the mixing blade set and mixing bowl thoroughly, please disassemble the mixing bowl by following the Instructions for the Use of Parts section in this operation manual.
- Do not use objects with sharp edges or metal scourers to clean the mixing bowl, but special detergents for stainless steel.
- Please be careful with the mixing blade set when cleaning and handling it. Do not touch the sharp edges of the mixing blade set.
- To guard against inadvertent dropping of the mixing blade set, be careful when dismounting it.
- Never insert your hand into the mixing bowl when it has been mounted to the main engine frame.
- To clean the surface of plastic accessories (e.g., the simmering basket), please use soft cleaning cloth and dish soap.
- All accessory tools including mixing blade set, blade cover, steamer set, simmering basket, slow-cook plug, measuring cup, whisk, scraper, and tea spoon set, are dishwasher safe.
- Always disconnect the power source before cleaning the main engine frame.
- Clean the main engine frame with a moist cloth and mild detergent.
- Do not use excessive water for cleaning in case water or moisture may leak into the main engine frame.
- The mixing bowl and mixing blade set may be damaged if they are soaked in water, other liquids, or residual food for a prolonged period of time. Therefore, please wash and dry them in a timely manner after use.
4.4.2 Maintenance
- Prolonged stewing or contact with acidic substances could lead to rust. Therefore, please carefully check for debris from your cooking ingredients.
- Regularly check the main engine frame and all its accessories (including the mixing bowl, power cord, sealing ring of the mixing bowl lid, and sealing ring of the mix blade set) for potential damage.
- Regularly check the air vent of the device. If the air vent is blocked, it will damage the device.
- Disconnect the device from the power source if the device is not in use for a prolonged time.
- The main engine frame is designed to have a drainage mechanism at the bottom of the mixing bowl dock. If a large amount of soup or liquid is splashed onto the mixing bowl dock, do not rotate or move the main engine frame because the liquid will automatically drain out from the drain holes at the bottom. Instead, use an absorptive sponge or a soft towel to wipe off the liquid from the surface of the main engine frame.
- Keep the device dry and clean. Place it in a dry and ventilated environment.
- Do not use any damaged accessories.
- Mixing blade set and accessories are consumables. Please replace them in a timely manner by considering their frequency of use and general condition to ensure perfect cooking results.
05 Troubleshooting
| Fault type | Fault diagnosis and solutions |
|---|---|
| Liquid leak in the region beneath the mixing bowl |
|
| Unable to switch on or no display |
|
| Unable to put the mixing bowl into the dock on the main engine frame |
|
| Unable to heat up |
|
| Interruption causes the device to stop During its operation |
|
| Incorrect weight |
|
| Interruption causes the device stop during cooking process |
|
| No access to Wi-Fi connection |
|
| Unable to upgrade the system/software |
|
06 Diagnostic Error Code
| Error Code | Description | Solution |
|---|---|---|
| No mixing bowl detected | The mixing bowl and the mixing bowl lid is not mounted properly, or the mixing bowl lid not | Mount the mixing bowl properly, close and fasten the mixing bowl lid. Then, try again. |
| E-05 | High temperature alarm of the mixing bowl bottom sensor | Restart the device when the temperature has dropped to the normal range. |
| E-10 | Mixing bowl bottom sensor is damaged | Contact the customer service. |
| E-16 | Overcurrent protection of the electric motor | Contact the customer service. |
| E-17 | Overvoltage protection of the electric motor | Contact the customer service. |
| E-18 | Under-voltage protection of the electric motor | Contact the customer service. |
| E-19 | Open-phase protection of the electric motor | Contact the customer service. |
| E-20 | Stalling protection of the electric motor | Contact the customer service. |
| E-21 | High temperature alarm of the electric motor | Restart the device when the temperature has dropped to the normal range. |
| E-22 | Open circuit of the electric motor sensor | Contact the customer service. |
| E-23 | Short circuit of the electric motor sensor | Contact the customer service. |
| E-24 | The temperature of the MOS transistor is too high | Restart the device when the temperature has dropped to the normal range. |
| E-25 | Open circuit of the MOS transistor temperature sensor | Contact the customer service. |
| E-26 | Short circuit of the MOS transistor temperature sensor | Contact the customer service. |
| E-27 | Abnormal communication with the electric motor | Contact the customer service. |
| E-29 | Abnormal communication with the weighing sensors | Contact the customer service. |
| E-30 | Abnormal communication with mainboard | Contact the customer service. |
07 Important Safeguards
Service restrictions
- The normal working altitude of the product ranges from 0 m to 2000 m.
- The product shall not be placed in an unbalanced or humid environment or close to fire or other heat sources (such as a stove). The distance to such heat sources should preferably exceed 30 cm.
- Do not place the main engine frame on cooking stoves (high-temperature area, ceramic heater top, induction cooker, etc.) or a heated surface.
- Minors are not allowed to operate this product, even under the supervision of an adult. Please keep this product and its power cord out of reach of children.
- This product is not a toy for minors.
- People with physical, cognitive, or mental disability or those lacking relevant knowledge or experience shall not operate this product, even under the supervision of their guardian.
- This product is for home use only, and its designed capacity meets the needs of an average family. It shall not be used for any purpose other than those specified in this Operation Manual.
Power line precautions
- Only use the supporting AC power cord.
- In case of damage, the power cord must be replaced by the manufacturer or its maintenance department or a professional of a similar department.
- Disconnect the AC power cord from the AC socket before maintenance or moving.
- Do not over-pinch, bend or twist the AC power cord, or its core may be exposed or broken.
- Do not use the supplied AC power cord on any other device.
Power supply precautions
- Do not use power supplies other than 120V AC to avoid electric shock or fire disaster.
- Be sure to disconnect the power plug by holding the plug firmly with your hand to avoid electric shock or short circuit fire. Do not pull the AC power cord when disconnecting it.
- Do not allow children to operate the device alone. Keep it out of reach of infants and young children to avoid the occurrence of electric shock, scald, and other dangerous accidents.
- Do not plug or disconnect the power plug with wet hands to avoid electric shock or injury.
- Use an independent power socket with its ground wire at a rated current above 16 A to avoid fire hazard and other accidents.
About the environment
- Steam and heat will cause damage, discoloration, and deformation to walls and furniture, so please keep the product more than 30 cm away from walls and furniture during use.
- When using the device in a kitchen cabinet or other similar places, please ensure sufficient ventilation.
In use
- Do not fill the mixing bowl with food materials with a volume larger than the mixing bowl's maximum allowable filling amount (the 2.2L maximum level mark).
- To avoid the splashing of oil, grease, or liquid, do not remove the measuring cup when the device is running at high speed.
- Do not force to open the mixing bowl lid or the lock-up mechanism.
- Open the mixing bowl lid only when the mixing speed is zero and the lock-up mechanism is unlocked.
- The whisk is not suitable for prolonged stewing (braising, simmering, and fermentation), especially not for high temperature stewing.
- The mixing blade set has sharp edges and must be handled with care to avoid injury!
- Do not touch moving parts, which could cause mechanical injury.
- To guard against damage and injury, do not put your hand into the mixing bowl when the device is connected to the power.
- Do not put your hand or any tools into the mixing bowl during its operation, or serious personal injury or damage to the product may be caused.
- Keep all body parts and hair away from the mixing blade set.
- Never use the scraper in the mixing bowl before the device has fully stopped.
- Make sure there is enough water in the mixing bowl during steam cooking.
- Supplement water if you want to extend the duration of steam cooking.
- The hot steam generated during steam cooking could cause scalding. Keep your face and body away from it.
- Do not touch the measuring cup during use or immediately after use of the device. To guard against scalding, keep the device away from infants and minors.
- Do not move or rock the device during its operation.
- It is strictly prohibited to cover the top of the product with other articles since this may prevent the release of steam.
- To guard against scalding, the temperature of water added to the device under stirring should preferably be lower than 60 °C.
- When the temperature of the liquid is too high, the device will automatically slow down its mixing speed.
- Please ensure that the mixing bowl lid and the mixing bowl are properly locked before starting up the device.
- Never leave the device unattended during its operation.
- Please ensure that the device has completely stopped before opening the mixing bowl lid.
- To guard against scalding, do not touch the mixing bowl when the device is used for heating food.
- Do not insert the power plug before all preliminary work has been properly finished.
- Do not use the device before mounting the accessories/mixing blade set.
- Do not let the device work without food materials.
- Be careful if hot liquid is poured into the mixing bowl as it can be ejected out due to sudden steaming.
After use
- Empty the food from the mixing bowl, disassemble the mixing blade set for timely cleaning, and be careful when cleaning the sharp edge of the mixing blade set.
- Always disconnect the power plug after use, before the mounting/dismounting of parts, and before cleaning.
Abnormality or fault
- In case of product abnormality or fault, stop using the device immediately and disconnect the power plug.
- Thoroughly wipe the mixing bowl before mounting it into the main engine frame.
- Abnormal heating of the power cord or the power plug in use.
- Smoke coming from the product and a peculiar burning smell.
- Part of the product has crack, loosened, or abnormal noise.
- Deformation of the mixing bowl.
- Other abnormalities or faults.
Additional notes
- Do not drop the product or bump it against hard objects to avoid injury or fault.
- No modification is allowed. Non-maintenance technicians shall not disassemble or repair the product to avoid fire, electric shock, or injury.
- In case of abnormality or fault, please stop using the device immediately to avoid fire, electric shock, or injury.
- The device cannot operate with an external timer or with a separate remote-controlled system.
- The silicone parts on the product must not come in contact with alcoholic beverage containing more than 50% ethanol.
- Switch off and disconnect the product from the power source before replacing accessories or touching any moving parts.
- Do not use fittings or accessories other than those specifically provided with this product to avoid fire and personal injury.
- The mixing bowl main pot can only be used with the main engine frame provided.
08 Specs
| Name | Omni Cook | Model | TLLJE01ACM-2A |
| Heating mode | Electric heating | Rated Motor Power | 500W |
| Rated Capacity | 2.2L | Rated Heating Power | 1000W |
| Size | 355 x 244 x 364mm | Total Rated Power | 1500W |
| Wireless Connectivity | Wi-Fi IEEE 802.11 b/g/n 2.4 GHz | Rated Voltage | 120 V~ |
| Rated Frequency | 60 Hz | Net Weight | 8.4kg |
| Version No. | V 0.4 |
FCC WARNING
1. Warning: Changes or modifications to this unit not expressly approved by the party responsible for compliance could void the user's authority to operate the equipment.
2. This equipment complies with FCC radiation exposure limits set forth for an uncontrolled environment. This equipment should be installed and operated with a minimum distance of 20cm between the radiator & your body. This transmitter must not be co-located or operating in conjunction with any other antenna or transmitter.
FCC STATEMENT
This equipment has been tested and found to comply with the limits for a Class B digital device, pursuant to Part 15 of the FCC Rules. These limits are designed to provide reasonable protection against harmful interference in a residential installation. This equipment generates, uses and can radiate radio frequency energy and, if not installed and used in accordance with the instructions, may cause harmful interference to radio communications. However, there is no guarantee that interference will not occur in a particular installation. If this equipment does cause harmful interference to radio or television reception, which can be determined by turning the equipment off and on, the user is encouraged to try to correct the interference by one or more of the following measures:
- Reorient or relocate the receiving antenna.
- Increase the separation between the equipment and receiver.
- Connect the equipment into an outlet on a circuit different from that to which the receiver is connected.
- Consult the dealer or an experienced radio/TV technician for help.
