Jandy TruGuard with Nature2 Technology Installation Guide
File info: application/pdf · 24 pages · 1.19MB
TruGuard WARNING - jandy.com
Page 4 ENGLISH Jandy TruGuard™ Installation Operation Manual ™ Installation Operation Manual Section 2. General Description 2.1 Product Overview This manual provides instructions for installing and replacing the Jandy T…
WARNING TruGuard™ - Jandy
The maintainer must be a professional with sufficient experience in pool equipment installation and maintenance so that all of the instructions in this manual can ...
Full PDF Document

If the inline viewer fails, it will open the original document in compatibility mode automatically. You can also open the file directly.
Extracted Text
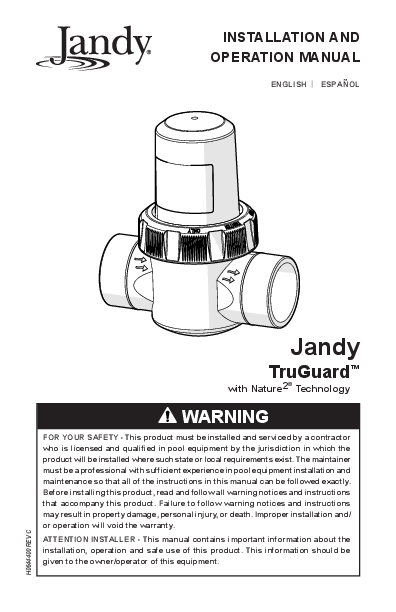
INSTALLATION AND OPERATION MANUAL
ENGLISH | ESPA�OL
Jandy
TruGuardTM
with Nature2� Technology
WARNING
FOR YOUR SAFETY - This product must be installed and serviced by a contractor who is licensed and qualified in pool equipment by the jurisdiction in which the product will be installed where such state or local requirements exist. The maintainer must be a professional with sufficient experience in pool equipment installation and maintenance so that all of the instructions in this manual can be followed exactly. Before installing this product, read and follow all warning notices and instructions that accompany this product. Failure to follow warning notices and instructions may result in property damage, personal injury, or death. Improper installation and/ or operation will void the warranty. ATTENTION INSTALLER - This manual contains important information about the installation, operation and safe use of this product. This information should be given to the owner/operator of this equipment.

H0644400 REV C

Page 2

ENGLISH

Jandy� TruGuardTM | Installation & Operation Manual

Table of Contents
Section 1. Important Safety Instructions ....... 3 Section 2. General Description....................... 4
2.1 Product Overview ..........................................................4 2.2 Product Contents ..........................................................4
Section 3. Installation Requirements ............. 4 Section 4. Installing the Jandy TruGuard ...... 5 Section 5. Low-Chlorine Recipe ..................... 8 Section 6. Circulation and Filtration .............. 9 Section 7. Cartridge Replacement................ 10 Section 8. Winterizing.................................... 10
8.1 Warm Climate..............................................................10 8.2 Cold Climate................................................................10
Section 9. Disposal ........................................ 11 Section 10. Troubleshooting........................... 12

Jandy� TruGuardTM | Installation & Operation Manual

ENGLISH

Page 3

Section 1. Important Safety Instructions
READ AND FOLLOW ALL INSTRUCTIONS
The Jandy TruGuard pool sanitizer is designed only for residential swimming pools.
When installing and using this equipment, basic safety precautions should always be followed, including the following:

WARNING
EQUIPMENT UNDER PRESSURE � Always turn pump off prior to installing or changing Nature2 cartridge. Your pump/filter system
is operated under pressure and the pressure must be released before you begin work. Please see your pump/filter owner's manual for further instructions. PREVENT CHILD DROWNING � Do not let anyone, especially small children, sit, step, lean or climb on any equipment installed as part of your pool's operational system. Locate the components of your operational system at least 3 feet from the pool so children cannot use the equipment to access the pool and be injured or drown. LOW CHLORINE RECIPE � You must strictly follow the low chlorine recipe included in this manual to maintain proper water chemistry and avoid health hazards. Failure to follow these instructions can lead to sickness from bacteria and other noxious organisms.

CAUTION
PRECAUTIONARY STATEMENT HAZARDS TO HUMANS AND DOMESTIC ANIMALS In the unlikely event that a cartridge breaks, mineral media should not be ingested by humans or animals as it may cause gastric distress. FIRST AID IF INGESTED: Call poison control center or doctor immediately for treatment advice.
ATTENTION INSTALLER This manual contains important information about the installation, operation and safe use of this product. This information should be given to the owner/operator of this equipment.

SAVE THESE INSTRUCTIONS

Page 4

ENGLISH

Jandy� TruGuardTM | Installation & Operation Manual

Section 2. General Description
2.1 Product Overview This manual provides instructions for installing and replacing the Jandy TruGuard to sanitize swimming pools from 5,000 to 45,000 gallons. The TruGuard housing will fit on 2" or 2 1/2" pipe sizes. The Jandy TruGuard consists of Nature2� technology used in conjunction with a chlorine delivery device or 0.5 ppm of an EPA registered chlorine pool product. Nature2� technology consists of silver and copper minerals.
Every pool has it's own characteristics of water type and exposure to natural elements. The recipe included in this manual will help ensure good water quality for your pool that will make your swimming experience more enjoyable.
NOTICE It is a violation of Federal law to use this product in a manner inconsistent with its labeling.
2.2 Product Contents
2

1

3

4 5

1 - TruGuard Housing 2 - TruGuard Cartridge 3 - Winterizing and Pressurizing Cap

4 - Owner's Manual 5 - Installation Manual

Section 3. Installation Requirements
Before installing a new TruGuard cartridge, clean debris and algae out of the pool and pool equipment. Do not install the new cartridge until the pool water is clean and chemically balanced. Refer to the Owner's Manual for water balance instructions.

Jandy� TruGuardTM | Installation & Operation Manual

ENGLISH

Page 5

Section 4. Installing the Jandy TruGuard
The Jandy TruGuard installs on your pool's return line. 1. Determine the location to install the Jandy TruGuard. It must be
installed: � After the filter on the main return to the pool. � Before or after the heater (downstream of solar heating systems).
� Before check valve to any chemical dispenser or the discharge of any off-line chemical dispenser.

Pump

Filter
Jandy TruGuard

Heater

Chlorinator
Check Valve

Intake Line

Return Line

2. Locate an area on the return line that is at least 8" to install the Jandy TruGuard.
3. Turn OFF the pool pump. Your pump/filter system is operated under pressure. The pressure must be released before you begin work. Please refer to the pump/filter owner's manual for further instructions.
4. Close any valves. If your pool filtration equipment is below the water level of the pool, you will either need to close the return valve or use winterizing plugs at the skimmer and return fittings to prevent excessive water loss.
5. Remove the cartridge from the housing and plumb the housing into the pipe, making sure that the flow indicator arrows on the housing match the flow direction of the water. Pipes must be clean and dry before gluing.
NOTE: If the flow direction of the water does not match the arrows on the housing, the unit will not function properly. Housing can be oriented horizontally or vertically. For ease of servicing and maintenance, it is recommended that the housing be installed horizontally with the cartridge facing up.

Page 6

ENGLISH

Jandy� TruGuardTM | Installation & Operation Manual

Water Flow

6. Insert the TruGuard cartridge into the housing. Water Flow
7. Tighten the locking ring.

Jandy� TruGuardTM | Installation & Operation Manual

ENGLISH

Page 7

10. Write the installation date and replacement date on the cartridge label.
11. Open any valves that you closed and turn on your pool pump to verify that there are no leaks.
If there is a leak, turn off the pump, close the valves, and remove the TruGuard. Check that the o-ring is not pinched, and is seated properly. Replace the cartridge and hand tighten the nut.
12. Superoxidize the pool water with chlorine according to manufacturer's instructions to burn off contaminants and activate cartridge.
IMPORTANT: Initial superoxidation with chlorine is required to burn off contaminants and activate cartridge.
13. Run the circulating pump for 24 hours a day for 4 days, maintaining 1-2 ppm free chlorine throughout, or 6 hours a day for 14 days, maintaining 1-2 ppm free chlorine throughout.
14. Let chlorine dissipate to 0.5 ppm once start up period is completed. Do not enter the pool if the free available chlorine residual is over 3 ppm.
15. Refer to Owner's Manual for maintaining a low chlorine recipe.
Section 7. Cartridge Replacement
The TruGuard cartridge needs to be replaced every six months. The installation and replacement date of the cartirdge should be written on the cartridge label when installed. 1. Turn off the pool pump. 2. Release the pressure from your pool plumbing system. Refer to your
pump/filter manual for pressure release instructions. 3. Close any valves. If your pool filtration equipment is below the water
level of the pool, you will either need to close the return valve or use winterizing plugs at the skimmer and return fittings to prevent excessive water loss. 4. Loosen the locking ring. 5. Remove the old TruGuard cartridge. 6. Install the new TruGuard cartridge.
7. Write the installation date and replacement date on the cartridge label. 8. Tighten the locking ring.

Page 8

ENGLISH

Jandy� TruGuardTM | Installation & Operation Manual

Section 8. Winterizing
8.1 Warm Climate 1. Reduce the number of hours that the pump runs since the cooler
weather decreases the spread of algae and other pollutants.
2. There is no need to superoxidize the pool during cool weather unless the water becomes cloudy (as may occur after a winter storm). See cloudy water in Troubleshooting section.
8.2 Cold Climate 1. Check total alkalinity and pH of pool to make sure that they are in
proper balance.
2. Vacuum the pool bottom to remove any debris or other potential contaminants.
3. Superoxidize the pool with chlorine according to manufacturer's instructions to clear the water.
4. Add a winter algaecide following manufacturer's instructions.
IMPORTANT: Do not use a winter algaecide with copper in it. This will void the Jandy warranty.
5. Backwash the filter. 6. Drain part of the pool water. The amount to drain varies from one part
of the country to another. Consult your dealer for advice.
7. Remove the TruGuard cartridge and discard.
8. Place the Winterizing and Pressurizing Cap in the housing and tighten the locking ring.
9. Winterize the pipes with pool antifreeze following manufacturer's instructions.
10. Drain the water out of all equipment (pump, filter, etc.). 11. Store all baskets, hoses and cleaning equipment, indoors if possible.
12. Cover the pool with a winter cover.
Section 9. Disposal
After six months of use, discard the TruGuard cartridge in household trash. Do not save the cartridge for re-use. The cartridge contains mineral media that is sealed inside. In the unlikely event that a cartridge breaks, remove it and vacuum out any media introduced into the pool.

Jandy� TruGuardTM | Installation & Operation Manual

ENGLISH

Page 9

Page 10

ENGLISH

Jandy� TruGuardTM | Installation & Operation Manual

Jandy� TruGuardTM | Installation & Operation Manual

ENGLISH

Page 11

Zodiac Pool Systems LLC 2882 Whiptail Loop # 100 Carlsbad, CA 92010 1.800.822.7933 | www.ZodiacPoolSystems.com
ZODIAC� is a registered trademark of Zodiac International, S.A.S.U., used under license. All trademarks referenced herein are the property of their respective owners. �2020 Zodiac Pool Systems LLC H0644400 REV C

ETL LISTED CONFORMS TO
UL STD 676
CERTIFIED TO CAN/CSA C22.2 NO.89

MANUAL DE INSTALACI�N Y OPERACI�N
ESPA�OL
Jandy
TruGuardTM
con tecnolog�a Nature2�
ADVERTENCIA
PARA SU SEGURIDAD: la instalaci�n y el servicio t�cnico de este producto deben estar a cargo de un contratista cualificado y matriculado para trabajar con equipamientos para piscinas en la jurisdicci�n en la que se instalar� el producto, donde existan tales requisitos estatales o locales. El t�cnico de servicio debe ser profesional y contar con experiencia suficiente en instalaci�n y mantenimiento de equipamientos para piscinas, para que todas las instrucciones de este manual se puedan seguir exactamente. Antes de instalar este producto, lea y siga todos los avisos de advertencia y las instrucciones que se proporcionan con el producto. Si no se siguen los avisos de advertencia ni las instrucciones, es posible que se produzcan da�os materiales, lesiones personales o la muerte. Si la instalaci�n o la operaci�n se llevan a cabo incorrectamente, la garant�a se anular�. ATENCI�N, INSTALADOR: este manual contiene informaci�n importante acerca de la instalaci�n, la operaci�n y la utilizaci�n seguras de este producto. Esta informaci�n debe ser entregada al due�o u operador de este equipo.

H0644400 REV C

P�gina 14

ESPA�OL

Jandy� TruGuardTM | Manual de instalaci�n y operaci�n

Contenido Contenido
Secci�n 1. Instrucciones importantes de seguridad................................. 15
Secci�n 2. Descripci�n general .................... 16
2.1 Aspectos generales del producto ................................16 2.2 Contenido del producto ...............................................16
Secci�n 3. Requisitos de instalaci�n ........... 16
Secci�n 4. C�mo instalar el Jandy TruGuard ...................... 17
Secci�n 7. Reemplazo del cartucho ............. 19
Secci�n 8. Preparaci�n para el invierno....... 20
8.1 Clima c�lido.................................................................20 8.2 Clima fr�o .....................................................................20
Secci�n 9. Eliminaci�n................................... 20

Jandy� TruGuardTM | Manual de instalaci�n y operaci�n

ESPA�OL

P�gina 15

Secci�n 1. Instrucciones importantes de seguridad
LEA Y SIGA ESTAS INSTRUCCIONES
El sanitizador para piscinas Jandy TruGuard est� dise�ado �nicamente para piscinas residenciales.
Cuando se instale y utilice este equipo, siempre se deber�n seguir las siguientes precauciones b�sicas de seguridad:

ADVERTENCIA
EQUIPO BAJO PRESI�N � Siempre apague la bomba antes de instalar o cambiar un cartucho Nature2. El sistema de
bomba/filtro funciona bajo presi�n y la presi�n debe liberarse antes de comenzar a trabajar. Consulte el manual del usuario de la bomba o del filtro para obtener instrucciones adicionales. EVITE EL AHOGAMIENTO DE LOS NI�OS � No permita que ninguna persona, especialmente ni�os peque�os, se siente, pise, se apoye o trepe en los equipos instalados como parte del sistema de operaci�n de la piscina. Ubique los componentes del sistema operativo al menos a 3 pies de la piscina de tal forma que los ni�os no puedan usar el equipo para acceder a la piscina y se lesionen o se ahoguen. F�RMULA CON BAJO CLORO � Debe seguir estrictamente la f�rmula con bajo cloro incluida en este manual para mantener una qu�mica del agua correcta y evitar peligros para la salud. Si no se cumplen estas instrucciones, pueden producirse enfermedades por bacterias y otros organismos nocivos.

PRECAUCI�N
INDICACI�N DE PRECAUCI�N PELIGROS PARA LOS HUMANOS Y PARA LOS ANIMALES DOM�STICOS
En el caso improbable que se rompa un cartucho, los humanos o los animales no deben ingerir el material mineral, ya que puede provocar problemas g�stricos.
PRIMEROS AUXILIOS SI SE INGIERE: Llame a un centro de toxicolog�a o a un m�dico de inmediato para obtener asesoramiento sobre el tratamiento.

ATENCI�N, INSTALADOR Este manual contiene informaci�n importante acerca de la instalaci�n, la operaci�n y la utilizaci�n seguras de este producto. Esta informaci�n debe proporcionarse al propietario/operador de este equipo.

GUARDE ESTAS INSTRUCCIONES

P�gina 16

ESPA�OL

Jandy� TruGuardTM | Manual de instalaci�n y operaci�n

Secci�n 2. Descripci�n general
2.1 Aspectos generales del producto Este manual proporciona instrucciones para instalar y reemplazar el Jandy TruGuard para sanitizar piscinas de 5000 a 45 000 galones. El alojamiento del TruGuard cabe en tubos de 2" o 2 1/2" de tama�o. El Jandy TruGuard consiste en la tecnolog�a Nature2� utilizada en conjunto con un dispositivo de suministro de cloro o 0.5 ppm de un producto de cloro para piscinas registrado con la EPA. La tecnolog�a Nature2� consiste en minerales de plata y cobre.
Cada piscina tiene sus propias caracter�sticas de tipo de agua y exposici�n a los elementos naturales. La f�rmula que se incluye en este manual ayudar� a asegurar una buena calidad del agua para su piscina, a fin de que disfrute m�s su experiencia en la piscina.
AVISO El uso de este producto de manera que no coincida con el etiquetado es una infracci�n a las leyes federales.
2.2 Contenido del producto
2

1

3

4 5

1 - Alojamiento de TruGuard 2 - Cartucho de TruGuard 3 - Tapa para el invierno y para presurizaci�n

4 - Manual del propietario 5 - Manual de instalaci�n

Secci�n 3. Requisitos de instalaci�n
Antes de instalar un nuevo cartucho TruGuard, limpie los residuos y las algas de la piscina y de los equipos de la piscina. No instale el nuevo cartucho hasta que el agua de la piscina est� limpia y equilibrada qu�micamente. Consulte el manual del propietario para obtener las instrucciones sobre c�mo equilibrar el agua.

Jandy� TruGuardTM | Manual de instalaci�n y operaci�n

ESPA�OL

P�gina 17

Secci�n 4. C�mo instalar el Jandy TruGuard
El Jandy TruGuard se instala en la l�nea de retorno de la piscina. 1. Determine la ubicaci�n para instalar el Jandy TruGuard. Debe instalarse:
� Despu�s del filtro en el retorno principal a la piscina. � Antes o despu�s del calentador (aguas abajo de los sistemas solares de calentamiento).
� Antes de la v�lvula de retenci�n para cualquier dispensador qu�mico o la descarga de cualquier dispensador qu�mico fuera de la l�nea.

Pump

Filter
Jandy TruGuard

Heater

Chlorinator
Check Valve

Intake Line

Return Line

2. Ubique un �rea en la l�nea de retorno que tenga al menos 8" para instalar el Jandy TruGuard.
3. APAGUE la bomba de la piscina. El sistema de bomba/filtro funciona bajo presi�n. La presi�n debe liberarse antes de comenzar el trabajo. Consulte el manual del usuario de la bomba/ del filtro para obtener instrucciones adicionales.
4. Cierre todas las v�lvulas. Si el equipo de filtrado de la piscina est� por abajo del nivel del agua de la piscina, deber� cerrar la v�lvula de retorno o usar tapones para el invierno en el filtro superficial y acoples de retorno para evitar la p�rdida excesiva de agua.
5. Quite el cartucho del alojamiento y conecte el alojamiento al tubo, asegur�ndose de que las flechas del indicador de flujo del alojamiento coincidan con la direcci�n de flujo del agua. Los tubos deben estar limpios y secos antes de adherirlos.
NOTA: Si la direcci�n del flujo de agua no coincide con las flechas del alojamiento, la unidad no funcionar� correctamente. El alojamiento puede orientarse horizontal o verticalmente. Para facilidad de servicio y mantenimiento, se recomienda que el alojamiento se instale horizontalmente con el cartucho mirando hacia arriba.

P�gina 18

ESPA�OL

Jandy� TruGuardTM | Manual de instalaci�n y operaci�n

Water Flow

6. Inserte el cartucho TruGuard en el alojamiento. Water Flow
7. Apriete el anillo de bloqueo.

10. Escriba la fecha de instalaci�n y la fecha de reemplazo en la etiqueta del cartucho.
11. Abra las v�lvulas que haya cerrado y encienda la bomba de la piscina para verificar que no haya fugas.

Jandy� TruGuardTM | Manual de instalaci�n y operaci�n

ESPA�OL

P�gina 19

Si hay alguna fuga, apague la bomba, cierre las v�lvulas y extraiga el TruGuard. Verifique que la junta t�rica no est� pellizcada y que est� asentada correctamente. Vuelva a colocar el cartucho y apriete la tuerca con la mano.
12. Superoxide el agua de la piscina con cloro seg�n las instrucciones del producto para quemar los contaminantes y activar el cartucho.
IMPORTANTE: La superoxidaci�n inicial con cloro es necesaria para quemar contaminantes y activar el cartucho.
13. Haga funcionar la bomba de circulaci�n durante las 24 horas durante 4 d�as, manteniendo siempre cloro libre a 1-2 ppm, o durante 6 horas por d�a durante 14 d�as, manteniendo siempre cloro libre a 1-2 ppm.
14. Permita que el cloro se disipe a 0.5 ppm despu�s de finalizado el periodo de puesta en funcionamiento. No ingrese a la piscina si el cloro libre disponible residual est� por arriba de 3 ppm.
15. Consulte el manual del propietario para mantener una f�rmula con bajo cloro.

Secci�n 7. Reemplazo del cartucho
El cartucho TruGuard debe reemplazarse cada seis meses. Las fechas de instalaci�n y de reemplazo del cartucho deben escribirse en la etiqueta del cartucho cuando se instala.
1. Apague la bomba de la piscina.
2. Libere la presi�n del sistema de tuber�as de la piscina. Consulte el manual de la bomba/del filtro para obtener las instrucciones sobre c�mo liberar la presi�n.
3. Cierre todas las v�lvulas. Si el equipo de filtrado de la piscina est� por abajo del nivel del agua de la piscina, deber� cerrar la v�lvula de retorno o usar tapones para el invierno en el filtro superficial y acoples de retorno para evitar la p�rdida excesiva de agua.
4. Afloje el anillo de bloqueo. 5. Extraiga el cartucho TruGuard anterior.
6. Instale el nuevo cartucho TruGuard.
7. Escriba la fecha de instalaci�n y la fecha de reemplazo en la etiqueta del cartucho.
8. Apriete el anillo de bloqueo.

P�gina 20

ESPA�OL

Jandy� TruGuardTM | Manual de instalaci�n y operaci�n

Secci�n 8. Preparaci�n para el invierno
8.1 Clima c�lido 1. Reduzca la cantidad de horas que funciona la bomba, debido a que el
clima m�s fr�o reduce la propagaci�n de algas y otros contaminantes. 2. No hay necesidad de superoxidar la piscina durante el clima fr�o, a no
ser que el agua se ponga turbia (como puede suceder despu�s de una tormenta de invierno). Consulte el apartado sobre el agua turbia en la secci�n de resoluci�n de problemas. 8.2 Clima fr�o 1. Verifique la alcalinidad total y el pH de la piscina para asegurarse de que est�n en el equilibrio correcto. 2. Aspire el fondo de la piscina para eliminar cualquier residuo u otros contaminantes potenciales. 3. Superoxide la piscina con cloro seg�n las instrucciones del producto para limpiar el agua.
4. Agregue un alguicida de invierno seg�n las instrucciones del producto.
IMPORTANTE: No utilice ning�n alguicida de invierno que contenga cobre. Esto anular� la garant�a de Jandy.
5. Retrolave el filtro. 6. Drene parte del agua de la piscina. La cantidad que debe drenarse
depende del lugar del pa�s donde est�. Consulte a su distribuidor para obtener asesoramiento. 7. Extraiga el cartucho TruGuard y elim�nelo. 8. Coloque la tapa para el invierno y para presurizaci�n en el alojamiento y apriete el anillo de bloqueo. 9. Prepare los tubos para el invierno con anticongelante para piscinas. Siga las instrucciones del producto. 10. Drene el agua de todos los equipos (bomba, filtro, etc.). 11. Guarde todos los canastos, mangueras y equipos de limpieza, si es posible bajo techo.
12. Cubra la piscina con un cobertor para invierno.
Secci�n 9. Eliminaci�n
Despu�s de seis meses de uso, elimine el cartucho TruGuard con los residuos dom�sticos. No guarde el cartucho para volver a utilizarlo. El cartucho contiene un material mineral sellado dentro. En el caso improbable de que se rompa un cartucho, qu�telo y aspire cualquier material que se haya introducido en la piscina.

Jandy� TruGuardTM | Manual de instalaci�n y operaci�n

ESPA�OL

P�gina 21

P�gina 22

ESPA�OL

Jandy� TruGuardTM | Manual de instalaci�n y operaci�n

Jandy� TruGuardTM | Manual de instalaci�n y operaci�n

ESPA�OL

P�gina 23

Zodiac Pool Systems LLC 2882 Whiptail Loop # 100 Carlsbad, CA 92010 1.800.822.7933 | www.ZodiacPoolSystems.com
ZODIAC� es una marca registrada de Zodiac International, S.A.S.U., utilizada con licencia. Todas las marcas comerciales a las que se hace referencia en este documento son propiedad de sus respectivos due�os.
�2020 Zodiac Pool Systems LLC H0644400 REV C

INCLUIDO EN ETL CUMPLE
UL STD 676
CERTIFICACI�N CAN/CSA C22.2 NO.89