Rubbermaid 5L45 7'x7' Resin Storage Building Assembly Instructions
Before You Begin
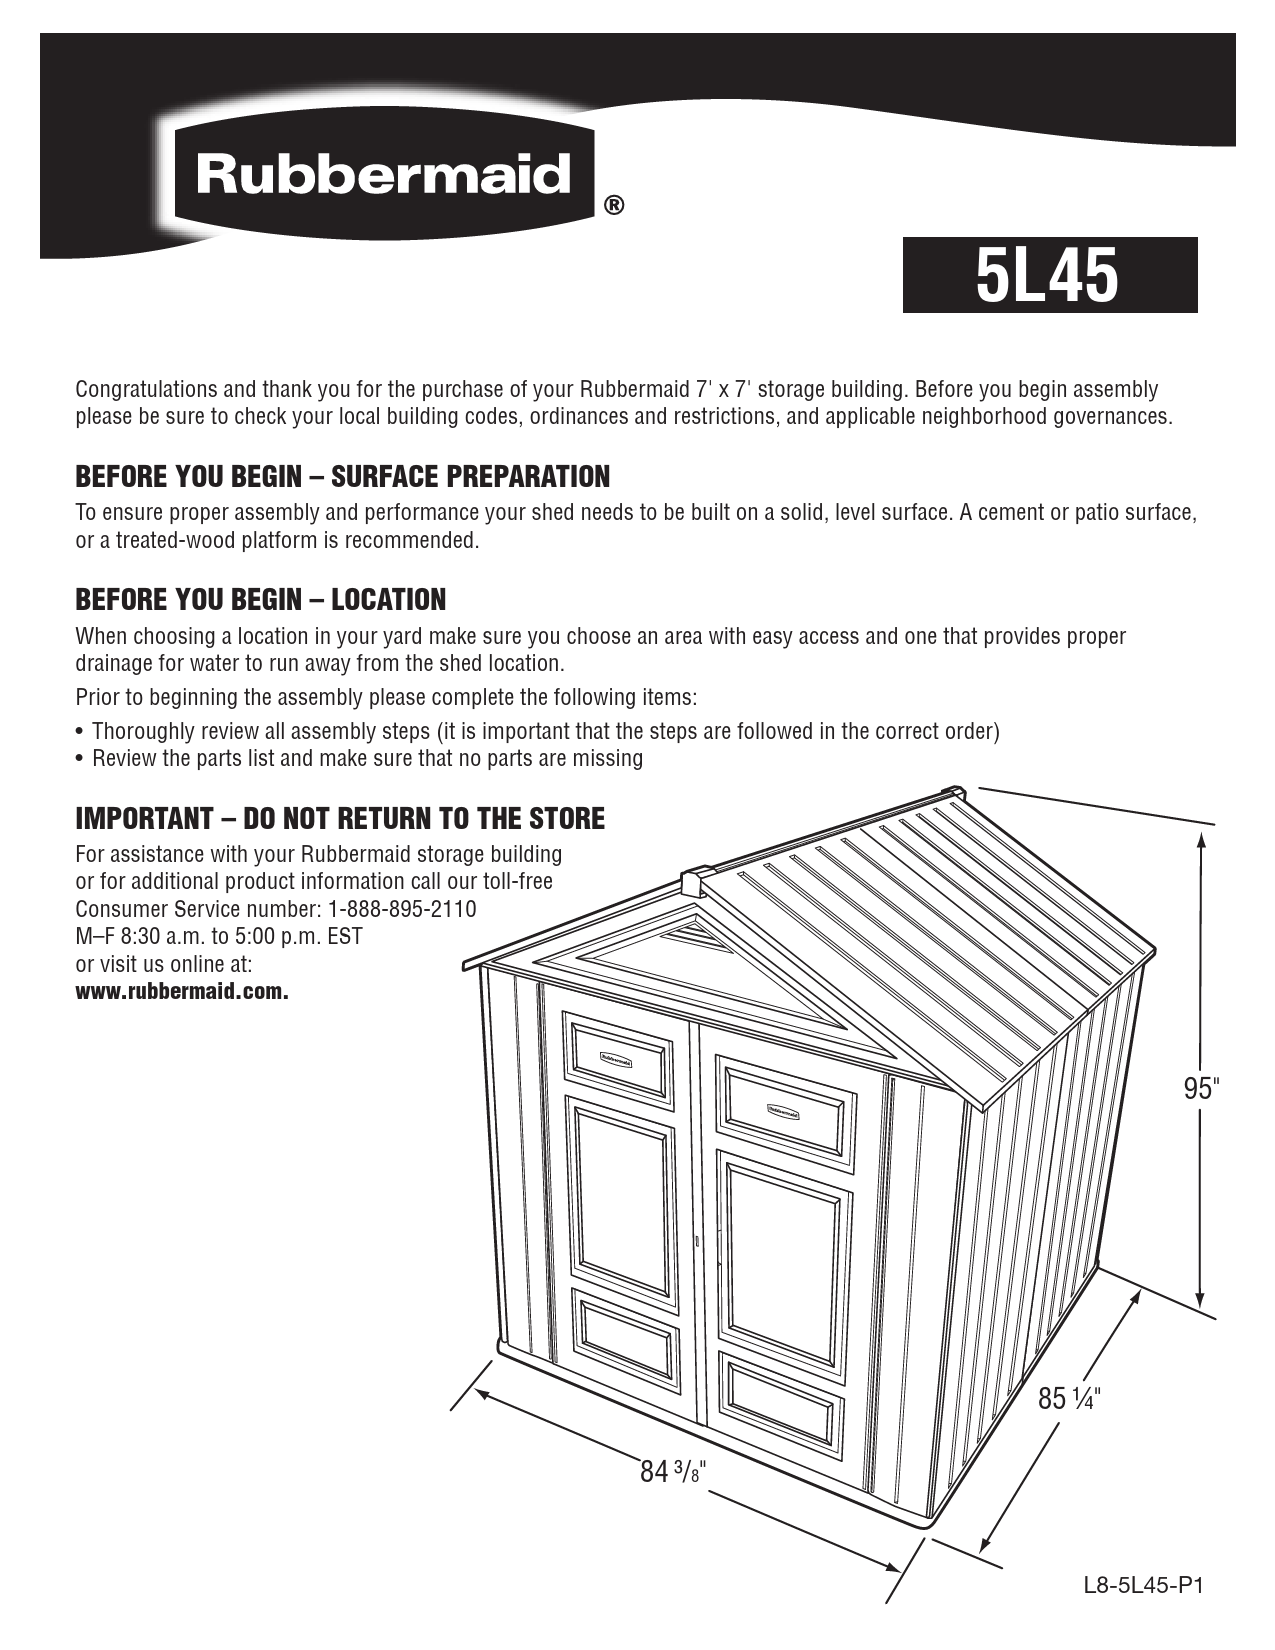
Congratulations on your purchase of the Rubbermaid 7'x7' storage building. Before starting assembly, please verify local building codes, ordinances, restrictions, and neighborhood governance.
Surface Preparation
For proper assembly and performance, the shed must be built on a solid, level surface. A cement or patio surface, or a treated-wood platform is recommended.
Location
Choose a location in your yard that offers easy access and proper drainage for water to run away from the shed. Ensure you have checked local building codes and neighborhood governance.
Pre-Assembly Checklist:
- Thoroughly review all assembly steps to ensure they are followed in the correct order.
- Review the parts list and confirm that all parts are present.
Important – Do Not Return to the Store
For assistance or additional product information, contact Rubbermaid Customer Service toll-free at 1-888-895-2110 (Monday-Friday, 8:30 a.m. to 5:00 p.m. EST) or visit www.rubbermaid.com.
Parts List and Required Tools
Parts List:
| Description | Part Number | Assembly Letter | Quantity |
|---|---|---|---|
| Front Left Floor | 37A4 | A | 1 |
| Front Right Floor | 37U4 | U | 1 |
| Back Left Floor | 37B4 | B | 1 |
| Back Right Floor | 37W4 | W | 1 |
| Left Side Panel | 37C4 | C | 2 |
| Right Side Panel | 37D4 | D | 2 |
| Left Back Panel | 37E4 | E | 1 |
| Right Back Panel | 37G4 | G | 1 |
| Left Front Panel | 37H4 | H | 1 |
| Right Front Panel | 37J4 | J | 1 |
| Wall Connector | 37Q4 | Q | 14 |
| Left Door Panel | 37X4 | K | 1 |
| Right Door Panel | 37Y4 | F | 1 |
| Lock Hasp | 5F58 | X | 1 |
| Left Roof Panel | 37N4 | N | 2 |
| Right Roof Panel | 37P4 | P | 2 |
| Gable | 37M4 | M | 2 |
| Ridge Beam | 37R4 | R | 1 |
| Roof Connector | 37T4 | T | 8 |
| #14 x 1" Combo Pan Head Screw | AA | 40 | |
| 1/4-20 x 1/2" Combo Round Head Bolt | BB | 2 | |
| 1/4-20 Flat Washer | CC | 2 | |
| 1/4 Hex Nut | DD | 2 | |
| Roof Pin | M8-3784-00 | EE | 4 |
Required Tools:
- Safety Glasses ?
- Rubber Mallet ?
- Phillips Screwdriver ?
- (2) Step Stools/Stepladders ?
- Liquid Soap (mild detergent)
Assembly Instructions
Step 1: Site Preparation
Level the construction site before beginning assembly. A foundation may be constructed if desired.
Step 2: Assemble Front Floor
Connect Front Left Floor (A) to Front Right Floor (U). Install Screws (AA) in 4 places. Caution: Do not overtighten screws.
Step 3: Assemble Back Floor
Connect Back Left Floor (B) to Back Right Floor (W). Install Screws (AA) in 4 places. Caution: Do not overtighten screws.
Step 4: Connect Floor Assemblies
Place the assembled front floor onto the leveled construction site. Connect the back floor to the front floor. Install Screws (AA) in 8 places. Caution: Do not overtighten screws.
Step 5: Attach Left Side Panel
Using a screwdriver, punch out the screw holes on the top of Left Side Panel (C) (2 places). Connect Left Side Panel (C) into Front Left Floor (A).
Step 6: Attach Left Front Panel
Lubricate dovetails on Left Front Panel (H) (4 places) with liquid soap. Connect Left Front Panel (H) into the dovetails of Left Side Panel (C). Engage snaps on the bottom of Left Front Panel (H) into Front Left Floor (A).
Step 7: Attach Left Back Panel
Using a screwdriver, punch out the screw holes on the top of Left Side Panel (C) (2 places). Align lap joint between Left Side Panels. Connect Left Side Panel (C) into Back Left Floor (B).
Step 8: Install Wall Connectors
Install Wall Connectors (Q) in 5 places.
Step 9: Attach Left Back Panel
Lubricate dovetails on Left Back Panel (E) (4 places) with liquid soap. Connect Left Back Panel (E) into the dovetails of Left Side Panel (C). Engage snaps on the bottom of Left Back Panel (E) into Back Left Floor (B).
Step 10: Repeat for Right Side
Repeat Steps 5-9 to assemble the right side of the shed. Then proceed to Step 11.
Step 11: Connect Back Panels
Engage lap joint between Left Back Panel (E) and Right Back Panel (G). Install Wall Connectors (Q) in 4 places.
Step 12: Install Back Gable
Install Gable (M) onto the top of the back wall, engaging the 2 dovetails and snaps on the back panel, and the dovetail on the side panel on both the left and right sides of the shed.
Step 13: Install Front Gable
Install Gable (M) onto the top of the front wall, engaging the 2 dovetails on the front panel and the dovetail on the side panel on both the left and right sides of the shed. Do not engage the snaps.
Step 14: Install Left Door
Install Left Door Panel (K) by inserting the lower hinge pin into the Front Left Floor (A) socket. Lift the left end of the Gable (M) enough to insert the top hinge pin on Left Door Panel (K) into the Gable (M) socket.
Step 15: Install Right Door and Hasp
Install Right Door Panel (F) by inserting the lower hinge pin into the Front Right Floor (U) socket. Lift the right end of the Gable (M) and insert the top hinge pin on Right Door Panel (F) into the Gable (M) socket. Install Lock Hasp (X) into the back side of Right Door Panel (F). Engage Gable (M) snaps on the front wall.
Step 16: Place Ridge Beam
Place Ridge Beam (R) into the cups at the top of each Gable (M).
Step 17: Secure Ridge Beam (Part 1)
Align slots in Ridge Beam (R) with holes in Gable (M) tabs. Install Bolt (BB), Washer (CC), and Nut (DD) in 1 place. Tighten the nut finger tight only.
Step 18: Optional Lumber Support
For areas with extreme snow or heat, you can install two 2" x 6" x 82.5" pieces of lumber into the Gable (M). Lumber is not included. This is optional but provides extra roof support.
Step 19: Secure Ridge Beam (Part 2)
Align slots in Ridge Beam (R) with holes in Gable (M) tabs. Install Bolt (BB), Washer (CC), and Nut (DD) in 1 place. Tighten the nut finger tight only.
Step 20: Install Left Roof Panel
Lubricate roof snaps on the front Gable (M) (8 places). Raise the Left Roof Panel (N) onto the front left side of the shed assembly. Ensure the arrows on the roof panel face the inside of the shed and point towards the Ridge Beam (R).
Step 21: Engage Left Roof Panel
Using two step stools (one inside, one outside), lift the bottom of the roof panel above horizontal. Guide the roof panel into the Ridge Beam (R). Align the front Gable (M) rib with the channel in Left Roof Panel (N). Engage Left Roof Panel (N) in Ridge Beam (R) by lowering the bottom of the roof panel onto the shed assembly. Hold the Ridge Beam (R) to prevent twisting. Do not snap the roof down yet.
Step 22: Install Right Roof Panel
Lubricate roof snaps on the back Gable (M) (8 places). Raise the Left Roof Panel (N) onto the back left side of the shed assembly. Ensure the arrows on the roof panel face the inside of the shed and point towards the Ridge Beam (R). Using two step stools, lift the bottom of the roof panel above horizontal, guide the roof panel into the Ridge Beam (R). Align the back Gable (M) rib with the channel in Left Roof Panel (N). Engage Left Roof Panel (N) in Ridge Beam (R) by lowering the bottom of the roof panel onto the shed assembly. Hold the Ridge Beam (R) to prevent twisting. Do not snap the roof down yet.
Step 23: Install Roof Connectors
Install Roof Connectors (T) in 4 places. You may need to lift the bottom of the roof panels to avoid the 2" x 6" lumber (if installed).
Step 24: Engage All Snaps
Engage all snaps between the roof panels and gables, then between the roof panels and wall panels.
Step 25: Repeat for Right Roof
Repeat Steps 20-24 for the right side of the shed roof.
Step 26: Secure Front Gable
Install Screws (AA) in 16 places into the Gable (M). Caution: Do not overtighten screws.
Step 27: Secure Side Panels to Roof
While one person holds down the bottom of the roof, install Screws (AA) in 8 places into the screw holes on the top of the Side Panels (C & D). These screws connect the Side Panels to the Roof Panels. Caution: Do not overtighten screws.
Step 28: Install Roof Pins
Install Roof Pins (EE) in 4 places, connecting the Roof Panels to the Gables.
Maintenance & Safety
- Periodically check the shed to ensure it remains stable and the site remains level.
- In areas with extreme high winds, it is recommended to anchor the shed to a platform or ground by drilling holes in the floor at designated locations and securing with proper fasteners (not included).
- Wash the shed with a garden hose or a mild detergent solution. Using an abrasive cleaner could damage your building.
- Hot items, such as recently used grills or fire pits, should not be stored in the building.
- Heavy items should not be leaned against the walls, as this may cause distortion.
- Keep doors closed when not in use to prevent wind damage.
- Do not climb onto the roof.
- The shed is not designed for habitation.
- In the event of severe weather, please disassemble and store in a secure location.
Product Information
Printed in U.S.A. ©2010 Rubbermaid Incorporated, Huntersville, NC U.S.A. 28078-1801
Customer Service Toll Free: 1-888-895-2110 M-F 8:30 a.m. to 5 p.m. EST
Visit us online at: www.rubbermaid.com
Dimensions: 84 3/8" width x 85 1/4" depth x 95" height
