Electrolux
Instruction Book
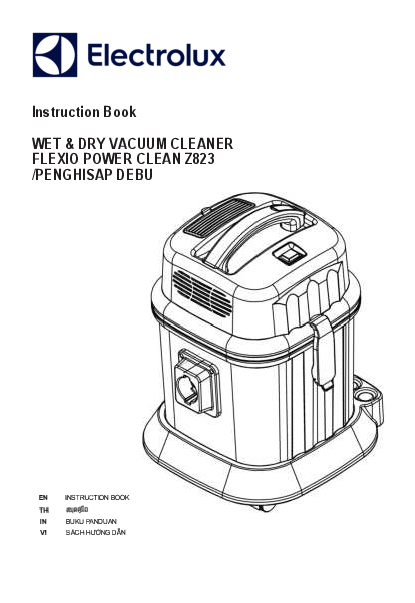
WET & DRY VACUUM CLEANER FLEXIO POWER CLEAN Z823 /PENGHISAP DEBU
Product and Accessories
Cleaning Tools
- Wet Nozzle
- Crevice Nozzle
- Dusting Brush
- Floor Brush
Diagram Description: The vacuum cleaner unit is depicted with various attachments. The main unit is cylindrical with a lid. Numbered components are indicated:
- 1. Wet Nozzle: A wide nozzle for cleaning wet surfaces.
- 2. Plastic Tubes: Sections of rigid tubing that connect to form the wand.
- 3. Flexible Hose: A corrugated hose connecting the wand to the vacuum unit.
- 4. Tools on Board: Storage for accessories on the main unit.
- 5. On/Off Switch: The main power button.
- 6. Power Plug: The electrical power cord connection.
- 7. Clasp: Secures the top cover to the main body.
- 8. Wheel: For mobility of the vacuum cleaner.
- 9. Exhaust Grille: Vents for air expulsion.
- 10. Drum: The main container for dust and debris.
Note: Line drawings are for illustration purposes and may differ from the actual product.
Safety Instructions
Please read these operating instructions carefully and observe the safety instructions provided.
- Read all instructions and use the appliance only for its intended purpose.
- Switch off the appliance before plugging or unplugging it from the wall socket. Do not pull the cord to remove the plug.
- Always remove the plug from the wall socket before any user maintenance or cleaning.
- Do not handle the plug with wet hands.
- Do not operate the appliance with a damaged electrical cord or plug. If damaged, return to an authorized Electrolux service center.
- If the appliance malfunctions or is damaged, return it to the nearest authorized Electrolux service center for examination, repair, or adjustment.
- Do not carry or drag the appliance by the electrical cord.
- Keep the electrical cord away from heat, oil, sharp edges, and rough or hot surfaces. Do not run the appliance over the cord.
- Hold the plug when rewinding the cord to prevent it from whipping or hitting the appliance.
- An extension cord may be used if it has a higher rating than the appliance. Consult the appliance's rating plate or an authorized Electrolux service center.
- To protect against electric shock, do not immerse the cord, plug, or appliance in water or other liquids.
- Do not expose the appliance to rain.
- Do not use the appliance outdoors.
- Never leave the appliance running unattended.
- This appliance is not intended for use by persons (including children) with reduced physical, sensory, or mental capabilities, or lack of experience and knowledge, unless supervised or instructed by a responsible person.
- Children should be supervised to ensure they do not play with the appliance.
- Store the appliance away from high heat sources.
- Do not use this appliance to vacuum:
- Flammable or combustible substances.
- Hard pointed objects.
- Hot ash, lighted cigarette ends, or anything burning or smoking.
- Large quantities of fine dust (e.g., lime, cement, plaster dust, toner dust from laser printers).
- Do not operate this appliance in areas where the above substances may be present.
- Ensure all orifices/vents are kept free from blockages to prevent reduced airflow. Do not insert objects into these openings.
- Do not use without filters in place.
- If the motor overheats, it will turn off automatically. Press the on/off button and wait a few minutes before switching on again.
- Exercise extra care when vacuuming staircases.
- It is dangerous to alter specifications or modify the vacuum cleaner; use only Electrolux-recommended accessories.
- Do not attempt to repair the vacuum cleaner yourself.
- The vacuum cleaner should only be repaired/serviced by an authorized Electrolux service center using genuine Electrolux spare parts. Failure to do so may void the warranty.
- This vacuum cleaner is for household use only.
Important: This vacuum cleaner must only be connected to a power supply whose voltage and frequency comply with the specifications on the appliance rating plate.
Quick Guide & Assembly
Quick Guide
When taking the product out of its packaging, check for damages.
Vacuum Cleaner Assembling
Always remove the plug from the power supply before fitting or removing accessories. Before putting the appliance into service, please check if all filters are inserted correctly.
Connecting the Vacuum Cleaner
Fitting or removing the flexible hose to the air inlet (A):
- Fit the flexible hose into the air inlet. Turn the hose grip clockwise until it clicks into position.
- To release, first remove the plug from the power socket. Detach the flexible hose firmly from the air intake duct by turning anti-clockwise.
Fitting or removing the flexible hose to the air outlet (B):
- Remove the exhaust grille and the filter.
- Fit the flexible hose into the air outlet. Turn the hose grip clockwise until it clicks into position.
- To release, first remove the plug from the power socket. Detach the flexible hose firmly from the air outlet duct by turning anti-clockwise.
Fitting the Extension Tubes and Accessories
Diagram Description: Shows how to attach an extension tube to the handle and then attach a cleaning tool (like a brush) to the extension tube.
- Fit the extension tube to the handle.
- Fit the brush to the extension tube.
Operating Procedure
Using Specific Nozzles
- Floor Brush: Ideal for daily cleaning on carpets and hard floors. Use for cleaning hard floors and carpets.
- Crevice Nozzle: For cleaning corners, between cushions, or difficult-to-reach places.
- Wet Nozzle: Ideal for absorbing water or liquid. Use only for cleaning wet surfaces.
- Dusting Brush: Used for furniture, venetian blinds, books, lampshades, and shelves.
Vacuuming Dust
Before vacuuming dust, ensure the body, motor housing, filter, and attachments are dry. Fit the floor brush or other tools to vacuum the dust.
Absorbing Water
You can fit the wet nozzle or other cleaning tools. The safety buoy will not work when the body is filled with liquid. If this occurs, switch off the unit, remove the top cover, and pour out the liquid. If the appliance has fallen over, water may enter the motor. Ensure there is no water inside the motor before operating again.
Blowing Dust
Remove the filter grille from the blower position. Fit the hose connection. Once complete, remove the hose connection and fit the exhaust grille to its position, turning it tightly.
Note: If suction power weakens during operation, turn off the unit for a moment before resuming. If it still does not work, clean the body and empty the dust bin. Continuous extended use with a full dust bin may increase motor temperature and damage the unit.
Maintenance
Dust Filter Replacement
Note: Always unplug the cleaner before cleaning or maintenance.
Diagram Description: Shows steps for removing and replacing the dust filter. This involves removing the top cover, lifting out the filter, rinsing it, drying it, and reassembling.
- After detaching the flexible tube, remove the top cover.
- Lift up the dust filter to remove it from its slot.
- Rinse the filter in lukewarm water and dry it completely.
- When suction is extremely low with a washed filter, replace it with a new one. Contact an Electrolux service station for new filters.
- Replace the top cover and secure both latches on each side.
Cleaning Filter
Note:
- Filter must be cleaned when it becomes visibly soiled.
- Disconnect from the electrical outlet before cleaning filters.
- Do not use a washing machine to rinse filters.
- Do not use a hair dryer to dry filters.
How to Store Your Vacuum
- Choose a storage location that is both safe and dry.
- The vacuum comes with an onboard tool coupling for storing the floor nozzle; slide the parking clip onto the parking positions on the cleaner.
- Keep the extension tubes, nozzles, and hose together to avoid losing them.
Troubleshooting
In case of malfunction, check for the following probable reasons. Make necessary corrections at home. If the problem persists, consult the Electrolux Authorized Service Centre.
| Problem | Possible Causes | Corrections |
|---|---|---|
| The vacuum cleaner does not start. | The plug is not properly connected to the socket. Thermal protector activated due to motor high temperature. | Check the plug connection or try another socket. Press the ON/OFF button and wait 30 minutes for the motor to cool off. |
| Reduction of suction capacity. | Suction hose blocked. Nozzle blocked. Filters clogged. Damaged or broken hose. | Clean the hose. Clean the nozzle. Clean or replace filters. Replace the hose. |
| Overheating. | Filters are clogged. | Clean/replace filters. |
Technical Data
For Z823
220-240V, 50/60Hz
Max Power (W): 1400W
