File info: application/pdf · 111 pages · 4.51MB
User Manual | Before you start
You’ll start a business that knocks the socks off of every customer. You’ll do things you ... Before you start. ● Read this manual before using your Glowforge printer, and ensure...
User Manual
Read this manual before using your Glowforge printer, and ensure everyone else who uses it reads this too. ○ Always follow all instructions in this section and ...
Extracted Text
User Manual
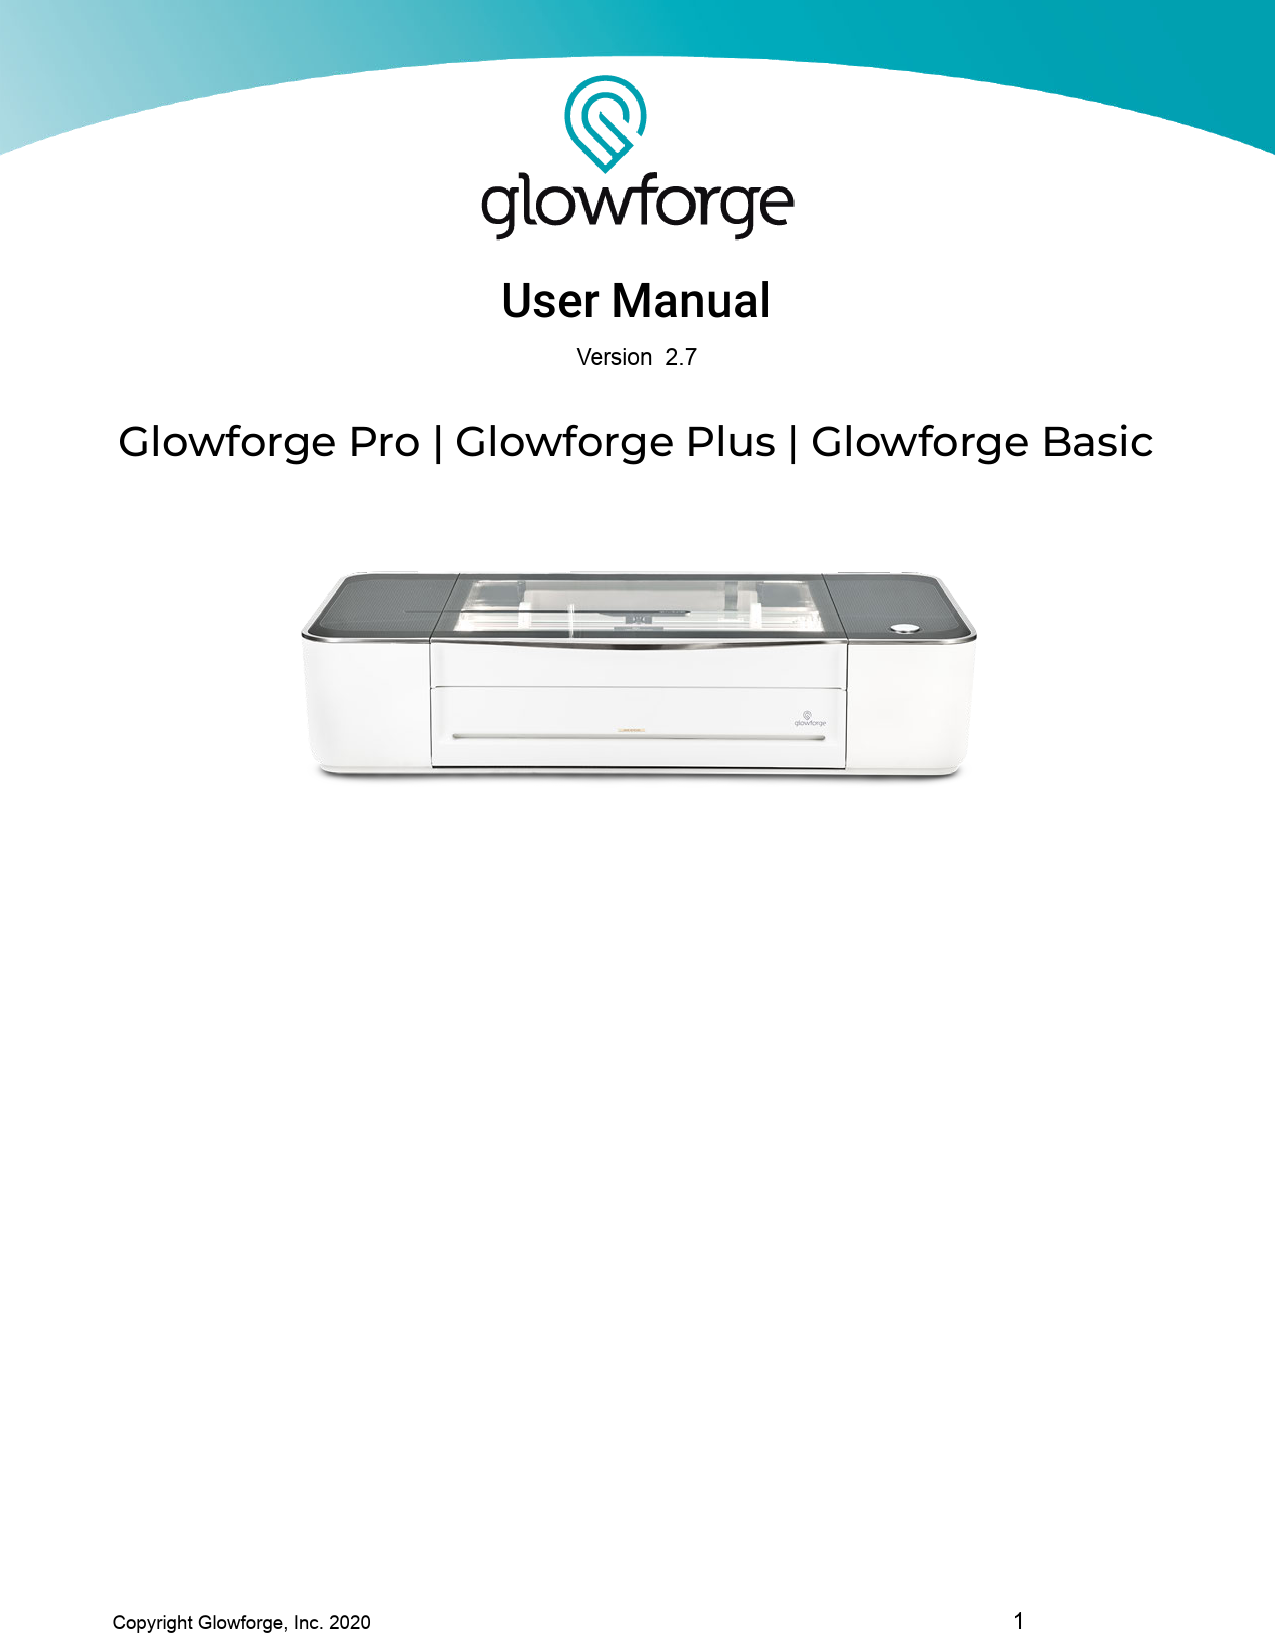
Version 2.7
Glowforge Pro | Glowforge Plus | Glowforge Basic
Copyright Glowforge, Inc. 2020
1
Introduction
We are over-the-moon excited to introduce you to your Glowforge 3D Laser Printer. It's here. You're here. This is a big deal.
With your Glowforge, you're going to do incredible things. You'll build that custom storage solution that you can't seem to find in stores. You'll make the best birthday present your aunt has ever received.
You'll start a business that knocks the socks off of every customer. You'll do things you haven't even dreamed of yet.
But before you can do any of that, there's this.
Our job is to make sure that every part of the Glowforge experience is delightful. We're sorry, but it is important that you read a few pages that are not delightful: the ones about safety. They're a little dry, and a bit scary. Most of this manual is dedicated to helping you create beautiful things, but this part was written by our safety team, in the most direct language possible, to make absolutely certain you can operate your Glowforge printer safely.
Then, after the safety talk, we'll get back to the fun part: unboxing, the easiest laser setup you've ever seen, and... Laser Time! Your very first Glowforge prints.
We're deeply humbled to be able to count you among our brilliant, thoughtful, creative, and inspiring customers. We can't wait to see the amazing things you'll do.
PS: If you see anything that is unclear or seems incorrect, please let us know immediately at support@glowforge.com .
Copyright Glowforge, Inc. 2020
2
Safety
Now, it's time to get serious. Improperly operating the Glowforge unit can cause fire, eye or skin injury from laser exposure, or exposure to chemicals that may be health hazards. These can result in serious injury or even death.
Before you start
Read this manual before using your Glowforge printer, and ensure everyone else who uses it reads this too.
Always follow all instructions in this section and in the Glowforge App. Children require the supervision and assistance of an adult at all times. Do not use your Glowforge printer while under the influence of alcohol or drugs. Lasers are subject to regulations and standards, particularly when installed in an educational
institution or place of work. Ensure that you comply with all applicable rules. Do not touch the head or arm of the Glowforge unit while the power is on. If you do so by
accident, turn it off, then back on again to prevent the possibility of damage. Parts of this product are made of glass that could break under impact. Should that happen,
be careful to avoid injury by broken glass pieces.
Copyright Glowforge, Inc. 2020
3
Electrical Safety
To reduce the risk of electric shock or fire:
Do not try to service, repair, or modify the Glowforge unit. Never try to access the wiring of the Glowforge unit. Do not open the power supply or any other sealed portion of the Glowforge unit. If the Glowforge unit is damaged, unplug the power cord and contact support@glowforge.com
immediately. In the event of any emergency or malfunction, unplug the power cord on the back of the unit. Use only a properly grounded outlet that meets local building codes and has least 800 watts of
power available. The power cord is intended to serve as the disconnect device. Make sure the outlet is near the
equipment and easily accessible, so you can unplug the unit if needed. The minimum rating of the circuit breaker, also known as an over-current protective device, on
this circuit feeding the outlet should be at least 15 amps.
Fire Safety
The Glowforge unit's laser cuts and engraves with a beam of high-intensity infrared light. The laser can generate extremely high temperatures in the material being cut or engraved. Under some circumstances, it is possible for the material inside the Glowforge unit to ignite and for the flame to spread outside of the area being cut or engraved. If ignited, the flame could destroy your unit and spread, potentially setting fire to the building.
Fire Risk
Do not put anything inside the Glowforge printer that is not laser-compatible, even if you do not intend to cut or engrave it. Learn more about laser-compatible materials below.
Do not stack materials; for example attempting to cut two or more sheets of material at a time. Multiple sheets are more likely to burn.
Clean out leftover bits inside the Glowforge unit when it builds up. (See "Cleaning") Do not place things on top of the Glowforge unit. Do not store things that can catch fire above it. Do not store sources of flammable vapors like oil-based paint, acetone, gasoline, or alcohol in
the same room as your Glowforge unit. Flammable vapors could be ignited during operation. When a print is complete, certain materials, like plastics, can remain hot. Allow them to cool
down before you touch them.
Copyright Glowforge, Inc. 2020
4
Keep watch during operation
Never leave the Glowforge unit unattended while operating � either when it's paused and ready to print (with the button flashing) or while it's actually printing (with the button on). Always stay within sight and look inside frequently.
A small, candle-like flame where the laser beam strikes the material is normal. This flame should move with the laser and should not remain lit when the laser has moved past.
If there is a lasting flame inside the Glowforge unit that does not extinguish when the laser has moved past:
1. Pull the plug on the back of the unit. 2. If it is safe to do so, extinguish the fire with a wet towel. Note that water may damage
your Glowforge. 3. If that is not an option, then if it is safe to do so, extinguish the fire with a fire
extinguisher. Note that fire extinguishers may cause damage to your Glowforge. 4. If the fire cannot be safely extinguished or if it spreads outside the Glowforge unit,
call your local emergency number (for example 911) and evacuate the building. 5. Do not operate the unit further until you have contacted Glowforge for service
information at support@glowforge.com.
Laser Safety for all Glowforge Printers (except where noted)
Laser Products
The Glowforge Basic 3D Laser Printer and the Glowforge Plus 3D Laser Printer are Class 1 laser products which contain an embedded Class 4 laser. The Glowforge Pro 3D Laser Printer is a Class 4 laser product. The laser in your Glowforge emits enough infrared light to cause instant skin and eye injury, or start a fire. This infrared laser light is invisible. The Glowforge unit has a case and glass lid which block harmful levels of infrared and ultraviolet light to allow you to operate the laser safely.
CAUTION! Use of controls or adjustments or performance of procedures other than those specified herein may result in hazardous radiation exposure.
Do not use if glass or case are damaged or modified.
Any damage or modifications could allow dangerous contact with moving and/or electrical parts, and/or allow infrared and ultraviolet light, heat, smoke, and fumes to escape.
Safety interlock switches on the front door turn off the laser immediately if they are opened. Do not place magnets near the lid or doors as they can interfere with the switches. Do not try to defeat the switches.
Copyright Glowforge, Inc. 2020
5
Do not modify or service
CAUTION! Attempting to modify or service the Glowforge unit may result in hazardous laser light exposure.
To reduce the risk of injury: Do not attempt service. All service must be performed only by the Glowforge factory or by factory-authorized technicians. Do not attempt to alter or modify the unit. Only use the front door or top lid to open the case. Do not try to open the case any other way, such as by drilling holes, removing fasteners, or removing coverings. Do not try to disassemble or open sealed portions of the Glowforge unit, including any protective coverings or housings. If the crumb tray is removed, use extreme caution to ensure that the laser only strikes laser-compatible material, and does not touch the metal bottom of the unit which could cause a reflection and damage the unit.
Glowforge Pro Only: Class 4 Laser Safety & LSO Training
Because the Glowforge Pro has pass-through slots, it is a Class 4 laser device. For safe operation, a Class 4 laser device should be operated under a laser safety program under the control of a Laser Safety Officer (LSO). Training for LSOs normally costs more than $1,000, but Glowforge has worked with leading laser safety training experts to prepare materials so that you can act safely as the LSO for your Glowforge Pro.
These materials will train you to operate your Glowforge Pro in Class 1 conditions, which do not require additional special precautions. If you need to operate your Glowforge Pro in Class 4 conditions, these materials will explain what you must do in order to operate it safely. They will also provide you with an overview of laser physics and safety concerns, and processes to follow.
You must read, understand, and follow the Glowforge Pro Training Materials to use your Glowforge Pro.
The Glowforge Pro LSO Training materials are emailed to all Glowforge Pro owners as a password-protected PDF.
Smoke and Fume Safety
When you use your Glowforge, the laser creates visible and invisible aerosols, gases, vapors, and particulates (referred to here as "smoke and fumes"). The smoke and fumes can include carbon monoxide and other chemicals which present health hazards, as well as being unpleasant and stinky.
Copyright Glowforge, Inc. 2020
6
The chemical composition of the smoke and fumes depend on the material being lasered. Smoke and fumes from laser-compatible materials are controlled by exhaust or filtration.
Exhaust
Only operate your Glowforge unit when it is exhausted to the outdoors or through the Glowforge Air Filter. Failure to exhaust will cause smoke and fumes to escape into the room, presenting a risk of health hazards or death.
If you exhaust outdoors, be sure that the exhaust location won't be bothersome to neighbors or passers-by, and don't forget to check your local rules for air quality regulations that may apply to you.
To prevent smoke and fumes from escaping the unit, do not open the lid until the fans stop.
Follow all of the instructions in "Setting Up" carefully.
There may be some odor present while printing. However, if you detect a strong, sharp smell that also causes eyes, nose, or throat irritation, or if there is visible smoke escaping while the lid is closed, stop immediately and re-check your exhaust setup. If the irritation and/or smoke emissions do not abate, discontinue using your Glowforge and contact support.
Pro Users: There may be small openings around the edges of the passthrough slot. This is expected; your Glowforge Pro's powerful fans will whisk smoke and fumes away into the exhaust hose.
Safety Equipment
Be sure carbon monoxide detectors are installed and tested in the building as recommended by local codes and manufacturer recommendations.
Materials Safety
Laser-Compatible Materials
"Laser-compatible" refers to materials that can be safely processed with the CO2 laser in the Glowforge unit. Materials that are not laser-compatible may catch fire, emit hazardous smoke and fumes that cannot be controlled by exhaust or filtration, and are a health hazard to you, your neighbors, and your Glowforge printer. For this reason, you must only put laser-compatible materials in the Glowforge unit.
ProofgradeTM materials
Glowforge sells a line of Proofgrade materials that are laser-compatible and give top-quality results when used with the Glowforge printer. To learn more about Proofgrade materials, go to glowforge.com/materials .
Copyright Glowforge, Inc. 2020
7
Laser-compatible materials from other suppliers
Other suppliers like Inventables.com sell material that they indicate is laser-compatible. If you are uncertain, ask the supplier if the material may be processed safely with a CO2 laser.
Food Safety
Many food products can be engraved, and some can even be cut. However, residue from prints on acrylic or other materials might be present in your Glowforge and could contaminate food that you put in your Glowforge. For that reason, if you use your Glowforge for materials other than food, then don't eat any food you put inside it.
What if I'm not certain whether my materials are laser-compatible?
If you aren't completely sure that your material is laser-compatible, do not put it in the Glowforge unit.
Some materials look similar to laser-compatible materials, but are different. For example, vinyl can be mistaken for some laser-compatible materials but emits harmful smoke and fumes.
Materials may have contaminants, coatings, or additives that are not laser-compatible. For example, certain plywood glues, inks, adhesives, dyes, and paints may not be laser-compatible.
Some materials can reflect the laser and damage your Glowforge unit. For example, copper and chrome can reflect the infrared laser light.
Materials must fit
Materials that do not fit properly may obstruct operation and result in damage and increased risk of fire.
Materials must be no more than 21 in. wide and must not be so long as to touch the end of the Glowforge unit. Material must be less than � in. tall if the crumb tray is in, or less than 2 in. tall if it is removed.
Materials must not extend past the side of the crumb tray (if it is being used) or the metal bottom of the print area (if not).
Do not place rolled-up material in the Glowforge. It may be too tall, or unroll during printing, obstructing operation.
Materials must be flat
Materials must be flat so they rest on the crumb tray. While a bulge is acceptable, for example from warped wood, the highest point of the material
may not extend more than � in. above the crumb tray. Material must never double back on itself, for example curling up. Should material curl or bend so it reaches more than � in. above the crumb tray during a print,
turn off the power immediately. If the material has a protective paper or plastic coating, that coating must be firmly affixed to the
material. If it begins to peel off, discard the material and do not print on it.
Copyright Glowforge, Inc. 2020
8
Operating Environment
To prolong the life of your Glowforge unit and to reduce the risk of fire or mechanical failure, do not put the Glowforge unit where it could experience:
Extreme temperature or humidity Temperatures below 40 degrees Fahrenheit (5 Celsius) or over 120 degrees Fahrenheit (48 Celsius) Extreme humidity conditions (below 10% or more than 75%) If venting outdoors, ensure that changing conditions do not cause extreme temperatures or humidity to enter the Glowforge unit through the exhaust hose. Disconnect the hose from the outside air when the Glowforge is not in use.
Direct sunlight Rain, moisture, or liquids Excessive hair, dust, or small particles Loose materials such as paper or a tablecloth that could be sucked into the air intake on the
bottom of the Glowforge
Print when the ambient temperature is within the following ranges. Printing outside these ranges may cause your print to pause periodically or fail to complete.
Basic and Plus: Between 60 degrees Fahrenheit (16 Celsius) and 75 degrees Fahrenheit (24
Celsius)
Pro: Between 60 degrees Fahrenheit (16 Celsius) and 81 degrees Fahrenheit (27 Celsius)
Stop Using Your Glowforge Unit If....
If any of the following occur, immediately turn off the power switch, unplug the unit, and contact support@glowforge.com. Do not use your Glowforge unit again until the issue has been addressed by support.
The default settings for a piece of ProofgradeTM material do not cut through the material even after cleaning the lens and windows
There is a fire in the unit which persists after the laser turns off The head stops moving but the laser is on The unit's button turns any color other than white, yellow, or teal You see any damage or discoloration to the case There are any cracks or chips in the glass tube or lid You see any moisture present inside the Glowforge unit You see any damage to the interior components of the Glowforge unit You notice unusual light coming from the unit that was not occurring previously.
Copyright Glowforge, Inc. 2020
9
You notice an unusual sound coming from the unit that was not occurring previously
DE: Informationen zur Sicherheit finden Sie im Anhang. IT: Trovare informazioni sulla sicurezza nell'appendice. ES: Encuentre informaci�n sobre seguridad en el ap�ndice. FR: Retrouvez les informations de s�curit� en annexe.
Copyright Glowforge, Inc. 2020
10
Glowforge Models
CDRH Classification Warranty Laser power rating Upgraded hardware for improved speed Enhanced top speed Faster cut speed Enhanced cooling for all day use Giant sized prints with Passthrough slot See "Using Your Glowforge Pro" TUV Certified to UL Standards (only when indicated on label on back of unit)
Pro Class 4 12 months
45W
3x 120%
Plus Class 1 12 months 40 W
2x 100%
Basic Class 1 6 months 40 W
1x 100%
Copyright Glowforge, Inc. 2020
11
Glowforge Regulatory Information
In the United States, lasers are regulated by the federal Center for Devices and Radiological Health (CDRH), a subsidiary of the federal Food & Drug Administration (FDA). The CDRH and the FDA, in conjunction with other agencies, help ensure that laser devices, from CD players to industrial lasers, can be used safely.
The Glowforge Basic unit is a Class 1 laser product containing an embedded Class 4 CO2 laser and a Class 1 laser diode. Because the Class 4 laser is fully contained in a Class 1 enclosure, this laser product is designated as a Class 1 laser product during all procedures of operation.
The Glowforge Plus unit is a Class 1 laser product containing an embedded Class 4 CO2 laser and a Class 1 laser diode. Because the Class 4 laser is fully contained in a Class 1 enclosure, this laser product is designated as a Class 1 laser product during all procedures of operation.
The Glowforge Pro unit is a Class 4 laser product containing an embedded Class 4 CO2 laser and a Class 1 laser diode. It is designated as a Class 4 laser product.
The included CO2 laser has the following characteristics: Wavelength: 10.6 �m continuous wave (CW) Internal laser power: less than 100 watts peak Beam diameter: less than 5mm at aperture Beam divergence: less than 1.2mrad
The included laser diode has the following characteristics: Wavelength: 635nm - 650nm CW Internal laser power: less than 0.39 milliwatts peak
The Glowforge unit is manufactured by:
Glowforge 2200 1st Avenue South, First Floor Seattle, WA 98134
For more information or support, contact support@glowforge.com
Copyright Glowforge, Inc. 2020
12
The following label information applies to the Glowforge Basic This label appears on the back of every Glowforge Basic, with an appropriate serial number, in the spot indicated by the arrow in the diagram below.
Copyright Glowforge, Inc. 2020
13
The following label information applies to the Glowforge Plus This label appears on the back of every Glowforge Plus, with an appropriate serial number, in the spot indicated by the arrow in the diagram below.
Copyright Glowforge, Inc. 2020
14
The following label information applies to the Glowforge Basic, Plus and Pro
This label appears on the laser tube in the spot indicated by the arrow in the diagram below and indicates that there is a high voltage shock hazard.
Cette �tiquette appara�t sur le tube laser � l'endroit indiqu� par la fl�che dans le diagramme ci-dessous et indique qu'il y a un risque d'�lectrocution � haute tension.
Copyright Glowforge, Inc. 2020
15
The following label information applies to the Glowforge Pro
The Manufacturer's Label and Aperture Label will appear on the back of every Glowforge Pro, with an appropriate serial number, in the positions indicated.
Copyright Glowforge, Inc. 2020
16
The Hazard and Explanatory Label appear on the right side of every Glowforge Pro in the position indicated.
Copyright Glowforge, Inc. 2020
17
Unboxing & Setting Up
Let's Get Started
If you've read about Safety, you now know everything you need to operate your Glowforge safely, and that's pretty cool. Thank you for your patience. Now, it's time to get lasering!
Unboxing shouldn't take too long � we can't wait for you to get started with your first print, either. In just a few minutes, you're going to have a working laser in your home (or office, classroom, workshop, or design studio)! Of course, if you encounter any challenges along the way, our Customer Success team can be reached at support@glowforge.com.
Before you start, be sure you have a stable surface on which to place your Glowforge where you'll have nearby access to an electrical outlet and exhaust vent.
Let's get started, shall we?
Any damage? If your packaging or any part of your Glowforge shipment is visibly damaged on arrival, we want to make it right as soon as possible! Send photos of the damage to support@glowforge.com and wait until you hear back from us. If the Glowforge itself is visibly damaged, do not plug it in or attempt to operate it; contact us immediately.
Copyright Glowforge, Inc. 2020
18
Getting Acquainted
Here's a quick tour of parts you'll need to know:
Copyright Glowforge, Inc. 2020
19
Your Glowforge 3D Laser Printer & Accessory Pack
Your shipment arrived in one or two boxes. The largest box contains your Glowforge printer and, shipped inside your Glowforge for safety, the printer head. We suggest telling the neighbors the box contains a big microwave, so they don't pester you all day to use it.
The box that's short and wide is your Glowforge Accessory pack. This is either in the large box or a stand alone package. It contains your ProofgradeTM materials along with your accessories. Set it to the side for just a few minutes.
Remove straps and edge protectors (Selected Packages)
If your Glowforge box has straps and edge protectors as shown, cut the straps and remove the edge protectors. You do not need to save these with the rest of your packaging.
Copyright Glowforge, Inc. 2020
20
Open Handle Locks (Selected Packages)
We've designed the packaging to make it easy to get your Glowforge out. The box is specially designed to protect your Glowforge through all shipments, domestic and international. Be sure to keep the box and packing materials, as you'll need them if you want to transport your Glowforge again or for any warranty repair.
Identify Handle Locks Your Glowforge box is locked tightly by 4 handle locks on the bottom of your box. (If your box doesn't have them, skip to the next section!)
Unlock the 4 Handle Locks Hold the white tab on the right side of each white box handle.
Copyright Glowforge, Inc. 2020
21
Open the Handle Locks Pull each white tab from right to left, opening the handle like a door.
Remove the Handle Locks Gently pull the frame of the white handle to remove it from the box.
Keep all 4 Handle Locks These lock The Glowforge Box together and are Required for proper shipping of your Glowforge unit.
Copyright Glowforge, Inc. 2020
22
Choose a Location
Choose a location in a well-ventilated room with a 4" outdoor exhaust vent. This is the same type of vent used to connect a dryer. The exhaust vent should be at least 3 feet from property lines and openings into a building, and at least 10 feet from mechanical air intakes. You can also put the hose out an open window, so long as the end of the hose is at least 3 feet from the window and meets the other criteria above.
Prepare a Surface Get a hard, flat, and stable surface ready. If the surface is unstable, uneven, or too small, then you could have inaccurate prints, the doors may not close properly, and the camera might be misaligned. You could even damage your Glowforge.
Unseal your Glowforge box Carefully cut both strips of tape sealing the underside of your Glowforge box.
Remove the Lid. First peek: that's your very own Glowforge!
Remove the top layer of protective foam. If your Accessory pack shipped inside your Glowforge box, you'll find the protective foam underneath the top pad.
Unfold the plastic covering so that you can lift your Glowforge out. Your Glowforge is shipped in a protective plastic bag to protect it from the elements during shipping. Unfold the plastic bag without cutting or tearing it, and move it to the sides so you can reach in. Be sure to keep the plastic bag in case you need to ship your Glowforge again.
Copyright Glowforge, Inc. 2020
23
Have two people lift the Glowforge unit out of the box.
Leave a Little Room Place the unit with at least an inch of clear space in all directions. Do not block the air intake on the bottom right side of the Glowforge unit.
Confirm Safety Equipment Confirm that your safety equipment meets requirements: See Fire Safety, Smoke and Fume Safety.
Remove Printer Head and Important Orange and Red Bits
We've secured your Glowforge with two foam blocks and several important orange and red bits. In addition to providing support during travel, the rear foam block also holds your Printer Head.
Remove the tape from the front of
your Glowforge, then lift the lid &
lower the front door.
Copyright Glowforge, Inc. 2020
24
Remove the Front Foam Block Gently pull out the foam closest to the lowered front door.
Remove Knobs To the left and right, you'll find red knobs. Unscrew and pull them out.
Reveal Printer Head and Lens Tool Remove the top layer of the rear foam block to reveal your printer head and lens tool.
Copyright Glowforge, Inc. 2020
25
Remove Rear Foam Block Gently remove the rear foam block, including the Printer Head and lens tool. Set these aside for now. Don't worry! You'll power up your Glowforge in mere minutes.
Remove Orange Tape from Laser Arm Pull the tape from the point farthest away from you towards you, then gently remove it from the wire ribbon. You don't need to save the tape!
Remove Clip Under the glass tube, you'll find an orange clip. Push down on it and it will pop off.
Copyright Glowforge, Inc. 2020
26
Remove Red Strips Push the laser tube back gently, then lift off the two red silicone strips.
Glowforge Pro Only: Removing your Pro Shields (optional)
Your two Pro Shields arrive installed inside your Glowforge Pro. They finger-screw right into the front and back passthrough slots of your Glowforge Pro to ensure that nothing - material or laser light - comes in or out when the slot is not in use.
The Pro Shields should always be installed except while the passthrough slot is in use. The Laser Safety Officer (LSO) training provided to Pro customers has important information about the Pro Shields. Please re-read it before removing them.
Should you need to remove them, follow these instructions:
Turn off your Glowforge Turn off your Glowforge using the power switch on the back. The lights and button should be off.
Lower the front door and remove the crumb tray Lift the lid, then lower the front door. Lift the crumb tray slightly and slide it towards you to remove it. Be careful not to tilt the crumb tray up, or it will knock into the laser arm and rails. Leave the front door open.
Remove the front Pro Shield from the front door of your Glowforge With the front door opened, turn the black finger screws on either end of the Pro Shield counterclockwise to unscrew them, then lift the shield away from the front door.
Copyright Glowforge, Inc. 2020
27
Using two hands, gently pull the laser arm to the front of your Glowforge This will expose the rear Pro Shield so you can easily remove it.
Remove the back Pro Shield from the inner back wall of your Glowforge Turn the black finger screws on either end of the Pro Shield counterclockwise to unscrew them, then lift the shield away from the wall.
Reinstall your crumb tray, close the front door, and turn on your Glowforge! Instructions for installing your crumb tray are available.
Your Glowforge Accessory Pack
It's time to open your Glowforge Accessory Pack. Inside you'll find your jet black ferrous steel crumb tray, power cord, an exhaust hose, and two ring clamps.
Copyright Glowforge, Inc. 2020
28
Glowforge Pro only: For more information about Pro Glasses and Pro Shields, see the Glowforge Pro Training Materials.
Slide In the Crumb Tray
The black and metal crumb tray sits inside the bed of your Glowforge, supports the material you place inside, and catches leftover print bits to keep your Glowforge nice and tidy. It has four little feet that rest in four little dimples. The handle goes in front, and the feet go on the bottom.
Lift the lid of your Glowforge & lower the front door
Gently move the Laser Arm. Using two hands, gently push the laser arm away from you until it's near the back of the unit.
Pick up the Crumb Tray. Pick up the crumb tray - make sure the handle is in front and the wide black plastic strip is in the back.
Slide in the Crumb Tray. Slide it in until you feel the feet settle into the dimples in the base of the Glowforge unit.
Copyright Glowforge, Inc. 2020
29
Make Sure the Handle is in Front. Check that the handle's in the front, and the wide black part is in the back, just like the picture. Otherwise, you'll have mysterious printing problems, and feel silly when we ask you if your tray is in backwards.
Close the Front Door
Snap in the Printer Head
Never connect or disconnect the printer head while the Glowforge is plugged in or you might break something.
Position the Laser Arm and Metal Plate Gently slide the metal plate on the laser arm all the way to the right, then push the arm to the back of the unit.
Carefully Pick Up the Printer Head Do not touch any part of the printer head that is not flat black metal. Be especially careful of the yellow window on the side of the head. Remove the printer head from the white foam tray and remove the orange foam cylinder from inside the head.
Copyright Glowforge, Inc. 2020
30
Pick Up the Wire Ribbon Holding only the finished black surfaces of the printer head, pick up the printer head and wire ribbon as shown.
Slide the Ribbon Into the Head Make sure the tab on the wire ribbon is facing up. Slide the ribbon into the head until it clicks.
Attach the head As shown, lower the printer head over the metal plate so that it rests next to the two round posts. Then push it gently away from you � you'll feel a "click" as magnets pull the printer head until it sits snugly atop the metal plate.
Copyright Glowforge, Inc. 2020
31
Make sure the head slides freely and move it to the center Using both hands, gently move the laser arm to the center of the bed. Gently slide the head all the way to the left, then right.
If it doesn't slide easily, make sure that the ribbon cable is a simple loop with no twists, as shown.
Move the head back to roughly the center of the bed, under the lid camera.
Copyright Glowforge, Inc. 2020
32
Close the front door and lower the lid on
your Glowforge.
Save Everything! If you need to ship your Glowforge, for example
for warranty service, you'll need all the original parts: boxes, handle locks, foam, plastic covering, and important orange and red bits. Store them safely - replacement packing materials are $249.
Set Up Exhaust
Connect Hose to Unit Use the hose provided. Slide the ring clamp around the hose then squeeze the two ends of the clamp together to fit the hose and clamp over the exhaust connection on the back of your Glowforge printer. Let go, then check to be sure the clamp is settled over the white ring around the exhaust and will not come off with a gentle tug.
Copyright Glowforge, Inc. 2020
33
Connect Hose to Outdoors Connect the other end of the hose to the outdoors through a window or a vent that connects directly outside. Do not use a vent that extends the length of the hose past 8 feet or adds any turns. Keep the hose as straight as you can, with no more than two turns of 90 degrees or less. Make sure the hose isn't twisted, pinched, kinked, or flattened.
Disconnect Hose After Use Changing weather conditions may cause hot, cold, or humid air to enter your Glowforge that could damage it. When your Glowforge is not in use, remove the hose from the vent or window, or disconnect it from your Glowforge.
Connect to electrical power
Make sure your Glowforge is turned off (O is depressed) and then connect the power cord.
Plug the Glowforge into a grounded wall outlet with 800 watts of power available. Make sure you connect the printer directly to a wall outlet and not a surge protector or power strip.
Turn on your Glowforge by pressing the switch so the "l" side is depressed.
Lights will come on, the head will move, and you might hear a bubbling sound. The unit's button will glow teal. Your Glowforge is on!
Copyright Glowforge, Inc. 2020
34
Sign in and connect your Glowforge to Wi-Fi
Your Wi-Fi network must be 2.4 GHz b/g/n and WPA2, WPA, WEP, or open. Note that every user
must have their own account. If another user needs an account email us at support@glowforge.com to request one. It is a violation of your agreement to allow anyone other than you to use your Glowforge online account.
Get Ready Find a device that uses Wi-Fi to access The internet, like a laptop computer. Go to community.glowforge.com and make sure the page loads correctly.
Begin Setup To begin setup, go to setup.glowforge.com
Sign In Your username is the email you used when placing your order. If you have not used your Glowforge account at all yet, you can set up your password by clicking "Forgot password?" You'll receive an email to help you create or reset your password.
Enable Airplane Mode
If you are using a phone or other device that can access the internet through the cellular network, put it in airplane mode. Otherwise, it will use the cellular network, and won't communicate with your Glowforge in the next step.
Connect to Your Glowforge Unit's Wi-Fi Your Glowforge is now broadcasting a special Wi-Fi channel so you can connect to it and finish setting it up. Follow the instructions on screen to connect to your Glowforge unit's Wi-Fi. You
Copyright Glowforge, Inc. 2020
35
will not be able to access the internet again until you either finish, or stop and reconnect to your usual Wi-Fi network.
Your Glowforge will begin to calibrate When you connect successfully, the printer head will center and begin its calibration process before completing and moving back to the unit's back left corner.
You Are Connected Your Glowforge is now connected to the internet and ready to print!
ProofgradeTM Materials
Your Proofgrade Materials
We're providing a selection of materials from our brand new Proofgrade materials line, designed specially for your Glowforge to help you get perfect prints every time. They come with a protective layer that dramatically improves the print quality and allows you to draw directly on the material for use with Trace. Each piece of Proofgrade material has been labeled with a code that your Glowforge can read, which tells it exactly which settings to use to produce pristine cuts and engraves.
Copyright Glowforge, Inc. 2020
36
Using Your Glowforge Pro
Be sure to review Laser Safety before operating your Glowforge Pro.
Moving material through the passthrough slot
Your material must move from front to back.
If your material is long enough to stick out either end, make sure that you support it so that it the part inside your Glowforge stays flat on the crumb tray.
If you've made a lot of cuts, it can help to open the lid and remove the pieces before you slide your material along. (A little tape can work wonders here to help you extract little pieces that are hard to pick up otherwise.)
When you're moving your material, It's ok to pull it from the back, and you can pull hard if you need to!
As you slide your material, you may need to adjust your supports -- make sure that your material continues to lie flat on the crumb tray.
Pro Shields
Installing and removing your Pro Shields
Your Pro Shields finger-screw right into the front and back passthrough slots of your Glowforge Pro to ensure that nothing - material or laser light - comes in or out when the slot is not in use.
The Pro Shields should always be installed except while the passthrough slot is in use. The Laser Safety Officer (LSO) training provided to Pro customers has important information about the Pro Shields.
Copyright Glowforge, Inc. 2020
37
Installing your Pro Shields
Turn off your Glowforge Turn off your Glowforge using the power switch on the back. The lights and button should be off.
Lower the front door and remove the crumb tray Lift the lid, then lower the front door. Lift the crumb tray slightly and slide it towards you to remove it. Be careful not to tilt the crumb tray up, or it will knock into the laser arm and rails. Leave the front door open.
Install the front Pro Shield The front Pro Shield has a rectangular edge and six circular holes which align perfectly with the screws already in the front door of your Glowforge.
With the rectangular edge facing away from you, align the two black screws on the front Pro Shield with the two open screw holes near the passthrough slot. The rectangular edge of the Pro Shield should be facing the inside of the Glowforge as pictured.
Using your fingers, screw the two black knobs clockwise to secure your Pro Shield.
Using two hands, gently pull the laser arm to the front of your Glowforge This will expose the back of your Glowforge so you can easily install the back Pro Shield.
Align the back Pro Shield against the passthrough slot on the inside of the Glowforge The back Pro Shield is an oval and has no screw holes aside from a black finger screw on either end. Using your fingers, screw the two black knobs clockwise to secure your Pro Shield.
Copyright Glowforge, Inc. 2020
38
Reinstall your crumb tray, close the front door, and turn on your Glowforge! Instructions for installing your crumb tray are available if you'd like a refresher.
Removing your Pro Shields (optional)
Turn off your Glowforge Turn off your Glowforge using the power switch on the back. The lights and button should be off.
Lower the front door and remove the crumb tray Lift the lid, then lower the front door. Lift the crumb tray slightly and slide it towards you to remove it. Be careful not to tilt the crumb tray up, or it will knock into the laser arm and rails. Leave the front door open.
Remove the front Pro Shield from the front door of your Glowforge With the front door opened, turn the black finger screws on either end of the Pro Shield counterclockwise to unscrew them, then lift the shield away from the front door.
Using two hands, gently pull the laser arm to the front of your Glowforge This will expose the rear Pro Shield so you can easily remove it
Copyright Glowforge, Inc. 2020
39
Remove the back Pro Shield from the inner back wall of your Glowforge Turn the black finger screws on either end of the Pro Shield counterclockwise to unscrew them, then lift the shield away from the wall.
Reinstall your crumb tray, close the front door, and turn on your Glowforge! Instructions for installing your crumb tray are available.
Cleaning, Service & Moving
Power Off
Always turn your Glowforge off before cleaning
Floor and crumb tray
Remove leftover cutting and engraving bits from the floor and the crumb tray whenever there is a buildup. Bits on the tray can prop your material up in the air, and a buildup of cutting and engraving bits can create a fire hazard.
To remove the crumb tray, lift the lid, then swing down the front door. Lift the crumb tray slightly and slide it towards you. Be careful not to tilt the crumb tray up, or it will knock into the printer head and rails.
Tilt the tray handle side down over a trash bin and empty out all the tiny remains of past projects that have fallen through the metal grid. If necessary, turn the tray upside down and shake out anything that's left. Use cotton swabs to gently remove bits that get caught. Be careful not to bend the grid.
Wipe the metal floor of the Glowforge unit with a soft cloth to sweep away any bits.
Copyright Glowforge, Inc. 2020
40
Pay special attention that the four dimples where the crumb tray sits are clean. If anything sits in those dimples, the Glowforge printer may not be able to focus correctly, and the camera will be out of alignment.
Return the crumb tray to the original location, sliding it in horizontally. Be careful not to contact the printer head or the rails. When it is in place, the tray's four feet will drop into the small dimples and it will no longer slide.
Things that need wiping
After every 40 hours of printing, use ZEISS lens cleaning wipes (available on Amazon and many other stores) to clean the cameras, laser lens, and windows. This will keep the unit working properly and prevent permanent damage to your unit.
Turn off your Glowforge. Grasp the printer head as shown, and pull gently up and back to disengage the magnets and remove it.
Copyright Glowforge, Inc. 2020
41
Turning the printer head over, use a ZEISS cleaning wipe to gently wipe the small window on either side of the lens.
Gently insert the lens tool into bottom of the head with the "Remove" arrow pointing in. When you hear the magnet click, withdraw the tool and the lens.
Gently slide the lens off the lens tool and wipe both sides with a lens wipe. Be careful to touch only the metal ring to avoid fingerprints on the lens.
Copyright Glowforge, Inc. 2020
42
Flip the lens tool until the "Install" arrow points up. Set the lens down on the lens tool. The open side goes away from the blue plastic, so it looks like a bowl on top of the tool. It will sit firmly on the tool and will not wiggle. Slide the lens tool up into the printer head until the magnet clicks, then remove the tool.
Review instructions for snapping in your printer head, then put the head back on.
Wipe the window on the left side of the head.
Copyright Glowforge, Inc. 2020
43
Carefully reach over the left rail and wipe the laser window on the left side of the bed.
Finally, gently wipe the lens of the wide angle camera on the unit's lid.
It's normal for some dust to accumulate inside your Glowforge. It is not necessary, but you can wipe the laser tube or the inside of the case with additional ZEISS cleaning wipes. Allow any moisture to dry completely before turning on your Glowforge again.
Wiping the Mirror in the Printer Head
After approximately every 120 hours of printing, use ZEISS lens cleaning wipes (available on Amazon and many other stores) to clean the mirror in your Printer Head.
Turn off your Glowforge.
Open the lid and gently move the Printer Head to the center of the laser arm.
Copyright Glowforge, Inc. 2020
44
The top of the Printer Head is held on by strong magnets. Grasping only the top, pull up carefully to remove it and set it aside.
Gently pick up the mirror.
Inspect and clean the mirror.
Be careful not to touch the mirror surface with your bare fingers.
Using a Zeiss wipe, gently wipe the surface of the mirror.
Use several passes until the mirror is clean, each time moving to an unused portion of the lens wipe.
If the mirror has a spot in the middle of it after cleaning, or is generally unable to be cleaned to a reflective finish, it needs to be replaced. Please take a photo, share it with us, and skip the rest of these instructions.
Copyright Glowforge, Inc. 2020
45
If the mirror is unblemished, replace it carefully
Replacing the mirror incorrectly can permanently damage your Glowforge. Fortunately, we designed it to be easy!
Hold the mirror by the handle and gently slide it into the notch with the mirror at a 45 degree angle to the top of the Printer Head.
Set the mirror gently back into the notch so that the Glowforge logo on the handle faces up and is parallel to the floor. It will rest softly in place there is no need to push it in.
The mirror handle should look like this:
Tap the blue handle once. This will help ensure that the mirror is resting properly in place.
Replace the top of the printer head.
Copyright Glowforge, Inc. 2020
46
Close the lid of your Glowforge and turn it on. It should NOT look like any of the below:
Additional Tidying
It's normal for some dust to accumulate inside your Glowforge. It is not necessary, but you can clean the circuit boards, laser tube, and inside the case. To avoid damage to your Glowforge, follow these instructions very closely:
Turn off Your Glowforge
Remove the Crumb Tray Follow the instructions to remove the Crumb Tray for access to additional surfaces. Do not remove any other parts and do not loosen or remove any fasteners.
Blow Dust off the Circuit Board on the Printer Head Over time, debris can build up on the circuit board on your Printer Head. It's not necessary to clean it. But if you'd like to, here's how:
Copyright Glowforge, Inc. 2020
47
Grasp the Printer Head as shown, and pull gently up and back to disengage the magnets and remove it.
Without disconnecting the wire ribbon, use canned air to blow the dust away from the circuit board
Review instructions for snapping in your Printer Head, then put the Printer Head back on.
Copyright Glowforge, Inc. 2020
48
Blow Dust off the Circuit Board in the Case There's another circuit board on the left side of your unit. It's not necessary to clean this one either. If you'd prefer to, follow the steps here:
Use both hands to gently move the laser arm to the front of the bed. You'll see the circuit board on the left side of your unit.
Use canned air to blow the dust away.
Use both hands to roll the laser arm back to the middle of the bed. Spray a Lint-Free Cloth If you want to use Isopropyl Alcohol, spray it on a lint-free cloth, then wipe debris away with the damp cloth. Never spray liquid on or in your Glowforge printer.
Copyright Glowforge, Inc. 2020
49
Allow All Moisture to Dry Completely Wait for your Glowforge unit to dry completely before turning it back on.
Exhaust
Remove Hose from Unit. Squeeze the two ends of the ring clamp together and pull the clamp and the hose away from your Glowforge to remove them. Use a vacuum to remove dust and debris from your Glowforge unit's exhaust connection as well as from your outdoor exhaust vent Replace your hose, or use a vacuum to remove dust and debris from the hose. The exhaust is a standard 4" exhaust vent, similar to what one would use with a clothes dryer. You can see it here.
http://www.homedepot.com/p/GE-4-in-x-8-ft-Dryer-Duct-PM8X73DS/100050673
Service
The Glowforge unit may not be serviced or repaired by the user. Should service or repair be required, it must be returned to the factory; contact support@glowforge.com for instructions.
Copyright Glowforge, Inc. 2020
50
Moving Your Glowforge
Moving to a new Wi-Fi network
Using a device that connects to the internet via Wi-Fi, go to setup.glowforge.com and sign in.
Turn on your Glowforge and wait until all motion has stopped for 30 seconds.
Hold down the button on your Glowforge for ten seconds, until it glows with a teal color.
Follow the instructions on screen to connect your Glowforge to Wi-FI.
Packaging Your Glowforge
Whether it's for a big move, taking your Glowforge to an event, or for any warranty repair, you'll need to package your Glowforge properly with the original boxes, foam blocks, and important orange and red bits. The box is specially designed to protect your Glowforge through all shipments, domestic and international. Leaving out any pieces can endanger your Glowforge. For example, if you move your Glowforge without the red knobs that lock the laser arm in place, you might break the laser tube.
Should you need to purchase a replacement shipping box for $249, contact support@glowforge.com.
Power Off and Unplug Your Glowforge
Always turn your Glowforge off before packaging any part of your unit. Unplug your unit and set the power cord aside.
Remove the Printer Head
Position the Laser Arm Gently push the laser arm to the back of the Glowforge
Remove the Printer Head Holding only the finished black surfaces, grasp the printer head as shown. Pull gently up and back to disengage the magnets and remove the head.
Copyright Glowforge, Inc. 2020
51
Unplug the Wire Ribbon Push down fully on the wire ribbon tab to unplug the wire ribbon from the printer head. Pull the wire ribbon gently away and tuck it into the laser arm.
Insert the Orange Foam Being careful to only touch the finished black surfaces, insert the orange foam into the head
Place Printer Head and Power Cord in Foam Block Remove all the packaging pieces stored in the white rear foam block. Gently lay the printer head and power cord into the foam as pictured. (Note: Do not return power cord during a repair or warranty replacement.)
Copyright Glowforge, Inc. 2020
52
Remove the Crumb Tray and Exhaust
Remove the crumb tray and exhaust vent following the instructions below. The crumb tray, exhaust hose, and lens tool are packed in the Accessories Box.
Lower the Front Door and Remove the Crumb Tray Lift the lid, then lower the front door. Lift the crumb tray slightly and slide it towards you. Be careful not to tilt the crumb tray up, or it will knock into the laser arm and rails.
Empty Your Crumb Tray Lower the front lip of the crumb tray and dump the contents of the crumb tray catch area. Afterwards, you may invert the crumb tray to remove anything that may be left.
Wipe the Floor of Your Glowforge Wipe the metal floor of the Glowforge unit with a soft cloth to sweep away any bits.
Remove the Exhaust Squeeze the ends of the ring clamp together and pull it and the hose off the exhaust vent with a gentle tug.
Copyright Glowforge, Inc. 2020
53
Pack Accessory Box Place the crumb tray, exhaust vent, and ring clamps in your Glowforge Accessory Pack box
Pack the Unit Safely
It's important to package your Glowforge properly with the original boxes, foam blocks, and important orange and red bits.
Place Red Strip on Both Rails Push the laser arm to the back of the unit. Set the red silicone strips on the rails near the center of the unit with the knobby bit close to you as pictured.
Position Laser Arm Slide the laser arm forward so that it's resting on the silicone strips. You'll need to pick it up just a bit at the front, then the back, like taking a baby carriage up a curb.
Attach the Clip The clip snaps onto the bottom of the laser arm
and pokes up into the metal plate. Align the left tab of the clip with the hole on the right side of the plate, then hook the back of the laser arm and pull the clip towards you and up. (It's much easier than it sounds.) When the clip is in place, the metal plate will no longer slide from side to side.
Copyright Glowforge, Inc. 2020
54
Insert the Rear Foam Block With the lid removed, insert the foam block containing the printer head and power cord into your Glowforge. The bottom will lay flat against the floor of your unit.
Screw in Red Knobs Locate the holes near the center of each rail. On both sides, screw the red knob through the hole in the laser arm to secure the laser arm to the rail. They must be screwed in as tight as your fingers will permit, but do not use a tool to tighten them.
Insert the Rear Foam Lid and Front Foam Block Place the lid of the rear foam block, covering the printer head and power cord. Place the final foam block in the front of your unit and close the front door.
Copyright Glowforge, Inc. 2020
55
Close the Lid and Box Glowforge Make sure the two black foam shells are in the bottom of the box. Have two people lift the Glowforge unit into the box. The unit will fit snugly into the foam inserts.
Place Top Foam Place the top layer of foam over your Glowforge. These pieces lay flat on your Glowforge.
If your Accessory pack shipped in the same box as your Glowforge, insert the top pad above the protective foam and place the Accessory pack on top of the pad.
Prepare to Lock Your Packaging Place the lid of your Glowforge Box over
the unit and get out the four locking clips.
Copyright Glowforge, Inc. 2020
56
Unlock All Four Handle Locks Use the pull tab to open the handles. Position the two back flaps so they face directly inside the box.
Insert Handle Locks Insert all four handle locks so they sit flush against the outer box. Use your finger to gently lock the inner tabs down and up into their final position.
Copyright Glowforge, Inc. 2020
57
Lock the Handle Locks In Place Close the securing handle door and press to ensure it is locked in place. Your packaging should now be locked together and ready for transport.
Copyright Glowforge, Inc. 2020
58
Your First Prints
Welcome to the Glowforge App
We know you're eager to get printing, so we've provided a little guidance for your first prints. These will get you familiar with the basics of creating with your Glowforge.
There are three ways to start printing: You can open a design that's already there - we've started you off with a few of our favorites. You can trace a sketch to turn it into a digital design that you can print. You can start with a digital design, like a digital photo or a file made in Inkscape or Adobe Illustrator. You can also design right in the app in minutes using Glowforge Premium features. (Glowforge Premium is free right now while it's in Beta - you can learn more here)
Enjoy!
1: Gift of Good Measure
Measure this moment
We want you printing beautiful things as fast as possible, so we set you up with a precise tool to put on your keychain or hand out to friends. Make it in metric or imperial!
Sign In Go to https://app.glowforge.com and sign in.
Copyright Glowforge, Inc. 2020
59
Hover over the design titled "Gift of Good Measure Keychain" and click "Open"
Place Your Material Open the lid of your Glowforge. Choose a piece of medium ProofgradeTM Draftboard and place it in the center of the bed. Make sure the barcode is clearly visible on the material. Close the lid completely.
Drag Your Design Into Place You will see an image of your material in the Workspace. Click and drag the design onto your piece of Draftboard. It will print approximately where you place the outline. A flame-up is more likely when you cut along the edge of the material, so don't put it right on the edge.
Copyright Glowforge, Inc. 2020
60
Time to Print Looking good! When you're happy with the placement of your design on your material, click "Print" in the upper right-hand corner of the Workspace. The printer head will scan the material for a precise laser focus and the Print Window will open. You'll see the time your design will take to print, and the button on your Glowforge will begin blinking.
Laser! And now, the laser! Press the blinking button on your Glowforge. It's important that you keep watch on your Glowforge while it is printing � luckily, it's really fun to watch a laser in action.
Need to Take a Break? If you need to take a break, you can press the white button to pause any time a print is happening. The button will blink white to let you know it's ready to resume. Don't leave your Glowforge unattended while it's paused as something could accidentally restart the print. To resume, just press the button again and the print will continue. We take care of all the magic so that there's no visible interruption. Opening the lid or clicking "Cancel" will cancel the print (so it cannot be restarted). Remember not to leave your Glowforge unattended while it is printing.
Reveal your Gift of Good Measure When the laser finishes, the fans will continue to whisk away the last wisps of exhaust for a few moments. Wait for the fans to stop, then remove your print. Peel away the protective layer (duct tape can make this easier!) to reveal the engraved material underneath.
Put your keychain through the hole and never lack for measurement again!
Copyright Glowforge, Inc. 2020
61
2: A Snap and Store Box with Your Personal Touch
Your Own Snap and Store box
It's time to customize a print with your very own artwork. Not one for artwork, you say? Don't worry with your Glowforge, even chicken scratches will look good. The idea is simple: you'll draw something on paper, and the camera in the lid of your Glowforge will convert your drawing to a digital file. You'll then add your drawing to a design we've provided to create a box that's uniquely yours.
Copyright Glowforge, Inc. 2020
62
How to create and customize your Snap and Store box
Sign In Go to https://app.glowforge.com and sign in.
Hover over the the design named "Snap and Store Box" and click "Open"
Create your art You have a host of options to create your unique box lid. Pick whichever one inspires you - or try all of them!
Option 1: The Artist Draw a picture with a black marker on a white piece of paper. Stay away from the edges so there's some white on every side of your drawing. Tip: Leave room for the handle in the middle of your drawing.
Option 2: The Poet Using a black marker, write a favorite quote or song lyric, or sign your name on a blank white piece of paper.
Option 3: The Good Friend Print this template out on an inkjet printer (not your Glowforge!) and use a black marker to fill in the blanks.
Option 4: The Shadow Master Grab something nearby: a shoe, a leaf, a doll, your other hand - and plunk it on a blank white piece of paper. Trace around the edges with a black marker.
Copyright Glowforge, Inc. 2020
63
Put Your Art in Your Glowforge Lift the lid of your Glowforge, place your artwork in the center of the bed, and close the lid.
Add Artwork Look at the app. When the Workspace loads, you'll see the box design and a picture of the bed of your Glowforge, including your drawing. Click the "+" icon in the center of the toolbar at the top of the app and then click Trace.
Select Your Artwork The app will load an image of your drawing. Click and drag a square around the artwork that you want to trace. You'll see a preview of what your Glowforge will engrave. Anything in black will be engraved, and nothing else will be. If you're not happy with your selection, click the "Back" button in the app and try again.
Copyright Glowforge, Inc. 2020
64
Get the Details You Want (Keyboard Shortcuts) To darken, use Control-Up Arrow (Windows) or Command-Up Arrow (Mac). To lighten, use Control-Down Arrow (Windows) or Command-Down Arrow (Mac).
To remove small details like dirt and noise, use Control-Shift-Up Arrow (Windows) or Command-Shift-Up Arrow (Mac). To restore small details, use Control-Shift-Down Arrow (Windows) or Command-Shift-Down Arrow (Mac).
Choose What to Cut If you drew a closed shape, you can click it to cut it out. In this image, we clicked the center of the heart so that the inside will be removed.
Don't Click Lines to Cut It's a subtle difference, but if you click the black line around your shape instead of the white inside the shape, it will cut out the black line that you clicked on - probably not what you intended!
When Your Trace Looks Ready... Click "Place Artwork" in the upper right-hand side. This will bring you back to the Workspace with your newly digitized artwork sitting on top of your piece of paper.
Copyright Glowforge, Inc. 2020
65
Remove Drawing, Insert ProofgradeTM Turn to your Glowforge. Say hi. Remove your drawing and place a piece of medium Proofgrade plywood on the center of the bed (it is very important you choose Plywood... so the fun 'snap' part of the project works... more later). Close the lid.
Size Your Artwork and Place it in the Design In the app, the Workspace shows both design and artwork above your material. Drag the box design where you'd like it printed - somewhere like the top edge to save material.
Place your artwork within the design. In this case, we've dragged the artwork onto the box lid.
Shrink your artwork to fit by clicking and dragging a corner. This works for any part of the print, but don't resize the box design or assembly won't work! The outer lines of the box design will be cut, so any artwork outside those lines won't be part of your final product.
To fine-tune placement, nudge selected objects using your arrow keys. Holding shift while using the arrow keys gives you bigger nudges.
Note: It's not just the lid! You can place artwork on any of the box's surfaces. Just note that two of the sides are cut out upside down to save material, so make sure your artwork is the right way up for the surface it's on. Any selection that can be rotated will have a rotation handle at the top.
Copyright Glowforge, Inc. 2020
66
Ignore or Re-Order Steps Different elements of your print are broken out into different actions called print steps. If you were designing this file yourself, each color would be a different print step. If you would like to change what happens during a step, for example if you would like to skip a step, start by clicking on it. Then, click on the word "Ignore" in the top navigation bar. If you want steps to occur in a different order than the default, just drag and drop print steps into the order you want.
Print! Click the "Print" button in your browser window, then press the button on your Glowforge printer when it starts glowing. Watch your Glowforge (always!) while it's printing. When the button stops glowing and the fans stop, remove your print, peel off the protective layer, and get ready to assemble.
Copyright Glowforge, Inc. 2020
67
Put it together We've made you step-by-step instructions to turn that beautiful collection of box pieces into an actual Snap and Store Box. Go back to your workspace where you were printing the box (if you don't have the box open on screen - open it again), and click on the icon in your toolbar that has three little dots. After clicking the three little dots, click on "Design Details".
When you do this, instructions will slide in from the right. You can view them in place or pop them open in a new window. Now, all you need to do is follow the steps. Your finished box is minutes away!
Copyright Glowforge, Inc. 2020
68
3: Make a Gift Tag from Scratch
What Your Laser Can Do
To create a great design for your Glowforge, it's useful to understand the three things your laser can do. Cut: The laser moves slowly along a path, at full power, to cut all the way through the material. Score: The laser moves quickly along a path, at lower power, to draw a line. Engrave: The laser moves quickly back and forth, turning on and off thousands of times per second, to create an image on the surface.
If you're not familiar with vector design, it starts with two simple ideas: a stroke (which is an outline) and a fill (which is a filled-in shape). When you upload your file, strokes become cuts and fills become engraves. You can then switch a stroke to a score.
Each color is a different step in the printing process. You can assign different settings to each color.
For example, if you want one shape to be engraved lightly and another more deeply, fill each shape with a different color. Before printing, you can choose a light engrave setting for one and a dark setting for the other.
There are many vector graphics editors out there, but we'll use Inkscape for this example because it's free and available for both Mac and PC. Note that we can provide support for customers who are using either Inkscape or Adobe Illustrator.
Copyright Glowforge, Inc. 2020
69
Introducing Glowforge Premium
Glowforge Premium gives you the superpower you need to print everything with boosted creativity and efficiency. It features millions of commercially-licensed vector graphics and fonts, outline and shape tools. You'll be able to tell which tools on the Glowforge app are Premium because they have a gold gem icon next to them. See our Community Forum for more information and guidance on our Premium offering.
Get Oriented to Inkscape
Inkscape is a free professional quality vector graphics editor. We've provided a little information about Inkscape and how to install it for those who aren't familiar with it. Once you're done installing, go ahead and open Inkscape.
You'll see a screen with a lot of icons and menus. It might look a little different, so find the items we've circled in red that we'll use for this tutorial.
1. Along the left side in this picture, the tool menu offers the select tool, the circle tool, the pen (or Bezier) tool, and the text tool.
2. Near the top, you'll see some boxes for adjusting the height and width of shapes. 3. On the right, there's room for several dialog boxes. If you don't see these, you can click "View"
in the menu, then "Show/Hide Dialogs." 4. At the bottom you'll see the Palette. If you don't, go to the "View" Menu, click "Show/Hide," and
then select the "Palette." 5. In the middle, there's a picture of a blank page -- that's where you'll draw!
Copyright Glowforge, Inc. 2020
70
Cut out three circles
To cut, the laser moves slowly along a path at full power. When you want a cut, you'll create a path that has a stroke of some color and does not have a fill. Other stroke settings like thickness or opacity don't matter and are ignored.
Click on the the Circle Tool on the left side of your screen
Click and drag on the blank document to draw a circle Don't worry about the size - we'll adjust it later.
Choose a Color Hold the Shift key and click a color in the palette. It doesn't matter which you choose; let's say a nice dark blue. If you look
Copyright Glowforge, Inc. 2020
71
at the bottom left corner of the screen, you'll see the current settings for your new circle: Fill (None) and Stroke (Blue).
If your circle doesn't turn blue when you click the color, make sure that the box next to the O (just to the right of the blue bar in the image) says "100." O stands for "Opacity," and if your Opacity is 0, your stroke or fill will be invisible.
Adjust the Size of the Circle Adjust the size of the circle near the top of the screen. First change the measurements from "px" (Pixels) to "in" (Inches), then type 3 in the W (Width) and H (Height box)
Click and drag to create a second circle Choose the same color as before, so it will use the same cut settings as the first one. Set the size to .2 in wide and high.
Duplicate the Small Circle Click the black arrow for the Selection tool in the upper left, then click on your smaller circle, and choose Edit > Duplicate from the menu. (If you're on a Mac, resist the temptation to use copy and paste; duplicate works better!)
Copyright Glowforge, Inc. 2020
72
Place Your Circles Drag the newly created circle off of the top of the original so it looks like this design. You'll now have three blue circles.
Write a Message to Engrave
In an engrave, the laser moves quickly back and forth, turning on and off thousands of times per second, to create an image on the surface. Engraving lets you customize the things you make with words, drawings, or art. To define an engrave, create a fill without a stroke. We're going to start with text.
Click the Text Tool
Type a Message Click on your drawing (it doesn't matter where), and then type a short message.
Choose a Font You can choose a font for your text to make it more special. While you have the text tool selected, you'll see the this menu at the top of the screen. If you've typed text that you want to change, highlight it first. Now click the arrow to the right of the font name to choose a new font. Change the number to make it bigger or smaller.
If you want to make your design stand out, Google Fonts has a host of choices that you can download and print for free. Using more than one font size adds a little elegance, too.
To change the spacing between lines of text, edit the number in this box.
Convert Your Text Click and drag inside your text box to select all of your text, then choose "Path" from the menu bar and click "Object to Path." You can't edit your text any more, but now it will print properly.
Copyright Glowforge, Inc. 2020
73
Create a Score to Highlight Your Work
To score, the laser lowers its power and moves quickly along a path. It's like a cut that doesn't go all the way through. It's a nice quick way to create a bold visual effect and scoring is much faster than engraving.
Duplicate Your Circle Click the black arrow for the Selection tool in the upper left, then click your large circle, and, once again, go to Edit > Duplicate. It won't look like anything happened unless you pay very close attention -- the blue line will appear a tiny bit thicker.
Pick a New Color Hold the shift key and select a pink from the palette. Making it a different color means you can apply a different setting to it in the Glowforge App.
Shrink your Circle a Little Hold the shift key, click a corner of the circle's selection box, and drag it towards the center of the circle just a bit. Holding shift keeps the pink circle centered as you resize it.
Keep Scoring!
Want a little emphasis? Add a line... or a few.
Click on the Pen Tool
Create a Straight Line Hold down the Control key (even if you're on a Mac) and click and drag to create a straight line. When you're finished, double-click on the end point of the line.
Pick a Color Hold the Shift key and click a red color in the palette. Check the bottom left corner to see what you've selected: Fill (None) and Stroke (Red).
Copyright Glowforge, Inc. 2020
74
Finish your Score Lines Use the selection tool (the black arrow) to select your line, then click Edit > Duplicate from the menu. This will create a new line right on top of the old one. Click and drag it to separate it from the original. We created four lines in our design.
Fine Tune Your Design
Position Your Gift Tag Elements Use the Selection tool to click and drag each piece of your Gift Tag into place.
Finalize Score Lines You can make your red lines longer or shorter by clicking and dragging their end points, or by changing the width, the way you changed the circle sizes above.
Align Shapes To center things neatly, hold shift and click each element that you want lined up. Click Object > Arrange, then choose the "center" icon.
Copyright Glowforge, Inc. 2020
75
Congratulations - Your Design is Complete
Save Your File
1. Go to the "File" Menu and click "Save As" 2. Type your File name 3. Choose "Plain SVG"
Copyright Glowforge, Inc. 2020
76
Arrange Your Print
Sign In Go to https://app.glowforge.com and sign in.
Place Material in the Bed of Your Glowforge The remaining hardwood you used for your Founder Ruler would be perfect. Make sure the barcode is whole and visible. (If it's not, you can select the material manually after you upload your file - just click "Unknown" at the top left of the screen.)
Upload Your File Go to app.glowforge.com to get to the Dashboard. Then click on the arrow at the top right of the "Create New" box, and click the "Upload" button. Choose the file you saved.
Your design will open in the Workspace. Each color in your drawing will appear as a separate print step on the left side of the screen.
Select A Step Click on the step showing the single circle (the one that was pink).
Copyright Glowforge, Inc. 2020
77
Convert to score Click on "Score", so it prints this circle with a score line instead of cutting it out.
Repeat this process for the lines that you drew so they are scored as well
Place Design on Material Drag your whole design to place it where you want it on your material. You can resize it if you want to, too.
And Now... Print!
1. When you're ready, press "Print". 2. The Print Window will show you an animation of your upcoming print, and will also
display the estimated time for your print. 3. When the button on your Glowforge starts blinking, press it and watch the laser go
pew pew pew. 4. Remove your print, peel off the protective layer and admire your creation!
Copyright Glowforge, Inc. 2020
78
Finding Community & Support
Having trouble? Want to do something new? We'll do our best to help you succeed!
Community Forum
Most Glowforge owners have registered at the Glowforge Community Forum, where hundreds of Glowforge owners post each day. You'll find some incredibly talented (and helpful) folks who can provide assistance, suggestions, and ideas to help you make the most of your Glowforge.
Here's an easy way to start:
If you've got a specific question or idea (like you want to make a new band for your watch), try searching to see what folks have written on the topic.
If you just want to browse the forum, we recommend starting with our Made on a Glowforge topic, where you can find hundreds of laser projects that our community either has made or wants to make.
Once you've read a bit to get an idea of how it works, post pictures of what you make. People will love it!
Support Online
Go to https://glowforge.com/support to find guidance any time of day or night. The Learn By Doing area includes tutorials to get you started with your Glowforge, and you'll also find Troubleshooters in case anything doesn't go according to plan.
Support by Email
We are here for you! Email support@glowforge.com with your questions, challenges, feedback, and even your stories of perfect prints. Our goal is to reply within hours on weekdays, and always within three days.
We provide the best support when we fully understand what you're facing. Please send:
A description of the steps you took, what happened and what you expected The date and time of the issue The name of your file, if there was a file involved The name of your Internet browser and Operating System A screenshot or photo of what happened
Copyright Glowforge, Inc. 2020
79
Appendix A
Sicherheitsaspekte
Jetzt kommen wir zu einem wichtigen Thema. Die unsachgem��e Bedienung des Glowforge-Ger�tes kann zu Feuer-, Augen- oder Hautverletzungen durch Lasereinwirkung oder durch den Kontakt mit Chemikalien f�hren, die eine gesundheitsgef�hrdend sein k�nnen. Diese Verletzungen k�nnen zu schweren Verletzungen oder sogar zum Tod f�hren.
Vor der Benutzung
Lesen Sie diesen Abschnitt vor dem Einsatz Ihres Glowforge-Druckers, und achten Sie darauf, dass etwaige andere Nutzer des Druckers ihn auch lesen.
Befolgen Sie immer alle in diesem Abschnitt und in der Glowforge App enthaltenen Anweisungen.
Kinder d�rfen den Drucker nur unter der Aufsicht und mit der Unterst�tzung eines Erwachsenen benutzen.
Verwenden Sie Ihren Glowforge-Drucker nicht unter dem Einfluss von Alkohol oder Drogen. Laser unterliegen Vorschriften und Normen, die insbesondere bei der Installation in einer
Bildungseinrichtung oder einem Arbeitsplatz gelten. Stellen Sie sicher, dass Sie alle geltenden Regeln einhalten. Ber�hren Sie nicht den Kopf oder Arm des Glowforge-Ger�tes, w�hrend es eingeschaltet ist. Falls das trotzdem versehentlich passiert, schalten Sie das Ger�t aus und wieder ein, um Sch�den zu vermeiden. Teile dieses Produkts sind aus Glas gefertigt, das beim Aufprall brechen kann. In diesem Fall ist darauf zu achten, dass keine Verletzungen durch Glasscherben entstehen.
Copyright Glowforge, Inc. 2020
80
Elektrische Sicherheit
Zur Reduzierung der Gefahr von Stromschl�gen oder Br�nden:
Versuchen Sie nicht, das Glowforge-Ger�t zu warten, zu reparieren oder zu modifizieren Versuchen Sie niemals, auf die Verkabelung des Glowforge-Ger�tes zuzugreifen Die Stromversorgung oder andere versiegelte Teile des Glowforge-Ger�tes d�rfen nicht
ge�ffnet werden Bei Sch�den am Glowforge-Ger�t ziehen Sie den Netzstecker und kontaktieren Sie sofort
support@glowforge.com Bei Notf�llen oder Fehlfunktionen ziehen Sie den Netzstecker auf der R�ckseite des Ger�tes Verwenden Sie nur eine ordnungsgem�� geerdete Steckdose mit mindestens 800 Watt Das Netzkabel ist als Trennvorrichtung vorgesehen. Stellen Sie sicher, dass sich die Steckdose
in der N�he des Ger�ts befindet und leicht zug�nglich ist, damit Sie das Ger�t bei Bedarf ausstecken k�nnen. Die maximale Nennleistung des Leistungsschalters, die auch als �berstromschutzeinrichtung bezeichnet wird, sollte bei dieser Stromkreiseinspeisung 15 Ampere betragen.
Brandschutz
Der Laser des Glowforge-Ger�ts schneidet und graviert mit einem Strahl aus hochintensivem Infrarotlicht. Der Laser kann extrem hohe Temperaturen im zu schneidenden oder zu gravierenden Material erzeugen. Unter bestimmten Umst�nden kann sich das Material im Inneren des Glowforge-Ger�tes entz�nden, wobei sich die Flamme au�erhalb des zu schneidenden oder zu gravierenden Bereichs ausbreiten kann. Die Flamme k�nnte Ihre Einheit zerst�ren und sich weiter ausbreiten und zu einem Feuer im Geb�ude f�hren.
Brandgefahr
Legen Sie keine Gegenst�nde in den Glowforge-Drucker, die nicht laserf�hig sind, auch wenn Sie nicht beabsichtigen, diese zu schneiden oder zu gravieren. Im Folgenden erfahren Sie mehr �ber laserf�hige Materialien.
Stapeln Sie Materialien nicht, z.B. indem zwei oder mehr Materialbl�tter auf einmal geschnitten werden sollen. Mehrere Schichten neigen eher zur Flammenbildung.
Reinigen Sie etwaige Materialreste im Inneren des Glowforge-Ger�tes (siehe "Reinigung"). Stellen Sie keine Gegenst�nde auf das Glowforge-Ger�t. Lagern Sie keine Gegenst�nde
dar�ber, die dar�ber Feuer fangen k�nnen. Lagern Sie keine brennbaren fl�chtigen Chemikalien wie etwa Farbe, Aceton, Benzin oder
Alkohol im selben Raum wie Ihr Glowforge-Ger�t. W�hrend des Betriebs k�nnen sich brennbare D�mpfe entz�nden.
Copyright Glowforge, Inc. 2020
81
Nach dem Abschluss des Druckvorgangs k�nnen bestimmte Materialien wie etwa Kunststoffe weiterhin hei� sein. Lassen Sie diese abk�hlen, bevor Sie sie ber�hren.
Aufsicht w�hrend des Betriebs
Lassen Sie das Glowforge-Ger�t w�hrend des Betriebs niemals unbeaufsichtigt - bleiben Sie Eine kleine, kerzenartige Flamme an dem Punkt, an dem der Laserstrahl auf das Material trifft,
ist normal. Diese Flamme sollte sich mit dem Laser bewegen und nicht brennen, nachdem der Laser weiter gezogen ist. Wenn sich im Inneren des Glowforge-Ger�tes eine bleibende Flamme entwickelt hat, die nicht erlischt, wenn der Laser weiter gezogen ist:
1. Ziehen Sie den Stecker auf der R�ckseite des Ger�tes. 2. L�schen Sie das Feuer mit einem feuchten Handtuch, insofern dass ohne Risiken
m�glich ist. Beachten Sie, dass Wasser Ihr Glowforge-Ger�t besch�digen kann.
3. Falls das nicht m�glich ist, l�schen Sie das Feuer mit einem Feuerl�scher, insofern dass
ohne Risiken m�glich ist. Beachten Sie, dass Feuerl�scher Sch�den an Ihrem Glowforge-Ger�t verursachen k�nnen.
4. Falls der Brand nicht sicher gel�scht werden kann oder sich au�erhalb des
Glowforge-Ger�tes ausbreitet, rufen Sie Ihre lokale Notrufnummer (z.B. 911) an und evakuieren Sie das Geb�ude.
5. Nehmen Sie das Ger�t erst dann wieder in Betrieb, wenn Sie sich mit Glowforge in
Verbindung gesetzt haben und Serviceinformationen �ber support@glowforge.com erhalten haben.
Laserschutz f�r alle Glowforge-Drucker (sofern nicht anders angegeben)
Laserprodukte
Der Glowforge Basic 3D-Laserdrucker und der Glowforge Plus 3D-Laserdrucker sind Laserprodukte der Klasse 1, die einen integrierten Laser der Klasse 4 enthalten. Der Glowforge Pro 3D-Laserdrucker ist ein Laserprodukt der Klasse 4. Der Laser in Ihrer Glowforge sendet gen�gend Infrarotlicht aus, um sofortige Haut- und Augenverletzungen zu verursachen oder ein Feuer zu entfachen. Das generierte Infrarot-Laserlicht ist unsichtbar. Die Glowforge-Einheit verf�gt �ber ein Geh�use und einen Glasdeckel, die sch�dliches Infrarot- und Ultraviolettlicht blockieren, damit Sie den Laser sicher bedienen k�nnen.
Copyright Glowforge, Inc. 2020
82
VORSICHT! Die Verwendung von Steuerger�ten oder Einstellungen oder die Durchf�hrung anderer als der hierin beschriebenen Verfahren k�nnen zu einer gef�hrlichen Strahlenexposition f�hren.
Verwenden Sie das Ger�t nicht, wenn Glas oder Geh�use besch�digt oder ver�ndert sind.
Besch�digungen oder Modifikationen k�nnen zu gef�hrlichem Kontakt mit beweglichen und/oder elektrischen Teilen f�hren und/oder dazu, dass Infrarot- und Ultraviolettlicht, Hitze, Rauch und D�mpfe entweichen.
Das �ffnen der Sicherheitsverriegelungsschalter an der Vordert�r schalten den Laser sofort aus. Platzieren Sie keine Magnete in der N�he des Deckels oder der T�ren, da diese die Schalter st�ren k�nnen. Versuchen Sie nicht, die Schalter zu �berbr�cken.
Das Ger�t nicht modifizieren oder warten
ACHTUNG! Modifikationen oder Wartungsarbeiten am Glowforge-Ger�t k�nnen zu einer gef�hrlichen Laserlichtbelastung f�hren.
Um das Verletzungsrisiko zu reduzieren:
Versuchen Sie nicht, die Wartung durchzuf�hren. Wartungsarbeiten d�rfen nur vom
Glowforge-Werk oder von durch den Hersteller autorisierten Technikern durchgef�hrt werden.
Versuchen Sie nicht, das Ger�t zu ver�ndern oder zu modifizieren. Verwenden Sie zum �ffnen des Geh�uses nur die vordere Klappe oder den oberen Deckel.
Versuchen Sie nicht, das Geh�use auf andere Weise wie etwa durch Bohren von L�chern, Entfernen von Befestigungselementen oder Entfernen von Abdeckungen zu �ffnen.
Versuchen Sie nicht, versiegelte Teile des Glowforge-Ger�ts wie etwa die Schutzabdeckungen
oder das Geh�use zu zerlegen oder zu �ffnen.
Wenn Sie das Kr�melfach entfernen, achten Sie besonders darauf, dass der Laser nur auf
laserkompatibles Material trifft und nicht die Metallunterseite des Ger�ts ber�hrt, da dies zu Reflexionen und Sch�den am Ger�t f�hren kann.
Glow Nur f�r Glowforge Pro: Lasersicherheits- und LSO-Training der Klasse 4
Da der Glowforge Pro Durchgangsschlitze hat, handelt es sich um ein Laserger�t der Klasse 4. F�r den sicheren Betrieb sollte ein Laserger�t der Klasse 4 im Rahmen eines Laserschutzprogramms betrieben werden, das von einem Laserschutzbeauftragten (LSO) gesteuert wird. Das Training f�r LSOs kostet normalerweise mehr als 1.000 US-Dollar. Glowforge hat jedoch mit f�hrenden Laserschulungsexperten zusammengearbeitet, um Materialien vorzubereiten, die Ihnen als LSO f�r Glowforge Pro den sicheren Betrieb erm�glichen.
Copyright Glowforge, Inc. 2020
83
Die vorliegenden Informationen schulen Sie im Umgang mit Ihrer Glowforge Pro unter Klasse 1 Bedingungen, die keine zus�tzlichen besonderen Vorsichtsma�nahmen erfordern. Wenn Sie Ihren Glowforge Pro unter Klasse 4 Bedingungen betreiben wollen, erkl�ren Ihnen diese Materialien, wie Sie den sicheren Betrieb gestalten sollten. Die Materialien vermitteln Ihnen auch einen �berblick �ber die Laserphysik und Sicherheitsaspekte sowie die zu befolgenden Prozesse.
Sie m�ssen f�r die Verwendung der Glowforge Pro die Schulungsmaterialien lesen, verstehen und befolgen.
Die Glowforge Pro LSO-Schulungsmaterialien werden per E-Mail als passwortgesch�tzte PDF-Datei an alle Glowforge Pro-Besitzer gesendet.
Rauch- und Dampfsicherheit
Beim Einsatz Ihres Glowforge-Ger�ts erzeugt der Laser sichtbare und unsichtbare Aerosole, Gase, D�mpfe und Partikel (hier als "Rauch und D�mpfe" bezeichnet). Der Rauch und die D�mpfe k�nnen Kohlenmonoxid und andere Chemikalien enthalten, die gesundheitssch�dlich sind, sowie unangenehm und �bel riechend sein k�nnen. Die chemische Zusammensetzung des Rauches und der D�mpfe h�ngt vom gelaserten Material ab. Der Rauch und die D�mpfe aus laserkompatiblen Materialien werden durch Abluft oder Filtration kontrolliert.
Abluft
Verwenden Sie Ihr Glowforge-Ger�t nur, wenn es nach drau�en oder durch den Glowforge-Luftfilter entl�ftet wird. Andernfalls k�nnen Rauch und D�mpfe in den Raum entweichen, was zu Gesundheitsgefahren oder zum Tod f�hren kann.
Wenn die Abluft nach drau�en geleitet wird, stellen Sie sicher, dass die Position der Auspuffanlage f�r Nachbarn oder Passanten nicht st�rend ist. Vergessen Sie nicht, die f�r Sie geltenden �rtlichen Vorschriften zur Luftverschmutzung zu beachten.
Um zu verhindern, dass Rauch und D�mpfe aus dem Ger�t entweichen, �ffnen Sie den Deckel nicht bevor der L�fter abgeschaltet wurde.
Befolgen Sie alle Anweisungen unter ,,Einrichten" sorgf�ltig.
Beim Drucken kann ein gewisser Geruch entstehen. Wenn Sie allerdings einen starken, scharfen Geruch feststellen, der Augen-, Nasen- oder Rachenreizungen verursacht, oder wenn Rauch sichtbar ist, w�hrend der Deckel geschlossen ist, stoppen Sie das Ger�t sofort und �berpr�fen Sie die Abluftanlage. Wenn die Reizung und/oder die Rauchentwicklung nicht nachl�sst, nehmen Sie Ihr Glowforge-Ger�t au�er Betrieb und kontaktieren Sie den Support.
Copyright Glowforge, Inc. 2020
84
Pro-Nutzer: An den R�ndern des Durchgangsschlitzes k�nnen kleine �ffnungen vorhanden sein. Diese �ffnungen sind erforderlich; die leistungsstarken L�fter Ihres Glowforge Pro f�hren den Rauch und die D�mpfe in den Abluftschlauch.
Sicherheitsausr�stung
Stellen Sie sicher, dass Kohlenmonoxid-Detektoren gem�� den �rtlichen Vorschriften und Herstellerempfehlungen im Geb�ude installiert und getestet werden.
Materialsicherheit
Laserf�hige Materialien
"Laserf�hig" bezieht sich auf Materialien, die mit dem CO2-Laser im Glowforge-Ger�t sicher verarbeitet werden k�nnen. Nicht laserf�hige Materialien k�nnen Feuer fangen oder gef�hrlichen Rauch und D�mpfe abgeben, die nicht durch Abluft oder Filtration kontrolliert werden k�nnen, und stellen damit eine Gefahr f�r Sie, Ihre Nachbarn und Ihren Glowforge-Drucker dar. Aus diesem Grund d�rfen Sie nur laserf�hige Materialien in die Glowforge-Einheit einlegen.
ProofgradeTM-Materialien
Glowforge vertreibt eine Reihe von Proofgrade-Materialien, die laserf�hig sind und mit dem Glowforge-Drucker Spitzenergebnisse liefern. Wenden Sie sich an support@glowforge.com f�r mehr Informationen �ber Proofgrade-Materialien.
Laserf�hige Materialien von anderen Lieferanten
Andere Anbieter wie Inventables.com verkaufen Material, von dem sie angeben, dass es mit dem Laser kompatibel ist. Wenn Sie sich nicht sicher sind, fragen Sie den Lieferanten, ob das Material sicher mit einem CO2-Laser verarbeitet werden kann.
Was ist, wenn ich nicht sicher bin, ob meine Materialien laserf�hig sind?
Wenn Sie nicht ganz sicher sind, ob Ihr Material laserf�hig ist, legen Sie es nicht in das Glowforge-Ger�t.
Einige Materialien sehen laserf�higen Materialien �hnlich. Vinyl und Glasfaser k�nnen etwa mit laserf�higen Materialien verwechselt werden, wobei sie jedoch sch�dlichen Rauch und D�mpfe abgeben.
Materialien k�nnen Verunreinigungen, Beschichtungen oder Zus�tze aufweisen, die nicht laserf�hig sind. Beispielsweise k�nnen bestimmte Sperrholzklebstoffe, Tinten, Klebstoffe, Farbstoffe und Farben nicht laserf�hig sein.
Einige Materialien k�nnen den Laser reflektieren und Ihre Glowforge-Einheit besch�digen. So k�nnen etwa Kupfer und Chrom das Infrarotlaserlicht reflektieren.
Copyright Glowforge, Inc. 2020
85
Die Materialien m�ssen in das Ger�t passen
Materialien, die nicht richtig in das Ger�t passen, k�nnen den Betrieb behindern und zu Sch�den f�hren und die Brandgefahr erh�hen.
Die Materialien d�rfen nicht mehr als 21 Zoll breit und das Ende des Glowforge-Ger�ts nicht ber�hren. Das Material muss weniger als � Zoll hoch sein wenn das Kr�melfach eingelegt ist oder weniger als 2 Zoll, wenn es ausgebaut ist.
Die Materialien d�rfen nicht �ber die Seite des Kr�melfachs (falls verwendet) oder �ber den Metallboden des Druckbereichs (falls es entfernt wurde) hinausragen.
Legen Sie kein aufgerolltes Material in das Glowforge-Ger�t. M�glicherweise ist es zu hoch oder rollt sich w�hrend des Druckvorgangs auf und behindert den Betrieb.
Die Materialien m�ssen flach sein
Die Materialien m�ssen flach genug f�r das Kr�melfach sein. W�hren beispielsweise bei verzogenem Holz leichte Erh�hungen akzeptabel sind, darf der
h�chste Punkt des Materials eine H�he von � Zoll �ber dem Kr�melfach nicht �berschreiten Das Material darf sich nicht verkr�mmen oder aufrollen. Sollte sich das Material kr�mmen oder verbiegen, so dass es mehr als � Zoll H�he erreicht
�ber dem Kr�melfach erreicht, schalten Sie die Stromversorgung sofort aus. Falls das Material eine Schutzschicht aus Papier oder Kunststoff aufweist, muss diese
Beschichtung fest mit dem Material verbunden sein. Wenn sich diese Schicht abl�st, werfen Sie das Material weg und bedrucken Sie es nicht.
Betriebsumgebung
Um die Lebensdauer Ihrer Glowforge-Einheit zu verl�ngern und das Risiko eines Feuers oder eines mechanischen Ausfalls zu verringern, stellen Sie das Glowforge-Ger�t nicht in der folgenden Umgebung auf:
Extreme Temperaturen oder Luftfeuchtigkeit
Temperaturen unter 40 Grad Fahrenheit (5 Grad Celsius) oder �ber 120 Grad Fahrenheit (48 Grad Celsius)
Extreme Luftfeuchtigkeit (unter 10% oder mehr als 75%) Wenn Sie die Abluft nach au�en gef�hrt wird, stellen Sie sicher, dass bei wechselnden
Bedingungen keine extremen Temperaturen oder Feuchtigkeit durch den Abluftschlauch in das Glowforge-Ger�t gelangen. Trennen Sie den Schlauch von der Au�enluft, wenn das Glowforge-Ger�t nicht verwendet wird.
Direktes Sonnenlicht Regen, Feuchtigkeit oder Fl�ssigkeiten Haar, Staub oder kleine Partikel
Copyright Glowforge, Inc. 2020
86
Lose Materialien wie Papier oder Tischdecken, die in den Lufteinlass an der Unterseite des
Glowforge-Ger�ts angesaugt werden k�nnten
Das Drucken ist m�glich, wenn die Umgebungstemperatur innerhalb der folgenden Bereiche liegt; Au�erhalb dieser Bereiche kann es sein, dass der Druck periodisch angehalten oder nicht abgeschlossen wird.
Basic und Plus: zwischen 60 Grad Fahrenheit (16 Grad Celsius) und 75 Grad Fahrenheit (24
Grad Celsius)
Pro: zwischen 60 Grad Fahrenheit (16 Grad Celsius) und 81 Grad Fahrenheit (27 Grad Celsius)
Verwenden Sie Ihr Glowforge-Ger�t nicht, wenn....
Einer der folgenden F�lle eintritt, schalten Sie das Ger�t sofort aus, ziehen Sie den Netzstecker heraus und setzen Sie sich mit support@glowforge.com in Verbindung. Verwenden Sie Ihr Glowforge-Ger�t erst wieder, wenn das Problem durch den Support behoben wurde.
Die Standardeinstellungen f�r ein ProofgradeTM-Material durchschneiden das Material selbst
nach dem Reinigen der Linse und der Fenster nicht
Flammen im Ger�t, die selbst nach dem Ausschalten des Lasers bestehen bleiben Der Kopf bleibt stehen, der Laser ist jedoch eingeschaltet Die Taste des Ger�ts zeigt eine andere Farbe als Wei�, Gelb oder Blaugr�n Geh�use weist Sch�den oder Verf�rbungen auf Risse oder Splitter in Glasrohr oder Deckel Feuchtigkeit im Glowforge-Ger�t Sch�den an den inneren Komponenten des Glowforge-Ger�t sichtbar Sie bemerken ungew�hnliches Licht von dem Ger�t, das zuvor nicht aufgetreten ist. Sie bemerken ungew�hnliche Ger�usche von der Einheit, die zuvor nicht aufgetreten sind
Copyright Glowforge, Inc. 2020
87
Sicurezza
� il momento di fare sul serio. L'uso improprio dell'unit� Glowforge pu� causare un incendio, lesioni agli occhi o alla cute da esposizione al laser o da esposizione a sostanze chimiche che possono rappresentare un rischio per la salute. Le conseguenze possono essere gravi o addirittura letali.
Prima di cominciare
Leggere attentamente questo capitolo prima di utilizzare la stampante Glowforge e accertarsi che chiunque la utilizzi lo legga.
Seguire sempre tutte le istruzioni contenute in questo capitolo e nella App Glowforge. Nel caso di bambini � necessaria sempre la supervisione di un adulto. Non utilizzare la stampante Glowforge sotto l'effetto di alcolici o di farmaci. I laser sono soggetti a norme e regolamenti, in particolare se installati in istituti scolastici o nel
posto di lavoro. Accertarsi di rispettare tutte le regole in vigore. Non toccare la testa o il braccio dell'unit� Glowforge mentre la corrente � attiva. Se ci� accade
inavvertitamente, spegnere l'unit� e riaccenderla per evitare eventuali danni. Alcune parti del prodotto sono di vetro soggetto a rottura in caso di urto. Se ci� dovesse
accadere evitare lesioni da frammenti di vetri rotti.
Copyright Glowforge, Inc. 2020
88
Sicurezza elettrica
Per ridurre il rischio di elettrocuzione o di incendio:
Non cercare di eseguire manutenzione, riparazioni o modifiche dell'unit� Glowforge Non cercare mai di accedere ai cavi dell'unit� Glowforge Non aprire la sezione di alimentazione elettrica o altre sezioni sigillate dell'unit� Glowforge Se l'unit� Glowforge � danneggiata, staccare il filo di alimentazione elettrica e rivolgersi
immediatamente a support@glowforge.com In caso di emergenza o di malfunzionamento staccare il cavo di alimentazione sul retro
dell'unit� Utilizzare solo una presa con adeguata messa a terra e disponibilit� di almeno 800 Watt Il cavo di alimentazione serve per scollegare il dispositivo. Accertarsi che la presa sia vicina
all'apparecchio e facilmente accessibile in modo da poter scollegare l'unit� se necessario. Nel circuito di alimentazione della presa la potenza massima dell'interruttore, noto anche come
dispositivo di protezione da sovracorrenti, deve essere di 15 amp.
Sicurezza antincendio
Il laser dell'unit� Glowforge taglia e incide con un raggio di luce a infrarossi ad alta intensit�. Il laser pu� generare temperature estremamente elevate nel materiale che viene tagliato o inciso. Secondo le circostanze il materiale all'interno dell'unit� Glowforge pu� accendersi e la fiamma pu� spandersi al di fuori dell'area di taglio o di incisione. In caso di accensione la fiamma potrebbe distruggere l'unit� e diffondere l'incendio all'edificio.
Rischio di incendio
Non introdurre nella stampante Glowforge nulla che non sia laser-compatibile, anche se non si ha intenzione di tagliare o incidere ci� che si vuole introdurre. Ulteriori informazioni su materiali laser-compatibili nel seguito.
Non impilare i materiali; per esempio cercando di tagliare due o pi� fogli di materiale in una volta. Pi� fogli possono provocare pi� facilmente un incendio.
Eliminare i residui all'interno dell'unit� Glowforge appena si formano. (Vedere "Pulizia") Non collocare oggetti sopra l'unit� Glowforge. Non depositarci sopra qualcosa che potrebbe
prendere fuoco. Non depositare fonti di vapori infiammabili come vernici, acetone, benzina o alcool nello stesso
locale in cui si trova l'unit� Glowforge. I vapori infiammabili potrebbero prendere fuoco durante il funzionamento. Quando una stampa � completata determinati materiali, come la plastica, possono restare molto caldi. Lasciarli raffreddare prima di toccarli.
Copyright Glowforge, Inc. 2020
89
Sorvegliare costantemente il funzionamento
Non lasciare mai l'unit� Glowforge incustodita mente � in funzione � tenerla sempre sott'occhio. Guardare spesso all'interno.
Una fiammella simile a quella di una candela dove il raggio laser colpisce il materiale � normale. La fiamma dovrebbe muoversi con il laser e non restare accesa dopo il passaggio del laser.
Qualora la fiamma sia costantemente presente all'interno dell'unit� Glowforge senza spegnersi dopo il passaggio del laser:
1. Staccare la spina sul retro dell'unit�. 2. Se ritenuto sicuro, spegnere il fuoco con un panno bagnato. Tenere presente che
l'acqua pu� danneggiare l'apparecchio Glowforge.
3. Qualora ci� non sia possibile, se ritenuto sicuro, spegnere il fuoco mediante un
estintore. Tenere presente che gli estintori possono danneggiare l'apparecchio Glowforge.
4. Qualora non sia possibile estinguere il fuoco in sicurezza o se le fiamme si propagano al
di fuori dell'unit� Glowforge, chiamare il numero del pronto intervento (per es. 911) ed evacuare l'edificio.
5. Non riprendere l'utilizzo dell'unit� prima di aver richiesto informazioni di assistenza a
Glowforge all'indirizzo support@glowforge.com.
Sicurezza laser per tutte le stampanti Glowforge (salvo diversa indicazione)
Prodotti laser
La stampante base Glowforge 3D Basic e la stampante laser Glowforge Plus 3D sono prodotti laser di Classe 1 contenenti un laser Classe 4 incorporato. La stampante laser Glowforge Pro 3D � un prodotto laser Classe 4. Il laser della vostra Glowforge emette luce a infrarossi sufficiente a provocare immediate lesioni alla cute e agli occhi, o a innescare un incendio. Questa luce laser a infrarossi � invisibile. L'unit� Glowforge ha un involucro e un coperchio di vetro che blocca i livelli pericolosi di luce a infrarossi e ultravioletta per consentire di utilizzare il laser in sicurezza.
ATTENZIONE! L'impiego di comandi o di regolazioni o l'adozione di procedure diverse da quanto qui specificato pu� provocare il rischio di esposizione a radiazioni.
Non utilizzare se il vetro o l'involucro sono danneggiati o modificati.
Copyright Glowforge, Inc. 2020
90
Qualsiasi danno o modifica pu� provocare il contatto pericoloso con particolari in movimento e/o parti elettriche e/o la fuoriuscita di luce a infrarossi o ultravioletta, di calore, fumo e vapori.
Gli interruttori con interblocco di sicurezza sullo sportello anteriore spengono immediatamente il laser in caso di apertura. Non collocare magneti vicino al coperchio o agli sportelli in quanto potrebbero interferire con gli interruttori. Non cercare di escludere gli interruttori.
Non eseguire modifiche n� manutenzione
ATTENZIONE! Il tentativo di eseguire modifiche o interventi di manutenzione dell'unit� Glowforge pu� causare la pericolosa esposizione a luce laser.
Per ridurre il rischio di lesioni:
Non cercare di eseguire interventi di manutenzione. Tutti gli interventi di manutenzione devono
essere eseguiti solo dalla fabbrica Glowforge o da tecnici autorizzati dalla fabbrica.
Non cercare di alterare o modificare l'unit�. Per aprire l'involucro servirsi unicamente dello sportello anteriore o del coperchio superiore.
Non cercare di aprire l'unit� in altro modo, per esempio praticando dei fori, togliendo i dispositivi di fissaggio o le coperture.
Non cercare di smontare o di aprire le parti sigillate dell'unit� Glowforge, inclusa qualsiasi
copertura o alloggiamento di protezione.
Se si estrae il vassoio degli scarti, prestare la massima attenzione e accertarsi che il laser
colpisca solo materiale laser-compatibile e non tocchi il fondo metallico dell'unit� causando riflesso e danneggiando l'unit�.
Solo per Glowforge Pro: Sicurezza Laser Classe 4 & Addestramento LSO Incaricato Sicurezza Laser
Poich� Glowforge Pro ha feritoie passanti, � un dispositivo laser di Classe 4. Per sicurezza un dispositivo laser di Classe 4 deve essere utilizzato secondo un programma di sicurezza laser sotto il controllo di un incaricato sicurezza laser (Laser Safety Officer (LSO)). L'addestramento degli LSO costa normalmente pi� di $1,000, ma Glowforge ha collaborato con i principali esperti di sicurezza laser alla preparazione di materiali utili per operare in sicurezza come LSO per la vostra Glowforge Pro.
Questi materiali preparano all'utilizzo di Glowforge Pro in condizioni di Classe 1, che non richiedono ulteriori particolari precauzioni. Qualora si intenda utilizzare Glowforge Pro in condizioni Classe 4 questi materiali illustrano come comportarsi per garantire l'utilizzo in sicurezza. Forniscono anche una panoramica con nozioni di fisica del laser e di sicurezza, nonch� delle procedure da applicare.
Copyright Glowforge, Inc. 2020
91
Per utilizzare Glowforge Pro � necessario leggere, comprendere e seguire i materiali di addestramento Glowforge Pro.
I materiali di addestramento per incaricati sicurezza laser Glowforge Pro LSO vengono spediti per posta elettronica a tutti i possessori di Glowforge Pro in PDF protetto da password.
Sicurezza contro fumo e vapori
Durante l'uso di Glowforge il laser produce aerosol, gas, vapori e particolato visibili e invisibili (qui citati come "fumo e vapori"). Il fumo e i vapori possono includere monossido di carbonio e altre sostanze chimiche pericolose per la salute, oltre che sgradevoli e puzzolenti. La composizione chimica del fumo e dei vapori dipende dal materiale trattato con il laser. Il fumo e i vapori originati da materiali laser-compatibili sono controllati dallo scarico o mediante filtrazione.
Scarico
Far funzionare l'unit� Glowforge solo quando lo scarico � diretto verso l'esterno o mediante filtro dell'aria Glowforge Air Filter. Il mancato scarico provoca la fuoriuscita di fumo e di vapori nel locale con rischio per la salute o pericolo di morte.
In caso di scarico verso l'esterno assicurarsi che la collocazione del condotto di scarico non disturbi i vicini o i passanti; non dimenticare di verificare i regolamenti locali in materia di qualit� dell'aria, eventualmente applicabili.
Per evitare la fuoriuscita di fumo e di vapori dall'unit�, non aprire il coperchio prima dell'arresto dei ventilatori.
Seguire con attenzione tutte le istruzioni di cui al capitolo "Messa in opera".
� possibile la presenza di odore durante la stampa. Qualora l'odore sia forte, penetrante e provochi anche irritazione agli occhi, al naso o alla gola, o in caso di fumo visibile che fuoriesce dal coperchio chiuso, arrestare immediatamente il processo e controllare nuovamente lo scarico. Se l'irritazione e/o l'emissione di fumo non cessano, interrompere l'utilizzo di Glowforge e rivolgersi al servizio assistenza.
Utenti Pro: Potrebbero esserci piccole aperture attorno ai bordi della fessura passante. Tutto ci� � previsto: le potenti ventole di Glowforge Pro's spingono via fumo e vapori nel tubo di scarico.
Apparecchiatura di sicurezza
Accertarsi che rivelatori di monossido di carbonio siano installati nell'edificio e vengano verificati come raccomandato dalle normative locali e dalle indicazioni del fabbricante.
Copyright Glowforge, Inc. 2020
92
Sicurezza dei materiali
Materiale laser-compatibili
Il termine "laser-compatibile" si riferisce a materiali che possono essere lavorati in sicurezza con laser CO2 nell'unit� Glowforge. Materiali non laser-compatibili possono prendere fuoco, emettere fumo e vapori pericolosi che non possono essere controllati dallo scarico o dalla filtrazione, e rappresentano un rischio sanitario per voi, per i vicini e per la stampante Glowforge. Per questo motivo si deve introdurre nell'unit� Glowforge solo materiale laser-compatibile.
Materiali ProofgradeTM
Glowforge vende una linea di materiali Proofgrade laser-compatibili e in grado di ottenere risultati di ottima qualit� se utilizzati con la stampante Glowforge. Per maggiori informazioni sui materiali Proofgrade rivolgersi a support@glowforge.com.
Materiali laser-compatibili di altri fornitori
Altri fornitori come Inventables.com vendono materiale che viene indicato come laser-compatibile. Nel dubbio chiedere al fornitore se il materiale pu� essere lavorato in sicurezza con un laser CO2.
Che cosa fare in caso di incertezza sulla compatibilit� laser dei propri materiali?
Se non si � assolutamente certi che il materiale � laser-compatibile, non introdurlo nell'unit� Glowforge.
Alcuni materiali sembrano simili ai materiali laser-compatibili ma sono differenti. Per esempio il vinile o la fibra di vetro possono essere considerati erroneamente materiali laser-compatibili, invece emettono fumo e vapori dannosi.
I materiali possono contenere contaminanti, rivestimenti o additivi non laser-compatibili. Per esempio certe colle per compensato, inchiostri, adesivi, coloranti e vernici possono essere non laser-compatibili.
Alcuni materiali possono riflettere il laser e danneggiare l'unit� Glowforge. Per esempio il rame e il cromo possono riflettere la luce laser a infrarossi.
I materiali devono essere idonei
I materiali che non si adattano adeguatamente possono ostacolare il funzionamento e causare danni o aumentare il rischio di incendio.
I materiali devono avere larghezza max. di 53,34 cm e lunghezza tale da toccare l'estremit� dell'unit� Glowforge. Lo spessore del materiale deve essere inferiore a 1,27 cm con il vassoio di raccolta scarti montato, oppure meno di 5,08 cm se il vassoio � stato rimosso.
I materiali non devono estendersi oltre il lato del vassoio di raccolta scarti (se montato) o il fondo di metallo della zona di stampa (se il vassoio non � montato).
Copyright Glowforge, Inc. 2020
93
Non posizionare materiale arrotolato nell'unit� Glowforge. Potrebbe avere uno spessore eccessivo, oppure svolgersi durante la stampa ostacolando il funzionamento.
I materiali devono essere piani
I materiali devono essere piani in modo da restare stesi sul vassoio di raccolta scarti. Mentre una lieve protuberanza o rigonfiamento � accettabile, per esempio per legno incurvato o
deformato, il punto pi� alto del materiale non deve superare 1,27 cm sopra il vassoio di raccolta scarti. Il materiale non deve essere arrotolarsi n� accartocciarsi. Se durante la stampa il materiale si arrotola o si piega al punto da superare 1,27 cm di altezza sopra il vassoio di raccolta scarti scollegare immediatamente l'alimentazione di energia elettrica. Se il materiale � protetto da un rivestimento di carta o di palstica, esso deve essere saldamente fissato al materiale. Se comincia a staccarsi, rimuoverlo dal materiale e non stamparci sopra.
Ambiente di lavoro
Per prolungare la durata dell'unit� Glowforge e ridurre il rischio di incendio o di guasto meccanico, non collocare l'unit� Glowforge in ambiente caratterizzato da:
Temperatura o umidit� estreme
Temperature al di sotto di 5�C o al di sopra di 48�C Condizioni di umidit� estrema (meno del 10% o pi� del 75%) In caso di scarico all'esterno, accertarsi che la variazione delle condizioni atmosferiche
non causi l'introduzione di temperature o umidit� estreme all'interno del tubo di scarico dell'unit� Glowforge. Staccare il tubo del collegamento con l'aria esterna quando l'unit� Glowforge non � in uso.
Luce solare diretta Pioggia, umidit� o liquidi Eccesso di peli, polvere o particelle minute Materiali liberi come carta o tovaglia che potrebbe essere risucchiata nel punto di ingresso
dell'aria sul fondo dell'unit� Glowforge
Stampare quando la temperatura ambiente � nella gamma qui indicata. Stampare al di fuori di tale gamma pu� causare pause di stampa o stampa incompleta.
Basic e Plus: Tra 16�C e 24�C Tra 16�C e 27�C
Copyright Glowforge, Inc. 2020
94
Interrompere l'utilizzo dell'unit� Glowforge se ....
Se si verifica una delle seguenti circostanze, spegnere immediatamente l'interruttore di alimentazione dell'energia, scollegare l'unit� e rivolgersi a support@glowforge.com. Non riprendere l'utilizzo dell'unit� Glowforge fino a completa risoluzione da parte del servizio assistenza.
Le impostazioni predefinite per un pezzo di materiale ProofgradeTM non eseguono il taglio del
materiale anche dopo aver pulito la lente e le finestre
Incendio in corso nell'unit� che continua anche dopo aver spento il laser La testina si arresta ma il laser � acceso Il pulsante dell'unit� cambia colore e non � pi� bianco, giallo o verde ottanio Si notano danni o scolorimento dell'involucro Cricche o trucioli nel tubo di vetro o sul coperchio Presenza di umidit� all'interno dell'unit� Glowforge Danni ai componenti interni dell'unit� Glowforge Una luce insolita proveniente dall'unit�, non presente in precedenza. Suoni insoliti provenienti dall'unit�, non verificatisi in precedenza
Copyright Glowforge, Inc. 2020
95
Seguridad
Considerar estas instrucciones con seriedad. El uso inapropiado de la impresora Glowforge puede causar incendios, lesiones en los ojos o en la piel por la exposici�n al l�ser o a qu�micos que pueden ser peligrosos para la salud. Estos pueden causar lesiones serias o incluso la muerte.
Antes de comenzar
Lea esta secci�n antes de usar su impresora Glowforge y aseg�rese de que quien la use lea este contenido tambi�n.
Siempre siga todas las instrucciones en esta secci�n y en la Aplicaci�n de Glowforge. Los ni�os requieren la supervisi�n y la ayuda de un adulto en todo momento. No use su impresora Glowforge bajo la influencia de alcohol o drogas. Los l�seres est�n sujetos a reglas y a normas, especialmente si se instalan en instituciones
educativas o lugares de trabajo. Aseg�rese de cumplir con todas las normas aplicables. No tocar el cabezal o brazo de la impresora Glowforge mientras la energ�a est� conectada. Si
lo hace por accidente, descon�ctelo, y con�ctelo de nuevo para evitar que se produzcan da�os. Algunas partes de este producto est�n hechas de vidrio que podr�a romperse si se somete a
impactos. Si esto ocurriese, tenga cuidado para evitar lastimarse con las piezas de vidrio rotas.
Copyright Glowforge, Inc. 2020
96
Seguridad El�ctrica
Para reducir el riesgo de descarga el�ctrica o incendio:
No intente revisar, reparar o modificar la impresora Glowforge. No intente nunca acceder a la instalaci�n el�ctrica de la impresora Glowforge. No abra el suministro el�ctrico ni ninguna parte sellada de la impresora Glowforge. Si la impresora Glowforge se da�a, desenchufe el cable y p�ngase en contacto con
support@glowforge.com de inmediato. En caso de emergencia o mal funcionamiento, desenchufe el cable de alimentaci�n de la parte
trasera de la unidad. Use una toma de corriente adecuadamente conectada a tierra con al menos 800 vatios
disponibles. El cable de alimentaci�n est� dise�ado para funcionar como elemento de desconexi�n.
Aseg�rese de que la salida est� cerca del equipo y sea de f�cil acceso para que pueda desenchufar la unidad de ser necesario. La intensidad m�xima del disyuntor, tambi�n conocido como dispositivo de protecci�n de sobre corriente, en este circuito que alimenta el tomacorriente debe ser de 15 amperios.
Seguridad Contra Incendios
El l�ser de la impresora Glowforge corta y graba con un haz de luz infrarroja de alta intensidad. El l�ser puede generar temperaturas extremadamente altas en el material que se est� cortando o grabando. En determinadas circunstancias, es posible que el material dentro de la impresora Glowforge se prenda fuego y que la llama se difunda fuera de la zona que se est� cortando o grabando. Si se prende fuego, la llama podr�a destruir su unidad, difundirse y potencialmente incendiar el edificio.
Riesgo de Incendio
No coloque nada dentro de la impresora Glowforge que no sea compatible con l�ser, incluso si no tiene la intensi�n de cortarlo o grabarlo. Conozca m�s acerca de materiales compatibles con el l�ser m�s adelante en este manual.
No apile materiales, por ejemplo, al intentar cortar dos o m�s hojas de material a la vez. M�ltiples hojas son propensas a quemarse.
Limpie los sobrantes dentro de la unidad cuando se acumulen. (Vea "Limpieza") No coloque nada sobre la impresora Glowforge. No acumule cosas que puedan incendiarse
sobre ella. No almacene fuentes de vapores inflamables como pintura, acetona, gasolina o alcohol en la
misma habitaci�n en la que guarda su impresora Glowforge. Los vapores inflamables podr�an encenderse durante el funcionamiento.
Copyright Glowforge, Inc. 2020
97
Cuando una impresi�n se haya completado, ciertos materiales, como el pl�stico, pueden permanecer calientes. Permita que se enfr�en antes de tocarlos.
Vigile mientras est� en funcionamiento
Nunca descuide la impresora Glowforge mientras est� en funcionamiento: mant�ngase siempre atento a ella. Mire el interior con frecuencia.
La presencia de una llama peque�a, similar al de una vela, en donde el haz de l�ser trabaja el material es normal. Esta llama debe moverse con el l�ser y no debe permanecer encendida cuando el l�ser se ha movido.
Si todav�a hay una llama dentro de la impresora Glowforge que no se extingue cuando el l�ser se ha movido:
1. Tire del cable detr�s de la unidad. 2. Si es seguro hacerlo, extinga el fuego con una toalla h�meda. Tenga en cuenta que el
agua puede da�ar su Glowforge.
3. Si ello no es una opci�n, y si es seguro hacerlo, extinga el fuego con un extintor para
incendios. Tenga en cuenta que los extintores para incendios pueden da�ar su Glowforge.
4. Si el fuego no se puede extinguir de forma segura o si se propaga hacia afuera de la
unidad Glowforge, llame a su n�mero de emergencia local (por ejemplo 911) y evacue el edificio.
5. No siga utilizando la unidad hasta ponerse en contacto con Glowforge a
support@glowforge.com para obtener informaci�n de servicio.
Seguridad del l�ser para todas las impresoras Glowforge (excepto cuando se indique lo contrario)
Productos L�ser
Las impresoras l�ser Basic 3D de Glowforge y la Plus 3D de Glowforge son productos con l�ser Clase 1, que contienen un l�ser Clase 4 incrustado. La impresora l�ser Pro 3D de Glowforge es un producto con l�ser Clase 4. El l�ser en su Glowforge emite la suficiente luz infrarroja como para provocar da�os inmediatos en la piel o en los ojos, o iniciar un incendio. Esta luz l�ser infrarroja es invisible. La impresora Glowforge tiene una caja y una tapa de vidrio que bloquea los niveles da�inos de luz infrarroja y ultravioleta para permitirle operar el l�ser de forma segura.
�PRECAUCI�N! El uso de otros controles o ajustes, o la realizaci�n de procedimientos distintos a los especificados aqu� podr�an ocasionar una exposici�n peligrosa a la radiaci�n.
Copyright Glowforge, Inc. 2020
98
No utilice si el vidrio o la caja est�n da�ados o modificados.
Cualquier da�o o modificaci�n podr�a permitir un contacto peligroso con partes m�viles o el�ctricas o el escape de luz infrarroja y ultravioleta, calor, humo o vapor.
Los interruptores de bloqueo de seguridad en la puerta frontal apagan el l�ser inmediatamente si se encienden. No colocar imanes cerca de la tapa o puertas ya que pueden interferir con los interruptores. No intente inhabilitar los interruptores.
No modifique o revise el producto
�PRECAUCI�N! Cualquier intento de modificaci�n o revisi�n de la impresora Glowforge puede ocasionar una exposici�n peligrosa a la luz l�ser.
Para reducir el riesgo de lesiones:
No intente revisarla. Todas las tareas de revisi�n deben ser realizadas por la f�brica de
Glowforge o por t�cnicos autorizados por la f�brica.
No intente alterar o modificar la unidad. Solo use la entrada delantera o tapa superior para abrir la caja. No intente abrir la caja de
ninguna otra forma, como, por ejemplo, taladrando orificios, retirando cierres o quitando cubiertas.
No intente desmontar o abrir las partes selladas de la impresora Glowforge, incluidas las
cubiertas protectoras o carcasas.
Si se quita la bandeja, preste mucha atenci�n para asegurarse de que el l�ser solo se aplique a
material compatible con l�ser y de que no toque el fondo met�lico de la unidad, lo que podr�a causar un reflejo y da�ar la unidad.
Para Glowforge Pro �nicamente: Seguridad para L�ser Clase 4 y Capacitaci�n para RSL
Debido a que Glowforge Pro tiene espacios que permiten acomodar el material, es un dispositivo l�ser Clase 4. Para operarse de forma segura, un dispositivo l�ser Clase 4 debe operarse seg�n un programa de seguridad l�ser bajo el control de un Responsable en Seguridad L�ser. La capacitaci�n para RSL normalmente cuesta m�s de $1000, pero Glowforge ha trabajado con expertos l�deres en capacitaci�n en seguridad l�ser para preparar materiales para que pueda actuar de forma segura como el RSL para su Glowforge Pro.
Estos materiales lo capacitar�n para operar su Glowforge Pro en condiciones Clase 1, que no requieren precauciones especiales adicionales. Si necesita operar su Glowforge Pro en condiciones Clase 4, estos materiales explicar�n qu� debe hacer para poder operarla de forma segura.
Copyright Glowforge, Inc. 2020
99
Estos tambi�n le proporcionar�n una introducci�n a la f�sica del l�ser y a cuestiones de seguridad y a los procesos a seguir.
Debe leer, entender y seguir los materiales de Capacitaci�n de Glowforge Pro para usar su Glowforge Pro.
Los materiales de Capacitaci�n RSL Glowforge Pro se env�an por correo electr�nico a todos los due�os de Glowforge Pro en un PDF protegido con contrase�a.
Seguridad contra humo y gases
Cuando use su Glowforge, el l�ser crea aerosoles visibles e invisibles, gases, vapores y part�culas (aqu� denominadas "humo y gases") El humo y los gases pueden incluir mon�xido de carbono y otros qu�micos que presentan riesgos para la salud, adem�s de ser desagradables y malolientes. La composici�n qu�mica del humo y de los gases depende del material del l�ser. El humo y los gases de los materiales compatibles con el l�ser se controlan mediante evacuaci�n o filtrado.
Evacuaci�n
Solo opere su impresora Glowforge cuando haya evacuaci�n al exterior o a trav�s del Filtro de Aire Glowforge. Si el humo y los gases no se evacuan, saldr�n hacia la habitaci�n, presentando un riesgo para la salud o peligro de muerte.
Si los evacua al exterior, aseg�rese de que la ubicaci�n de evacuaci�n no ser� un problema para los vecinos o transe�ntes, y no se olvide de revisar las normas locales para las regulaciones en materia de calidad de aire aplicables.
Para evitar que el humo y el vapor se escapen de la unidad, no abra la tapa hasta que el ventilador se detenga.
Siga todas las instrucciones en "Setting Up" ("Instalaci�n") cuidadosamente.
Es posible que haya olor presente durante la impresi�n. No obstante, si detecta un olor fuerte y penetrante que tambi�n causa irritaci�n en los ojos, la nariz o la garganta, o si sale humo visible cuando la tapa est� cerrada, det�ngase de inmediato y vuelva a revisar la instalaci�n de la evacuaci�n. Si no se reduce la irritaci�n o las emisiones de humo, interrumpa el uso de su Glowforge y p�ngase en contacto con el servicio t�cnico.
Usuarios de la Pro: Es posible que haya peque�as aperturas en los bordes del espacio de acomodaci�n del material. Esto se espera: los potentes ventiladores de su Glowforge Pro llevar�n r�pidamente el humo y los gases hacia la manguera de evacuaci�n.
Copyright Glowforge, Inc. 2020
100
Equipo de Seguridad
Aseg�rese de que los detectores de mon�xido de carbono se instalen y se prueben en el edificio como aconsejan los c�digos locales y las recomendaciones del fabricante.
Seguridad de materiales
Materiales Compatibles con L�ser
"Compatibles con l�ser" hace referencia a los materiales que pueden procesarse de forma segura con el l�ser de CO2 en la impresora Glowforge. Los materiales que no sean compatibles con l�ser pueden incendiarse, emitir humo y gases peligrosos que no pueden controlarse mediante evacuaci�n o filtrado, y ponen en riesgo su salud, la de sus vecinos y su impresora Glowforge. Por esta raz�n, solo debe poner materiales compatibles con l�ser en la impresora Glowforge.
Materiales ProofgradeTM
Glowforge vende una l�nea de materiales Proofgrade que son compatibles con l�ser y dan resultados de primera calidad cuando se usan con la impresora Glowforge. Para conocer m�s sobre materiales Proofgrade, p�ngase en contacto con support@glowforge.com.
Materiales compatibles con l�ser de otros proveedores Otros proveedores como Inventables.com venden materiales que indican que son compatibles con l�ser. Si no est� seguro, preg�ntele al proveedor si el material puede procesarse de forma segura con un l�ser de CO2.
�Qu� sucede si no estoy seguro de la compatibilidad de mis materiales con el l�ser?
Si no est� completamente seguro de que su material es compatible con l�ser, no lo coloque en la impresora Glowforge.
Algunos materiales son parecidos a los materiales compatibles con l�ser, pero son diferentes. Por ejemplo, el vinilo y la fibra de vidrio se pueden confundir con materiales compatibles con el l�ser, pero emiten humo y gases nocivos.
Los materiales pueden tener contaminantes, recubrimientos o aditivos que no son compatibles con l�ser. Por ejemplo, ciertos pegamentos, tintas, adhesivos y pinturas de contrachapado pueden no ser compatibles con l�ser.
Algunos materiales pueden reflejar el l�ser y da�ar su impresora Glowforge. Por ejemplo, el cobre y el cromo pueden reflejar la luz l�ser infrarroja.
Copyright Glowforge, Inc. 2020
101
Los materiales deben caber
Los materiales que no quepan adecuadamente pueden obstruir la operaci�n y ocasionar da�os y aumentar el riesgo de incendio.
Los materiales no deben tener m�s de 21 pulgadas de ancho y no deben ser tan largos como para tocar el final de la impresora Glowforge. Los materiales tener una altura inferior a � pulgadas si la bandeja est� colocada, o inferior a 2 pulgadas si se ha quitado.
Los materiales no deben extenderse m�s all� del largo de la bandeja (si se est� utilizando o del fondo de metal del �rea de impresi�n, si no).
No coloque materiales enrollados en su Glowforge. Pueden ser demasiado altos o desenrollarse durante la impresi�n y obstruir la operaci�n.
Los materiales deben ser planos
Los materiales deben ser lo suficientemente planos como para caber c�modamente en la bandeja.
Mientras que una protuberancia es aceptable, por ejemplo, de una madera combada, el punto m�s alto del material no puede extenderse m�s de � pulgadas sobre la bandeja.
El material no debe nunca doblarse por sobre s� mismo, por ejemplo, comb�ndose. Si un material se curva o dobla y alcanza m�s de � pulgadas sobre la bandeja durante
una impresi�n, apague la impresora de inmediato. Si el material tiene un papel protector o cubierta de pl�stico, esa cubierta debe estar
firmemente adherida al material. Si comienza a desprenderse, descarte el material y no imprima sobre �l.
Entorno Operativo
Para prolongar la vida de su impresora Glowforge y para reducir el riesgo de incendio o falla mec�nica, no coloque su Glowforge en donde pueda experimentar:
Temperatura extrema o humedad;
Temperaturas inferiores a 40 grados Fahrenheit (5 Celsius) o superiores a 120 grados Fahrenheit (48 Celsius).
Condiciones extremas de humedad (inferiores a 10% o superiores a 75%). Si la ventilaci�n es exterior, aseg�rese de que condiciones cambiantes no provoquen el
ingreso de temperaturas extremas o humedad en su impresora Glowforge a trav�s de la manguera de evacuaci�n. Desconecte la manguera del aire exterior cuando la Glowforge no est� en uso.
Luz solar directa; Lluvia, humedad o l�quidos; Exceso de pelo, polvo o part�culas peque�as;
Copyright Glowforge, Inc. 2020
102
Materiales sueltos como papel o mantel que podr�an aspirarse en la toma de aire en la parte
inferior de la Glowforge.
Imprima cuando la temperatura ambiente se encuentre dentro de los siguientes rangos. La impresi�n fuera de estos rangos puede causar que su impresi�n se pause peri�dicamente o no pueda completarse.
Basic y Plus: Entre 60 grados Fahrenheit (16 Celsius) y 75 grados Fahrenheit (24 Celsius). Pro: Entre 60 grados Fahrenheit (16 Celsius) y 81 grados Fahrenheit (27 Celsius).
Interrumpa el uso de su Glowforge si...
Si ocurre alguna de las siguientes situaciones, apague el interruptor de encendido de inmediato, desenchufe la unidad y contacte a support@glowforge.com. No use su Glowforge de nuevo hasta que el servicio t�cnico haya resuelto el problema.
La configuraci�n predeterminada para una pieza de material ProofgradeTM no corta a trav�s del
material incluso despu�s de limpiar el lente y las ventanas.
Hay fuego en la unidad y persiste despu�s de que el l�ser se apaga. El cabezal se detiene, pero el l�ser contin�a encendido. El bot�n de la unidad se pone de otro color que no es blanco, amarillo ni verde azulado. Ve alg�n da�o o decoloraci�n en la caja. Hay grietas o astillas en el tubo de vidrio o tapa. Ve humedad dentro de la unidad. Ve alg�n da�o en los componentes interiores de la impresora Glowforge. Observa una luz inusual proveniente de la unidad que anteriormente no estaba ocurriendo. Observa un sonido inusual proveniente de la unidad que anteriormente no estaba ocurriendo.
Copyright Glowforge, Inc. 2020
103
S�curit�
Revenons au s�rieux. Une utilisation incorrecte de l'imprimante Glowforge peut provoquer un incendie, des l�sions oculaires ou cutan�es dues � l'exposition au laser ou une exposition � des produits chimiques pouvant pr�senter des risques pour la sant�. Ceux-ci peuvent entra�ner des blessures graves, voire la mort.
Avant de commencer
Lisez cette section avant d'utiliser votre imprimante Glowforge et assurez-vous que chaque personne qui utilise l'imprimante l'ait �galement lue.
Suivez toujours toutes les consignes donn�es dans cette section et sur l'application Glowforge. Les enfants doivent �tre constamment sous la supervision et l'assistance d'un adulte. N'utilisez pas votre imprimante Glowforge si vous avez consomm� de l'alcool ou des drogues. Les lasers sont soumis � des r�glementations et � des normes particuli�res, notamment
lorsqu'ils sont install�s dans un �tablissement scolaire ou sur un lieu de travail. Assurez-vous de respecter toutes les r�gles applicables. Ne touchez pas la t�te ou le bras de l'imprimante Glowforge lorsque l'appareil est sous tension. Si vous y touchez par erreur, �teignez-la, puis rallumez-la pour �viter tout dommage. Certaines pi�ces de cet appareil sont en verre et risquent de se briser sous un impact. Si tel est le cas, faites attention de ne pas vous blesser avec les morceaux de verre.
Copyright Glowforge, Inc. 2020
104
S�curit� �lectrique
Pour r�duire le risque d'�lectrocution ou d'incendie:
N'essayez pas de faire l'entretien, de r�parer ou de modifier l'imprimante Glowforge N'essayez jamais d'acc�der au c�blage de l'imprimante Glowforge N'ouvrez pas le bloc d'alimentation ni aucune autre partie ferm�e herm�tiquement de
l'imprimante Glowforge. Si l'imprimante Glowforge est endommag�e, d�branchez le cordon d'alimentation et contactez
imm�diatement support@glowforge.com En cas d'urgence ou de dysfonctionnement, d�branchez le cordon d'alimentation � l'arri�re de
l'appareil Utilisez uniquement une prise de terre avec au moins 800 watts disponibles Le cordon d'alimentation sert de moyen de d�connexion. Assurez-vous que la prise est �
proximit� de l'imprimante et facilement accessible afin de pouvoir d�brancher l'appareil si n�cessaire. L'amp�rage maximal du disjoncteur (ou dispositif de protection contre les surintensit�s) sur le circuit alimentant la machine doit �tre de 15 amp�res.
S�curit� incendie
Le laser de l'imprimante Glowforge coupe et grave � l'aide d'un faisceau de lumi�re infrarouge � haute intensit�. Le laser peut g�n�rer des temp�ratures extr�mement �lev�es dans le mat�riau � couper ou � graver. Dans certaines conditions, il est possible que le mat�riau � l'int�rieur de l'appareil Glowforge prenne feu et les flammes se propagent en dehors de la zone � couper ou � graver. En cas d'incendie, les flammes pourraient d�truire votre appareil et se propager, mettant ainsi le feu au b�timent.
Risque d'incendie
Ne mettez rien dans l'imprimante Glowforge qui ne soit pas compatible avec le laser, m�me si vous n'avez pas pr�vu de couper ou de graver le mat�riau. Vous en saurez plus sur les mat�riaux compatibles avec le laser dans le paragraphe suivant.
N'empilez pas les mat�riaux, par exemple en essayant de couper deux ou plusieurs feuilles de ce mat�riau � la fois. Plusieurs feuilles trait�es ensembles sont plus susceptibles de prendre feu.
Nettoyez tous les r�sidus pr�sents dans l'imprimante Glowforge lorsque ceux-ci s'accumulent. (Voir � Nettoyage �)
Ne placez pas d'objets sur le dessus de l'imprimante Glowforge. Ne stockez pas d'objets pouvant prendre feu au-dessus de l'imprimante.
Copyright Glowforge, Inc. 2020
105
Ne stockez pas de sources de vapeurs inflammables telles que la peinture, l'ac�tone, l'essence ou l'alcool dans la m�me pi�ce que votre imprimante Glowforge. Les vapeurs inflammables peuvent prendre feu pendant le fonctionnement.
A la fin d'une impression, certains mat�riaux, tels que les plastiques, peuvent rester chauds. Laissez-les refroidir avant de les toucher.
Surveillance constante durant l'impression
Ne laissez jamais l'imprimante Glowforge sans surveillance pendant son fonctionnement gardez toujours la machine � port�e de vue. V�rifiez r�guli�rement l'int�rieur.
Il est normale qu'une petite flamme en forme de bougie apparaisse l� o� le faisceau laser touche le mat�riau. Cette flamme doit se d�placer avec le laser et ne doit pas rester apr�s le passage du laser.
Si une flamme durable apparait � l'int�rieur de l'imprimante Glowforge et ne s'�teint pas apr�s le passage du laser:
1. D�branchez la fiche � l'arri�re de l'imprimante. 2. Si possible et s'il n'y a aucun risque, �touffez la flamme avec une serviette humide.
Notez que l'utilisation d'eau peut endommager votre Glowforge. 3. Si l'utilisation d'une serviette humide n'est pas possible, utilisez un extincteur pour
�teindre le feu, uniquement si vous pouvez le faire en toute s�curit�. Notez que l'utilisation d'un extincteur peut endommager votre Glowforge. 4. Si l'incendie ne peut pas �tre �teint en toute s�curit� ou s'il se propage � l'ext�rieur de votre Glowforge, appelez les services d'urgence (par exemple le 112) et �vacuez le b�timent. 5. N'utilisez plus votre imprimante avant d'avoir contact� Glowforge pour toute information d'entretien � l'adresse support@glowforge.com.
S�curit� laser pour toutes les imprimantes Glowforge (sauf indication contraire)
Produits � Laser
L'imprimante laser 3D Glowforge Basic et l'imprimante laser 3D Glowforge Plus sont des produits laser de classe 1 qui sont �quip�s d'un laser int�gr� de classe 4. L'imprimante laser 3D Glowforge Pro est un produit laser de classe 4. Le laser de votre Glowforge �met suffisamment de lumi�re infrarouge pour provoquer des l�sions cutan�es et oculaires instantan�es ou un d�part d'incendie. Cette lumi�re laser infrarouge est invisible. L'imprimante Glowforge dispose d'un bo�tier et d'un couvercle en verre qui arr�tent les radiations nocives de lumi�re infrarouge et ultraviolette pour vous permettre d'utiliser ce laser en toute s�curit�.
AVERTISSEMENT ! L'utilisation de commandes, de r�glages ou de proc�dures autres que ceux sp�cifi�s dans le pr�sent document peut entra�ner une exposition � des rayonnements dangereux.
Copyright Glowforge, Inc. 2020
106
Ne pas utiliser l'appareil si le verre ou le bo�tier sont endommag�s ou ont �t� modifi�s.
Tout dommage ou modification peut engendrer un contact dangereux avec des pi�ces en mouvement et/ou �lectriques, et/ou permettre � la lumi�re infrarouge et ultraviolette, � la chaleur, � la fum�e et aux vapeurs de s'�chapper de l'imprimante.
Les interrupteurs de s�curit� sur la porte avant d�sactivent le laser imm�diatement en cas d'ouverture de la porte. Ne placez pas d'aimants pr�s du couvercle ou des portes, ceux-ci pourraient interf�rer avec les interrupteurs. N'essayez pas de court-circuiter les interrupteurs de s�curit�.
Ne pas modifier ou ne pas proc�der � l'entretien
AVERTISSEMENT ! Toute modification ou entretien de l'imprimante Glowforge peut entra�ner une exposition dangereuse � la lumi�re laser.
Pour r�duire le risque de blessure: N'essayez pas de proc�der � l'entretien de votre appareil. Tout entretien doit �tre effectu� uniquement par l'usine Glowforge ou par des techniciens agr��s par l'usine. N'essayez pas de modifier l'imprimante. Utilisez uniquement la porte � l'avant ou le couvercle sup�rieur pour ouvrir le bo�tier. N'essayez pas d'ouvrir le bo�tier de quelque autre mani�re, notamment en per�ant des trous, en retirant des attaches ou en enlevant des couvercles. N'essayez pas de d�monter ou d'ouvrir les parties scell�es de l'imprimante Glowforge, notamment les rev�tements de protection ou les bo�tiers.D Si vous retirez le plateau de r�cup�ration des r�sidus, faites preuve d'une extr�me prudence pour vous assurer que le laser touche uniquement des mat�riaux qui lui sont compatibles et ne touche pas le fond m�tallique de l'imprimante, ce qui pourrait r�fl�chir le faisceau et endommager l'appareil.
Glowforge Pro uniquement : S�curit� pour les lasers de classe 4 & Formation d'un Responsable S�curit� Laser (LSO)
L'imprimante Glowforge Pro dispose de fentes de passage et est donc consid�r�e comme un appareil laser de classe 4. Pour un fonctionnement en toute s�curit�, un appareil laser de classe 4 doit �tre utilis� dans le cadre d'un programme de s�curit� laser sous la supervision d'un responsable s�curit� laser (LSO). La formation pour les LSO co�te normalement plus d'un millier de dollars, mais Glowforge a travaill� avec des experts de la formation en s�curit� laser pour pr�parer des supports de formation afin que vous puissiez agir en toute s�curit� en tant que Responsable s�curit� laser (LSO) lors de l'utilisation de votre Glowforge Pro.
Copyright Glowforge, Inc. 2020
107
Ces documents vous apprendront � utiliser votre Glowforge Pro dans des conditions de classe 1, qui ne n�cessitent pas de pr�cautions particuli�res suppl�mentaires. Si vous devez utiliser votre Glowforge Pro dans des conditions de classe 4, ces supports de formation vous expliqueront ce qu'il faut faire pour le faire fonctionner en toute s�curit�. Ils contiennent �galement un aper�u de la physique du laser, des divers probl�mes de s�curit� ainsi que des processus � suivre.
Il est important de lire, comprendre et suivre ces supports de formation Glowforge Pro pour utiliser votre imprimante Glowforge Pro.
Les supports de formation Glowforge Pro pour les Responsables S�curit� Laser (LSO) sont envoy�s par email � tous les propri�taires de Glowforge Pro sous forme de fichier PDF prot�g� par mot de passe.
S�curit� vis � vis des fum�es et des �manations
Lorsque vous utilisez votre Glowforge, le laser cr�e des a�rosols, des gaz, des vapeurs et des particules visibles et invisibles (appel�s ici � fum�es et �manations �). La fum�e et les �manations peuvent contenir du monoxyde de carbone et d'autres produits chimiques pr�sentant des risques pour la sant�, tout en �tant d�sagr�ables et naus�abonds. La composition chimique de la fum�e et des vapeurs �mises d�pend du mat�riau. La fum�e et les �manations provenant de mat�riaux compatibles avec le laser sont contenues gr�ce � un syst�me d'�chappement ou une filtration.
�vacuations des fum�es et �manations
Utilisez uniquement votre imprimante Glowforge si les fum�es et �manations sont �vacu�es vers l'ext�rieur ou passent par un filtre � air Glowforge. Le manque d'�vacuation des fum�es et �manations peut entrainer un risque pour la sant� ou voire la mort.
Si vous �vacuez les fum�es et �manations vers l'ext�rieur, assurez-vous que ce ne soit pas g�nant pour les voisins ou les passants, et n'oubliez pas de v�rifier la r�glementation locale concernant la qualit� de l'air qui pourraient s'appliquer � votre activit�.
Pour �viter que de les fum�es et �manations ne s'�chappent de l'imprimante, n'ouvrez pas le couvercle avant que les ventilateurs ne se soient arr�t�s.
Suivez attentivement toutes les consignes donn�es dans la section � Configuration�.
Il peut y avoir un d�gagement d'odeurs lors de l'impression. Toutefois, si vous d�tectez une odeur forte et �cre qui provoque �galement une irritation des yeux, du nez ou de la gorge, ou si de la fum�e visible s'�chappe lorsque le couvercle est ferm�, arr�tez imm�diatement et v�rifiez � nouveau votre syst�me d'�vacuation. Si les irritations ou les �missions de fum�e ne diminuent pas, arr�tez d'utiliser votre Glowforge et contactez notre assistance.
Copyright Glowforge, Inc. 2020
108
Utilisateurs professionnels : Il peut y avoir de petites ouvertures sur les bords de la fente de passage. C'est normal. Les puissants ventilateurs de votre Glowforge Pro �vacueront la fum�e et les �manations par le tuyau d'�chappement.
�quipement de s�curit�
Assurez-vous que des d�tecteurs de monoxyde de carbone ont �t� install�s et test�s dans le b�timent, conform�ment aux recommandations des codes locaux et du fabricant.
S�curit� des mat�riaux
Mat�riaux compatibles avec le laser
"Compatible avec le laser" fait r�f�rence aux mat�riaux pouvant �tre utilis�s en toute s�curit� avec le laser CO2 dans l'imprimante Glowforge. Les mat�riaux qui ne sont pas compatibles avec le laser peuvent prendre feu, �mettre des fum�es et des �manations toxiques qui ne peuvent pas �tre contr�l�es par une �vacuation ou une filtration et qui repr�sentent un danger pour votre imprimante Glowforge ainsi que pour votre sant�, celle de vos voisins. Pour cette raison, utilisez uniquement des mat�riaux compatibles avec le laser dans l'imprimante Glowforge.
Mat�riaux ProofgradeTM
Glowforge propose une gamme de mat�riaux Proofgrade compatibles avec le laser et donnant des r�sultats de tr�s grande qualit� avec l'imprimante Glowforge. Pour en savoir plus sur les mat�riaux Proofgrade, contactez-nous � l'adresse support@glowforge.com.
Mat�riaux compatibles avec le laser propos�s par d'autres fournisseurs
D'autres fournisseurs comme Inventables.com vendent des mat�riaux qu'ils indiquent �tre compatibles avec le laser. En cas d'incertitude, demandez au fournisseur si le mat�riau peut �tre utilis� en toute s�curit� avec un laser au CO2.
Que faire si je ne suis pas certain que mes mat�riaux soient compatibles avec le laser?
Si vous n'�tes pas certain � 100 % que votre mat�riau est compatible avec le laser, ne l'utilisez pas dans l'imprimante Glowforge.
Certains mat�riaux ressemblent � des mat�riaux compatibles avec le laser, mais sont diff�rents. Par exemple, le vinyle et la fibre de verre peuvent �tre confondus avec des mat�riaux compatibles avec le laser mais �mettent des fum�es et des vapeurs nocives.
Copyright Glowforge, Inc. 2020
109
Les mat�riaux peuvent contenir des contaminants, des rev�tements ou des additifs non compatibles avec le laser. Par exemple, certaines colles � contreplaqu�, encres, adh�sifs, colorants et autres peintures peuvent ne pas �tre compatibles avec le laser.
Certains mat�riaux peuvent r�fl�chir le laser et endommager votre imprimante Glowforge. Par exemple, le cuivre et le chrome peuvent r�fl�chir la lumi�re laser infrarouge.
Des mat�riaux de la bonne dimension
Les mat�riaux qui ne sont pas de la bonne dimension peuvent entraver le fonctionnement, endommager l'imprimante et augmenter les risques d'incendie.
Les mat�riaux ne doivent pas d�passer une largeur de 53 cm (21 po) et ne doivent pas �tre trop longs (ne pas toucher l'extr�mit� de l'imprimante Glowforge). Le mat�riau doit �tre d'une �paisseur inf�rieure � 1,25 cm (� po) si le plateau de r�cup�ration des r�sidus est en place, et inf�rieure � 5 cm (2 po) si ce dernier est retir�.
Les mat�riaux ne doivent pas d�passer le c�t� du plateau de r�cup�ration des r�sidus (le cas �ch�ant) ou le fond m�tallique de la zone d'impression (sans plateau de r�cup�ration des r�sidus).
Ne placez pas de mat�riau enroul� dans la Glowforge. Il pourrait �tre trop volumineux ou se d�rouler pendant l'impression, ce qui g�ne le fonctionnement.
Les mat�riaux doivent �tre plats
Les mat�riaux doivent �tre plats pour qu'ils reposent sur le dessus du plateau de r�cup�ration des r�sidus.
Un l�ger renflement est acceptable, par exemple du bois d�form�, mais en son point le plus �lev�, le mat�riau ne doit pas d�passer une �paisseur de 1,25 cm (� po) au-dessus du plateau de r�cup�ration des r�sidus.
Le mat�riau ne doit jamais �tre repli� sur lui-m�me, par exemple en se recourbant. Si le mat�riau se recourbe ou se plie et atteint une �paisseur sup�rieure � 1,25 cm (� po)
au-dessus du plateau de r�cup�ration des r�sidus pendant une impression, �teignez l'imprimante imm�diatement. Si le mat�riau est dot� d'un papier protecteur ou un rev�tement en plastique, ce rev�tement doit �tre solidement fix� au mat�riau. S'il commence � se d�coller, jetez le mat�riau et ne l'utilisez pas pour une impression.
Environnement de fonctionnement
Pour prolonger la dur�e de vie de votre imprimante Glowforge et r�duire le risque d'incendie ou de d�faillance m�canique, ne placez pas votre Glowforge dans les conditions suivantes:
� des temp�ratures ou une humidit� extr�mes � des temp�ratures inf�rieures � 5�C (40�F) ou sup�rieures � 48�C (120�F) � des conditions d'humidit� extr�mes (inf�rieures � 10% ou sup�rieures � 75%)
Copyright Glowforge, Inc. 2020
110
en cas d'�vacuation vers l'ext�rieur, assurez-vous que les conditions changeantes ne provoquent pas de temp�ratures ou une humidit� extr�mes dans l'imprimante Glowforge via le tuyau d'�vacuation. D�branchez le tuyau d'�vacuation vers l'ext�rieur lorsque la Glowforge n'est pas en fonctionnement.
� la lumi�re directe du soleil � la pluie, � l'humidit� ou en pr�sence de liquides � un exc�s de particules, de poils ou de poussi�re � des mat�riaux en vrac tels que du papier ou une nappe qui pourraient �tre aspir�s dans la
prise d'air au bas de la Glowforge
Utilisez votre imprimante lorsque la temp�rature ambiante est comprise dans les plages suivantes. Si vous utilisez votre imprimante en dehors de ces plages, cela peut entra�ner une pause p�riodique de votre impression ou son �chec.
Basic et Plus : Entre 16�C (60�F) et 24�C (75�F) Pro: Entre 16�C (60�F) et 27�C (81�F)
Arr�tez d'utiliser votre imprimante Glowforge si...
Dans l'un des cas suivants, �teignez imm�diatement votre imprimante, d�branchez-la et contactez-nous � support@glowforge.com. N'utilisez plus votre imprimante Glowforge tant que le probl�me n'a pas �t� r�solu par notre service d'assistance.
Les param�tres par d�faut (pour un morceau de mat�riau ProofgradeTM) ne traversent pas le mat�riau m�me apr�s avoir nettoy� la lentille et les fen�tres
Un incendie dans l'imprimante persiste apr�s avoir �teint le laser La t�te cesse d'avancer mais le laser est allum� Le bouton de l'imprimante passe � une couleur autre que blanc, jaune ou bleu Vous constatez des dommages ou une d�coloration du bo�tier Vous constatez des fissures ou des �clats au niveau du tube en verre ou du couvercle Vous constatez la pr�sence d'humidit� � l'int�rieur de l'imprimante Glowforge Vous constatez des dommages aux composants int�rieurs de l'imprimante Glowforge Vous remarquez une lumi�re inhabituelle provenant de l'imprimante qui ne se produisait pas
auparavant. Vous remarquez un bruit inhabituel provenant de l'imprimante qui ne se produisait pas
auparavant
Copyright Glowforge, Inc. 2020
111