HENDI 231807 Vegetable Cutter User Manual
File info: application/pdf · 84 pages · 1.00MB
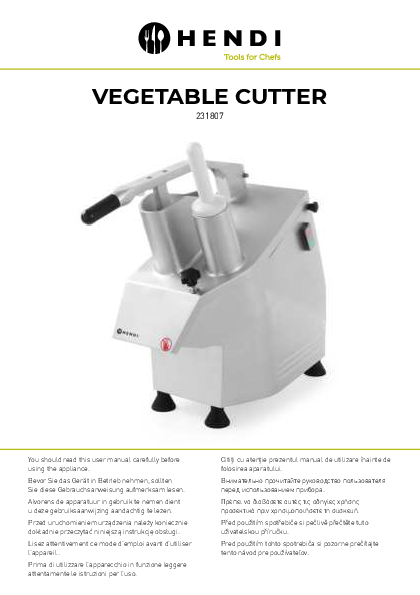
VEGETABLE CUTTER
this manual carefully, paying particular attention to the safety regulations outlined below. Safety regulations • This appliance is not intended for household use. • The appliance must only be used for the purpose for w…
this manual carefully, paying particular attention to the safety regulations outlined below. Safety regulations. • This appliance is not intended for ...
Full PDF Document

If the inline viewer fails, it will open the original document in compatibility mode automatically. You can also open the file directly.
Extracted Text
VEGETABLE CUTTER
231807

You should read this user manual carefully before using the appliance.
Bevor Sie das Ger�t in Betrieb nehmen, sollten Sie diese Gebrauchsanweisung aufmerksam lesen.
Alvorens de apparatuur in gebruik te nemen dient u deze gebruiksaanwijzing aandachtig te lezen.
Przed uruchomieniem urzdzenia naley koniecznie dokladnie przeczyta niniejsz instrukcj obslugi.
Lisez attentivement ce mode d'emploi avant d'utiliser l'appareil .
Prima di utilizzare l'apparecchio in funzione leggere attentamente le istruzioni per l'uso.

Citii cu atenie prezentul manual de utilizare �nainte de folosirea aparatului.
      .
           .
Ped pouzit�m spotebice si pecliv pectte tuto uzivatelskou p�rucku.
Pred pouzit�m tohto spotrebica si pozorne prec�tajte tento n�vod pre pouz�vateov.

Keep these instructions with the appliance. Diese Gebrauchsanweisung bitte beim Ger�t aufbewahren. Bewaar deze handleiding bij het apparaat. Zachowaj instrukcj urzdzenia Gardez ces instructions avec cet appareil. Conservate le istruzioni insieme all'apparecchio. Pstrai maualul de utilizare alturi de aparat.     .        . Tyto pokyny uschovejte spolu se spotebicem. N�vod na pouzitie skladujte spolu so zariaden�m. For indoor use only. Nur zur Verwendung im Innenbereich. Alleen voor gebruik binnenshuis. Do uytku wewntrz pomieszcze. Pour l'usage � l'int�rieur seulement. Destinato solo all'uso domestico. Doar pentru uz la interior.    .      . Pouze pro vnitn� pouzit�. Len na pouzitie v interi�ri.
2

Dear Customer,
Thank you for purchasing this Hendi appliance. Before using the appliance for the first time, please read this manual carefully, paying particular attention to the safety regulations outlined below.
Safety regulations � This appliance is not intended for household use. � The appliance must only be used for the purpose for which it was intended and designed.
The manufacturer is not liable for any damage caused by incorrect operation and improper use. � Keep the appliance and electrical plug away from water and any other liquids. In the event that the appliance should fall into water, immediately remove plug from the socket and do not use until the appliance has been checked by a certified technician. Failure to follow these instructions could cause a risk to lives. � Never attempt to open the casing of the appliance yourself. � Do not insert any objects in the casing of the appliance. � Do not touch the plug with wet or damp hands. � Danger of electric shock! Do not attempt to repair the appliance yourself. In case of malfunctions, repairs are to be conducted by qualified personnel only. � Never use a damaged appliance! Disconnect the appliance from the electrical outlet and contact the retailer if it is damaged. � Warning! Do not immerse the electrical parts of the appliance in water or other liquids. EN Never hold the appliance under running water. � Regularly check the power plug and cord for any damage. If the power plug or power cord is damaged, it must be replaced by a service agent or similarly qualified persons in order to avoid danger or injury. � Make sure the cord does not come in contact with sharp or hot objects and keep it away from open fire. To pull the plug out of the socket, always pull on the plug and not on the cord. � Ensure that the cord (or extension cord) is positioned so that it will not cause a trip hazard. � Always keep an eye on the appliance when in use. � Warning! As long as the plug is in the socket the appliance is connected to the power source. � Turn off the appliance before pulling the plug out of the socket. � Never carry the appliance by the cord. � Do not use any extra devices that are not supplied along with the appliance. � Only connect the appliance to an electrical outlet with the voltage and frequency mentioned on the appliance label. � Connect the power plug to an easily accessible electrical outlet so that in case of emergency the appliance can be unplugged immediately. To completely switch off the appliance pull the power plug out of the electrical outlet. � Always turn the appliance off before disconnecting the plug.
3

� Never use accessories other than those recommended by the manufacturer. Failure to do so could pose a safety risk to the user and could damage the appliance. Only use original parts and accessories.
� This appliance is not intended for use by persons (including children) with reduced physical, sensory or mental capabilities, or lack of experience and knowledge.
� This appliance must not be used by children under any circumstances. � Keep the appliance and its cord out of reach of children. � Always disconnect the appliance from the mains if it is left unattended or is not in use,
and before assembly, disassembly or cleaning. � Never leave the appliance unattended during use. Special Safety Regulations

� CAUTION! Unplug before cleaning, maintenance or repair!

� CAUTION! Two-person handling required!

� CAUTION! Read instruction manual before operation, cleaning or maintenance.

� WARNING! Do not put your hands into the discharge opening during operation.

Disconnect the power plug before reaching in.

EN

� This appliance should not be used for cutting frozen food, bone-in meat or fish, etc. � Use the appliance only as described in this manual.

� This appliance should be operated by trained personnel in kitchen of the restaurant,

canteens or bar staff, etc.

� Do not place the appliance on a heating object. (gasoline, electric, charcoal cooker, etc.)

Keep the appliance away from any hot surfaces and open flames. Always operate the

appliance on a level, stable, clean, heat-resistant and dry surface.

� Do not use the appliance near explosive or flammable materials, credit cards, magnetic

discs or radios.

� This appliance is not intended to be operated by means of an external timer or separate

remote-control system.

� Never bypass any safety interlocks on the appliance.

� WARNING: Keep all ventilation openings in the appliance clear of obstruction.

� WARNING: ALWAYS switch off the appliance and unplug from electrical power supply

before cleaning, maintenance or storage.

� WARNING! ALWAYS keep hands, long hair and clothing away from the moving parts.

� Allow at least 15 cm spacing around the appliance for ventilation purpose during use.

� Caution! Securely route the power cord if necessary in order to prevent unintentional

pulling or contact with the heating surface.

� Do not wash the appliance with water or waterjet. Washing with water can cause leakage

and increase the risk of electric shock. No parts are dishwasher safe.

� Do not clean or store the appliance unless it is completely cooled down.

4

� Do not move the appliance while it is under operation. Unplug the appliance when moving and hold it at the bottom.
� Do not operate the appliance without ingredients to avoid overheated. � WARNING! Take great care when handling the cutting disks. Wear protective gloves (not
supplied) if necessary.

Intended use � This appliance is intended for professional use
and can be operated only by qualified personnel. � This appliance is designed only for cutting, slicing
& grating fresh vegetables (e.g. carrots,potatoes, cabbage, etc) with the use of appropriate cutting discs in commercial use. Any other use may lead to damage of the appliance or personal injury.

� Operating the appliance for any other purpose shall be deemed a misuse of the device. The user shall be solely liable for improper use of the device.

Grounding installation This appliance is classified as protection class I appliance and must be connected to a protective ground. Grounding reduces the risk of electric shock by providing an escape wire for the electric

current. This appliance is equipped with a cord having a grounding wire with a grounding plug. The plug must be plugged into an outlet that is properly installed and grounded.

Preparations before installation � Remove all protective packaging and wrapping. � Check the appliance for completeness and trans-
port damages. In case of incomplete delivery (e.g. cutting disks, etc) or damage, contact supplier immediately. DO NOT use the appliance. (See == > Warranty).

� Clean the appliance before use (See ==> Cleaning

and Maintenance).

� Make sure the appliance is completely dry.

EN

Installation � Read this manual thoroughly and carefully before
installation and operation. � Ensure the machine is placed in a dry area and
that surface has sufficient strength to support the machine. Also ensure there are no obstructions nearby during operation of the machine.

� Ensure that the electrical power supply corresponds with the rating label on the machine.
� CAUTION! Never bypass any safety micro switch.

5

Usage Attention: The appliance has a safety system which makes sure that it will not work as long as the lever and the housing are not down and locked. � Press the green button to turn on the appliance
and the red to turn it off. � Raise the lever and put the vegetables inside the
inlet. Then pull down the lever to firmly press the vegetables. � Use your right hand to operate and push the ON (GREEN) and OFF (RED) buttons and use your left hand to operate the lever downwards so that the vegetable are being cut.
� To place or replace the blades, make sure that the power button is off and pull the plug out of the socket.
� Watch out: KNIVES ARE SHARP
EN
� To place or replace the blades open the appliance by rotating the knob counter-clockwise and opening the housing.
� Always place the nylon disc first before placing the blade of your choice.
� To remove a blade turn it counter-clockwise and then lift it.
� Close the appliance and turn the round knob clockwise to lock the housing. Press the on button to automatically place the blade in the correct position.
� Contains different knives for different cutting results and 1 nylon disc: - 2 mm slice disc - 4 mm slice disc - 3 mm grater - 4,5 mm grater - 7 mm grater - The nylon disc should always be placed under a knife to push the vegetables out of the machine.
6

Important � WARNING! Never use the hands to press the cut
food. Always use the supplied plunger. � Never use frozen vegetables

� Do not use wooden/metal or plastic objects except the polyethylene mesher that presses the vegetables.

Cleaning and Maintenance Attention: Always unplug the appliance from the electrical power outlet and let it cool down completely before cleaning and storage.

Cleaning � Clean the appliance after each use. � Never immerse the appliance in water or other
liquids. � Clean the cooled exterior surface with a slightly
damp cloth or sponge with some mild soap solution.

� Never use abrasive sponges or detergents, steel wool or metallic utensils to clean the interior or exterior parts of the appliance.

Storage � Before storage, always make sure the appliance
has already been disconnected from the electrical outlet and cooled down completely. � Store the appliance in a cool, clean and dry place.

� Blades of the cutting disks may become dull after prolonged use. Check this regularly and contact the supplier for service.

Troubleshooting If the appliance does not function properly, please check the below table for the solution. If you are still unable EN to solve the problem, please contact the supplier/service provider.

Problems Appliance does not work

Possible cause
No power at the electrical outlet. The plug is not plugged (correctly) into the electrical outlet. The lever or the housing are not closed proper. The safety mechanism makes sure the appliance does not work. Motor overheated.

Possible solution Check the fuse. Check the plug.
Check if both the lever and the housing are closed properly.
Cool down the appliance for 3/4 hours.

Technical specification Item no.: 231807 Operating voltage & frequency: 230-240V~ /50Hz Rated power consumption: 550W

Protection class: Class I Waterproof protection class: IP23 Net weight: Approx. 27,5 kg

Remark: Technical specification is subjected to change without notification.

7

Circuit diagram
AC230V~ Input

230V

1/ 3/ 5/ 13 NO NC NC NO
2/ 4/ 6 14 NO NC NC NO

A1 Contactor
A2

Light

Turn on (Green) Turn off (Red)

Sensor switch Magnet Switch

On Sensor switch Magnet switch Light indicator
Off

D2

T1

T2

A2 A1

LN

NC2

NC1

D1

FU

T3

C2 T4
C3

Motor

Black Red White White Blue Blue

Overheated protection device

EN

Capacitor

Warranty Any defect affecting the functionality of the appliance which becomes apparent within one year after purchase will be repaired by free repair or replacement provided the appliance has been used and maintained in accordance with the instructions and has not been abused or misused in any way. Your statutory rights are not affected. If the appliance is claimed under warranty, state where

and when it was purchased and include proof of purchase (e.g. receipt).
In line with our policy of continuous product development we reserve the right to change the product, packaging and documentation specifications without notice.

Discarding & Environment When decommissioning the appliance, the product must not be disposed of with other household waste. Instead, it is your responsibility to dispose to your waste equipment by handing it over to a designated collection point. Failure to follow this rule may be penalized in accordance with applicable regulations on waste disposal. The separate collection and recycling of your waste equipment at the time of disposal will help conserve natural re-

sources and ensure that it is recycled in a manner that protects human health and the environment. For more information about where you can drop off your waste for recycling, please contact your local waste collection company. The manufacturers and importers do not take responsibility for recycling, treatment and ecological disposal, either directly or through a public system.

8

Sehr geehrte Kundin, sehr geehrter Kunde,
wir danken Ihnen f�r den Kauf des Ger�tes Hendi. Machen Sie sich bitte mit dieser Anleitung noch vor der Inbetriebnahme des Ger�tes vertraut, um Sch�den durch die unsachgem��e Bedienung zu vermeiden. Den Sicherheitsregeln ist besondere Aufmerksamkeit zu widmen.
Sicherheitsregeln � Die unsachgem��e Bedienung des Ger�ts kann zur schweren Besch�digung des Ger�ts
sowie zu Verletzungen f�hren. � Dieses Ger�t ist nicht f�r den Hausgebrauch bestimmt. � Das Ger�t ist ausschlie�lich zu dem Zweck zu benutzen, zu dem es hergestellt wurde.
Der Hersteller haftet nicht f�r Sch�den, die auf unsachgem��e Bedienung des Ger�ts zur�ckzuf�hren sind. � Den Kontakt des Ger�tes und des Steckers mit Wasser oder einer anderen Fl�ssigkeit vermeiden. Den Stecker unverz�glich aus dem Stecker ziehen und das Ger�t von einem anerkannten Fachmann pr�fen lassen, wenn das Ger�t unbeabsichtigterweise ins Wasser f�llt. Bei Nichteinhaltung dieser Sicherheitsvorschriften besteht Lebensgefahr. � Nie eigenst�ndig das Geh�use des Ger�tes zu �ffnen versuchen. � In das Geh�use des Ger�tes keine Gegenst�nde einf�hren. � Den Stecker nicht mit nassen oder feuchten H�nden ber�hren. � Gefahr eines Stromschlags! Das Ger�t darf nicht selbstst�ndig repariert werden. S�mtliche M�ngel und Unzul�nglichkeiten sind ausschlie�lich durch qualifiziertes Per- DE sonal zu beseitigen. � Niemals ein besch�digtes Ger�t benutzen! Das besch�digte Ger�t vom Netz trennen und sich mit dem Verk�ufer in Verbindung setzen. � Warnung: Die Elektroteile des Ger�tes d�rfen weder in Wasser noch in andere Fl�ssigkeiten getaucht werden. Ebenso ist das Ger�t nicht unter flie�endes Wasser zu halten. � Der Stecker und die Stromversorgungsleitung sind regelm��ig auf Besch�digungen zu pr�fen. Der besch�digte Stecker oder Leitung sind an eine Servicestelle oder einer anderen qualifizierten Person zur Reparatur zu �bergeben, um eventuellen Gefahren und Verletzungen des K�rpers vorzubeugen. � Man muss sich davon �berzeugen, ob die Stromversorgungsleitung weder mit scharfkantigen noch mit hei�en Gegenst�nden in Ber�hrung kommt; halten Sie die Leitung weit entfernt von einer offenen Flamme. Um den Stecker aus der Netzsteckdose zu nehmen, muss man immer am Stecker und nicht an der Leitung ziehen. � Die Stromversorgungsleitung (oder Verl�ngerungsleitung) ist vor dem zuf�lligen Herausziehen aus der Steckdose zu sch�tzen. Die Stromversorgungsleitung muss so gef�hrt werden, dass niemand zuf�llig dar�ber stolpern kann. � Das Ger�t muss w�hrend seiner Anwendung st�ndig kontrolliert werden. � Warnung! Wenn der Stecker in der Netzsteckdose ist, muss man das Ger�t als an die Stromversorgung angeschlossen betrachten. � Bevor der Stecker aus der Netzsteckdose genommen wird, ist das Ger�t auszuschalten.
9

� Das Ger�t darf beim Tragen nicht an der Leitung gehalten werden. � Benutzen Sie kein Zubeh�r, das nicht mit diesem Ger�t mitgeliefert wurde. � Das Ger�t muss man ausschlie�lich an die Steckdose mit solch einer Spannung und
Frequenz anschlie�en, wie auf dem Typenschild angegeben wird. � Stecken Sie den Stecker in die Steckdose, die an einem leicht und bequem zug�nglichen
Ort angeordnet ist, und zwar so, dass das Ger�t bei einer St�rung sofort abgeschaltet werden kann. Um das Ger�t vollst�ndig auszuschalten, muss man es von der Stromquelle trennen. Zu diesem Zweck muss man den Stecker, der sich am Ende der vom Ger�t getrennten Leitung befindet, aus der Netzsteckdose ziehen. � Vor dem Abtrennen des Steckers ist das Ger�t auszuschalten! � Benutzen Sie kein Zubeh�r, das nicht vom Hersteller empfohlen wird. Die Anwendung vom nicht empfohlenen Zubeh�r stellt eine Gefahr f�r den Nutzer dar und kann zur Besch�digung des Ger�tes f�hren. Benutzen Sie ausschlie�lich Ersatzteile und Zubeh�r im Original. � Dieses Ger�t eignet sich nicht f�r den Gebrauch durch Personen (gilt auch f�r Kinder) mit geringerer Motorik, Sensorik oder geistiger F�higkeit oder mangelhafter Erfahrung und Wissen. � Auf keinen Fall darf das Bedienen des Ger�tes durch Kinder zugelassen werden. � Das Ger�t mit Stromversorgungsleitung ist au�erhalb der Reichweite von Kindern zu lagern. � Ebenso muss daf�r gesorgt werden, dass die Kinder das Ger�t nicht zum Spielen beDE nutzen. � Das Ger�t ist immer dann von der Stromversorgung zu trennen, wenn es ohne Aufsicht bleiben soll bzw. auch vor der Montage, Demontage und Reinigung. � W�hrend der Nutzung darf das Ger�t nicht ohne Aufsicht gelassen werden. Besondere Sicherheitsbestimmungen � HINWEIS! Vor Reinigung, Wartung und Reparatur den Netzstecker ziehen!
� HINWEIS! Handhabung durch zwei Personen erforderlich!!
� HINWEIS! Bedienungsanleitung vor Betrieb, Reinigung und Wartung lesen! � WARNUNG! Stecken Sie w�hrend des Betriebs nie die H�nde in die Auslass�ffnung!
Trennen Sie das Ger�t von der Stromquelle, bevor Sie hineingreifen! � Das Ger�t eignet sich nicht zum Schneiden von tiefgefrorenen Lebensmitteln, Fleisch mit
Knochen, Fischen usw. � Benutzen Sie das Ger�t ausschlie�lich nur entsprechend der vorliegenden Anleitung. � Das Ger�t sollte nur durch geschultes Personal f�r K�cheneinrichtungen von Restaurants,
Kantinen oder durch die Bedienung von Imbissstuben usw. bedient werden. � Ebenso darf das Ger�t nicht auf ein Objekt gestellt werden, das W�rme emittiert (Gas-
oder Elektroherd, Grill, usw.). Halten Sie das Ger�t weit entfernt von irgendwelchen
10

hei�en Fl�chen oder einer offenen Flamme. Das Ger�t stellt man auf eine ebene, stabile,

saubere und trockene Fl�che, die gegen die Einwirkung hoher Temperaturen best�ndig

ist.

� Das Ger�t darf nicht in der N�he von explosiven oder leicht brennbaren Materialien,

Zahlkarten, Magnetscheiben oder Rundfunkempf�ngern verwendet werden.

� Das Ger�t ist nicht f�r die Bedienung durch einen externen Timer oder ein gesondertes

Fernsteuerungssystem geeignet.

� An den Sicherheitsblockaden darf absolut nicht manipuliert werden.

� WARNUNG: Die Bel�ftungs�ffnungen des Ger�tes d�rfen nicht verdeckt werden.

� WARNUNG: Denken Sie IMMER vor dem Reinigen, der Wartung oder dem Zubeh�rwech-

sel an das Ausschalten und Abtrennen des Ger�tes von der Stromversorgungsquelle.

� WARNUNG! Man muss IMMER daran denken, dass keine lose Kleidung getragen wird

und die beweglichen Teile des Ger�tes mit den H�nden ber�hrt werden sowie die Haare

zusammengebunden sind.

� Ebenso ist ein Raum von mindestens 15 cm rundum das Ger�t abzusichern, um die

entsprechende Bel�ftung w�hrend der Nutzung zu gew�hrleisten.

� Hinweis! F�hren und sch�tzen Sie entsprechend die Stromversorgungsleitung, damit

einem zuf�lligen Ziehen oder Kontakt mit einer hei�en Fl�che vorgebeugt wird.

� Das Ger�t darf weder mit Wasser noch mit einem starken Strahl gewaschen werden,

denn dadurch kann das Wasser in den elektrischen Teil des Ger�tes gelangen und es

kann zu einem Stromschlag kommen. Die Teile des Ger�tes d�rfen auch nicht in der

Geschirrsp�lmaschine gewaschen werden.

DE

� Das Ger�t ist weder zu reinigen noch an den Lagerort zu bringen, bis es nicht v�llig

abgek�hlt ist.

� W�hrend der Nutzung darf das Ger�t nicht getragen werden. Vor dem Herumtragen des

Ger�tes muss man immer daran denken, das Ger�t von der Elektrosteckdose zu trennen

und das Ger�t immer von unten zu halten.

� Um ein �berhitzen des Motors zu vermeiden, darf man das Ger�t nicht einschalten,

bevor die Lebensmittel eingebracht worden sind.

� WARNUNG! Beim Ber�hren der Trennscheiben muss man besonders vorsichtig sein.

Falls notwendig, sind Schutzhandschuhe zu tragen (sind dem Ger�t nicht beigef�gt).

Verwendungszweck des Ger�tes � Dieses Ger�t ist f�r den professionellen Ge-
brauch bestimmt und darf nur von qualifiziertem Personal bedient werden. � Das Ger�t ist f�r den gewerblichen Gebrauch bestimmt und dient zum Schneiden, Zerkleinern und Abreiben von frischem Gem�se (z.B. M�hren, Kartoffeln, Kohl usw.) mit Hilfe entsprechender

Schneidscheiben. Die Verwendung des Ger�tes f�r andere Zwecke kann zu seiner Besch�digung sowie zu K�rperverletzungen f�hren. � Jede andere Verwendung des Ger�tes gilt als nicht bestimmungsgem��. Der Benutzer ist allein verantwortlich f�r die unsachgem��e Nutzung des Ger�tes.

11

Montage der Erdung Dieses Ger�t wurde als ein Ger�t der Schutzklasse I eingestuft und muss an einen Schutzleiter angeschlossen werden. Die Erdung verringert das Risiko eines elektrischen Schlags, indem ein Fluchtdraht f�r den elektrischen Strom bereitgestellt

wird. Dieses Ger�t ist mit einem Kabel ausgestattet, welches einen Erdungsdraht mit Erdungsstecker besitzt. Der Stecker muss in eine Steckdose gesteckt werden, die ordnungsgem�� installiert und geerdet wurde.

Vorbereitungen vor dem erstmaligen Gebrauch � Entfernen Sie alle Schutz- und sonstigen Verpa-
ckungen. � Pr�fen Sie das Ger�t auf Vollst�ndigkeit sowie
eventuelle Transportsch�den. Bei unvollst�ndiger Anlieferung (z.B. es fehlen die Trennscheiben) oder Besch�digungen, muss man sich sofort mit dem Lieferanten in Verbindung setzen.

Bei unvollst�ndiger Lieferung oder Besch�digung darf das Ger�t NICHT benutzt werden. (Siehe == > Garantie). � Reinigen Sie das Ger�t vor dem Gebrauch (siehe ==> Reinigung und Wartung). � Pr�fen Sie, ob das Ger�t v�llig trocken ist.

Installation � Vor der Montage und dem Benutzen des Ger�-
tes muss man sehr aufmerksam diese Anleitung durchlesen. � �berzeugen Sie sich, ob das Ger�t auf eine trockene Fl�che mit entsprechender Festigkeit gestellt wurde. Ebenso muss man sich vergewissern, ob w�hrend des Funktionsbetriebes ein entspreDE chender Zugang zum Ger�t gew�hrleistet wird.

� Man muss sich au�erdem davon �berzeugen, ob die Spezifikation des Ger�tes auf seinem Typenschild den Parametern der Elektrosteckdose, an die das Ger�t angeschlossen werden soll, entspricht.
� HINWEIS! Es d�rfen in keinem Fall die Sicherheits-Mikroschalter entfernt werden.

Bedienung Warnung: Das Ger�t ist mit einem Sicherheitssystem ausger�stet, auf Grund dessen das Ger�t zum Zerkleinern den Funktionsbetrieb nicht beginnt, bevor nicht der Hebel abgesenkt bzw. das Geh�use geschlossen und blockiert wurde. � Dr�cken Sie den gr�nen Knopf, um das Ger�t
einzuschalten und den roten um es auszuschalten. � Heben Sie den Hebel und geben Sie das Gem�se in die �ffnung. Danach dr�cken Sie den Einlegehebel herunten und pressen das Gem�se langsam ein. � Mit der rechten Hand dr�ckt man die Taste ON (GR�N) und OFF (ROT), mit der linken Hand dagegen den Hebel des Ger�tes nach unten, um das Gem�se zu zerkleinern.

12

� Um die Messer zu platzieren oder zu entfernen sorgen Sie das die Power Knopf ausgeschaltet ist und holen Sie den Stecker aus der Steckerdose.
� Achtung: DIE MESSER SIND SCHARF!

� Um die Messer zu platzieren oder zu entfernen, �ffnen Sie das Ger�t indem Sie den Griff gegen den Uhrzeigersinn drehen und das Geh�use �ffnen.
� Platzieren Sie die Nylonscheibe immer bevor Sie das Messer Ihrer Wahl einsetzen.

� Um ein Messer zu entfernen drehen Sie es gegen

den Uhrzeigersinn und heben es dann.

� Schlie�en Sie das Ger�t und drehen Sie den run-

den Knopf im Uhrzeigersinn um das Geh�use zu

verschlie�en. Dr�cken Sie den ,,ON"-Knopf, um

das Messer automatisch in der richtigen Position

zu platzieren.

DE

� Beinhaltet 5 unterschiedliche Messer f�r unterschiedliche Schneidresultate und 1 Nylonscheibe: - 2 mm Schneidscheibe - 4 mm Schneidscheibe - 3 mm Reibe - 4,5 mm grater - 7,5 mm Reibe - Die Nylonscheibe sollte immer unter dem Messer platziert werden, um das Gem�se aus der Maschine zu dr�cken.

Wichtig � WARNUNG! Sto�en Sie die Lebensmittel niemals
mit der Hand an. Zu diesem Zweck muss man immer einen St��el benutzen.

� Verwenden Sie niemals gefrorenes Gem�se. � Verwenden Sie nur den mitgelieferten Polyethy-
len St��el zum Einpressen des Gem�ses.

13

Reinigung und Wartung Hinweis: Vor dem Reinigen und Abstellen des Ger�ts am Lagerort, ist das Ger�t immer von der Netzsteckdose zu trennen und dazu muss man abwarten, bis es abgek�hlt ist.

Cleaning � Das Ger�t muss nach jedem Gebrauch gewa-
schen werden. � Tauchen Sie das Ger�t nie in Wasser und andere
Fl�ssigkeiten. � Nach dem Abk�hlen der Oberfl�che ist sie mit
einem feuchten Tuch oder Schwamm mit einer geringen Menge eines milden Reinigungsmittels zu reinigen.

� Verwenden Sie weder aggressive Reinigungsmittel und Scheuerschw�mme, noch Schw�mme aus Stahlwolle oder Metallgegenst�nde zur Reinigung des Innenraums und der �u�eren Teile des Ger�ts.

Lagerung � Bevor das Ger�t am Lagerort abgestellt wird,
muss man sich sicherstellen, dass das Ger�t von der Netzsteckdose getrennt wurde und v�llig abgek�hlt ist. � Lagern Sie das Ger�t an einem k�hlen, sauberen und trockenen Ort.

� Im Ergebnis einer l�ngeren Nutzung k�nnen die Schneiden stumpf werden. Pr�fen Sie deshalb regelm��ig die Schneiden der Trennscheiben und setzen Sie sich mit dem Lieferanten in Verbindung, falls ein Servicedienst erforderlich ist.

Fehlerbehebung Sollte das Ger�t nicht ordnungsgem�� funktionieren, �berpr�fen Sie bitte die nachfolgende Tabelle f�r eine DE L�sung. Sollten Sie das Problem noch immer nicht l�sen k�nnen, wenden Sie sich bitte an den Lieferanten/ Dienstanbiet.

Problem Das Ger�t funktioniert nicht

M�gliche Ursache

M�gliche L�sung

Keine Leistung in der Steckdose .

Kontrollieren Sie die Sicherung.

Die Stromkabel wurden ans Elektronetz �berpr�fen Sie, ob der Stecker an die Netz-

nicht richtig angeschlossen.

steckdose richtig angeschlossen ist.

Der Hebel oder das Geh�use sind nicht richtig verschlossen. Der Sicherheitsmechanismus garantiert, dass das Ger�t nicht arbeitet.

Kontrollieren Sie ob der Hebel und das Geh�use richtig verschlossen sind.

Motor �berhitzt.

Lassen Sie das Ger�t etwa 45 Minuten abk�hlen.

Technische Spezifikation Bestellnummer: 231807 Betriebsspannung und frequenz: 230-240V~ /50Hz Nennleistungsverbrauch: 550W

Schutzklasse: Class I Wasserbest�ndigkeitsklasse: IP23 Nettogewicht: ca. 27,5 kg

Hinweis: Die technische Spezifikation kann ohne Vorank�ndigung ver�ndert werden.

14

Schaltplan
AC230V~ Eingang

230V

1/ 3/ 5/ 13 NO NC NC NO
2/ 4/ 6 14 NO NC NC NO

A1 Schaltsch�tz
A2

Kontrolllampe Einschalttaste (gr�n) Ausschalttaste (Rot)

Sensorschalter Magnetsensor

Einschalttaste A2 A1

LN

NC1

NC2

T1

Sensorschalter Magnetsensor

D2

T2

Signallampe

Ausschalttaste

D1

FU

T3

C2 T4
C3

Motor

Schwarz Rot
Wei� Wei� Blau Blau

Schutz vor �berhitzung

Kondensator

DE

Garantie Alle innerhalb von einem Jahr nach dem Kaufdatum festgestellten Defekte oder M�ngel, die die Funktionalit�t des Ger�tes beeintr�chtigen, werden auf dem Wege der unentgeltlichen Reparatur bzw. des Austausches unter der Voraussetzung beseitigt, dass das Ger�t in einer der Bedienungsanleitung gem��en Art und Weise betrieben und gewartet wird und weder vors�tzlich vernichtet noch nicht bestimmungsgem�� genutzt wurde. Ihre Rechte aus den entsprechenden Gesetzen bleiben davon

unber�hrt. Eine in der Garantiefrist einzureichende Beanstandung hat die Angabe des Kaufortes und Kaufdatums und in der Anlage einen Kaufbeleg (z.B. Kassenzettel) zu enthalten.
Gem�� unserer Politik der st�ndigen Weiterentwicklung unserer Produkte behalten wir uns vor, �nderungen am Produkt, an seiner Verpackung und an den dokumentierten technischen Daten ohne vorherige Ank�ndigung vorzunehmen.

Entsorgung und Umweltschutz Wird das Ger�t au�er Betrieb genommen, darf es nicht �ber den Hausm�ll entsorgt werden. Der Benutzer ist f�r die �bergabe des Ger�tes an eine geeignete Sammelstelle f�r Altger�te verantwortlich. Die Nichteinhaltung dieser Regel kann gem�� den geltenden Vorschriften �ber die Abfallentsorgung bestraft werden. Die getrennte Sammlung und das Recycling der Altger�te tr�gt zur Schonung der nat�rlichen Ressourcen bei und sorgt f�r eine

umwelt- und gesundheitsschonende Verwertungsweise. Weitere Informationen dar�ber, wo Sie Ihre Altger�te entsorgen k�nnen, erhalten Sie bei Ihrem �rtlichen Entsorgungsunternehmen. Der Hersteller und der Importeur �bernehmen keine Verantwortung f�r das Recycling sowie die umweltfreundliche Verwertung von Abf�llen, weder direkt noch �ber ein �ffentliches System.

15

Geachte klant,
Hartelijk dank voor de aankoop van dit Hendi apparaat. Leest u deze gebruiksaanwijzing zorgvuldig voordat u het apparaat gebruikt, dit om schade door verkeerd gebruik te voorkomen. Lees vooral de veiligheidsinstructies aandachtig door.
Veiligheidsinstructies � Onjuiste bediening en verkeerd gebruik van het apparaat kan ernstige schade aan het
apparaat en verwonding van personen tot gevolg hebben. � Dit apparaat is niet bedoeld voor huishoudelijk gebruik. � Het apparaat mag alleen worden gebruikt voor het doel waarvoor het werd ontworpen.
De fabrikant aanvaardt geen enkele aansprakelijkheid voor schade als gevolg van onjuiste bediening en verkeerd gebruik. � Zorg dat het apparaat en de stekker niet met water of een andere vloeistof in aanraking komen. Mocht het apparaat onverhoopt in het water vallen, trek dan onmiddellijk de stekker uit het stopcontact en laat het apparaat controleren door een erkend vakman. Niet-naleving hiervan kan levensgevaar opleveren. � Probeer nooit zelf de behuizing van het apparaat te openen. � Steek geen voorwerpen in de behuizing van het apparaat. � Raak de stekker niet met natte of vochtige handen aan. � Gevaar van elektrische schokken! Probeer het apparaat niet zelf te repareren. In NL het geval van storingen, laat reparaties alleen uitvoeren door gekwalificeerd personeel. � Gebruik nooit een beschadigd apparaat! Als het apparaat is beschadigd, haal de stekker dan uit het stopcontact en neem contact op met de winkel. � Waarschuwing! Dompel de elektrische onderdelen van het apparaat niet onder in water of andere vloeistoffen. Houd het apparaat nooit onder stromend water. � Controleer de stekker en het netsnoer regelmatig op schade. Als de stekker of het netsnoer is beschadigd, moet het worden vervangen door de technische dienst of een soortgelijk gekwalificeerd persoon om gevaar of letsel te voorkomen. � Zorg ervoor dat het netsnoer niet in contact komt met scherpe of hete voorwerpen en houd het uit de buurt van open vuur. Als u de stekker uit het stopcontact wilt halen, trek dan altijd aan de stekker en niet aan het netsnoer. � Zorg ervoor dat niemand per ongeluk aan het netsnoer (of verlengsnoer) kan trekken of kan struikelen over het netsnoer. � Houd het apparaat in de gaten tijdens gebruik. � Waarschuwing! Zolang de stekker in het stopcontact zit, is het apparaat aangesloten op de voedingsbron. � Schakel het apparaat uit voordat u de stekker uit het stopcontact trekt. � Draag het apparaat nooit aan het netsnoer. � Gebruik geen extra hulpmiddelen die niet worden meegeleverd met het apparaat. � Sluit het apparaat alleen aan op een stopcontact met de spanning en frequentie die is vermeld op het typeplaatje.
16

� Sluit de stekker aan op een stopcontact dat eenvoudig bereikt kan worden, zodat de stekker in geval van nood onmiddellijk uit het stopcontact kan worden getrokken. Trek de stekker volledig uit het stopcontact om het apparaat volledig uit te schakelen. Gebruik de stekker om het apparaat los te koppelen van het lichtnet.
� Schakel het apparaat altijd uit voordat u de stekker uit het stopcontact trekt. � Gebruik nooit accessoires die niet worden aanbevolen door de fabrikant. Zij kunnen mo-
gelijk een veiligheidsrisico vormen voor de gebruiker en kunnen het apparaat mogelijk beschadigen. Gebruik alleen originele onderdelen en accessoires. � Dit apparaat is niet geschikt voor gebruik door personen (inclusief kinderen) met een verminderd fysiek, sensorisch of geestelijk vermogen, of gebrek aan ervaring en kennis. � Dit apparaat mag onder geen enkele omstandigheid worden gebruikt door kinderen. � Houd het apparaat en het netsnoer buiten bereik van kinderen. � Kinderen mogen niet met het apparaat spelen. � Koppel het apparaat altijd los van het lichtnet als het onbeheerd wordt achtergelaten en voordat het apparaat wordt gemonteerd, gedemonteerd of gereinigd. � Laat het apparaat nooit onbeheerd achter tijdens gebruik.

Speciale veiligheidsvoorschriften

� WAARSCHUWING! Haal de stekker uit het stopcontact voor reiniging, onderhoud

en reparatie!

� WAARSCHUWING! Vereist twee mensen om te verplaatsen.

NL

� WAARSCHUWING! Lees de instructiehandleiding voor gebruik, reiniging en onderhoud!
� WAARSCHUWING! Steek tijdens gebruik geen handen in de opening waar gesneden groenten uitkomt. Haal de stekker uit het stopcontact voordat u erin grijpt.
� Dit apparaat mag niet worden gebruikt voor het snijden van bevroren voedsel, vlees met been of vis, etc.
� Gebruik het apparaat alleen zoals beschreven in deze handleiding. � Dit apparaat mag alleen worden gebruikt door getraind personeel in keukens van
restaurants, kantines of barpersoneel, etc. � Plaats het apparaat niet op een verwarmingsvoorwerp (kooktoestel op benzine,
elektriciteit, houtskool, etc.). Houd het apparaat uit de buurt van warme oppervlakken en open vuur. Gebruik het apparaat altijd op een vlakke, stabiele, schone, hittebestendige en droge ondergrond. � Gebruik het apparaat niet in de buurt van explosieve of ontvlambare materialen, creditcards, magnetische schijven of radio's. � Dit apparaat is niet bedoeld om gebruikt te worden in combinatie met een externe timer of apart afstandsbedieningssysteem. � Omzeil nooit de veiligheidsmechanismen op het apparaat.

17

� WAARSCHUWING: Houd alle ventilatieopeningen in het apparaat vrij. � WAARSCHUWING: Schakel het apparaat ALTIJD uit en trek de stekker uit het stopcontact
alvorens het apparaat te reinigen, onderhouden of op te bergen. � WAARSCHUWING! Houd uw handen, lange haren en kleding ALTIJD uit de buurt van de
bewegende onderdelen. � Laat tijdens gebruik minimaal 15 cm ruimte vrij rond het apparaat voor voldoende
ventilatie. � Let op! Plaats het netsnoer indien nodig op een veilige manier om te voorkomen dat
het in contact kon komen met het verwarmingsoppervlak en dat er per ongeluk aan het netsnoer kan worden getrokken. � Was het apparaat niet met water of een waterstraal. Wassen met water kan lekkage veroorzaken en het risico op elektrische schokken verhogen. Geen van de onderdelen zijn vaatwasmachinebestendig. � Niet reinigen of opbergen tenzij het apparaat volledig is afgekoeld. � Verplaats het apparaat niet tijdens gebruik. Trek de stekker uit het stopcontact en houd het apparaat vast aan de onderkant als u het apparaat verplaatst. � Gebruik het apparaat niet zonder ingredi�nten om oververhitting te voorkomen. � WAARSCHUWING! Wees uiterst voorzichtig bij de omgang met de snijschijven. Draag beschermende handschoenen (niet meegeleverd) indien nodig.

Beoogd gebruik NL � Dit apparaat is bedoeld voor professioneel ge-
bruik en kan alleen worden bediend door gekwalificeerd personeel. � Dit apparaat is uitsluitend bestemd voor het snijden en raspen van verse groenten (bijv. wortelen, aardappelen, kool, etc.) met behulp van de geschikte snijschijven in een commerci�le omge-

ving. Elk ander gebruik kan leiden tot schade aan het apparaat of lichamelijk letsel. � Gebruik van het apparaat voor andere doeleinden wordt beschouwd als verkeerd gebruik van het apparaat. De gebruiker is volledig aansprakelijk voor alle risico's die voortvloeien uit verkeerd gebruik van het apparaat.

Installatie met aarding Dit apparaat is geclassificeerd als beschermingsklasse I en moet worden aangesloten op een aansluiting met aarde. Aarding verlaagt de kans op elektrische schokken doordat elektrische stroom via een ontsnappingsdraad kan weglopen. Dit ap-

paraat is uitgerust met een snoer met een aardedraad en een geaarde stekker. De stekker moet in een stopcontact worden gestoken dat juist is ge�nstalleerd en geaard.

Voorbereidingen voor het eerste gebruik � Verwijder alle verpakkingsmaterialen. � Controleer het apparaat op volledigheid en even-
tuele transportschade. Neem in geval van schade of een onvolledige levering (bijv. snijschrijven, etc.) onmiddellijk contact op met de leverancier. Gebruik het apparaat NIET. (Zie == > Garantie).

� Reinig het apparaat v��r gebruik (Zie == > Reiniging en onderhoud).
� Zorg ervoor dat het apparaat volledig droog is.

18

Installatie � Lees deze handleiding volledig en aandachtig
door voordat u het apparaat installeert en gebruikt. � Zorg ervoor dat het apparaat in een droge omgeving wordt geplaatst en dat het op een oppervlak wordt geplaatst dat het gewicht van het apparaat kan ondersteunen. Zorg er tijdens het gebruik

van het apparaat ook voor dat er geen obstakels in de buurt zijn. � Zorg ervoor dat de specificaties van de elektrische voeding overeenkomen met de gegevens op het typeplaatje op het apparaat. � LET OP! Omzeil de veiligheidsmicroschakelaars nooit.

Bediening Attentie: Het apparaat heeft een veiligheidssysteem dat ervoor zorgt dat het apparaat niet werkt zolang de hendel en behuizing niet naar beneden zijn gedrukt en zijn vergrendeld.

� Druk de groene knop in om het apparaat aan te zetten en de rode om het apparaat uit te zetten.
� Til de hendel op en plaats de groenten in de opening. Druk vervolgens de hendel weer naar beneden om zo de groenten aan te drukken.
� Gebruik uw rechterhand om op de knoppen AAN (GROEN) en UIT (ROOD) te drukken en gebruik uw linkerhand om de hendel omlaag te drukken, zodat groenten worden gesneden.

NL � Voor het plaatsen of vervangen van de snijschij-
ven, zorg ervoor dat de aan- en uitknop uit staat en verwijder de stekker uit de wandcontactdoos.
� Let op: MESSEN ZIJN SCHERP!

� Voor het plaatsen of vervangen van de snijschijven opent u de machine door de knop tegen de klok in te draaien en vervolgens de machine naar boven open te klappen.
� Plaats altijd eerst de nylon schijf en daarna de snijschrijf naar keuze.

19

� Voor het verwijderen van een schrijf draait u de schijf tegen de klok in en vervolgens tilt u de schijf op.
� Vervolgens sluit u het apparaat en draait u de knop met de klok mee dicht. Druk nu de aanknop in om de messen automatisch in de juiste positie te vergrendelen.
� Bevat verschillende schijven voor verschillende manier van snijden: - 2 mm mes voor schijfjes - 4 mm mes voor schijfjes - 3 mm rasp - 4,5mm rasp - 7 mm rasp - Een nylon schijf die altijd onder de snijschijf is geplaatst voor het uitvoeren van de gesneden groenten.

Belangrijk � WAARSCHUWING! Gebruik nooit uw handen om
het te snijden voedsel aan te drukken. Gebruik altijd de meegeleverde stamper. � Gebruik nooit bevroren groenten.

� Gebruik geen producten van hout/metaal/kunststof m.u.v. de bijgeleverde polyethyleen stamper om de groenten aan te drukken.

Reiniging en onderhoud NL Let op: Trek de stekker van het apparaat altijd uit het stopcontact en laat het apparaat afkoelen alvorens het
apparaat te reinigen & op te bergen.

Reiniging � Reinig het apparaat na elk gebruik. � Dompel het apparaat nooit onder in water of an-
dere vloeistoffen. � Reinig het afgekoelde buitenoppervlak met een
licht vochtige doek of spons met een milde zeepoplossing.

� Gebruik nooit schuursponsjes of reinigingsmiddelen, staalwol of metalen keukengerei/gereedschap om de onderdelen aan de binnenkant of buitenkant van het apparaat te reinigen.

Opslag � Zorg er voordat u het apparaat opbergt altijd voor
dat de stekker van het apparaat uit het stopcontact is getrokken en dat het apparaat volledig is afgekoeld. � Berg het apparaat op een koele, schone en droge plek op.

� De messen van de snijschijven kunnen na langdurig gebruik bot worden. Controleer dit regelmatig en neem indien nodig contact op met de leverancier voor onderhoud.

20

Problemen oplossen Als het apparaat niet naar behoren functioneert, raadpleeg dan de onderstaande tabel voor een oplossing. Als u het probleem nog steeds niet kunt oplossen, neem contact op met de leverancier/dienstverlener.

Problemen Het apparaat doet niets

Mogelijke oorzaak

Mogelijke oplossing

Geen spanning op de wandcontactdoos.

Controleer de zekering.

Stekker niet (goed) in de wandcontactdoos Stekker controleren.

De hendel of de behuizing is niet goed Controleer of zowel de hendel als de behuizing dicht. Beveiliging zorgt ervoor dat het ap- volledig gesloten zijn. paraat niet aan kan.

Motor oververhit.

Circa 45 minuten af laten koelen.

Technische specificaties Itemnr. : 231807 Bedrijfsspanning en frequentie: 230-240V~ /50Hz Nominaal stroomverbruik: 550W

Beschermingsklasse: Klasse I Beschermingsklasse waterdichtheid: IP23 Nettogewicht: ong. 27,5 kg

Opmerking: Technische specificaties onderhevig aan verandering zonder voorafgaande kennisgeving.

Schakelschema
AC230V~ Ingang

230V

1/ 3/ 5/ 13 NO NC NC NO
2/ 4/ 6 14 NO NC NC NO

A1 Relais
A2

Lamp

Inschakelen (Groen)
Uitzetten (Rood)

Sensor schakelaar Magneetschakelaar

Aan
Sensor schakelaar Magneetschakelaar Lampindicator
Uit

D2

T1

T2

NC2

NC1

A2 A1

NL
LN

FU

D1

T3

C2 T4
C3

Motor

Zwart Rood Wit Wit Blauw Blauw

Condensator

Oververhittingsbeveiliging

21

Garantie Elk defect waardoor de werking van het apparaat nadelig wordt be�nvloed dat zich binnen ��n jaar na aankoop van het apparaat voordoet, wordt gratis hersteld door reparatie of vervanging, mits het apparaat conform de instructies is gebruikt en onderhouden en niet op enigerlei wijze verkeerd is behandeld of misbruikt. Dit laat onverlet uw bij wet bepaalde rechten. Als de garantie van kracht is, vermeld dan waar en wanneer u het apparaat

hebt gekocht en sluit een aankoopbewijs bij (bijv. kassabon of factuur).
Gezien ons streven naar voortdurende verdere productontwikkeling behouden wij ons het recht voor, zonder voorafgaande kennisgeving wijzigingen aan te brengen aan product, verpakking en documentatie.

Verwijdering & milieu Bij de buitengebruikstelling van het apparaat, mag het niet met het overige huisafval worden verwijderd. In plaats daarvan is het uw verantwoordelijkheid om uw afgedankte apparatuur in te leveren bij een daartoe aangewezen inzamelpunt. Het niet opvolgen van deze regel kan worden bestraft in overeenstemming met de geldende voorschriften voor afvalverwerking. De gescheiden inzameling en recycling van uw afgedankte apparatuur ten tijde van buitengebruikstelling helpt bij de instand-

houding van natuurlijke hulpbronnen en waarborgt dat de apparatuur wordt gerecycled op een manier die de volksgezondheid en het milieu beschermt. Voor meer informatie over waar u uw afval kunt inleveren voor recycling kunt u contact opnemen met uw lokale afvalverwerkingsbedrijf. De fabrikant en importeurs nemen geen verantwoordelijkheid voor de recycling, behandeling en ecologische verwijdering, hetzij rechtstreeks of via een openbaar systeem.

NL

22

Szanowny Kliencie,
Dzikujemy za zakup urzdzenia firmy Hendi. Prosimy o uwane zapoznanie si z niniejsz instrukcj przed podlczeniem urzdzenia, aby unikn uszkodze spowodowanych niewlaciw obslug. Naley zwr�ci szczeg�ln uwag na zasady bezpieczestwa.
WANE ZASADY BEZPIECZESTWA � Nieprawidlowa obsluga i niewlaciwe uycie mog spowodowa powane uszkodzenie
urzdzenia lub zranienie os�b. � Urzdzenie stosuj wylcznie zgodnie z przeznaczeniem. Producent i/lub Sprzedawca nie
ponosi adnej odpowiedzialnoci za szkody spowodowane nieprawidlow obslug i niewlaciwym uytkowaniem urzdzenia. � Urzdzenie nie jest przeznaczone do uytku domowego. � W czasie uycia zabezpiecz urzdzenie i wtyczk kabla zasilajcego przed kontaktem z wod lub innymi plynami. W malo prawdopodobnym przypadku zanurzenia urzdzenia w wodzie, natychmiast wycignij wtyczk z kontaktu, a nastpnie zle kontrol urzdzenia specjalicie. Nieprzestrzeganie tej instrukcji moe spowodowa zagroenie ycia. � Nigdy nie otwieraj samodzielnie obudowy urzdzenia. � Nie wtykaj adnych przedmiot�w w obudow urzdzenia. � Nie dotykaj wtyczki kabla zasilajcego wilgotnymi rkami. � Ryzyko poraenia prdem! Regularnie kontroluj stan wtyczki i kabla. W przypadku wykrycia uszkodzenia wtyczki lub kabla, zle napraw w wyspecjalizowanym punkcie na- PL prawczym. � Nigdy nie uywaj uszkodzonego urzdzenia! W przypadku, gdy urzdzenie spadnie lub ulegnie uszkodzeniu w inny spos�b, przed dalszym uyciem zawsze zle przeprowadzenie kontroli i ewentualn napraw w wyspecjalizowanym punkcie naprawczym. � Ostrzeenie! Nie zanurzaj elektrycznych czci urzdzenia w wodzie lub w innych plynach. Nigdy nie trzymaj urzdzenia pod biec wod. � Nigdy nie naprawiaj urzdzenia samodzielnie moe to spowodowa zagroenie ycia. � Chro kabel zasilajcy przed kontaktem z ostrymi lub gorcymi przedmiotami i chro go przed otwartym ogniem. Jeeli chcesz odlczy urzdzenie z kontaktu, zawsze chwytaj za wtyczk, nigdy nie cignij za kabel. � Zabezpiecz kabel (lub przedluacz), aby nikt przez omylk nie wycignl go z kontaktu ani si o niego nie potknl. � Urzdzenie powinno by uywane tylko do cel�w, dla kt�rych zostaly pierwotnie zaprojektowane. � Kontroluj funkcjonowanie urzdzenia w czasie uytkowania. � Dzieci nie uwiadamiaj sobie zagroe, jakie moe spowodowa uycie urzdze elektrycznych. Nigdy nie pozwalaj dzieciom poslugiwa si elektrycznymi urzdzeniami gospodarstwa domowego bez nadzoru. � Gdy urzdzenie nie jest uywane oraz zawsze przed czyszczeniem, odlcz je od r�dla zasilania, wycigajc wtyczk z kontaktu.
23

� Uwaga! Jeeli wtyczka kabla zasilajcego jest podlczona do kontaktu, urzdzenie caly czas pozostaje pod napiciem.
� Wylcz urzdzenie, zanim wycigniesz wtyczk z kontaktu. � Nigdy nie przeno urzdzenia za kabel zasilajcy. � Nie uywaj akcesori�w innych ni dostarczone z urzdzeniem. � Urzdzenie mona podlcza wylcznie do gniazda o napiciu i czstotliwoci zgodnej z
danymi znajdujcymi si na tabliczce znamionowej. � Unikaj przecienia. � Po uyciu wylcz urzdzenie wyjmujc wtyczk z gniazda. � Instalacja elektryczna musi odpowiada krajowym i lokalnym przepisom. � Z urzdzenia nie mog korzysta osoby (take dzieci), u kt�rych stwierdzono oslabione
zdolnoci fizyczne, sensoryczne lub umyslowe, albo kt�rym brakuje odpowiedniej wiedzy i dowiadczenia, chyba e odbywa si to pod nadzorem lub zgodnie z instrukcjami osoby odpowiedzialnej za ich bezpieczestwo.

Szczeg�lne przepisy bezpieczestwa � UWAGA! Odlcz od sieci przed czyszczeniem, konserwacj i/lub napraw!

� UWAGA! Wymagane 2 osoby do przenoszenia!

PL �

UWAGA! Przed uyciem, konserwacj i/lub napraw przeczytaj instrukcj!

� OSTRZEENIE! Nie wkladaj dloni do otworu wylotu podczas pracy urzdzenia! Odlcz maszyn od zasilania przed jej otwarciem!
� Urzdzenie nie nadaje si do krojenia zamroonej ywnoci, misa z koci, ryb, itp. � Korzystaj z urzdzenia wylcznie zgodnie z niniejsz instrukcj. � Urzdzenie powinno by obslugiwane wylcznie przez przeszkolony personel zaplecza
kuchennego restauracji, stol�wek lub obslug baru, itp. � Nie umieszczaj urzdzenia na obiekcie emitujcym cieplo (kuchenka gazowa, elektryczna,
grill, itp.). Trzymaj urzdzenie z dala od jakichkolwiek gorcych powierzchni lub otwartego plomienia. Ustaw urzdzenie na r�wnej, stabilnej, czystej i suchej powierzchni, odpornej na dzialanie wysokich temperatur. � Nie uywaj urzdzenia w pobliu material�w wybuchowych lub latwopalnych, kart platniczych, dysk�w magnetycznych lub radioodbiornik�w. � Urzdzenie nie jest przystosowane do obslugi za pomoc zewntrznego timera lub oddzielnego systemu zdalnego sterowania. � Nigdy nie manipuluj przy blokadach bezpieczestwa. � OSTRZEENIE: Nie zaslaniaj otwor�w wentylacyjnych urzdzenia. � OSTRZEENIE: ZAWSZE pamitaj o wylczeniu i odlczeniu urzdzenia od r�dla zasilania przed czyszczeniem, konserwacj lub wymian akcesori�w. � OSTRZEENIE! ZAWSZE pamitaj, by nie nosi lunej odziey i nie dotyka ruchomych czci urzdzenia rkoma oraz by zwiza wlosy.

24

� Zapewnij co najmniej 15-centymetrow przestrze wok�l urzdzenia, celem zapewnienia odpowiedniej wentylacji podczas uytkowania.
� Uwaga! Odpowiednio poprowad i zabezpiecz przew�d zasilajcy, aby zapobiec przypadkowemu pocigniciu lub kontaktowi z nagrzan powierzchni.
� Nie myj urzdzenia wod ani za pomoc silnego strumienia. Mycie urzdzenia wod moe spowodowa przedostanie si jej do czci elektrycznych i doprowadzi do poraenia prdem. Czci urzdzenia nie mog by myte w zmywarce.
� Nie czy ani nie umieszczaj urzdzenia w miejscu przechowywania, zanim calkowicie nie ostygnie.
� Nie przeno urzdzenia podczas eksploatacji. Przed przeniesieniem urzdzenia zawsze pamitaj o odlczeniu go od gniazdka elektrycznego i trzymaj je od spodu.
� Nie wlczaj urzdzenia przed umieszczeniem w nim ywnoci, aby unikn przegrzania silnika.
� OSTRZEENIE! Zachowaj szczeg�ln ostrono podczas dotykania tarcz tncych. Jeli to konieczne, zal� rkawice ochronne (niedolczone do urzdzenia).

Przeznaczenie � Urzdzenie przeznaczone do uytku profesjonalne-
go, obsluga tylko przez wykwalifikowany personel. � Urzdzenie przeznaczone jest do uytku komer-
cyjnego i sluy do krojenia, szatkowania i cierania wieych warzyw (np. marchwi, ziemniak�w, kapusty itp.) przy pomocy odpowiednich tarcz tncych. Uycie urzdzenia w jakimkolwiek in-

nym celu moe prowadzi do jego uszkodzenia bd obrae ciala. � Wykorzystanie urzdzenia w jakimkolwiek innym celu uznane bdzie za wykorzystanie niezgodne z przeznaczeniem. Uytkownik bdzie wylcznie odpowiedzialny za nieprawidlowe wykorzystanie PL urzdzenia.

Monta uziemienia Kuchenka jest urzdzeniem I klasy ochronnoci i wymaga uziemienia. Uziemienie zmniejsza ryzyko poraenia prdem, dziki zastosowaniu przewodu odprowadzajcego prd elektryczny. Kuchenka wy-

posaona jest w przew�d z uziemieniem z wtykiem uziemiajcym. Wtyczka musi zosta podlczona do gniazdka sieciowego, kt�re zostalo odpowiednio zamontowane i uziemione.

Przed pierwszym uyciem � Zdejmij i usu opakowanie i zabezpieczenia. � Sprawd urzdzenie pod ktem kompletnoci
oraz ewentualnych uszkodze podczas transportu. W przypadku niekompletnej dostawy (np. brak tarcz tncych) lub uszkodze, natychmiast skontaktuj si z dostawc. W przypadku niekom-

pletnej dostawy lub uszkodze, NIE korzystaj z urzdzenia. (Patrz == > Gwarancja). � Wyczy urzdzenie (patrz == > Czyszczenie i konserwacja). � Sprawd, czy urzdzenie jest calkowicie suche.

Monta � Uwanie zapoznaj si z treci instrukcji przed
montaem i korzystaniem z urzdzenia. � Upewnij si, czy urzdzenie zostalo umieszczone
na suchej powierzchni o odpowiedniej wytrzymaloci. Upewnij si r�wnie, czy zapewniony zostal odpowiedni dostp do urzdzenia podczas jego eksploatacji.

� Upewnij si, czy specyfikacja urzdzenia na tabliczce znamionowej odpowiada parametrom gniazdka elektrycznego, do kt�rego ma by podlczone urzdzenie.
� UWAGA! Nigdy nie odlczaj adnych mikroprzelcznik�w bezpieczestwa.
25

Obsluga Ostrzeenie: Urzdzenie wyposaone jest w system zabezpieczajcy, dziki kt�remu szatkownica nie rozpocznie pracy, jeli dwignia nie jest opuszczona, a obudowa zamknita i zablokowana. � Nacinij zielony przycisk aby uruchomi urzdze-
nie, czerwony aby je wylczy. � Unie dwigni i wl� warzywa do rodka otworu
wlotowego. Nastpnie pocignij mocno dwigni w d�l, aby dokladnie zgnie warzywa. � Praw dloni wciskaj przycinki ON (ZIELONY) i OFF (CZERWONY), a lew opuszczaj dwigni urzdzenia, by poszatkowa warzywa.
� Aby zaloy lub wymieni noe, upewnij si, e urzdzenie jest wylczone i odlczone od r�dla zasilania.
� Uwaga: NOE S OSTRE!
PL � Aby zainstalowa lub wymieni tarcze otw�rz urzdzenie uprzednio obracajc pokrtlo w kierunku przeciwnym do ruchu wskaz�wek zegara.
� Pamitaj, aby zawsze najpierw umieci nylon dysk przed wloeniem wybranego ostrza.
� Aby wyj tarcz przekr j w kierunku przeciwnym do ruchu wskaz�wek zegara a nastpnie j unie.
� Zamknij urzdzenie i przekr pokrtlo zgodnie z ruchem wskaz�wek zegara, aby zabezpieczy obudow. Nacinij przycisk "wlcz" aby automatycznie ustawi tarcz we wlaciwej pozycji.
� Zawiera 5 r�nych noy dla osigania r�nych rezultat�w szatkowania oraz 1 nylon dysk: - 2 mm tarcza do plastr�w - 4 mm tarcza do plastr�w - 3 mm tarka - 4,5 mm tarka - 7 mm tarka - Nylon dysk powinien zawsze by umieszczany pod noem, aby warzywa byly wypychane z urzdzenia.
26

Wane � OSTRZEENIE! Nigdy nie popychaj ywnoci
dlomi. Zawsze uywaj w tym celu popychacza. � Nigdy nie uywaj mroonych warzyw.

� Nie uywaj adnych drewnianych/metalowych ani plastikowych przedmiot�w, uywaj wylcznie plastikowej (polietylenu) plytki zgniatajcej warzywa.

Czyszczenie i konserwacja Uwaga: Przed rozpoczciem czyszczenia i umieszczeniem urzdzenia w miejscu przechowywania, zawsze odlcz urzdzenie od gniazdka sieciowego i odczekaj, a kuchenka ostygnie.

Czyszczenie � Umyj urzdzenie po kadym uyciu. � Nigdy nie zanurzaj urzdzenia w wodzie oraz in-
nych plynach. � Po ostygniciu powierzchni zewntrznej oczy
j przy pomocy wilgotnej ciereczki lub gbki, z niewielk iloci lagodnego roztworu rodka myjcego.

� Do czyszczenia wntrza i zewntrznych czci urzdzenia nigdy nie uywaj szorstkich gbek ani rcych detergent�w, jak r�wnie gbek z welny stalowej lub przyrzd�w metalowych.

Przechowywanie � Przed umieszczeniem w miejscu przechowywa-
nia, zawsze upewnij si, czy urzdzenie zostalo odlczone od gniazdka sieciowego i calkowicie ostyglo. � Przechowuj urzdzenie w chlodnym, czystym i suchym miejscu.

� W wyniku dlugotrwalego uytkowania ostrza tarcz tncych mog ulec stpieniu. Regularnie sprawdzaj ostrza tarcz tncych i skontaktuj si z dostawc w celu przeprowadzenia ich serwisu. PL

Rozwizywanie problem�w Jeli urzdzenie nie dziala prawidlowo, zapoznaj si z ponisz tabel w celu znalezienia prawidlowego rozwizania. Jeli nadal nie moesz rozwiza problemu, skontaktuj si z dostawc.

Problem

Moliwa przyczyna

Moliwe rozwizanie

Brak zasilania w gniazdku.

Sprawd wtyczk.

Wtyczka nie jest podlczona (odpowiednio) do gniazdka. Sprawd wtyczk.

Urzdzenie nie dziala

Dwignia nie jest opuszczona lub obudowa nie jest zabezpieczona. Mechanizm bezpieczestwa uniemoliwia w takiej sytuacji prac urzdzenia.

Sprawd czy dwignia jest opuszczona, a obudowa odpowiednio zamknita.

Przegrzanie silnika.

Studzi urzdzenie przez 45 minuty.

Specyfikacja techniczna Numer produktu: 231807 Napicie robocze i czstotliwo: 230-240V~ /50Hz Znamionowy pob�r mocy: 550W

Klasa ochronnoci: Klasa I Klasa wodoodpornoci: IP23 Waga netto: ok. 27,5 kg

Uwaga: Specyfikacja techniczna moe ulec zmianie bez uprzedzenia.

27

Schemat elektryczny
AC230V~ Wejcie

230V

1/ 3/ 5/ 13 NO NC NC NO
2/ 4/ 6 14 NO NC NC NO

A1 Stycznik
A2

Light

Turn on (Green) Turn off (Red)

Przelcznik sensoryczny Czujnik mag-
netyczny

Przycisk wlczenia

A2 A1

LN

Przelcznik sensoryczny

NC1

NC2

T1

D2

Czujnik magnetyczny Lampka sygnalizacyjna
Przycisk wylczenia

T2

D1

FU

T3

C2 T4
C3

Silnik

Czarny Czerwony
Bialy Bialy

Niebieski Niebieski

Zabezpieczenie przed przegrzaniem

PL

Kondensator

Gwarancja Kada wada bd usterka powodujca niewlaciwe funkcjonowanie urzdzenia, kt�ra ujawni si w cigu jednego roku od daty zakupu, zostanie bezplatnie usunita lub urzdzenie zostanie wymienione na nowe, o ile bylo uytkowane i konserwowane zgodnie z instrukcj obslugi i nie bylo wykorzystywane w niewlaciwy spos�b lub niezgodnie z przeznaczeniem. Postanowienie to w adnej mierze nie narusza innych praw uytkownika wynikajcych z przepis�w prawa. W przypadku zgloszenia urz-

dzenia do naprawy lub wymiany w ramach gwarancji naley poda miejsce i dat zakupu urzdzenia i dolczy dow�d zakupu (np. paragon).
Zgodnie z nasz polityk ciglego doskonalenia wyrob�w zastrzegamy sobie prawo do wprowadzania bez uprzedzenia zmian w wyrobie, opakowaniu oraz danych technicznych podawanych w dokumentacji.

28

Wycofanie z uytkowania i ochrona rodowiska

Pamitaj! Nie wyrzucaj zuytego sprztu lcznie z innymi odpadami Nie demontuj zuytych urzdze zawierajcych niebezpieczne skladniki na wlasn rk! Gro Ci za to kary grzywny!

Po zakoczeniu eksploatacji produktu nie wolno gromadzi razem z odpadami komunalnymi, tylko naley odstawi do punktu odbioru odpad�w elektrycznych i elektronicznych. Uytkownik ponosi odpowiedzialno za przekazanie wycofanego z uytkowania urzdzenia do punktu gospodarowania odpadami. Nieprzestrzeganie tej zasady moe by karane zgodnie z lokalnie obowizujcymi przepisami dotyczcymi gospodarowania odpadami. Jeli urzdzenie wycofane z uytkowania jest poprawnie odebrane jako osobny odpad, moe zosta przetworzone i zutylizowane w spos�b przyjazny dla rodowiska, co zmniejsza negatywny wplyw na rodowisko i zdrowie ludzi. Aby uzyska wicej informacji dotyczcych dostpnych uslug w zakresie odbioru odpad�w, naley skontaktowa si z lokaln firm odbierajc odpady.

Symbol przekrelonego kosza na mieci oznacza, e tego produktu nie wolno wyrzuca do zwyklych pojemnik�w na odpady. Zuyte urzdzenia elektryczne i elektronicznie mog zawiera niebezpieczne skladniki np. rt, ol�w, kadm lub freon. Jeli tego typu substancje przedostan si w spos�b niekontrolowany do rodowiska, spowoduj skaenie wody i gleby, a take wplyn niekorzystnie na zdrowie ludzi i zwierzt.

Wlaciwe postpowanie ze zuytym sprztem zapobiega potencjalnym negatywnym konsekwencjom dla rodowiska naturalnego i ludzkiego zdrowia.

Jednoczenie oszczdzamy naturalne zasoby na-

szej Ziemi wykorzystujc powt�rnie surowce uzy-

skane z przetwarzania sprztu.

PL

29

Cher client,
Merci d'avoir achet� cet appareil de Hendi. Veuillez lire attentivement ce mode d'emploi avant de brancher l'appareil afin d'�viter tout endommagement pour cause d'usage abusif. Veuillez notamment lire les consignes de s�curit� avec la plus grande attention.
R�gles de s�curit� � L'utilisation abusive et le maniement incorrect de l'appareil peuvent entra�ner une grave
d�t�rioration de l'appareil ou provoquer des blessures. � Cet appareil n' est pas destin� � un usage domestique. � L'appareil doit �tre utilis� uniquement pour le but il a �t� con�u. Le fabricant d�cline
toute responsabilit� en cas de dommage cons�cutif � un usage abusif ou un maniement incorrect. � Veillez � tenir l'appareil et la prise �lectrique hors de port�e de l'eau ou de tout autre liquide. Si malencontreusement l'appareil tombe dans l'eau, d�branchez imm�diatement la prise �lectrique et faites contr�ler l'appareil par un r�parateur agr��. La non-observation de cette consigne entra�ne un risque d'accident mortel. � Ne tentez jamais de d�monter vous-m�me le b�ti de l'appareil. � N'enfoncez aucun objet dans la carcasse de l'appareil. � Ne touchez pas la prise avec les mains mouill�es ou humides. � Risque d'�lectrocution! Ne tentez jamais de r�parer l'appareil. Tous d�fauts et dysFR fonctionnement doivent �tre supprim�s par le personnel qualifi�. � N'utilisez jamais l'appareil endommag�! D�branchez l'appareil endommag� de l'alimentation �lectrique et contactez votre revendeur. � Avertissement: N'immergez pas les pi�ces �lectriques de l'appareil dans l'eau ou dans d'autres liquides. Ne mettez pas l'appareil sous l'eau courante. � V�rifiez r�guli�rement la fiche et le c�ble d'alimentation pour les dommages. La fiche ou le c�ble d'alimentation endommag�(e) transmettre pour la r�paration au service ou � une personne qualifi�e, pour pr�venir tous les menaces ou les blessures possibles. � Assurez-vous que le c�ble d'alimentation n'est pas en contact avec les objets pointus ou chauds ; gardez le c�ble loin des flammes nues. Pour retirer la fiche de la prise murale, tirez toujours en tenant la fiche et non le c�ble d'alimentation. � Prot�gez le c�ble d'alimentation (ou la rallonge) contre le d�branchement accidentel de la prise murale. Le c�ble doit �tre pos� de mani�re ne provocant pas les chutes accidentelles. � Surveillez en permanence l'appareil pendant l'utilisation. � Avertissement ! Si la fiche est ins�r�e dans la prise murale, l'appareil doit �tre consid�r� comme branch� � l'alimentation. � Avant de retirer la fiche de la prise, �teignez l'appareil ! � Ne transportez jamais l'appareil en tenant le c�ble. � N'utilisez aucuns accessoires qui n'ont pas �t� fournis avec l'appareil. � L'appareil doit �tre branch� � la prise murale avec une tension et la fr�quence indiqu�es sur la plaque signal�tique.
30

� Ins�rez la fiche � la prise murale situ�e dans un endroit facilement accessible de sorte qu'en cas de panne l'appareil puisse �tre imm�diatement d�connect�. Pour �teindre compl�tement l'appareil, d�branchez-le de la source d'alimentation. Pour cela, retirez la fiche � l'extr�mit� du c�ble d'alimentation de la prise murale.
� Eteignez l'appareil avant de d�brancher l'appareil de la prise! � N'utilisez jamais les accessoires non recommand�s par le fabricant. L'utilisation des ac-
cessoires non recommand�s peut pr�senter des risques pour l'utilisateur et provoquer les dommages � l'appareil. Utilisez uniquement des pi�ces et accessoires originaux. � Cet appareil n�est pas apte � �tre utilis� par des personnes (enfants compris) avec capacit�s physiques, sensorielles ou intellectuelles diminu�es ou ne poss�dant pas l�exp�rience et les connaissances suffisantes. � Ne laissez jamais les enfants utiliser l'appareil. � L'appareil et le c�ble d'alimentation doivent �tre stock�s hors de la port�e des enfants. � Ne permettez pas aux enfants d'utiliser l'appareil pour jouer � D�branchez toujours l'appareil de l'alimentation s'il doit �tre laiss� sans surveillance et �galement avant le montage, le d�montage et le nettoyage. � Ne laissez jamais l'appareil sans surveillance lorsqu'il est utilis�.

Consignes particuli�res de s�curit�

� ATTENTION! D�branchez avant de nettoyer, d'entretenir ou de r�parer!

FR

� ATTENTION! Manipulation � deux personnes requises!

� ATTENTION! Lire le manuel d'instructions avant toute utilisation, nettoyage ou entretien!
� ATTENTION! Ne mettez pas vos mains dans l'ouverture o� sortent les l�gumes pendant le fonctionnement. D�branchez la prise de courant avant que vous rentrez vos mains dans l'ouverture.
� L'appareil ne convient pas pour trancher des aliments congel�s, la viande avec des os, des poissions etc.
� Utilisez l'appareil uniquement conform�ment au pr�sent mode d'emploi. � L'appareil doit �tre utilis� uniquement par du personnel qualifi� de cuisine du restaurant,
des cantines ou du bar etc. � Ne placez pas l'appareil sur un objet �mettant de la chaleur (la cuisini�re � gaz,
�lectrique ou les barbecues etc.) Tenez l'appareil �loign� des surfaces chaudes ou des flammes nues. Placez l'appareil sur une surface stable, propre et s�che, r�sistant � des temp�ratures �lev�es. � N'utilisez pas l'appareil � proximit� de mat�riaux explosifs ou inflammables, de cartes de cr�dits, de disques magn�tiques ou de radios. � L'appareil n'est pas con�u pour �tre utilis� avec la minuterie externe ou un syst�me de t�l�commande s�par�.

31

� Ne modifiez jamais les verrous de s�curit�. � AVERTISSEMENT : N'obstruez pas les orifices de ventilation. � AVERTISSEMENT : Rappelez-vous TOUJOURS d'�teindre et de d�brancher l'appareil de
la source d'alimentation avant de nettoyer, d'entretenir ou de remplacer les accessoires. � AVERTISSEMENT ! Rappelez-vous TOUJOURS de ne pas porter de v�tements amples
et de ne pas toucher les parties mobiles avec vos mains nues et d'attacher vos cheveux. � Assurez un espace d'au moins 15 cm autour de l'appareil, pour garantir une ventilation
ad�quate pendant l'utilisation. � ATTENTION ! Faites passer et prot�ger correctement le cordon d'alimentation pour �vi-
ter toute traction accidentelle et tout contact avec la surface chauff�e. � Ne nettoyez pas l'appareil avec de l'eau ou avec un fort courant d'eau. Le lavage de
l'appareil avec de l'eau peut provoquer la p�n�tration de l'eau dans des parties �lectriques et provoquer le choc �lectrique. Les parties de l'appareil ne peuvent pas �tre lav�es dans le lave-vaisselle � Ne nettoyez pas l'appareil ou ne le rangez pas avant le refroidissement complet. � Ne transportez pas l'appareil pendant le fonctionnement. Avant de d�placer l'appareil assurez-vous toujours de le d�brancher de la prise �lectrique et tenez-le de dessous. � N'allumez pas l'appareil avant de mettre les aliments pour �viter toute surchauffe du moteur. � AVERTISSEMENT ! Faites une attention particuli�re lorsque vous touchez les disques � trancher. Si n�cessaire, portez des gants de protection (non fournis).
FR

Destination de l'appareil

� Cet appareil est destin� � un usage professionnel.

quates. L'utilisation de l'appareil � d'autres fins

Ne peut qu'�tre utilis� par du personnel qualifi�. � L'appareil est con�u pour l'utilisation commer-

peut entra�ner des dommages ou des blessures. � L'utilisation de l'appareil � d'autres fins sera

ciale et sert � couper, � trancher, � r�per des l�gumes frais (p.ex. carottes, pommes de terre,

consid�r�e comme une utilisation inappropri�e. L'utilisateur sera seul responsable de l'utilisation

choux, etc.) au moyen des disques de coupe ad�-

incorrecte de l'appareil.

Mise � la terre La cuisini�re est un appareil de la I�re classe de protection et doit �tre obligatoirement mis � la terre. La mise � la terre r�duit le risque de choc �lectrique gr�ce � un conduit �vacuant le courant

�lectrique. L'appareil est �quip� d'un conduit avec la mise � la terre et la prise de terre. N'ins�rez pas la fiche � la prise murale si l'appareil n'a pas �t� correctement install� et mis � la terre.

Avant la premi�re utilisation � Retirez et �liminez l'emballage et toutes les pro-
tections. � V�rifiez l'appareil et les accessoires en ce qui
concerne l'int�gralit� et les dommages �ventuels de l'appareil pendant le transport. En cas de livraison incompl�te (par exemple les disques �

trancher manquants) ou de dommages, contactez votre fournisseur. N'utilisez pas l'appareil (voir ==> Garantie). � Nettoyez l'appareil (voir == > Nettoyage et entretien). � V�rifiez que l'appareil est compl�tement sec.

32

Installation � Lisez attentivement le mode d'emploi avant
d'installer et de faire fonctionner l'appareil. � Assurez-vous que l'appareil a �t� plac� sur une
surface s�che et suffisamment r�sistante. Assurez-vous que l'acc�s � l'appareil pendant son fonctionnement est garanti.

� Assurez-vous que la sp�cification de l'appareil sur la plaque signal�tique correspond � la prise �lectrique � laquelle vous vous connectez.
� ATTENTION ! Ne connectez jamais les micro-interrupteurs de s�curit�.

Fonctionnement AVERTISSEMENT : L'appareil est �quip� d'un syst�me de s�curit� gr�ce auquel le coupe-l�gume ne commence pas � fonctionner jusqu'� ce que le levier ne soit pas abaiss� et le bo�tier ne soit pas bloqu�.

� Appuyez sur vert pour mise en marche et appuyez le rouge pour d�brancher.
� Levez la manivelle et mettez vos l�gumes dans l'orifice. Puis tirez le levier pour appuyer fermement sur les l�gumes.
� Appuyez avec votre main droite sur les boutons OFF (ROUGE) et ON (VERT) avec votre main gauche abaissez le levier pour trancher les l�gumes.

� Pour installer ou remplacer les disques tran-

chants, assurez-vous que le commutateur d'ali-

FR

mentation est d�branch� et retirez la fiche de la

prise.

� Attention: LES COUTEAUX SONT AIGUES!

� Pour installer ou remplacer le disque tranchant tournez le bouton � gauche et ensuite levez le couvercle.
� Mettez toujours d'abord un disque en mati�re nylon et ensuite le disque tranchant de votre choix.

� Pour enlever le disque, tournez-la en direction contre l'horloge et levez-la.
� Le disque tranchant mise, fermez l'appareil et tournez le bouton en direction de l'horloge. Mettez l'appareil en marche (bouton verte) pour verrouiller les couteaux automatiquement en position.
33

� Fourni avec des disques diverses pour les modes de tranchement ou �mincement et en plus un disque en nylon qu'il faut poser toujours sous le disque tranchant pour d�charger les l�gumes coup�es. - 2 mm couteau pour disques - 4 mm couteau pour disques

- 3 mm r�pe - 4,5 mm r�pe - 7,5 mm r�pe - Le disque en plastique nylon devrait toujours
�tre mis en premier, sous le couteau, afin de pousser les l�gumes dehors de la machine.

Attention � AVERTISSEMENT ! Ne poussez pas la nourriture
avec vos mains. Utilisez toujours le poussoir. � Ne mettez jamais des l�gumes quand elles sont
encore congel�es.

� Ne jamais utiliser d'objets en bois/m�tal ou en plastique, sauf le disque en poly�thyl�ne qui appuie sur les l�gumes.

Nettoyage et entretien Attention : Avant le nettoyage et l'entretien de l'appareil, d�branchez l'appareil de la source d'alimentation en retirant la fiche de la prise �lectrique et attendez jusqu'� ce que l'appareil refroidisse compl�tement.

Nettoyage � Nettoyez toujours l'appareil apr�s chaque utili-
sation. � N'immergez jamais l'appareil dans l'eau ou
d'autres liquides. � Apr�s le refroidissement de la surface externe, FR nettoyez-la avec un chiffon humide ou une
�ponge, avec une petite quantit� d'une solution de d�tergent doux.

� N'utilisez jamais pour le nettoyage des parties internes et externes des �ponges abrasives ou des d�tergents abrasives ou des �ponges en laine d'acier ou des instruments m�talliques.

Stockage � Avant de la mise de l'appareil en stock, assu-
rez-vous toujours que l'appareil a �t� d�branch� de la prise �lectrique et a compl�tement refroidi. � Tenez l'appareil dans un endroit frais, propre et sec.

� En raison d'une utilisation prolong�e, les lames des disques � trancher peuvent s'�mousser. V�rifiez r�guli�rement les lames des disques � trancher et contactez votre fournisseur pour effectuer l'entretien.

R�solution des probl�mes Si l'appareil ne fonctionne pas correctement, reportez-vous au tableau ci-dessous pour y trouver une solution. Si vous n'arrivez toujours pas � r�soudre le probl�me, contactez votre distributeur/fournisseur.

Panne L'appareil ne fait rien

Cause possible Pas de courant sur la prise. Fiche pas nettement dans la prise. Le levier ou le couvercle ne sont pas proprement ferm�s. Le syst�me de s�curit� pr�vient l'usage. Surfchauffe du moteur.

Solution propos�e Contr�lez les fusibles. Contr�lez la fiche. Contr�lez si le levier et le couvercle sont bien ferm�s. Refroidir l'appareil pendant 3/4 heurs.

34

Caract�ristiques techniques Num�ro de produit: 231807 Tension et fr�quence: 230-240V~ /50Hz Consommation �lectrique: 550W

Classe de protection: Classe I Classe de r�sistance � l'eau: IP23 Poids net: environ 27,5 kg

Remarque : Les caract�ristiques techniques peuvent �tre modifi�es sans pr�avis.

Sch�ma �lectrique
AC230V~ Entr�e

230V

1/ 3/ 5/ 13 NO NC NC NO
2/ 4/ 6 14 NO NC NC NO

A1 Contacteur
A2

Lampe

Bouton de marche (vert) Bouton d'arr�t (Rouge)

Interrupteur sensoriel Capteur
magn�tique

Bouton de marche
Interrupteur sensoriel
Capteur magn�tique

T1

A2 A1

NC2

NC1

LN

D2

T2

Voyant

Bouton d'arr�t

D1

FU

T3

C2 T4
C3

Moteur

Noir Rouge Blanc Blanc Blue Blue

Protection contre

FR

la surchauffe

Condensateur

35

Garantie Tout vice ou toute d�faillance entra�nant un dysfonctionnement de l'appareil qui se d�clare dans les 12 mois suivant la date de l'achat sera �limin� � titre gratuit ou l'appareil sera remplac� par un appareil nouveau si le premier a �t� d�ment exploit� et entretenu conform�ment aux termes de la notice d'exploitation et s'il n`a pas �t� ind�ment exploit� ou de mani�re non conforme � sa destination. La pr�sente stipulation ne porte pas de pr�judice aux autres droits de l'utilisateurs pr�vus par les dispositions l�gales. Dans le cas o� l'appareil est donn� � la r�paration ou doit �tre remplac�

dans le cadre de la garantie, il y a lieu de sp�cifier le lieu et la date de l'achat de l'appareil et produire un justificatif n�cessaire (par ex. facture ou ticket de caisse).
Conform�ment � notre politique d'am�lioration permanente de nos produits, nous nous r�servons le droit d'introduire sans avertissement pr�alable des modifications � l'appareil, � l'emballage et aux caract�ristiques techniques pr�cis�es dans la documentation.

�limination et protection de l'environnement En cas de retrait du produit de l'exploitation l'appareil ne peut pas �tre jet� avec d'autres d�chets m�nagers. L'utilisateur est responsable de la remise de l'�quipement au point de collecte appropri� pour l'�quipement usag�. Le non-respect des dispositions ci-dessus peut entra�ner les p�nalit�s conform�ment � la r�glementation applicable en mati�re d'�limination des d�chets. La collecte s�lective et le recyclage des �quipements usag�s contribuent � la FR

conservation des ressources naturelles et assurent un recyclage sans danger pour la sant� et l'environnement. Pour plus d'informations sur les endroits de collecte des �quipements usag�s pour le recyclage, contactez la soci�t� de collecte des d�chets locale. Le producteur et l'importateur ne sont pas responsables du recyclage et du traitement des d�chets d'une mani�re respectueuse de l'environnement directement et dans le syst�me public.

36

Gentile cliente,

grazie per aver acquistato questo apparecchio Hendi. Ti invitiamo a leggere queste istruzioni per l'uso con attenzione prima di collegare l'apparecchio al fine di evitare danni dovuti a uso improprio. Ti invitiamo inoltre a prestare particolare attenzione alle precauzioni di sicurezza.

Precauzioni di sicurezza

� L'uso scorretto e improprio dell'apparecchio possono danneggiare seriamente l'apparec-

chio e ferire gli utenti.

� Questo apparecchio non � destinato all'uso domestico.

� L'apparecchio pu� essere utilizzato solo per lo scopo per cui � stato concepito e proget-

tato. Il produttore non � responsabile di eventuali danni provocati da uso scorretto ed

improprio.

� Tenere l'apparecchio e la spina elettrica lontani da acqua ed altri liquidi. Nel caso impro-

babile che l'apparecchio cada in acqua, staccare immediatamente la spina dalla presa

e fare ispezionare l'apparecchio da un tecnico certificato. . L'inosservanza delle presenti

istruzioni pu� dare luogo a situazioni pericolose

� Non provare mai ad aprire l'involucro dell'apparecchio da soli.

� Non inserire oggetti nell'involucro dell'apparecchio.

� Non toccare la presa con le mani bagnate o umide.

� Pericoli di scosse elettriche! Non tentare de riparare l'apparecchio da solo. Even-

tuali difetti e malfunzionamenti devono essere rimossi soli da personale qualificato.

IT

� Non usare l'apparecchio danneggiato! L'apparecchio difettoso deve essere immediata-

mente scollegato dalla rete e contattare il rivenditore.

� Attenzione: Non immergere parti elettriche in acqua o altri liquidi. Non mettere l'appa-

recchio sotto l'acqua corrente.

� Controllare regolarmente se la spina e il cavo di alimentazione non sono danneggiati. La

spina o il cavo danneggiati trasmettere al servizio o alla persona qualificare per riparare,

per evitare eventuali pericoli e lesioni.

� Assicurarsi che il cavo di alimentazione non � in contatto con oggetti appuntiti o caldi. Te-

nere il cavo lontano da fiamme libere. Per scollegare la spina dalla presa, tirare sempre

la spina, mai il cavo.

� Proteggere il cavo di alimentazione (o di estensione) per la sconnessione accidentale

dalla presa. Disporre il cavo in modo per evitare lo slittamento accidentale.

� Sorvegliare l'apparecchio continuamente durante l'uso.

� Attenzione! Se la spina � inserita nella presa, l'apparecchio � considerato come colle-

gato.

� Prima di rimuovere la spina dalla presa, spegnere l'apparecchio!

� Non trasportare l'apparecchio tenendo il cavo di alimentazione.

� Non utilizzare qualsiasi accessorio che non � stato fornito con l'apparecchio.

� L'apparecchio deve essere collegato ad una presa con tensione e frequenza indicate sulla

targhetta.

37

� Inserire la spina nella presa situata in un punto facilmente accessibile in modo che in caso di guasto sia possibile scollegare immediatamente l'apparecchio. Per spegnere completamente l'apparecchio, scollegarlo dalla presa di corrente. Per questo staccare la spina che si trova sull'estremit� del cavo di alimentazione.
� Prima di scollegare la spina, ricordarsi sempre di spegnere l'apparecchio! � Non usare gli accessori non raccomandati dal produttore. L'uso di accessori non racco-
mandati pu� creare i rischi per l'utente e provocare i danni all'apparecchio. Usare unicamente solo pezzi ed accessori originali. � L'installazione elettrica deve soddisfare le normative nazionali e locali applicabili. Questo apparecchio non � destinato all'uso da parte di persone (inclusi i bambini) con capacit� fisiche, sensoriali o mentali ridotte, o senza esperienza e conoscenza. � Non permettere ai bambini di utilizzare l'apparecchio. � Tenere l'apparecchio con il cavo fuori dalla portata dei bambini. � Non permettere ai bambini di giocare con l'apparecchio. � Scollegare l'apparecchio dalla rete se esso deve essere lasciato incustodito e prima del montaggio, dello smontaggio o della pulizia. � Non lasciare l'apparecchio incustodito durante l'utilizzazione.

Regole di sicurezza speciali

IT � �

ATTENZIONE! Scollegare prima di pulire, di effettuare manutenzione o riparazione! ATTENZIONE! Necessaria la movimentazione con due persone!

� ATTENZIONE! Leggere il manuale di istruzioni prima di mettere in funzionamento, della pulizia o della manutenzione!
� ATTENZIONE! Non mettere le mani nell'apertura di uscita durante il funzionamento. Scollegare la spina di alimentazione prima di inserirle.
� L'apparecchio non � adatto per tagliare cibo congelato, carne con ossa, pesci ecc. � Utilizzare l'apparecchio solo in base alle presenti istruzioni. � L'apparecchio deve essere utilizzato solo da personale qualificato da ristorante, da mensa
o bar ecc. � Non posizionare l'apparecchio sull'oggetto che emette calore (cucina a gas, elettrica,
grill ecc.). Tenere l'apparecchio lontano da superfici calde o fiamme libere. Posizionare l'apparecchio su una superficie stabile, pulita e asciutta, resistente alle alte temperature. � Non utilizzare l'apparecchio vicino a materiali esplosivi o infiammabili, carte di credito, dischi magnetici o radio. � L'apparecchio non � progettato per l'uso con un timer esterno o un sistema di controllo separato. � Non modificare mai serrature di sicurezza. � AVVERTIMENTO: Non coprire le aperture di ventilazione.

38

� AVVERTIMENTO: Prima della pulizia o prima di mettere l'apparecchio in deposito di sostituire le parti, scollegare SEMPRE l'apparecchio dalla presa di corrente e lasciare raffreddare.
� AVVERTIMENTO! Ricordare SEMPRE di non indossare abiti larghi e non toccare le parti in movimento con le mani e legare i capelli.
� Fornire almeno 15 cm di distanza attorno all'apparecchio per assicurare un'adeguata ventilazione.
� Attenzione! Far passare e proteggere il cavo di alimentazione per evitare di strappare o toccare accidentalmente la superficie riscaldata.
� Non lavare l'apparecchio con acqua o un forte getto di acqua. La pulizia dell'apparecchio con l'acqua pu� causare la penetrazione nei componenti elettrici e causare una scossa elettrica. Le parti dell'apparecchio non possono essere lavate in lavastoviglie.
� Non pulire l'apparecchio o stoccarlo in deposito prima di raffreddamento completo. � Non spostare l'apparecchio durante il funzionamento. Prima di spostare l'apparecchio si
deve sempre scollegarlo dalla presa elettrica e tenerlo da sotto. � Non accendere l'apparecchio prima di mettere il cibo per evitare il surriscaldamento del
motore. � AVVERTIMENTO! Prestare particolare attenzione toccando i dischi da taglio. Se necessa-
rio, indossare i guanti protettivi (non inclusi).

Destination de l'appareil � Questo apparecchio � destinato all'uso profes-

tion de l'appareil � d'autres fins peut entra�ner IT

sionale e pu� essere utilizzato solo da personale

des dommages ou des blessures.

qualificato.

� L'utilisation de l'appareil � d'autres fins sera

� Il dispositivo � destinato all'uso commerciale e

consid�r�e comme une utilisation inappropri�e.

serve a tagliare, trinciare e grattugiare verdure

L'utilisateur sera seul responsable de l'utilisation

fresche (ad esempio carote, patate, cavoli, ecc.)

incorrecte de l'appareil.

utilizzando dischi da taglio appropriati. L'utilisa-

Messa a terra Il fornello � l'apparecchio della I classe di protezione e deve esser messa a terra. La messa a terra riduce il rischio di scosse elettriche grazie al cavo evacuante il corrente elettrico. L'apparecchio � do-

tato di un cavo con una messa a terra. Non inserire la spina nella presa di corrente se l'apparecchio non � stato correttamente installato o messo a terra.

Prima del primo utilizzo � Rimuovere e eliminare l'imballaggio e le prote-
zioni. � Controllare l'apparecchio e gli accessori per la
completezza e eventuali danni durante il trasporto. In caso di consegna incompleta o di danni contattare il fornitore (ad esempio se i dischi da taglio mancano). In caso di consegna incompleta o danni NON utilizzare l'apparecchio (vedere == > Garanzia).

� Pulire l'apparecchio (Vedere==> Pulizia e manutenzione).
� Verificare che il prodotto � completamente asciutto.

39

Installazione � Leggere attentamente le istruzioni prima di in-
stallare o utilizzare l'apparecchio. � Assicurarsi che l'apparecchio sia posizionato su
una superficie asciutta e di adeguata resistenza. Assicurarsi inoltre di avere un accesso adeguato all'apparecchio durante il suo funzionamento.

� Assicurarsi che le specifiche del dispositivo sulla targhetta corrispondano alla presa elettrica a cui si sta effettuando la connessione.
� Attenzione! Non scollegare mai i microinterruttori di sicurezza.

Funzionamento AVVERTIMENTO: L'apparecchio � dotato di un sistema di sicurezza per impedire l'avvio della tagliaverdura fino a che la leva non sia abbassata e l'involucro non sia chiuso.

� Premere il pulsante verde per accendere l'apparecchio e il pulsante rosso per spegnerlo.
� Sollevare la leva e inserire le verdure nell'apertura d'ingresso. Quindi abbassare la leva per spingere con decisione le verdure.
� Premere con la mano destra i pulsanti ON (VERDE) e OFF (ROSSO) e con la mano sinistra abbassare la leva per tagliare le verdure.

� Per montare o sostituire le lame, accertarsi che il

IT

tasto di accensione sia disattivato e disinserire la

spina dalla presa.

� Prestare attenzione: I COLTELLI SONO AFFILA-

TI!

� Per montare o sostituire le lame aprire l'apparecchio ruotando la manopola in senso antiorario e aprire l'alloggiamento.
� Montare sempre il disco di nylon prima di inserire le lame di propria scelta.

40

� Per rimuovere una lama ruotarla in senso antiorario quindi sollevarla.
� Chiudere l'apparecchio e ruotare la manopola rotonda in senso orario per bloccare l'alloggiamento. Premere il tasto on per posizionare automaticamente la lama nella posizione corretta.
� Contiene coltelli diversi per risultati di taglio differenti e 1 disco in nylon. - Disco per fette di 2 mm - Disco per fette di 4 mm - grattugia da 3 mm - grattugia da 4,5 mm - grattugia da 7 mm - Il disco in nylon dev'essere sempre collocato al di sotto di un coltello per spingere le verdure fuori dalla macchina.

Importante � AVVERTIMENTO! Non spingere mai il cibo con le
mani. Utilizzare sempre il caricatore. � Non utilizzare verdure congelate

� Non utilizzare oggetti in legno/metallo o plastica salvo il filtro in polietilene che spinge le verdure.

Pulizia e manutenzione

Attenzione: Prima della pulizia o prima di mettere l'apparecchio in deposito, scollegare sempre l'apparec-

chio dalla presa di corrente e lasciare raffreddare il fornello.

IT

Pulizia � Pulire l'apparecchio dopo ogni l'uso. � Non immergere l'apparecchio in acqua o altri li-
quidi. � Dopo il raffreddamento della superficie esterna, pu-
lirla con un panno umido o una spugna umida con una piccola quantit� di un detergente per pulizia. Stoccaggio � Prima di mettere l'apparecchio in deposito assicurarsi che � stato scollegato dalla presa di corrente e che � raffreddato completamente. � Conservare l'apparecchio in un luogo fresco, pulito e asciutto.

� Non usare mai per la pulizia dell'interno o dell'esterno dell'apparecchio spugne abrasive o detergenti abrasivi o spugne di lana d'acciaio o strumenti metallici.
� Dopo l'uso prolungato le lame dei dischi da taglio possono diventare smussati. Controllare regolarmente le lame dei dischi da taglio e contattare il fornitore per effettuare la loro manutenzione.

41

Risoluzione dei problemi Se l'apparecchio non funziona correttamente, leggere la tabella qui sotto per trovare la soluzione corretta. Se non � possibile risolvere il problema, contattare il rivenditore.

Problema L'apparecchio non funziona

Causa possibile
La presa elettrica non � alimentata
La spina non � inserita (correttamente) nella presa elettrica.
La leva o l'allloggiamento non sono chiusi correttamente. Il meccanismo di sicurezza fa s� che l'apparecchio non funzioni
Motore surriscaldato

Soluzione possibile Controllare il fusibile Controllare la spina
Controllare che sia la leva sia l'alloggiamento siano chiusi correttamente.
Lasciare raffreddare l'apparecchio per 3/4 ore

Specifiche tecniche Numero del prodotto: 231807 Tensione e frequenza: 230-240V~ /50Hz Consumo di energia: 550W

Classe di protezione: Classe I Classe di resistenza all'acqua: IP23 Peso netto: 27,5 kg circa

Nota: Le specifiche tecniche sono soggette a modifiche senza preavviso.

Schema elettrico

AC230V~ Ingresso
IT
230V

1/ 3/ 5/ 13 NO NC NC NO
2/ 4/ 6 14 NO NC NC NO

Light

Pulsante di accensione (verde)
Pulsante di spegnimento (Rosso)

A1 Contattore
A2

Commutatore sensoriale Sensore magnetico

Pulsante di accensione Commutatore sensoriale

A2 A1

T1

D2

Sensore magnetico
Spia luminosa

T2

Pulsante di spegnimento

NC2

NC1

LN

T3

D1

FU

C2 T4
C3

Motore

Nero Rosso Bianco Bianco Blu Blu

Condensatore

Protezione contro il surriscaldamento

42

Garanzia Qualsiasi difetto che influenza la funzionalit� del dispositivo che compaia entro un anno dall'acquisto sar� corretto a titolo interamente gratuito o con la sostituzione del prodotto che � stato utilizzato e sottoposto a manutenzione corretta seguendo le istruzioni, senza alcuna violazione. I diritti legali del cliente non sono assolutamente modificati. Nel caso in cui l'intervento di manutenzione o sostitu-

zione sia previsto nel periodo di validit� della garanzia, precisare dove e quando si � acquistato il prodotto, possibilmente allegando lo scontrino.
In linea con la nostra politica di sviluppo continuo dei prodotti, ci riserviamo il diritto di modificare il prodotto, l'imballo e le specifiche di documentazione, senza notifica alcuna.

Smaltimento e protezione dell'ambiente In caso di ritiro dell'apparecchiatura dal funzionamento il prodotto non pu� essere smaltito con altri rifiuti domestici. L'utente � responsabile della consegna dell'attrezzatura al punto di raccolta appropriato per l'attrezzatura usata. Il mancato rispetto delle disposizioni sopramenzionate pu� comportare l'imposizione di sanzioni in conformit� con le normative vigenti in materia di smaltimento dei rifiuti. La raccolta e il riciclaggio selettivi di attrezzature usate contribuiscono alla conserva-

zione delle risorse naturali e garantiscono il riciclaggio in modo tale da non nuocere alla salute e all'ambiente. Per ulteriori informazioni sui luoghi di smaltimento delle apparecchiature usate per il riciclaggio, contattare la societ� locale di raccolta dei rifiuti. Il produttore e l'importatore non sono responsabili per il riciclaggio e il trattamento dei rifiuti in modo ecologico, sia direttamente che nel quadro del sistema pubblico.

IT

43

Stimate client,
V mulumim pentru achiziionarea acestui aparat Hendi. V rugm s citii cu atenia acest manual �nainte de a conecta aparatul pentru evitarea defectrii ca urmare a utilizrii incorecte. Acordai o atenie deosebit regulilor de siguran.
Reguli de siguran � Operarea incorect i utilizarea necorespunztoare a aparatului poate avaria grav apara-
tul i poate cauza rni oamenilor. � Acest aparat nu este destinat uzului casnic. � Aparatul poate fi folosit doar �n scopul pentru care a fost proiectat. Productorul nu este
rspunztor pentru orice avariere cauzat operrii incorecte i a utilizrii necorespunztoare. � Asigurai-v c aparatul i techerul nu intr �n contact cu ap sau alte lichide. �n cazul �n care aparatul este scpat �n ap, scoatei imediat techerul din priz i un tehnician autorizat trebuie s-l verifice. Dac nu respectai aceste instruciuni, acest lucru poate cauza situaii care v pot pune viaa �n pericol. � Nu incercati sa deschideti singuri carcasa aparatului. � Nu introducei nici un fel de obiecte �n carcasa aparatului. � Nu atingei techerul cu m�inile ude sau umede. � Pericol de electrocutare! Nu �ncercai s reparai singur/ aparatul. �n cazul unei RO defeciuni, reparaiile vor fi efectuate �ntotdeauna numai de personal calificat. � Nu utilizai niciodat un aparat defect! Deconectai aparatul de la priza electric i contactai distribuitorul �n cazul unei defeciuni. � Avertisment! Nu scufundai prile electrice ale aparatului �n ap sau �n alte lichide. Nu inei niciodat aparatul sub jet de ap. � Verificai �n mod regulat tecrul i cablul pentru a v asigura c nu sunt deteriorate. �n cazul �n care tecrul sau cablul de alimentare este deteriorat, acesta trebuie �nlocuit de agentul de service sau de alt personal calificat similar pentru a evita orice pericol � Cablul nu trebuie s intre �n contact cu obiecte ascuite sau fierbini i trebuie pstrat departe de foc. Pentru a scoate tecrul din priz, tragei �ntotdeauna de tecr, nu de cablu. � Asigurai-v c nimeni nu poate trage din greeal cablul (sau prelungitorul) i c nimeni nu se poate �mpiedica de el. � Supravegheai �ntotdeauna aparatul atunci c�nd este �n funciune. � Avertisment! At�t timp c�t tecrul este �n priz, aparatul este conectat la sursa de electricitate. � Oprii aparatul �nainte de a scoate tecrul din priz. � Nu crai niciodat aparatul in�ndu-l de cablu. � Nu utilizai dispozitive suplimentare care nu sunt livrate �mpreun cu aparatul. � Conectai aparatul doar la prize electrice cu intensitatea i frecvena electrice menionate pe eticheta aparatului.
44

� Conectai cablul de alimentare la o priz electric uor accesibil, astfel �nc�t aparatul s poat fi deconectat imediat �n caz de urgen. Scoatei cablul de alimentare din priza electric pentru a opri complet aparatul. Utilizai cablul de alimentare ca dispozitiv de deconectare.
� Oprii �ntotdeauna aparatul �nainte de a deconecta cablul de alimentare. � Nu utilizai niciodat accesorii care nu sunt recomandate de ctre productor. Acestea
pot reprezenta un risc de siguran pentru utilizator i pot deteriora aparatul. Utilizai numai piese i accesorii originale. � Acest aparat nu trebuie folosit de copii sau persoane care au capaciti mentale, senzoriale sau fizice reduse, sau lips de experien i cunotine. � Acest aparat nu trebuie utilizat sub nicio form de ctre copii. � Nu inei produsul i cablurile sale la �ndem�na copiilor. � Copiii nu trebuie s se joace cu acest produs. � Deconectai �ntotdeauna aparatul de la sursa de alimentare �n cazul �n care este lsat nesupravegheat, precum i �nainte de asamblare, dezasamblare sau curare. � Nu lsai niciodat aparatul nesupravegheat pe parcursul utilizrii. Reguli speciale de siguran

� ATENIE! Deconectai cablul �nainte de curare, �ntreinere sau reparare!

� ATENIE! Este necesar manevrarea cu dou persoane!

RO

� ATENIE! Citii manualul de utilizare �nainte de operare, curare sau �ntreinere! � AVERTISMENT! Nu punei m�inile �n orificiul de evacuare �n timpul funcionrii!
Deconectai sursa de alimentare �nainte de a ajunge �nuntru! � Aparatul nu trebuie utilizat la tierea alimentelor congelate sau a crnii ori petelui cu
oase etc. � Utilizai aparatul doar �n conformitate cu indicaiile din acest manual. � Acest aparat trebuie utilizat de ctre personalul instruit de la buctria restaurantelor,
cantinelor sau barurilor etc. � Nu punei aparatul pe un obiect de �nclzire (aparat de gtit cu benzin, electric, crbune
etc.) Meninei aparatul la distan de orice suprafee fierbini i de flcri deschise. Utilizai �ntotdeauna aparatul pe o suprafa orizontal, stabil, curat, termorezistent i uscat. � Nu utilizai aparatul �n apropierea materialelor explozibile sau inflamabile, cardurilor de credit, discurilor magnetice sau radiourilor. � Acest aparat nu este construit spre a fi utilizat cu ajutorul unui cronometru extern sau al unui sistem de control separat. � Nu scoatei niciodat din circuit comutatoarele de siguran ale aparatului. � AVERTISMENT: Nu obstrucionai orificiile de ventilaie ale aparatului.

45

� AVERTISMENT: Oprii �NTOTDEAUNA aparatul i deconectai-l de la sursa de alimentare electric �nainte de a efectua operaiuni de curare, �ntreinere sau depozitare.
� AVERTISMENT! Meninei �NTOTDEAUNA degetele, prul lung i hainele la deprtare de piesele �n micare.
� �n timpul utilizrii, lsai cel puin 15 cm �n jurul aparatului ca spaiu de ventilaie. � Atenie! Aezai corespunztor cablul de alimentare, dac este cazul, pentru a �mpiedica
tragerea neintenionat sau contactul cu suprafaa de �nclzire. � Nu splai aparatul cu ap sau sub jet de ap. Splarea cu ap poate produce scurgeri i
crete riscul de electrocutare. Componentele nu pot fi curate �n maina de splat vase. � Nu curai i nu depozitai aparatul dec�t dup ce s-a rcit complet. � Nu mutai aparatul �n timp ce acesta funcioneaz. Scoatei aparatul din priz atunci
c�nd �l deplasai i inei-l de partea din fund. � Nu folosii aparatul fr ingrediente �n el pentru a evita supra�nclzirea. � AVERTISMENT! Trebuie mult atenie la manipularea discurilor tietoare. Dac este ne-
cesar, purtai mnui de protecie (nu sunt furnizate).

Destinaia produsului � Acest aparat este destinat uzului profesional i
poate fi utilizat numai de personal calificat. � Acest aparat este destinat exclusiv tierii i rzui-
rii zarzavaturilor proaspete (de exemplu morcovi, RO cartofi, varz etc.) cu ajutorul unor discuri tie-
toare adecvate, �n scopuri comerciale. Orice alt

utilizare poate provoca avarierea aparatului sau accidentarea persoanelor. � Utilizarea aparatului �n orice alt scop reprezint o utilizare incorect. Utilizatorul este singurul rspunztor de orice utilizare incorect a aparatului.

Instalaia de �mpm�ntare Acest aparat este �ncadrat �n clasa de protecie I i trebuie �mpm�ntat. �mpm�ntarea reduce riscul electrocutrii prin asigurarea unui fir de ieire pentru curentul electric. Acest aparat este dotat cu

un cablu cu fir de �mpm�ntare cu fi. Fia trebuie conectat la o priz instalat corespunztor i �mpm�ntat.

Pregtirea �nainte de prima utilizare � Desfacei ambalajul i �nvelitoarea de protecie. � Verificai dac aparatul este complet i dac nu
a suferit avarii �n timpul transportului. �n cazul �n care produsul livrat nu este complet (de exemplu, lipsesc discurile tietoare etc.) sau dac exist

avarii, luai imediat legtura cu furnizorul. NU utilizai aparatul. (Vezi == > Garanie). � Curai aparatul �nainte de utilizare (Vezi == > Curarea i �ntreinerea). � Asigurai-v c aparatul este complet uscat.

Instalarea � Citii acest manual cu atenie i rigurozitate �na-
inte de instalare i punere �n funciune. � Asigurai-v c aparatul este amplasat �ntr-o
zon uscat i c suprafaa este suficient de rezistent pentru a susine aparatul. Mai verificai ca �n jur s nu existe obstacole �n timpul funcionrii aparatului.

� Asigurai-v c sursa de alimentare cu electricitate corespunde etichetei de pe aparat.
� ATENIE! Nu untai niciodat micro-comutatorul.

46

Modul de utilizare Atenie: Aparatul are un sistem de siguran care s nu �l lase s funcioneze c�t timp maneta i carcasa nu sunt lsate �n jos i blocate. � Apsai butonul verde pentru a porni aparatul i
butonul rou pentru a-l �nchide. � Ridicai m�nerul i introducei legumele. Apoi
trageti in jos parghia apasand ferm pe legume. � Utilizai aparatul cu m�na dreapt i apsai
butoanele de pornire (VERDE) i cel de oprire (ROU) i folosii m�na st�ng pentru a apsa maneta �n jos permi�nd tierea zarzavaturilor.
� Pentru a aeza sau a �nlocui lamele, asigurai-v c butonul pentru pornire este dezactivat i scoatei techerul din priz.
� Atenie: LAMELE SUNT ASCUITE !

� Pentru a aeza sau �nlocui lamele, deschidei aparatul rotind m�nerul �n sensul invers acelor de ceasornic i deschidei carcasa.
� Aezai mai �nt�i discul de nailon �nainte de a aeza lama dorit.
� Pentru a �ndeprta o lam, rotii-o �n sens invers acelor de ceasornic i apoi ridicai-o.
� �nchidei aparatul i rotii discul rotund �n sensul acelor de ceasornic pentru a �nchide carcasa. Apsai butonul pentru pornire pentru a seta �n mod automat poziia corect a lamei.
� Conine 5 cuite diferite pentru diferite tipuri de tiere i un disc de nailon. - disc pentru feliere de 2 mm - disc pentru feliere de 4 mm - rztoare de 3 mm - rztoare de 4,5 mm - rztoare de 7 mm - Acesta trebuie �ntotdeauna aezat sub o lam pentru a �mpinge legumele afar din aparat.

RO 47

Important � AVERTISMENT! Nu apsai niciodat alimentele
cu m�na. Folosii �ntotdeauna �mpingtorul livrat. � Nu utilizai legume congelate

� Nu folositi obiecte din lemn/metal sau plastic inafara de discul de plastic (din polietilena) pentru presarea legumelor.

Curarea i �ntreinerea Atenie: Scoatei �ntotdeauna aparatul din priz i lsai-l s se rceasc complet �nainte de curare i depozitare.

Curare � Curai aparatul dup fiecare utilizare. � Nu scufundai niciodat aparatul �n ap sau �n
alte lichide. � Curai suprafaa exterioar rcit cu o c�rp
uor umezit sau un burete cu o soluie delicat de spun.

� Nu folosii niciodat burei sau detergeni abrazivi, burei de s�rm sau ustensile metalice pentru a cura prile interioare sau exterioare ale aparatului.

Depozitarea � Asigurai-v �ntotdeauna �nainte de depozitare c
aparatul a fost deconectat de la sursa de alimentare i s-a rcit complet. � Depozitai aparatul �ntr-un loc rcoros, curat i uscat.

� Lamele discurilor tietoare se pot toci dup o utilizare mai �ndelungat. Verificai-le �n mod regulat i luai legtura cu furnizorul pentru service.

RO Depanarea Dac aparatul nu funcioneaz bine, consultai tabelul de mai jos pentru a gsi soluia. Dac tot nu putei rezolva problema, luai legtura cu furnizorul/agentul de service.

Probleme Aparatul nu funcioneaz

Cauz posibil Nu exist curent �n surs techerul nu este introdus (corect) �n priz M�nerul sau carcasa nu sunt �nchise corect. Mecanismul de siguran determin funcionarea aparatului Motor supraincalzit

Soluie posibil Verificai sigurana Verificai priza Verificai dac m�nerul i carcasa sunt �nchise corect
Lasat aparatul sa se raceasca timp de 3/4 ore.

Specificaia tehnic Articol nr.: 231807 Tensiune i frecven: 230-240V~ /50Hz Puterea consumat nominal: 550W

Clasa de protecie: Clasa I Clasa de protecie contra apei: IP23 Greutate net: aprox. 27,5 kg

Observaie: Specificaia tehnic poate fi modificat fr preaviz.

48

Diagrama circuitului
AC230V~ Tensiune de intrare

230V

1/ 3/ 5/ 13 NO NC NC NO
2/ 4/ 6 14 NO NC NC NO

A1 Contactor
A2

Light

Turn on (Green) Turn off (Red)

Comutator cu senzor �ntreruptor magnetic

Pornit

A2 A1

LN

NC1

NC2

T1

D2

Comutator cu senzor �ntreruptor magnetic
Indicator luminos

T2

Oprit

D1

FU

T3

C2 T4
C3

Motor

Negru Rou Alb Alb
Albastru Albastru

Protecie la supra�nclzire

Condensator

RO

Garanie Orice defeciune care afecteaz funcionarea aparatului aprut la mai puin de un an de la cumprarea acestuia va fi remediat prin reparaie sau �nlocuire gratuit, cu condiia ca aparatul s fi fost folosit i �ntreinut conform instruciunilor nu s nu fi fost bruscat sau folosit necorespunztor �n vreun fel. Drepturile dumneavoastr legale nu sunt afec-

tate. Dac aparatul este �n garanie, menionai c�nd i de unde a fost cumprat i includei dovada cumprrii (de ex. chitana).
Conform politicii noastre de dezvoltare continu a produsului, ne rezervm dreptul de a modifica produsul, ambalajul i documentaia fr notificare.

Eliminarea i mediul �nconjurtor La dezafectarea aparatului, produsul nu trebuie aruncat �mpreun cu alte deeuri menajere. �n schimb, este responsabilitatea dumneavoastr s eliminai echipamentul uzat prin predarea acestuia la un punct de colectare desemnat. Nerespectarea acestei reguli poate fi penalizat �n conformitate cu reglementrile aplicabile privind eliminarea deeurilor. Colectarea separat i reciclarea echipamentului dumneavoastr uzat la momentul debarasrii contribuie la conservarea resurselor na-

turale i asigur realizarea reciclrii �ntr-un mod care protejeaz sntatea fiinelor umane i a mediului. Pentru informaii suplimentare privind modul �n care putei preda deeurile dumneavoastr �n scopul reciclrii, v rugm s contactai compania local de colectare a deeurilor. Productorii i importatorii nu �i asum responsabilitatea cu privire la reciclarea, tratarea i eliminarea ecologic a deeurilor, fie direct, fie prin intermediul unui sistem public.

49

 ,
    ,      Hendi.               .     .
   �        -
      . �       . �      .
  ,       . �             .      ,                 .             . �      . �       . �   ,     . RU �   !     .        . �      .          . � :       ,   .     . �         .          ,          . � ,         ;      .  ,          ,    . �    ()        ,      . �     . � !      �  ,      . �  ,     ,   ! �   ,     .
50

�    , ,

 .

�      ,

  ,    .

�     ,      -

,          .   -

      ;

  ,     ,  .

�  ,        ,

!

�    , ,

 , ..   ,

       ,

 .     , -

.

�        -

  ,    , -

     ,     ,

 ,  ,

     .

�          .

�        .

RU

�        .

�      ,

  ,  ,   .

�      .

    � !     ,
/ !

� !    2 !

� !  ,   /

 !

�

!

.    ,     !

�       ,   ,

 ..

�        .

�       , ,

  ,   ..

51

�       (   ,   ..).          .    , ,    ,    .
�        ,  ,    .
�             .
�     . � :     . � :  ,
    ,    . � !  ,        -
      . �     15   ,
    . � !      ,
      . �       .
         .        . RU �        ,      . �      .   ,  ,         . �   ,      ,    . � !        .      (     ).

  �     -
       . �         ,      (, , ,   ..)

   .             . �        ,  -
   .

52

     I      .         -

  .        ,      .

   �      . �    -
      .     (,   )  ,    -

.          ( == > ). �   ( == >    ). � ,    .

 �
   . � ,
   .  ,            .

� ,          ,      .
� !     .


:    ,     -

 ,    ,     .

�   ,   -

RU

,   �   .

�

 .

 ,    -

.

�     ON ()

 OFF (),   �

   .

�  ,     , ,        .
� :  !
53

�  ,     ,  ,         .
� ,         .

�   ,

   ,  -

  .

�       -

  ,

.   "",

     -

.

,   -

 ,    ,  -

 .

�  5


.

- 2

RU

- 4

- 3

- 4,5

- 7

-     -

  ,   -

  .

 � !    -
  .      . �     .

�   /    ,    () ,  .

54

    :       ,       ,   .

 �     -
. �
 . �     -
            .

�        ,         ,         .

 �    , ,
       . �    ,    .

�    ,     .         ,     .

      ,     ,    .        ,   .
RU


   ()

      .         .

,   ,     .


    45

   : 231807    : 230-240 ~ /50    : 550W

 : I   : IP23  : . 27,5

:        .

55


AC230~

230V

1/ 3/ 5/ 13 NO NC NC NO
2/ 4/ 6 14 NO NC NC NO

A1
A2

   ()   ()


A2 A1

T1

D2


T2

NC2

NC1

LN

T3

D1

FU

C2 T4
C3


RU
    ,       ,          ,   ,       ,             ,     .          ,   -

.            ,          ,   .
              ,     ,      .

          ,        .              .                 .
56

     ,        .      ,       ,       .              ,  ,      .

 ,
      Hendi.         ,           -  .       .
  �       . �
.               . �            .         ,                   .            . �           . �       . �       . �  !        .   ,         . �      !   ,   GR         . � !            .         . �           .         ,                . �                   .        ,         . �     (   )           . �        . � !      ,       . �          . �        . �          . �                 . �
57

        .      ,      . �        . �            .   ,             .      . �          ( )   ,          . �     ,   ,    . �         . �                    ,   . �           .

� !      ,   !

�
GR
�

!     ! !      ,   !

� ! M          !      !
�           ,    .
�         . �           ,
,  . �         (, ,
  ).          .      , , ,      . �          ,  ,    . �             . �       . � :            .

58

� :    ,     ,             .
� !   ,         .
�   15 cm            .
� ! ,   ,               .
�         .              .        .
�           . �      .    ,
           . �
  . � !        .
  ( ),   .

  �
      . �       ,      (.. , ,  )

     .         GR   . �          .        .

               .              .

             .            .

      �
. �         -
    .      (..    )  ,    .    . (. == > ).

�        (. ==>   ).
�       .

59

 �       -
    . �
           .            .

�            .
� !      .

 :                     . �
        . �         .  ,        . �                ON ()  OFF ()                   .
GR

�        ,       OFF       .
� :

�        ,           .
�             .

60

�     ,    ,  ,  .
�              .             .
�         1  : -   2 mm -   4 mm -   3 mm -   4,5 mm -   7 mm -                    .

 � !
    .     . �

�   /   ,         .

   :                  GR    .

 �       . �
. �
         .

�      ,              .

 �    ,
        . �     ,    .

�             .          .

61

       ,       .         ,    /


    .      ()  .         .          .  .

    .   .
         .
      3-4 .

  . .: 231807    : 230-240V~ /50Hz   : 550W

 :  I   : IP23  :  27,5 kg

:         .


AC230V~
GR

230V

1/ 3/ 5/ 13 NO NC NC NO
2/ 4/ 6 14 NO NC NC NO

A1
A2


 ()  ()


 A2 A1

LN


NC1

NC2

T1

D2


T2


D1

FU

T3

C2 T4
C3


62

                ,       ,                         .      .

 ,            (..   ).            ,       ,         .

 &   ,       ,       .   ,    ,    .                 .

           .              ,       .          ,    ,      .

 : .: 213 0 998989 (10 ) info@pks-hendi.com
GR

63

V�zen� z�kazn�ku,
Dkujeme v�m za zakoupen� tohoto spotebice Hendi. Ped prvn�m pouzit�m spotebice si pros�m pecliv pectte tuto p�rucku, picemz vnujte zvl�stn� pozornost n�ze uveden�m bezpecnostn�m pedpism.
Bezpecnostn� pedpisy � Tento spotebic je urcen pro pouzit� v dom�cnosti. � Spotebic se sm� pouz�vat pouze k �celu, pro kter� byl urcen a zkonstruov�n. V�robce
neodpov�d� za skody zpsoben� nespr�vnou obsluhou a nespr�vn�m pouz�v�n�m. � Udrzujte spotebic a elektrickou z�strcku mimo dosah vody a jin�ch kapalin. V p�pad,
ze by spotebic spadl do vody, okamzit vyt�hnte z�strcku ze z�suvky a nepouz�vejte ji, dokud spotebic nezkontroluje certifikovan� technik. Nedodrzen� tchto pokyn mze zpsobit ohrozen� zivota. � Nikdy se nepokousejte otev�t kryt spotebice sami. � Do krytu spotebice nevkl�dejte z�dn� pedmty. � Nedot�kejte se z�strcky mokr�mi nebo vlhk�mi rukama. � Nebezpec� �razu elektrick�m proudem! Nepokousejte se spotebic sami opravit. V p�pad poruchy mus� opravy prov�dt pouze kvalifikovan� person�l. � Nikdy nepouz�vejte poskozen� spotebic! Odpojte spotebic z elektrick� z�suvky a v p�pad poskozen� kontaktujte prodejce. � Pozor! Elektrick� c�sti spotebice neponoujte do vody ani jin�ch tekutin. Nikdy nedrzte CZ spotebic pod tekouc� vodou. � Pravideln kontrolujte, zda nen� poskozena z�strcka a kabel. Pokud je s�ov� z�strcka nebo nap�jec� kabel poskozen, mus� ho vymnit servisn� technik nebo podobn kvalifikovan� osoba, aby nedoslo k nebezpec� nebo zrann�. � Zajistte, aby se kabel nedostal do kontaktu s ostr�mi nebo hork�mi pedmty a udrzujte jej mimo dosah oteven�ho ohn. Chcete-li vyt�hnout z�strcku ze z�suvky, vzdy tahejte za z�strcku a ne za kabel. � Zajistte, aby byl kabel (nebo prodluzovac� kabel) um�stn tak, aby nezpsobil nebezpec� zakopnut�. � Pi pouz�v�n� spotebic vzdy sledujte. � Pozor! Pokud je z�strcka v z�suvce, je spotebic pipojen ke zdroji energie. � Ped vytazen�m z�strcky ze z�suvky vypnte spotebic. � Nikdy nepen�sejte spotebic za kabel. � Nepouz�vejte z�dn� dals� za�zen�, kter� nejsou souc�st� dod�vky spotebice. � Spotebic pipojujte pouze k elektrick� z�suvce s napt�m a frekvenc� uveden�mi na st�tku spotebice. � Pipojte s�ovou z�strcku do snadno p�stupn� elektrick� z�suvky, aby se v p�pad nouze dal spotebic okamzit odpojit. Pro �pln� vypnut� spotebice vyt�hnte z�strcku ze z�suvky. � Ped odpojen�m z�strcky spotebic vzdy vypnte. � Nikdy nepouz�vejte jin� p�slusenstv�, nez kter� doporucuje v�robce. Pokud tak neucin�te,
64

mze to pedstavovat bezpecnostn� riziko pro uzivatele a poskodit spotebic. Pouz�vejte pouze origin�ln� d�ly a p�slusenstv�. � Tento spotebic nen� urcen k pouzit� osobami (vcetn dt�) se sn�zen�mi fyzick�mi, smyslov�mi nebo ment�ln�mi schopnostmi nebo s nedostatkem zkusenost� a znalost�. � Tento spotebic nesm� za z�dn�ch okolnost� pouz�vat dti. � Uchov�vejte spotebic a jeho kabel mimo dosah dt�. � Pokud spotebic nech�v�te bez dozoru nebo nepouz�v�te a ped mont�z�, demont�z� nebo cistn�m, vzdy jej odpojte od s�t. � Bhem pouz�v�n� nikdy nenech�vejte spotebic bez dozoru.

Zvl�stn� bezpecnostn� pedpisy � VAROV�N�! Ped cistn�m, �drzbou a / nebo opravou odpojte od s�t!

� VAROV�N�! K pen�sen� jsou nutn� 2 osoby!

� VAROV�N�! Ped pouzit�m, �drzbou a / nebo opravou si pectte n�vod!

� VAROV�N�! Pokud je za�zen� v provozu, nestrkejte ruku do vypoustc�ho otvoru!

Ped oteven�m odpojte stroj od nap�jen�!

� Tento spotebic by se neml pouz�vat k ez�n� zmrazen�ch potravin, masa nebo ryb s

kostmi atd.

� Pouz�vejte spotebic pouze tak, jak je pops�no v t�to p�rucce.

CZ

� Tento spotebic by ml obsluhovat person�l vyskolen� v kuchyni restaurace, j�delny nebo

baru atd.

� Nepokl�dejte spotebic na topn� tleso (benz�n, elektrick�, vaic na uhl� atd.). Udrzujte

spotebic mimo dosahu hork�ch povrch a oteven�ho ohn. Pracujte vzdy na rovn�m,

stabiln�m, cist�m, tepeln odoln�m a such�m povrchu.

� Nepouz�vejte spotebic v bl�zkosti v�busn�ch nebo holav�ch materi�l, kreditn�ch karet,

magnetick�ch disk nebo r�di�.

� Tento spotebic nen� urcen k provozu pomoc� extern�ho casovace nebo samostatn�ho

syst�mu d�lkov�ho ovl�d�n�.

� Nikdy neobch�zejte bezpecnostn� blokov�n� spotebice.

� POZOR: Udrzujte vsechny ventilacn� otvory spotebici bez pek�zek.

� POZOR: Ped cistn�m, �drzbou nebo uskladnn�m VZDY vypnte spotebic a odpojte jej

od elektrick�ho nap�jen�.

� POZOR! VZDY udrzujte ruce, dlouh� vlasy a oblecen� mimo pohybliv� c�sti.

� Bhem pouz�v�n� ponechte kolem spotebice nejm�n 15 cm pro ventilacn� �cely.

� Pozor! Bezpecn vete nap�jec� kabel, pokud je to nutn�, abyste zabr�nili ne�mysln�mu

tazen� nebo kontaktu s topnou plochou.

� Neum�vejte spotebic vodou ani proudem vody. Myt� vodou mze zpsobit �nik a zv�sit

riziko �razu elektrick�m proudem. Z�dn� c�sti nejsou vhodn� do mycky.

� Necistte ani neukl�dejte spotebic, pokud nen� �pln vychladl�.

65

� Nepem�sujte spotebic, kdyz je v provozu. Pi pemisov�n� odpojte spotebic ze z�suvky a drzte jej za spodn� c�st.
� Nepouz�vejte spotebic bez n�pln, aby nedoslo k peh�t�. � POZOR! Pi manipulaci s ezn�mi kotouci bute velmi opatrn�. V p�pad poteby pouz�vejte
ochrann� rukavice (nejsou souc�st� dod�vky).

Urcen� pouzit� � Tento spotebic je urcen� k odborn�mu pouzit� a
lze provozovat pouze kvalifikovan�m person�lem. � Spotebic je urcen pouze pro kr�jen�, ez�n� a
strouh�n� cerstv� zeleniny (nap. mrkev, brambory, zel� atd.) za pouzit� vhodn�ch ezn�ch kotouc

pro komercn� pouzit�. Jak�koli jin� pouzit� mze v�st k poskozen� spotebice nebo zrann� osob. � Pouz�v�n� spotebice k jin�mu �celu se povazuje za zneuzit� za�zen�. Za nespr�vn� pouzit� za�zen� je v�lucn odpovdn� uzivatel.

Uzemnn� instalace Tento spotebic je klasifikov�n jako spotebic 1. t�dy ochrany a mus� b�t pipojen k ochrann�mu uzemnn�. Uzemnn� snizuje riziko �razu elektrick�m proudem zajistn�m �nikov�ho dr�tu pro elek-

trick� proud. Tento spotebic je vybaven kabelem s uzemovac�m dr�tem s uzemovac� z�strckou. Z�strcka mus� b�t zapojena do z�suvky, kter� je spr�vn nainstalov�na a uzemnna.

P�prava ped instalac� � Odstrate vsechny ochrann� obaly a materi�ly. � Zkontrolujte, zda je spotebic cel� a nebyl po-
skozen pi peprav. V p�pad ne�pln� dod�vky (nap. ezn� kotouce atd.) nebo poskozen�, okaCZ mzit kontaktujte dodavatele. NEPOUZ�VEJTE spotebic. (Viz == > Z�ruka).

� Ped pouzit�m spotebic vycistte (Viz ==> Cistn� a �drzba).
� Ujistte se, ze je spotebic zcela such�.

Instalace � Ped instalac� a provozem si pozorn pectte
tuto p�rucku. � Ujistte se, ze je stroj um�stn na such�m m�st a
ze povrch m� dostatecnou pevnost, aby podp�ral stroj. Bhem provozu stroje tak� zajistte, aby v jeho bl�zkosti nebyly z�dn� pek�zky.

� Zajistte, aby p�vod elektrick� energie odpov�dal jmenovit�mu st�tku na stroji.
� POZOR! Nikdy neobch�zejte z�dn� bezpecnostn� mikrosp�nac.

Pouz�v�n� Pozor: Spotebic m� bezpecnostn� syst�m, kter� zajist�, ze nebude fungovat, dokud p�ka a kryt nebudou dole a zajistny. � Stisknut�m zelen�ho tlac�tka zapnte spotebic a
cerven�m vypnte spotebic. � Zvednte p�ku a vlozte zeleninu dovnit p�vodu.
Pot� zatlacte p�ku dol a zeleninu pevn pitlacte. � Pravou rukou ovl�dejte a stisknte tlac�tka ON
(ZELEN�) a OFF (CERVEN�) a levou rukou ovl�dejte p�ku dol tak, aby se zelenina ezala.

66

� Chcete-li vlozit nebo vymnit noze, ujistte se, ze je sp�nac nap�jen� vypnut� a vyt�hnte z�strcku ze z�suvky
� Pozor: NOZE JSOU OSTR�

� Chcete-li vlozit nebo vymnit noze, otevete spotebic ot�cen�m knofl�ku doleva a oteven�m krytu.
� Nylonov� kotouc vzdy vlozte jako prvn� ped vlozen�m noze podle vaseho v�bru.

� Chcete-li vyjmout nz, ot�cejte j�m doleva a pot�

ho zvednte.

� Zavete spotebic a otocen�m kruhov�ho knofl�ku

doprava zajistte kryt. Stisknut�m tlac�tka ON au-

tomaticky d�te nz do spr�vn� polohy.

� Obsahuje rzn� noze pro rzn� v�sledky ez�n� a

1 nylonov� kotouc:

- 2 mm kr�jec� kotouc

CZ

- 4 mm kr�jec� kotouc

- 3 mm struhadlo

- 4,5 mm struhadlo

- 7 mm struhadlo

- Nylonov� kotouc by se ml vzdy pokl�dat pod

nz, aby vytlacoval zeleninu ze stroje.

Dlezit� � POZOR! Nikdy nestlacujte zeleninu rukama. Vzdy
pouz�vejte dodan� p�st. � Nikdy nepouz�vejte zmrazenou zeleninu.

� Nepouz�vejte devn�/kovov� nebo plastov� pedmty s v�jimkou polyetylenov� m�zky, kter� tlac� zeleninu.

67

Cistn� a �drzba Pozor: Ped cistn�m a ulozen�m vzdy odpojte spotebic z elektrick� z�suvky a nechte jej �pln vychladnout.

Cistn� � Po kazd�m pouzit� spotebic vycistte. � Nikdy neponoujte spotebic do vody nebo jin�ch
tekutin. � Chlazen� vnjs� povrch ocistte lehce navlhce-
n�m had�kem nebo houbou s jemn�m m�dlov�m roztokem.

� K cistn� vnitn�ch nebo vnjs�ch c�st� spotebice nikdy nepouz�vejte dr�tnky nebo cistic� prostedky, ocelov� houbicky nebo kovov� n�stroje.

Ulozen� � Ped ulozen�m se vzdy ujistte, ze byl spotebic
odpojen od elektrick� z�suvky a zcela vychladl. � Spotebic skladujte na chladn�m, cist�m a su-
ch�m m�st.

� Cepele ezn�ch kotouc se mohou po dels�m pouz�v�n� otupit. Pravideln je kontrolujte a kontaktujte servisn�ho technika.

esen� probl�m Pokud spotebic nepracuje spr�vn, pod�vejte se pros�m na esen� v n�ze uveden� tabulce. Pokud st�le nemzete probl�m vyesit, obrate se na dodavatele / poskytovatele sluzeb.

Probl�my CZ
Spotebic nefunguje

Mozn� p�cina
V elektrick� z�suvce nen� nap�jen� Z�strcka nen� (spr�vn) zapojena do elektrick� z�suvky. P�ka nebo kryt nejsou spr�vn zaveny. Bezpecnostn� mechanismus zajisuje, ze spotebic nebude fungovat. Peh�t� motor.

Mozn� esen� Zkontrolujte pojistku. Zkontrolujte z�strcku.
Zkontrolujte, zda jsou p�ka i kryt spr�vn uzaveny.
Nechte spotebic zchladit na 3/4 hodiny.

Technick� specifikace Polozka c.: 231807 Provozn� napt� a kmitocet: 230-240V~ /50Hz Jmenovit� spoteba energie: 550W

T�da ochrany: 1. t�da T�da ochrany proti vod: IP23 Cist� hmotnost: cca. 27,5 kg

Pozn�mka: Technick� specifikace podl�h� zmn�m bez pedchoz�ho upozornn�.

68

Sch�ma zapojen�
Vstup AC230V~

230V

1/ 3/ 5/ 13 NO NC NC NO
2/ 4/ 6 14 NO NC NC NO

A1 Stykac
A2

Svtlo

Zapnout (zelen�) Vypnout (cerven�)

Sp�nac sn�mace Magnetov� sp�nac

Zapnout Sp�nac sn�mace Magnetov� sp�nac
Kontrolka
Vypnout

D2

T1

T2

A2 A1

LN

NC2

NC1

D1

FU

T3

C2 T4
C3

Motor

Cern� Cerven� B�l� B�l� Modr� Modr�

Ochrana proti peh�t�

Kondenz�tor

CZ

Z�ruka Jak�koli vada, kter� negativn ovlivuje funkci spotebice a kter� se projev� v prbhu jednoho roku pot�, co byl spotebic zakoupen, bude odstranna bez n�klad opravou nebo v�mnou za pedpokladu, ze spotebic byl pouz�v�n a udrzov�n v souladu s p�ruckou a nebyl pouz�v�n nespr�vn nebo jakkoli zanedb�v�n. T�m nen� dotceno z�dn� z vasich z�konn�ch pr�v. V p�pad reklamace spotebice v

z�ruce, uvete, kde a kdy jste ho zakoupili, a pilozte doklad o zakoupen� (nap. pokladn� stvrzenku).
S ohledem na n�s z�mr neust�le zdokonalovat nase v�robky si vyhrazujeme pr�vo na zmnu v�robku, obalu a dokumentace bez pedchoz�ho ozn�men�.

Vyazen� a zivotn� prosted� Pi vyazov�n� spotebice z provozu se nesm� v�robek likvidovat s jin�m dom�c�m odpadem. M�sto toho je vas� povinnost� zlikvidovat vase vyazen� za�zen� odevzd�n�m do urcen�ho sbrn�ho m�sta. Nedodrzen� tohoto pravidla mze b�t penalizov�no v souladu s platn�mi pedpisy o likvidaci odpadu. Separovan� sbr a recyklace odpadn�ch za�zen� pi likvidaci pomze setit p�rodn� zdroje a zajis-

tit jejich recyklaci zpsobem, kter� chr�n� lidsk� zdrav� a zivotn� prosted�. Dals� informace o tom, kde mzete odpad pedat k recyklaci, dostanete v m�stn� sbrn odpad. V�robci a dovozci nenesou odpovdnost za recyklaci, zpracov�n� a ekologickou likvidaci ani p�mo, ani prostednictv�m veejn�ho syst�mu.

69

V�zen� z�kazn�k,
akujeme, ze ste si k�pili zariadenie Hendi. Predt�m, ako zariadenie pouzijete prv�kr�t, prec�tajte si pros�m pozorne n�vod na pouzitie a dbajte najm� na bezpecnostn� pokyny uveden� nizsie.
Bezpecnostn� pokyny � Tento spotrebic nie je urcen� na pouzitie v dom�cnostiach. � Zariadenie sa smie pouz�va len na �cel, na ktor� je urcen� a navrhnut�. V�robca nenesie
zodpovednos za skody sp�soben� nespr�vnym alebo nevhodn�m pouzit�m. � Zariadenie a jeho elektrick� sn�ru drzte mimo dosahu vody a in�ch tekut�n. V pr�pade,
ak zariadenie spadne do vody, okamzite vytiahnite jeho elektrick� sn�ru zo z�suvky a zariadenie nepouz�vajte, k�m ho neskontroluje certifikovan� technik. Nedodrzanie tohto pokynu m�ze predstavova ohrozenie udsk�ch zivotov. � Nikdy sa sami nepok�sajte otvori kryt zariadenia. � Pod kryt zariadenie nevkladajte ziadne predmety. � Nedot�kajte sa z�strcky mokr�mi alebo vlhk�mi rukami. � Nebezpecenstvo elektrick�ho soku! Zariadenie sa nepok�sajte sami opravi. Ak zariadenie nefunguje spr�vne, opravy smie vykon�va len kvalifikovan� osoba. � Nikdy nepouz�vajte poskoden� zariadenie! Zariadenie odpojte zo z�suvky a kontaktujte predajcu v pr�pade, ze je zariadenie poskoden�. � Upozornenie! Nepon�rajte elektrick� s�ciastky zariadenia do vody alebo in�ch tekut�n. SK Zariadenie nikdy neumiestujte pod tec�cu vodu. � Pravidelne kontrolujte elektrick� z�strcku a elektrick� sn�ru zariadenia, ci nie s� poskoden�. Ak s� poskoden�, mus� ich v�menu vykona servisn� technik alebo podobne kvalifikovan� osoba, aby sa predislo nebezpecenstvu �razu. � Elektrick� sn�ra zariadenia nesmie pr�s do kontaktu s ostr�mi alebo hor�cimi predmetmi a otvoren�m ohom. Ke chcete z�strcku vytiahnu zo z�suvky, vzdy ahajte za z�strcku a nie za sn�ru zariadenia. � Uistite sa, ze elektrick� sn�ra (alebo predlzovacia sn�ra) s� umiestnen� tak, ze nesp�sobia niekomu p�d. � Zariadenie vzdy sledujte, ke sa pouz�va. � Upozornenie! Ke je elektrick� sn�ra zapojen� do z�suvky, zariadenie je pod elektrick�m nap�t�m. � Predt�m, ako vytiahnete sn�ru zo z�strcky, vypnite zariadenie. � Zariadenie nikdy nepren�sajte tak, ze bude visie na elektrickej sn�re. � S t�mto zariaden�m nikdy nepouz�vajte in� zariadenia, ktor� neboli s�casou balenia k tomuto zariadeniu. � Zariadenie zapojte do elektrickej z�suvky len v pr�pade, ze nap�tie a frekvencia spa parametre uveden� na st�tku zariadenia. � Zariadenie zapojte do ahko dostupnej elektrickej z�suvky, aby mohlo by v naliehavom pr�pade okamzite odpojen�. Ak chcete zariadenie �plne vypn�, vytiahnite z�strcku z elektrickej z�suvky.
70

� Pred vytiahnut�m zo z�suvky zariadenie vzdy vypnite. � Nepouz�vajte pr�slusenstvo in� ako doporucen� v�robcom tohto zariadenia. Ak tak urob�te,
vystavujete sa riziku zranenia a m�zete zariadenie poskodi. Pouz�vajte len origin�lne diely a pr�slusenstvo. � Toto zariadenie nie je urcen� na pouzitie pre osoby (vr�tane det�) so zn�zen�mi fyzick�mi, zmyslov�mi alebo dusevn�mi schopnosami alebo s nedostatkom sk�senost� a znalost�. � Zariadenie nem�zu za ziadnych okolnost� pouz�va deti. � Zariadenie a jeho elektrick� sn�ru drzte mimo dosah det�. � Zariadenie vzdy odpojte od elektrickej siete, ak ho nech�vate bez dozoru alebo sa nepouz�va, pred jeho skladan�m, rozkladan�m alebo cisten�m. � Nikdy nenech�vajte zariadenie bez dozoru, ke sa pouz�va.

Mimoriadne bezpecnostn� pokyny � VAROVANIE! Pred cisten�m, �drzbou a / alebo opravou odpojte od siete!

� VAROVANIE! Na pren�sanie s� nutn� 2 osoby!

� VAROVANIE! Pred pouzit�m, �drzbou a / alebo opravou si prec�tajte n�vod!

� VAROVANIE! Ak je zariadenie v prev�dzke, nestrkajte ruku do vyp�sacieho otvoru!

Pred otvoren�m odpojte stroj od nap�jania! � Zariadenie by sa nemalo pouz�va na kr�janie zmrznut�ho jedla, m�sa s kosou alebo r�b

SK

a pod.

� Zaradenie pouz�vajte len v s�lade s n�vodom na pouzitie.

� Zariadenie by mal obsluhova len skolen� person�l kuchyne v restaur�cii, jed�lni alebo

v bare.

� Zariadenie neklate na hor�ce predmety (plynov�, elektrick�, uhl�kov� spor�ky a pod.).

Zariadenie by sa nemalo dosta do kontaktu s hor�cimi povrchmi a otvoren�m ohom.

Zariadenie pouz�vajte na rovnom, stabilnom, cistom, teplu odolnom a suchom povrchu.

� Zariadenie nepouz�vajte v bl�zkosti v�busn�ch alebo horav�ch materi�lov, kreditn�ch

kariet, magnetick�ch diskov alebo r�di�.

� Toto zariadenie nie je urcen� na to, aby ho riadil extern� casovac alebo samostatn� syst�m

diakov�ho ovl�dania.

� Nikdy neobch�dzajte ziadne bezpecnostn� z�mky zariadenia.

� UPOZORNENIE: Vsetky otvory na vetranie na zariaden� musia by von�.

� UPOZORNENIE: VZDY zariadenie vypnite a odpojte od elektrickej siete pred jeho cisten�m,

�drzbou alebo skladovan�m.

� UPOZORNENIE! VZDY drzte ruky, dlh� vlasy a oblecenie mimo dosahu pohybliv�ch cast�

zariadenia.

� Vzdy ponechajte aspo 15 cm von�ho priestoru okolo zariadenia za �celom vetrania

pocas jeho pouz�vania.

71

� Upozornenie! Bezpecne umiestnite elektrick� sn�ru tak, aby ste zabr�nili nepl�novan�mu vytiahnutiu zo z�suvky alebo kontaktu s hor�cou plochou.
� Zariadenie necistite vodou alebo pod pr�dom vody. Umytie vodou m�ze sp�sobi presakovanie a zv�si riziko elektrick�ho soku. Ziadne casti tohto zariadenie nie je mozn� um�va v um�vacke riadu.
� Zariadenie necistite ani neuskladujte, k�m nie je �plne vychladnut�. � Zariaden�m neh�bte, ke sa pouz�va. Vytiahnite ho z elektrickej siete a drzte ho za jeho
spodn� cas. � Zariadenie nepouz�vajte bez ingredienci�, inak sa m�ze prehria. � UPOZORNENIE! D�vajte si pozor pri pr�ci s rezn�mi kot�cmi. Ak je to potrebn�, nasate
si ochrann� rukavice (nie s� s�casou balenia).

�cel pouzitia � Tento spotrebic je urcen� na profesion�lne pou-
zitie a obsluhova ho m�ze len kvalifikovan� person�l. � Zariadenie je urcen� len na komercn� pouzitie, na kr�janie, rezanie a str�hanie cerstvej zeleniny (napr. mrkvy, zemiakov, kapusty a pod.) za pou-

zitia spr�vnych rezn�ch kot�cov. In� sp�sob pouzitia m�ze vies k poskodeniu zariadenia alebo k zraneniu osoby. � Pouzitie zariadenia na in� �cel sa bude povazova za jeho chybn� pouzitie. Pouz�vate je s�m zodpovedn� za nespr�vne pouzitie zariadenia.

Uzemnenie Toto zariadenie je klasifikovan� ako zariadenie SK ochrannej triedy I a mus� by uzemnen�. Uzemnenie znizuje riziko elektrick�ho soku t�m, ze poskytuje �nikov� dr�t pre elektrick� pr�d. Zariadenie je

vybaven� elektrickou sn�rou, ktor� m� uzemovac� dr�t a uzemovaciu z�strcku. Z�strcka mus� by zapojen� do z�suvky, ktor� je spr�vne instalovan� a uzemnen�.

Pr�pravy pred instal�ciou � Odstr�te vsetky ochrann� obaly. � Skontrolujte, ci zariadenie obsahuje vsetky cas-
ti a ci sa neposkodilo pri preprave. V pr�pade, ze zariadenie nie je kompletn� (napr. ch�baj� rezn� kot�ce ) alebo je poskoden�, okamzite kontaktujte dod�vatea zariadenia. Zariadenie NEPOUZ�VAJTE (vi == > Z�ruka).

� Pred pouzit�m zariadenie vycistite (vi ==> Cistenie a �drzba).
� Uistite sa, ze je zariadenie �plne such�.

Instal�cia � Pozorne a d�kladne si prec�tajte tento n�vod pred
instal�ciou a pouzit�m zariadenia. � Uistite sa, ze zariadenie je umiestnen� na su-
chom povrchu, ktor� je schopn� unies v�hu zariadenia. Tiez skontrolujte, ze sa pocas jeho pouz�vania v bl�zkosti zariadenia nenach�dzaj� ziadne prek�zky.

� Skontrolujte, ci elektrick� pr�d s�hlas� s �dajmi uveden�mi na st�tku zariadenia.
� UPOZORNENIE! Nikdy neobch�dzajte ziadny mikro bezpecnostn� vyp�nac.

72

Pouzitie Upozornenie: Zariadenie m� zabudovan� bezpecnostn� syst�m, ktor� zabezpec�, ze zariadenie nebude fungova, pokia nie je p�ka a kryt dolu a nie s� uzamknut�. � Stlacte zelen� tlacidlo, ak chcete zariadenie zap-
n�, a cerven�, ak ho chcete vypn�. � Zdvihnite p�ku a umiestnite zeleninu dovn�tra.
Potom p�ku potiahnite dolu, aby ste zeleninu pevne stlacili. � Pouzite prav� ruku na stlacenie tlacidla ZAPNUTIE (ZELEN�) a VYPNUTIE (CERVEN�) a av� ruku pouzite na obsluhu p�ky smerom dolu za �celom pokr�jania zeleniny.

� Ak chcete do zariadenie umiestni rezn� kot�ce alebo ich chcete vymeni, uistite sa, ze zariadenie je vypnut�, a vytiahnite z�strcku zo z�suvky.
� D�vajte si pozor: KOT�CE S� OSTR�
� Ak do zariadenie chcete umiestni rezn� kot�ce alebo ich chcete vymeni, otvorte zariadenie tak, ze tlacidlo otoc�te proti smeru hodinov�ch ruciciek a otvor�te kryt.
� Vzdy najprv umiestnite nylonov� kot�c predt�m, ako do zariadenia umiestnite Vami zvolen� rezn� kot�c.
� Ak chcete rezn� kot�c vybra, otocte kot�c proti smeru hodinov�ch ruciciek a potom ho zdvihnite.
� Zariadenie zatvorte a otocte okr�hlym tlacidlom v smere hodinov�ch ruciciek, aby ste uzamkli kryt. Stlacte tlacidlo ZAPNUTIE, c�m sa kot�c automaticky dostane do spr�vnej polohy.
� Balenie obsahuje r�zne noze pre r�zne v�sledky rezania a 1 nylonov� kot�c. - 2 mm rezn� n�z - 4 mm rezn� n�z - 3 mm str�hadlo - 4,5 mm str�hadlo - 7 mm str�hadlo - Nylonov� kot�c by mal by vzdy umiestnen� pod rezn�m kot�com, aby vytl�cal zeleninu von zo zariadenia.

SK 73

D�lezit� � UPOZORNENIE! Nikdy nepouz�vajte ruky na po-
tlacenie nakr�janej potraviny. Vzdy pouz�vajte plunzer, ktor� je s�casou balenia. � Nikdy nepouz�vajte mrazen� zeleninu.

� Nepouz�vajte dreven�/kovov� alebo plastov� predmety okrem polyetyl�novej mriezky, ktor� stl�ca zeleninu.

Cistenie a �drzba Upozornenie: Pred cisten�m a uskladnen�m zariadenia ho vzdy odpojte od elektrickej siete a nechajte ho vychladn�.

Cistenie � Po kazdom pouzit� zariadenie vycistite. � Nikdy zariadenie nepon�rajte do vody alebo in�ch
tekut�n. � Vychladnut� vonkajs� povrch zariadenia vycistite
pomocou jemne navlhcenej l�tky alebo spongie za pouzitia jemn�ho cistiaceho prostriedku.

� Na cistenie vn�torn�ch alebo vonkajs�ch cast� zariadenia nepouz�vajte drsn� spongie alebo sapon�ty, dr�tenku ani kovov� n�stroje.

Uskladnenie � Pred uskladnen�m zariadenia sa uistite, ze ste
zariadenie odpojili od elektrick�ho pr�du a ze je �plne vychladnut�. � Zariadenie skladujte na chladnom, cistom a suchom mieste. SK

� Noze rezn�ch kot�cov m�zu by po dlhodobom pouz�van� zakalen�. Pravidelne to kontrolujte a obr�te sa na svojho dod�vatea kv�li servisu.

Riesenie probl�mov Ak zariadenie spr�vne nefunguje, pros�m skontrolujte v tabuke nizsie, ako je mozn� dan� probl�m vyriesi. Ak neviete probl�m vyriesi, pros�m obr�te sa na svojho dod�vatea/poskytovatea servisu.

Probl�my Zariadenie nefunguje

Mozn� pr�cina
V elektrickej z�suvke nie je pr�d. Z�strcka nie je (spr�vne) zasunut� do elektrickej z�suvky. P�ka alebo kryt nie s� spr�vne uzatvoren�. Bezpecnostn� syst�m zabezpec�, ze zariadenie nebude pracova. Motor je prehriaty.

Mozn� riesenie Skontrolujte poistky. Skontrolujte z�strcku.
Skontrolujte, ci s� p�ka a kryt spr�vne uzatvoren�.
Zariadenie schlate po dobu 45 min�t.

Technick� specifik�cia C�slo v�robku: 231807 Prev�dzkov� nap�tie & frekvencia: 230-240V~ /50Hz Stanoven� spotreba elektrickej energie: 550W

Ochrann� trieda: Trieda I Ochrann� trieda nepremokavosti: IP23 Cist� v�ha: Priblizne. 27,5 kg

Pozn�mka: Technick� specifik�cie podlieha zmen�m bez ohl�senia.

74

Obvodov� diagram
AC230V~ Vstup

230V

1/ 3/ 5/ 13 NO NC NC NO
2/ 4/ 6 14 NO NC NC NO

Osvetlenie Zapnutie (Zelen�) Vypnutie (Cerven�)

A1 St�kac
A2

Sp�nac sn�maca Magnetick� sp�nac

Zapnutie
Sp�nac sn�maca Magnetick� sp�nac Ukazovate svetla
Vypnutie

D2

T1

T2

A2 A1

LN

NC2

NC1

D1

FU

T3

C2 T4
C3

Motor

Cierna Cerven� Biela Biela Modr� Modr�

Zariadenie na ochranu proti prehriatiu

Kondenz�tor

SK

Z�ruka Ak�kovek porucha, ktor� ovplyvuje funkcnos spotrebica a prejav� sa do jedn�ho roka od n�kupu, bude odstr�nen� bezplatne pr�padne v�menou za predpokladu, ze spotrebic bol pouz�van� a udrziavan� v s�lade s pokynmi a nebol ziadnym sp�sobom pouzit� nespr�vne alebo nevhodne. Vase z�konn� pr�va nie s� ovplyvnen�. Ak je na spotrebic uplatnen� n�rok poda z�ruky, uvete kde a kedy

ste ho k�pili, a prilozte doklad o k�pe (napr. pr�jmov� doklad).
V s�lade s nasimi z�sadami neust�leho v�voja produktov si vyhradzujeme pr�vo bez upozornenia zmeni v�robok, balenie a specifik�ciu v dokument�cii.

Likvid�cia a zivotn� prostredie Pri vyraden� spotrebica z prev�dzky nesmie by zlikvidovan� s in�m odpadom z dom�cnosti. Ste zodpovedn� za likvid�ciu svojho zariadenia jeho odovzdan�m na urcenej skl�dke odpadu. V opacnom pr�pade m�zete dosta pokutu v s�lade s platn�mi nariadeniami o likvid�cii odpadu. Separovan� zber a recykl�cia zariadenia urcen�ho na likvid�ciu pom�ze chr�ni pr�rodn� zdroje a zaist� recykl�ciu

sp�sobom, ktor� chr�ni zdravie ud� a zivotn� prostredie. alsie inform�cie o tom, kde m�zete odnies spotrebic na recykl�ciu, v�m poskytne vasa miestna spolocnos zaoberaj�ca sa zberom odpadu. V�robcovia a dovozcovia nepreberaj� zodpovednos za recykl�ciu, zaobch�dzanie a ekologick� likvid�ciu priamym sp�sobom ani prostredn�ctvom verejn�ho syst�mu.

75

Exploded drawing and part list Explosionszeichnung und Teileliste Opengewerkte tekening en onderdelenlijst Rysunek zloeniowy i lista czci Sch�ma �clat� et liste des pi�ces Desen de ansamblu explodat i lista pieselor

Disegno esploso ed elenco parti           Rozlozen� v�kres a seznam d�l Rozclenen� grafick� zoznam s�ciastok

76

EN 1 Bolt

DE Schraube

NL Bout

PO ruba

FR Vis

2 Handlebar

Handgriff

Handgreep

Uchwyt

Poign�e

3 Nylon gasket

Nylondichtung

Nylon pakking

Uszczelka nylonowa

Joint Nylon

4 Pressing plece

Andr�ck-element

Aandruk hulpstuk

Element dociskowy

El�ment de serrage

5 Input shaft

Einsatzteil

Invoerschacht

Cze wsadowa

Pi�ce chargeuse

6 Anchor knob

Halteknopf

Vergrendelknop

Pokrtlo przytrzymujce Molette de fixation

7 Spring

Feder

Springveer

Spryna

Ressort

8 Gasket

Dichtung

Pakking

Uszczelka

Joint d'�tanch�it�

9 Pin

Drehbolzen

Pin

Trzpie obrotowy

Tige rotative

10 Anchor spindle

Haltebolzen

Vergrendelas

Trzpie przytrzymujcy

Tige de fixation

11 Knife disc

Schneid-scheibe

Snijdschijf

Tarcza tnca

Disque de coupe

12 Drain disc

Abfallschleu-derscheibe

Uitwerpschijf

Tarcza odrzucajca odpadki Disque d'�vacuation de d�chets

13 Anchor board

Befestigungs-platte

Bevestigingsplaat

Plytka przytrzymujca

Platine de fixation

14 Pin

Drehbolzen

Pin

Trzpie obrotowy

Tige rotative

15 Oil envelop

�lbeh�lter

Oliehouder

Zbiorniczek na olej

Godet � huile

16 Central spindle

Mittlerer Drehbolzen

Centrale as

rodkowy trzpie obrotowy Mandrin rotatif central

17 Isolated sheath

Isolierte Abdeckung

Isolatiehoes

Oslona izolowana

Gaine isol�e

18 Gear

Mechanismus

Aandrijving

Mechanizm

Engrenage

19 Block circle

Blockaderad

Blok cirkel

K�lko blokujce

Cercle de blocage

20 Anchor sheath

Halteab-deckung

Ankerhoes

Oslona przytrzymujca

Gaine de fixation

21 Belt wheel

Riemenrad

Riemwiel

Kolo pasowe

Poulie

22 Seat of body

Geh�useab-deckung

Behuizing

Oslona korpusu

Bo�tier du corps

23 Electric box

Elektrokasten

Elektronicahuis

Skrzynka elektryczna

24

Bottom board of electric box

Untere Abdeckung des Elektro- Onderplaat van elektro-

kastens

nicahuis

Dolna oslona skrzynki elektrycznej

25

Bottom board of body

Untere Abdeckung des Geh�uses

Onderplaat van behuizing Dolna oslona korpusu

26 Magnet steel

Magnetstahl

Magnetisch staal

Stal magnetyczna

Bo�te �lectrique Protection inf�rieure de la bo�te �lectrique
Protection inf�rieure du corps
Acier magn�tique

27 Umbrella bolt

Pilzkopf-schraube

Paraplubout

ruba z lbem grzybkowym Vis parapluie

28 Steel sheath

Stahlab-deckung

Stalen as

Oslona stalowa

Gaine en acier

29 Nut

Mutter

Moer

Nakrtka

�crou

30 Adjusting bolt

Feststell-schraube

31 Plastic pressing stick Gegenhalter aus Kunststoff

32 Seat of magnet

Magnet-abdeckung

Stelschroef Plastic aandruk hulpstuk Magneethouder

ruba ustalajca
Dociskacz z tworzywa sztucznego
Oslona magnesu

Vis de fixation Manche presseur en plastique Si�ge d'aimant

33 Magnet steel

Magnetstahl

Magnetisch staal

Stal magnetyczna

Acier magn�tique

34 Knife

Messer

Mes

N�

Couteau

35 Body

Geh�use

Behuizing

Korpus

Corps

36 Microswitch

Mikroschalter

Microschakelaar

Mikroprzelcznik

Microrupteur

37 Waved bolt

Andr�ckknopf

Bout

Pokrtlo dociskowe

Molette de serrage

38 Switch

Schalter

Schakelaar

Przelcznik

Commutateur

39 Strapped wheel

Riemenrolle

Aandrijfwiel

Rolka pasowa

Rouleaux courroie

40 Belt

Riemen

Riem

Pas

Courroie

41 Motor

Motor

Motor

Silnik

Moteur

42 Gasket

Dichtung

Pakking

Uszczelka

Joint d'�tanch�it�

43 Gasket

Dichtung

Pakking

Uszczelka

Joint d'�tanch�it�

44 Bolt

Schraube

Bout

ruba

Vis

45 Gear cover

Abdeckung des Mechanismus Aandrijving dekkap

Pokrywa mechanizmu

Couvercle de m�canisme

46 Bolt

Schraube

Bout

ruba

Vis

77

IT

1

Bullone

RO urub

RU

2

Impugnatura

M�ner


3

Tenuta in nylon

Garnitur din nailon


4

Dispositivo di pressatura

Component pentru apsare


5

Corpo dispositivo

Corpul dispozitivului


6

Pomello di fissaggio

Buton rotativ de fixare


7

Molla

Arc


8

Tenuta

Garnitur


9

Perno

Nit


10 Mandrino di fissaggio

urub de fixare


11 Disco di affettatura

Disc cu cuite


12 Disco di scarico

Disc pentru scurgere


13 Piastra di fissaggio

Plac de fixare


14 Perno

Nit


15 Alloggiamento olio 16 Mandrino centrale 17 Rivestimento isolato

Loca pentru ulei Ax central Cma izolat


18 Ingranaggio

Angrenaj


19 Cerchio di bloccaggio

Cerc de blocare


20 Guaina di fissaggio

Cma de fixare


21 Ruota a cinghia

Roat pentru curea


22 Sede della base

Suport


23 Centralina elettrica 24 Base della centralina elettrica 25 Base del corpo del dispositivo

Cutie electric Placa inferioar a cutiei electrice Placa inferioar a corpului


26 Piastra calamitata

Oel magnetic


27 Bullone ad ombrello

urub cu cap semisferic


28 Guaina in acciaio

Cma din oel


29 Dado

Piuli


30 Bullone di regolazione

urub de reglare

31 Dispositivo di pressione in plastica Piston din plastic

32 Sede della calamita

Suport pentru magnet


33 Piastra calamitata

Oel magnetic


34 Lam a

Cuit


35 Corpo

Corp


36 Microinterruttore

Micro-comutator


37 Bullone

urub cu acionare manual


38 Interruttore

Comutator


39 Fissaggio cinghia

Roat fix


40 Cinghia

Curea


41 Motore

Motor


42 Tenuta

Garnitur


43 Tenuta

Garnitur


44 Bullone

urub


45 Coperchio ingranaggi

Capac angrenaj


46 Bullone

urub


GR


78

CZ

1

Sroub

SK Skrutka

2

Rukoje

P�ka

3

Nylonov� tsnn�

Nylonov� tesnenie

4

Lisovac� kus

Lis

5

Vstupn� h�del

Vstupn� sachta

6

Kotevn� knofl�k

Kotviaci gomb�k

7

Pruzina

Sk�ra

8

Tsnn�

Tesnenie

9

Kol�k

Kol�k

10 Kotevn� veteno

Kotviaci hriade

11 Nozov� kotouc

Kot�c noza

12 Vypoustc� kotouc

Odtokov� kot�c

13 Kotevn� deska

Kotviaca doska

14 Kol�k

Kol�k

15 Olejov� ob�lka

Olejov� lievik

16 Centr�ln� veteno

Centr�lny hriade

17 Izolovan� pouzdro

Izolacn� pl�s

18 Ozuben� kolo

Pohon

19 Blokovac� krouzek

Blokov� kot�c

20 Kotevn� pl�s

Kotviaci pl�s

21 emenov� kolo

Remeov� koleso

22 Sedlo tla

Z�kladn� cas

23 Elektrick� sk�

Elektrick� krabica

24

Spodn� deska elektrick� sk�ky

Spodn� doska elektrickej krabice

25 Spodn� deska tla

Spodn� doska z�kladnej casti

26 Magnetov� ocel

Magnetick� oce

27 Sroub s destn�kovou hlavou

Skrutka s d�zdnikovou hlavou

28 Ocelov� pouzdro

Oceov� pl�s

29 Matice

Matka

30 Stavc� sroub

Prisp�sobovacia skrutka

31 Plastov� lisovac� tyc

Plastov� lisovacia tyc

32 Sedlo magnetu

Magnet

33 Magnetov� ocel

Magnetick� oce

34 Nz

N�z

35 Tlo

Telo

36 Mikrosp�nac

Mikrosp�nac

37 Zvlnn� sroub

Vlnit� skrutka

38 Pep�nac

Sp�nac

39 P�skovan� kolo

Prip�tan� kot�c

40 P�s

Reme

41 Motor

Motor

42 Tsnn�

Tesnenie

43 Tsnn�

Tesnenie

44 Sroub

Skrutka

45 Kryt pevodovky

Kryt pohonu

46 Sroub

Skrutka

79

Hendi B.V. Innovatielaan 6 6745 XW De Klomp The Netherlands

Tel: +31 317 681 040 Fax: +31 317 681 045 Email: info@hendi.eu www.hendi.eu

Declaration of conformity/ Konformit�tserkl�rung/ Conformiteitsverklaring/ Deklarcja Zgodnoci/ D�claration de conformit�/ Dichiarazione di conformit�/ Declaraie de conformitate/  /  / Prohl�sen� o shod/ Vyhl�senie o zhode

Hendi BV hereby declares under his own responsibility that the product:/ Hendi BV erkl�rt unter seiner alleinigen verantwortung, dass Produkte:/ Hendi BV verklaart hierbij, onder eigen verantwoordelijkheid, dat de producten:/ Hendi BV owiadcza, na swoj wylczn odpowiedzialno, e ponisze produkty:/ Hendi BV d�clare, sous sa seule responsabilit�, que les produits suivants:/ Hendi BV dichiara, sotto la sua esclusiva responsabilit�, che i seguenti prodotti:/ Hendi BV declar pe propria rspundere c produsele:/ Hendi BV    ,   :/ Hendi BV        : / Spolecnost Hendi BV t�mto prohlasuje na svou v�hradn� odpovdnost, ze v�robek:/ Spolocnos HENDI BV t�mto prehlasuje na svoju v�hradn� zodpovednos, ze v�robok:

Product number: / Produktnummer: / Productnummer: / Kod Produktu: / Code produit: / Codice prodotto: / Numrul: /  : /  : / C�slo v�robku:/ C�slo v�robku:

231807

Product name: / Produktname: / Productomschrijving: / Nazwa Produktu: / Nom du produit: / Nome del prodotto: / Denumirea produsului: /  : /  : / N�zev v�robku:/ N�zov v�robku:

Vegetable Cutter Profi Line / Gem�seschneider Profi Line / Groentesnijder Profi Line / Szatkownica elektryczna do warzyw Profi Line z zestawem 5 tarcz / Coupe-l�gumes Profi Line / Tagliaverdura Profi Line / Tietor legume Profi Line /   Profi Line /   Profi Line / CZ / SK

Brand: / Marke: / Merk: / Marka: / Marque: / Marchio: / Brand: / : / :/ Znacka:/ Znacka:

Hendi

Meets the essential requirements as described in: / Erf�llt die Anforderungen wie beschrieben in: / Voldoet aan de essenti�le vereisten zoals beschreven in: / Spelnia wymagania zasadnicze okrelone w nastpujcych dyrektywach: / R�pond aux exigences essentielles d�finies dans les directives suivantes: / Il prodotto soddisfa i requisiti essenziali stabiliti nelle seguenti direttive: / �ndeplinete cerinele eseniale descrise �n: /   ,    : /       : / Spluje z�kladn� pozadavky popsan� v:/ Spa z�kladn� poziadavky op�san� v:

2006/42/EC 2014/30/EU 2011/65/EU & amendment 2015/863/EU

Has been engineered and manufactured in conformity to harmonized standards: / Wurde in �bereinstimmung mit harmonisierten Normen entwickelt und hergestellt: / Is ontwikkeld en vervaardigd in overeenstemming met geharmoniseerde normen: / Zostal zaprojektowany i wykonany zgodnie z normami zharmonizowanymi: / Il a �t� con�u et fabriqu� selon des normes harmonis�es: / Il prodotto � stato progettato e realizzato secondo standard armonizzati: / A fost proiectat i fabricat �n conformitate cu standardele in vigoare: /        : /         : / Byl navrzen a vyroben v souladu s harmonizovan�mi normami:/ Bol navrhnut� a vyroben� v s�lade s harmonizovan�mi normami:

EN 55014-1:2017 EN 55014-2:2015 EN 61000-3-2:2014 EN 61000-3-3:2013 EN 60204-1:2006+ A1:2009/AC:2010 EN ISO 12100:2010 EN 1678:1998+ A1:2010

Meets the requirements as described in regulations: / Erf�llt die Anforderungen wie beschrieben in: / Voldoet aan de eisen zoals beschreven in verordening: / Spelnia wymagania okrelone w rozporzdzeniach: / R�pond aux exigences �nonc�es dans les r�glements: / Il prodotto soddisfa i requisiti specificati nelle normative: / �ndeplinete cerinele descrise �n regulament: /  ,   : /       : / Spluje pozadavky stanoven� v pedpisech:/ Spa podmienky uveden� v predpisoch:

1907/2006/EC 1935/2004/EC 10/2011/EU

80

Technical documentation available at the company's headquarters: / Technische Dokumentation am Hauptsitz: / Technische documentatie beschikbaar op het hoofdkantoor: / Dokumentacja techniczna dostpna w siedzibie firmy: / Documentation technique disponible au si�ge de l'entreprise: / Documentazione tecnica disponibile presso la sede dell'azienda: / Documentaia tehnic este disponibil la sediul companiei: /       : /          : / Technick� dokumentace k dispozici v s�dle spolecnosti:/ Technick� dokument�cia k dispoz�cii v s�dle spolocnosti:

Hendi B.V., Innovatielaan 6, 6745 XW De Klomp, The Netherlands

De Klomp, 22-09-2020

R.E. Vooijs Purchasing Manager

81

82

83

Hendi B.V. Innovatielaan 6 6745 XW De Klomp, The Netherlands Tel: +31 317 681 040 Email: info@hendi.eu
Hendi Polska Sp. z o.o. ul. Firmowa 12 62-023 Robakowo, Poland Tel: +48 61 658 7000 Email: info@hendi.pl
Hendi Food Service Equipment GmbH Ehring 15 5112 Lamprechtshausen, Austria Tel: +43 6274 200 10 0 Email: office.austria@hendi.eu
Hendi Food Service Equipment Romania S.R.L. Str. 13 decembrie 94A, Hala 14 Braov, 500164, Romania Tel: +40 268 320330 Email: office@hendi.ro

PKS Hendi South East Europe SA 5 Metsovou Str. 18346 Moschato, Athens, Greece Tel: +30 210 4839700 Email: info@pks-hendi.com
Hendi Italia S.R.L. Via Leonardo da Vinci 4 39100 Bolzano (BZ), Italy Tel: +39 800 727 438 Email: office.italy@hendi.eu
Hendi HK Ltd. 1208, 12/F Exchange Tower 33 Wang Chiu Road, Kowloon Bay, Hong Kong Tel: +852 2154 2618 Email: info-hk@hendi.eu
Find Hendi on internet: www.hendi.eu www.facebook.com/HendiToolsforChefs www.linkedin.com/company/hendi-food-service-equipment-b.v. www.youtube.com/HendiEquipment

- Changes, printing and typesetting errors reserved. - �nderungen und Druckfehler vorbehalten. - Wijzigingen en drukfouten voorbehouden. - Producent zastrzega sobie prawo do zmian oraz
bld�w drukarskich w instrukcji. - Variations et fautes d'impression r�serv�s.
� 2020 Hendi B.V. De Klomp - The Netherlands

- Errori di cambiamenti, di stampa e di impaginazione riservati. - Drepturi rezervate cu privire la modificri i greeli de imprimare. - ,     . -   ,    .
Ver: 18-11-2020