User's Manual
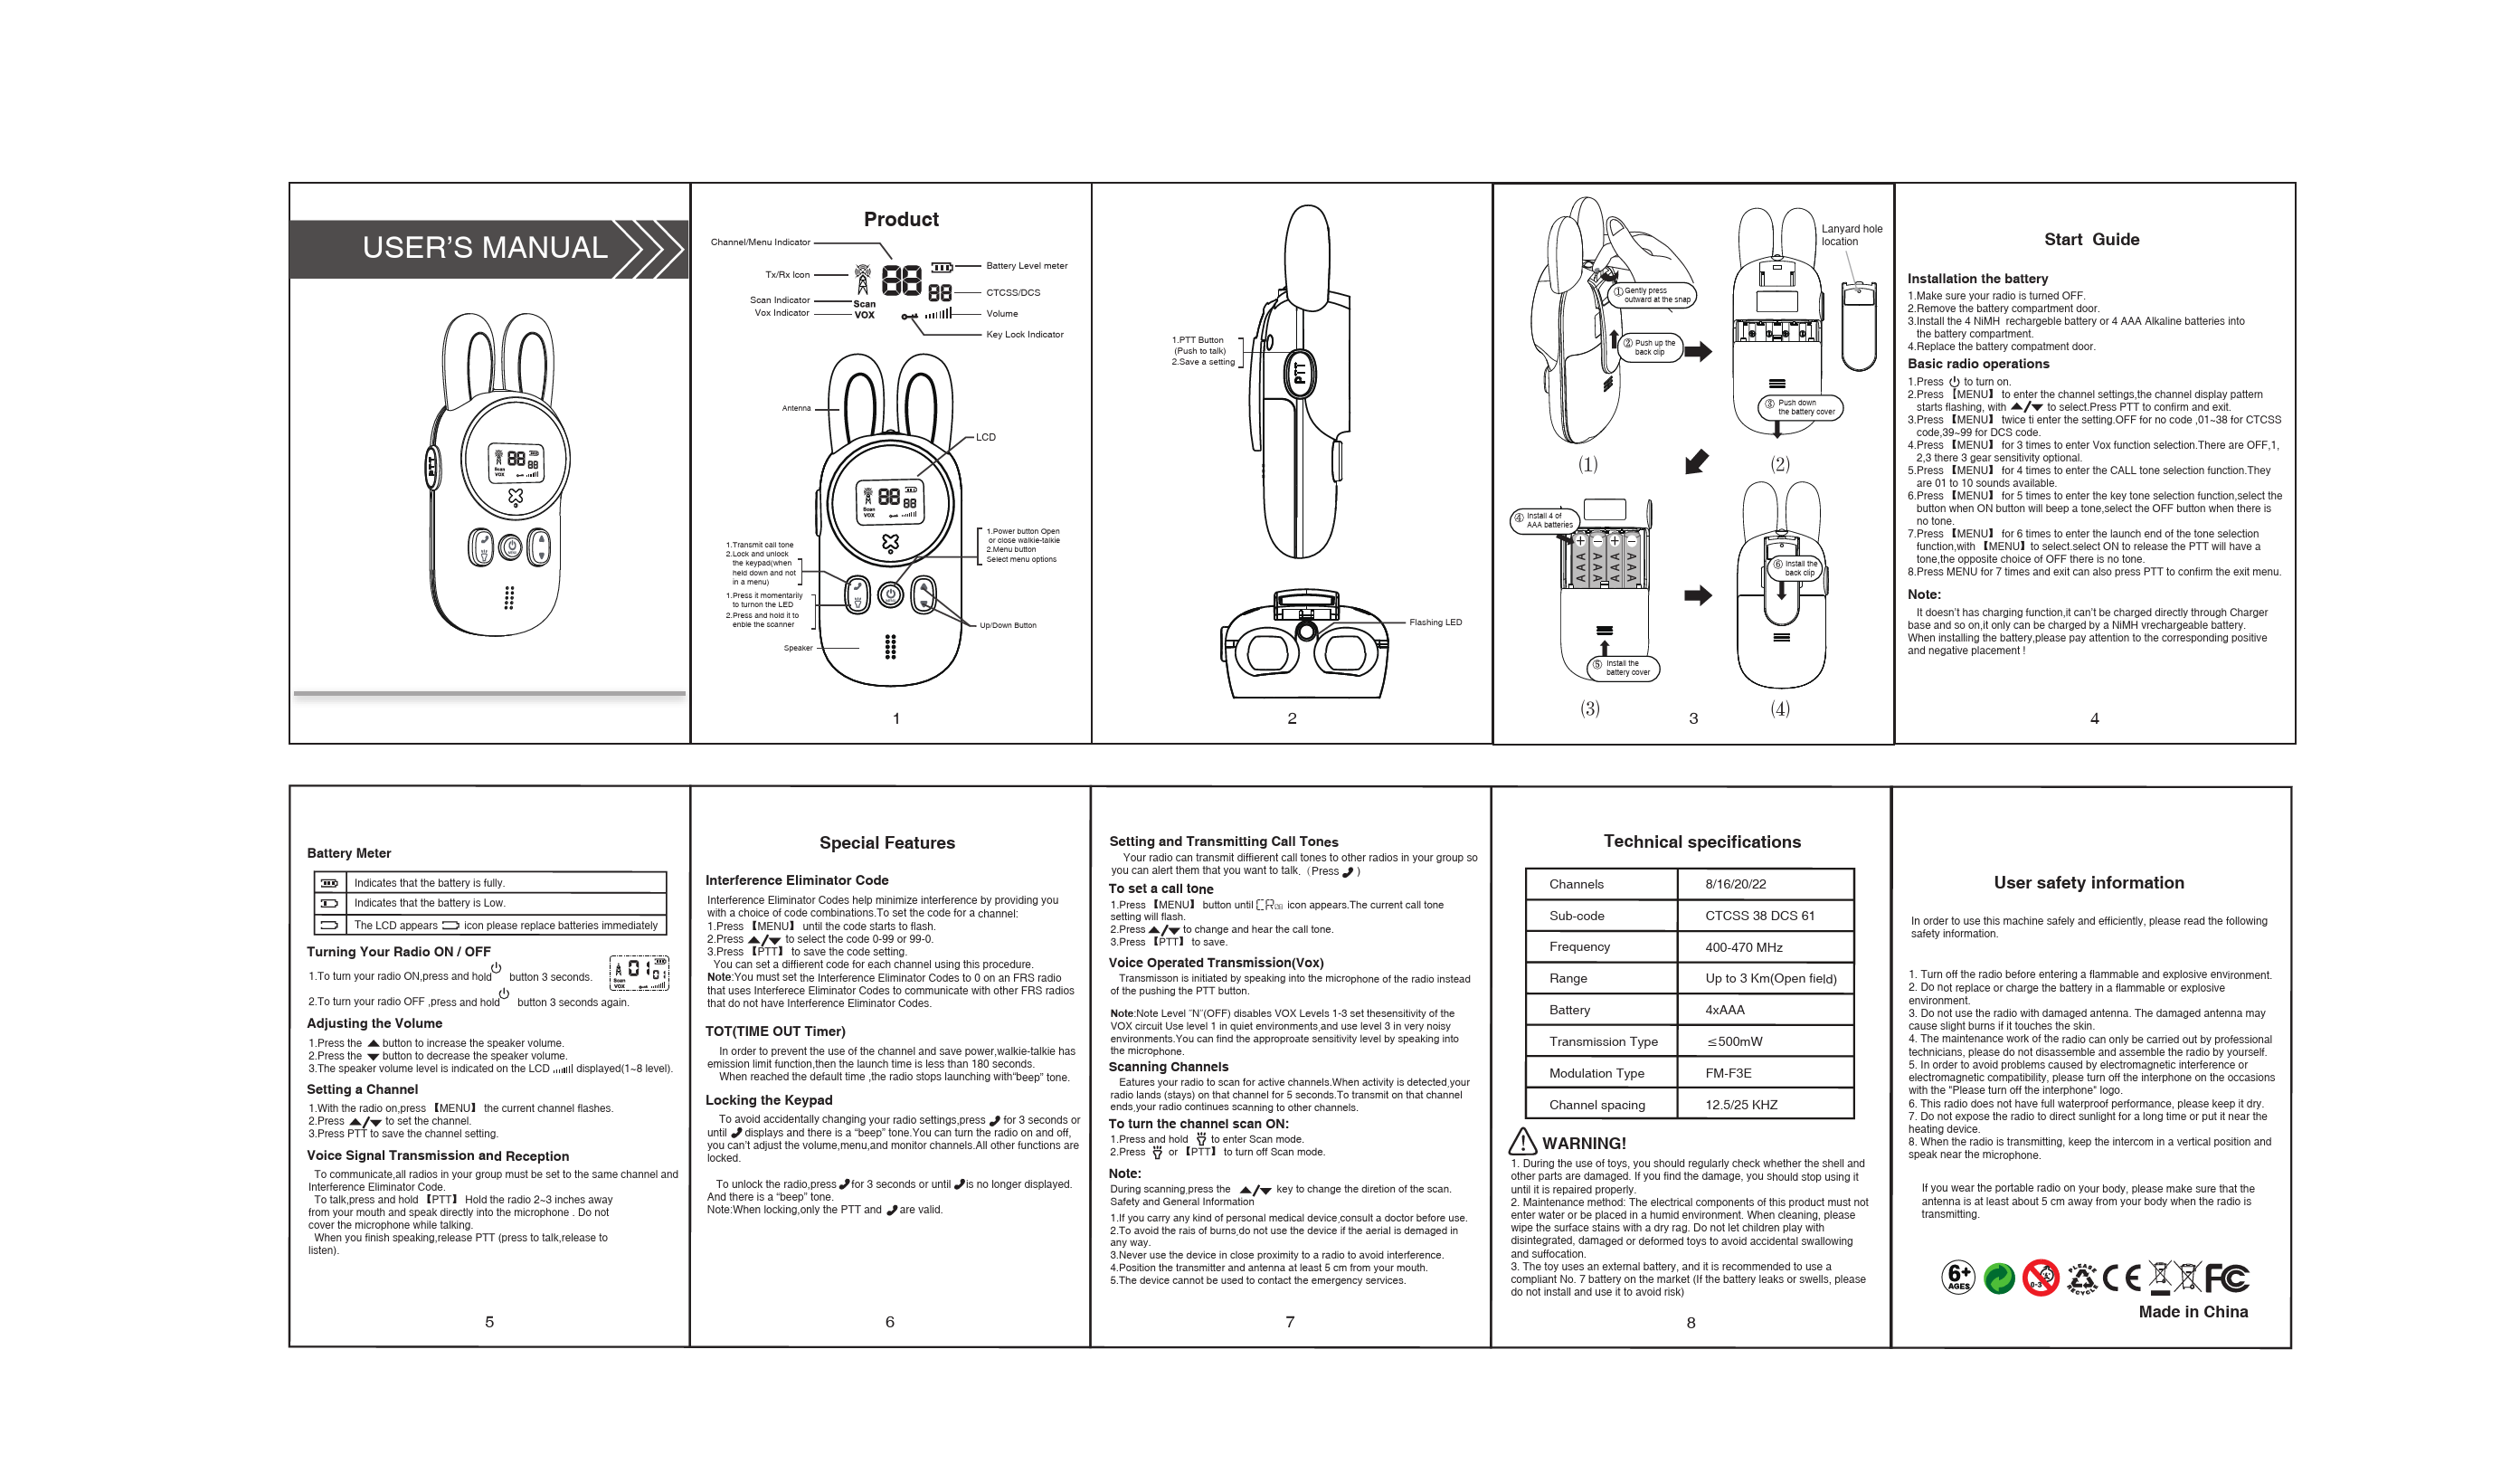
Product Overview
This section details the components of the two-way radio:
- Channel/Menu Indicator: Displays the current channel or menu option.
- Tx/Rx Icon: Indicates when the radio is transmitting or receiving.
- Scan Indicator: Shows when the scanning function is active.
- VOX Indicator: Indicates when the Voice Operated Transmission (VOX) function is active.
- Antenna: For transmitting and receiving signals.
- Speaker: Outputs audio.
- LCD: The main display screen.
- PTT Button (Push to talk): Press to transmit.
- Menu Button: Used to access and select menu options.
- Up/Down Button: Navigates through menus and adjusts settings.
- Battery Level meter: Shows the remaining battery power.
- Volume: Adjusts the speaker volume.
- Key Lock Indicator: Shows when the keypad is locked.
- Lanyard hole location: For attaching a lanyard.
Start Guide
Installation the battery
- Ensure the radio is turned OFF.
- Remove the battery compartment door.
- Install 4 NiMH rechargeable batteries or 4 AAA Alkaline batteries into the battery compartment, observing correct polarity.
- Replace the battery compartment door.
Basic radio operations
- Press the power button to turn the radio ON.
- Press [MENU] to enter channel settings. Use Up/Down buttons to select a channel, then press PTT to confirm.
- Press [MENU] twice to access sub-code settings (OFF, CTCSS 01-38, DCS 39-99).
- Press [MENU] three times to access VOX function sensitivity (OFF, 1, 2, 3).
- Press [MENU] four times to select a CALL tone (01-10).
- Press [MENU] five times to enable/disable key tones.
- Press [MENU] six times to enable/disable the launch end tone.
- Press [MENU] seven times to exit the menu, or press PTT to confirm and exit.
Note: This device does not have a charging function. It can only be used with rechargeable NiMH batteries.
Battery Meter
- Full Battery: ||||
- Low Battery: | - Replace batteries immediately when the icon appears.
Turning Your Radio ON / OFF
- To turn ON: Press and hold the power button for 3 seconds.
- To turn OFF: Press and hold the power button for 3 seconds.
Adjusting the Volume
- Press the Up button [▲] to increase volume (1-8 levels).
- Press the Down button [▼] to decrease volume (1-8 levels).
Setting a Channel
- With the radio on, press [MENU] until the current channel flashes.
- Press Up/Down buttons to select the desired channel.
- Press PTT to save the channel setting.
Voice Signal Transmission and Reception
Ensure all radios are set to the same channel and Interference Eliminator Code for communication.
- To talk: Press and hold the [PTT] button. Hold the radio 2-3 inches from your mouth and speak clearly. Do not cover the microphone.
- To listen: Release the [PTT] button.
Special Features
Interference Eliminator Code
These codes minimize interference. To set a code for a channel:
- Press [MENU] until the code flashes.
- Press Up/Down buttons to select a code (0-99).
- Press PTT to save the code setting.
Note: Set codes to 0 on an FRS radio to communicate with other FRS radios without codes.
TOT (Time Out Timer)
This function limits continuous transmission to prevent channel misuse and save power. The radio emits a "beep" tone when the emission limit (less than 180 seconds) is reached, and stops transmitting.
Locking the Keypad
- To lock: Press and hold the [ ] button for 3 seconds until [ ] displays and a "beep" is heard. This locks all functions except PTT and volume adjustment.
- To unlock: Press and hold the [ ] button for 3 seconds until [ ] is no longer displayed and a "beep" is heard.
Note: When locked, only the PTT and volume buttons are functional.
Setting and Transmitting Call Tones
Your radio can transmit different call tones to alert others. To set a call tone:
- Press [MENU] until the call tone icon appears. The current setting will flash.
- Press Up/Down buttons to change and hear the call tones.
- Press PTT to save.
Voice Operated Transmission (VOX)
Transmission is initiated by speaking into the microphone instead of pressing the PTT button.
Note: Level 'N' (OFF) disables VOX. Levels 1-3 set sensitivity. Use Level 1 in quiet environments and Level 3 in noisy environments. Adjust sensitivity by speaking into the microphone.
Scanning Channels
This feature scans for active channels. When activity is detected, the radio stays on that channel for 5 seconds before continuing to scan. To transmit, press the PTT button.
- To turn Scan ON: Press and hold the [ ] button to enter Scan mode.
- To turn Scan OFF: Press the [ ] or PTT button.
Note: During scanning, press the Up/Down buttons to change the scan direction.
Technical Specifications
| Parameter | Specification |
|---|---|
| Channels | 8/16/20/22 |
| Sub-code | CTCSS 38 DCS 61 |
| Frequency | 400-470 MHz |
| Range | Up to 3 Km (Open field) |
| Battery | 4xAAA |
| Transmission Type | <500mW |
| Modulation Type | FM-F3E |
| Channel spacing | 12.5/25 KHZ |
User Safety Information
Please read the following safety information for safe and efficient use of this machine.
- Turn off the radio before entering flammable and explosive environments.
- Do not replace or charge batteries in flammable or explosive environments.
- Do not use the radio with a damaged antenna, as it may cause slight burns if it touches the skin.
- Radio maintenance should only be performed by professional technicians. Do not disassemble or assemble the radio yourself.
- To avoid issues caused by electromagnetic interference, turn off the interphone in areas with the "Please turn off the interphone" logo.
- This radio is not fully waterproof; keep it dry.
- Do not expose the radio to direct sunlight for extended periods or place it near heating devices.
- When transmitting, hold the intercom in a vertical position and speak near the microphone.
- If wearing the radio on your body, ensure the antenna is at least 5 cm away from your body during transmission.
- If you carry a personal medical device, consult a doctor before use.
- To avoid the risk of burns, do not use the device if the antenna is damaged.
- Never use the device in close proximity to a radio to avoid interference.
- Position the transmitter and antenna at least 5 cm from your mouth.
- The device cannot be used to contact emergency services.
WARNING!
- Regularly check for damage to the shell and other parts during use. Stop using and repair if damage is found.
- Maintenance: Electrical components must not get wet. Clean surface stains with a dry cloth.
- Do not let children play with disassembled, damaged, or deformed toys to avoid accidental swallowing and suffocation.
- Use compliant No. 7 batteries (AAA). If batteries leak or swell, do not install or use them.
Age Recommendation: 6+
Certifications: CE, FCC
Made in: China
