K-POD302
File info: application/pdf · 2 pages · 612.65KB
K-POD302
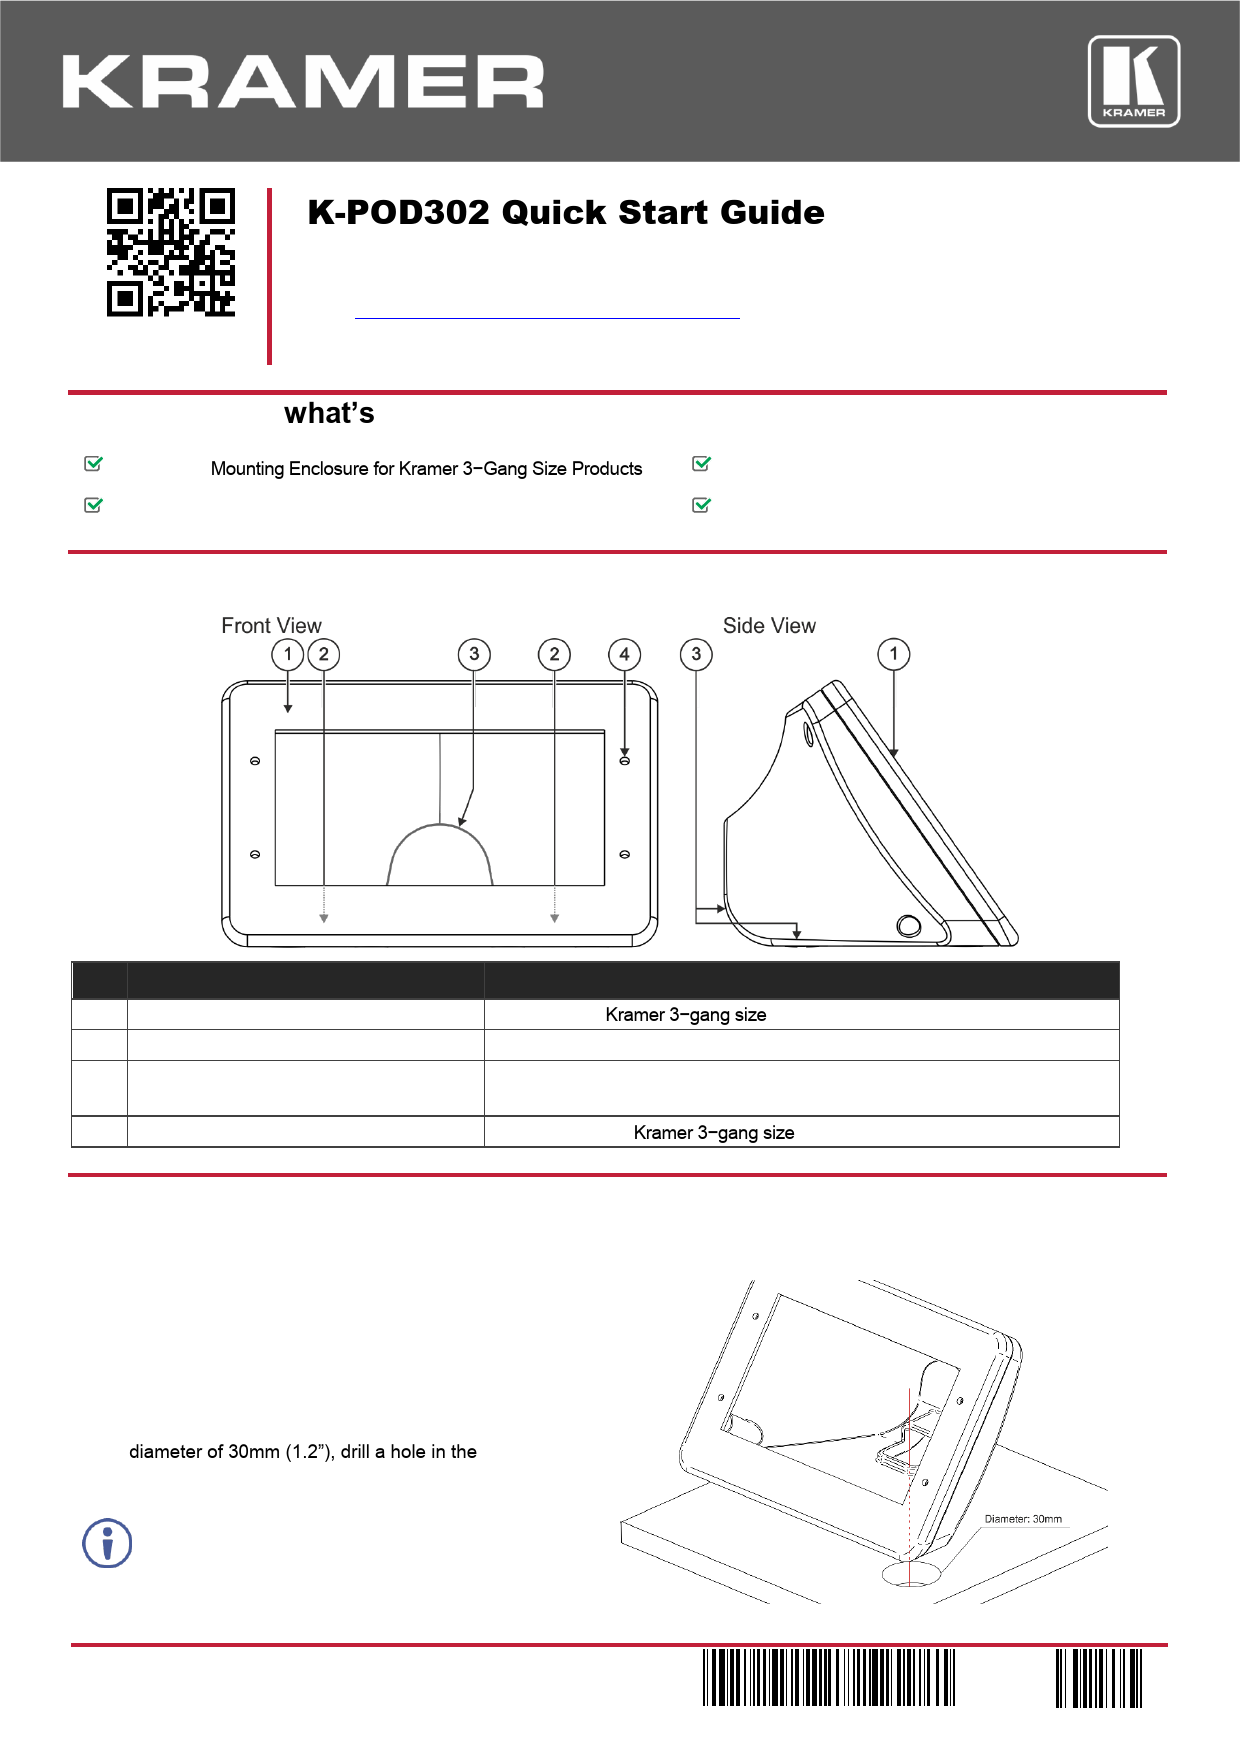
Mounting Enclosure for Kramer 3−Gang Size Products
K-POD302 Quick Start Guide - Kramer Electronics
K-POD302 Mounting Enclosure for Kramer 3−Gang Size Products. 4 M3X8 screws. 2 4x1/2" screws. 1 Quick start guide. Step 2: Get to know your K-POD302. #.
K-POD302 Quick Start Guide
User Guide
Staub. KRAMER - 3 GANG PODIUM TABLE BUS
Full PDF Document

If the inline viewer fails, it will open the original document in compatibility mode automatically. You can also open the file directly.
Extracted Text
Scan for full manual

K-POD302 Quick Start Guide
This guide helps you install and use your K-POD302 for the first time. Go to http://www.kramerav.com/downloads/K-POD302 to download the latest user manual and check if firmware upgrades are available.

Step 1: Check what's in the box
K-POD302 Mounting Enclosure for Kramer 3-Gang Size Products 2 4x1/2" screws

4 M3X8 screws 1 Quick start guide

Step 2: Get to know your K-POD302

# Feature 1 Mounting Frame 2 Table Screw Openings (x2) 3 Cable Opening
4 Device Mounting Screw Openings (x4)

Function For mounting Kramer 3-gang size device. For attaching the K-POD302 onto the surface. Use to pass the cables either through the rear side of K-POD302 or under the table/podium (if the surface has a cut-out opening). For attaching the Kramer 3-gang size device to the K-POD302.

Step 3: Mount the K-POD302 onto a surface
If you plan to pass the cables under the table you need to drill a hole in the table before mounting K-POD302 onto the surface. If you plan to pass the cables through the rear opening, skip the first part in this section.
To drill a hole in the table:
1. Place the K-POD302 on the surface and carefully mark the opening area so it fits the opening in the KPOD302.
2. Using any standard cup bit drill, with a diameter of 30mm (1.2"), drill a hole in the table in the desired location.
3. Clean the table surface.
Take care not to damage the table. Kramer Electronics is not responsible for any damage caused to the table.

K-POD302 Quick Start (P/N: 2900-301100QS REV 3)

P/N: 2 9 0 0 - 3 0 1 1 0 0 QS

Rev: 3

To attach K-POD302 to the table surface: 1. Place the K-POD302 on the table in the desired location (if you cut a hole in the table, fit the underside opening to that hole). 2. Pass the 2 M4x1/2" screws (supplied) through the table screw openings and tighten them to fix the K-POD302 to the table.
Step 4: Attach RC-74DL to the K-POD302
RC-74DL is used here as an example. Other 3-gang Kramer products can also be mounted in K-POD302.
To attach RC-74DL to the K-POD302: 1. Connect the cables to the rear panel of the RC-74DL and pass the cables through the cables opening.
2. Place the RC-74DL panel over the K-POD302 frame and pass the 4 M3x8 screws (supplied) through the RC-74DL holes and mounting screw openings and tighten them.
3. Position the RC-74DL faceplate over the panel and tighten with the 4 RC-74DL faceplate screws (supplied with RC-74DL).