Home
›
BRAND MAN
›
BRAND MAN 1600207023 For safe use and enjoyment of your new barbeque Instruction Manual

BRAND MAN 1600207023 For safe use and enjoyment of your new barbeque Instruction Manual
File info: application/pdf · 20 pages · 10.01MB
Rodeo Instruction Manual - Brand-Man Grill
FOR OUTDOOR USE ONLY! DO NOT USE INDOORS. • Please read these instructions carefully prior to assembly and use. • Failure to follow these instructions could ...
To obtain correct temperature use an instant-read meat thermometer in the thickest careful not to touch any bone. COOKING TIMES. POULTRY. Cut of Meat. Weight or ...
All slow cooking needs a heat deflector for infirect heating. a heat deflector. NOTE: Trivet and heat deflector (pizza stone) are not including, sell in separat ...
Extracted Text
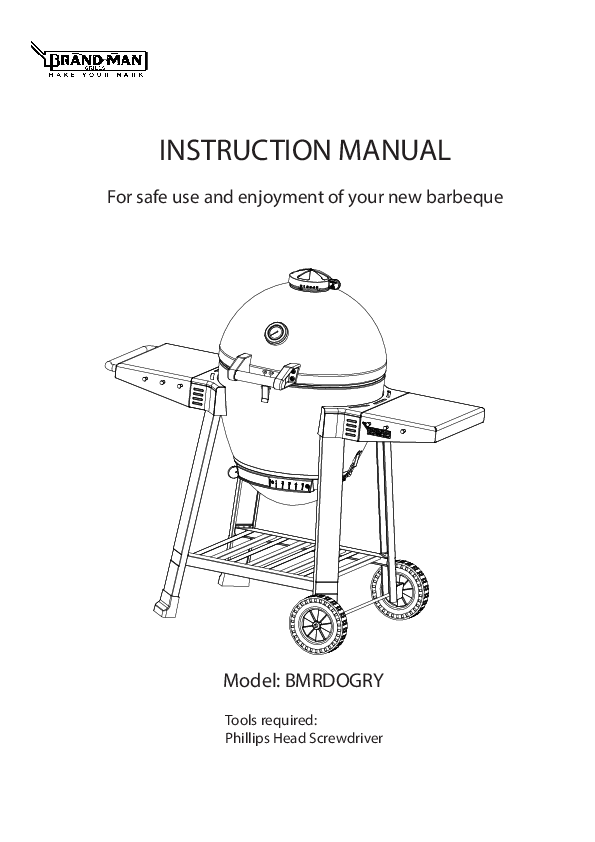
INSTRUCTION MANUAL
For safe use and enjoyment of your new barbeque
Model: BMRDOGRY
Tools required: Phillips Head Screwdriver

IMPORTANT HEALTH & SAFETY INFORMATION
1. WARNING
FOR OUTDOOR USE ONLY! DO NOT USE INDOORS
� Please read these instructions carefully prior to assembly and use. � Failure to follow these instructions could lead to serious injury and/or significant damage to
property. � Do not use the barbeque if there is any doubt over the correct assembly or lighting procedure. � These instructions should be retained for future reference. � The barbeque must have a minimum side, back and front clearance from any combustible
material of at least 1000mm. Additionally there must be a clearance of at least 2000mm clear above the cooking surface of the barbeque. � Flammable materials and liquids must be stored well away from the barbeque. � Aerosols must not be used near the barbeque. � The barbeque should not be moved when lit or hot. � A lit barbeque should be attended at all times. � Avoid dousing the barbeque with water. � Ensure the barbeque charcoal is completely extinguished when the barbeque is not in use. � Always allow the barbeque to completely cool down before covering. � For safety reasons it is advisable to keep a fire extinguisher and fire blanket close to hand. � Unsupervised children and the infirm should not be allowed close to the barbeque during preheat, cooking, burn off or cooling down of the unit. � Please dispose of all packing materials and carefully and keep plastic bags out of the reach of children.
1

SETTING UP THE BARBEQUE
THIS APPLIANCE SHALL ONLY BE USED IN AN ABOVE GROUND OPEN AIR SITUATION WITH NATURAL VENTILATION, WITHOUT STAGNANT AREAS, WHERE PRODUCTS OF COMBUSTION ARE
RAPIDLY DISPERSED BY WIND AND NATURAL CONVECTION
FOR OUTDOOR USE ONLY 1. POSITIONING
� Please make sure that the barbeque is NOT positioned underneath any combustible material or surface.
� There MUST be a clearance of at least 1000mm from the sides, back and front of the barbeque to any combustible materials or surfaces. There must also be a clearance of at least 2000mm above the cooking surfaces to any combustible surface.
� Flammable materials of any description MUST be kept well away from the barbeque. � The barbeque must be positioned to avoid walkways, gangways and general pedestrian access. � The nature of a barbeque is such that many of the surfaces are hot to touch, the positioning of the
barbeque should take into consideration the possibility of accidental hand or body contact.
Any enclosure in which the appliance is used shall comply with one of the following:
� An enclosure with walls on all sides, but at least one permanent opening at ground level and no overhead cover. SEE EXAMPLE 1
� Within a partial enclosure that includes an overhead cover and no more than two walls. SEE EXAMPLE 2 & 3
� Within a partial enclosure that includes an overhead cover and more than two walls, the following shall apply� at least 25% of the total wall area is completely open; and � at least 30% of the remaining wall area is open and unrestricted SEE EXAMPLE 4 & 5
� In the case of balconies, at least 20% of the total of the side, back and front wall areas shall be and remain open and unrestricted
BURNING CHARCOAL INSIDE CAN KILL. IT GIVES OFF CARBON MONOXIDE WHICH HAS NO ODOUR.
Both ends open

EXAMPLE 1

EXAMPLE 2

EXAMPLE 3

Open side at least 25% of total wall area
EXAMPLE 4

30% or more in total of the remaining wall area in open is unrestricted

Open side at least 25% of total wall area
EXAMPLE 5
2

30% or more in total of the remaining wall area in open is unrestricted

ASSEMBLY INSTRUCTIONS
PARTS LIST

ASSEMBLY INSTRUCTIONS
HARDWARE LIST
Screwdriver
4

ASSEMBLY INSTRUCTIONS
Step 1
a) Fit Foot (T) to both of the Left Legs (S) as shown in the diagram.

Step 2
a) Attach three Tool Hook Screws (HH) onto the Table - LEFT (O) and Table - RIGHT ( P) as shown.
P

HH

X 6

5

ASSEMBLY INSTRUCTIONS
Step 3
a) Take the pre-assembled Table Handle (Q) and attach it onto Table - LEFT (O). Secure it with two bolts (BB) as shown below.
Q
O
x 2
Step 4
a) Install one Ash Pan Handle (B) onto each side of the previously prepared Ashpan Assembly (N). b) Secure each Ash Pan Handle (B) with two bolts (KK).
B
x 4
6

"44&.#-:*/4536$5*0/4
Step 5
a) Attach the Ashpan Support (F) onto the Ashpan Assembly (N) and secure it with three bolts (CC).
F

x 3
Step 6
a) Start from the left side of the Body Assembly (A), attach two prepared Left Legs (S) from step 1 onto the left of the Body Assembly (A) each with two Flat Washers (FF), two Spring Washers (EE) and two bolts (AA).
b) Repeat the same procedure on the right side of the Body Assembly (A) with Right Leg - FRONT (V) and Right Leg - BACK (W).
c) Ensure all bolts are properly tightened. A

W

S

V

FF

x 12

S

EE

x 12
AA

x 12

7

"44&.#-:*/4536$5*0/4

Step 7

a) Stand the assembly upright as shown and attach the Bottom Shelf (U) onto the BBQ legs.

b)

(U)

(AA).

x 8
x 8
x 8
Step 8
a) Working on the left side of the leg, lift the BBQ silghtly up to fit the Axel (Y) through the wheels (X) and Spacer (R), then through the BBQ legs as shown in the digram below.
b) After attaching both wheels and the axle to the BBQ legs, secure it with the Split pin (II) on the end of the axle as shown below.

II x 1

Y
X R
8

ASSEMBLY INSTRUCTIONS
Step 9
a) Align the Hood Handle (I) with Handle Bracket - LEFT (H) and Handle Bracket - RIGHT (J) as shown. b)
(EE) and two Bolts (AA) on each handle bracket. c) Ensure all screws are properly tightened.

--

--

x4

x4

x4

Step 10
a) Open the BBQ and attach the Damper (K) and Damper O-Ring Seal (L) on to the hood. b) Secure from inside with two Fibre Washers (GG), two Flat Washers (FF), two Spring Washers (EE) and two
Bolts (BB).

x2 x2 x2 x2
9

ASSEMBLY INSTRUCTIONS
Step 11
a) Loosen the two pre-installed bolts on the left side of the barbeque body, and allow 5 mm bolt length to extend. Align the holes on the Table - LEFT (O) with the extended bolts, then push down on the Table until it locates into place, tighten with screwdriver until secure.
b) Align the other two holes on the left side of body assembly (A) with the two holes from under the Table Assembly - LEFT (O). Then insert one Bolt (AA) into each hole and tighten with screwdriver until secure.
c) Repeat the procedure for the Table - RIGHT (P). d) Go back and tighten allbolts with a screwdriver.
x 4
Step 12
a) With the BBQ hood open, insert the Fire Bowl (M), the Charcoal Grill (E) and Trivet (F) in the order as shown below.
Insert Second
Insert First
10 �

ASSEMBLY INSTRUCTIONS

Step 13

a)

b) Place the Cooking Grill Inner (D) into the middle of the Cooking Grill Outer (C).

C)

Z

Z

Step 14
a) Hang the grate lifter on the Table hook for convenience. b)
sides as shown below.

11

01&3"5*/(:063#"3#&26&
#FGPSF-JHIUJOH
- Set the BBQ up on a hard non-combustible level surface. The base of the BBQ will get hot so be sure
starter. - When coals are ashed-over arrange coals evenly over grate with long handled tongs.
'PPE$PPLJOH*OGPSNBUJPO
- ALWAYS wash your hands before or after handling uncooked meat and before eating. - NEVER place cooked meat on the same plate that raw meat was on. - DO NOT use the same utensils to handle cooked and uncooked foods. - Before cooking ensure barbeque grill surfaces and tools are clean and free of old food residue.
"GUFS6TF*OTUSVDUJPOT
- Make sure all coals are fully extinguished and the BBQ is cool. - Remove ashes. - Wash BBQ with a mild detergent and rinse with water. - Wipe dry with cloth or paper towel. - Clean cooking grill and warming rack with a wire brush. - Store in dry area.
%"/(&3
%0/05 use charcoal briquettes for indoor cooking or heating. TOXIC carbon monoxide fumes can accumulate and cause asphyxiation and death!
%"/(&3
This BBQ is not intended to be installed in or on recreational vehicles and / or boats.
8"3/*/(5)&
12

COOKING INSTRUCTION

N

MA

LIGHTING YOUR STEEL KAMADO

LIGHTING INSTRUCTIONS

2. Place 1 or 2 Natural Fire Starter Cubes in the charcoal so1/4 of cube is visible. 3. Open bottom vent fully and leave the hood open. 4. Light the Fire Starter Cubes. Charcoal will be ready in around 15-20 minutes.

the charcoal burn hotter. 6. Pre-heat for 15 minutes prior to cooking. Do not cook before the fuel has a coating of ash.

A charcoal starter chimney is a helpful alternative for lighting.

CAUTIONS

Do not use "Instant Light" briquettes. This will cause the same undesirable taste.
CONTROLLING THE TEMPERATURE
NOTE: Trivet and heat deflector (pizza stone) are not including, sell in separat, item number is BA145002
1. With the Charcoal fully lit and hood closed, make sure the bottom vent is fully open.
2. Open the top damper vent fully and monitor the temperature until it reaches your desired temperature.
3. Close the top damper vent half way, wait 5 minutes and check the temperature.
4. Adjusting the top damper vent by either closing it more (lower temperature) or opening it more (higher temperature)
5. Monitor the temperature during cooking and if you notice that the temperature has moved outside your desired range, adjust the top damper vent in very small increments and wait 1-2minutes.
Trivet & heat deflector(pizza stone) (not including)
Lower Vent

Top Damper Vent

13

COOKING INSTRUCTION

BEFORE ANY CARE AND MA SLOW COOK/SMOKE (125 � C to 150 � C)

All slow cooking needs a heat deflector for infirect heating.

Beef, Lamb or Pork

1 hour per kg

Chicken Wings

15 minutes per kg

Full Rack of Ribs

30 minutes per kg

Roasts

30 minutes per kg

ROAST/BAKE/GRILL (160 � C to 250 � C)

The times listed below are for cooking directly on the cooking grill, on a roast rack, in a drip pan (direct

a heat deflector.

Chicken (pieces)

30 - 45 minutes

Chicken (whole)

60 - 80 minutes

Pork Tenderloin

20 - 30 minutes

Seafood

5 - 10 minutes

Turkey

2 - 4 hours

STEAK HOUSE SEAR (250 � C to 350 � C)

individual taste. Hamburgers Chops Steak

8 - 10 minutes 6 - 8 minutes 6 - 8 minutes

BAKING
NOTE: Trivet and heat deflector (pizza stone) are not including, sell in separat, item number is BA145002

Trivet & heat deflector(pizza stone) (not including)

For baking, it is usually easier to achieve your desired temperature by keeping the lower vent fully open

and only adjusting the top damper vent.

To bake successfully, you will need to use a heat deflector.

1. grill at this stage.
2.

3. Close the hood and preheat for 10 minutes. 4. Make sure the bottom vent is fully open. Open the top damper vent and
monitor the temperature until it reaches your desired temperature. 5. Close the top damper vent half way, wait 5 minutes and check the
temperature. 6. Adjust the top damper vent by either closing it more (lower temperature)
or opening it more (higher temperature).
14

COOKING INSTRUCTION
BEFORE ANY CARE AND MA
BAKING (cont.)
7. Once the desired temperature is achieved, set your baking tray in place on the cooking grill. You can also bake on the warming rack. Close the hood and start baking.
8. Monitor the temperature during cooking and if you notice that the temperature has moved outside your desired range, adjust the top damper vent in very small increments, wait 1-2 minutes and readjust if necessary.
ROASTING NOTE: Trivet and heat deflector (pizza stone) are not including, sell in separat, item number is BA145002 For roasting, it is usually easier to achieve your desired temperature by keeping the lower vent fully open and only adjusting the top damper vent. Some people prefer to use a A small pizza stone is great for this. You can roast successfully
up with some water under a roast support rack.
1. using one and leave out the cooking grill at this stage.
2. When the charcoal is fully lit, taking care to avoid burns, if you are
place. 3. Close the hood and preheat for 10 minutes. 4. Make sure the bottom vent is fully open. Open the top damper
vent and monitor the temperature until it reaches your desired temperature. 5. Close the top damper vent half way, wait 5 minutes and check the temperature. 6. Adjust the top damper vent by either closing it more (lower temperature) or opening it more (higher temperature). 7. Once the desired temperature is achieved, set your roast (and drip pan and roast rack if your are using them instead of a heat
roasting food onto the warming rack. Close the hood and start roasting. 8. Monitor the temperature during cooking and if you notice that the temperature has moved outside your desired range, adjust the top damper vent in very small increments, wait 1-2 minutes and re-adjust if necessary. 9. Use a meat probe thermometer to take the guesswork out of knowing when your roast is done.
15

COOKING INSTRUCTION
BEFORE ANY CARE AND MA
GRILLING
For direct grilling, it is usually easier to achieve your desired temperature by keeping the lower vent fully open and only adjusting the top damper vent.
1. Before lighting, Leave out the cooking grill at this stage. 2. 3. Close the hood and preheat for 10 minutes. 4. Make sure the bottom vent is fully open. Open the top damper vent and monitor the temperature
until it reaches your desired temperature. 5. Close the top damper vent half way, wait 5 minutes and check the temperature. 6. Adjust the top damper vent by either closing it more (lower temperature) or opening it more (higher
temperature). 7. Once the desired temperature is achieved, set your food in place on the cooking grill. You can grill
extra food on the warming rack. Close the hood and start grilling. 8. Monitor the temperature during cooking and if you notice that the temperature has moved outside
your desired range, adjust the top damper vent in very small increments, wait 1-2 minutes and readjust if necessary. 9. Use a meat probe thermometer to take the guesswork out of knowing when your food is done.
SMOKING NOTE: Trivet and heat deflector (pizza stone) are not including, sell in separat, item number is BA145002 For smoking, the best way to achieve the lower required temperatures is by almost closing the lower
1. 2. Take care not to use too much charcoal. 3.
optional smoker box with woodchips and drip pan (if you are using one) into place on top of the heat
4. Close the hood. Set the lower vent to 1 or 2 marks away from fully closed. 5. Close the top damper vent half way, wait 5 minutes and check the temperature. 6. Adjust the top damper vent by either closing it more (lower temperature) or opening it more (higher
temperature). 7. Once the desired temperature is achieved, set your food in place on the cooking grill or on optional
smoking racks. You can also smoke on the warming rack. Close the hood and start smoking. 8. Monitor the temperature during cooking and if you notice that the temperature has moved outside
your desired range, adjust the top damper vent in very small increments, wait 1-2 minutes and readjust if necessary.
16

$00,*/(3&'&3&/$&
*/5&3/"-.&"55&.1&3"563&4
#FFG Meat Probe temperature: Rare 140�F / 60�C Medium 150�F / 66�C Well Done 170�F / 77�C
-BNC Meat Probe temperatures: Rare 140�F / 60�C Medium 150�F / 65�C Well Done 165�F / 75�C
7FBM Meat Probe temperatures: Rare not advised Medium 155�F / 70�C minimum safe temperature Well Done 165�F / 75�C
1PSL Meat Probe temperatures: Rare not advised Medium 150�F / 65�C minimum safe temperature Well Done 160�F / 70�C
1PVMUSZ Meat Probe temperatures: Rare not advised Medium 170-175�F / 75-80�C minimum safe temperature Well Done not advised; poultry tends to dry out over 175�F / 80�C
5PPCUBJODPSSFDUUFNQFSBUVSFVTFBOJOTUBOUSFBENFBUUIFSNPNFUFSJOUIFUIJDLFTU
DBSFGVMOPUUPUPVDIBOZCPOF

$00,*/(5*.&4

POULTRY

Cut of Meat

Weight or Thickness BBQ Method

Chicken (whole)

2 kg

Indirect

Chicken (halved or quartered) 2 kg total

Indirect

Chicken (breasts, boneless) 150 g ea

Direct

Chicken (breasts, boneless) 150 g ea

Indirect

Wings

120 g

Direct

Wings

120 g

Indirect

Cut Up Legs and Wings

2 kg

Direct

Cut Up Legs and Wings

2 kg

Indirect

Boneless Cubes (For Kebabs) 2.5 cm

Direct

Turkey (Whole)

4.5 kg

Indirect

Approx Cook Time 70-80 min 55-65 min 12-15 min 23-25 min 23-30 min 35 - 40 min 10 min 40 min 12-15 min total 2-3 hours

17

BEEF

Cut of Meat

Weight or Thickness BBQ Method

Roasts

2 kg

Indirect

Steaks (T-bone, New York, Por-

terhouse, Round, Sirloin)

2.5 cm

Direct

Rump Steak

3.5 cm

Direct

Minute Steaks

0.5 cm

Direct

Approx Cook Time 50 min per kg (rare)
5-6 min per side (rare) 5-7 min per side (med rare) 1.5-2 min per side (rare)

2.5 cm

Direct

2.5 cm

Direct

2.5 cm

Direct

Thermometer Temperature: Rare = 60�C, Medium = 66�C, Well = 77�C

4-5 min per side (rare) 5-6 min per side (med. Rare) Ground 6-7 min per side (well done)

SEAFOOD Cut of Meat Whole Fish (with or Without head and tail) Steaks & Fillets Prawns Lobster Tails

Weight or Thickness BBQ Method

2 kg 2 cm Medium sized 300 g

Indirect Direct Direct Direct

Approx Cook Time
30-35 min 3-4 min per side 1.5-2 min per side 9-13 min

18

CARE & MAINTENANCE
BEFORE ANY CARE AND MAINTENANCE IS ATTEMPTED PLEASE ENSURE THAT THE BARBEQUE ARE NOT IN USE AND THAT ALL SURFACES HAVE BEEN GIVEN SUFFICIENT TIME TO COOL DOWN.
Please note the following when maintaining and caring for your barbeque: � Cleaning your barbeque regularly will help to keep a pristine appearance. � Throwing cold water over any hot surface of the barbeque is NOT recommended and is potentially dangerous. � Avoid handling and touching hot parts of the barbeque.
CARE OF THE BARBEQUE BODY term appearance. � Excess grease and fat can be removed using grease remover and warm water with a soft scraper (not metal edged). � The barbeque body should be fully cleaned by using hot soapy water and a sponge to avoid corrosion starting on dirty surfaces. prevention. � Regularly spray screws and fasteners with an appropriate lubricant or rust preventer. � If external paint is scratched or chipped it must be immediately covered with paint or a rust preventer. � Keep the barbeque covered when it not in use.
CUSTOMER SERVICE CENTRE: PHONE: (949) 229-8927
Email: Brandmanservice@handhasia.com
19