iiglo TVL1102 Motorized TV Wall Mount
Installation Manual
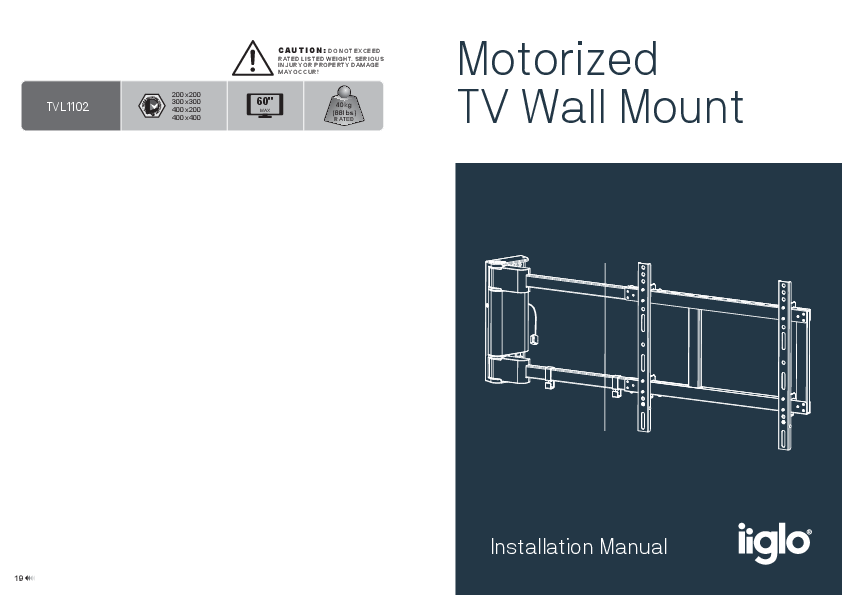
Product Overview & Specifications
This document provides installation instructions for the iiglo TVL1102 Motorized TV Wall Mount. It supports VESA patterns including 200x200, 300x300, 400x200, and 400x400. The mount has a maximum weight capacity of 40kg (88lbs) and is suitable for TVs up to 60 inches.
⚠️ CAUTION: Do not exceed the rated listed weight. Doing so may result in serious injury or property damage.
Important Safety Information & Warnings
Before starting installation, read the entire manual. If you have questions, contact your local distributor.
- This mounting bracket is designed for installation and use only as specified in this manual. Improper installation can cause damage or injury.
- Installation should be performed by someone with good mechanical ability and basic building experience.
- Ensure the supporting surface can safely bear the combined weight of the equipment and all attached components.
- When mounting to wood wall studs, ensure mounting screws are anchored into the center of the studs. A stud finder is highly recommended.
- Always use an assistant or lifting equipment to safely lift and position the equipment.
- Tighten screws firmly but avoid over-tightening, which can reduce holding power.
- This product is intended for indoor use only.
- Do not disassemble or alter electronic components without authorization.
Component Checklist
Verify all parts are present before installation. Contact your local distributor for replacements if any parts are missing or faulty.
Package A: Main Components
- Motorized wall mount (x1) [A]
- Wall template (x1) [B]
- Cable clip (x2) [C]
- Adapter bracket (x2) [D]
- IR receiver (x1) [E]
- Remote control (x1) [F]
- Power supply (x1) [G]
- Bubble level (x1) [H]
Package M: Mounting Hardware
- M5x14 screws (x4) [M-A]
- M6x14 screws (x4) [M-B]
- M6x30 screws (x4) [M-C]
- M8x30 screws (x4) [M-D]
- M8x50 screws (x4) [M-E]
- Washers (x4) [M-F]
- Small spacers (x8) [M-G]
- Big spacers (x8) [M-H]
Package W: Wall Mounting Hardware
- ST6.3x55 screws (x5) [W-A]
- Concrete anchors (x5) [W-B]
- D6 washers (x3) [W-C]
Installation Instructions
Step 1: Separating Decorative Covers
Remove decorative covers from the wall mount using a Phillips screwdriver.
Step 2: Opening Swing Arm
Open the swing arm to a 90° angle.
Step 3: Positioning Swing Arm
Adjust the swing arm based on the TV size. The formula for adjustment is X = TV(L)/2 + 260mm, where L is the length of the TV. Reinstall screws and washers to secure the adjusted swing arm.
Step 4: Wall Mounting
4a. For Wood Stud Wall Mounting
Forward Installation: Use the wall template to find and mark the exact location of mounting holes. Drill pilot holes (7mm recommended). Attach the mount, ensuring screws are tightened leaving a 7mm space from the wall.
Reverse Installation: Similar process, ensuring correct orientation. A stud finder is recommended to locate the center of studs.
⚠️ WARNING: Ensure screws are anchored into the center of studs. Installers are responsible for providing appropriate hardware for other mounting situations and must verify the supporting surface can handle the weight.
4b. For Solid Brick and Concrete Mounting
Forward Installation: Mark mounting hole locations using the template. Drill pilot holes (7mm recommended). Insert concrete anchors [W-B] and washers [W-A] as needed. Attach the mount, leaving a 7mm space from the wall.
Reverse Installation: Similar process with correct orientation. Ensure the supporting surface can handle the weight.
Step 5: Installing Decorative Covers and Cable Clips
Attach the decorative covers and cable clips [C] to the wall mount.
Step 6: Installing Adapter Brackets
Remove screws from adapter brackets and keep them for later use.
6-1 For Flat Back Screens
Attach adapter brackets to the TV using appropriate screws, washers, and spacers (e.g., M-A, M-F; M-B, M-F). Position brackets close to the screen's middle. Tighten screws firmly but do not over-tighten.
6-2 For Recessed Back Screens or to Access A/V Inputs
Attach adapter brackets using combinations like M-C/M-D with M-F/M-G/M-H or M-E with M-F/M-G/M-H, depending on the TV's back design. Position brackets close to the screen's middle. Tighten screws firmly but do not over-tighten.
Step 7: Hooking the TV onto the Wall Mount
Hook the TV over the swing arm. Reinstall bottom screws to secure the adapter brackets to the swing arm. Ensure the TV is correctly hooked before releasing it. Adjustment screws can be tightened to help level the TV and counteract tilt caused by weight.
Step 8: Cable Management
Connect cables to the TV and route them through the cable clips. Leave slack in the cables for arm movement.
Remote Control Operation
9. Placing the IR Receiver
Do not open the electrical cover. Plug the power supply into the outlet only when ready. Peel the backing paper from the IR receiver and place it in the desired position, ensuring it has an unobstructed view for signal transmission.
10. Remote Control Operating Instructions
The remote control (RMT-01) operates the motorized TV wall mount.
Basic Operation:
- Standby: Upon power-up, the buzzer sounds once, and the mount enters standby.
- Forward/Reverse Installation Choice: For forward installation, no action is needed. For reverse installation, press and hold the left directional button [◀] for 5 seconds until the buzzer sounds twice.
- Return to Flat Position: Press and release the OK button to return the mount to a flat position against the wall.
Button Functions:
- Stop Button: Pressing the stop button halts movement.
- Left Button [◀]: Swivels the mount left until OK is pressed or 90° is reached.
- Right Button [▶]: Swivels the mount right until OK is pressed or 0° is reached.
- Memory Button 1 [mem1]: Press and hold for 3 seconds to save the current position. Buzzer sounds twice.
- Memory Button 2 [mem2]: Press and hold for 3 seconds to save the current position. Buzzer sounds twice.
- Recall Memory 1: Press [mem1] then [OK] to move to the saved position 1.
- Recall Memory 2: Press [mem2] then [OK] to move to the saved position 2.
- Installation Choice Button: Used to set forward/reverse installation preference (invalid during operation).
- Learning Button [SET + OK]: Used to learn functions from a TV remote.
Reset Mode:
To reset the system, restart the power. Then, press and hold the [SET] button three times for 3 seconds each. The system will perform an automatic positioning sequence (flat against the wall, then 90° rotation).
LEARN MODE Operation:
This mode allows a TV remote (from popular brands) to control specific functions of the TV wall mount. Note that the TV remote cannot replace all functions of the original remote; only specific buttons can be learned.
Learning Process:
- Press and hold [SET] for 3 seconds, then press [OK]. The IR receiver's red LED will turn on.
- Press the directional button [◀] on the matched remote until the buzzer sounds twice and the red LED flashes slowly.
- Aim the TV remote at the IR receiver. Press the desired button on the TV remote. The buzzer will sound three times, and the red LED will flash fast.
- Press [OK] on the matched remote. The buzzer sounds four times, and the red LED turns off, indicating successful learning. If the buzzer sounds once, learning failed.
To learn the "Power" button:
- Press and hold [SET] for 3 seconds, then press [OK].
- Press and hold the directional button [◀] on the matched remote until the buzzer sounds twice and the red LED flashes slowly.
- Aim the TV remote at the IR receiver and press the "Power" button. The buzzer sounds three times, and the red LED flashes fast.
- Press [OK] on the matched remote. The buzzer sounds four times, and the red LED turns off. The "Power" button is now learned. Pressing the learned "Power" button will reset the mount.
Note: If no activity occurs for 20 seconds, the system exits LEARN MODE.
Maintenance & Troubleshooting
Maintenance
Check that the bracket is secure and safe at regular intervals (at least every three months). Contact your distributor with any questions.
Troubleshooting
Error Indication: Buzzer Constantly Gives Out Alarm Sound (Error of Positioning Signal)
Reset the system as per instructions. If the alarm persists, contact iiglo for a replacement product.
Remote Control Problems:
- Abnormal Loss of Power: If the remote loses power after 24 hours of inactivity, please contact iiglo for a replacement remote control.
- Buttons Don't Work: Check IR receiver connection and remote batteries. If issues persist, contact iiglo for replacement of the remote control and IR receiver.
- Insensitivity (Distance < 3m): Replace remote batteries. If the problem continues, contact iiglo for replacement of the remote control and IR receiver.
Operation Issues:
- Unsteady Movement: Ensure the TV mount is installed evenly. Readjust if necessary. If the problem persists, contact iiglo for a replacement product.
- Can't Operate: Check power adapter connection and power. If no buzzer or red light, check the power adapter. Contact iiglo for a replacement power adapter if faulty. If the power adapter is functional but the mount is not, contact iiglo for a product replacement.
- Abnormal Noise: Contact iiglo for a replacement product.
- Motor Can't Stop / Anti-Collision Mechanism Slips: Contact iiglo for a replacement product.


