CALIBER RMD 032 User Manual
File info: application/pdf · 4 pages · 1.04MB
RMD 032 - Caliber Europe
MANUAL. I. Control Panel. II. Basic operations. 1. Power switch/mute/pause button ( ) a) Short press " " button in the standby state and the radio will be started up ...
RMD 032 - calibereurope.com
NGIS NGIS ANA I. Control Panel II. Basic operations 1. Power switch/mute/pause button ( ) a) Short press " " button in the standby state and the radio will be started up; long press " " in the ON state
I. Control Panel. II. Basic operations. 1. Power switch/mute/pause button ( ) a) Short press " " button in the standby state and the radio will be started ...
Full PDF Document

If the inline viewer fails, it will open the original document in compatibility mode automatically. You can also open the file directly.
Extracted Text
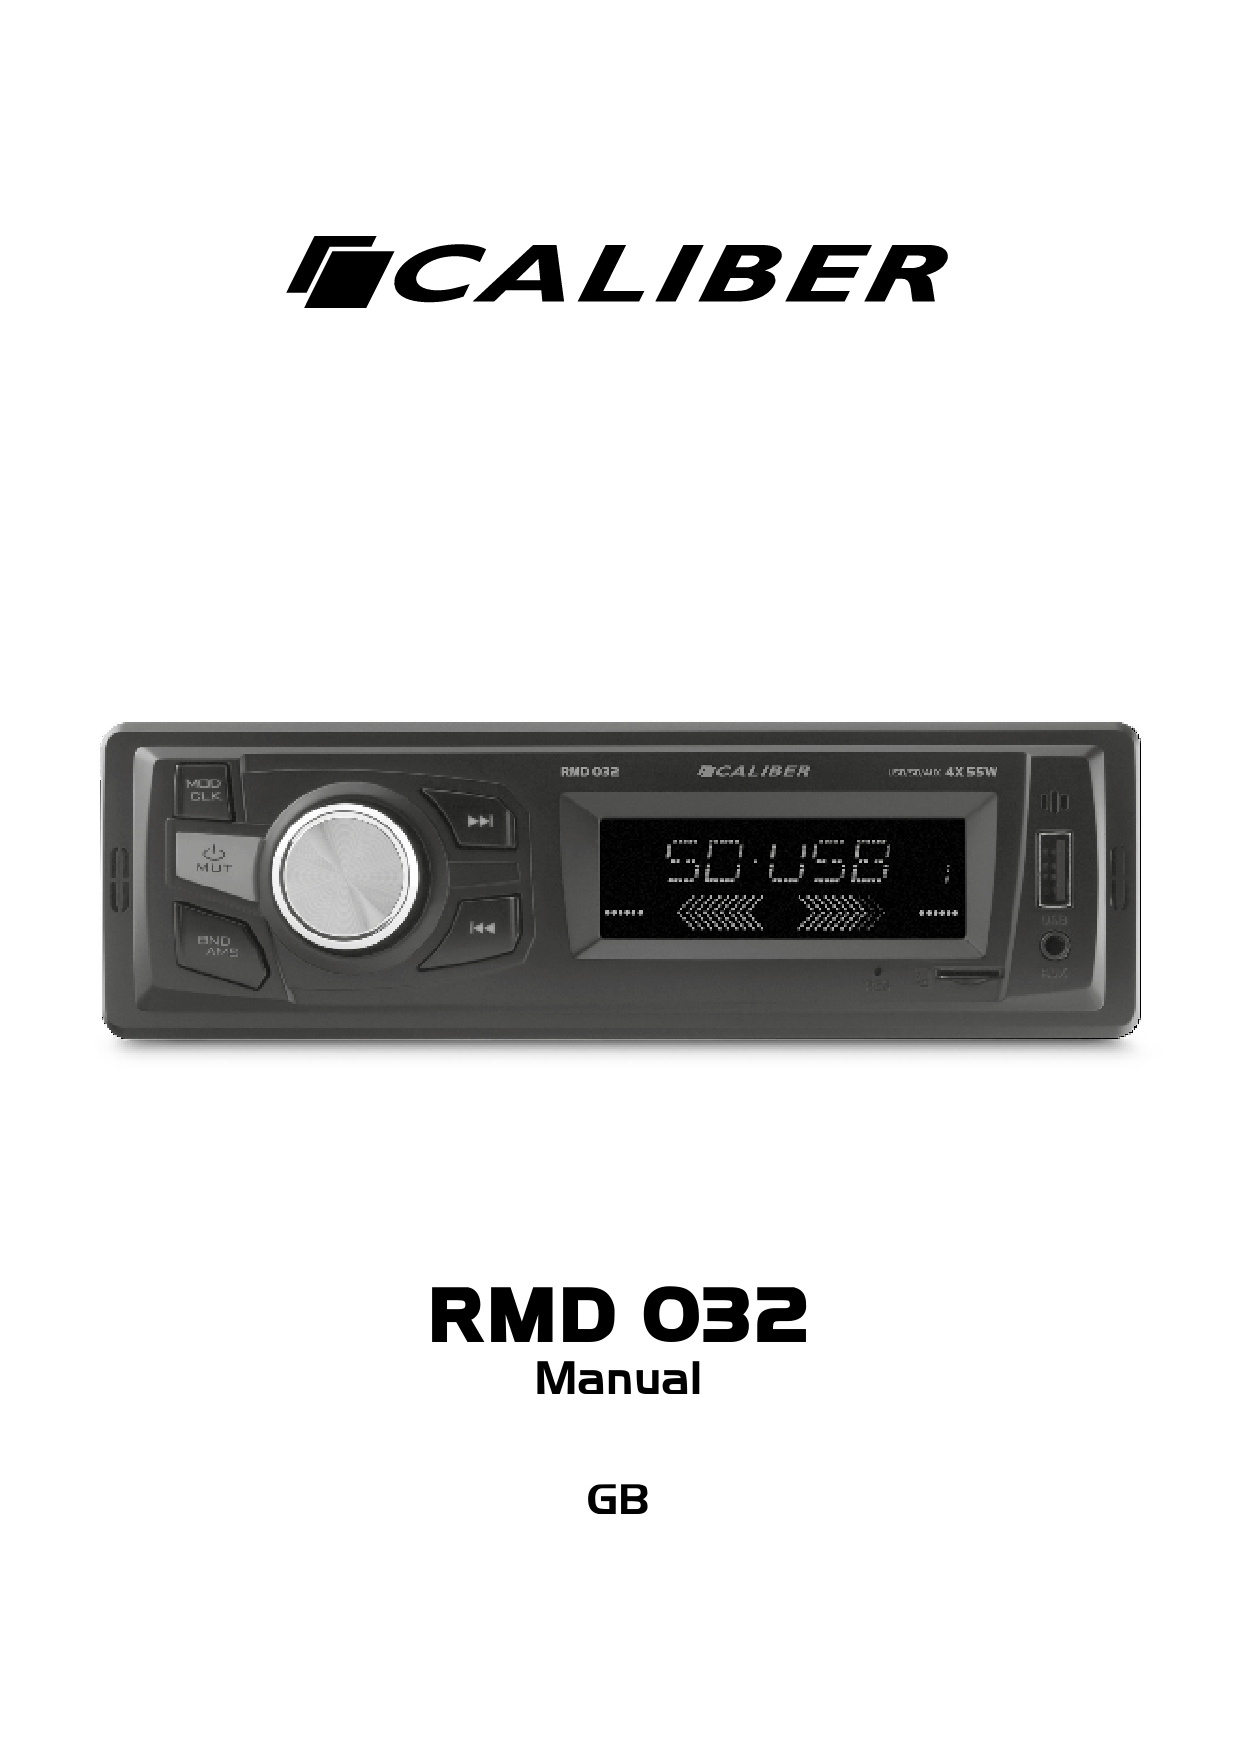
RMD 032
Manual
GB

ENGLISH ENGLISH

MANUAL

I. Control Panel

12

3

4

5

6

11

10

9

87

1. Power switch/Mute/Pause

8. MicroSD card slot

2. Mode switching/Clock button

9. Reset button

3. Volume control/Function selection

10. Previoustrack/Searchradiostation

4. Next track/Search radio station forwards

backwards

 5. Display

11. Band switching/Automatic

6. USB interface (No charge function)

memory storage

7. AUX-IN jack

1. Power ON/OFF

2. End/ignore call (only for Bluetooth models) 1

POWER

11

VOL

3. Mode switch

2

12

(Tuner/AUX/Bluetooth)

3

MODE

7 TUNE/SEEK 8

13

4. Intro play / Preset 2 / No. 2

4

 5. P lay/Pauseplayback/Preset1/No.1 5

 6. S huffleplayback/Preset4/No.4

 7. Preset5/No.5/-10tracks

6

8. RDS AF mode / Preset 8 / No. 8

7

14

12

INT

VOL

RPT

1

2

3

15

RMD

PTY

16

5

6

4

7

17

9. RDS TA mode / Preset 9 / No. 9 10. Audio (settings) menu / Numeric #

AF

TA

BAND DSP

8

8

9

0*

18

9

19

11. Call pickup (only for Bluetooth models)

10

SEL #

12. Increasevolume/+inmenu

13. Next track / tune seek

14. Decreasevolume/-inmenu

15. Repeatmode/Preset3/No.3

16. PTY / Preset 7 / No. 7

 17. P reset6/No.6/+10tracks

18. Display / Numeric *

19. Band / Numeric 0

II. Basic operations
1. Power switch/mute/pause button ( )
a) Short press " " button in the standby state and the radio will be started up; long press " " in the ON state and the radio will be shut down.
b) Short press this button in the radio or AUX state, and it is the "Mute" function. Short press this button when the MP3 is being played, and it is the "Pause/Play" function.

2. Mode switching/clock button (MOD/CLK)
a) Short press this button to switch the mode (Radio/USB/SD/AUX). b) Long press this button to display the clock which will automatically exit after 3 sec. When the clock is
displayed,longpressthisbuttonfor2sec.toadjustthehour:thedigitwillflicker,androtatethevolume knobtoadjustthetime;shortpressthisbuttonagaintoadjusttheminute:thedigitwillflicker,androtate thevolumeknobtoadjustthetime.5sec.aftercompletionoftheoperation,thesystemwillautomatically confirmthetimeandreturntothestatebeforeenteringtheclockadjustment.

3. Volume control/function selection button


a) A djustthisbuttonclockwisetoincreasethevolumeandcounterclockwisetoreducethevolumeinthe

radio/playback state.

b) Short press this button in the radio/playback state to enter function of BASS, TER (treble), BAL (balance),

FAD (fader), EQ (equalizer), LOUD ALL (loudness), DX/LOC (distant/local), STEREO/MONO (stereo radio/

force mono), CH/STEP (choose radio station/stepped frequency), CLOCK24/12 (24/12-hour clock),

orAREAEU/US(Europeanstandard/Americanstandard),andadjustthevolumeknobtoselectthe

corresponding function.

4. Next track/search radio station forwards
a) In the radio state, short press this button to select next radio station, and long press this button to semi-automatically search the radio stations forwards.
b) In the MP3 playback state, short press this button to select the next song, and long press this button to fast forward the song.

 5. Display
It displays the radio frequency and current playback information.

6. USB interface (USB)


 InsertaUSBflashdrive,anditwillautomaticallyplaythesonginthecorrespondingformat.

7. AUX-IN jack (AUX)
It is used for connecting external audio signal.

8. MicroSD card slot / TF card slot (TF)
Insert a MicroSD card, and it will automatically play the song in the corresponding format.

9. Reset button (RES)
Short press this button to conduct system resetting when the radio system functions in disorder. The radio shall be restarted for operation after the resetting.

 10. Previoustrack/searchradiostationbackwards


a) Intheradiostate,shortpressthisbuttontoselectpreviousradiostation,andlongpressthisbuttonto

semi-automatically search the radio stations backwards.


b) IntheMP3playbackstate,shortpressthisbuttontoselecttheprevioussong,andlongpressthisbutton

to fast backward the song.

11. Band switching/automatic station locking (BND/AMS)
In the radio state, short press this button to switch the band (FM1-FM2-FM3), and long press this button to automatically search the radio stations and store the searched stations in P1-P6 in order; after the automatic search, the radio station stored in P1 will be automatically played. 6 radio stations can be stored in each band, and 18 radio stations in total can be stored.

ENGLISH ENGLISH

MANUAL
III. Operating Instructions for Station Adjustment
Manual step-by-step station adjustment
In the radio state, short press "SEL" button for many times to enter the "CH" (choose radio station) state, and adjustthevolumeknobtoenter"STEP"(steppedfrequency)state.Andthenshortpress" " or " " to adjust thestationstepbystep,andthesystemwillautomaticallyreturnto"CH"stateafter5sec.withoutoperation.
V. Installation Drawing
1. Before installing the radio, place the radio according to the assembly position, and connect the corresponding speaker line and power line for listening test.
2. Fix the radio only after its running effect is ideal.
Install the radio
1. Install the support on the dashboard, and bend its partial parts for sticking in the positions.
2. Connect the power line and speaker line, andfixthefixingplateonthecar.
3. Insert the antenna plug and push the radiointothesupport,andtightenfixing screwsofthefixingplate.
Disassemble the radio
Insert both of the tool for disassembling radio into the gaps on left and right sides to make them hook the radio, and then gently pull out the tools to make the radio separated from the support. Then disassemble the connecting lines and unplug the antenna plug.

VI. Wiring Diagram ISO connector:

Warning: The negative speaker lead should NOT be grounded, otherwise it will damage the radio!

WARNING!
To connect the unit, use ISO connectors only. Ifyourvehicleisn'tequipedwithanISOconnector,pleaseusethe providedISOloomcable.Thispreventsanincorrectwiredconnection.
Damage caused by faulty wiring: warranty will be void.

GB Caliber hereby declares that the item RMD 032 is in compliance with the essential requirements and other relevant provisions of Directive 2014/53/EU (RED), 2011/65/EU (RoHS), 2014/30/EU (EMC) and 2014/35/EU (LVD).
FR Par la pr�sente Caliber d�clare que l'Appareil RMD 032 est conforme aux exigences essentielles et aux autres dispositions pertinentes de la directive 2014/53/EU (RED), 2011/65/EU (RoHS), 2014/30/EU (EMC) et 2014/35/EU (LVD).
DE Hiermit erkl�rt Caliber, dass sich das Ger�t RMD 032 in �bereinstimmung mit den grundlegenden Anforderung und �brigen einschl�gigen Bestimmungen der Richtlinie 2014/53/EU (RED), 2011/65/EU (RoHS), 2014/30/EU (EMC) und 2014/35/EU (LVD) befindet.
IT Con la presente Caliber dichiara che questo RMD 032 � conforme ai requisiti essenziali ed alle alte disposizioni pertinenti stabilite dalla directtiva 2014/53/EU (RED), 2011/65/EU (RoHS), 2014/30/EU (EMC) e 2014/35/EU (LVD).
ES Por medio de la presente Caliber declara que el RMD 032 cumple con los requisitos esenciales y otra disposiciones Aplicables o exigibles de la Directiva 2014/53/EU (RED), 2011/65/EU (RoHS), 2014/30/EU (EMC) e 2014/35/EU (LVD).
PT Caliber declara que este RMD 032 est� conforme com os requisitos essenciais e outras disposi�es da Directiva 2014/53/EU (RED), 2011/65/EU (RoHS), 2014/30/EU (EMC) e 2014/35/EU (LVD).
S H�rmed intygar Caliber att denna RMD 032 Pro st�r i �verensst�mmelse med de v�sentliga egenskapskrav och �vriga relevanta best�mmelser som framg�r av direktiv 2014/53/EU (RED), 2011/65/EU (RoHS), 2014/30/EU (EMC) sv 2014/35/EU (LVD).
PL Niniejszym Caliber owiadcza, e RMD 032 jest zgodne z zasadniczymi wymaganiami oraz innymi stosownymi postanowieniami Dyrektywy 2014/53/EU (RED), 2011/65/EU (RoHS), 2014/30/EU (EMC) i 2014/35/EU (LVD).
DK Undertegnede Caliber erkl�rer hermed, at f�lgende udstyr RMD 032 overholder de v�sentlige krav og �vrige relevante krav i direktiv 2014/53/EU (RED), 2011/65/EU (RoHS), 2014/30/EU (EMC) og 2014/35/EU (LVD).
EE K�esolevaga kinnitab Caliber seadme RMD 032 vastavust direktiivi 2014/53/EU (RED), 2011/65/EU (RoHS), 2014/30/EU (EMC) p�hin�uetele ja nimetatud direktiivist tulenevatelle teistele asjakohastele s�tetele ja 2014/35/EU (LVD).
LT Siuo Caliber deklaruoja, kad sis RMD 032 atitinka esminius reikalavimus ir kitas 2014/53/EU (RED), 2011/65/EU (RoHS), 2014/30/EU (EMC) Direktyvos nuostatas ir 2014/35/EU (LVD).
FI Caliber vakuuttaa t�ten ett� RMD 032 tyyppinen laite on direktiivin 2014/53/EU (RED), 2011/65/EU (RoHS), 2014/30/EU (EMC) oleellisten vaatimusten ja sit� koskevien direktiivin muiden ehto jen mukainen ja 2014/35/EU (LVD).
IS H�r me� l�si Caliber yfir vi a� RMD 032 er samr�mi vi� grunnkr�fur og a�rar kr�fur, sem ger�ar eru � tilskipun 2014/53/EU (RED), 2011/65/EU (RoHS), 2014/30/EU (EMC) and 2014/35/EU (LVD).
NO Caliber erkl�rer herved at utstyret RMD 032 er i samsvar med de grunnleggende krav og �vrige relevante krav i drektiv 2014/53/EU (RED), 2011/65/EU (RoHS), 2014/30/EU (EMC) og 2014/35/EU (LVD).
NL Hierbij verklaart Caliber dat het toestel RMD 032 in overeenstemming is met de essenti�le eisen en de andere relevante bepalingen van richtlijn 2014/53/EU (RED), 2011/65/EU (RoHS), 2014/30/EU (EMC) en 2014/35/EU (LVD).
Latest declaration form can be found at: www.caliber.nl/media/forms/DeclarationRMD032.pdf
WWW.CALIBER.NL
CALIBER EUROPE BV � Kortakker 10 � 4264 AE Veen � The Netherlands � Tel: +31 416-699 000