BYD LVS 4.0 B-Box Premium Battery Storage User Manual
File info: application/pdf · 47 pages · 6.16MB
PDF BYD Battery-Box Premium
next page. You can also download the full PDF document by clicking the Download button, which requires the Internet available on your device. Select Application Language.
Full PDF Document

If the inline viewer fails, it will open the original document in compatibility mode automatically. You can also open the file directly.
Extracted Text
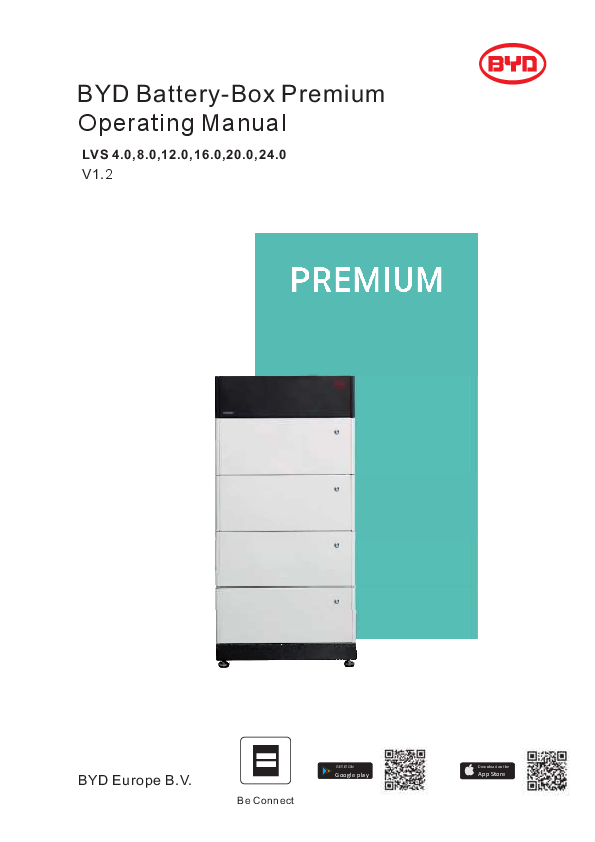
BYD Battery-Box Premium Operating Manual
LVS 4.0,8.0,12.0,16.0,20.0,24.0 V1.2

BYD Europe B.V.

Be Connect

GET IT ON
Google play

Download on the
App Store

Legal Provisions
All the information in this document is the property of BYD Europe B.V. No part of this document could be reproduced in any way for business use. Internal use is allowed. BYD Europe B.V. makes no representations or warranties express or implied, with respect to this document or any of the equipment and/or software it may describe, including (with no limitation) any implied warranties of utility, merchantability, or fitness for any particular purpose. All such representations or warranties are expressly disclaimed. Neither BYD Europe B.V. nor its distributors or dealers shall be liable for any indirect, incidental, or consequential damages under any circumstances. The exclusion of implied warranties may not apply in all cases under some statutes, and thus the above exclusion may not apply. This document does not replace and is not intended to replace any local, state, provincial, federal, or national laws, regulations, or codes applicable to the installation, electrical safety, and use of the battery system. BYD Europe B.V. assumes no responsibility for the compliance or noncompliance with such laws or codes in connection with the installation of the battery system. Specifications are subject to change without notice. Every effort has been made to make this document complete, accurate, and up-to-date. However, BYD Europe B.V. may need to make some improvements under certain circumstances without advance notice. BYD Europe B.V. shall not be responsible for any loss caused by this document, including, but not limited to, omissions errors, typographical errors, arithmetical errors, or listing errors in this document. All trademarks are recognized. Limited Warranty You can download the latest Limited Warranty from the Internet at www.bydbatterybox.com. BYD Europe B.V. `s-Gravelandseweg 256, 3125 BK, Schiedam, the Netherlands
1

Content
Legal Provisions ............................................................................................................................... 1 1. Information on this Document .................................................................................................... 4
1.1. Validity ............................................................................................................................. 4 1.2. Target Group ................................................................................................................... 4 1.3. Content and Structure of this Document .......................................................................... 4 1.4. Declaration of Conformity................................................................................................. 4 1.5. Levels of Warning Messages ........................................................................................... 4 1.6. Symbols in the Document ................................................................................................ 5 1.7. Designation in the Document ........................................................................................... 5 2. Safety ........................................................................................................................................ 6 2.1. Intended Use ................................................................................................................... 6 2.2. IMPORTANT SAFETY INSTRUCTIONS ......................................................................... 6
2.2.1. Battery Module Leakage ........................................................................................ 6 2.2.2. Firefighting Measures ............................................................................................ 6 2.2.3. Battery Modules Handling and Storage Guide ....................................................... 7 2.2.4. Warning of Overvoltages ....................................................................................... 7 2.2.5. Caution of Weight .................................................................................................. 8 2.2.6. Notice of Property Damage.................................................................................... 8 3. Scope of Delivery....................................................................................................................... 9 4. Battery System Overview ......................................................................................................... 11 4.1. Battery System Description ............................................................................................ 11 4.2. Interface......................................................................................................................... 12 4.3. Symbols on the System ................................................................................................. 12 4.4. LED Signals ................................................................................................................... 14 5. Installation................................................................................................................................ 15 5.1. Requirements for Installation ......................................................................................... 15 5.1.1. Requirements for Installation Location ................................................................. 15 5.1.2. Tools.................................................................................................................... 15 5.1.3. Safety Gear ......................................................................................................... 15 5.1.4. Additionally Required Installation Material............................................................ 16 5.2. Installation...................................................................................................................... 16 6. Electrical Connection ............................................................................................................... 19

6.1. Overview of the Connection Area................................................................................... 19 6.2. Connection Diagram ...................................................................................................... 19 6.2.1. One Tower.................................................................................................................. 19 6.2.2. Multiple Towers .......................................................................................................... 20 6.3. Connecting the PE ......................................................................................................... 20 6.4. Data Cable Connection .................................................................................................. 21
6.4.1. Data Cable Connection between Inverter and BMU ............................................. 21 6.4.2. Data Cable Connection between BMU and PDU ................................................. 23 6.4.3. Data Cable Connection between BMU and Router .............................................. 23 6.4.4. Cover the Terminal Resistor ................................................................................ 24 6.4.5. Data Cable Connection between Towers ............................................................. 24 6.5. DC Connection .............................................................................................................. 25 7. Commissioning ........................................................................................................................ 30 7.1. Switch on the Battery System ........................................................................................ 30 7.2. Configure the Battery System ........................................................................................ 31 7.3. Switch on and Commission the Inverter ......................................................................... 34 8. Operation ................................................................................................................................. 35 8.1. Switch on the Battery System ........................................................................................ 35 8.2. Switch off the Battery System ........................................................................................ 36 8.3. Maximum Current at Different Temperature ................................................................... 37 8.4. Protective Devices ......................................................................................................... 37 9. Decommissioning..................................................................................................................... 38 10. Extension .......................................................................................................................... 39 11. Troubleshooting ................................................................................................................ 40 11.1. Battery System Behavior under Fault Conditions........................................................ 40 11.2. LED Light Designation for Errors ................................................................................ 40 12. Maintenance and Storage ................................................................................................. 42 13. Disposal of the Battery System.......................................................................................... 43 14. Technical Parameters ....................................................................................................... 44 15. Contact Information ........................................................................................................... 45 Appendix Data Cable Connection Instruction with Inverters ............................................................ 46

1. Information on this Document
1.1. Validity
This document is valid for the Battery-Box Premium LVS 4.0, 8.0, 12.0, 16.0, 20.0, 24.0.
1.2. Target Group
The instructions in this document may only be performed by qualified persons who must have the following skills: � Knowledge of how batteries work and are operated � Knowledge of how an inverter works and is operated � Knowledge of, and adherence to the locally applicable connection requirements, standards, and directives � Knowledge of, and adherence to this document and the associated system documentation, including all safety instructions � Training in dealing with the hazards associated with the installation and operation of electrical equipment and batteries � Training in the installation and commissioning of electrical equipment Failure to do so will make any manufacturer's warranty, guarantee or liability null, and void unless you can prove that the damage was not due to non-compliance.
1.3. Content and Structure of this Document
This document contains safety information and instructions, scope of delivery, battery system overview, installation, electrical connection, commissioning, operation, decommissioning, extension, troubleshooting, maintenance and storage, disposal of the battery system, technical parameters and contact information. Please finish reading this document before taking any actions on the battery system.
1.4. Declaration of Conformity
The battery system described in this document complies with the applicable European directives. The certificate is available in the download area at www.bydbatterybox.com.
1.5. Levels of Warning Messages
The following levels of warning messages may occur when handling the battery system.
DANGER Indicates a hazardous situation which, if not avoided, will result in death or serious injury.
WARNING Indicates a hazardous situation which, if not avoided, could result in death or serious injury.
4

CAUTION Indicates a hazardous situation which, if not avoided, could result in minor or moderate injury.
NOTICE Indicates a situation which, if not avoided, can result in property damage.

1.6. Symbols in the Document
1.7. Designation in the Document
Designation in this document
Battery System BIC BMS BMU BYD PDU SOC

Sections describing activities to be performed by qualified persons only.
Complete designation
Battery-Box Premium LVS Battery Information Collector Battery Management System Battery-Box Premium LV BMU(Battery Management Unit )-IP55 BYD Europe B.V. Power Distribute Unit State of Charge

5

2. Safety
2.1. Intended Use
The battery system is for residential and works with a photovoltaic system. It is a 48V Li-ion battery storage system, with the control module on itself. It could be operated in on-grid and off-grid modes with compatible inverters. The battery system could be connected to the Internet through network cable for maintenance and firmware updating. The battery system must only be used as stationary equipment.
The battery system is suitable for indoor and outdoor use under the conditions mentioned in Section 5.1.
The battery system must only be operated in connection with a compatible inverter. The list (BYD Battery-Box Premium LVS Minimum Configuration List) of these inverters could be found at www.bydbatterybox.com. The battery system is not suitable for supplying life-sustaining medical devices. Please ensure that no personal injury would lead due to the power outage of the battery system. Alterations to the battery system, e.g., changes or modifications are not allowed unless the written permission of BYD is achieved. Unauthorized alterations will void the guarantee and warranty claims. BYD shall not be held liable for any damage caused by such changes. The type label should always be attached to the battery system.
2.2. IMPORTANT SAFETY INSTRUCTIONS
The battery system has been designed and tested in accordance with international safety requirements. However, in order to prevent personal injury and property damage and ensure long-term operation of the battery system, please do read this section carefully and observe all safety information at all times.
2.2.1. Battery Module Leakage
If the battery modules leak electrolytes, contact with the leaking liquid or gas should be avoided. The electrolyte is corrosive, and the contact may cause skin irritation and chemical burns. If one is exposed to the leaked substance, do these actions:
Inhalation: Evacuate the contaminated area, and seek medical help immediately. Eye contact: Rinse eyes with flowing water for 15 minutes and seek medical help immediately.
Skin contact: Wash the affected area thoroughly with soap and water and seek medical help immediately. Ingestion: Induce vomiting and seek medical help immediately.
2.2.2. Firefighting Measures
The battery modules may catch fire when it is put into the fire. In case of a fire, please make sure that an ABC or carbon dioxide extinguisher is nearby. Water cannot be used to extinguish the fire. Full protective clothing and self-contained breathing apparatus are required for the firefighters to extinguish the fire.
6

2.2.3. Battery Modules Handling and Storage Guide � The battery modules and its components should be protected from damage when transporting and handling. � Do not impact, pull, drag, or step on the battery modules. � Do not insert unrelated objects into any part of the battery modules. � Do not throw the battery module into a fire. � Do not soak the battery modules in water or seawater. � Do not expose to strong oxidizers. � Do not short circuit the battery modules. � The battery modules cannot be stored at high temperatures (more than 50�C). � The battery modules cannot be stored directly under the sun. � The battery modules cannot be stored in a high humidity environment. � Do not use the battery modules if it is defective, or appears cracked, broken or otherwise damaged, or fails to operate. � Do not attempt to open, disassemble, repair, tamper with, or modify the battery modules. The battery modules are not user-serviceable. � Do not use cleaning solvents to clean the battery modules. 2.2.4. Warning of Overvoltages
DANGER Danger to life due to electric shock in case of overvoltages and if surge protection is missing Overvoltages (e. g. in the event of a flash of lightning) can be further conducted into the building and to other connected devices in the same network via the network cables or other data cables if there is no surge protection. Touching live parts and cables results in death or lethal injuries due to electric shock. � Ensure that all devices in the same network and the inverteU are integrated into the
existing surge protection. � When laying the network cables or other data cables outdoors, it must be ensured that a
suitable surge protection device is provided at the transition point of the cable from the EDWWHU\system or the inverter outdoors to the inside of a building.
7

2.2.5. Caution of Weight CAUTION
Risk of injury due to weight of the battery module Injuries may result if the battery module is lifted incorrectly or dropped while being transported or installed. � Transport and lift the battery module carefully. Take the weight of the battery module into
account. � Wear suitable personal protective equipment for all work on the battery system.
2.2.6. Notice of Property Damage NOTICE
Damage to the PDU due to sand, dust and moisture ingress Sand, dust and moisture penetration can damage the PDU and impair its functionality. � Only open the PDU if the humidity is within the thresholds and the environment is free of
sand and dust.
NOTICE Damage to the battery system due to under voltages � If the battery system doesn't start at all, please contact BYD local after-sales service
within 48 hours. Otherwise, the battery could be permanently damaged.
8

3. Scope of Delivery

X1

X1

X1

X1

X2

(
A1
PDU

or
A2
PDU(For Australia)

+
B
Base

+
C
M4 Screw

X2

X2

X4

X2

X1

X2

D
Hanger (PDU Part)
X2

E
Hanger (Wall Part)
X2

F
M5 Screw
X2

H
M6 Bolt and Nut
X2

QBuaictkteSryta-BrtoGx uPidreemium L16 BYD Europe B.V.V1.0

I
Documents

J
Communication Gland

X2

X2

K*
DC Connector
X1

L*
Metal Terminal

M*
Rubber Core

X3

N*
O-Ring

O*

P*

Claw

Cap

Q
Battery Module
A1 A2 B C D E F H I J K *

C
M4 Screw
PDU PDU for Australia Battery module M4 Screw Hanger (PDU part) Hanger (Wall part) M5 Screw M6 Screw Bolt and Nut Documents Communication Gland DC connector
9

L *

Metal Terminal

M *

Rubber Core

N *

O-ring

O *

Claw

P *

Cap

Q

Battery Module

*Only in the Delivery of Scope for Australia. In other markets, these components are needed to purchase individually.

10

4. Battery System Overview
4.1. Battery System Description
The Battery-Box Premium LVS is used as a connected battery for the intermediate storage of excess PV energy in an inverter system. It works together with Battery-Box Premium LV BMU-IP55 (BMU). The parameters and instruction of BMU could be read on our websites. The battery system could support the backup function of inverters and is compatible with both 1 and 3 phase inverters.
A E
D
B

C

A

PDU (the normal one without the air switch, but the one for

Australia market has an air switch)

B

Battery module

C

Base

D

Button with LED

E

Air switch (only available for Australia market)

One tower could be made up by one to six battery modules. HOWEVER, WHEN BATTERY TOWERS ARE IN PARALLEL CONNECTION, UP TO FOUR BATTERY MODULES COULD BE INSTALLED AT EACH TOWER, and up to 16 towers could be connected in parallel.

11

BMS INVERER ETHERNET
6

BMS INVERER ETHERNET
4

4

4

Tower Quantity16
4.2. Interface
WLAN
BMU is equipped with a WLAN interface as a standard.
Be Connect
Be Connect is an app for Android and iOS system devices. You can download it from Google Play or App Store. Search Be Connect or scan the QR code on this document cover.
With Be Connect, you can update the firmware, configure and read the information of the battery system.
Be Connect Plus
Be Connect Plus is a PC app. You can download from our website (https://www.bydbatterybox.com/downloads).
With Be Connect, you can configure and diagnose the battery system, read the general battery information, update the firmware, etc.
Be Connect Monitoring
BMU is equipped with an Ethernet interface as a standard. When your battery system accesses the Internet, it will join our Be Connect Monitoring, which is a platform for BYD to provide remote service to customers. It can diagnose your battery system, and update the firmware. It is highly recommended you to access your system to the Internet.

4.3. Symbols on the System

Symbol

Explanation

Observe the documents Observe all documents supplied with the system.
Grounding conductor This symbol indicates the position for connecting a grounding conductor.

12

WEEE designation Do not dispose of the system together with the household waste but in accordance with the disposal regulations for electronic waste applicable at the installation site. CE marking The system complies with the requirements of the applicable EU directives. This side up.
Handle with care.
Keep dry.
Keep the battery modules away from open flame or ignition sources.
Beware of electrical voltage.
Beware of a danger zone This symbol indicates that the system must be additionally grounded if additional grounding or equipotential bonding is required at the installation site. Keep the battery modules away from children.
RCM (Regulatory Compliance Mark), a brief guide to Electrical equipment approvals in Australia
Do not short circuit.
13

4.4. LED Signals
Flashing white and blue alternatively

White

ON

OFF

ON
Blue
OFF

0.5S 0.5S

Glowing white

White

ON

OFF

ON
Blue
OFF

White

ON

2S

OFF

Flashing white slowly

ON
Blue
OFF

White

ON

OFF

1S

Flashing white quickly ON

Blue

OFF

2S

2S

1S

Flashing white and glowing blue

White

ON

1S

1S

OFF

ON

Blue

OFF

Flashing white and blue

ON
White
OFF ON
Blue
OFF

1S 1S

......
N

The battery system is initiating.
Idle (the battery system is neither charging nor discharging).
The battery system is charging.
The battery system is discharging.
The battery system is discharging, and the SOC is below 15%.
An error has occurred.

14

5. Installation
5.1. Requirements for Installation 5.1.1. Requirements for Installation Location
a) A solid support surface must be available (e.g., concrete or masonry). b) The installation location must be inaccessible to children. c) The installation location must be suitable for the weight and dimensions of the battery system. d) The installation location must not be exposed to direct solar irradiation. e) The installation location must not be close to the fire. f) The altitude of the installation location should be less than 3000m. g) The ambient temperature should be between -10�C and +50�C. h) The ambient humidity should be between 5-95%. 5.1.2. Tools The tools in the following table could be needed during the installation.

Network Wire Clamp

Pen

Phillips Screwdriver Bit

Torque Wrench

Cylinder Screwdriver

Wire Stripper

Crimper

Tape Measure

Drill

5.1.3. Safety Gear Wear the following safety gear when dealing with the battery system.

15

5.1.4. Additionally Required Installation Material

x2

x2

x1

DC Cable (35mm2/50mm2/70mm )
5.2. Installation

Expansion Anchor Bolt (M8x40)

Cat5 Shield (Metal Shielded RJ45 of Cat5 or higher)

PE with Terminal
2
(terminal,5mm; cable10mm )

CAUTION
Risk of injury due to weight of the battery module Injuries may result if the battery module is lifted incorrectly or dropped while being transported or installed.
� Transport and lift the battery module carefully. Take the weight of the battery module into account.
� Wear suitable personal protective equipment for all work on the battery system.

Additionally required installation material (not included in the scope of delivery): 1. Two screws suitable for the support surface (diameter: 8 mm) 2. Where necessary, two screw anchors suitable for the support surface and the screws. Procedure: 1. Take the PDU and base from the package out. 2. Remove the screws between the PDU and the base out by a
Phillips screwdriver (PH2), and take the PDU from the base.

3. Put the installed base and feet along the wall, and keep the distance of 12~19 mm between the wall and the base.
16

12-19

PD 2 2Nm
WALL
mm

4. Take a battery module from the package out. Put one battery module on the base. Pay attention to the direction of the module to make sure that the blind-mating connectors of the module and the base are at the same side.
5. Repeat the operations for other battery modules.
6. Install the hanger (PDU part) to the PDU. To do this, insert the screws (M5x14) through the hole on the PDU using a cylinder screwdriver (8 mm) and tighten them (torque: 5.5 Nm).
7. Put the PDU on top of the battery modules.
8. Fix the connection between the battery module and the base, between battery modules, and between PDU and battery module. To do this, insert the screws (M4x14) through the holes on them, using a Phillips screwdriver (PH2) and tighten them (torque: 2 Nm).
9. Hold the hanger (wall part) where it intends to be mounted on the wall and mark the position of the drill holes. Please pay attention that there may be power cables or other supply lines (e.g., gas or water) routed inside of the wall. Ensure that no lines are laid in the wall, which could be damaged when drilling holes.
10. Set the hanger aside and drill the marked holes. 11. Insert screw anchors into the drill holes if the support
surface requires them. 12. Secure the hanger using screws (recommended
M8x40).
17

45kg
8mm 5.5Nm

13. Fix the two hangers (wall part and PDU part) with M6X16 bolts and nuts, using a cylinder screwdriver (10 mm) to tighten it (torque: 8 Nm).
14. Mark the product type.
18

6. Electrical Connection
6.1. Overview of the Connection Area

D
E C

IN

A

P+ COM

OUT

B

P-

A

IN

Gland for data cable in

B

OUT

Gland for data cable out/terminal resistor

C

PE

Grounding point

D

P+

Gland for DC+ (P+)

E

P-

Gland for DC- (P-)

6.2. Connection Diagram 6.2.1. One Tower

INVERTER

P+

P-

BMU

BMS

INVERER ETHERNET

IN P+ COM
OUT P-

The connection to Ethernet cable is recommended, not compulsory.
19

6.2.2. Multiple Towers

BMU

BMS INVERER ETHERNET

INVERTER
P+ P-

IN P+ COM
OUT P-

IN P+ COM
OUT P-

...

IN P+ COM
OUT P-

6.3. Connecting the PE
Additionally required mounting material (not included in the scope of delivery): Additionally required mounting material (not included in the scope of delivery): PE with Terminal PE and Terminal Requirement a) Terminal, 5mm. b) Minimum terminal cross-section: 10 mm�
20

c) The cross-section of the grounding terminal must comply with the locally applicable standards and directives
d) PE cross-section  10 mm�
e) PE Material: Copper wire
Procedure:
1. Make sure the PDU air switch is off. (This step is only applicable for the Australia market).
2. Take out the grounding screw, and get the PE conductor through it.
3. Fix them together, with a cylinder screwdriver 8 mm, and tighten it (torque, 4 Nm).

6.4. Data Cable Connection

8mm

5.5Nm

6.4.1. Data Cable Connection between Inverter and BMU
Additionally required mounting material (not included in the scope of delivery): One data cable Data cable requirements: The cable length and quality affect the quality of the signal. Observe the following cable requirements. � Cable category: Cat5, Cat5e or higher � Plug type: Metal Shielded RJ45 of Cat5, Cat5e or higher � Shielding: Yes � UV-resistant for outdoor use � Straight- through wired cables Maximum cable length: 10 m. Procedure: 1. Read the designation of the INVERTER port on BMU and the inverter manual, and decide
whether to modify the data cable. The designation of INVERTER port on BMU could be read below.

21

No.

Assignment

1

485-A

2

485-B

3

Unused

4

CAN H

5

CAN L

6

Unused

7

Unused

8

Unused

Our compatible inverters' communication ports with BMU designation could be read below.

BMU

SMA

STUDER

VICTRON SELECTRONIC SOLAREDGE GOODWE

The detailed connection instruction with different inverters could be read in the Appendix. Note: the information here is just for reference. If it is contrary to the inverter manufacture's manual, take the later one into account. If the data cable has to be modified, please cut the cable, arrange the ware positions, and crimp the RJ45 connector with a network wire clamp.
2. Take off the gland at the INVERTER port of BMU, and get the cover and support sleeve through the data cable.

3. Get the main part of the gland through the cable.
4. Plug the RJ45 connector to the BMU INVERTER port.
22

5. Tighten the gland. 6. Plug the RJ45 connector to the corresponding
port at the inverter.
6.4.2. Data Cable Connection between BMU and PDU
Additionally required mounting material (not included in the scope of delivery): One data cable Data cable requirements: The cable length and quality affect the quality of the signal. Observe the following cable requirements. � Cable category: Cat5, Cat5e or higher � Plug type: Metal Shielded RJ45 of Cat5, Cat5e or higher � Shielding: Yes � UV-resistant for outdoor use � Straight- through wired cables � Maximum cable length: 10 m. Procedure: 1. Take the gland from the accessories. 2. Take off the cover and support sleeve of the gland, and get the cover, support sleeve, main part
of the gland through the data cable. 3. Plug the RJ45 connector to the IN port of PDU. 4. Tighten the gland. 5. Plug the other side of RJ45 connector to the BMS port of BMU. Refer the procedure of Point 2 to
4 of Section 6.4.1
6.4.3. Data Cable Connection between BMU and Router
Additionally required mounting material (not included in the scope of delivery): One data cable Data cable requirements: The cable length and quality affect the quality of the signal. Observe the following cable requirements. � Cable category: Cat5, Cat5e or higher � Plug type: Metal Shielded RJ45 of Cat5, Cat5e or higher
23

� Shielding: Yes � UV-resistant for outdoor use � Straight- through wired cables � Maximum cable length: 10 m. Procedure: 1. Plug the RJ45 connector to the Ethernet port of BMU. Refer to the procedure of
Point 2 to 4 of Section 6.4.1 2. Plug the RJ45 connector at the other side of the cable to a router port. Note: Connecting to the Internet is not compulsory but highly recommended. During the configuration by the Be Connected, temporarily disconnect the connection with the router will benefit the connection between Be Connect and the battery system.
6.4.4. Cover the Terminal Resistor
Procedure: 1. Take the gland from the accessories. 2. Cover the terminal resistor with the gland, and tighten it.
6.4.5. Data Cable Connection between Towers
This is only applicable when there are multiple towers to be connected in parallel. Maximum four battery modules could be installed in one tower, and maximum 16 towers could be connected in parallel. The connection diagram could be read below.
24

BMS

INVERER

ETHERNET

IN P+ COM
OUT P-

IN P+ COM
OUT P-

...

IN P+ COM
OUT P-

Data cable requirements: The cable length and quality affect the quality of the signal. Observe the following cable requirements. � Cable category: Cat5, Cat5e or higher � Plug type: Metal shielded RJ45 of Cat5, Cat5e or higher � Shielding: Yes � UV-resistant for outdoor use � Straight- through wired cables � Maximum cable length between two towers: 10 m. Procedure: 1. Remove the terminal resistor from the OUT port of the first tower. 2. Take two glands from the accessories. 3. Take off the covers and supports sleeve of the gland, and get the covers, supports sleeve and
the main part of the gland through the data cable. 6. Plug the RJ45 connector to the OUT port of the PDU at the first tower, and to the IN port of the
PDU at the second tower. 4. Tighten the gland. 5. Repeat Step 2 and 3 for the following towers. 6. Cover the terminal resistor on the PDU of the last tower, referring to 6.4.4 in this manual.
6.5. DC Connection
When multiple towers are connected, the positive power cable length for all the towers should be approximately equal, and so are the negative power cables. A junction box is needed to combine these cables. Please follow the local, state, provincial, federal, or national laws, regulations, and instructions from the inverter manufacturer to choose the right junction box.
25

Additionally required mounting material (not included in the scope of delivery):
Two DC power cables
Cable requirements:
� Conductor cross-section: three options are available, 35mm, 50mm and 70mm. Please choose the correct one according to application and also the requirements of the inverter manufacturer.
� Maximum cable length: 10 m
Procedure 1. Follow the table below to choose the connector type and parts. Please pay attentions to the
small letters on the O-ring and claw. The black terminal is for the negative connector, and the orange one is for the positive connector.

70mm2 50mm2 35mm2

14.0�0.5 mm 17.0�0.5 mm 11.9�0.4 mm 14.9�0.4 mm 10.2�0.3 mm 13.1�0.3 mm
26

2. Install rubber core, O-Ring and cap in sequence on the DC cable.
3. Strip the PE insulation sleeve up to 20 � 1.0 mm 20 � 1.0 mm
4. Plug the DC terminal into the stripped part of the cable.
5. Clamp the metal terminal with a clamper. Before that, please make sure the correct dies are chosen.
27

6. Plug the metal terminal into the connector.
7. Plug the branches of the rubber core to the holes of O-ring.
8. Push the integrated part rubber core and O-ring into the connector, and make sure that the O-ring is totally inside of the connector.
9. Push the cap to make sure the cap and the connector clutched well.
28

10. Remove the protective covers on the connectors and the PDU.

11. Plug the cables into the PDU. The other side of the cables should be well protected if it is not installed at this step.
12. When you want to unplug the connectors, press the lock on it, push the lock forward a little bit, and then pull it out.

1 2

29

7. Commissioning
7.1. Switch on the Battery System

Requirements: � The power cable connection between the battery system and the inverter is switched off. � The inverter must be correctly mounted. � All cables must be correctly connected. Procedure:

INVERTER

BMS INVERER ETHERNET

1
(if available)

3 seconds 2

For Australia Market

INVERTER

BMS INVERER ETHERNET

...

ON ON ON

OFF TRIP

1

OFF TRIP

(if available)

3 seconds 3

2

OFF TRIP

2

2

...

1. Switch on the air switch between the battery and inverter if there is any. 2. Switch on the air switch. (this only applies for the Australia market) 3. Press the LED button on the of the top battery module of the first tower. The LED starts to flash
0.5s white and 0.5s blue alternatively. On the condition that the BMU is well connected, it will change to solid white or blinking white later. For other cases, please refer to Chapter 11.
30

7.2. Configure the Battery System

Procedure:

1. Download Be Connect from Google Play

or App Store. The battery system requires

the latest version firmware to operate. So

please make sure you either have

downloaded the latest firmware in your

device (cell phone, Ipad, etc.), or your

device could access the Internet during configuration.

BE CONNECT

Download on the
App Store

GET IT ON
Google

2. Allow Be Connect to access photos, media, and files on your device (this is for Android system), and choose the language. Currently, there are six languages available, English, Chinese, German, Spanish, French, and Italian.
3. Click anywhere of the Welcome Page to continue. 4. Read the privacy policy and click the Confirm button to go to the
next page. You can also download the full PDF document by clicking the Download button, which requires the Internet available on your device.

Select Application Language

Language

English
2

Confirm

Allow Be Connect to access photos,media,and files on your device?

DENY

ALLOW
1

Privacy Policy of SHEN ZHEN BYD ELECTRONIC CO,.LTD
Responsible for data processing (controllers): 3 6 6
Confirm
Cancel Download

5. On the firmware update page, click the Download Firmware button to download the latest version firmware into your device. If your device cannot access the Internet, you can use the firmware stored in your device.

Tips:Check that Your Device is Connected to the Internet.
Download Firmware
Current firmware information in the battery system.
Type BMU-A BMU-B BMS
Firmware version in your device.
BMU-A BMU-B BMS Note:WLAN password:BYDB-Box Tips:1.Turn off the Cellular Date.
2.Disconnect the battery system Ethernet cable from Router.
Update Firmware

31

6. Connect the WLAN of the battery system.
The name of the WLAN is printed on the BMU.
All the WLAN shares the common password (BYDB-Box). Turning off the Cellular Data and disconnecting the battery system Ethernet cable at the router side will be good for the WLAN connection between the battery system and your device.

WLAN
AVAILABLE NETWORKS BYD-XXXX
Connected (no lnternet access)
4G-CPE-299430 Saved,encrypted
BYD-XXXX Saved,encrypted
BYD-XXXX Encrypted
BYD-XXXX Encrypted

This wlan network no internet access. Connect anyway?

CANCEL

CONNECT

7. Click the Update Firmware button to update. If the firmware in your device is a lower version than the one in the system, this step cannot move forward.
8. On the configuration page, click Confirm to set time.

Tips:Check that Your Device is Connected to the Internet.
Download Firmware
Current firmware information in the battery system.
Type BMU-A BMU-B BMS
Firmware version in your device.
BMU-A BMU-B BMS Note:WLAN password:BYDB-Box Tips:1.Turn off the Cellular Date.
2.Disconnect the battery system Ethernet cable from Router.
Update Firmware

Time

Inverter

System

Grid

Time&Date of Installation
AUG-20,2020 10:56:30
Confirm
Back

Configuration System Information Service Contact

9. Choose an inverter brand.

Time

Inverter

System

Grid

Inverter

Back

Configuration System Information Service Contact
32

10. Choose the battery system model, LVS. And then set how many battery modules are installed overall.

Time

Inverter

System

Grid

Model
1
Confirm
2
Back

Configuration System Information Service Contact

11. Choose the Grid and Phase options according to the actual application.

Time

Inverter

System

Grid

Grid
1
Phase
2
Confirm
3
Back

Configuration System Information Service Contact

12. Check the summary of the configuration information, tick the sentence, and click Submit.
If there is a prompt or Submit button is grey, wait a moment and check the WLAN connection.
There will be a prompt "Succeeded" when the configuration is completed.

Time

Inverter

System

Grid

Confirmation interface

Inverter:xxxxxx Model:xxx Battery Module Quantity per Tower:xx Grid: xxxxxx Phase:xxxxxx

Submit

Cancel

Configuration System Information Service Contact

Restart the Be Connect if it was stuck somewhere.
Please note that the SOC of the battery may not be accurate before a full charge or discharge after the configuration.

33

7.3. Switch on and Commission the Inverter
Procedure: 1. Mount and connect the inverter according to the inverter manufacturer`s instruction. 2. Commission and configure the inverter according to the inverter manufacturer`s instruction. If the battery information could be read correctly, it means the connection between the battery system and the inverter is all right. Normally, the LED of the BMU will also turn to white then, and the battery system is ready to work. If LED of BMU still flashes blue, and/or there are some battery errors shown at the inverter, go to the Chapter 11 of this manual.
34

8. Operation
8.1. Switch on the Battery System
To make sure the battery system can work well with the inverter, please follow the right procedure to start them. The procedure is: 1) turn on the switch between the inverter and battery if there is any; 2) switch on the battery system; 3) switch on the inverter.

INVERTER

BMS INVERER ETHERNET

OFF

1

3

(if available)

3 seconds 2

...

ON ON

For Australia Market
INVERTER

BMS INVERER ETHERNET

OFF

ON ON ON

1

4

(if available)

3 seconds
3

2

OFF TRIP

OFF TRIP

2

2

...

OFF TRIP

35

8.2. Switch off the Battery System
The procedure to switch off the battery system is: 1) switch off the inverter; 2) switch off the battery; 3) switch off the air switch between the battery and the inverter if there is any.
The way to switch off the battery system is to press the LED Button on the BMU for 5 seconds. For the Australia market, turn off the air switch at the PDU on each tower.

INVERTER
OFF OFF
3 1
(if available)

BMS INVERER

ETHERNET

2

...

ON ON

For Australia Market

INVERTER
OFF OFF
4 1
(if available)

BMS

INVERER ETHERNET

2

OFF TRIP

3

ON ON ON

TRIP O F F

3

3

...

TRIP O F F

36

8.3. Maximum Current at Different Temperature

Temperature
-10T<0 0T<5 5T<50

Maximum current 48A 48A
65A

charge

Maximum current 48A 65A
65A

discharge

Remarks
*N of the modules *N of the modules *N of the modules, up to 250A per tower

8.4. Protective Devices
The battery system could protect itself (switch off) if the Battery-Box Premium LVS Minimum Configuration List is not complied.
If external protective devices are needed, please follow the local, state, provincial, federal, or national laws, regulations, and instructions from the inverter manufacturer.

37

9. Decommissioning
CAUTION Risk of injury due to weight of the battery module Injuries may result if the battery module is lifted incorrectly or dropped while being transported or installed. � Transport and lift the battery module carefully. Take the weight of the battery module into
account. � Wear suitable personal protective equipment for all work on the battery system.
Procedure: 1. Shut off the inverter. 2. Switch off the battery system. 3. Switch off the breaker between the inverter and the battery system if there is any. 4. Disconnect the DC cables between inverter and the battery system, PE, and data cable among
battery system, inverter, BMU and router (if applicable). 5. Loosen the screws on hangers between PDU and the wall. And then take off the hangers. 6. Loose the screws between PDU and battery modules, and between battery modules and the
base. 7. Take the PDU from battery modules and battery modules from the base. Before lifting the battery module, ensure that the screws on both sides of them are removed. 8. Remove the hangers (PDU part) from PDU. If the battery system is to be stored or shipped, pack the system. Use the original packaging or packaging that is suitable for the weight and dimensions of the system. Dispose of the battery system in accordance with the locally applicable disposal regulations for electronic waste.
38

10. Extension
The battery system could be extended at any time. The original SOC of the new battery module is around 30%. Procedure: 1. Shut off the inverter. 2. Switch off the battery system. 3. Switch off the breaker between the inverter and the battery system if there is any. 4. Take the PDU off. 5. Add the new module on top of other battery modules. 6. Put PDU back on top of the new battery module. 7. Switch on the breaker between the inverter and the battery system if there is any. 8. Switch on and configure the battery system. 9. Start the inverter.
39

11. Troubleshooting
11.1. Battery System Behavior under Fault Conditions
Blue light flashing
If blue LED flashes, and the interval time between two flashes is 1 second, which means an error happened. (When the system is initiating, the white light and blue light flash alternatively every 0.5s. That is not an error.)
The detailed designation for errors of each LED lights could be read in 11.2 and 11.3.
Except the LED light, we can also get the faulty messages of the battery through the remote server and Be Connect Plus. Information read through that could help a lot t to identify the issues. So highly recommend to connect the battery system to the Internet or download and use Be Connect Plus.
WLAN is not available
Contact with BYD local after-sales service.
The battery system is not able to be turned on.
Check the system has been constructed according to the Battery-Box Premium Compatible Inverter List. If the problem still cannot be solved, contact with BYD local after-sales service within 48 hours.

NOTICE Damage to the battery system due to under voltages � If the battery system doesn't start at all, please contact BYD local after-sales service
within 48 hours. Otherwise, the battery could be permanently damaged.

The battery system cannot be turned off. Contact with BYD local after-sales service. BMU cannot be powered on. Contact with BYD local after-sales service.
11.2. LED Light Designation for Errors
LED light on BMU

Blue LED is flashing for one time. Blue LED is flashing two times. Blue LED is flashing three times. Blue LED is flashing for four times. Blue LED is flashing five times. Blue LED is flashing six times.

System initiating failed Address distribution failed Precharge failed BMS failure BMS and BMU communication failed Communication with an inverter failed

40

LED light on battery
Blue LED is flashing once Blue LED is flashing two times
Blue LED is flashing three times
Blue LED is flashing four times Blue LED is flashing five times Blue LED is flashing six times Blue LED is flashing seven times Blue LED is flashing eight times Blue LED is flashing nine times Blue LED is flashing ten times Blue LED is flashing eleven times

DC cable connection incorrect MOS failure BIC (battery information collector) communication failed Battery sensor failure Volt sensor failure Current sensor failure Battery failure Precharge failed BIC balance failure temperature sensor on battery control unit failure BMS and BMU communication failure

41

12. Maintenance and Storage
Cleaning
It is recommended that the battery system be cleaned periodically. If the enclosure is dirty, please use a soft, dry brush or a dust collector to remove the dust. Liquids such as solvents, abrasives, or corrosive liquids should not be used to clean the enclosure.
Maintenance
The battery module should be stored in an environment with a temperature range between -10�C +50�C, and charged regularly according to the table below with no more than 0.5 C (A C-rate is a measure of the rate at which a battery is discharged relative to its maximum capacity. ) to the SOC of 40% after a long time of storage.

Storage environment temperature
Below -10 -10~25 25~35 35~50 Above 50

Relative humidity of the storage environment
/ 5%~70% 5%~70% 5%~70% /

Storage time
Not allowed  12 months  6 months  3 months Not allowed

SOC
/ 25%SOC60% 25%SOC60% 25%SOC60% /

NOTICE Damage to the system due to under voltages
� Charge the over-discharged system within seven days when the temperature is above 25�C. � Charge the over-discharged system within fifteen days when the temperature is below 25�C.

42

13. Disposal of the Battery System
Disposal of the system must comply with the local applicable disposal regulations for electronic waste and used batteries. � Do not dispose of the battery system with your household waste. � Avoid exposing the batteries to high temperatures or direct sunlight. � Avoid exposing the batteries to high humidity or corrosive atmospheres. � For more information, please contact BYD.
43

14. Technical Parameters

Battery Module Number of Modules Usable Energy [1] Max Cont. Output Current [2] Peak Output Current [2]
Dimensions (H/W/D)
Weight Nominal Voltage Operating Voltage Operating Temperature Battery Cell Technology Communication Enclosure Protection Rating Round-Trip Efficiency Scalability [3] Certification Applications Warranty [4] Compatible Inverters Battery designation

LVS 4.0

LVS 8.0

LVS 12.0

LVS 16.0

LVS (4 kWh, 51.2 V, 45 kg)

LVS 20.0

LVS 24.0

1

2

3

4 kWh

8 kWh

12 kWh

65 A

130 A

195 A

90 A, 5 s

180 A, 5 s

270 A, 5 s

528 x

761 x

944 x

650 x 298 mm 650 x 298 mm 650 x 298 mm

4 16 kWh 250 A 360 A, 5 s 1277 x 650 x 298

5

6

20 kWh

24 kWh

250 A

250 A

360 A, 5 s

360 A, 5 s

1460 x

1693 x

650 x 298 mm 650 x 298 mm

64 kg

109 kg

154 kg

199 kg

244 kg

289 kg

51.2 V

40-57.6 V

-10 �C to +50�C Lithium Iron Phosphate (cobalt-free)

CAN / RS485

IP55

95%

Max. 64 Modules in Parallel (256 kWh)

Single Tower Only

VDE2510-50 / IEC62619 / CE / CEC / UN38.3

205 kg ON Grid / ON Grid + Backup / OFF Grid
10 Years

Refer to BYD Battery-Box Premium LVS Minimum Configuration List

IFpP/47/174/120/16S/M/-10+50/90

[1] DC Usable Energy, Test conditions: 100% DOD, 0.2C charge & discharge at + 25 �C. System Usable Energy may vary with different inverter brands [2] Charge derating will occur between -10 �C and +5 �C [3] Parallel tower function only available for 1 to 4 battery modules per tower. LVS 20.0 and LVS 24.0 can only be used as a single tower. [4] Conditions apply. Refer to BYD Battery-Box Premium Limited Warranty

44

15. Contact Information

BYD Global Service bboxservice@byd.com Telephone: +86 755 89888888-47175 Address:No.3009,BYD Road, Pingshan,Shenzhen,518118,P.R.China www.bydbatterybox.com

Social media link https://www.facebook.com/BatteryBoxBYD/ https://twitter.com/BYD_BatteryBox https://www.linkedin.com/company/byd-battery-box

Australia
South Africa

Alps Power Pty Ltd service @alpspower.com.au Telephone: +61 2 8005 6688 Address: 14/47-51 Lorraine St Peakhurst NSW 221 www.alpspower.com.au
AFRIPLUS ENERGY GROUP (PTY) LTD Support@afriplusenergy.co.za Telephone: +27 21 140 3594 Address: The Pavilion, Corner of Dock & Portswood Road, V&A WATERFRONT, 8001, CAPE TOWN

Europe USA

EFT-Systems GmbH service@eft-systems.de Telephone +49 9352 8523999
+44 (0) 2037695998(UK) +34 91 060 22 67(ES) +39 02 873683(IT) Address: Bruchtannenstra�e 28, 63801 Kleinostheim, Germany www.eft-systems.de BYD US Service
bboxservice@byd.com Telephone: +1(833) 338-8721

45

Appendix Data Cable Connection Instruction with Inverters

Connection with SMA BMU

BMU PIN
4 5
SMA

SMA PIN
4 5

Connection with SOLAREDGE

BMU

SOLAREDGE

BMU PIN
4 5

SOLAREDGE PIN 4 5

PIN6 PIN2
ON

Connection with SELECTRONIC SELECTRONIC

BMU PIN
4 5

SELECTRONIC PIN 1 2

Connection with VICTRON

VICTRON

BMU PIN
4 5

VICTRON PIN 7 8

Connection with STUDER BMU

STUDER

BMU PIN
4 5

STUDER PIN 4 5

NU

NU

CAN H

1

CAN L

2

CAN H

GND

GND

CAN H

3

CAN L

4

CAN H

NU

NU

CAN H

5

CAN L

6

CAN H

GND

GND

CAN H

7

CAN L

8

CAN H

NU

NU

Connection with GOODWE BMU

BMU PIN
4 5

GOODWE PIN 4 5

GOODWE

46