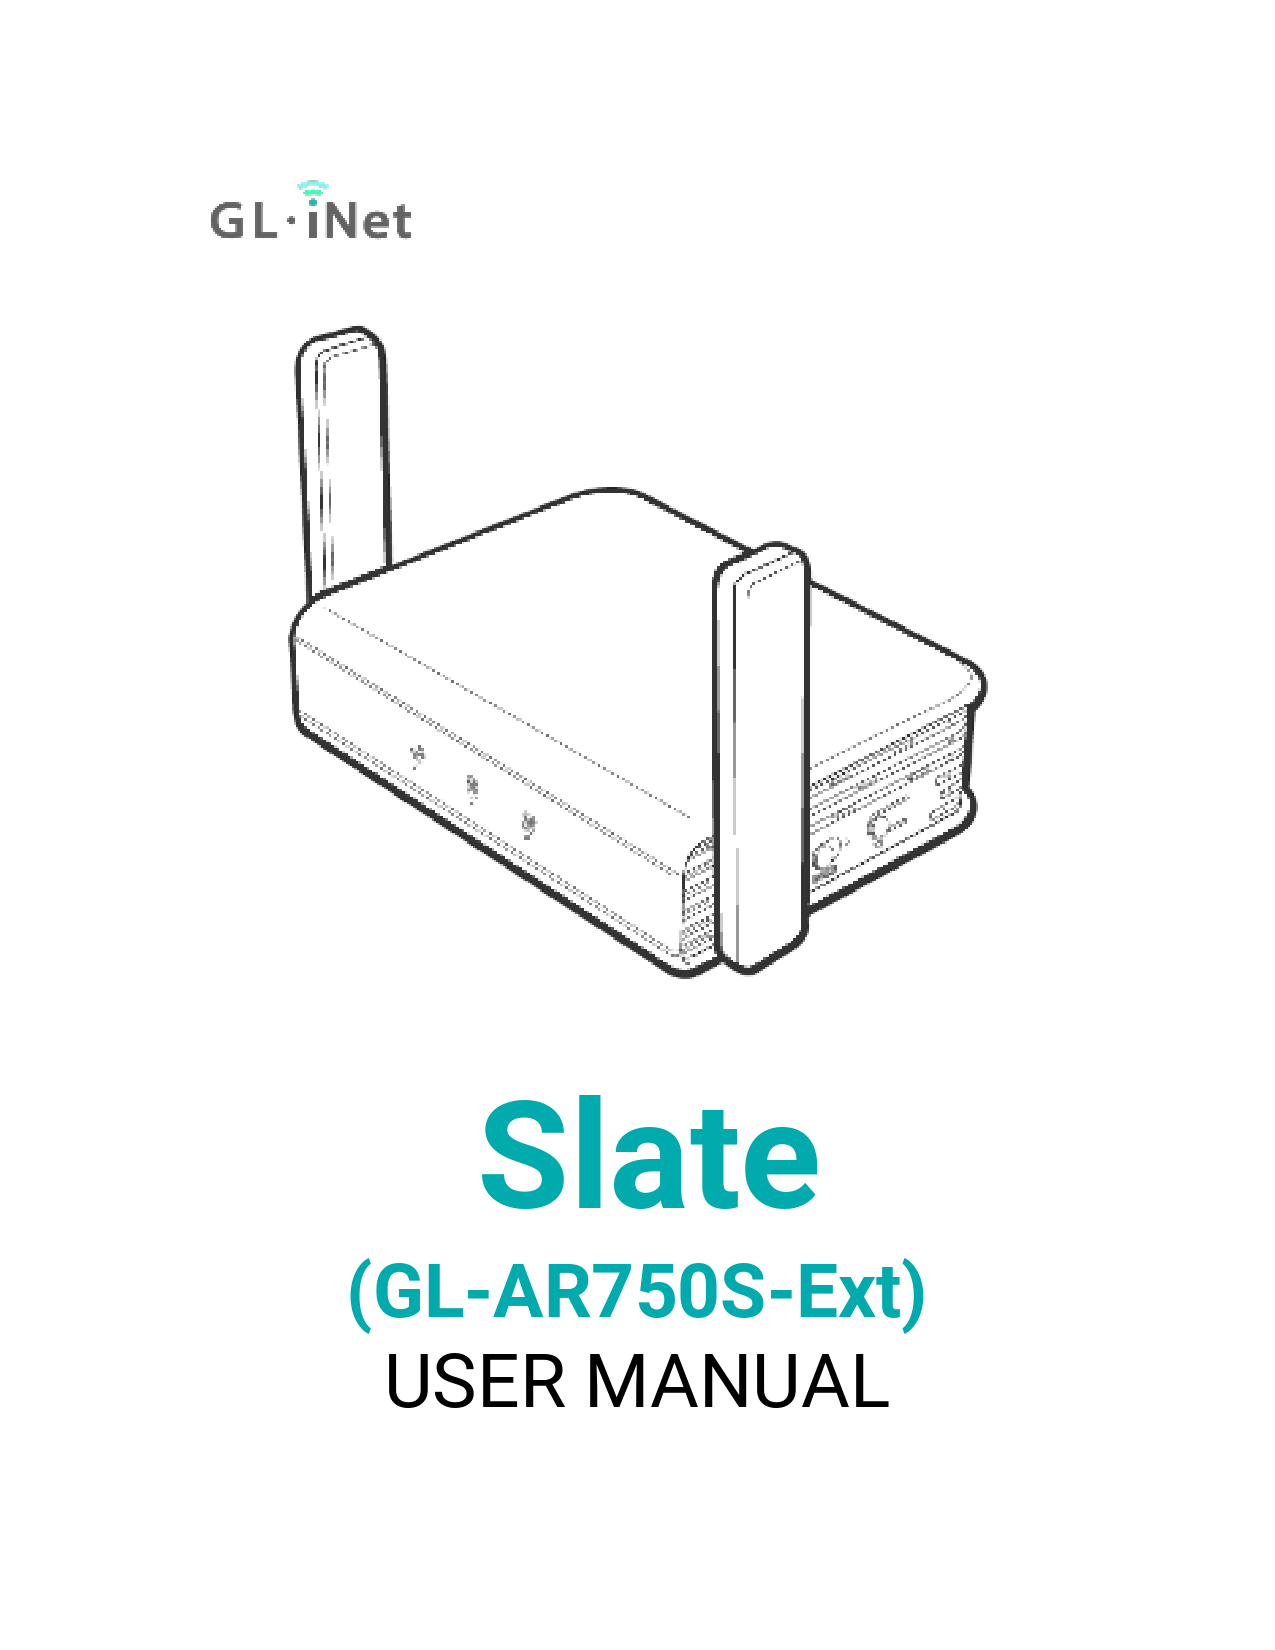
User Manual for GL iNet models including: Gigabit Travel AC Router Slate, GL-AR750S-Ext

16

Jiaqi Yin

Slate - images-na.ssl-images-amazon.com

Although this manual describes the operation of all models, all i

It doesn't require any manual configuration. (2)Static Static is required if your Internet Service Provider (ISP) has provided a fixed IP address for you or you want to configure the network information such as IP address, Gateway, Netmask manually.

(GL-AR750S-Ext) USER MANUAL

Using Repeater means connecting the router to another existing wireless network, e.g. when you are using free Wi-Fi in a hotel or cafe. It works in WISP ( Wireless ...

Not Your Device? Search For Manuals / Datasheets:

File Info : application/pdf, 80 Pages, 3.16MB

Document
B1MiAxopo-S
Slate
(GL-AR750S-Ext) USER MANUAL

Table of Contents
1. Getting Started with GL.iNet Slate..........................................................................................1 1.1. Power on......................................................................................................................................1 1.2. Connect........................................................................................................................................2 (1) Connect via LAN..................................................................................................................2 (2) Connect via Wi-Fi ................................................................................................................3 1.3. Access the Web Admin Panel ..............................................................................................3 (1) Language Setting................................................................................................................4 (2) Admin Password Setting ................................................................................................4 (3) Admin Panel ..........................................................................................................................5
2. INTERNET............................................................................................................................................6 2.1. Cable..............................................................................................................................................7 (1) DHCP.........................................................................................................................................8 (2) Static .........................................................................................................................................8 (3) PPPoE.......................................................................................................................................9 2.2. Repeater.................................................................................................................................... 10 2.3. USB 3G/4G Modem............................................................................................................. 11 Compatible Modems .................................................................................................................. 13 2.4. Tethering .................................................................................................................................. 14 EasyTether ....................................................................................................................................... 14
3. WIRELESS......................................................................................................................................... 14 4. CLIENTS ............................................................................................................................................ 16 5. UPGRADE ......................................................................................................................................... 16
5.1. Online Upgrade...................................................................................................................... 17 5.2. Upload Firmware .................................................................................................................. 18
(1) Official OpenWrt/LEDE firmware ............................................................................. 18 (2) Compile your own firmware ....................................................................................... 18 (3) Third party firmware....................................................................................................... 19 5.3. Auto Upgrade ......................................................................................................................... 19 6. FIREWALL......................................................................................................................................... 19 6.1. Port Forwards ........................................................................................................................ 20 6.2. Open Ports on Router......................................................................................................... 20
Page 1 | 3

6.3. DMZ............................................................................................................................................. 21 7. VPN...................................................................................................................................................... 22
7.1. OpenVPN .................................................................................................................................. 22 7.1.1. OpenVPN Server .......................................................................................................... 22 7.1.2. OpenVPN Client ........................................................................................................... 25
7.2. WireGuard ................................................................................................................................ 29 7.2.1. WireGuard Server ........................................................................................................ 30 7.2.2. WireGuard Client.......................................................................................................... 32 7.2.3. Wireguard App on mobile devices...................................................................... 34
7.3. Shadowsocks......................................................................................................................... 35 7.3.1. Shadowsocks (SS) Setting for UI 3.0 ................................................................ 35 7.3.2. Setup SS-Server and Start SS services ............................................................ 38 7.3.3. Using SS on PCs or Smartphones ...................................................................... 40 7.3.4. Shadowsocks Client Setup on the router........................................................ 40
7.4. VPN Policies ........................................................................................................................... 45 7.4.1. Settings ............................................................................................................................ 46 7.4.2. Add VPN policy............................................................................................................. 46 7.4.3. Clear DNS cache.......................................................................................................... 47
8. APPLICATIONS.............................................................................................................................. 48 8.1. Plug-ins...................................................................................................................................... 48 8.2. File Sharing.............................................................................................................................. 49 8.2.1. Router settings ............................................................................................................. 49 8.2.2. Access the storage device ..................................................................................... 50 8.3. DDNS .......................................................................................................................................... 59 8.3.1. Install gl-cloud-ui plug............................................................................................... 59 8.3.2. Enable DDNS.................................................................................................................. 60 8.3.3. Check if DDNS is enabled ....................................................................................... 61 8.3.4. HTTP Remote Access............................................................................................... 61 8.3.5. SSH Remote Access.................................................................................................. 62 8.3.6. Uninstall ........................................................................................................................... 62 8.4. Cloud .......................................................................................................................................... 65 8.5. Portal .......................................................................................................................................... 65 8.5.1. Turn on Captive Portal.............................................................................................. 66
Page 2 | 3

8.5.2. Change the default page ......................................................................................... 68 8.5.3. Disable Captive Portal .............................................................................................. 68 9. MORE SETTINGS .......................................................................................................................... 69 9.1. Admin Password .................................................................................................................. 69 9.2. LAN IP ........................................................................................................................................ 70 9.3. Time Zone ................................................................................................................................ 71 9.4. MAC Clone............................................................................................................................... 72 9.5. Custom DNS Server ............................................................................................................ 73 9.6. Button Settings...................................................................................................................... 73 9.7. Network Mode ....................................................................................................................... 74 9.8. Revert Firmware.................................................................................................................... 75 9.9. Advanced.................................................................................................................................. 76
Page 3 | 3

1. Getting Started with GL.iNet Slate
Model: GL-AR750S-Ext
1.1. Power on
Plug the Micro USB power cable into the power port of the router. Make sure you are using a standard 5V/2A power adapter. Otherwise it may cause malfunction.
Page 1 | 76

Note: Hot plug for TF card is not supported. If you want to use TF card, please insert before powering on the router.
1.2. Connect
You can connect to the router via Ethernet cable or Wi-Fi. Note: This step only connects your devices to the local area network (LAN) of the router. You cannot access the Internet currently. In order to connect to the Internet, please finish the setup procedures below and then follow Internet to set up an Internet connection.
(1)Connect via LAN
Connect your device to the LAN port of the router via Ethernet cable.
Page 2 | 76

(2)Connect via Wi-Fi
Search for the SSID of the router in your device and input the default password: goodlife. Note: The SSID was printed on the bottom label of the router with the following formats: · GL-AR750S-XXX · GL-AR750S-XXX-5G
1.3. Access the Web Admin Panel
Open a web browser (we recommend Chrome, firefox) and visit http://192.168.8.1. You will be directed to the initial setup of the web Admin Panel.
Page 3 | 76

(1)Language Setting
You need to choose the display language of the Admin Panel. Currently, our routers support English, , , Deutsch, Français, Español and  .
Note: If your browser always redirects to Luci (http://192.168.8.1/cgi-bin/luci), you can visit: http://192.168.8.1/index.html instead of http://192.168.8.1.
(2)Admin Password Setting
There is no default password for the Admin Panel. You have to set your own password, which must be at least 5 characters long. Then, click Submit to proceed.
Page 4 | 76

Note: This password is for this web Admin Panel and the embedded Linux system. It will not change your Wi-Fi password.
(3)Admin Panel
After the initial setup, you will enter the web Admin Panel of the router. It allows you to check the status and manage the settings of the router.
Page 5 | 76

2. INTERNET
There are total 4 types of connection method that you can use to access the Internet: Cable, Repeater, 3G/4G Modem and Tethering.

Click INTERNET to create an Internet connection.

Page 6 | 76

2.1. Cable
Connect the router to the modem or main router via Ethernet cable to access the Internet. Before plugging the Ethernet cable into the WAN port of the router, you can click Use as LAN to set the WAN port as a LAN port. That is useful when you are using the router as a repeater. As a result, you can have one more LAN port.
Page 7 | 76

Plug the Ethernet cable into the WAN port of the router. The information of your connection will be shown on the Cable section. DHCP is the default protocol. You can click Modify to change the protocol.
(1) DHCP
DHCP is the default and most common protocol. It doesn't require any manual configuration.
(2) Static
Static is required if your Internet Service Provider (ISP) has provided a fixed IP address for you or you want to configure the network information such as IP address, Gateway, Netmask manually. The current settings will be automatically filled once you choose Static. Change it according to your needs and then click Apply.
Page 8 | 76

(3) PPPoE
PPPoE is required by many Internet Service Providers (ISP). Generally, your ISP will give you a modem and provide you a username & password that you needed when you are creating the Internet connection. Under PPPoE protocol, enter your username and password, then click Apply.
Page 9 | 76

2.2. Repeater
Using Repeater means connecting the router to another existing wireless network, e.g. when you are using free Wi-Fi in a hotel or cafe. It works in WISP (Wireless Internet Service Provider) mode by default, which means that the router will create its own subnet and act as a firewall to protect you from the public network. In Repeater section, click Scan to search for the available wireless networks nearby.
Choose a SSID from the drop-down list and enter its password. You can also enable the Remember button to save the current chose wireless network. Finally, click Join.
Page 10 | 76

2.3. USB 3G/4G Modem
You can connect to the Internet using a USB 3G/4G modem. Insert your SIM card into the USB modem Plug the USB modem into the USB port of the router. Once it has been detected, the 3G/4G modem section will be activated and you will be able to set up your USB modem. Be aware that some modems work in host-less mode, which will be configured through Tethering but not 3G/4G modem. In General, you can set up your 3G/4G modem by the three basic parameters below. Click Apply to connect. · Device: Choose /dev/cdc-wdm0 if your modem supports QMI, otherwise you
need to choose /dev/ttyUSB, which may include several ttyUSB from 0 to 3. You need to choose the correct one based on the modem spec. We suggest you to try ttyUSB0 first. · Service Type: Indicate the service type of your SIM card. · APN: Confirm with your SIM card carrier.
Advanced Settings: · Dial Number: Generally, it is a default value and you don't need to set it
manually. However, if you have this info, please input it. · Pincode, Username and Password: Generally, these are not necessary for an
unlocked SIM card. However, if you have a locked SIM card, please consult your service provider.
Page 11 | 76

It is connected when the IP address of your SIM card shows up.
Page 12 | 76

Compatible Modems

Here is a list of supported modems that we had tested before.

Model Quectel EC20-E, EC20-A, EC20-C Quectel EC25-E, EC25-A, EC25-V, EC25-C Quectel UC20-E ZTE ME909s-821 Huawei E1550 Huawei E3276 TP-Link MA260 ZTE M823
ZTE MF190
Huawei E3372 Pantech UML290VW (Verizon) Pantech UML295 (Verizon) Novatel USB551L (Verizon) Verizon U620L (Verizon)

3G/4G Tested Tested by

4G

Yes

GL.iNet

Comments*

4G

Yes GL.iNet

3G

Yes

GL.iNet

4G

Yes

GL.iNet

3G

Yes

GL.iNet

4G

Yes

GL.iNet

3G

Yes

GL.iNet

4G

Yes

Arnas

Risqianto

3G

Yes

Arnas

Risqianto

4G

Yes

anonymous

4G

Yes

GL.iNet/steven QMI

4G

Yes

GL.iNet/steven Host-less

4G

Yes

GL.iNet/steven QMI

4G

Yes

Host-less

*QMI: This modem supports QMI mode. Please choose /dev/cdc-wdm0 in the Device list.
*Host-less: This modem supports tethering mode, please set up by using Tethering but not 3G/4G modem.
You can also refer to http://ofmodemsandmen.com/supported.html for a well supported modem list.

Page 13 | 76

2.4. Tethering
Using USB cable to share network from your smartphone to the router is called Tethering. Host-less modem works in Tethering during the setup of the modem as well. For host-less modem tethering, plug it into the USB port of the router. For smartphone tethering, connect it to the USB port of the router and click Trust to continue when the message pops up in your smartphone. After plugging in your device, the Tethering section will update and your device will be shown on the device list. The device name will begin with eth or usb such as eth2, usb0. Choose your device and click Connect.
EasyTether
Some carriers prohibit the sharing of the data so that you may not be able to use tethering. However, you can try easytethering. Note: Easytether is not a free service and we have no affiliation with them.
3. WIRELESS
In WIRELESS, you can check the current status and change the settings of the wireless network created by the router. The wireless network can be turned on or off by switching the ON/OFF button.
Wi-Fi Name (SSID): The name of the Wi-Fi. It is not suggested to use unicode characters such as Chinese. Wi-Fi Key: The password of the Wi-Fi, which must be at least 6 characters long. We suggest you to change it when you receive the router.
Page 14 | 76

Channel: The router will not choose the best channel itself. You need to choose a channel manually. If your router is used as a Wi-Fi repeater, the channel will be fixed according to the connected wireless network. Speed: The wireless speed of the router. TX Power (dBm): It specifies the signal strength. The default value is 20 (Strongest).
Click Modify to change the settings of the wireless network.
Page 15 | 76

4. CLIENTS
You can manage all connected clients in CLIENTS. You can see their name, IP, MAC address and connection type. Click the button on the right to block any unwanted client.
5. UPGRADE
Click UPGRADE to check any available update and upgrade the firmware.
Page 16 | 76

5.1. Online Upgrade
You can find the current firmware version here. If your router is connected to the Internet, it will check for the newer firmware version available for download.
Note: It is suggested to uncheck Keep setting. If you keep the settings and encounter problems after the upgrade, please reset the router.
Page 17 | 76

5.2. Upload Firmware
Click Local Upgrade to upload a firmware file to the router. Simply drag and drop your firmware file to the area indicated.
(1)Official OpenWrt/LEDE firmware
You can download the official firmware from our website. · GL-AR750(Crena): https://dl.gl-inet.com/firmware/ar750/ · GL-AR750S (Slate): https://dl.gl-inet.com/firmware/ar750s/ Find the available firmwares from the folder according to your device model, and they are located in different sub-folders: V1/release: Official GL.iNet OpenWrt/LEDE firmware. testing: Beta version of GL.iNet OpenWrt/LEDE firmware. Note: You have to upload the .tar file. The .img file can only be flashed to the router through Uboot.
(2)Compile your own firmware
You can compile your own firmware and flash to the router. Please refer to github.com/domino-team/openwrt-cc.
Page 18 | 76

(3)Third party firmware
You may also try other firmwares such as DDWRT. Note: If you uploaded an incompatible firmware thus bricked the router, please use Uboot to re-install the correct firmware.
5.3. Auto Upgrade
You can enable auto upgrade. The router will search for available update and upgrade automatically according to the time that you set.
6. FIREWALL
In FIREWALL, you can set up firewall rules like port forwarding, open port and DMZ.
Page 19 | 76

6.1. Port Forwards
Port Forwarding allows remote computers to connect to a specific computer or service behind the firewall in the local LAN (such as web servers, FTP servers, etc). To set up port forwarding, click Port Forwards and input the required parameters or click Add a New One.
Name: The name of the rule which can be specified by the user. Internal IP: The IP address assigned by the router to the device which needs to be accessed remotely. External Ports: The numbers of external ports. You can enter a specific port number or a range of service ports (E.g 100-300). Internal Ports: The internal port number of the device. You can enter a specific port number. Leave it blank if it is same as the external port. Protocol: The protocol used, you can choose TCP, UDP, or both TCP and UDP. Status: Activate of Deactivate the rule.
6.2. Open Ports on Router
The router's services, such as web, FTP and so on, require their respective ports to be opened on the router in order to be publicly reachable. To open a port, click Open Ports on Router and input the required parameters or click Add a New One.
Page 20 | 76

Name: The name of the rule which can be specified by the user. Port: The port number that you want to open. Protocol: The protocol used, you can choose TCP, UDP, or both TCP and UDP. Status: Activate of Deactivate the rule.
6.3. DMZ
DMZ allows you to expose one computer to the Internet, so that all the inbounds packets will be redirected to the computer you set. Click DMZ and enable Open DMZ. Input the internal IP address (E.g. 192.168.8.100) of your device which is going to receive all the inbound packets.
Page 21 | 76

7. VPN
GL.iNet routers have pre-installed VPN server and client in OpenVPN and WireGuard. Shadowsocks is not a default function and you need to install packages in Plugins. Please refer to the links below for the detailed setup instruction:
7.1. OpenVPN
GL.iNet routers have pre-installed OpenVPN server and client.
7.1.1. OpenVPN Server
You can set up an OpenVPN server on GL.iNet router. Click + Generate a configuration file.
Page 22 | 76

(1) Server configuration There are preset OpenVPN server configurations. You can also click Modify to change them manually. Click Apply when you finish.
(2) Export OpenVPN configuration file Click Export Config to download the OpenVPN configuration file which you need to upload when you are configuring your OpenVPN client.
Page 23 | 76

(3) Start the OpenVPN server Click Start to start your OpenVPN server. Otherwise, you will not be able to connect to the OpenVPN server by using its configuration file.
Page 24 | 76

7.1.2. OpenVPN Client
OpenVPN client requires OpenVPN configuration file (.ovpn) to create the OpenVPN connection. If you have your own VPN service provider but you don't know how to get the configuration file, please refer to Get your configuration file. Click + Add a New VPN Configuration to upload the configuration file.
(1) Upload your OpenVPN configuration file Simply drag and drop your file to the pop up windows. It can be a single .ovpn file or a zip/tar.gz file which contains multiple .ovpn files.
Page 25 | 76

Be careful that some .ovpn files use separated ca, cert, crl files. These files must be zipped together with the .ovpn file before upload.
(2) Enter Description, Username and Password Enter a description for your OpenVPN configuration file and then click Submit to finish the upload process. In some cases, it will ask you to enter your username and password.
Page 26 | 76

(3) Connect to the OpenVPN server You can now click Connect to start the OpenVPN connection.
Once connected, you should find your IP address, data received/sent.
Page 27 | 76

(4) Manage configuration files Click Management to check the list of configuration files. You can modify the Description, User name or Password of each configuration file. You can also add, delete a configuration file or even purge all your uploaded configuration files. If your configuration file is a zip/tar.gz file which includes multiple ovpn files, you can choose an individual .ovpn file that you would like to connect in Server.
Page 28 | 76

Get your configuration file We have tested different VPN service providers. Therefore, if you don't know how to get the configuration file, you can follow the instruction below. However, you have to contact your service provider for the configuration file if they are not listed below. If you have any problem in the setup of OpenVPN, please contact support@glinet.com
7.2. WireGuard
WireGuard is an extremely simple yet fast and modern VPN that utilizes state-ofthe-art cryptography. It aims to be faster, simpler, leaner, and more useful than IPSec, while avoiding the massive headache. It intends to be considerably more performant than OpenVPN. You can setup and use WireGuard easily in firmware 3.0, wireGuard server and clients are pre-installed in firmware 3.0.
Page 29 | 76

7.2.1. WireGuard Server
You can set up a WireGuard server on GL.iNet router with firmware 3.0. Click + Create a New User.
(1) Start a WireGuard server You can simply use the default parameters of Local IP and Local Port, or you can set your own value. Then click Start to start your own WireGuard server.
Page 30 | 76

(2) Add a new client You have to add a new user and apply the configurations when you are connecting to this WireGuard server. Click Management tab and then Create a New User.
Specify the Name of the new client and then click Add.
(3) Get the configuration details for your client You can now check the list of the clients you added. You can Delete any unwanted client. Please click Configurations to find the configuration details which you need to use when you are setting up WireGuard client. We provide QRcode, Plain Text and JSON configurations currently.
Page 31 | 76

If you are using another GL.iNet router as a client, please copy the JSON configuration and paste it directly when you are setting up WireGuard client.
7.2.2. WireGuard Client
To set up a WireGuard client, please click + Add New Profiles.
Page 32 | 76

(1) Specify the name of your server Specify the name and then click Next.
(2) Input the configurations You can copy the JSON configurations from your server to Configuration or input the settings manually. If you are using Azirevpn or Mullvad, you can click Others and use your AzireVPN or Mullvad account to set up WireGuard client directly. Click Add to finish the WireGuard Client setup.
Page 33 | 76

(3) Connect to the WireGuard server
Click Connect. You will see the upload and download traffic when it is connected successfully.

7.2.3. Wireguard App on mobile devices
You can also use WireGuard App on your mobile phone.

Page 34 | 76

· Android: https://play.google.com/apps/testing/com.wireguard.android · iOS: https://itunes.apple.com/us/app/wireguard/id1441195209?mt=8
7.3. Shadowsocks
7.3.1. Shadowsocks (SS) Setting for UI 3.0
You will learn how to set up shadowsocks server and client in UI 3.0 on our mini routers in this guide. Because the UI 3.0 default excludes Shadosocks, this guide is only for DIY purpose and provided as is. To to the following setup, you have to upgrade your Plug-ins.
(1) Update Plug-ins · Login the router, finish your first-time setup and internet setup, ensure you
are connecting the internet. · Select APPLICATIONS -> Plug-ins on UI 3.0 web management left side.
Page 35 | 76

· Click Update on top-right corner.
Page 36 | 76

(2) Install the following packages in the Plug-ins:
(1). gl-ss (2). gl-ss-server
The following Success window will pop-up each time when installed a package.
And after all packages installed, you can find 2 more selections, "SS Server" and "SS Client" are displayed at left side in VPN pull-down menu.
Page 37 | 76

7.3.2. Setup SS-Server and Start SS services
Click VPN-> SS Server on the left side, main setup page of SS Server will be shown as following:

Input 3 parts in the right table. Port - SS Server Port

Page 38 | 76

Password - SS services password to be used when client connect to this server Encryption Method - Select one of the encryption method list.
After all sections setup finished, you can click the green "Start" button to start SS server. Then the dot before Shadowsocks Server will turn to green and IP Address will display. This is the SS server Public IP
Page 39 | 76

7.3.3. Using SS on PCs or Smartphones
· Download the clients of your OS platform: https://shadowsocks.org/en/download/clients.html
· Setup your client on different devices Install the Shadowsocks Client on your device (iOS, Android or Windows devices), then setup the following information: Host: your Public IP address (you checked in step 2.3) Port: 443 Password: your password (same as you setup in ss-server) Encryption: rc4-md5 (same as you select in ss-server)
· Start using Private Shadowsocks Services After setup, you just start your shadowsocks on your devices, enjoy it. You can test or check whether it's workable by open a web browser on your smartphone (use 3G/4G data but not WiFi), then go to a IP address checking website to check if the IP address is same as your SS-server public IP address.
7.3.4. Shadowsocks Client Setup on the router
· Select "SS Client" in the VPN pull-down menu.
Page 40 | 76

· Click "Management" tab to setup SS-Client for GL-AR750s
· 4.3. Click "Add a New Shadowsocks Client", fill the following information in the pop-up window:
Page 41 | 76

Description : Your SS server description Server Address: "Your Public IP" Server Port: 443 Password: "Your Password" Encrypt Method: RC4-MD5 Click "Add",
Page 42 | 76

The setup will finish and auto return to the Status page now you can select the previously configuration in the pull-down menu of SS Client.
Click green "Connect" button, then the connection shall be established.
Page 43 | 76

If you successfully connected the SS-client to SS Server, the dot before Shadowsocks Client will turn green and Green "Connect" button will become Red "Disconnect". Enjoy your SS services.
Page 44 | 76

7.4. VPN Policies
Starting from firmware version 3.022, users can define VPN routing policies. For example, it is possible to use VPN for a specific website/IP while maintaining a normal Internet traffic without VPN for others.
Page 45 | 76

7.4.1. Settings
Enable VPN Policy: Turn on/off VPN policies. Use VPN for all process on the router: Generally, the traffic of all processes running on the router such as GoodCloud will be routed through VPN if there is a connected VPN client (e.g. WireGuard, OpenVPN, Shadowsocks). In this case, these processes will lose Internet if VPN is disconnected. In order to ensure a proper operation of these processes, you can disable this option. As a result, they will not use VPN. Please Choose Policy: The item can be either Domain/IP (e.g. gl-inet.com / 192.168.1.1 / 192.168.1.0/24) or Mac address (24:F0:94:5C:8E:F9).
7.4.2. Add VPN policy
You can only configure either Use VPN for or Do not use VPN for. Click the arrow to switch among Use VPN for and Do not use VPN for. To add a policy, enter the domain/IP or Mac address into the box and then click Add. Finally, click Apply to activate the policy. For example, if we want to route only the traffic of gl-inet.com through VPN, we need to add gl-inet.com under Use VPN for.
Page 46 | 76

However, if we want to route all traffic through VPN except gl-inet.com, we need to add gl-inet.com under Do not use VPN for.
7.4.3. Clear DNS cache
If you are using domain-based policy, it may not work unless you clear your DNS cache. Please follow the instructions below to clear your DNS cache. Windows: Press Win + R and run cmd. Execute command ipconfig /flushdns. MacOS: Open Terminal and execute command sudo killall -HUP mDNSResponder. Ubuntu: Open Terminal and execute command sudo service network-manager restart.
Page 47 | 76

You may also need to clear DNS cache in your browser. Chrome: Visit chrome://net-internals/#dns. Click Clear host cache. Firefox: Open Firefox and press Ctrl + Shift + Delete. Select Time range to Everything and check only Cache. Finally, click Clear Now.
8. APPLICATIONS
8.1. Plug-ins
Plug-ins allows you to manage OpenWrt packages. You can install or remove any package. Remember to click Update whenever you access this packages repository.
Page 48 | 76

8.2. File Sharing
You can use an external USB storage or a MicroSD card with GL.iNet router. The file sharing features of the external storage device can be configured in File Sharing. Share via LAN: Share the contents of the external storage device with all connected clients. Share via WAN: The contents of the external storage device can be accessed from the WAN. Writable: The contents of the external storage device can be edited.
8.2.1. Router settings
The contents of the external storage device are shared to LAN but not WAN and they are unwritable by default. Please click on your router model below to check how to change the file sharing settings of the router.
Page 49 | 76

Supported external storage devices

Router Model GL-MT300N* GL-MT300N-V2* GL-AR150 Series GL-AR300M Series GL-USB150 GL-MiFi GL-AR750 GL-AR750S-Ext (Slate) GL-B1300*

USB Stick        

USB Hard Drive        

MicroSD Card    -

*Firmware 3.0 for this model has not released yet.

Note: The power consumption of USB hard drive is quite high. You should use it with an external power supply. Otherwise, it may cause malfunction.

8.2.2. Access the storage device
You can access the contents of the external storage device from your computer or smart phone. Please check the following guidance for the using of file sharing among different operating systems.
Windows 1) Your network must be Home/Private. Otherwise you may not be able to see your router in Network. if you are using Win10, you also need to enable SMB 1.0. · Win7
Go to Control panel -> Network and Internet -> Network and Sharing Center. Find if your active network is Home network. If not, click it and change it to Home network. · Win10 Go to Control panel -> Network and Internet -> HomeGroup. Click Change network location.
Page 50 | 76

Go to Control Panel -> Programs and Features -> Turn Windows features on or off -> Find SMB 1.0/CIFS file sharing support, check all SMB1 related items, click apply and restart your computer. 2) Open a Windows explorer, you can find Network in the folder directory. Double click your router to access its contents.
Mac 1) Go to System Preferences -> Sharing -> File sharing. Click Options and then enable SMB. 2) Open Finder. You should be able to find your router under Shared. IOS You have to use file manage app to access the contents of your external storage device. You may use FE File Explorer:
Page 51 | 76

1) Click + to create a Windows connection.
Page 52 | 76

2) Enter the IP address of your router (192.168.8.1). The User Name is root and the Password is the one that you use to login the web Admin Panel. Finally, click Save.
Page 53 | 76

3) Click your newly created connection to access the contents.
Page 54 | 76

Android Most Android devices have file manager which you can use to access the contents of your external storage device. Or you can use ES file explorer: 1) Open the app and then click Network.
Page 55 | 76

2) Click Scan to find your network storage device.

Page 56 | 76

Page 57 | 76

Page 58 | 76

8.3. DDNS
Dynamic Domain Name Service(DDNS) is a service used to map a domain name to the dynamic IP address of a network device. You can remotely access your router by url though this function. In 3.021 version or above it is a default function, other 3.0 version need to install packages in Plug-ins.
8.3.1. Install gl-cloud-ui plug
(If your firmware version is equal or greater than v3.021, please jump to Step 2)
Access to router Admin Panel (default is http://192.168.8.1), at the left sidebar, APPLICATIONS -> Plug-ins, click "Update" button to updage Plug-ins, then input
Page 59 | 76

"gl-cloud-ui" and click "Install" button. After installation, press "F5" to refresh Admin Panel, a new item "Remote Access" will appear inside APPLICATIONS.
8.3.2. Enable DDNS
At the left sidebar, APPLICATIONS -> Remote Access, toggle "Enabled DDNS", agree Terms of Services & Privacy Policy, click "Apply" button. Generally it take several minutes to take effect. Move mouse to hover the icon besides "Enabled DDNS", it will display the DDNS url of your device.
Page 60 | 76

The DDNS domain printed on the back label of router has changed. If your DDNS url is xxxxxxx.gl-inet.com on the back of router, new DDNS url will be xxxxxxx.glddns.com.
8.3.3. Check if DDNS is enabled
Use nslookup command to check if your DDNS is enabled. Make sure you use your DDNS url when use nslookup command.
nslookup xx5007c.glddns.com 8.8.8.8
8.3.4. HTTP Remote Access
Page 61 | 76

Follow the steps above, to enable HTTP Remote Access. * HTTP is not encrypted, use at your own risk.* If your router is behind NAT, you may need to set up port forward in higher level router. After you enable HTTP Remote Access, you can access Admin Panel anywhere by your DDNS url as you in LAN.
8.3.5. SSH Remote Access
Follow the steps above, to enable SSH Remote Access, then you can use Terminal tools to ssh anywhere.
8.3.6. Uninstall
If you don't want DDNS, just disable it.
Page 62 | 76

After disable DDNS, the interface is like above. If you want uninstall DDNS feature to save space, you need to uninstall gl-cloud-ui, gl-ddns, and gl-mqtt plug-ins.
Page 63 | 76

Follow the steps above, to uninstall gl-cloud-ui plug-in. Follow the steps above, to uninstall gl-ddns plug-in.

Follow the steps above, to uninstall gl-mqtt plug-in.

Page 64 | 76

8.4. Cloud
GL.iNet GoodCloud cloud management services provide an easy and simple way to remotely manage routers. In our website, you can remotely check your router status, change the password, control clients, even set email alarm when a device is online or offline. In 3.021 version or above it is a default function, other 3.0 version need to install packages in Plug-ins.
For the details, please refer to Cloud.
8.5. Portal
You can set a captival portal in our routers, when newly users connect to wifi, they need to access a web page before access the internet. Only support 3.022 version or above.
Page 65 | 76

A captive portal is a web page accessed with a web browser that is displayed to newly connected users of a Wi-Fi network before they are granted broader access to network resources. Captive portal feature need firmware version is equal or greater than v3.022, please visit this to download latest firmware and upgrade.
8.5.1. Turn on Captive Portal
Open a web browser (we recommend Chrome) and to access router Web Admin Panel(default url is http://192.168.8.1). At the left sidebar, APPLICATIONS -> Portal, follow the steps below to enable Captive Portal.
Page 66 | 76

1) Turn on one-click Internet access 2) Choose the network that you want to use Portal. LAN is for LAN clients, include wired clients. Guest is for Guest clients which access by Guest Wi-Fi. 3) Set free internet time. 4) Certification URL is the default page that clients will force redirect to when they are connected, e.g. https://www.gl-inet.com 5) Apply the configuration. For wired desktop client, please use browser to access a http(not https) website, e.g. http://neverssl.com or http://apple.com/? , then you will see the portal. Below is the Portal on iPhone, click the "GET CONNECTED" button to access the internet. On Android and desktop platform, it's a similar interface.
Page 67 | 76

8.5.2. Change the default page
The default page is located /etc/nodogsplash/htdocs/, use SSH or WinSCP to change this page. For more information about how to use SSH and WinSCP, please access this. You may need basic HTML and CSS knowledge to change this page, please learn these from w3school or other sites. If you want to change the picture on the default page, just replace the image on /etc/nodogsplash/htdocs/portal_login.png. After you had change the page, it need to disable Portal and enable Portal again to enable the modified default page.
8.5.3. Disable Captive Portal
Follow the steps below to disable Captive Portal.
Page 68 | 76

9. MORE SETTINGS 9.1. Admin Password
Change the password of the web Admin Panel, which must be at least 5 characters long. You have to input your current password in order to change it.
Page 69 | 76

9.2. LAN IP
LAN IP is the IP address that you use to connect to this router. The default IP address of GL.iNet router is 192.168.8.1. If it conflicts with the IP address of your main router, you can change it.
Page 70 | 76

9.3. Time Zone
The time of the router's activities will be recorded according to the router time. Therefore, choosing the time zone of your location is recommended.
Page 71 | 76

9.4. MAC Clone
Clone the MAC address of your current client to the router. It is used especially in hotel when the network checks your MAC address. For example, if you got your smartphone registered on the network, you can clone the MAC address of your smartphone to the router so that the router can also connect to the network.
Page 72 | 76

9.5. Custom DNS Server
You can configure the DNS server of the router in order to prevent DNS leak or other purposes. DNS Rebinding Attack Protection: Some network may require authentication in captive portal. Disable this option if the captive portal of your network cannot be resolved. Override DNS Settings for All Clients: Enabling this option will capture DNS request from all connected clients. DNS over TLS from Cloudflare: Cloudflare DNS over TLS uses the TLS security protocol for encrypting DNS queries, which helps increase privacy and prevent eavesdropping. Manual DNS Server Settings: Input a custom DNS server manually.
9.6. Button Settings
Configure the function of the mode switch. It doesn't have any function by default. You can set it as a toggle to turn on or off Wireguard/OpenVPN client.
Page 73 | 76

9.7. Network Mode
Change the network mode to cater your usage scenario. You may need to reconnect your client device whenever you change the network mode of the router. Be aware that you may not be able to access the web Admin Panel with the default IP 192.168.8.1 if you use the router in Access Point, Extender or WDS mode. If you want to access the web Admin Panel in this case, you have to use the IP address assigned by the main router to the GL.iNet router. Router: Create your own private network. The router will act as NAT, firewall and DHCP server. Access Point: Connect to a wired network and broadcast a wireless network. Extender: Extend the Wi-Fi coverage of an existing wireless network. WDS: Similar to Extender, please choose WDS if your main router supports WDS mode.
Page 74 | 76

9.8. Revert Firmware
Revert the router to factory default settings. All your settings, applications and data will be erased.
Page 75 | 76

9.9. Advanced
Click Advanced to direct to Luci which is the default web interface of OpenWrt. You can check the detailed system log or conduct more advanced configurations there.
Note: The username is root. The password is same as the one that you use to access the web Admin Panel.
Page 76 | 76


References

Adobe PDF Library 11.0