User Guide for Honeywell models including: TC500A, Commercial Thermostat

TC500A Commercial Thermostat User Guide

TC500 Commercial thermostat user guide

TC500, Commercial, thermostat, user, guide

Honeywell International Inc.

Not Your Device? Search For Manuals / Datasheets:

File Info : application/pdf, 129 Pages, 13.28MB

Document
PDF tc500a-n ug
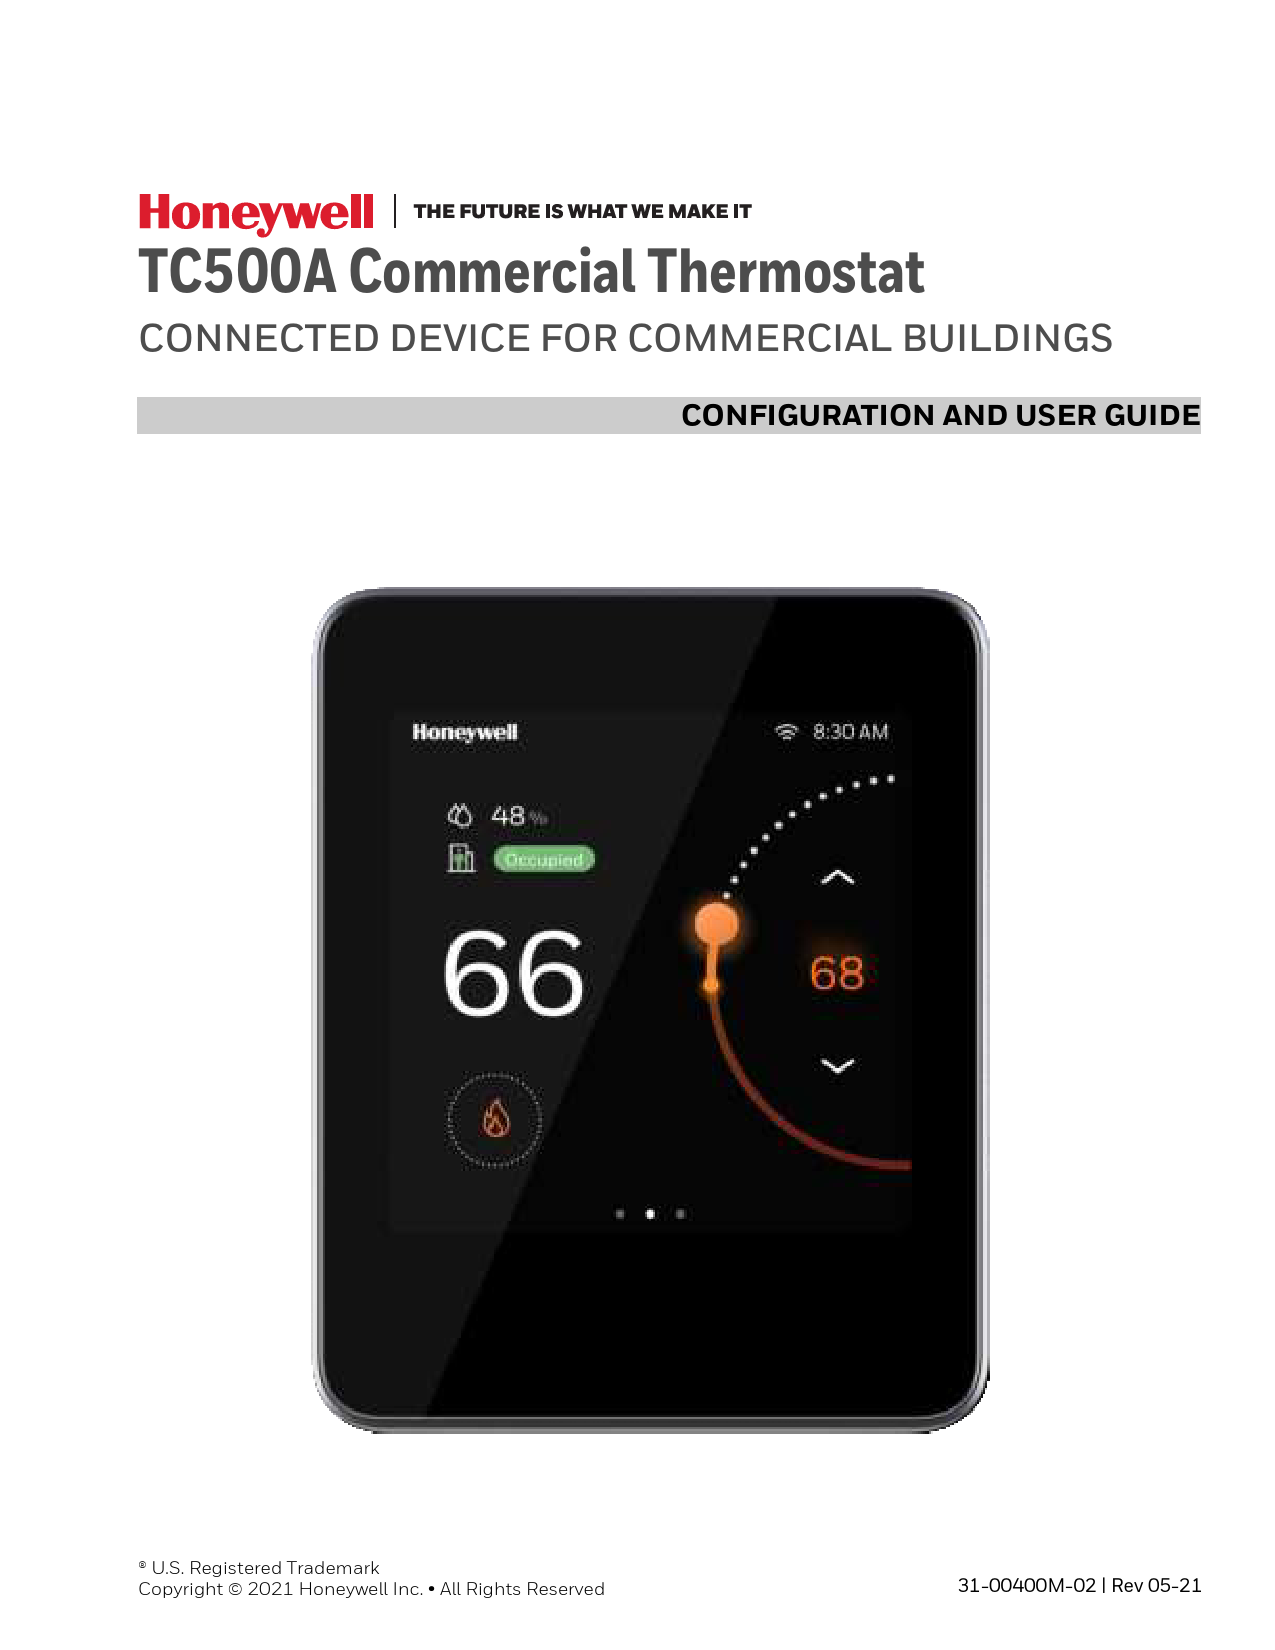
TC500A Commercial Thermostat
CONNECTED DEVICE FOR COMMERCIAL BUILDINGS
CONFIGURATION AND USER GUIDE

® U.S. Registered Trademark Copyright © 2021 Honeywell Inc. · All Rights Reserved

31-00400M-02 | Rev 05-21

Table of contents

Table of contents ............................................................................................................................ 3 Important Safety Information and Installation Precautions.................................. 6
Introduction...................................................................................................................................... 9 About TC500A Thermostat ............................................................................................... 10 Features.................................................................................................................................... 10 Intended audience and assumed knowledge............................................................ 10 Reference documents......................................................................................................... 11 Abbreviation and nomenclature ..................................................................................... 11 Conventions............................................................................................................................ 12 Dimensions ............................................................................................................................. 13 Technical specifications..................................................................................................... 13 Terminal Identification ....................................................................................................... 17 Terminal Assignment .......................................................................................................... 18 Security requirement........................................................................................................... 20
Getting started ............................................................................................................................. 23 Thermostat display overview ........................................................................................... 24 Presence detection............................................................................................................... 24 Home Page: Temperature reading and adjustment ............................................... 25 Device configuration page (right side page): Quick access and device management .......................................................................................................................... 26 Ambiance page (left side page): Sensor reading ..................................................... 27 Home screen icon overview .............................................................................................. 28 Smart LED indication.......................................................................................................... 29
Initial Configuration................................................................................................................... 31 Prerequisites........................................................................................................................... 32 Boot-up the thermostat ..................................................................................................... 33

31-00400M-02 | Rev 05-21

3

COMMERCIAL TOUCHSCREEN THERMOSTAT
Integrating with Occupant app and Cloud registration ........................................50 Device Configuration & Equipment Settings ...................................................................53
Basic Configuration .............................................................................................................54 Connection ..............................................................................................................................65 User management ................................................................................................................67 Configuring the user roles.................................................................................................68 Configuring the Home page (Display Management) .............................................76 Configuring the alarm preference..................................................................................76 Viewing the system status .................................................................................................78 Reset to Default .....................................................................................................................79 Advance settings: Configuring the equipment settings........................................81 Configuring the Thermostat I/O terminals.................................................................90 Configuring the sensors.....................................................................................................91 Managing the setpoint options .......................................................................................95 Miscellaneous ........................................................................................................................97 Enabling the Service mode ...............................................................................................99 Alarms ........................................................................................................................................... 101 Alarms..................................................................................................................................... 102 Alarm notification signs .................................................................................................. 102 Alert notification ................................................................................................................. 103 Unacknowledged alarms................................................................................................. 104 List of alarms and their severity................................................................................... 107 Managing the alarms ....................................................................................................... 108 Scheduling .................................................................................................................................. 111 About Schedule................................................................................................................... 111 Setting up a weekly schedule ........................................................................................ 113 Resetting a schedule ........................................................................................................ 119 Setting up a holiday schedule....................................................................................... 121 Special event ........................................................................................................................ 126

4

31-00400M-02 | Rev 05-21

COMMERCIAL TOUCHSCREEN THERMOSTAT
Declaration
This document contains Honeywell proprietary information. Information contained herein is to be used solely for the purpose submitted, and no part of this document or its contents shall be reproduced, published, or disclosed to a third party without the express permission of Honeywell International Inc. While this information is presented in good faith and believed to be accurate, Honeywell disclaims the implied warranties of merchantability and fitness for a purpose and makes no express warranties except as may be stated in its written agreement with and for its customer. In no event is Honeywell liable to anyone for any direct, special, or consequential damages. The information and specifications in this document are subject to change without notice. Copyright 2021 ­ Honeywell International Inc.
Waste Electrical and Electronic Equipment (WEEE)
WEEE: Waste Electrical and Electronic Equipment Directive · At the end of the product life, dispose of the packaging and product in an appropriate recycling center. · Do not dispose of the device with the usual domestic refuse. · Do not burn the device.
FCC Part 15 compliant
This device complies with part 15 of the FCC Rules. Operation is subject to the following two conditions: (1) This device may not cause harmful interference, and (2) This device must accept any interference received, including interference that may cause undesired operation.

31-00400M-02 | Rev 05-21

5

COMMERCIAL TOUCHSCREEN THERMOSTAT

Regulation (EC) No 1907/2006
According to Article 33 of Reach Regulation, be informed that the substances listed below may be contained in these products above the threshold level of 0.1% by weight of the listed article.

Product/Part Code
Only TC500A-W / thermostat mainboard CBA, thermostat wall plate board PCBA

Substance Name Lead Lead oxide

CAS Number 7439-92-1 1317-36-8

Important Safety Information and Installation Precautions
Read all instructions Failure to follow all instructions may result in equipment damage or a hazardous condition. Read all instructions carefully before installing equipment. When performing any work (installation, mounting, start-up), all manufacturer instructions and in particular the Mounting Instructions (31-00399M-02) are to be observed. · TC500A Thermostat may be installed and mounted only by authorized and
trained personnel. · It is recommended that devices be kept at room temperature for at least 24 hours
before applying power. This is to allow any condensation resulting from low shipping/storage temperatures to evaporate. · Do not open TC500A Thermostat, as it contains no user-serviceable parts inside! · Investigated according to United States Standard UL- 60730-1, and UL60730-29. · Investigated according to Canadian National Standard(s) C22.2, No. 205-M1983 (CNL-listed). · CE declarations according to LVD Directive 2014/35/EU and EMC Directive 2014/30/EU. · Product standards are EN 60730-1 and EN 60730-2-9. · TC500A Thermostat is Class B digital apparatus and complies with Canadian ICES-003.
Local codes and practices Always install equipment in accordance with the National Electric Code and in a manner acceptable to the local authority having jurisdiction.
Electrostatic sensitivity This product and its components may be susceptible to electrostatic discharge (ESD). Use appropriate ESD grounding techniques while handling the product. When possible, always handle the product by its non-electrical components.

6

31-00400M-02 | Rev 05-21

COMMERCIAL TOUCHSCREEN THERMOSTAT
High voltage safety test Experienced electricians, at first contact, always assume that hazardous voltages may exist in any wiring system. A safety check using a known, reliable voltage measurement or detection device should be made immediately before starting work and when work resumes. Lightning and high-voltage danger Most electrical injuries involving low-voltage wiring result from sudden, unexpected high voltages on normally low voltage wiring. Low-voltage wiring can carry hazardous high voltages under unsafe conditions. Never install or connect wiring or equipment during electrical storms. Improperly protected wiring can carry a fatal lightning surge for many miles. All outdoor wiring must be equipped with properly grounded and listed signal circuit protectors, which must be installed in compliance with local, applicable codes. Never install wiring or equipment while standing in water. Wiring and equipment separations All wiring and controllers must be installed to minimize the possibility of accidental contact with other potentially hazardous and disruptive power and lighting wiring. Never place 24VAC or communications wiring near other bare power wires, lightning rods, antennas, transformers, or steam or hot water pipes. Never place wire in any conduit, box, channel, duct or other enclosure containing power or lighting circuits of any type. Always provide adequate separation of communications wiring and other electrical wiring according to code. Keep wiring and controllers at least six feet from large inductive loads (power distribution panels, lighting ballasts, motors, etc.). Failure to follow these guidelines can introduce electrical interference and cause the system to operate erratically. Warning By using this Honeywell literature, you agree that Honeywell will have no liability for any damages arising out of your use, or modification to, the literature. You will defend and indemnify Honeywell, its affiliates and subsidiaries, from and against any liability, cost, or damages, including attorneys' fees, arising out of, or resulting from, any modification to the literature by you. The material in this document is for information purposes only. The content and the product it describes are subject to change without notice. Honeywell makes no representations or warranties with respect to this document. In no event shall Honeywell be liable for technical or editorial omissions or mistakes in this document, nor shall it be liable for any damages, direct or incidental, arising out of or related to the use of this document. No part of this document may be reproduced in any form or by any means without prior written permission from Honeywell.
Safety Information as per EN60730-1
TC500A Thermostat is intended for commercial and residential environments. TC500A Thermostat is an independently mounted electronic control system with fixed wiring. TC500A Thermostat is used for the purpose of building HVAC control and is suitable for use only in non-safety controls for installation on or in appliances.

31-00400M-02 | Rev 05-21

7

COMMERCIAL TOUCHSCREEN THERMOSTAT

8

31-00400M-02 | Rev 05-21

1CHAPTER

Introduction

This chapter contains brief description of the TC500A thermostat and its hardware specifications.

Related topics

About TC500A Thermostat Features Intended audience and assumed knowledge Reference documents Abbreviation and nomenclature Conventions Dimensions Technical specifications Security requirement

31-00400M-02 | Rev 05-21

9

1 - INTRODUCTION

About TC500A Thermostat
The TC500A Thermostat is an advanced, configurable, connected device for commercial buildings. It controls and monitors AHU, Heat Pump equipment, and their configurations. This device communicates over Wi-Fi, Bluetooth, BACnet IP over Wi-Fi, Sylk to easily integrates with the building automation system. The built-in intelligent control algorithms of the device help to achieve the perfect balance between Energy Efficiency and Comfort. The device is packaged with numerous presets suitable for most commercial building requirements that enable the easy and quick initial setup. The firmware of the device can be upgraded via the Wi-Fi network. The device has two universal inputs, two universal inputs/outputs and a pair of Sylk terminals to connect with sensors or other accessories. It also has a built-in temperature sensor, humidity sensor, and proximity sensor.

Features

· Easily customizable and intuitive user interface. · Multiple, configurable, levels of user privilege access for features such as
Occupancy set points, Date/Time, Schedules, Calendars of special events, remote and local Manual Override, remote and local Occupancy Override, Choice of language and units, and screen lockouts to prevent unauthorized settings changes. · Advanced commercial control algorithms such as auto changeover, preoccupancy purge, power-up disable time, freeze protection, demand limit controls, and same reliable optimized recovery methods established over decades of use. · Settings to switch Fahrenheit to Celsius and vice-versa. · Heat set points are limited automatically between 40°F to 90°F and cool set points are limited automatically between 50°F to 99°F · Auto display goes into sleep mode when there is no user action. · A LED indicator to show the operational status of the thermostat when the display goes to sleep mode. · Real-Time Clock time keeping accuracy with 72 hour retention during power loss. · Thermostat can be configured via HMI or BACnet IP. · BACnet settings can be configured via HMI.

Intended audience and assumed knowledge
This document provides information about installing and commissioning a TC500A Thermostat. It also shows how to operate the user interface. It is assumed that the user is trained and familiar with HVAC concepts. IMPORTANT: Always install equipment in accordance with the National Electric Code and in a manner acceptable to the local authority having jurisdiction (AHJ). No guidelines, instructions, installation practices, or other information presented in this guide may be interpreted to supersede or modify the local codes and practices of the AHJ.

10

31-00400M-02 | Rev 05-21

REFERENCE DOCUMENTS

Reference documents
· TC500A Commercial Thermostat Datasheet (31-00398M-02) · TC500A Commercial Thermostat Mounting instructions (31-00399M-02) · TC500A Commercial Thermostat Quick start guide (31-00401M-02) · TC500A Commercial Thermostat Pocket guide (31-00463M) · TC500A Deco Plate Pocket guide (31-00457M) · TC500A BACnet Integration guide (31-00478-01)
Abbreviation and nomenclature

Abbreviation AHU RTU VAC VDC/ DC OTW ETA BMS

Definition Air Handling Unit Roof Top Unit Volts AC (Alternating Current) Volts DC (Direct Current) Over-The-Wire Serial Communication protocol Building Management System

31-00400M-02 | Rev 05-21

11

1 - INTRODUCTION
Conventions
The TC500A thermostat has a 4 inch, 480x480 pixel LCD screen for easy navigation and setup. You can select various options available on the screen by lightly tapping the option on the screen or scrolling through the list. The conventions for hand gestures used to navigate through the pages on the TC500A Thermostat display are: · Tap: Quickly touch and release to select a control or item; equivalent to a mouse-
click. · Swipe: Quickly slide one or more fingers across the screen to reveal controls or to
scroll through lists or groups of items; equivalent to scroll.
Figure 1 Hand Gestures Convention Swipe down to view or scroll towards up

Swipe right to view or scroll towards left

Swipe left to view or scroll towards right

Tap to select an item

Swipe up to view or scroll towards down
· A green tick appears before the valid selection · If the option selected or the text entered is valid, the option to move to the
subsequent screen turns blue. Tapping the option in blue will toggle to next screen.

12

31-00400M-02 | Rev 05-21

Dimensions
3 -19/32 " (91.2 mm)

Figure 2 Dimensions

4 x 11/32" (9mm)

4 x 3/16" (4.5mm)

DIMENSIONS

4 - 15/32" (113.7 mm)

2 - 3/8" (60.3mm)

3 - 1/4" (82.75mm)

Technical specifications

Power Characteristics
Power Supply
Power Consumption (Display ON) Min. Load Max. Load

Table 1 Power Characteristics
Rated voltage: 24VAC 50/60Hz, Working voltage range: 20-30VAC, UL listed class-2 transformer or IEC 61558 listed transformer.
Max. 8.5VA @ 24VAC (355mA @ 24VAC)
4VA (all DOs OFF)
96VA (all DOs ON)

Display

Display Type Resolutions Active Display Area Backlight

Table 2 Display
24 BPP TFT display with CTP 480x480 pixel 4" diagonally LCD (Dimmable)

31-00400M-02 | Rev 05-21

13

1 - INTRODUCTION

Operating Environment
Ambient Operating Temperature Ambient Operating Humidity Storage Temperature Protection Class

Table 3 Operating Environment 32 to 122 °F (0 to +50°C)
10 to 90% relative humidity (non-condensing)
-40 to 150 °F(-40 to 65.5°C) IP20

Compliances
Certificates Standards

Table 4 Compliances
CE, FCC, ICES, UL/cUL, RoHs, REACH, California, Title 24, and Prop65.
EN 60730-1, EN 60730-2-9, EN 301489-1, EN 301489-17, EN 300328, EN 301893, EN 62479, UL60730-1, UL60730-2-9, Title 47 part 15 subpart B, Title 47 part 15 subpart C, RSS 210, ICES-003

IO Characteristics
UIO x 2
UI x 2
DO (G, Y1,Y2,Y3,W1,W2,W3) DO (AUX)

Table 5 IO Characteristics · Resistive Temperature Sensor Input
-- 10K NTC type II, C7021 series -- 10K NTC type III,C7023 series -- 20K NTC, TR21 and C7041 series. · Temperature Accuracy -- ±0.5°C (±1°F) at 10 ­ 32°C (50 ­ 90°F) -- ±1.1°C (±2°F) at -1.1 ­ 50°C (30 ­ 122°F) · Voltage Input, SELV -- 0-10V, ±5% of full scale · Digital Input -- Dry contact closure -- Open circuit ( 100Kohms) -- Closed circuit (100ohms) · Voltage Output · 0-10V, ±3% of full scale @2K ohms · Resistive Temperature Sensor Input -- 10K NTC type II, C7021 series -- 10K NTC type III,C7023 series -- 20K NTC, TR21 and C7041 series · Temperature Accuracy -- ±0.5°C (±1°F) at 10 ­ 32°C (50 ­ 90°F) -- ±1.1°C (±2°F) at -1.1 ­ 50°C (30 ­ 122°F) · Voltage Input, SELV -- 0-10V, ±5% of full scale · Digital Input -- Dry contact closure -- Open circuit ( 100Kohms) -- Closed circuit (100ohms) · Relay Output -- 1 Amps Max. at 24VAC
· Relay Dry Contact -- 1 Amps Max. at 24VAC/DC

14

31-00400M-02 | Rev 05-21

TECHNICAL SPECIFICATIONS

Communication Technologies
BACnet IP Wi-Fi
Bluetooth SylkTM

Table 6 Communication Technologies
Over Wi-Fi
802.11 b/g/n Supported security levels WPA, WPA2, WPA/WPA2 mixed, *WPA3 will be supported in future release.
BLE 4.2 with 1 Mbps Classic Bluetooth with max. 3 Mbps
Honeywell SylkTM

Electrical Characteristics

Table 7 Electrical Characteristics

Rated Impulse Voltage 500 V

Construction of Control Independently Mounted Control

Operation Method

Type 1 Action

Pollution Degree

2

Purpose of Control

Operating Control

Supported Sensors and Functions

Figure 3 Supported Sensors

Sensors

Options

Part Numbers

Occupancy Sensor

Direct (Normally Open) Reverse (Normally Closed)

Dry contact occupancy sensor

Dirty Filter Sensor

Direct (Normally Open) Reverse (Normally Closed)

DPS200, DPS400, DPS1000 (Dry contact differential pressure switch)

Proof Of Air Flow Sensor Direct (Normally Open) Reverse (Normally Closed)

DPS200, DPS400, DPS1000 (Dry contact airflow switch)

Shutdown Sensor

Direct (Normally Open) Reverse (Normally Closed)

Mixed Air Temperature Sensor

NTC 20K, Type II NTC 10K, Type II Sylk

Outdoor Air Temperature Sensor

NTC 20K, Type II NTC 10K, Type II Sylk

Return Air Temperature Sylk Sensor

Discharge Air Temperature Sensor

NTC 20K, Type II NTC 10K, Type II Sylk

Dry contact shutdown switch
C7250 C7021 C7400S
C7250A C7021 C7400S
C7400S
C7041 C7021 C7400S

31-00400M-02 | Rev 05-21

15

1 - INTRODUCTION

Sensors

Options

Space Temperature Sensors

NTC 20K, Type II Sylk

Fan Current Sensor Max 0~<+Inf Amps Amps

CO2 sensor (analog)

0-10 VDC or Sylk Sylk

Proof of waterflow

Digital Input

Part Numbers TR21 TR40/TR75 (max 4), TR120 (max 1) Coming soon
C7232 TR40-CO2, TR42-CO2 Dry contact waterflow switch

Thermostat Variants
TC500A-N TC500A-W (coming soon)

Table 8 Thermostat Pert Number
Thermostat with North American Wi-Fi conformance Thermostat with outside of North American Wi-Fi conformance

16

31-00400M-02 | Rev 05-21

Terminal Identification

TERMINAL IDENTIFICATION

Terminal 24VAC UIO1 UIO2 UI1 UI2 Sylk (S-BUS) RS485

Table 9 Terminal Identification

Label R C
1 COM
2 COM
1 COM
2 COM

Connection 24VAC power from heating transformer 24VAC common (Neutral). For 2 transformer systems, use common wire from cooling transformer Universal input/output Common Universal input/output Common Universal input Common Universal input Common Sylk bus, master, power output

+ _ R-RC

Sylk bus, master, power output
BACnet Communications (coming soon) BACnet Communications (coming soon) Jumper between R and RC for single transformer system

31-00400M-02 | Rev 05-21

17

1 - INTRODUCTION

Terminal 24VAC Aux

Label RC G Y1 Y2 Y3
W1 W2 W3

Connection 24VAC power from cooling transformer Fan Relay output, Compressor contactor (stage1) Relay output, Compressor contactor (stage2) Relay output, Compressor contactor (stage3)/Configurable Output Relay output, Heat (stage1) Relay output, Heat (stage2) Relay output, heat (stage3)/Configurable Output Relay dry contact, Aux-1

Relay dry contact, Aux-2

Terminal Assignment

Type Terminal

Digital Outputs

DO1 DO2 DO3 DO4

DO5 DO6 DO7

DO8 (Dry Contact, 2 terminals)

Table 10 Terminal assignment

Label

Terminal Assignments (Default & Optional Assignments)

Default

Inputs

Outputs

G

Supply Fan

High Speed Fan

W1

Heat Stage 1

W2

Heat Stage 2

W3 / Aux Heat Stage 3

Reversing Valve OB, Low Speed Fan, Occupancy, Simple Dehum, and Humidification.

Y1

Cool Stage 1

Y2

Cool Stage 2

Y3 / Aux Cool Stage 3

Economizer (Enable), Low Speed Fan, Occupancy, Simple Dehum, and Humidification.

Aux

Economizer (Enable),

Occupancy,

Simple Dehum,

Low Speed Fan, and

Humidification.

18

31-00400M-02 | Rev 05-21

TERMINAL ASSIGNMENT

Type Terminal
Universal UI1 Inputs (2 terminals)
UI2 (2 terminals) Universal UIO1 Inputs/ (2 terminals) Outputs UIO2 (2 terminals)
Power R C RC
Sylk Bus 1 2

Label UI1 UI2 UIO1 UIO2
R C RC S-Bus

Terminal Assignments (Default & Optional Assignments)

Default

Inputs

Outputs

NA

Occupancy Sensor,

Dirty Filter,

NA

Proof of Airflow, Shutdown Sensor,

Mixed Air Sensor,

NA

Outdoor Air Sensor,

Multi-Speed Fan (UIO1)

Discharge Air Sensor,

Outdoor Air Damper

NA

CO2 Sensor, Proof of Waterflow, Space Temp Sensor, *Filter Pressure sensor,

Modulating Heat (UIO2) Outdoor Air Damper

*Compressor Current

Sensor,

*Fan Current Sensor,

*Compressor Discharge,

*Temperature sensor

24v Power

Common

24v Power / Cooling

Sylk connection

Note: * Marked sensors are supported in future.

31-00400M-02 | Rev 05-21

19

1 - INTRODUCTION
Security requirement
System Environmental Considerations
An Internet firewall is required to isolate the Thermostat. Unprotected Internet connections can expose and damage the thermostat system and facility components to cyber-attacks from third parties. This may cause the thermostat to malfunction and can also be misused for illegal purposes for which the operator may then be held liable.
Deployments and Maintenance Considerations
· Always keep the local server up to date on the latest security patches via a regular system update. This applies not only to workstations or servers running on Windows, Linux, Mac, or any devices that run as part of information infrastructure or operations workstation.
· Always keep the thermostat firmware with the latest released firmware to have maximum protection by built-in security features.
· Do not use default passwords for any devices (if exists). This includes, but not limited, to all server workstations, storage servers, firewall devices, routers, and mobile devices.
· Do not use weak passwords for server administrators or operators. Different user roles (for example administrator, user, guest, etc.) shall have a different password, and the user should not share common passwords.
· In case of wireless communication, malicious wireless devices can easily scan the wireless channel and inject malicious packets or mass data flow to perform Denyof-Service attacks. Honeywell has taken steps to prevent the TC500A Commercial Thermostat device from being injected, but the mass data flow will result in the loss of wireless communication bandwidth within the whole system. A regular check of the communication failure rate or response rate of the thermostat is helpful to discover and isolate devices being attacked and stop the physical attacks in the daily operation
Network Communication Notice
· To keep maximum integration compatibility with third-party devices and Fastpack communications are un-encrypted as open protocol. Improper security protection may lead to data leakage, spoofing, and/or tampered by malicious devices and denial-of-service attacks.
· To keep maximum integration compatibility with legacy devices, in-room wired devices are less secure from data confidentiality and authentication thus notrecommended for a new design. It is always highly recommended to use deep mesh wireless network communication to gain maximum protection and the latest updates.
· In case of Deny-of-Service attacks, all communication channels will inevitably have a loss of bandwidth due to malicious data flow.
· Connected devices may contain legacy technology, which is less secure under modern cyber-security attacks. Honeywell strongly recommends using a secured deep mesh wireless network communication. In case of legacy technology, the user needs to be aware of the risk of being tampered with or attacked. To reduce

20

31-00400M-02 | Rev 05-21

SECURITY REQUIREMENT
the attack surface, the user is advised to physically secure the wired communication signals or provide necessary shield on wires, or place necessary access control on accessing such communication wires.

31-00400M-02 | Rev 05-21

21

1 - INTRODUCTION

22

31-00400M-02 | Rev 05-21

2CHAPTER

Getting started

This chapter describes the TC500A Thermostat display, home pages, icons, device registration, and other user interfaces. For mounting the TC500A Thermostat, refer to TC500A Thermostat Mounting instructions (31-00399M).

Related topics

Thermostat display overview Presence detection Home Page: Temperature reading and adjustment Device configuration page (right side page): Quick access and device management Ambiance page (left side page): Sensor reading Home screen icon overview Smart LED indication

31-00400M-02 | Rev 05-21

23

2 - GETTING STARTED
Thermostat display overview
The image below illustrates the typical screen of TC500A Thermostat screens in sleep mode. The 4 inch LCD screen on the thermostat is touch-sensitive and shows the status of the thermostat.
Presence detection
TC500A Thermostat has a built-in proximity sensor. It detects the presence of a user up to 1.5 meters, and "wakes" the screen to prepare for user interaction.

24

31-00400M-02 | Rev 05-21

HOME PAGE: TEMPERATURE READING AND ADJUSTMENT
Home Page: Temperature reading and adjustment
5 6

1

2

7

3

8

9

4

10

11

Item 1 2
3 4 5 6 7 8 9 10 11

Table 11 Home Page (main screen) overview
Description Indoor Humidity: Displays the current indoor humidity Current Mode: Indicates the current Setpoint Status (Occupied, Unoccupied, Standby, Temporary) Indoor Temperature: Displays the current indoor temperature. Mode Display: Orange flame for heat mode, blue snowflake for cool mode. Wi-Fi signal strength Time Adjust temperature: Touch the up arrow to increase the desired temperature. Desired temperature: Displays the desired temperature. Adjust temperature: Touch the down arrow to decrease the desired temperature. Temperature Slider: Use a finger to move the slider to set the desired temperature. Home screen indicator: Use finger to swipe to left or right to display more options.

31-00400M-02 | Rev 05-21

25

2 - GETTING STARTED
Device configuration page (right side page): Quick access and device management
Swipe left from the home page to view the Device configuration page.

9

8

1

2

7

3

6

4

5

Item 1 2 3 4 5 6 7 8 9

Table 12 Device configuration page overview
Description The name assigned to the thermostat while performing initial set up. Brightness: Tap to increase or decrease the brightness of the display. Schedule: Tap to set the schedules. Setpoint: Tap to configure the set points of various parameters. Config: Tap to configure the thermostat. Override: Tap to override unoccupied or standby modes to allow setpoint adjustments. Contractor information: Tap to view contractor information. Alerts: Tap to view active alarms. Temperature Units: Tap to toggle between Fahrenheit or Celsius.

26

31-00400M-02 | Rev 05-21

AMBIANCE PAGE (LEFT SIDE PAGE): SENSOR READING
Ambiance page (left side page): Sensor reading
Swipe right from the home page to view the Ambiance page.

1

2

4

3

4

Note: The types of reading displayed varies according to the sensor connected to the thermostat.

Item 1 2 3 4

Table 13 Typical Ambiance page overview
Description Outdoor temperature Outdoor humidity Indoor CO2 level Indoor humidity

31-00400M-02 | Rev 05-21

27

2 - GETTING STARTED
Home screen icon overview

Table 14 Home screen icon overview

Icon

Description High severity alert

Medium severity alert

Low severity alert

Auto mode

Emergency heat mode

Heating mode

Cooling mode

Occupied mode

Standby mode

Unoccupied mode

Temporary mode

Wi-Fi signal strength

28

31-00400M-02 | Rev 05-21

Smart LED indication
Display

SMART LED INDICATION

Table 15 Smart LED indication

Stages

LED, screen status and Description

Interact with touchscreen · Screen ON · LED Lighting OFF

Heating

The orange light pulses when in heating and auto heat mode
· Screen OFF
· LED Lighting ON (Light stops pulsing when the indoor temperature reaches the setpoint)

Cooling

The blue light pulses when in cooling and auto cool mode
· Screen OFF
· LED Lighting ON (Light stops pulsing when the indoor temperature reaches the setpoint)

31-00400M-02 | Rev 05-21

29

2 - GETTING STARTED
Display

Table 15 Smart LED indication

Stages

LED, screen status and Description

Off

· Screen OFF

· LED lighting OFF

30

31-00400M-02 | Rev 05-21

3CHAPTER Initial Configuration

This chapter contains steps and descriptions to set up the initial configuration of the thermostat and other basic configurations.

Related topics

Prerequisites WARNINGS Boot-up the thermostat Integrating with Occupant app and Cloud registration

31-00400M-02 | Rev 05-21

31

3 - INITIAL CONFIGURATION

Prerequisites
Before going through initial guided setup sequences, ensure the TC500A is installed and wired up according to the TC500A installation and mounting guide.

WARNINGS

· To reduce the risk of electrical shock do not open the thermostat. There are no user-serviceable parts inside. Refer servicing to qualified service personnel only.
· Cleaning -- Use a dry cloth to clean the product. Do not use liquid cleaners or aerosol cleaners
· Water and moisture -- Do not use the product near water. Do not install the product in a place where water may splash onto it.
· Do not operate the thermostat with a hard, sharp, or pointed object such as a fingernail, pen.
· The screen used for the thermostat is made of glass. Therefore, it can break when the product is dropped or heavy impact is applied. Be careful not to be injured by broken glass pieces in case the screen breaks.

32

31-00400M-02 | Rev 05-21

BOOT-UP THE THERMOSTAT
Boot-up the thermostat
The thermostat will be powered up automatically after it mounted on the wallplate. You will navigate through the settings given below subsequently while setting up the thermostat. Configuring the language Configuring the thermostat via mobile app Configuring the thermostat via local interface Assigning a name to the thermostat Selecting a temperature unit Configuring UTC Offset Setting Date and Time Setting up the Equipment type Setting up the conventional equipment Setting up the Heat pump Configuring the Setpoints Setting up the Installer Passcode Configuring the contractor information Connecting the thermostat to Wi-Fi
To set up the thermostat 1. Boot-up the thermostat. The Honeywell logo page appears, followed by the "Welcome to TC500A" page.
Figure 4 Welcome screens

The Welcome page followed by the LET'S BEGIN page appears.

31-00400M-02 | Rev 05-21

33

3 - INITIAL CONFIGURATION

Figure 5 Welcome screen

2. Tap LET's BEGIN. The Language page appears.
Configuring the language 3. Select your preferred language and tap NEXT.
Note: French and Spanish language support is coming soon.
Figure 6 Language page

The Platform Configuration page appears. The Platform Configuration page allows to configure the thermostat using mobile app or thermostat interface locally.

Configuring the thermostat via mobile app

Note:

Configuration via mobile app is supported only for Small and Medium Business Administrator system thermostat. Use the local interface for configuration for Standalone version thermostat. To configure the thermostat (for both version) using the local interface, refer to Configuring the thermostat via local interface.

34

31-00400M-02 | Rev 05-21

Figure 7 Platform Configuration

BOOT-UP THE THERMOSTAT

4. To configure using mobile app, tap Mobile App, and tap NEXT. A QR code displays on the thermostat screen.
Figure 8 QR Code screen

5. Scan the QR code by aligning the QR code on the Honeywell app within the frame on your mobile phone camera screen.
6. The thermostat will be connected to the mobile application. 7. Follow the set up guide on mobile application to complete the configuration. 8. After setup is completed, the App Completed message appears.

31-00400M-02 | Rev 05-21

35

3 - INITIAL CONFIGURATION

Figure 9 Mobile app configuration successful message

Configuring the thermostat via local interface 9. On the platform configuration screen tap Thermostat, and tap NEXT. Figure 10 Platform configuration (Thermostat)
The Device Name page appears.

36

31-00400M-02 | Rev 05-21

Assigning a name to the thermostat

Figure 11 Device Name

BOOT-UP THE THERMOSTAT

10.Tap on the text field A keyboard will be displayed on the screen to enter the device name.
11.Enter the device name. Assign a unique name to a thermostat specifying a name to the location where the thermostat is installed. It assists the user to easily identify the device during remote operation of the thermostat.
Figure 12 Saving the device name

12.After entering a valid device name tap NEXT. The Zip Code page appears.
13. Enter the Zip code of your area and tap NEXT. The device name is saved and the Temperature Unit page appears.

31-00400M-02 | Rev 05-21

37

3 - INITIAL CONFIGURATION
Selecting a temperature unit

Figure 13 Temperature unit

14.Select a preferred temperature unit and tap NEXT. The Date and Time page appears.

Configuring UTC Offset

Figure 14 UTC Offset page

15.Tap plus or minus symbol as per location time zone set from the UTC and scroll the numbers to set the time.
16.Tap NEXT. The Equipment Type page appears.

38

31-00400M-02 | Rev 05-21

Setting Date and Time

BOOT-UP THE THERMOSTAT
Figure 15 Date and Time Config page

17.Tap the calendar pen icon to set the date. 18.Tap the clock icon to set the time. 19.Slide the Display toggle button to the right to set the 24h time format if required. 20.After setting date and time, tap NEXT.
The UTC Offset page appears.
Setting up the Equipment type The TC500A is designed to control Heat Pump or Conventional HVAC. It can control up to 3 heating stages and 3 cooling stages in conventional systems and up to 3 compressor stages and 2 auxiliary heat stages in heat pump systems.
Figure 16 Equipment type - Conventional

31-00400M-02 | Rev 05-21

39

3 - INITIAL CONFIGURATION

Setting up the conventional equipment

Note:

If you want to configure the Heat pump, then refer to the Setting up the Heat pump section. Skip setting up the conventional equipment section.

21.On the Equipment Type page, tap Conventional and tap NEXT.

The Cooling Stages page appears.

Figure 17 Cooling stages

22. Select a required cooling stage and tap NEXT. The Heating Type/Stages page appears.
Figure 18 Heating Type/Stages

23. Under Stages tab, select a required number of heating stage. 24. To use the modulating hear type, tap Modulating.

40

31-00400M-02 | Rev 05-21

Figure 19 Modulating heating

BOOT-UP THE THERMOSTAT

25. Toggle the Use stage 1 heat as an enable button to YES. 26. Swipe the slider to select the desired percentage of output. 27. If no heating is required, tap None. 28. After setting up heating stages, tap NEXT.
The Setpoints page appears. Refer to Configuring the Setpoints.

Setting up the Heat pump

Figure 20 Select Heat pump

29. On the Equipment Type page, tap Heat pump and tap NEXT. The Heat Pump and Reversing Valve page appears.

31-00400M-02 | Rev 05-21

41

3 - INITIAL CONFIGURATION

Figure 21 Type of Heat Pump and Reversing Valve

30. Tap Air Side or Water Side and tap NEXT. The Compressor Stages page appears.
Figure 22 Select number of compressor stages

31. Select a required compressor stage number.
32. Tap NEXT. The Aux Heating Type/Stages page appears.

42

31-00400M-02 | Rev 05-21

Figure 23 Aux Heating Type/Stages

BOOT-UP THE THERMOSTAT

33. Under Stages tab, select a required number of heating stage. 34. To use the modulating hear type, tap Modulating.
Figure 24 Modulating heating

35. Toggle the Use stage 1 heat as an enable button to YES. 36. Swipe the slider to select the desired percentage of output. 37. If no heating is required, tap None. 38. After setting up heating stages, tap NEXT.
The Changeover page appears.

31-00400M-02 | Rev 05-21

43

3 - INITIAL CONFIGURATION

Figure 25 Changeover page

39. Select a changeover mode and tap NEXT. The Setpoints page appears.
Configuring the Setpoints
Figure 26 Define the setpoints

Tip:

Long press the +/- button to quickly increase or decrease the value.

40. Configure the required setpoint limits for Occupied, Standby, and Unoccupied modes.

Thermostat performs limit checking on all temperature setpoints, in case setpoint relationships are violated.

· Occupied mode treats the building space as occupied and configured with comfort setpoints.

· Unoccupied mode treats the building space as not occupied and configured with energy savings setpoints.

· Standby mode setpoints are configured in a way that the setpoints can quickly change to the Occupied mode when switched. Standby mode setpoint saves energy higher than occupied mode and lesser than the Unoccupied mode.

44

31-00400M-02 | Rev 05-21

BOOT-UP THE THERMOSTAT

· Temporary mode allows the user to change the temperature setpoints of the Occupied mode after the user switches to the temporary mode from the Occupied mode. This is not possible in Unoccupied mode and Standby mode.
· When a schedule uses the Occupied mode but the Occupancy sensor reads occupied, then the thermostat switches automatically to the Standby mode. In other scenarios, the thermostat follows the schedule status and the occupancy sensor's value has no impact on it.
· Minimum cool setpoint and maximum heat setpoint can be adjusted, default minimum cool setpoint is 50F, maximum heat setpoint is 90F. Heat setpoint range: 40F-90F; Cool setpoint range: 50F-99F.
· While configuring the temperature range make sure that the unoccupied heat <= standby heat <= occupied heat < occupied cool <= standby cool<= unoccupied cool.
· Occupied cool setpoint should be at least a deadband value bigger than occupied heat setpoint.
41. Tap NEXT. The Installer Passcode page appears.

Setting up the Installer Passcode

Figure 27 Setting Installer Pin

42.Tap on the text field A keyboard will popup.

43.Enter a passcode.

Note:

The passcode must contains 4 to 12 characters including a Alpha/numeric/symbol character.

Tip:

Tap the Eye icon to view and confirm the Password.

44. Tap the tick button.

45.Tap NEXT. The Contractor Information page appears.

Note:

The Installer passcode is to prevent unauthorized changes to thermostat settings. This passcode will be used by the admin user.

31-00400M-02 | Rev 05-21

45

3 - INITIAL CONFIGURATION

Configuring the contractor information

Figure 28 Contractor Information

46.Enter the contractor information.
47. Tap NEXT. The connection page appears.

Connecting the thermostat to Wi-Fi

Figure 29 Connection request page

48. Tap YES. The Wi-Fi page appears. Select a type of connection. Local Router: Select this option to directly connect the thermostat to cloud. Honeywell Gateway: Select this option to connect the thermostat to gateway system. BACnet IP: Select this option to connect the thermostat to BACnet device.

46

31-00400M-02 | Rev 05-21

Figure 30 Wi-Fi page

BOOT-UP THE THERMOSTAT

49. Tap Local Router. A list of Wi-Fi connections appear.
Figure 31 Local Router - Wi-Fi connections

50.Tap a Wi-Fi connection. 51.Tap NEXT. 52.Enter the Wi-Fi connection password.
53.Tap the tick button. 54.Tap NEXT.
Wi-Fi connection loading page appears. If the connection is successful, "Your thermostat is now connected" message appears.
55. Tap the thermostat screen. The Congratulations message appears.

31-00400M-02 | Rev 05-21

47

3 - INITIAL CONFIGURATION

Figure 32 Successful connection

56. Tap DONE. Thermostat Home page appears. Note: If the connection is unsuccessful, user can RETRY or SKIP setting Wi-Fi connection.
Figure 33 Unsuccessful Wi-Fi connection

After set up the thermostat device, you can start configuring the schedules, alarms, and terminal assignments. To reconfigure initial setup, refer to Device Configuration & Equipment Settings.

48

31-00400M-02 | Rev 05-21

INTEGRATING WITH OCCUPANT APP AND CLOUD REGISTRATION

Integrating with Occupant app and Cloud registration
The thermostat can be remotely monitored and controlled using the Occupant mobile app. This mobile app integration also helps to register the thermostat with the Cloud network and subsequently supports Over-the-air (OTA) firmware upgrade.

Prerequisites

· Go to the app store and search for "Honeywell Connect Me" to download the app. Install the app on your mobile device, then create an account, and create a site.

To integrate with the Occupant app and Cloud registration 1. Turn on Bluetooth on the thermostat. Refer to Bluetooth. 2. On the Occupant app, after app registration and site creation, you will be prompted to add a thermostat. The following page appears.

Figure 34 Occupant app - Adding thermostat

3. Tap Add. 4. Tap SCAN TO CONNECT. 5. Scan the QR code that appears on the thermostat Bluetooth page.

31-00400M-02 | Rev 05-21

49

3 - INITIAL CONFIGURATION

Figure 35 Thermostat - Bluetooth page

6. The Successfully Connected message appears on the Occupant app if connected successfully. Subsequently, the thermostat will be registered to the cloud and registration message appears. Then, the Add Device page appears.
Figure 36 Add Device - Naming thermostat

50

31-00400M-02 | Rev 05-21

INTEGRATING WITH OCCUPANT APP AND CLOUD REGISTRATION
7. You can rename the device name, then tap ADD. This will update the thermostat name in the actual thermostat itself. If the thermostat name is renamed then the Updated thermostat name appears. After a successful connection, the "Your thermostat is added and ready to use" message appears. Figure 37 Thermostat is added to the Occupant app

8. Tap DONE. Registered thermostat home page appears on your mobile. To remove the registration, refer to Reset to Default.

31-00400M-02 | Rev 05-21

51

3 - INITIAL CONFIGURATION

52

31-00400M-02 | Rev 05-21

4CHAPTER Device Configuration & Equipment Settings

This chapter contains thermostat level configuration and equipment level configuration procedures. Only the Installer has access to these configuration pages.

Related topics

Basic Configuration Connection User management Configuring the user roles Configuring the Home page (Display Management) Configuring the alarm preference Viewing the system status Reset to Default Advance settings: Configuring the equipment settings Configuring the Thermostat I/O terminals Configuring the sensors Managing the setpoint options Miscellaneous Advance settings: Configuring the equipment settings

31-00400M-02 | Rev 05-21

53

4 - DEVICE CONFIGURATION & EQUIPMENT SETTINGS
Basic Configuration
The Basic configuration contains two tabs such as General and Equipment. General includes Language, Device name, Temperature unit, Date & Time, Screen cleaning, Brightness, and Contractor information. Equipment tab includes Equipment type, Auto Changeover, and Standby Action. You might have configured some of these settings while initial set up. However, you reconfigure these settings whenever required.
Figure 39 Basic configuration

The following features are covered under the Basic configuration. To configure language To rename the device name To change the temperature unit To configure Date & Time To configure Daylight savings To configure the UTC Offset To enable screen cleaning mode To adjust the display brightness To modify contractor information To configure Equipment type To configure the Heat Pump To configure Auto Changeover To set up Standby Action Pre-occupancy purge

54

31-00400M-02 | Rev 05-21

BASIC CONFIGURATION
General
To configure language 1. Swipe left from the Home page. 2. On the Device configuration page, tap Config > Basic > Language The Language page appears.
Note: French and Spanish language support is coming soon.
Figure 40 Language selection
3. Select a language. 4. Tap the back button to navigate back to the previous page and save the settings. To rename the device name 1. Swipe left from the Home page. 2. On the Device configuration page, tap Config > Basic > Device Name.
The Device name page appears. Figure 41 Naming the thermostat

31-00400M-02 | Rev 05-21

55

4 - DEVICE CONFIGURATION & EQUIPMENT SETTINGS
3. Tap on the text field A keyboard will be displayed on the screen to enter the device name.
4. Enter the device name. Assign a unique name to a thermostat specifying a name to the location where the thermostat is installed. It assists the user to easily identify the device during remote operation of the thermostat.
5. Tap the back button to navigate back to the previous page and save the settings.
To change the temperature unit 1. Swipe left from the Home page. 2. On the Device configuration page, tap Config > Basic > Temperature Unit. The Temperature Unit page appears.
Figure 42 Temperature unit

3. Select a temperature unit. 4. Tap the back button to navigate back to the previous page and save the settings.
To configure Date & Time The date and time of the thermostat is synced with local time automatically after a successful connection. However, if the thermostat date and time is not synced automatically, then you can manually set it. You can configure the Date & time, Daylight savings, and UTC Offset. 1. Swipe left from the Home page. 2. On the Device configuration page, tap Config > Basic > Date & Time. The Date & Time page appears.

56

31-00400M-02 | Rev 05-21

Figure 43 Date & Time

BASIC CONFIGURATION

3. Tap Date & Time. The Date and Time page appears. Figure 44 Date and Time Config page

4. Tap the calendar pen icon to set the date. 5. Tap the clock icon to set the time. 6. Slide the toggle button to the right to set the 24h time format if required. 7. Tap the back button to navigate back to the previous page.
To configure Daylight savings 1. Swipe left from the Home page. 2. On the Device configuration page, tap Config > Basic > Date & Time > Daylight Savings. The Daylight Savings page appears.

31-00400M-02 | Rev 05-21

57

4 - DEVICE CONFIGURATION & EQUIPMENT SETTINGS
Figure 45 Daylight savings page
The Daylight Saving is on by default. 3. Tap the Start calendar pen icon to set the start date for daylight savings. 4. Tap the End calendar pen icon to set the end date for daylight savings. 5. To disable the daylight light savings, slide the Enable Daylight Saving toggle button to
left. 6. Tap the back button to navigate back to the previous page. To configure the UTC Offset UTC offset is to offset your location time zone from UTC time. 1. Swipe left from the Home page. 2. On the Device configuration page, tap Config > Basic > Date & Time > UTC Offset.
The UTC Offset page appears. Figure 46 UTC Offset page

58

31-00400M-02 | Rev 05-21

BASIC CONFIGURATION

USA Time Zone Atlantic Eastern

Standard
UTC-04:00 UTC-05:00

Central

UTC-06:00

Mountain

UTC-07:00

Pacific

UTC-08:00

Alaska

UTC-09:00

Hawaii-Aleutian UTC-10:00

American Samoa

UTC-11:00

UTC-12:00

UTC+12:00

Chamorro

UTC+10:00

Table 16 USA Time Zones
Cities
Puerto Rico, U. S. Virgin Islands
Connecticut, Delaware, District of Columbia, Georgia, Maine, Maryland, Massachusetts, New Hampshire, New Jersey, New York, North Carolina, Ohio, Pennsylvania, Rhode Island, South Carolina, Vermont, Virginia, West Virginia; Partially: Florida, Indiana, Kentucky, Michigan, Tenness, Navassa Island, Bajo Nuevo Bank, Serranilla Bank
Alabama, Arkansas, Illinois, Iowa, Louisiana, Minnesota, Mississip pi, Missouri, Oklahoma, Wisconsin; Partially: Florida, Indiana, Kan sas, Kentucky, Michigan, Nebraska, North Dakota, South Dakota, Tennessee, Texas
Arizona, Colorado, Montana, New Mexico, Utah, Wyoming; Partially: Idaho, Kansas, Nebraska, North Dakota, Oregon, South Dakota, Texas
California, Nevada, Washington (state); Partially: Idaho, Oregon
Partially: Alaska
Hawaii, Partially: Alaska
American Samoa, Jarvis Island, Midway Atoll, Palmyra Atoll, Kingman Reef
Baker Island, Howland Island
Not defined by 15 U.S.C. §260: Wake Island
Guam, Northern Mariana Islands

1. Tap plus or minus symbol as per location time zone set from the UTC and scroll the numbers to set the time.
2. Tap the back button to navigate back to the previous page.
To enable screen cleaning mode Screen cleaning mode lock/disable the touch sensitivity of the display for 30 seconds so you clean the device display while the thermostat is functional. 1. Swipe left from the Home page. 2. On the Device configuration page, tap Config > Basic > scroll down > Screen Cleaning. The Screen Cleaning page appears.

31-00400M-02 | Rev 05-21

59

4 - DEVICE CONFIGURATION & EQUIPMENT SETTINGS

Figure 47 Screen Cleaning

3. Tap OK to enable the screen cleaning mode for 30 seconds or tap the back button to navigate back to the previous page.

To adjust the display brightness

1. Swipe left from the Home page.

2. On the Device configuration page, tap Config > Basic > scroll down > Brightness.

The Brightness page appears.

Figure 48 Brightness

3. Move the slider to right or left to adjust the brightness. 4. Tap the back button to navigate back to the previous page.
To modify contractor information You might have added the Contractor information while performing initial setup. To modify that information, follow the procedure given below. 1. Swipe left from the Home page. 2. On the Device configuration page, tap Config > Basic > scroll down > Contractor Information. The Contractor Information page appears.

60

31-00400M-02 | Rev 05-21

Figure 49 Contractor information

BASIC CONFIGURATION

3. Modify Name, Phone, and Email address of the contractor. 4. Tap the back button to navigate back to the previous screen and save the modified
information.

Equipment

This section contains procedures to reconfigure the Equipment type of Conventional and Heat pump settings that you have set up while performing initial set up. Also, it covers Auto changeover and Standby settings.

To configure Equipment type 1. Swipe left from the Home page.
2. On the Device configuration page, tap Config > Basic > Equipment > Equipment type. The Equipment Type page appears.

Figure 50 Equipment type

3. Tap Conventional and tap NEXT. The Conventional page appears.

31-00400M-02 | Rev 05-21

61

4 - DEVICE CONFIGURATION & EQUIPMENT SETTINGS
Figure 51 Conventional settings
4. Tap Cooling Stages. The Cooling Stages page appears.
5. Select a cooling stage number. 6. Tap the back button to navigate to the previous page. 7. Tap Heating Type/Stages.
The Heating Type/Stages page appears. 8. Under Stages tab, select a required number of heating stage. 9. To use the modulating hear type, tap Modulating.
Figure 52 Modulating heating

10. Toggle the Use stage 1 heat as an enable button to YES. 11. Swipe the slider to select the desired percentage of output. 12. If no heating is required, tap None. 13. After selected an option, tap the back button to navigate back to the Conventional page. 14. Tap the back button to navigate back to the Equipment Type page.

62

31-00400M-02 | Rev 05-21

To configure the Heat Pump 1. On the Equipment Type page, tap Heat pump and tap NEXT. The Heat Pump page appears.
Figure 53 Heat Pump

BASIC CONFIGURATION

2. Tap Heat Pump & Reversing Valve. The Heat Pump & Reversing Valve page appears.
3. Selection a required option. 4. Tap the back button to navigate back to the Heat Pump page. 5. Tap Compressor Stages.
Select a required compressor stage number. 6. Tap the back button to navigate back to the Heat Pump page. 7. Tap Aux Heating Type/Stages. 8. Under the Stages tab, select a required number of heating stage. 9. To use the modulating hear type, tap Modulating.
Figure 54 Modulating heating

10. Toggle the Use stage 1 heat as an enable button to YES. 11. Swipe the slider to select the desired percentage of output.

31-00400M-02 | Rev 05-21

63

4 - DEVICE CONFIGURATION & EQUIPMENT SETTINGS
12. If no heating is required, tap None. 13. Tap the back button to navigate back to the Heat Pump page.
To configure Auto Changeover 1. Swipe left from the Home page. 2. On the Device configuration page, tap Config > Basic > Equipment > Auto Changeover. The Auto Changeover page appears. Figure 55 Auto Changeover

3. Tap a required option. 4. Tap the back button to navigate back to the Equipment page.
To set up Standby Action The Standby Action refers to which mode setpoints to be used while the thermostat is in Standby mode. You can select either Occupied mode or Unoccupied mode. 1. Swipe left from the Home page. 2. On the Device configuration page, tap Config > Basic > Equipment > Standby Action. The Standby Action page appears. 3. Tap Treat as Occupied or Treat as Unoccupied.
Pre-occupancy purge Pre-occupancy purge is required in some regions and allows fresh air to ventilate a building prior to occupancy. It is configured by creating a Standby period prior to the Occupied period, usually one hour prior. Treat the Standby period as Occupied and ensure the fan mode is set to Continuous. To bring in fresh air, connect the thermostat to a packaged economizer or wire the outside air damper to the UI01 terminals and configure them for Outdoor Air Damper Control.

64

31-00400M-02 | Rev 05-21

CONNECTION
Connection
The thermostat is connected with Wi-Fi while performing the initial configuration. The source of the Wi-Fi can be Local router, Honeywell Gateway, or BACnet IP. Bluetooth is used to connect the thermostat with the Connect Me app. To connect with Wi-Fi 1. Swipe left from the Home page. 2. On the Device configuration page, tap Config > Connection
The Connection page appears.
Figure 56 Connection page

Wi-Fi - Local Router 1. Tap Wi-Fi > Local Router, and tap NEXT. A list of the Wi-Fi signals available in the surroundings appears 2. Select a secured Wi-Fi signal and tap NEXT. The Wi-Fi Password page appears. 3. Tap Join. Wi-Fi connection progress appears, followed by the Successful message appears. 4. Close the Successful message. The Config page appears.
Wi-Fi - Honeywell Gateway If you are using Honeywell Gateway, then you can connect the thermostat to it. 1. Tap Wi-Fi > Honeywell Gateway, and tap NEXT 2. Tap Automatic to connect with the Gateway automatically. It automatically searches the Gateway Wi-Fi station and connect with it. 3. Tap Manual and tap NEXT. It ask you to enter the Gateway Wi-Fi credentials to manually connect with the Gateway. The Manual page appears. 4. Enter SSID and select Security, tap NEXT. Wi-Fi connection progress appears, followed by the Successful message appears.

31-00400M-02 | Rev 05-21

65

4 - DEVICE CONFIGURATION & EQUIPMENT SETTINGS

5. Close the Successful message. The Config page appears.

BACnet IP

Note:

If you are using BACnet IP connection type, then you cannot communicate with the Occupant app.

1. Tap Wi-Fi > BACnet IP and tap NEXT.

2. Tap BACnet Network Settings to connect through local network or tap Wi-Fi.

3. Enter Device ID, Network Number, and UDP Port.

4. Tap the back button to save the settings.

Note:

For BACnet object related information, refer to the 31-00478-01(BACnet Integration Guide - TC500A).

Bluetooth 1. If you are pairing your mobile with the thermostat, then tap Bluetooth. The Bluetooth page appears.
2. Turn on the Bluetooth. A QR code image appears.
3. Scan the QR code using your mobile.

66

31-00400M-02 | Rev 05-21

USER MANAGEMENT

User management
The TC500A supports four kinds of user identities. Here's an overview of the identity types and permissions available for various roles. 1. Visitor: The visitor has access to read-only the components associated with the visitor.
The visitor can view room temperature, desired temperature, humidity and mode.
Note: when in Simplified view type, if permitted, the visitor will be able to regulate the desired temperature. Basic User, Advanced User, and Installer require a passcode if utilized. Permission values can be customized for Basic and Advanced Users.

2. Basic User: The Basic User has access to read and write to components associated with basic control such as Setpoint changes, screen brightness, as configured in the User Management set up section. This type of user role is applicable for the user requiring limited control of thermostat such as store clerks, receptionist.
3. Advanced User: Group Owner has access to read and write all components related to advance control. The advanced user will be able to perform system overrides, schedule changes, or modify the basic configuration. This type of user role is applicable for users requiring more control of the thermostat such as store manager, business owner.
4. Installer: This is an Admin User who has access to read and write all components in the application. Through this role, the user can control all elements of the thermostat. Table 17 User roles and permissions

System Modes

Visitor

Basic User

Advanced User Installer

Overrides

View Alerts

Temperature Units

Contractor Information

Brightness

Schedule Changes

Basic Configuration

System Status

Advanced Configuration

31-00400M-02 | Rev 05-21

67

4 - DEVICE CONFIGURATION & EQUIPMENT SETTINGS
Passcode rules
All the user accounts are passcode protected. When creating the passcode, follow the password rules given below. · Password length must be between 4 to 12 characters · It must contain only alphanumeric characters and special characters · Do not use spaces · Do not use the same passcode used for other users (across all user types) · If no password is entered for basic or advanced user, the thermostat will remain at
the highest level of access, installer, and will not require a password for access.
Configuring the user roles
To manage the type of users and permission 1. Swipe left from the Home page. 2. On the Device configuration page, tap Config > User Management. The User Management page appears.
Figure 57 User Management page

68

31-00400M-02 | Rev 05-21

Visitor

To manage the Visitor user role

1. On the User Management page, select Visitor. Tap to select View Type and Permission

2. Tap View Type.

Figure 58 Select view type.

CONFIGURING THE USER ROLES

3. Tap Permission to allow the visitor to override the Setpoints. Note: Visitors will have access to increase or decrease the temperature in Simplified view only.
Figure 59 Set Visitor Permission

4. Tap Note:

to go to the previous page. After setting these permission or view type and tapping button, it takes 30 seconds for screen to timeout and sleep. It takes another 30 seconds for the user permission to become effective.

31-00400M-02 | Rev 05-21

69

4 - DEVICE CONFIGURATION & EQUIPMENT SETTINGS

Simple View Home Screen Controls

The Simple view home screen enables visitors (if permitted) to change the setpoints in occupied or unoccupied mode.

Users can tap

or

to increase or decrease the temperature.

In the unoccupied mode, the simple view has an override toggle option on top. User must slide the toggle to override to make changes in setpoint.

Figure 60 Simple View - Occupied

Figure 61 Simple view - Unoccupied

User can tap

or

to increase or decrease the temperature. The thermostat

screen provides a visual indication of heating or cooling in different colors. The same

is also represented using horizontal bars in the display.

70

31-00400M-02 | Rev 05-21

Low

CONFIGURING THE USER ROLES

Table 18 Increasing Temperature

Medium

High

Low

Table 19 Decreasing Temperature

Medium

High

31-00400M-02 | Rev 05-21

71

4 - DEVICE CONFIGURATION & EQUIPMENT SETTINGS
Basic user
To manage the Basic User role 1. On the User Management page, select Basic User and Tap 2. Set a Passcode, View Type and, user Permission. Refer to Passcode rules. Figure 62 Basic user
Figure 63 Basic User Permission.

3. Toggle the undesired Permissions to "Off" position. 4. Select the View Type.
Scroll up or down to view additional options.

72

31-00400M-02 | Rev 05-21

Figure 64 Select View type

CONFIGURING THE USER ROLES

5. Tap to go to the previous menu. 6. If the passcode is not entered a notification banner appears.
Tap Yes to enter the passcode. Figure 65 No passcode

31-00400M-02 | Rev 05-21

73

4 - DEVICE CONFIGURATION & EQUIPMENT SETTINGS
Advanced user
To manage the Advanced User role 1. On the User Management page, select Advanced User and Tap . 2. Set a Passcode, Permission. Refer to Passcode rules. Figure 66 Advance user

3. Toggle the undesired Permissions to "Off" position. 4. Tap to go to the previous menu 5. If the passcode is not entered a notification banner appears.
Tap Yes to enter the passcode. Figure 67 No passcode

74

31-00400M-02 | Rev 05-21

CONFIGURING THE USER ROLES

Installer

To manage the Installer role

1. On the User Management page, select Installer and Tap . 2. Set or change a Passcode, Permission. Refer to Passcode rules.
Figure 68 Installer

31-00400M-02 | Rev 05-21

75

4 - DEVICE CONFIGURATION & EQUIPMENT SETTINGS
Configuring the Home page (Display Management)
This section explains managing the icons displayed on the Home page and Ambiance page of thermostat. It is applicable at the device level so any changes on the display management will be applied to all user accounts. To manage the display icons 1. Swipe left from the Home page. 2. Tap Config > Display Management.
The Display Management page appears.
Figure 69 Display Management

All icons are enabled by default. You can turn it off by sliding the toggle button to the left. 3. Scroll down to see more options.
Note: Tap the information icon to view the icon names.
Configuring the alarm preference
You can configure the alert notification of alarms displayed on the home page of the thermostat. You can choose to display the alerts as a notification banner, or a dot notification based on priority. By default, all alerts are configured to display as a dot notification.
To set the alert notification preference for alarms 1. Swipe left from the Home page. 2. Tap Config > Alarm Preference. The Alert Preference page appears. 3. Tap Alarm. A list of alarms option appears. 4. Tap an alarm type. Corresponding Alarm settings page appears.

76

31-00400M-02 | Rev 05-21

CONFIGURING THE ALARM PREFERENCE
5. Tap the alarm type that you want to configure. Corresponding alarm type configuration page appears. Figure 70 Alarm notification configuration page
6. On the middle row, tap the toggle button to the right to enable the notification settings. The corresponding alarm or reminder type will be displayed as a notification banner on the home page when it is triggered.

31-00400M-02 | Rev 05-21

77

4 - DEVICE CONFIGURATION & EQUIPMENT SETTINGS
Viewing the system status
The system status shows device information, live status and readings of the sensors that are operated or connected with the thermostat. These values are view only. · Basic information · Configurable I/O · Device information · Network status
To view the system status 1. Swipe left from the Home page. 2. Tap Config > scroll down > System Status The System Status page appears.
Figure 71 System status

3. Tap a required option to view the associated status.

Basic Information
Configurable I/O Device information Network status

It shows current Indoor temperature, Indoor setpoint, Indoor humidity, Indoor CO2 level, current system mode, Fan status, Heat stage status, Cool stage status, Aux heat status, Outdoor temperature, Outdoor humidity, Return air temperature (For future release), Discharge air temperature, Economizer enable status, Effective mode, and Override remaining.
All terminals ON/OFF status.
Model name, Bootloader version, Firmware version, Application version, UUID of the thermostat, Serial number of the thermostat, and QR code to connect with the thermostat using the mobile application.
Name of the Wi-Fi connected with, Connection status, WI-Fi MAC address, Wi-Fi SSID, and Wi-Fi IP address of the thermostat.

78

31-00400M-02 | Rev 05-21

RESET TO DEFAULT
Reset to Default
User can reset the entire thermostat to the factory default or reset only temperature setpoints and schedule to factory default. To restore the factory default setting 1. Swipe left from the Home page. 2. Tap Config > scroll down > Reset to Default.
The Reset to Default page appears. Figure 72 Reset All
3. Tap Reset Schedule to only reset the temperature and schedule setpoint. It retains other configurations. Refer to Resetting a schedule.
4. Tap Reset All to fully reset the thermostat. It deletes all the configurations and user data. 5. Tap Reset Registration to remove the registration from the cloud.
Figure 73 Reset typical pages

6. Upon successful reset, user will be notified by a notification banner.

31-00400M-02 | Rev 05-21

79

4 - DEVICE CONFIGURATION & EQUIPMENT SETTINGS

Figure 74 Reset All

80

31-00400M-02 | Rev 05-21

ADVANCE SETTINGS: CONFIGURING THE EQUIPMENT SETTINGS

Advance settings: Configuring the equipment settings
The equipment tab provides multiple options to configure the heat pump, cooling, heating, fan, humidity, and system switch.

To configure the operational limits of equipment

1. Swipe left from the Home page.

2. Tap Config > scroll down > Advanced > Equipment. The Equipment page appears. It contains the following equipment control options.

Tip:

Long press the +/- button to quickly increase or decrease the value.

Operation Configuration Configuration

Type

Select

Range

Description

Heat Pump Mode

Savings

(Default)

The controller will minimize the use of auxiliary heat to save energy. See Aux Heat Droop for more information.

Comfort

N/A

The controller uses auxiliary heat as needed in addition to the compressor to keep the space comfortable.

Lockouts

Compressor Lockouts

0-70F (Default During heating mode, when the

30)

outside air temperature is below the

Heat Pump Compressor Lockout

setpoint, the compressor stages are

disabled and the auxiliary heating is

allowed to run.

Auxiliary Heat Lockouts

30-120F (Default 65)

During heating mode, when the outside air temperature is above the Heat Pump Aux Heat Lockout setpoint, the auxiliary stages will be disabled. However, if the compressors are locked out by outside air temperature or the unit is commanded to emergency heat mode, the auxiliary heat stages are allowed to run.

31-00400M-02 | Rev 05-21

81

4 - DEVICE CONFIGURATION & EQUIPMENT SETTINGS

Operation Configuration Configuration

Type

Select

Range

Description

Heat Pump Auxiliary Heat

Aux Heat Ramp Factor

0-100 (Default Ramp is used when the thermostat

2)

is recovering from the unoccupied

setpoint. To avoid the auxiliary heat

stages from being used during this

period, the user can specify an

auxiliary heat ramp factor. This

creates a second recovery ramp

setpoint for the auxiliary heat. If the

heat compressors cannot maintain

its recovery ramp or are locked out

when the outside air temperature is

low, the auxiliary heat ramp will be

used to allow auxiliary heat to

recover before the occupied period.

Aux Heat Droop

0-10F (Default 0)

When the "Savings" mode is selected for heat pump control, then this configuration is shown. Droop is the number of degrees the ambient temperature is allowed to drop while the compressor is running before the auxiliary heat is engaged (provided auxiliary heat is not locked out). This lowers the auxiliary heat setpoint below the compressor setpoint to minimize use of auxiliary heat to save energy.

Upstage Timer

30-960mins (Default OFF)

This timer starts when the highest stage of the previous heating equipment type turns on. Aux Heat will be used (if needed) when the timer expires.

82

31-00400M-02 | Rev 05-21

ADVANCE SETTINGS: CONFIGURING THE EQUIPMENT SETTINGS

Operation Configuration Configuration

Type

Select

Range

Description

Cooling

Minimum Times Cooling Min. Off 0-300s

Time

(Default 60s)

The thermostat has a built in compressor protection (minimum off timer) that prevents the compressor from restarting too early after a shutdown. This timer is activated after the compressor is shut by the thermostat.

Cooling Min. On 0-300s

Time

(Default 120s)

The minimum time the cooling system will be active. Set as recommended by the manufacturer. When a heat pump is configured, the TC500 will follow the cooling (compressor) min on and off times, whereas the AUX heat stages will follow the heating min on and off times.

Lockouts

OAT (Outside Air -40F-120F Temperature) (Default 35F) Cooling Lockout Setpoint

When the outside air temperature is below the cooling lockout setpoint, the cooling control will be disabled. When the outside air temperature is above the cooling lockout setpoint plus 2 deg F differential, the cooling control is enabled.

DAT (Discharge Air Temp) Cooling Low Limit

'-40-60F (Default 45F)

When the discharge air temperature is below the discharge air low limit setpoint, the cooling control will turn off stages of cool until the discharge air temperature rises above it's setpoint plus a 2 deg F differential

Gains

Throttling Range 0-30F (Default Throttling range is used by the

0F -Auto)

thermostat to tune the PID loop for

staged cooling. When set to 0

(Auto), the TC500 sets the throttling

range based on the number of

stages selected. The TC500 also

sets integral time based on the TR.

1 stage: TR 3 degrees F

2 stages: TR 4 degrees F

3 stages: TR 6 degrees F

Cycles Per Hour Cooling Cycles 2-20 CPH

Per Hour

(Default 3)

The maximum number of cycles per hour the thermostat cycles the equipment at 50% load. Honeywell recommends 3 CPH for conventional cooling or heat pump.

31-00400M-02 | Rev 05-21

83

4 - DEVICE CONFIGURATION & EQUIPMENT SETTINGS

Operation Configuration Configuration

Type

Select

Range

Description

Heating

Minimum Times Heating Min. Off 0-300s

The minimum time the between

Time

(Default 60s) calls for heat.

Heating Min On, 0-300s

The minimum time duration of a call

Time

(Default 120s) for heat.

Lockouts

OAT Heating Lockout Setpoint

40-120F (Default 65F)

OAT Heating lockout set points defined as when outside air is above the lockout, it will not allow heating to be enabled. When the outside air temperature is below the heating lockout setpoint less a 2 deg F differential, the heating control is enabled.

DAT Heating High Limit

65-140F (Default 140F)

When the discharge air temperature is above the discharge air high limit setpoint, the heating control will turn off stages of heat until the discharge air temperature falls below its setpoint minus a 2 deg F differential. This will help prevent the discharge air temperature from getting too hot and avoid tripping limits.

84

31-00400M-02 | Rev 05-21

ADVANCE SETTINGS: CONFIGURING THE EQUIPMENT SETTINGS

Operation Configuration Configuration

Type

Select

Range

Description

Heating

Gains

Throttling Range Auto(0) Default When the TC500 is configured for

to 30F

modulating heat it will output 0-

10VDC on the UIO2 hot and

common terminals.

Proportional error is the deviation from set point of the sensed temperature divided by the throttling range. The set point is the temperature at which the control loop is satisfied. When the sensed temperature is at set point there is no proportional error and the output is 0%.

The throttling range is the amount of change in the sensed temperature required to drive the output from 0 to 100%. The throttling range must be narrow enough to provide good control without becoming unstable.

The throttling range is determined by factors including, the control application, the response time of the equipment being controlled, and the control algorithm being used. The narrower (smaller) the throttling range, the more precise the control and the wider (larger) the throttling range, the more stable the control. The objective is setting the throttling range to achieve the optimum balance between precision and stability.

When the TC500 is configured for staged heat it will use the TR to tune the PID loop for staged heat control. The throttling range controls the cycling of the system and helps to compensate for load changes, equipment sizing and thermostat mounting location.

When set to 0 (Auto), the TC500 sets the throttling range based on the number of stages selected. The TC500 also sets integral time based on the TR. 1 stage: TR 3 degrees F 2 stages: TR 4 degrees F 3 stages: TR 6 degrees F

31-00400M-02 | Rev 05-21

85

4 - DEVICE CONFIGURATION & EQUIPMENT SETTINGS

Operation Configuration Configuration

Type

Select

Range

Heating

Cycles Per Hour Heating Cycles 2-20 CPH

Per Hour

(Default 6)

Fan

Mode

Continuous

Default is Continuous

Auto Circulate

Run with heat On/Off

Default On

Fan extended runtime in heating

0-300s (Default 90s)

Fan extended runtime in cooling

0-300s (Default 0s)

Description
The maximum number of cycles per hour the thermostat cycles the equipment at 50% load. The default cycle rate for heat (conventional) or Aux heat (Heat pump) is 6 and for cool (conventional) or compressor (Heat pump) is 3. Honeywell recommends these settings: -Gas Heat: 6 CPH -Heat Pump: 3 CPH -Electric: 9 CPH
The fan will run continuously during occupied periods for ventilation, and during unoccupied periods will run the fan only when there is a call for cool or heat (if fan on in heat is configured).
In occupied and unoccupied periods, the fan runs with a call for cooling or heat (when fan on in heat is configured)
The fan runs approximately 35% of the time, roughly 20 minutes each hour, minus any time the fan is already running with the heating or cooling system
When set to On, thermostat will run the fan with a call for heat (and cool). Select off when controlling a heating system that operates the system fan in heat. When fan on heat is configured to Off and thermostat is configured for heat pump operation, a call for compressor heat will always turn on fan output (G).
Fan run on time after all heating stages are turned off. May be used to run fan after all heating stages have turned off so that the heat exchanger can cool down before the fan turns off.
Fan run on time after all cooling stages are turned off. May be used to run fan after all cooling stages have turned off so that the cooling (DX) coil can warm up before the fan turns off to prevent condensation from evaporating into the space.

86

31-00400M-02 | Rev 05-21

ADVANCE SETTINGS: CONFIGURING THE EQUIPMENT SETTINGS

Operation Configuration Configuration

Type

Select

Range

Fan

Speed Type

Single Speed N/A

Two Speed

Vent Mode Cool Single Stage Cool Multi Stage, Heat Single Stage Heat Multi Stage All Other Modes

Description
Terminal G (DO1) is energized on a call for fan.
One of these terminals can be configured for low speed fan: W3 (DO4), Y3 (DO7), or DO8. G (D01) for High Speed Fan When in low speed fan, only the configured terminal is active, and when in high speed fan, only the G (DO1) is active. When configured for heat pump application and both compressor heat and auxiliary heat stages are on, the unit uses the maximum of the speeds selected for the compressor and auxiliary heat.

Variable Speed

See the note in the Variable Speed section for more information on fan speed assignments.

Speeds

G (D01) is fan start/stop

Configuration UI01 for 0-10 VDC as analog output

(Assign speeds to vary the speed of the fan.

to 6 fan speed

configurations) When modulating heating control/

Speed

Auxiliary modulating heating is

Assignment used, the fan speed will start with

(Assign speeds the configured minimum speed and

1-6 to

will ramp towards configured

ventilation and maximum. The fan will require a

stage modes) minimum 5% output from

modulating control or the

modulating output should be

greater than

Cfg_Heat_ModHtEnSp, which ever

setpoint is greater in order to start

ramping up.

Note: Use Speed Configuration

to set speeds for up to 6 fan

speeds. Then use Speed Assign-

ment to assign those speeds to

each equipment mode. When the

thermostat calls for first stage

equipment, it will run the fan at

the Cool Single Stage speed, or

Heat Single Stage speed. When it

calls for second stage or higher, it

will run the fan at the Multi-Stage

speed. The Vent Mode speed will

be used when the thermostat is

not calling for heating or cooling

equipment but is calling for fan,

such as when it is in the Occu-

pied mode.

31-00400M-02 | Rev 05-21

87

4 - DEVICE CONFIGURATION & EQUIPMENT SETTINGS

Operation Configuration Configuration

Type

Select

Range

Description

Humidity

Dehumidification Simple - Space 0-100% Rh

relative humidity (Default 65%

high limit,

Rh)

Dehumidificati-

on off delay

The TC500 dehumidifies to a configured humidity high limit with on/off control using external dehumidification equipment. When relative humidity (Rh) rises above the setpoint, the TRC500 will energize the W3 (DO4), Y3 (DO7), or DO8 terminal (as configured by user in Configurable I/O menu.) When the space Rh falls 5% points below this setpoint, it will deenergize this terminal. Once active, the dehumidification cycle will be on for a minimum amount of time configured with the Dehum On Delay, 20 minutes default, configurable from 0-60 minutes. The supply fan will operate based on configured fan type under following mode: -If Fan is configured as Single Speed, then supply fan will run in default mode -If Fan type is configured as Two Speed, then supply fan will run in lowest fan speed -If Fan type is configured as Variable Speed, then supply fan will run as per configured under Speed Type/Assignments The C7400S Sylk bus sensor may be used for space humidity (and temperature) sensing.

Staged Reheat - 0-100% Rh When the TC500 is configured for

Space relative (Default 65% at least one stage of cooling and

humidity high Rh

heating, staged reheat can be used.

limit,

Staged Reheat When in cooling mode, and the

Dehumidificati- (Default Off) space Rh rises above the setpoint,

on off delay,

Minimum On the first stage of cooling & heating

Enable

Time (Default will turn on. When the space cooling

Minimum on Off)

control is calling for more than 1

time operation Minimum On stage of cooling, staged reheat

Time 240-

operation will be disabled.

1200s (Default

600s)

The heating section must be

Minimum On located downstream of the cooling

Delay 0-60 min coil to provide reheat.

(Default 20

min)

88

31-00400M-02 | Rev 05-21

ADVANCE SETTINGS: CONFIGURING THE EQUIPMENT SETTINGS

Operation Configuration Configuration

Type

Select

Range

Description

Humidity

Humidification

Space relative humidity high limit

0-100% Rh (Default 35% Rh)

The TC500 humidifies to a configured humidity low limit with on/off control using external humidification equipment. When the space relative humidity (Rh) is less than the Rh low limit setpoint the TC500 will engage the W3 (DO4), Y3 (DO7), or DO8 terminal (as configured by user in Configurable I/O menu.) When the space humidity rises above the low limit setpoint plus 5% RH differential this terminal will be disengaged. As soon as the humidify function goes inactive the supply fan will go OFF after with a delay of 2 minutes. The supply fan will operate based on configured fan type under following mode: -If Fan s configured as Single Speed, then supply fan will run in default mode -If Fan type is configured as Two Speed, then supply fan will run in lowest fan speed -If Fan type is configured as Variable Speed, then supply fan will run as per configured under Speed Type/Assignments The C7400S Sylk bus sensor may be used for space humidity (and temperature) sensing.

Humidification on delay

0-60 min (Default 20 min)

Once active, the humidity action will be ON for minimum of this amount of time.

System Switch

System Switch

Choice of

Heat, Cool,

system switch to Auto, EMER

correspond to Heat, Off

HVAC equipment

Heat, Cool, Auto, Off

Heat, Cool, Off

Heat, Off

Cool, Off

Select a system switch that corresponds with the HVAC equipment. Networked commands to control the system switch mode take precedence over the setting on the TC500. The system switch setting is saved during power outages.

31-00400M-02 | Rev 05-21

89

4 - DEVICE CONFIGURATION & EQUIPMENT SETTINGS
Configuring the Thermostat I/O terminals
After connecting the thermostat to equipment, you must configure certain terminals in the thermostat so it can identify the correct purpose and apply the appropriate control schemes. The Configurable I/O tab provides options configure thermostat to the equipment and sensors wired to it. To view and configure the I/O 1. Swipe left from the Home page. 2. Tap Config > scroll down > Advanced > Configurable I/O.
The Configurable I/O page appears. Scroll down to see more I/Os. Figure 75 Terminals page
Some terminals such as DO2, DO3, DO5, and DO6 show the equipment configured in the corresponding terminals and are not configurable by the user. 3. For other terminals, tap the particular terminal. Associated equipment terminals appears. Scroll down to see more equipment. 4. Tap an equipment terminal. The selected terminal is connected with the thermostat. 5. Tap the back button You can see the selected equipment terminal is assigned on the Configurable I/O page.

90

31-00400M-02 | Rev 05-21

CONFIGURING THE SENSORS

Configuring the sensors
Thermostat supports Sylk sensors, Control sensors (temperature and humidity only), and four additional sensors. In order to ensure proper operation and control, configure for Sylk sensors only if they actually will be wired to the TC500. Local Sensor: Internal TC500 temperature sensor. Remote Sensor: Space temperature sensor connected to UI/UIO terminal, TR40 wall module configured at address 2, or TR120 wall module configured at address 6. Multi Sensor: Local Sensor and Sylk wall module at address 2, 3, 4, 5, 6 used together to calculate space temperature. If the thermostat is located in the occupied space and system is using a remote temperature sensor, it is recommended to use the "smart" or "average" sensor options. In the event of remote sensor failure the temperature will be controlled using the onboard sensor in the thermostat. When using averaging the thermostat's onboard sensor should be set at minimum level 1 weighted setting.

To configure the sensors

1. Swipe left from the Home page.

2. Tap Config > scroll down > Advanced > Sensors.

The Sensors page appears.

Figure 76 Sensors

3. Tap Sylk Sensors. A list of Sylk Sensors appears with the respective bus address corresponding to the address number listed in the thermostat listing.

31-00400M-02 | Rev 05-21

91

4 - DEVICE CONFIGURATION & EQUIPMENT SETTINGS
Figure 77 Sylk sensors after configuration

4. Tap a Sylk sensor to configure its parameters.
5. Navigate back to the Sensors page and tap Additional Sensors. The Additional Sensors page appears that lists 4 sensors, only if already configured in UIO1, UIO2, UI1, and UI2 terminals of the thermostat. Otherwise, the "No Additional Sensors Here" message appears. Figure 78 Additional Sensors

6. Navigate back to the Sensors page and tap Control Sensors. The Control Sensors page appears. By default, it shows Local Sensors. If Remote sensors are also configured then Multi-Sensors and Remote Sensors also appear.

92

31-00400M-02 | Rev 05-21

Figure 79 Control Sensors

CONFIGURING THE SENSORS

The Multi-Sensors tab allows you to configure certain parameters of multiple sensors at a time.
7. Tap Multi-Sensors. The Multi-Sensors page appears. It lists all the control sensors that are configured with the thermostat. Scroll down to see more sensors. Figure 80 Multi-Sensors

8. Select the required sensors for calculation.
9. Tap Next. The Calculate Sensors page appears. It lists, Average - The weighted average of the sensors is used for control. Tap the right arrow to set the relative weight of each sensor.

31-00400M-02 | Rev 05-21

93

4 - DEVICE CONFIGURATION & EQUIPMENT SETTINGS

Figure 81 Average options

Values show the relative weighting for each sensor in temperature averaging. The built in logic calculates weighted average as the assigned sensor weighting times the measured temperature for each sensor and divides by the total weighting. When a sensor is not connected, the effective weight for that sensor is 0, and therefore excluded from the calculation. When a sensor is connected, the effective weight can be adjusted from 0-10, with the default being 10. Scroll down to view Adr. 4 and Adr 5. Tap the back button to navigate back to the Calculated Sensors page. Minimum - The minimum sensed temperature is used for control and displayed as the indoor temperature. Maximum - The maximum sensed temperature is used for control and display. Smart - When the TC500 is in the heating mode, the minimum sensed temperature is used. When in the cooling mode, the maximum sensed temperature is used. When in neither in heating or cooling mode, the average space temperature is used.
10. Tap one of the above-given parameters. The corresponding parameter page appears with the list of selected sensors. Scroll down to see more sensors.
11. Adjust the values by tapping plus or minus signs.

94

31-00400M-02 | Rev 05-21

MANAGING THE SETPOINT OPTIONS

Managing the setpoint options
This option allows users to set the maximum or minimum temperature setpoints.
To manage the setpoints of the equipment 1. Swipe left from the Home page. 2. Tap Config > scroll down > Advanced > Setpoint Options. The Setpoint Options page appears. It provides the following heating or cooling options.

Operation Configuration Type

Range

Description

Stops

Cooling Min. Setpoint
Heating Max. Setpoint

50-99F (Default 50F) The minimum cool setpoint that can be set by the user
40-90F (Default 90F) The maximum heat setpoint can be set by the user

Thermostat Deadband

0-30F(Default: 30F)

The thermostat Deadband ensures that the heat setpoint and the cool setpoint maintain a temperature span this number of degrees when the thermostat is in auto mode.

Limits

Temporary Setpoint -5 - 5F (Default 0F) Limit

The temporary setpoint adjustment allows an occupant to change the space temperature setpoint during occupied periods. This includes scheduled occupancy or override of the scheduled occupancy (bypass override). During unoccupied and standby periods, the effective setpoint
offset is set to 0 °F. If an occupant wants
to change the temporary setpoint, the occupant must first override the schedule to occupied and then the thermostat will allow the occupant to change the temporary setpoint

Cooling Recovery

Max. Setpoint Ramp 0 -20°F/hr (Default 6°F/hr

Min. Setpoint Ramp 0 -20°F/hr (Default 2°F/hr]

OAT at max. Cool setpoint Ramp

-40-120F (Default 70F)

OAT at min. Cool setpoint Ramp

-40-120F (Default 90F)

When an outside air temperature is available, the effective cool ramp rate is changed as the outdoor air temperature changes. When the outdoor air temperature is at the minimum cool ramp rate temperature (e.g. 90°F) and above, the effect cool ramp rate is at the minimum cool
ramp (e.g. 2 °F/hr). When the outdoor air
temperature falls, the cool ramp rate is lowered until the maximum cool ramp temperature (e.g. 70) is reached or above, the effective cool ramp is at the maximum
cool ramp rate (e.g. 6 °F/hr). The cooling
recovery algorithm is well established over decades of use and is the same as used on the T7350 and similar Honeywell commercial thermostat models.

31-00400M-02 | Rev 05-21

95

4 - DEVICE CONFIGURATION & EQUIPMENT SETTINGS

Operation Configuration Type

Range

Max. Setpoint Ramp (0 -36°F/hr)

Min. Setpoint Ramp (0 -36°F/hr)

OAT at max. Heat setpoint Ramp

-40-120F (Default 60F)

Heating Recovery

OAT at min. heat setpoint Ramp

-40-120F (Default 0F)

Description
When an outside air temperature is available, the effective heat ramp rate is changed as the outdoor air temperature changes. When the outdoor air temperature is at the minimum heat ramp rate temperature (e.g. 0°F) and below, the effect heat ramp rate is at the minimum heat ramp
(e.g. 2 °F/hr). When the outdoor air
temperature is at the maximum heat ramp temperature (e.g. 60°F) and above, the effective heat ramp is at the maximum heat
ramp rate (e.g. 8 °F/hr). The heating
recovery algorithm is well established over decades of use and is the same as used on the T7350 and similar Honeywell commercial thermostat models.

96

31-00400M-02 | Rev 05-21

MISCELLANEOUS
Miscellaneous
This section contains miscellaneous feature that manages the thermostat functionalities. To manage the thermostat's miscellaneous functions 1. Swipe left from the Home page. 2. Tap Config > scroll down > Advance > scroll down > Miscellaneous.
The Miscellaneous page appears.
Figure 82 Miscellaneous

Operation Configuration Type

Range

Description

Power Up Delay Controller delay after

Time

power up

0 ­ 300 s (Default 10s)

Following power-up for this amount of time, the fan, heating, and cooling outputs are disabled. This is to prevent multiple controllers from starting major electrical loads simultaneously when power is restored to a building.

Unoccupied Duration Override Time

1-1080 mins (Default 180 mins)

Number of minutes the TC500 will switch from unoccupied to occupied in override

Demand Response

Setpoint Shift

+/- 0 ­ 10°F (Default 3F) The number of degrees that the controller can shift the setpoint to shed load upon request from the utility using a network command. Demand response is triggered via a BACnet connection.

31-00400M-02 | Rev 05-21

97

4 - DEVICE CONFIGURATION & EQUIPMENT SETTINGS

Operation Configuration Type

Range

Description

No action

No action is taken (Default)

Shutdown

Smoke Mode

(Smoke Mode is

triggered by a

BACnet command)

Pressurize

Depressurize

Turn all outputs OFF Shutdown can be initiated by

(fan, heating and cooling digital input on UI1, UI2, UIO1

stages and

or UIO2 or as part of the BACnet

humidification are off) Smoke Mode network

command.

Fan is turned on Fan is turned on

If an outdoor air damper is set under Configurable I/O and wired to the thermostat, the damper will be driven open in the Pressurize and Depressurize modes.

98

31-00400M-02 | Rev 05-21

ENABLING THE SERVICE MODE
Enabling the Service mode
Service mode disables all control algorithms to perform service of the equipment. Compressor protection is not available during the service mode. To enter service mode 1. Swipe left from the Home page. 2. Tap Config > scroll down > Advanced > scroll down > Service Mode.
The service mode caution message appears. Figure 83 Service mode caution page
3. Read the message, and tap Yes to continue. The Service Mode page appears.

31-00400M-02 | Rev 05-21

99

4 - DEVICE CONFIGURATION & EQUIPMENT SETTINGS
Figure 84 Service Mode page

4. Tap each item to see the current values and status. 5. Tap the back arrow button to exit the service mode and resume the equipment operation
and control algorithms.

100

31-00400M-02 | Rev 05-21

5CHAPTER

Alarms

This chapter explains alarms and its configuration procedures.
Related topics Alarms Alarm notification signs Alert notification Unacknowledged alarms List of alarms and their severity Managing the alarms

31-00400M-02 | Rev 05-21

101

5 - ALARMS

Alarms

In the TC500A thermostat, alarms are configured for predefined set values. When the values are breached, the alarms are triggered and displayed on the home page as banner notification, dot notification, and on the Alert button. You can view the triggered alarms and acknowledge them.

Alarm notification signs
The alarm menu notification icon has three color codes to indicate the severity of the alarm. The following table describes the available signs with color codes of the alarm pages.

Icons

Description High
Medium Low

102

31-00400M-02 | Rev 05-21

ALERT NOTIFICATION
Alert notification
The alerts of alarms can be configured as banner notification or dot notification as per the Alert configuration. The banner notification is pop-up on the home page whereas the dot notification appears beside the Wi-Fi icon. For alert configuration, refer to Configuring the alarm preference.
Figure 85 Alarm banner notification
You can tap the banner notification to view the alarm and acknowledge it. If multiple alarms are triggered then the latest one (high) will be displayed on the home page. After tapping the banner, it takes you to the Alarm page. · High - Red color banner · Medium - Orange color banner · Low - Yellow color banner

31-00400M-02 | Rev 05-21

103

5 - ALARMS
Unacknowledged alarms
In addition to the banner notification, all other alarms (for which the notification is not configured) can be viewed and acknowledged under the Alert page. The Alert tab displays the alarms that have not been acknowledged by the user. If there are unacknowledged alarms, the Alert button will have a visual notification as per the severity of the alarm. To view the unacknowledged alarms 1. Swipe left from the Home page. 2. On the Device configuration page, tap the bell (Alert) icon.
The Alert page appears. Figure 86 Home page - Alert Tab
3. Tap Alarm. A list of unacknowledged alarms appears.

104

31-00400M-02 | Rev 05-21

UNACKNOWLEDGED ALARMS
Figure 87 Alert Preference - Alarm

Note: Under the ALARM tab, tap the Red, orange, or yellow-colored Alarms. The relevant data points list appears to acknowledge the alarms. Red icon: Displays only the data points with High severity alarm. Orange icon: Display only the data points with Medium severity alarm. Yellow icon: Display only the data points with Low severity alarm. 4. Tap an Alarm name. The corresponding alarm property page appears. The alarm property page describes the nature of event state transition.
Figure 88 Alarm Page - Select the alarm

5. Tap ACKNOWLEDE to view additional information and acknowledge the alarm.

31-00400M-02 | Rev 05-21

105

5 - ALARMS

Figure 89 Acknowledge alarms

Notes

- Except for Alarms "Unknown Time" and "Wi-Fi Network Not Configured" all alarms can be acknowledged by tapping ACKNOWLEDGE.
- For "Unknown Time", the set Date and Time page appears. Click SAVE to acknowledge alarms. - For "Wi-Fi Network Not Configured", Configuration Settings appear. Select the WiFi network to acknowledge the alarms.

106

31-00400M-02 | Rev 05-21

LIST OF ALARMS AND THEIR SEVERITY

List of alarms and their severity
The list of alarms in the Commercial Connected thermostat is as follows

Table 20 List of alarms

Alarms

Severity

Proof of Air Flow Alarm (fan state)

High

Space Freeze Protection Alarm

High

Proof of water flow Alarm

High

CO2 sensor failure

High

Outdoor air sensor failure

High

Mixed air sensor failure

High

Discharge Air Temperature sensor failure High

Space Temperature Sensor Failure

High

Space Humidity Sensor Failure

High

Sylk Device Communication Failure

High

Space Humidity Sensor Failure

Medium

Sylk Device Communication Failure

Medium

Internal Proximity Sensor Failure

Medium

WiFi Network Not Configured

Medium

Unknown Time ?no time?

Medium

Discharge Air Temperature out of range alarm

Medium

Space Temperature out of range alarm Medium

Mixed Air Temperature out of range alarm Medium

Outdoor air Temperature out of range alarm

Medium

CO2 out of range alarm

Medium

WiFi Connection Lost

Low

31-00400M-02 | Rev 05-21

107

5 - ALARMS

Managing the alarms

Table 21 Managing Alarms

Alarm Proof of Air Flow Alarm (fan state)
Space Freeze Protection Alarm
Proof of water flow Alarm

Trigger Scenario
1.An input (such as a current switch or differential pressure switch) shall be available to monitor proof of air flow in the Rooftop Unit. When configured, the control will monitor this digital input once per second. 2.If the fan should be on, then it is not on, should generate an alarm and disable stages. For example, if the stage should be on, then digital input indicates no air flow for 10 consecutive seconds.
The frost alarm shall occur if space temperature drops below 42.8°F (6°C) even when the controller is in manual mode, night purge mode, or pressurize/ depressurize. No frost alarm shall occur if the controller is disabled, in test mode, or in some higher priority mode as defined by the application.
1.Heat pump proof of water is for water source heat pumps only and needs extra configuration (water flow detector). 2.If the stage should be on, then the input indicates loss of water flow in a Heat pump application. 3.There are 2 options by which user can send the proof of water flow. If we receive no proof from neither of those then we will generate an alarm after 10 seconds.

Action depend on the alarm configuration:
1.Display indicator: It will generate an alarm and alarm indicator is displayed.
2.Interlock stage: the control shuts down all digital outputs and will continue to try to restart the fan.
The alarm shall be sent within 2 minutes of the temperature sensor going below the frost setpoint. The heating and fan output will be enabled until the room temperature reaches 46 °F (8°C) or the thermostat is turned on.
depend on the alarm configuration:
1.Just displays indicator: It will generate an alarm and alarm indicator is displayed.
2.Interlock stage: The controller shall disable the heat pump compressor and report an alarm.

Level High
High High

Sylk Device Communication Failure

1. Physical Input - UI/UIO terminal input
2. Network Input - WSHP Enable & WSHP value points
if any one of the Sylk sensor fails, the alarm will be triggered.

1.If the sensor is used to control loop and network temp/humidity space sensors are available, the thermostat will generate an alarm. 2.The application shall disable all control functions associated with the failed sensor; i.e. it will react as if the sensor was not configured.

Sensor issue
High (Action 2)/ Medium (Action 1)

108

31-00400M-02 | Rev 05-21

MANAGING THE ALARMS

Alarm CO2 sensor failure alarm
Outdoor air sensor failure alarm
Mixed air sensor failure alarm
Discharge air sensor failure alarm
Space Temperature Sensor Failure

Trigger Scenario 1.Open/short limit is detected on CO2 sensor(UI1/UI2/UIO1/UIO2) 2. CO2 outside of range(CO2 < 0ppm or DA sensor > 2000ppm)
1.Open/Short limit is detected on outdoor air sensor(UI1/UI2/UIO1/ UIO2) 2.OAT outside of range (OA sensor < 40F or OA sensor > 150F)
1.Open/Short limit is detected on mixed air sensor(UI1/UI2/UIO1/UIO2) 2.MAT outside of range: (MA sensor < 40°F or MA sensor > 120°F)
35°F<SA sensor<125°F.(No matter which sensor act as space temperature)
DAT sensor fault: Open/short limit is detected on Discharge air sensor(UI1/ UI2/UIO1/UIO2) DAT outside of range: (DA sensor < 35°F or DA sensor > 165°F)
1. Local Space temp as the main control and sensor fault is detected (High) depend on network value 2. Remote Space temp as the main control. sensor fault is detected (High) depend on network value 3. Multi space temp as the main control. All/Some of the temp sources have sensor fault detected (High/Medium) also depend on network value

Action
High--The application shall disable all control functions associated with the failed sensor; i.e. it will react as if the sensor was not configured. Medium--CO2 out of range: Will not disable control function, Check equipment for proper operation.
The application shall disable all control functions associated with the failed sensor; i.e. it will react as if the sensor was not configured. --OAT out of range: Will not disable control function, Check equipment for proper operation.
The application shall disable all control functions associated with the failed sensor; i.e. it will react as if the sensor was not configured. -MAT out of range: Will not disable control function, Check equipment for proper operation.
DAT sensor fault: The application shall disable all control functions associated with the failed sensor; i.e. it will react as if the sensor was not configured.
DAT out of range: Will not disable control function, Check equipment for proper operation.
1.If the sensor is used to control loop and network temp/humidity space sensors are available, the thermostat will generate an alarm 2.If the sensor is used to control loop and network temp/humidity space sensors are unavailable, the application shall shut down all output control of Heating and Cooling equipment. The fan shall remain under normal control.

Level
Wiring issue High (failure)/ Medium (out of range)
Sensor issue
High (failure)/ Medium (out of range)
Sensor issue High (Action 2)/ Medium (Action 1)

Space Humidity Sensor Failure

1. Local Space Humidity as the main control and sensor fault is detected (High) 2. Remote Space Humidity sensor as the main control fault is detected (High) 3. Multi space Humidity sensor as the main control, All/Some of the temp source have sensor fault detected (High/Medium)

1.If the sensor is used to control loop and network humidity space sensors are available the thermostat will generate an alarm 2.If network temp/humidity space sensors are unavailable the application shall disable all control functions (E.g Humidity control for humidification or dehumidification) associated with the failed sensor.

Sensor issue High (Action 2)/ Medium (Action 1)

31-00400M-02 | Rev 05-21

109

5 - ALARMS

Alarm
Space Temperature out of range alarm

Trigger Scenario
Space temperature outside of range (SA sensor < 35°F or SA sensor >125°F).(No matter which sensor act as space temperature)

Action
1.If the sensor is used to control loop and network temp are available thermostat will just generate an alarm. 2.If the sensor is used to control loop and network temp are unavailable, the application shall shut down all output control of Heating and Cooling equipment. The fan shall remain under normal control.

Level
Sensor issue Medium

Internal Proximity Sensor Onboard proximity sensor fault is

Failure

detected

Unknown Time
WiFi Network Not Configured WiFi Connection Lost

Thermostat has been powered off for a long time thus RTC time is lost when the INTERNET is not connected.
If user selects WiFi as the means of communication, then the thermostat isn't configured to join WiFi network
If user selects WiFi as the means of communication and Thermostat lost WiFi connection with Gateway

The thermostat is the same as that no proximity sensor is configured.
Prompt user to set date/time
WiFi alarm is displayed on home screen.

Sensor issue Medium Medium
Connection issue Medium Connection issue Low

110

31-00400M-02 | Rev 05-21

6CHAPTER

Scheduling

About Schedule
TC500A enables you to plan operations based on the time of day and holidays. This scheduling structure allows you to control day-to-day operations with the standard schedule. The holiday schedule controls days or times when a facility is typically unoccupied. The event schedule controls periods outside normal occupied times. The holiday schedule overrides the standard schedule and the event schedule overrides the holiday and standard schedules within a schedule set. Schedules use the setpoint configuration of Occupied, Unoccupied, or Standby modes. Occupied mode treats the building space as occupied and configured with comfort setpoints. Unoccupied mode treats the building space as not occupied and configured with energy savings setpoints. Standby mode setpoints are configured in a way that the setpoints can quickly change to the Occupied mode when switched. Standby mode setpoint saves energy higher than occupied mode and lesser than the Unoccupied mode. Temporary mode allows the user to change the temperature setpoints of the Occupied mode after the user switches to the temporary mode from the Occupied mode. This is not possible in Unoccupied mode and Standby mode. When a schedule uses the Occupied mode but the Occupancy sensor reads occupied, then the thermostat switches automatically to the Standby mode. In other scenarios, the thermostat follows the schedule status and the occupancy sensor's value has no impact on it.
How schedules works
When you set up schedules, it is important to understand the relationship of the schedules in the schedule set and how to use each one. · Standard schedule: Use the weekly schedule to program occupied and standby
periods for each of the week. · Holiday schedule: Use holiday schedules to set holidays that "float" or occur on a
specific date each year. Up to 20 holidays can be created.

31-00400M-02 | Rev 05-21

111

6 - SCHEDULING

· Special event: Use Special event to schedule one-time events. Note: Holiday schedules automatically write a 12:00 AM OFF time, which is in effect unless it is
overridden by an event schedule.

Related topics

Setting up a weekly schedule Resetting a schedule Setting up a holiday schedule Special event

112

31-00400M-02 | Rev 05-21

SETTING UP A WEEKLY SCHEDULE
Setting up a weekly schedule
To add a new time value to a weekly schedule 1. Swipe left from the Home page. 2. On the Device configuration page, tap Schedule. The schedule main page appears which lists all types of schedules available in the thermostat. Figure 90 Select Schedule
3. Tap Weekly to add a new schedule. The corresponding regular schedule page appears. Figure 91 List of types Schedules

4. Select a day where you want to add a new schedule. The corresponding day page appears which contains existing schedules.

31-00400M-02 | Rev 05-21

113

6 - SCHEDULING

Figure 92 Existing Time values of a day

5. To add a new schedule tap on the Unoccupied button. The Create Event page appears. Figure 93 Adding a schedule
6. Select Start and End time of the schedule by tapping the clock icon. Select the mode (Occupied or Standby) from the selections below it.

114

31-00400M-02 | Rev 05-21

SETTING UP A WEEKLY SCHEDULE
Figure 94 Add Time and select type of schedule
7. Tap Save. The corresponding day page with all schedules appears. Figure 95 Save Schedule
8. Tap the back arrow button to exit scheduling. Note: Unscheduled times default to Unoccupied mode.

31-00400M-02 | Rev 05-21

115

6 - SCHEDULING
Editing or deleting weekly schedules
The existing weekly schedules can be edited from the Weekly schedule page. To change or delete an existing weekly schedule
1. On the Weekly schedule page, tap the schedule to be modified. The Edit Event page will appear. Figure 96 Editing a Regular Schedule
2. Select the new Start and End time and mode. Tap Save to save changes or Tap DELETE to delete the schedule. Figure 97 Edit Event

116

31-00400M-02 | Rev 05-21

SETTING UP A WEEKLY SCHEDULE
Copying an existing weekly schedule
The TC500A enables the user to copy an existing regular schedule. To copy a schedule from one day to another
1. Navigate to the Weekly schedule page from where the schedule is to be copied. Select day to copy. Tap to copy schedules. Copy screen will appear. Figure 98 Copy Schedule

2. Tap on the days of the week for which schedule is to be copied. Figure 99 Select Days

3. Tap CONFIRM. A banner indicating successful copying will pop up.
31-00400M-02 | Rev 05-21

117

6 - SCHEDULING

Figure 100 Copy successful

118

31-00400M-02 | Rev 05-21

RESETTING A SCHEDULE
Resetting a schedule
Resetting schedule will reset the weekly schedule and setpoints of occupied, unoccupied, and standby to factory default. To reset all the schedule 1. On the Home page, tap the Config > scroll down > Reset to Default.
The Reset to Default page appears. 2. Tap Reset Schedule.
User will be prompted to confirm the action before reset. Figure 101 Reset Schedule
3. Tap YES to reset schedule. The progress screen appears. Figure 102 Reset Schedule

4. Upon a successful reset, the user will be notified by a notification banner.

31-00400M-02 | Rev 05-21

119

6 - SCHEDULING

Figure 103 Reset Confirmation

120

31-00400M-02 | Rev 05-21

SETTING UP A HOLIDAY SCHEDULE
Setting up a holiday schedule
Holidays are defined as reoccurring events that are different from the weekly schedule, can be Occupied or Standby, or by default Unoccupied. So the Unoccupied/Standby mode setpoints will be executed on the holidays. There are two holiday types are available to choose. There are Floating date and Specific date. Only one day can be selected for the floating holiday type whereas multiple days can be selected for Specific date type. To schedule a holiday 1. Swipe left from the Home page. 2. On the Device configuration page, tap the Schedule icon.
The schedule page appears. Figure 104 List of types Schedules
3. Tap Holiday to add a new holiday schedule. The Holiday page appears.
4. Tap . to add a Holiday. The Create Holiday page appears. Figure 105 Creating Holiday

31-00400M-02 | Rev 05-21

121

6 - SCHEDULING

5. Tap Date. The Set Date page appears.

Figure 106 Set Date

6. Tap Floating Date to schedule a floating date as a holiday (Organization related holidays) or tap Specific Date to schedule festival holidays, government holidays, or public holidays. If Floating date is selected, then you can choose only one day to create an event.
7. Tap the clock icon.
8. Select a date.
9. Tap CONFIRM. The Set Date page appears. If you are configuring a Specific Date holiday type, then you can add multiple days by tapping the How is the holiday with first date is fixed date.
10.Tap Save. The Create Holiday page appears.
11.Tap Event to configure the actions to be executed on the configured holiday (s). 12.Tap Set Event.
Event list page for the set date appears. You can add a maximum of four events.

122

31-00400M-02 | Rev 05-21

SETTING UP A HOLIDAY SCHEDULE
Figure 107 Date page for special events

13.Tap an Unoccupied cell. The Create Holiday Event page appears.
Figure 108 Create holiday vent page

14.Tap the Start clock icon to set the event start time. 15.Set the start time and then tap CONFIRM. 16.Tap the End clock icon. 17.Set the event end time and then tap CONFIRM. 18. Tap Occupied or Standby based on your requirement. 19.Tap SAVE.
The created event appears on the Holiday page. 20. Tap Save. 21.Tap Done.
The holiday creation successful message appears.
31-00400M-02 | Rev 05-21

123

6 - SCHEDULING
Deleting a holiday schedule
To delete a holiday 1. On the Holiday page, swipe right to delete Holiday. Trash bin appears on right. Figure 109 Select Holiday

2. Tap

to delete the Holiday. Figure 110 Delete Holiday

3. User will be prompted to confirm to delete the holiday. Tap DELETE

124

31-00400M-02 | Rev 05-21

SETTING UP A HOLIDAY SCHEDULE
Figure 111 Pop up to delete Holiday
4. The holiday will be deleted.

31-00400M-02 | Rev 05-21

125

6 - SCHEDULING
Special event
Special events are one time events that are different from the weekly schedule. To create a special event
1. Right swipe the home page. 2. On the Device configuration page, tap Schedule and then tap Special Event.
The Special Event page appears.
Figure 112 Special event page

3. On the top right, tap the add button. The Create Special Event page appears. Date is mandatory to create a special event.
4. Tap Date. The Set Date page appears.
Figure 113 Set date page

126

5. Tap the clock icon. 6. Select a year, scroll and select a date, day, and month. You can set a special event within 3
years from today.
31-00400M-02 | Rev 05-21

SPECIAL EVENT
7. Tap CONFIRM. The Set Date appears.
8. If the special event reoccurs on multiple days, then increase the holiday count. 9. Tap Save. 10.Tap Done.
The Create Special Event page appears. 11.Tap Set Event.
Event list page for the set date appears. You can add a maximum of four special events for the particular date.
Figure 114 Date page for special events

12.Tap an Unoccupied cell. The Create Event page appears.
Figure 115 Create Event page

13.Tap the clock icon for Start. 14.Set the special event start time and then tap CONFIRM. 15.Tap the clock for End. 16.Set the special event end time and then tap CONFIRM.
31-00400M-02 | Rev 05-21

127

6 - SCHEDULING
17. Tap Occupied or Standby based on your requirement. 18.Tap SAVE.
The created special event appears under the special event date page. 19. Tap Save. 20.Tap Done. You have created a special event.
To delete a special event 1. On the special event page, tap a special event. A confirmation message appears. 2. Tap DELETE. The special event is deleted.

128

31-00400M-02 | Rev 05-21

Honeywell Building Technologies Honeywell 715 Peachtree Street NE Atlanta, GA 30308 customer.honeywell.com buildingcontrols.honeywell.com

® U.S. Registered Trademark © 2021 Honeywell International Inc. 31-00400M-02 | Rev 05-21


References

Adobe PDF Library 15.0