VDS C2 Oscilloscope Software - User Help V1.3.5
File info: application/pdf · 48 pages · 2.58MB
VDS C2 Oscilloscope Software - User Help V1.3.5
Oscilloscope Software Model MP720016 and MP720017
Keep ventilation in good condition: Refer to the user manual for detail installation instructions in order to fix this product correctly and provide it with good ventilation conditions. Do not operate in a humid environ…
Operating Instructions (2.58MB) EN
MP720016 US - Multicomp Pro - PC USB Oscilloscope, Multicomp Pro PC Oscilloscopes, 2 Analogue
Full PDF Document

If the inline viewer fails, it will open the original document in compatibility mode automatically. You can also open the file directly.
Extracted Text
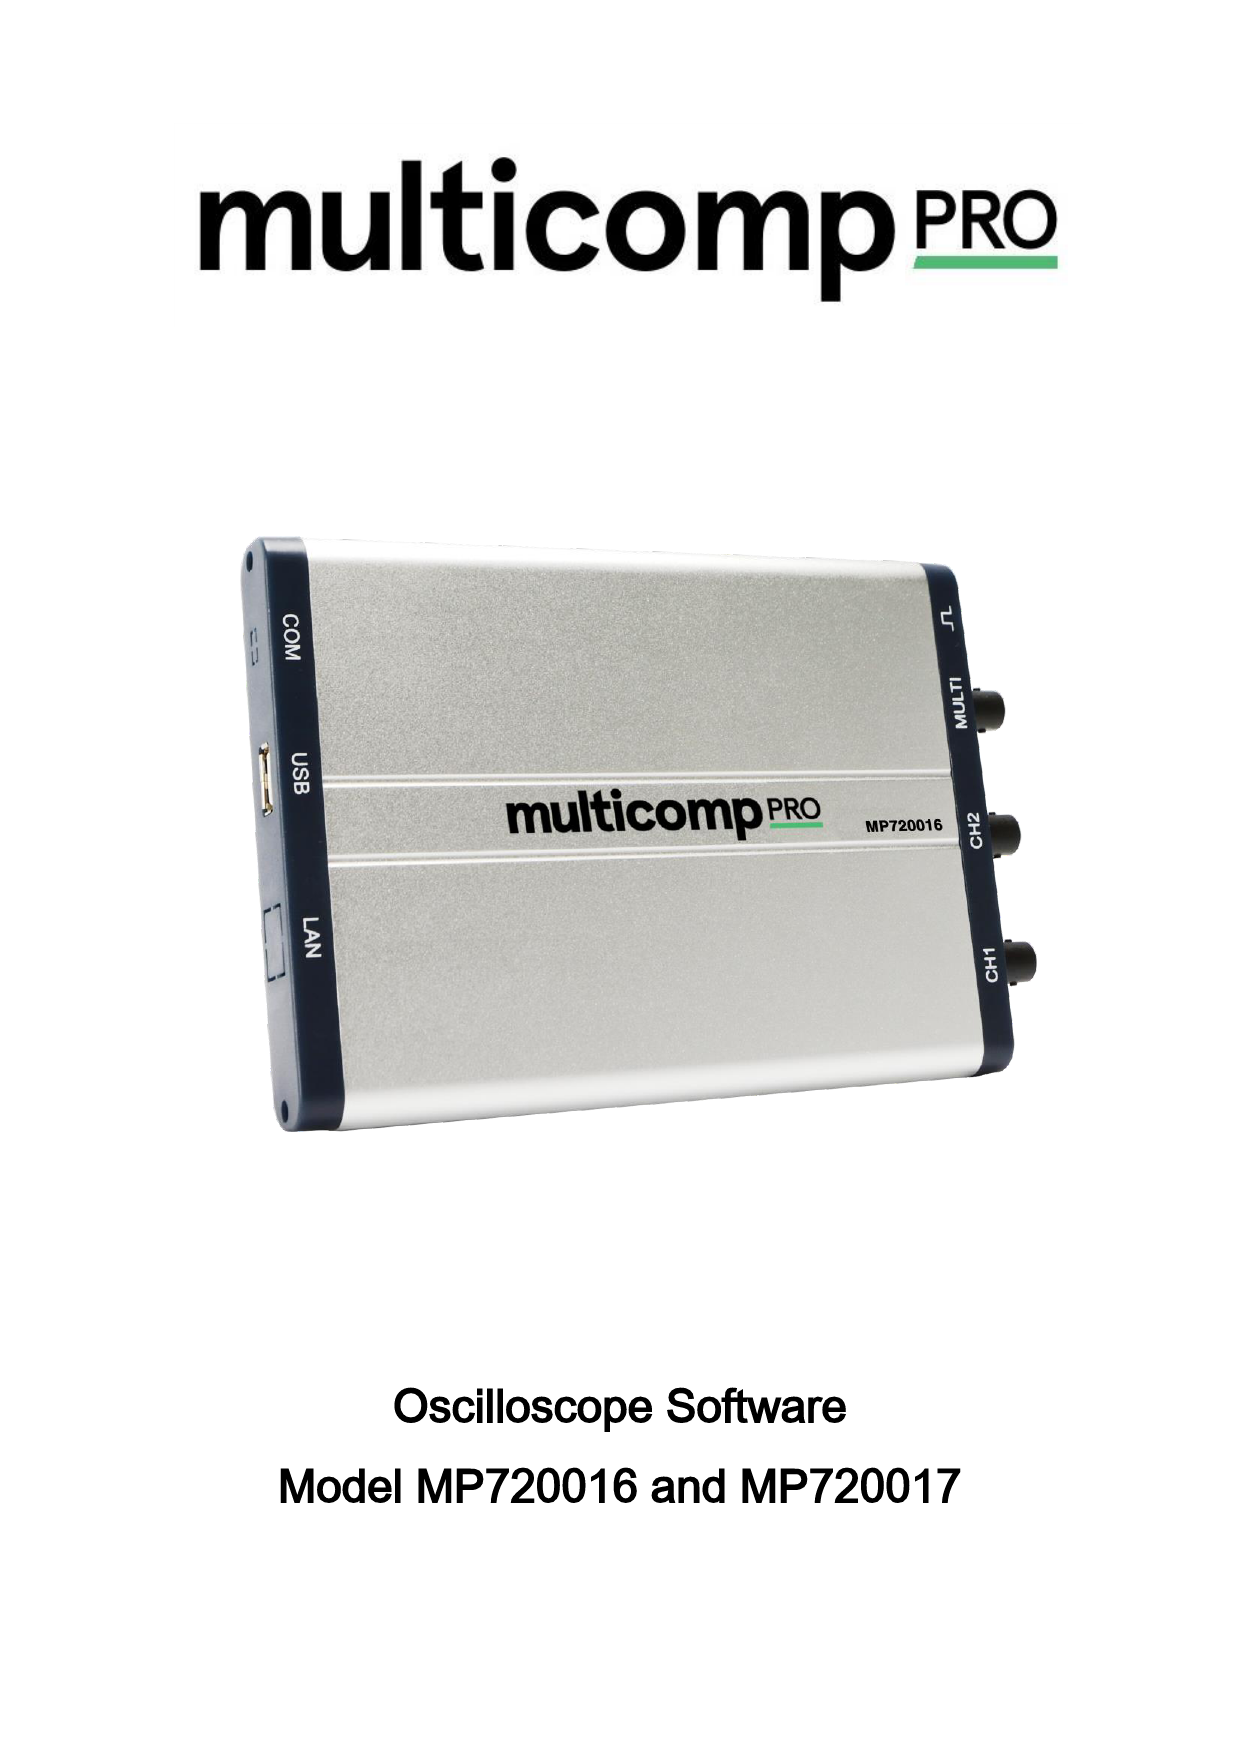
Oscilloscope Software Model MP720016 and MP720017

Oscilloscope Software Help
Welcome to Multicomp Pro Oscilloscope software.
The supplied accessories of the oscilloscope include a Quick Guide. The Quick Guide of the oscilloscope and the following helps are for your reference.
Minimum PC Requirements Processor: Pentium(R) 4 2.4 GHz Memory: 1 GB Disk space: 1 GB minimum
Recommended PC Requirements Processor: Pentium(R) Dual-Core 2.4 GHz Memory: 2 GB Disk space: 1 GB minimum
Other Requirements Operating system: Windows 10(32-bit & 64-bit), Windows 8(32-bit & 64-bit), Windows 7(32-bit & 64-bit), Windows Vista(32-bit & 64-bit), Windows XP(32-bit & 64-bit) Ports: USB 2.0 Display Resolution: 1024 x 768
Ports Introduction

Figure: Ports of the Oscilloscope
1. USB port: Supply power by PC USB or the adapter; communicate with PC 2. Probe Compensation: Measurement signal (5 V/1 kHz) output 3. MULTI port: EXT trigger input, trigger output or Pass/Fail output 4. Signal input of Channel 2 5. Signal input of Channel 1
General Safety Requirements
Before any operations, please read the following safety precautions to avoid any possible bodily injury and prevent this product or any other products connected from damage. In order to avoid any contingent danger, this product is only used within the range specified. Only qualified technicians should perform any maintenance.
Pay attention to the nominal values of all terminals: To avoid fire or electric shock, please keep a watchful eye on all nominal values and marks specified for this product. Before any connection performed on this product, carefully read the user's manual of the product for further information of nominal values. No touch is allowed on bare conductors: When the product is powered on, do not touch any bare joints or parts of the scope meter. Operation is prohibited in case of any undetermined failure: When in doubt any damage on this product, consult the qualified personnel for checking on it. Keep ventilation in good condition: Refer to the user manual for detail installation instructions in order to fix this product correctly and provide it with good ventilation conditions. Do not operate in a humid environment. Do not operate in an explosive environment. Keep clean and dry on the product surface. Incorrect operation or using outside the specification of the equipment, may possibly damage the protection which the equipment provides.

Safety Terms and Symbols
Safety Terms
Terms in this manual. The following terms may appear in this manual:
Warning: Warning indicates the conditions or practices that could result in injury or loss of life.
Caution: Caution indicates the conditions or practices that could result in damage to this product or other property.
Terms on the product. The following terms may appear on this product: Danger: It indicates an injury or hazard may immediately happen. Warning: It indicates an injury or hazard may be accessible potentially. Caution: It indicates a potential damage to the instrument or other property might occur.
Safety Symbols
Symbols on the product. The following symbol may appear on the product:

Hazardous Voltage

Refer to Manual

Protective Earth Terminal

Chassis Ground

Test Ground

I. PC Software USB Driver Install Guide
Use the supplied USB cable to connect the oscilloscope with a PC through their USB ports. Note: If you use a USB cable that is not supplied by us, some problems such as connection error and signal disturbing might occur.
For Windows 10\Windows 8\Windows 7\Windows Vista
During the whole installation, please assure that the device is running well and plugged into PC from USB. Right click [Computer], you can find it on the desktop, or in [Start] menu.

In the pop up menu, click [Manage] and it will open a window named "Computer Management", as follow, in the left side click [Device Manager], it will show a devices tree in the middle, and then click the last one button "Scan for hardware changes" in tool bar as follow, and if the device is running well and plugged into PC, computer will detect an unknown device with a "!" icon.
Right click the unknown device icon, in the pop up menu click [Update Driver Software...].
In the open window, select [Browse my computer for driver software].

The next window, select a directory path for the driver software location "USBDRV\win10_win8_win7_vista", and click "Next". The system is installing driver software for you, as follow:

And finish. Now a successful installation window opens with information "Windows has successfully updated your driver software".
Close the window, have a look at the "Computer Management" window, you will find a device under [LibUSB-Win32 Devices], it should be like this:

Now the USB driver will work.
For Windows XP\Windows 2000
Notice: for both x86 and x64. Plug into the running well device to open [Found New Hardware Wizard] dialog.
Or you can right click [My Computer] and select [Manage], in the left area of opened [Computer Management] select [Device Manager] , double click the item [USB Device] with "?" in the middle area to open the Wizard.

In the Wizard, select [No, not this time]. Select [Install from a list or specific location(Advanced)].

Select [Search for the best driver in these locations.] , then select [Include this location in the search] and indicate a directory location for USB driver which is named as "USBDRV\win_xp" and under the directory where you installed the program at.
Then the installation is running.

And complete. And prompt as installed.

And show installed in [Device Management].
Now you can use the program and use if for USB communication. If there is an early version of USB driver in your computer, you could try running "reinstall.bat" to fix, the file is under the directory of "USBDRV".

II. User Interface

1. Waveform Display Area

2. Display status, click to choose "Disconnect" or "Install USB Driver". Refer to the instruction of the status after this list.

3. The red pointer indicates the horizontal position for the trigger 4. The pointer indicates the trigger position in the internal memory 5. Measure time with cursors 6. The two yellow dotted lines indicate the size of the viewing expanded window 7. Auto set, see 15.How to Use Executive Buttons

8. Run/Stop, see 15.How to Use Executive Buttons 9. Single Trigger, see 15.How to Use Executive Buttons

10. Back to Home menu 11. Hide the menu 12. Measure voltage with cursors

13. The red pointer shows the trigger level position for CH1 (yellow for CH2). It can be dragged up and down.

14. Function menu, click menu.

to show/hide. Click the icons on the left to enter the corresponding

15. Shortcut icon of resetting to factory settings, see "Default"

Shortcut icon of exporting waveform, see "Pause&Export"

Switch Three View/One View. In the Three View display mode, the left top is XY mode widow, the right top is FFT window.

Show/hide Function menu

16. Trigger window, see 4.How to Set the Trigger System
17. Sample and Period window, see 3.How to Set the Horizontal System
18/19. Channel window of CH2 and CH1, see 2.How to Set the Vertical System
20. Display the measured type and value of the corresponding channel, see 6.How to Measure Automatically
21. Cursor measure window, see 8.How to Measure with Cursors
22/23. The yellow pointer shows the grounding datum point (zero point position) of the CH2 waveform. If the pointer is not displayed, it means that this channel is turned off. (Red pointer is for CH1)
24. Waveform of CH1
Keyboard Shortcuts F5: Run/Stop Ctrl + Enter: AutoSet Q: The voltage division of Channel 1 decreases one
level A: The voltage division of Channel 1 increases one level W: The voltage division of Channel 2 decreases one
level S: The voltage division of Channel 2 increases one level : Time base decreases one level : Time base increases one level F1: Open this help document

Instruction of the status information

Auto Ready Trig'd Scan Stop Error ReSyncing AutoSet

Automatic trigger mode Ready for a trigger Has trigged Slow scan Data acquisition stopped Error occurred Synchronize with the oscilloscope again In process of auto setting

The statuses of not staying connected with the oscilloscope:

Offline USBFound USBDrvErr MachineNotSupport

No connection with the oscilloscope Find available USB devices USB drivers installed error Can not recognize the device

The statuses in the process of connecting with the oscilloscope:

Linking Connect Match Syncing

Being connecting with the oscilloscope connect successfully Matching the model Sync the settings

III. Operations Instruction
Relevant operations of this software.

1.How to Set the Probe Attenuation Coefficient

The probe has several attenuation coefficients, which will influence the vertical scale factor of the oscilloscope. To change or check the probe attenuation coefficient in the menu of oscilloscope:

(1) Click

to show the function menu, choose "Channel".

(2) Click to select the channel that the probe connects with (CH1 or CH2).

(3) Set "Probe Rate" to the proper value corresponding to the probe.

This setting will be valid all the time before it is changed again.

Caution:
The default attenuation coefficient of the probe in the software is preset to X10. Make sure that the set value of the attenuation switch in the probe is the same as the menu selection of the probe attenuation coefficient in the software.

The set values of the probe switch are 1X and 10X.

Figure: Attenuation Switch Caution: When the attenuation switch is set to X1, the probe will limit the bandwidth of the oscilloscope in 5MHz. To use the full bandwidth of the oscilloscope, the switch must be set to X10.
2.How to Set the Vertical System
You can set the corresponding parameters of vertical system in the Channel window (18/19 in II. User Interface).

In the voltage division list, you can select the proper value.
You can set the zero point position through the control bar to regulate of the vertical display position of the signal. You can also drag the zero point position pointer (22, 23 in II. User Interface).
Drag the slider up to increase, down to decrease; the further from the center, the higher the changing speed is.
Keyboard Shortcuts Q: The voltage division of Channel 1 decreases one level A: The voltage division of Channel 1 increases one level W: The voltage division of Channel 2 decreases one level S: The voltage division of Channel 2 increases one level
Cymometer
It is a 6-digit cymometer. The cymometer can measure frequencies from 2Hz to the full bandwidth. Only if the measured channel has triggering signal and in Edge mode, it can measure frequency correctly. In the Single trigger mode, it is a one channel cymometer and it can only measure the frequency of the triggering channel. In the ALT trigger mode, it is a two channel cymometer and it can measure the frequency of two channels.

3.How to Set the Horizontal System
You can set the corresponding parameters of horizontal system in the Capture&period window (17 in II. User Interface).
You can use Horizontal Trigger Position control bar to adjust the horizontal position of the signal in the waveform window. You can also drag the red pointer to adjust it (3 in II. User Interface).

The further from the center, the higher the changing speed is.
Keyboard Shortcuts : Time base decreases one level : Time base increases one level
See also: 11.How to zoom the waveform
4.How to Set the Trigger System
Trigger determines when VDS starts to acquire data and display waveform. Once trigger is set correctly, it can convert the unstable display to meaningful waveform.
When VDS starts to acquire data, it will collect enough data to draw waveform on left of trigger point. VDS continues to acquire data while waiting for trigger condition to occur. Once it detects a trigger it will acquire enough data continuously to draw the waveform on right of trigger point.

Click

to show Function menu, choose "Trigger".

You can also click

in the right bottom window to show it.

Trigger Control
The oscilloscope provides two trigger types: single trigger and alternate trigger.
Single trigger: Use a trigger level to capture stable waveforms in two channels simultaneously.
Alternate trigger: Trigger on non-synchronized signals.
The Single Trigger and Alternate Trigger menus are described respectively as follows:
Single trigger
1. In Trigger menu, choose "Single" (the chosen label has a mark). 2. Choose Source. 3. Choose Mode. (Note: CH2 does not support Video trigger mode. ) Single trigger has four modes: edge trigger, video trigger, slope trigger and pulse trigger. Edge Trigger: It occurs when the trigger input passes through a specified voltage level with the specified
slope. Video Trigger (only support CH1): Trigger on fields or lines for standard video signal.
Slope Trigger: The oscilloscope begins to trigger according to the signal rising or falling speed. Pulse Trigger: Find pulses with certain widths. The four trigger modes in Single Trigger are described respectively as follows:
Edge Trigger
Choose Mode as "Edge". An edge trigger occurs on trigger threshold value of input signal. Select Edge trigger mode to trigger on rising edge or falling edge.
Set in Trigger menu: (1) Choose "Rise" to trigger on rising edge.
Choose "Fall" to trigger on falling edge. (2) Click the voltage value after "Trigger" to show slider bar. You can also drag "13. Trigger point" in
II. User Interface .

(3) Choose Trig Mode. Auto: Acquire waveform even no trigger occurs. Normal: Acquire waveform when trigger occurs. Single: When trigger occurs, acquire one waveform then stop.
(4) Set Hold Off: When trigger occurs, acquire one waveform then stop (100 ns - 10 s). Setting method: "+", "++", "+++" is the position of digit that will be changed. "+" represents the last digit, "++" represents the middle digit, "+++" represents the first digit. Eg. When "+" is chosen, click , the last digit will be increased by 1. Click "Reset" to set Holdoff time as default value (100ns).
Set in Trigger window:
Force: Force to create a trigger signal and the function is mainly used in "Normal" and "Single" mode.
Video Trigger (only support CH1)
Choose Mode as "Video" to trigger on fields or lines of NTSC, PAL or SECAM standard video signals. (1) Select video modulation: NTSC, PAL or SECAM. (2) Set trigger synchronization: Line, Field, Odd filed, Even filed or Line Number. When "Line
Number" is selected, you can set the line number.
(3) Set Hold Off. About the setting method, refer to Edge Trigger.
Slope Trigger
Choose Mode as "Slope" to set the oscilloscope as the positive/negative slope trigger within the specified time. (1) Select slope condition. (2) Set slope time. (3) Set the High level upper limit and Low level lower limit.
(4) Set Trig Mode and Hold Off. About the setting method, refer to Edge Trigger.
Slew rate = (High level - Low level) / Settings

Pulse Width Trigger
Choose Mode as "Pulse". Pulse trigger occurs according to the width of pulse. The abnormal signals can be detected through setting up the pulse width condition. (1) Select pulse width condition and set time. (2) Set trigger level.
(3) Set Trig Mode and Hold Off. About the setting method, refer to Edge Trigger.
Alternate trigger
Trigger signal comes from two vertical channels when alternate trigger is on. This mode is used to observe two unrelated signals. You can choose different trigger modes for different channels.
Set in Trigger menu: 1. In Trigger menu, choose "Alternate" (the chosen label has a mark). 2. Choose Source. 3. Choose Mode. (Note: CH2 does not support Video trigger mode. )
About the setting method of Mode and parameters, refer to Single trigger.
Set in Trigger window:

Instruction of Trigger mode icon in Trigger window:

Rise in Edge mode Synchronic trigger in video line Synchronic trigger in video odd filed Rising in Slope +Pulse Width

Fall in Edge mode Synchronic trigger in video field Synchronic trigger in video even field Falling in Slope -Pulse Width

5.How to Set the Channels

Click

to show Function menu, choose "Channel". You can also click or in the Channel

window on the left bottom.

To turn on/off channels
Click to choose "CH1" or "CH2", check "On" to turn on the channel, uncheck it to turn off. You can also click the channel switch in Channel window in left bottom. See figure below.
To invert a waveform
Waveform inverted: the displayed signal is turned 180 degrees against the phase of the earth potential. Click to choose "CH1" or "CH2", check "Invert" to invert the waveform, uncheck it to display normally.
To set channel coupling
DC: Pass both AC and DC components of the input signal. AC: Block the DC component of the input signal. Ground: Disconnect the input signal. You can also click the coupling mode to switch it. See figure below.
To adjust the probe attenuation
For correct measurements, the attenuation coefficient settings in the operating menu of the Channel should always match what is on the probe (see 1.How to Set the Probe Attenuation Coefficient ). If the attenuation coefficient of the probe is 1:1, the menu setting of the input channel should be set to X1.
Some operations could be done in Channel window:

6.How to Measure Automatically

Click

to show Function menu, choose "Measure".

When you move the mouse over the area of measurement results, icon to show/hide the Measure menu.

will appear on the left. Click this

Automatic measurement works under this function. Totally twenty kinds of measurements. At most 8 types of measurements could be displayed on the bottom left of the screen. The oscilloscopes provide 20 parameters for auto measurement, including Vpp, Vmax, Vmin, Vtop, Vbase, Vamp, Vavg, Vrms,
Overshoot, Preshoot, Freq, Period, Rise Time, Fall Time, Delay AB , Delay AB ,+Width, -Width, +Duty, -Duty.

Show All: Choose channel from the list on the right side of "Show All", a pop-up window will show all the measurement values.

Add measurement: Check the channel and measurement type. Measurement results display on the bottom left. You can add 8 types at most for each channel. If 8 types are exceeded, the former option will be canceled. The measured values of two channels can be displayed simultaneously.

Remove measurement: Uncheck the measurement type to remove it. Click "Remove All" to remove all measurements.

The automatic measurement of voltage parameters
The oscilloscopes provide automatic voltage measurements including Vpp, Vmax, Vmin, Vavg, Vamp, Vrms, Vtop, Vbase, Overshoot and Preshoot. Figure below shows a pulse with some of the voltage measurement points.
Vpp: Peak-to-Peak Voltage. Vmax: The maximum amplitude. The most positive peak voltage measured over the entire waveform. Vmin: The minimum amplitude. The most negative peak voltage measured over the entire waveform. Vamp: Voltage between Vtop and Vbase of a waveform. Vtop: Voltage of the waveform's flat top, useful for square/pulse waveforms. Vbase: Voltage of the waveform's flat base, useful for square/pulse waveforms. Overshoot: Defined as (Vmax-Vtop)/Vamp, useful for square and pulse waveforms. Preshoot: Defined as (Vmin-Vbase)/Vamp, useful for square and pulse waveforms. Average: The arithmetic mean over the entire waveform. Vrms: The true Root Mean Square voltage over the entire waveform.
The automatic measurement of time parameters
The oscilloscopes provide time parameters auto-measurements include Frequency, Period, Rise Time, Fall Time, +Width, -Width, Delay 12 , Delay 12 , +Duty and -Duty. Figure shows a pulse with some of the time measurement points.

Rise Time: Time that the leading edge of the first pulse in the waveform takes to rise from 10% to 90% of its amplitude.
Fall Time: Time that the falling edge of the first pulse in the waveform takes to fall from 90% to 10% of its amplitude.
+Width: The width of the first positive pulse in 50% amplitude points. -Width: The width of the first negative pulse in the 50% amplitude points.
Delay 12 : The delay between the two channels at the rising edge.
Delay 12 : The delay between the two channels at the falling edge. +Duty: +Duty Cycle, defined as +Width/Period. -Duty:-Duty Cycle, defined as -Width/Period.

7.How to Implement Sampling Setup

Click

to show Function menu, choose "Sampling" to set sampling mode.

Sampling Mode Sampling Peak Detect
Average

Description
Normal sampling mode.
Use to capture maximal and minimal samples. Finding highest and lowest points over adjacent intervals. It is used for the detection of the jamming burr and the possibility of reducing the confusion.
It is used to reduce the random and don't-care noises, with the editable number (1 number 128) of averages.

Figure: Normal sampling mode display, in which no burr can be detected.

Figure: Peak Detect mode, under which the burrs on the falling edge of the square wave, can be detected and the noise is heavy.
Figure: The displayed waveform after the noise is removed under the Average Mode, in which the average number of 16 is set.

8.How to Measure with Cursors

Click

to show Function menu, choose "Mark Cursor".

When the Mark Cursor function is disabled, click on the left of the Waveform Display Area to show/hide the Mark Cursor menu.
Normal mode
1. Choose source: choose the channel to be measured by cursors between CH1 and CH2. 2. Check measurement type: choose either Time cursor measurement or Voltage cursor measurement,or both.
Time cursor measurement: Tick on "Time" option, then two light red lines display along the vertical direction of the screen, which represent Cursor 1 and Cursor 2. Place the mouse pointer over Cursor 1 or Cursor 2, drag after the mouse pointer changing to , adjust the positions of Cursor 1 and Cursor 2 according to the waveform to be measured. The cursor increment window at the left bottom shows current time of the two cursors, absolute time difference of the two cursors and frequency. (See figure below)

Voltage cursor measurement: Tick on "Voltage" option, then two light red lines which represent Cursor 1 and Cursor 2 display along the horizontal direction. Place the mouse pointer over Cursor 1 or Cursor 2, drag after the mouse pointer changing to , adjust the position of Cursor 1 and Cursor 2 according to the waveform to be measured. The cursor increment window on the bottom left shows current position of the two cursors, absolute voltage amplitude difference of the two cursors and frequency. (See Figure below)
The cursor measurement for FFT mode
Check measurement type: choose either Amplitude Measurement or Frequency Measurement at the mode of FFT, or both at the same time. Frequency Measurement: Tick on "Frequency", enter Home page->Math->FFT, then two light red lines represent Cursor 1 and Cursor 2 show along the vertical direction on FFT window. Place the mouse cursor on Cursor 1 or Cursor 2, drag after the mouse shape changing to , adjust the position of Cursor 1 and Cursor 2 according to the waveform to be measured. The cursor increment window on the bottom left of FFT window shows current frequency of the two cursors, absolute frequency difference of the two cursors. (See figure below)

Vamp Measurement: Tick on "Amplitude", enter Home page->Math->FFT, then two light red lines represent Cursor 1 and Cursor 2 show along the horizontal direction on FFT window.
Place the mouse cursor on Cursor 1 or Cursor 2, drag after the mouse shape changing to , adjust the position of Cursor 1 and Cursor 2 according to the waveform to be measured. The cursor increment window on the bottom left of FFT window shows current position of the two cursors, absolute voltage amplitude difference of the two cursors. (See figure below)

9.How to Set the Display System

Click

to show Function menu, choose "Display".

Display Type
Click the button to choose the display type (the chosen button has a mark). Vector: The space between the adjacent sampling points in the display is filled with the vector form. Dots: Only the sampling points are displayed.
Figure: Display in the Vector Form

Figure: Display in the Dots Form
XY Mode
Check "XY Mode", the user interface is switched into Three View mode. Choose the first channel and the second channel. In XY mode widow, the first channel is displayed in the horizontal axis and the second in the vertical axis.
Persistence
When the Persistence function is used, the persistence display effect of the picture tube oscilloscope can be simulated. The reserved original data is displayed in fade color and the new data is in bright color.
Different persistence time can be chosen: Off, 0.5 second, 1second, 2seconds, 5seconds and Infinite. When the "Infinite" option is set, the measuring points will be stored till the controlling value is changed. Click "Clear" button, the persistence will be cleared.
Note: If the time base, voltage division is changed, or the channel is turned off/on, the persistence will be cleared automatically and record the updated waveform.
Grid Brightness
Drag slider to adjust the brightness of grid in the Waveform Display Area.
10.Use Mathematical Manipulation Function
The Mathematical Manipulation function is used to show the results of the addition, multiplication, division and subtraction operations between Channel 1 and Channel 2, and the FFT operation of Channel 1 or Channel 2.

Math of dual waveform

1. Turn on CH1 and CH2.

2. Click

to show Function menu, choose "Math". Check "Math".

3. Choose the factors and operator. Select the voltage division of M. The software transforms the waveform

data of the two factors into selected voltage division of M and calculates. The green calculated waveform

M is displayed in the screen.

Using FFT function
The FFT (fast Fourier transform) math function mathematically converts a time-domain waveform into its frequency components. It is very useful for analyzing the input signal on Oscilloscope. You can match these frequencies with known system frequencies, such as system clocks, oscillators, or power supplies.

FFT function in this oscilloscope transforms 2048 data points of the time-domain signal into its frequency components mathematically and the final frequency contains 1024 points ranging from 0Hz to Nyquist frequency.

Taking the FFT operation for example, the operation steps are as follows:

1. Click

to show Function menu, choose "Math". Check "FFT". The user interface is switched into

Three View mode.

2. Set "Channel", "Window", "Format", "Scale", "Frequency Base".

3. You can drag anywhere in FFT window to move the signal up and down and side to side.

To select the FFT window
There are four FFT windows. Each one has trade-offs between frequency resolution and magnitude accuracy. What you want to measure and your source signal characteristics help you to determine which window to use. Use the following guidelines to select the best window.

Type Hamming
Rectangle Blackman

Characteristics
Better solution for magnitude than Rectangle, and good for frequency as well. It has slightly better frequency resolution than Hanning. Recommend to use for: Sine, periodic and narrow band random noise. Transients or bursts where the signal levels
before and after the event are significantly different.
Best solution for frequency, worst for magnitude. Best type for measuring the frequency spectrum of non-repetitive signals and measuring frequency components near DC. Recommend to use for: Transients or bursts, the signal level before and
after the event are nearly equal. Equal-amplitude sine waves with frequencies
those are very close. Broadband random noise with a relatively slow
varying spectrum.
Best solution for magnitude, worst for frequency. Recommend to use for: Single frequency waveforms, to find higher order

Window

Hanning

harmonics.
Good for magnitude, but poorer frequency resolution than Hamming. Recommend to use for: Sine, periodic and narrow band random noise. Transients or bursts where the signal levels
before and after the event are significantly different.

The figures below are examples for measuring sine wave with a frequency of 1 kHz under the selection of four different windows for FFT:

Figure: Hamming window

Figure: Rectangle window

Figure: Blackman window
Figure: Hanning window
Notes for using FFT Select "Scale" to magnify the FFT waveform if necessary. Use the default dB scale for details of multiple frequencies, even if they have very different amplitudes.
Use the Vrms scale to compare frequencies. DC component or offset can cause incorrect magnitude values of FFT waveform. To minimize the DC
component, choose AC Coupling on the source signal. To reduce random noise and aliased components in repetitive or single-shot events, set the oscilloscope
acquisition mode to average. What is Nyquist frequency? The Nyquist frequency is the highest frequency that any real-time digitizing oscilloscope can acquire without aliasing. This frequency is half of the sample rate. Frequencies above the Nyquist frequency will be under sampled, which causes aliasing. So pay more attention to the relation between the frequency being sampled and measured. Note In FFT mode, only support to set coupling, voltage division and zero position in Channel window, other operations are prohibited. If you want to enter other menus, uncheck "FFT" first.

11.How to zoom the waveform

Click

to show Function menu, choose "Horizontal".

Main Time Base
The setting of the horizontal main time base is used to display the waveform.

Assist Set
A window area is defined by two cursors, which will be expanded to the full screen size in Window Expansion.

Choose W value from the combo box to adjust the size of this window area. Click slider bar. You can adjust the horizontal position of the area in main window by it.

to show the

Note: In Assist Set status, the time base and horizontal trigger position can not be set.

Window Expansion
Click "Zoom", the window area defined by two cursors will be expanded to the full screen size. You can adjust the time base W and horizontal trigger position Tw of zoom window in the menu. You can also drag the red pointer to adjust the horizontal trigger position (3 in II. User Interface).
You can also switch and set in Capture&period window as shown in the below.

12.How to do Pass/Fail test

The Pass/Fail function monitors changes of signals and output pass or fail signals by comparing the input signal that is within the pre-defined mask.

Click

to show Function menu, choose "Pass/Fail".

Detect whether the input signal is within the limits of the rule, if it exceeds limits of the rule, it is "Fail"; otherwise it is "Pass". Also it can output fail or pass signal by built-in and configurable output port.

To run the test, read the following steps: 1. Choose channel: Options include CH1,CH2 and Math
2. Set horizontal tolerance and vertical tolerance. You can adjust by

or input directly.

3. Click "Create Rule". 4. Set output type: Choose "Pass" or "Fail". Check or uncheck "Ring", "Message Show" and "Stop Once" as
needed. Ring: The bell rings when it meets the rule. Stop Once: Stop once it meets the rule. Message Show: Display the counting message on the left top. 5. Enable switch on: Click "Enable". 6. Begin to test: Click "Run". 7. Stop testing: Click "Stop".

Save rule Save: Save current rule. Use: Load the selected rule in the list as the testing rule. Remove: Remove the selected rule in the list.

13.How to Record and Play a Waveform

Wave Record function can record the input current wave. You can set the interval between recorded frames and get better analysis effect with playback and storage function. The limit of the saved file size is 4000M. It will save the initial trig status, the time base, voltage division, horizontal trigger position and zero position of each frame during recording.

Click

to show Function menu, choose "Record".

Record
1. Choose "Record" tab on the top (the chosen button has a mark). 2. Click "Preset Save Path" to specify the save location. Waveform files have the suffix ".cap". 3. Set "Interval Time" and "End Frame". Interval Time refers to the interval between recorded frames.
Interval Time ranges from 0 to 100000ms and increment by 10ms. 4. Make the waveform in Run status. 5. Click "Begin Record". Counter starts to count the frame number. 6. Click "End Record" to stop recording, or wait until the Counter reaches the End Frame. Note: 1.Waveforms of two channels can be recorded simultaneously. 2.You can turn on/off the channels while recording. Only channels turned on can be recorded. If a channel is
turned off while recording, there will be no waveform of this channel after the frame when stopped.
Replay the waveform recorded

1. Choose "Play" tab on the top (the chosen button has a mark). 2. Click "From..." to choose the waveform file to be replayed. 3. Set the start frame "Sta" and end frame "End". 4. Set Interval Time for replaying. 5. Check "Cycle" to play back the waveform in a loop. Uncheck it to replay just once. 6. Click "Play". "Numbers" shows the current frame number that is replayed. 7. Click "Pause" to pause it. 8. Drag slider to display the frame you need.
Note: 1. If the software is in Run status, playing back will make the current acquisition stopped. 2. When replaying, entering other menu items will make the replay paused.

14.How to Implement the Utility setting

Click

to show Function menu, choose "Utility".

Language
Choose the desired language.
Skin
Choose Black or Blue for interface skin. Then "Restart" button will appear. After clicking it, the software will be closed and restarted to apply the new skin.
Open File
Choose BIN waveform file saved and open it, or just drag the file into the software interface to open it.
Print Preview
Click to open the Print Preview Window.
Instruction of the menu items in Print Preview Window:
File  Page Set: Set the page margins Print: Enter printing window Exit: Close the Print Preview Window

View Page Transform: Switch the page orientation between landscape and portrait Whole page: Display the full page on the screen Face size: Display in actual size Default Scale... : Display in a specified zoom factor Show Wave Background: Check to display wave background colour; uncheck to display preview paper background Set Preview Page Background: Click to display colour picker dialog box to set the colour of preview page background
Save Image
Click to save screen shot as an image file in png, bmp or gif format.
Save/Refer
This function allows to store 8 reference waveforms. These waveforms can be displayed with the current waveform simultaneously. The recalled waveform can't be adjusted. The source can be CH1, CH2 or Math. To save the waveform of CH1 into object "a" and recall it, the steps are as follows: 1. Choose CH1 as source. 2. Choose "To Object" as "a". 3. Fill in "Object Rename", such as "sine". Click "OK". The object name is renamed as "a(sine)". This step
can be skipped. 4. Click "save". 5. Select "a(sine)" from the list, tick "Show", the reference waveform will appear on the screen. The object
name and relevant information will be displayed on the top left. You can continue to choose another reference waveform to display. Click "Remove all" to clear all reference waveforms on the screen. If the chosen object has no stored waveform, it will display "No Saved" below.

Pause&Export
Export the waveform into a file in specified format. You can choose bin, txt, csv, xls as the format. You can

also click

icon on the user interface to save it in the format specified in menu.

Self Cal
The self-calibration can make the oscilloscope reach the optimum condition rapidly to obtain the most accurate measurement value. You can carry out this application program at any time. This program must be executed whenever the change of ambient temperature is 5 or over. Before performing a self-calibration, disconnect all probes or wires from the input connector. After everything is ready, click "Self Cal".
Default

Click "Default" to call out the factory settings. You can also click

icon on the user interface.

Help
Open this help document. You can press F1 as shortcut key.

Tips Window
Choose a label among "Channel", "Capture&Period" or "Trigger" to view the guide for the new users. Click anywhere in the help window to turn page. If you do not want to display the guide automatically when running the software, check "Don't show again".
About
Display Version, Serial Number and Company website. Press "Update" button to detect update program on server.

MULTI
Control the function of the port 3 in Ports of the Oscilloscope. Trigger In: Input the trigger signal synchronously Trigger Out: Output the trigger signal synchronously Pass/Fail: Output high level when pass, output low level when fail.

15.How to Use Executive Buttons

Executive Buttons include AutoSet , Run/Stop / , Single Trigger . See 7, 8, 9 in II. User Interface.
AutoSet:
It's a very useful and quick way to apply a set of pre-set functions to the incoming signal, and display the best possible viewing waveform of the signal and also works out some measurements for user as well.

The details of functions applied to the signal when using AutoSet are shown as the following table:

Function Items Setting Acquisition Mode Current

Vertical Coupling DC

Vertical Scale

Adjust to the proper division.

Horizontal Level Middle

Horizontal Sale Adjust to the proper division

Trigger Type Trigger Source Trigger Coupling

Current Show the minimum number of channels. Current

Trigger Slope

Current

Trigger Level Trigger Mode Display Format

Mid-point Setting Edge YT

Run/Stop: Enable or disable sampling on input signals.
Single Trigger: You can set the trigger mode as single directly, so when trigger occurs, acquire one
waveform then stop.
Keyboard Shortcuts Ctrl + Enter: AutoSet F5: Run/Stop

IV. Technical Specifications
Note: "I" indicates the model has the power supply isolation and earth ground isolation between the oscilloscope and PC (optional). The two channels are non-isolated electrically. "L" indicates LAN port (optional).

Unless otherwise specified, the technical specifications applied are for VDS_C2 only, and Probes attenuation set as 10X. Only if the oscilloscope fulfills the following two conditions at first, these specification standards can be reached.
This instrument should run for at least 30 minutes continuously under the specified operating temperature.
If change of the operating temperature is up to or exceeds 5, do the "Self Cal" procedure in Utility menu (see Self Cal).

Performance Characteristics

Instruction

Bandwidth

PM720017

25 MHz

Channel

2 + 1 (*MULTI port)

Acquisition

Mode
Sample rate (real time)

Normal, Peak detect, Averaging

PM720017

100 MS/s

Input coupling

DC, AC , Ground

Input impedance and capacitive reactance

1 M � 2%, in parallel with 15 pF � 5 pF

Probe attenuation factor

1X, 10X, 100X, 1000X

Input

Max. input voltage

PM720016 PM720017

40 V (PK-PK) (DC + AC PK-PK) 400 V (PK-PK) (DC + AC PK-PK)

Channel�channel isolation

50 Hz: 100 : 1 10 MHz: 40 : 1

Time delay between channel(typical)

150 ps

Sampling rate range

PM720017

0.5 S/s - 100 MS/s

Interpolation

(sin x)/x

Record length

Max sampling rate 5k

Horizontal System

Scanning speed (S/div)

5 ns/div - 100 s/div, step by 1 - 2 - 5

Sampling rate / relay time accuracy

� 100 ppm

Interval(T) accuracy
(DC - 100MHz)

Single �(1 interval time+100ppm�reading+0.6ns); Average>16 �(1 interval time +100ppm�reading+0.4ns)

A/D converter

8 bits resolution (2 Channels simultaneously)

Sensitivity

5 mV/div - 5 V/div

Displacement

� 10 div

Analog bandwidth

25 MHz

Vertical system

Single bandwidth Low Frequency

Full bandwidth  5 Hz (at input, AC coupling, -3 dB)

Rise time

PM720017

 14 ns (at input, Typical)

DC accuracy

�3%

DC accuracy (average)

Average16: �(3% rdg + 0.05 div) for V

Waveform inverted ON/OFF

Cursor

V and T between cursors

Measurement

Automatic Waveform Math

Vpp, Vmax, Vmin, Vtop, Vbase, Vamp, Vavg, Vrms, Overshoot, Preshoot, Freq, Period, Rise Time, Fall Time, Delay AB , Delay AB , +Width, -Width, +Duty, -Duty
, , *, / ,FFT

Bandwidth

Lissajous

figure

Phase

difference

Full bandwidth �3 degrees

Communicatio n port

USB

2.0 Full Speed

Multi-function Signal type Interface Level standard

Synchronizing input, Synchronizing output, Pass/Fail output, External trigger input
TTL

*MULTI port refers to trigger in, trigger output or Pass/Fail output.

Trigger:

Performance Characteristics

Instruction

Trigger level range

Internal

�5 div from the screen center

Trigger level

Internal

Accuracy (typical) EXT

�0.3div TTL

Trigger displacement
Trigger Holdoff

According to time base 100 ns - 10 s

Performance Characteristics

Instruction

range

50% level setting

(typical)

Input signal frequency  50 Hz

Edge trigger

slope

Rising, Falling

Pulse trigger Video Trigger

Trigger condition
Pulse Width range
Modulation
Line number range

Positive pulse, ,  Negative pulse, ,
30 ns - 10 s Support standard NTSC, PAL and SECAM broadcast systems
1 - 525 (NTSC) and 1 - 625 (PAL/SECAM)

Slope Trigger

Positive pulse, ,  Trigger condition
Negative pulse, ,

Time setting Trigger on CH1 Alternate Trigger Trigger on CH2

30 ns - 10 s Edge, Pulse, Video, Slope Edge, Pulse, Slope

Output of the Probe Compensator

Performance Characteristics

Instruction

Output Voltage (Typical )

About 5 V, with the Peak-to-Peak voltage 1 M.

Frequency (Typical ) Square wave of 1 kHz

Power

Mains Voltage

5.0 V / 500 mA

Power Consumption < 2.5 W

Environment

Temperature
Relative Humidity Height

Working temperature: 0  - 40  Storage temperature: -20  - 60   90% Operating: 3,000 m

Cooling Method

Non-operating: 15,000 m Natural convection

Mechanical Specifications

Dimension

170 mm � 120 mm � 18 mm (L*W*H)

Weight

About 0.26 kg

Interval Period of Adjustment: One year is recommended for the calibration interval period.

INFORMATION ON WASTE DISPOSAL FOR CONSUMERS OF ELECTRICAL & ELECTRONIC EQUIPMENT.
When this product has reached the end of its life it must be treated as Waste Electrical & Electronics Equipment (WEEE). Any WEEE marked products must not be mixed with general household waste, but kept separate for the treatment, recovery and recycling of the materials used. Contact your local authority for details of recycling schemes in your area.
Made in China LS12 2EN