ASTRO Gaming A20 Wireless Headset Setup
This guide provides a visual overview of setting up your ASTRO Gaming A20 Wireless headset.
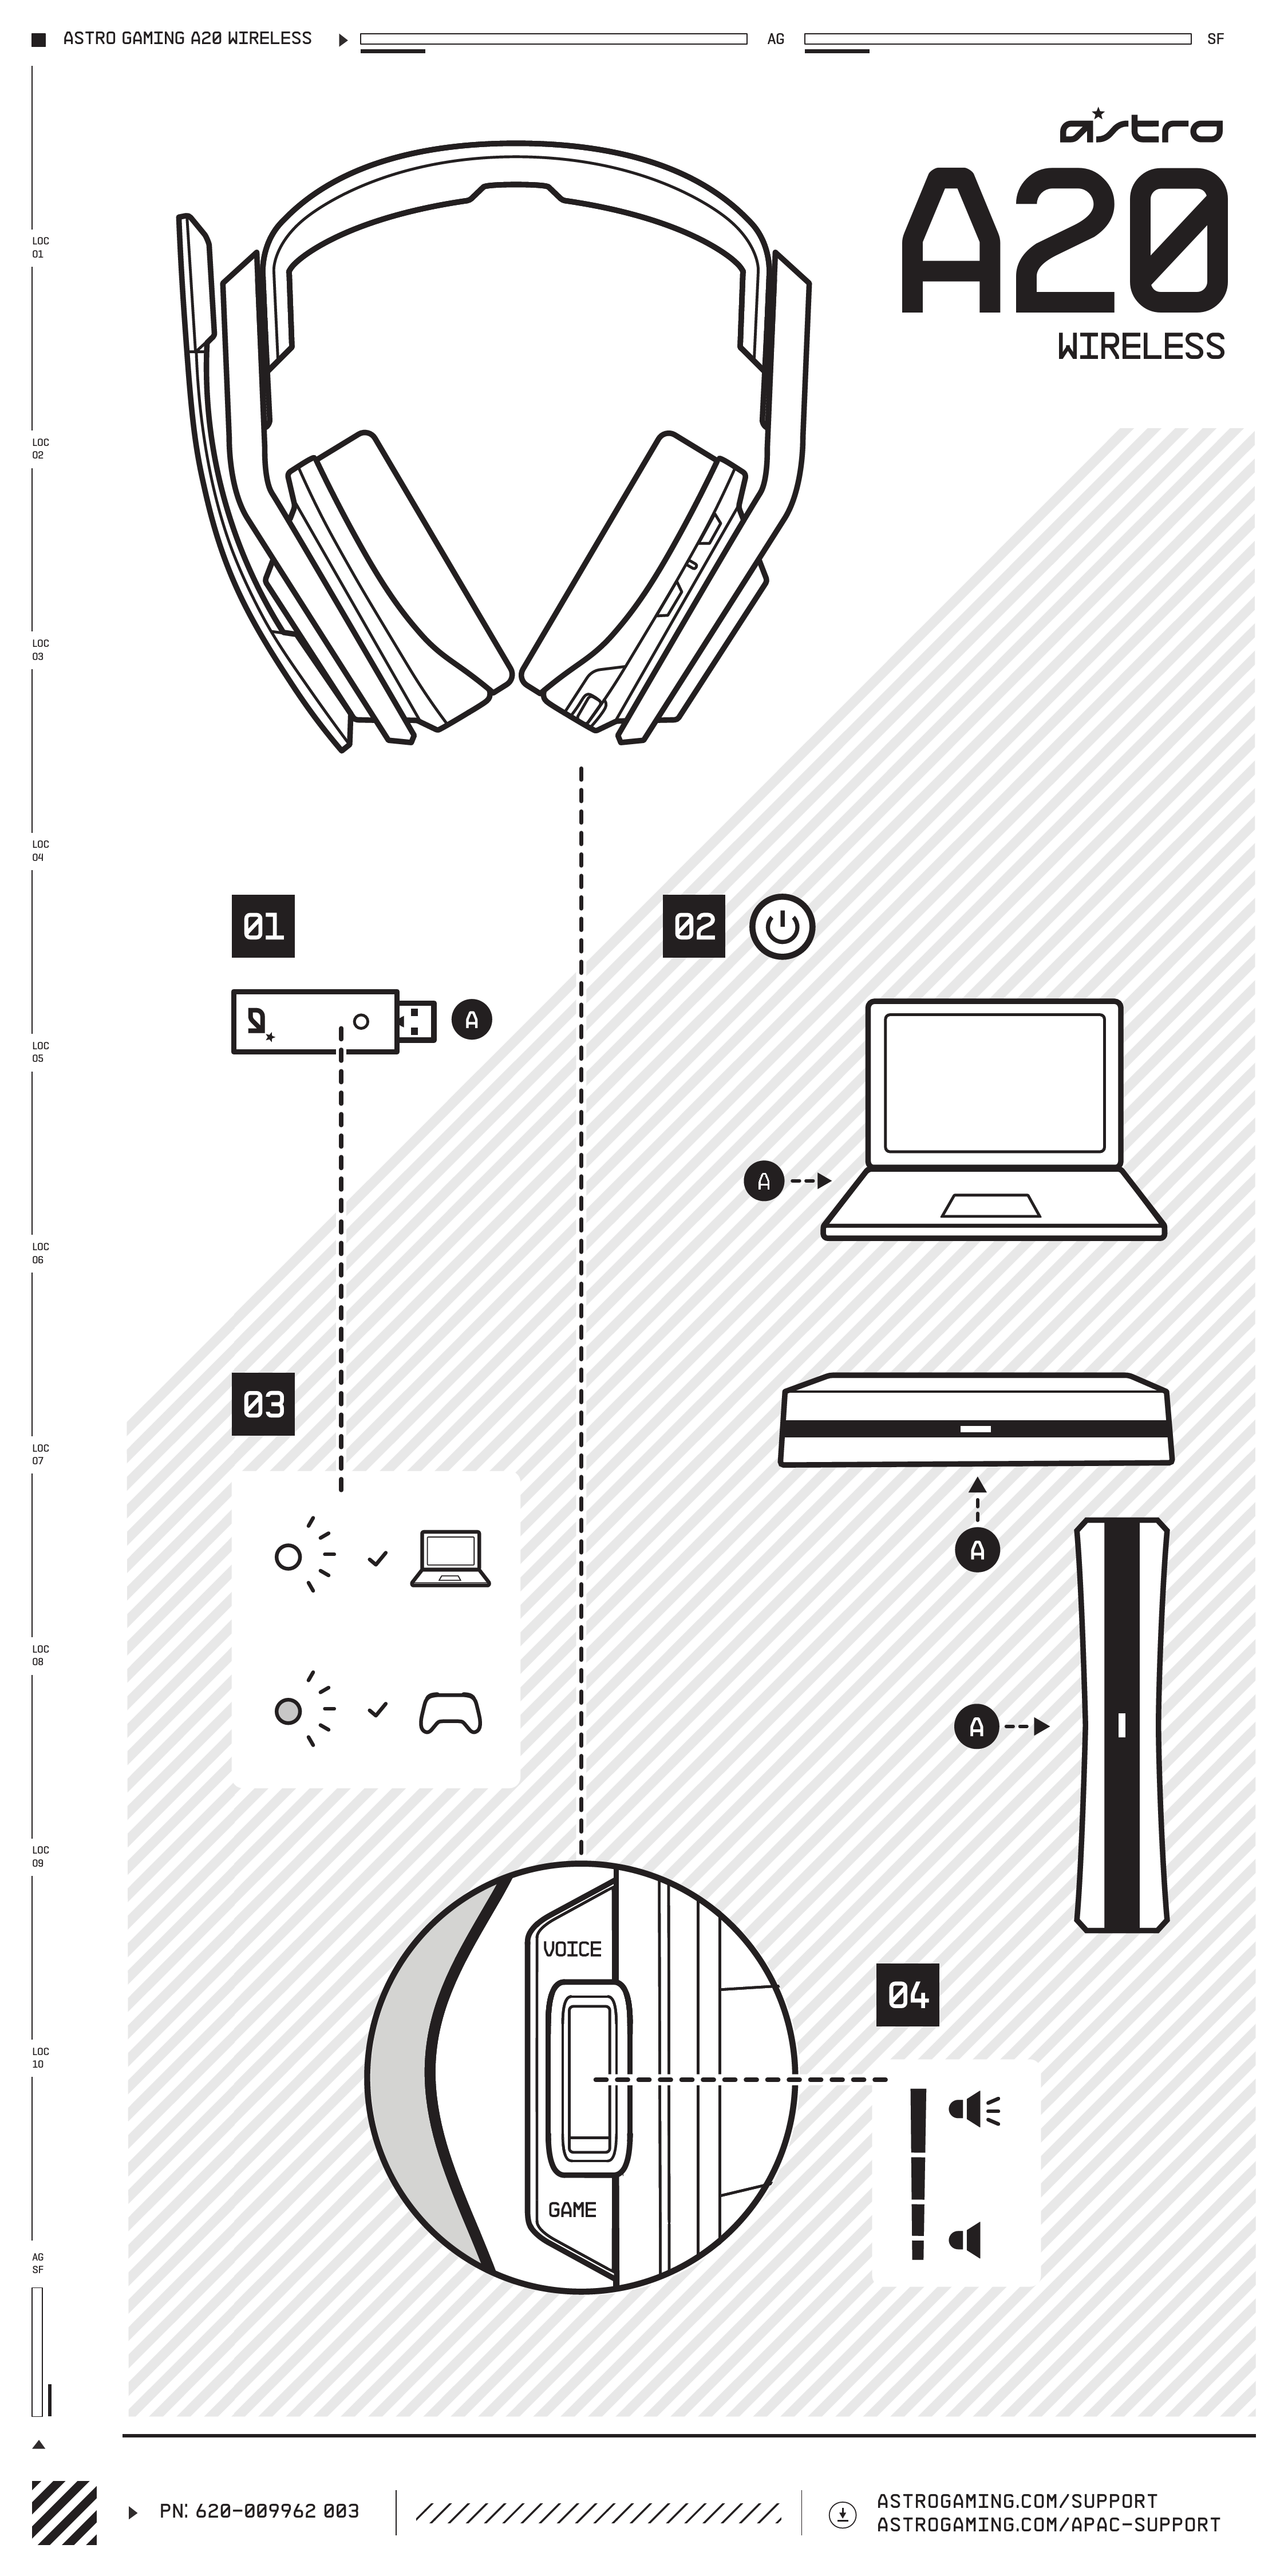
Connection and Setup Steps
-
Step 1: Connect the Transmitter
A USB transmitter is shown with a USB-A connector and a small indicator light. It connects to a device via USB.
-
Step 2: Power On
A power button icon [power-symbol] is displayed, indicating the headset should be powered on.
-
Step 3: Platform Connection
The headset can be connected to different platforms:
- PC Connection: A laptop is shown with an arrow pointing from the USB transmitter to a USB port on the laptop. An indicator light is shown with a checkmark [checkmark], suggesting a successful connection.
- Console Connection: A game console is depicted with an arrow pointing from the USB transmitter to a USB port on the console. An indicator is shown with a checkmark [checkmark], indicating a successful connection.
-
Step 4: Adjusting Audio Mix
A close-up view of the headset's controls shows a toggle switch labeled "VOICE" and "GAME".
A volume indicator bar is shown, suggesting audio level adjustment. The toggle allows users to balance voice chat and game audio.
Support Information
For further assistance and detailed guides, please visit:
