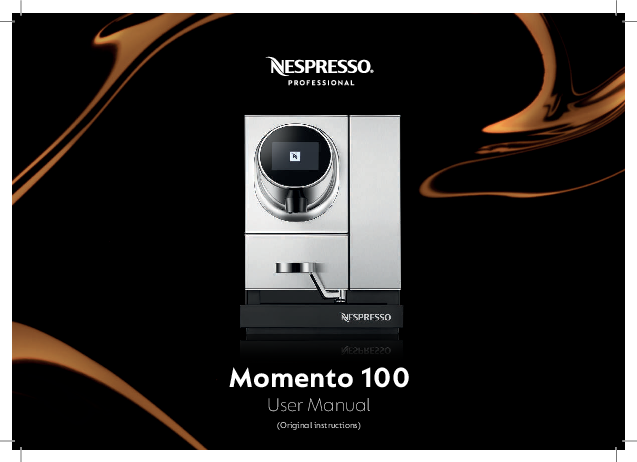
Nespresso Momento 100 User Manual
Original Instructions
Table of Contents
Welcome to Nespresso Professional
To help your company make the most of your Nespresso machine, let us guide you through everything this machine has to offer. It has many features that you will discover and enjoy. Nothing is more important than ensuring you enjoy the same high quality cup after cup, which is why we guarantee the performance of your machine as a natural part of our after-sales service.
How will you create your ideal coffee experience?
Safety Precautions and General Information
Safety Precautions
Please read all instructions in this user manual before operating the machine.
General Safety Notes
- In the event of emergency, switch off the machine with the main switch located under the water tank, behind the drip tray. Unplug the machine. If your machine is plumbed in, turn off the water mains supply to the machine.
- This appliance can be used by children aged from 8 years and above and persons with reduced physical, sensory or mental capabilities or lack of experience and knowledge if they have been given supervision or instruction concerning the use of the appliance in a safe way and they understand the hazards involved. Children must not play with the appliance.
- At least one copy of this user manual should be kept in a location available at all times to maintenance and management staff. Safety instructions must be available for all users.
NOTE: This appliance contains a class-1 laser product. [laser warning]
WARNING: Risk of Electric Shock
Contact with electrical components during operation of the machine could result in death or serious injury.
- The machine must only be installed, relocated, removed, repaired or maintained by authorised, trained service staff.
- Ensure that your machine voltage is the same as your mains voltage.
- Do not open the casing under any circumstances.
- Keep the machine away from moisture.
- Never immerse the machine, cable or plug in water or any other liquid.
- Protect the cable from sharp edges.
- Machine cables must be positioned out of the reach of children.
- Immediately stop using the machine if cable or plug are damaged.
- Do not position the cable near or on hot parts of the machine. Using the machine near open flames is strictly prohibited.
Risk of Food Safety
Ingestion of contaminated food could result in death or serious injury.
- Clean the machine periodically and in accordance with this user manual.
- During cleaning or descaling process, please make sure to identify that the machine cannot be used, in order to avoid consumer ingestion of cleaning/descaling agent.
- Only fill water tank with drinkable water.
CAUTION: Risk of Scalding
Contact with hot fluids could result in minor or moderate injury.
- Do not perform work underneath the product outlet.
- Avoid direct contact with hot fluids.
- Do not touch any part of the outlet before or after a beverage has been dispensed.
- Empty the drip tray with caution.
Risk of Bruising
Handling inside the machine could result in minor or moderate injury.
- Do not put fingers into the capsule insertion slot.
- If a capsule is blocked in the capsule insertion slot, switch off and unplug the machine before performing any operation.
Intended Use
This machine is meant to be used in a professional environment by the personnel listed below:
- Self-serve users: Self-serve users are users guided by the screen instructions to operate the machine in a safe mode. Self-serve users must not conduct any maintenance operations.
- Trained operator staff: Trained operator staff are staff able to operate the machine and execute the cleaning and maintenance activities described in this manual.
Operation
This machine is only suitable for producing coffee and hot water products. Take note of the following instructions:
- This machine is designed for Nespresso Professional capsules, available exclusively through Nespresso and its authorised distributors.
- Ensure all necessary maintenance work is done following the instructions and intervals recommended in this user manual.
- If you do not plan to use the machine for a long period of time (weeks), please ensure to empty it, unplug it and disconnect the water mains supply (if the machine is plumbed in). Refer to the chapter "Settings" for more information.
- All operations other than those mentioned in this user manual, must only be performed by authorised and trained service providers of Nespresso aftersales centres.
Cleaning the Machine
- The machine has to be cleaned daily to ensure hygiene and food safety, preserve your machine lifetime and contribute to an excellent Nespresso experience.
- Machine cleaning and maintenance shall not be made by children without supervision.
- This machine needs to be descaled. Always read the safety precautions on the descaling package before proceeding. Avoid contact with eyes, skin and surfaces.
- Refer to the chapter “Daily cleaning and maintenance” for a complete guide to successfully clean your machine.
Avoid Contamination During Machine Handling
- Microbiological contamination: use sanitized fresh material (e.g. paper towels) or clean hands, when conducting machine maintenance. Do not use materials such as cloths or sponges.
- Chemical contamination: use adequate chemical agents for the sanitation (e.g. non-odor chemicals, mild detergents).
- Physical contamination: do not introduce foreign materials that can fall into the consumer cup.
- Allergenic contamination: use specific tools for cleaning the coffee outlet and never use tools that have been in contact with other food products (e.g. milk).
- Do not put in the microwave plastic parts or any components of the machine.
- Do not clean machine components in the dishwasher.
- Do not clean plastic parts with alcohol, ethanol, methanol, methylated spirits, disinfectants. Detergents with strong acid agents such as acetic acid must not be used either.
- Do not clean the machine with high pressure such as water jets.
- Clean coffee outlet only with single-use disposable tissues or paper towels.
Machine Hygiene
- Frequent automated rinsing (internally and externally) takes place to sustain high hygiene standards throughout the machine lifetime.
Maintenance Work
- The machine must be serviced by authorised and trained service providers at least every 25,000 beverages per coffee head.
- A notification will appear on the coffee machine display if the machine needs to be serviced.
Disposal
- We recommend that you contact Nespresso to dispose of the machine, components and packaging; follow all local regulations.
Limitations of Liability
- The manufacturer accepts no liability for any injuries or accidents if the safety instructions covered in this manual are not adhered to.
- The manufacturer cannot be held liable for any damage caused by misuse or inappropriate handling of the machine.
- The manufacturer does not accept any liability for consequences arising from both internal and external modifications of the machine.
Warranty Regulations
- The warranty provisions apply as agreed with Nespresso.
- Malfunctions due to misuse or connecting unsuitable connections are not covered by warranty.
- Wear and tear parts are not covered by warranty.
- All Nespresso machines must pass stringent controls. Reliability tests under practical conditions are performed randomly on selected units. This can show traces of previous use.
Risk of Material Damage
- This equipment is to be installed to comply with the applicable federal, state or local plumbing codes.
- Wrong handling of the machine can lead to property damage.
- This machine is designed for indoor use. Keep it in such a controlled environment (protected from dust, water splashes, direct sunlight, pests, etc).
- Please make sure that the Pest Control system is in place and that the machine is located in an area with Pest Control Monitoring.
- Position the machine on a flat, horizontal, stable, heat-resistant and fluid-resistant surface.
- Do not position the machine where a water jet might be used for cleaning.
- Machine should be placed in a space with sufficient ventilation around (see Machine set-up section of this user manual for more information).
- Store the machine in a dust-free and dry environment, always at a temperature above 0 °C.
- The machine and base cabinets have been developed in compliance with the regulation on accessibility by people with a disability. Please check your local regulation for further information.
- Never use the machine without drip grid.
- Do not store explosive or flammable substances such as aerosol cans with a flammable propellant inside the appliance.
- For optimal performance, the ambient temperature must be between 5 °C and 32 °C.
Machine Overview
Overview of the Parts
- 1 Capsule insertion slot
- 2 Touch control panel
- 3 Coffee outlet
- 4 Cup support
- 5 Drip tray
- 6 Water tank with lid
- 7 Drip grid
- 8 Main switch
- 9 Cup heater
- 10 Capsule container
- 11 Water filter
- 12 Water hardness test strip
- 13 Key for water tank door
Diagram description: A front view of the Nespresso Momento 100 machine with numbered callouts pointing to its various parts. The main switch is shown with ON/OFF positions.
Screens
Home Screen
The Home Screen typically displays options like: Change language (see page 19), Descaling (see page 29), Go to recipe screen, insert capsule, filter, recipe, hot water.
Recipe Screen
The Recipe Screen displays beverage options such as espresso, lungo, ristretto, americano, with a 'select recipe' button.
Recurring Screen Symbols
- ◀️ : Go to previous screen
- ▶️ : Go to next screen
- ✔️ : Confirm symbol
- ❌ : Cancel (back to main screen)
Machine Set-up
Machine Installation
- Ventilation: Ensure the coffee machine is placed in a location with sufficient ventilation (at least 5 cm space on the back, on the sides and top of the machine).
- Cup Support: Insert cup support by tilting it into position.
- Capsule Container: Insert capsule container.
- Water Tank: Remove water tank from machine. Remove water tank lid. Rinse with fresh potable water. Insert water filter into water tank. Fill water tank with fresh drinking water and attach lid again.
- Water Tank Re-insertion: Insert water tank back to machine.
- Power Connection: Connect power plug to mains power socket. Ensure to use the correct mains voltage as given in "Specifications" on page 34.
- Power On: Switch on machine. Insert drip tray with drip grid.
Set-up/First Use
Set-up/first use settings will only show up once or after the machine is reset to factory settings.
- Set Language: Select desired language (e.g., English ??, German ??, French ??, Dutch ??) and tap on "confirm" symbol ✔️.
- Set Time Zone: Use left ◀️ or right ▶️ arrows to set time zone and tap on "confirm" symbol ✔️ to proceed to set time and date.
- Energy Saving: Select an option (yes/no) for activating the cup heater and tap on "next" symbol ▶️ to proceed to set standby time and time to sleep.
- Set Temperature: Set coffee temperature using +/- buttons. Nespresso recommends the temperature as displayed. Tap on "next" symbol ▶️.
- Set Recipe Length: If using Nespresso branded cups, set recipe length for all cup sizes and recipes. Nespresso recommends recipe length as displayed. Tap on "next" symbol ▶️.
- Access Code: Enter new access code and tap on "confirm" symbol ✔️. Proceed with water filter installation and follow instructions.
Cup Heater
The cup heater is located on top of the machine. If a cup shall be heated, it must be placed upside down. Only glass/ceramic cups are accepted. Do not place paper/plastic/disposable cups on the cup heater. See "Energy saving modes" on page 21 to switch on/off the cup heater.
Prepare Your Beverage
Coffee Preparation
Everytime the machine is started, it will do a rinsing to ensure the perfect cup of coffee. Every 2 hours the machine will rinse briefly.
- Select Cup: Select the right cup (size) for your drink. Use cup support for small and medium cups. Move cup support to the side if a large cup is used.
- Place Cup & Insert Capsule: Place cup under the coffee outlet. Insert capsule into capsule slot.
- Select Recipe: Recommended recipes for the inserted capsule are highlighted.
- Brewing: The screen displays the preparation whilst the beverage is being prepared. Preparation can be stopped manually by tapping on "cancel" symbol ❌.
- Prepare Again: After finishing preparation, press the "hot coffee" symbol to manually start preparation again.
Tip: Press the "recipe" symbol on the home screen to access the recipe screen directly.
Hot Water Preparation
- Place Cup: Place a cup under the coffee outlet.
- Select Hot Water: Press "hot water" symbol ? to fill the cup with hot water.
Settings
Change Language
- Tap on the "language" symbol ⚙️ to access the language menu.
- Select desired language (e.g., English ??, German ??, French ??, Dutch ??) and tap on "confirm" symbol ✔️.
Settings Menu
- Tap on the "settings" symbol ⚙️ to access the settings menu.
- The menus are: A. Maintenance menu (service procedures), B. Setup menu (general settings), C. Technician menu (can only be accessed by a trained Nespresso technician).
- All three menus are protected. The default code for maintenance and setup menus is 8888. This code can be customised in the setup menu (see page 22).
Maintenance Menu
After entering the code, the maintenance menu appears. Select an option by tapping on the circle next to it and follow instructions.
Maintenance Menu Options:
- Change the internal filter: See page 28.
- Descale the machine: See page 29.
- Reset the cabinet capsule container counter: Set counter back to 0. Available only on machines equipped with the Nespresso base cabinet (optional).
- Display the connectivity status: Network data are displayed. Available only on machines equipped with telemetry (optional).
- Display the log: Automatic protocol of software events, e.g., to diagnose problems.
- Display the serial number and software version: Serial numbers and software versions of the corresponding machine parts are displayed.
- Emptying the machine: Prepare the machine for long storage or transportation.
Emptying the Machine
- From the Maintenance menu, navigate to "emptying the machine".
- Prepare Water Tank: Remove water tank lid. Empty and rinse with fresh potable water. Dry with disposable tissue or paper towel. Attach lid again. Insert water tank back to machine.
- Start Emptying: Enter maintenance menu. Select "emptying the machine" menu and press start.
- Power Off: Once machine is successfully emptied, turn it off by pressing the ON/OFF [power switch] button. Unplug the machine.
Setup Menu
After entering the code, the setup menu appears. Select an option by tapping on the circle next to it and follow instructions.
Setup Menu Options:
- Set language: See page 19.
- Set time: Set timezone, time and date.
- Set energy saving modes: See page 21.
- Set temperature: See page 21.
- Set cup size: See page 22.
- Set recipe: See page 22.
- Set access code: See page 22.
- Set water hardness: See page 23.
- Reset to factory settings: See page 23.
Set Energy Saving Modes
- Cup Heater: Activate/deactivate cup heater and tap on "next" symbol ▶️.
- Standby Time: Select time after which the machine enters standby mode. In this mode, the machine automatically turns on again if a user gets near the machine.
- Sleep Time: Select time after which the machine enters sleep mode. In this mode, a control panel has to be touched to turn on the machine again.
Set Temperature
- Set coffee temperature using +/- buttons. Tap on "next" symbol ▶️ to proceed to setup menu. Nespresso recommends the temperature as displayed.
Set Cup Size
- Nespresso Branded Cups: Select "yes" if you use Nespresso branded cups. If not, select "no". The machine will help you to define the size of your cups.
- Prepare Cup Sizes: Have your standard small, medium and large cups available. Tap on "next" symbol ▶️, follow instructions on the screen and place smallest cup under coffee outlet.
- Fill & Stop: Press "start" to fill cup and press "stop" when full. Repeat procedure with medium and large cup. You can skip a cup size by tapping on "next" symbol ▶️.
Set Recipe
- Set recipe length for all available recipes with +/- buttons. Nespresso recommends recipe length for each recipe as displayed.
Set Access Code
- Enter new access code and tap on "confirm" symbol ✔️.
- Confirm new access code and tap on "confirm" symbol ✔️. The default access code for the maintenance and setup menu is 8888.
Set Water Hardness
- Prepare Test Strip: Prepare items as instructed. After 1 minute in water, the test strip is coloured.
- Match Colour: Tap on "A", "B" or "C" symbol to match the colour of your test strip. Tap on "next" symbol ▶️ to proceed.
- Adjust Filter: Adjust the bottom ring on the water filter to "A", "B" or "C" as recommended.
Reset to Factory Settings
- Select "yes" to reset the machine to its factory settings. To cancel, select "no" or tap on "cancel" symbol ❌.
ℹ️ If machine is reset to factory settings, all customised settings will be lost!
Daily Cleaning and Maintenance
Introduction
Your Nespresso machine has been developed according to the highest standards of quality and reliability. In order to ensure excellent performance and in-cup quality, please conduct the following maintenance operations at the required frequency:
- Daily machine cleaning (see below)
- Water scale maintenance (see page 29)
Please remember to use mild non-odor detergents and non-abrasive tools.
Rinse Water Tank (Daily)
- Remove water tank from machine.
- Remove water tank lid. Empty, clean with a cloth and rinse with potable water. Fill water tank with potable water and attach lid again.
- Insert water tank back to machine.
Clean Capsule Container (Daily)
- Swing cup support to the side and remove capsule container.
- Empty capsule container, wash with soapy water and clean it.
- Insert capsule container back to machine.
Clean Drip Tray (Daily)
- Remove drip tray with drip grid.
- Remove drip grid from drip tray. Empty drip tray. Wash with soapy water, rinse and dry both elements.
- Insert drip tray with drip grid back to machine.
Clean Coffee Outlet (Daily)
- Remove coffee outlet cover. Be careful, hot water might drip.
- Rinse coffee outlet cover with fresh potable water and dry it.
- Clean coffee outlet with a disposable tissue or paper towel.
- Insert coffee outlet cover back into the machine.
Clean Cup Heater (Daily)
- Clean cup heater with a disposable tissue or paper towel. Be careful, it might be hot.
Change the Internal Filter
When the "filter" symbol ? appears in red, the internal filter should be changed. Tap on the red filter symbol and follow instructions on screen.
Alternatively, the settings menu can be entered to start the internal filter procedure.
- Remove water tank from machine. Clean tank.
- Remove water tank lid. Empty and rinse with fresh potable water.
- Remove old water filter from water tank.
- Insert new water filter.
- Fill water tank with fresh drinking water and attach lid again. Tilt the water tank back and forth to remove air bubbles from the filter.
- Insert water tank back to machine.
Descaling
For descaling, use Nespresso liquid descaler. Never use vinegar.
If the machine is equipped with a water filter, always remove it before descaling.
The machine requires 2 bags of Nespresso liquid descaler.
When the "descale" symbol ? appears in red, the machine should be descaled. Tap on the red descaling symbol and follow instructions on screen. Machine will descale for approximately 10 minutes.
Alternatively, the settings menu can be entered to start the descaling procedure.
Descaling Interval
| Water hardness (see page 23) | For an average consumption of ... | ||
|---|---|---|---|
| 25 recipes per day | 50 recipes per day | 80 recipes per day | |
| High water hardness (A) | ~8 months | ~4 months | ~2 months |
| Medium water hardness (B) | ~10 months | ~5 months | ~3 months |
| Low water hardness (C) | ~16 months | ~8 months | ~5 months |
Troubleshooting
No Light
- Check if the machine cannot be switched on/no light.
- Check if power plug is connected to mains power socket.
Red Symbols on Main Screen
- A Red "descale" symbol ?: The machine needs to be descaled (see page 29).
- B Red "filter" symbol ?: Change the internal filter (see page 28).
Operational Alerts
| Alert Type | Problem | Potential Solution |
|---|---|---|
| Warning | Warning: error code #, please contact machine operator. | Switch off/on the machine. If warning message persists, contact your machine operator. |
| Warning | Warning: Momento 100 is cooling down, please wait. | Wait for the machine to cool down. If warning message persists, contact your machine operator. |
| Warning | Warning: Brewing unit jam: please press ❌. If that did not work, contact machine operator. | Press ❌ at the bottom of the screen. If that did not work, check if something is stuck on the machine brewing unit. If so, unplug the machine, try to push down the obstructed object with a tool (e.g. spoon, stirrer). If problem persisted, contact machine operator. |
| Warning | Warning: Direct water connection issue: please contact machine operator. | Switch off/on the machine. If warning message persists, contact your machine operator. |
| Maintenance warning | Warning: Machine service to be performed. Please contact machine operator. | Please contact your machine operator to arrange machine maintenance. |
| Maintenance warning | Warning: Please clean the water tank. | Please clean the water tank as described in the User Manual. |
Other Machine Issues
| Problem | Potential Solution |
|---|---|
| The language displayed is not appropriate | Modify language settings in your machine setup menu. If problem persists, contact your machine operator. |
| The machine enters in sleep/standby mode too quickly | Modify energy-saving settings in your machine setup menu. If problem persists, contact your machine operator. |
| The temperature of Momento 100 beverages is too hot/too cold | Modify temperature settings in your machine setup menu. If problem persists, contact your machine operator. |
| The length of Momento 100 beverages is too long/ too short | Modify cup size / recipe length settings in your machine setup menu. If problem persists, contact your machine operator. |
| Momento 100 seems to function, yet no water/coffee comes out of the coffee head | Ensure there is water in the machine's water tank. Ensure there is no air stuck in the water filter. To do that, fill the water tank with fresh drinkable water, introduce the filter upside down, and ensure all air inside the filter is out, place your filter on the water tank and try the machine again. |
| Cup heater does not work | Turn on cup heater. See "Energy saving modes" on page 21 to turn on/turn off cup heater. |
Appendix
Direct Water Connection
The machine can be connected to the water network directly. Thus, water filter needs to be changed less often. No water refill is required.
Telemetry
The machine can be connected to internet. This allows bi-directional communication with the machine, which enables the following benefits:
- Visualize machine coffee consumption and health status
- Update machine options
- Receive additional Nespresso services
Specifications
- Plumbing Requirement:
- A trained Nespresso technician is required (plumber installation) and pressure needs to be set between 2 - 4 bars.
- Power Supply:
- 100-127 V / 50-60 Hz (IEC certification)
120 V / 60 Hz (UL certification)
220 - 240 V / 50 – 60 Hz (IEC certification) - Weight:
- 16 kg
- Operation Temperature Range:
- +5 °C - +32 °C
- Storage Temperature Range:
- -25 °C - +60 °C (please empty your machine before storage)
- Water Tank Capacity:
- 3 L
- Dimensions (W x D x H):
- 300 x 500 x 420 mm
- Noise Emission:
- < 55 dBA
Type Plate
The type plate contains the following details:
- Machine Type:
- Nespresso Professional Coffee Machine
- Model:
- Momento 100
- Type:
- 230/NP100
- Voltage:
- According to type plate
- Power:
- According to type plate
- Serial Number:
- According to type plate
- Production Date:
- According to type plate
Diagram description: A close-up view of the machine's type plate, showing where the details like model, type, voltage, serial number, and production date are located.
Recycling Capsules and Machine at End of Life
This appliance complies with the EU Directive 2012/19/EC. Packaging materials and appliance contain recyclable materials. Your appliance contains valuable materials that can be recovered or can be recycled. Separation of the remaining waste materials into different types facilitates the recycling of valuable raw materials.
Leave the appliance at a collection point. You can obtain information on disposal from your local authorities.
To know more about Nespresso sustainability strategy, go to www.nespresso.com/positive
Publishing Details
Version: User manual Momento 100
Original User Manual
Contact Nespresso
For service calls, contact your country-specific Nespresso representative on www.nespresso.com
