File info: application/pdf · 100 pages · 9.18MB
Imbera Refrigeration and Freezers
and understood this manual and looks out for their safety. • Do not use or operate this device if its use has been excessive, misused, altered or modified from manufacturer’s original specifications. • Be extremely care…
Imbera Refrigeration and Freezers | Instruction Manual
WARNING! Use this cooler only for the purpose that it was made for as described in this manual. Proper installation, care and maintenance are essential for perfect operation and...
Extracted Text
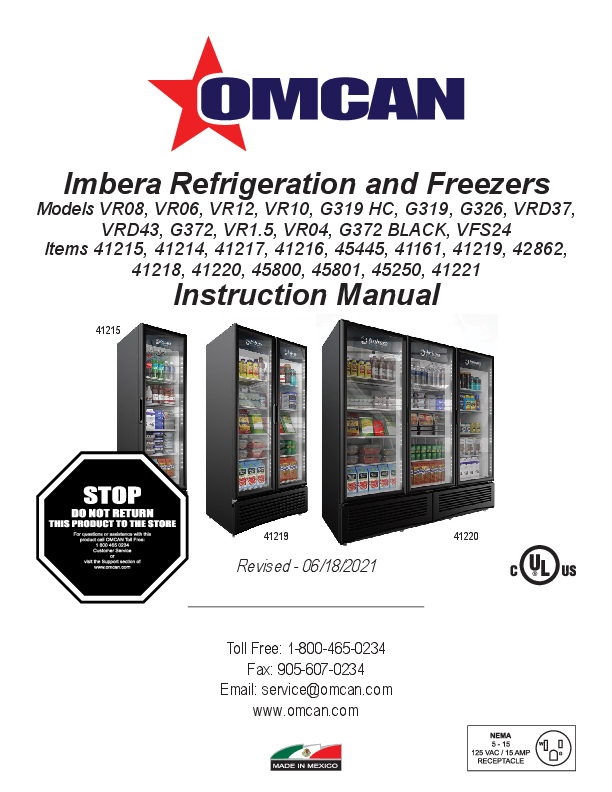
Imbera Refrigeration and Freezers
Models VR08, VR06, VR12, VR10, G319 HC, G319, G326, VRD37, VRD43, G372, VR1.5, VR04, G372 BLACK, VFS24
Items 41215, 41214, 41217, 41216, 45445, 41161, 41219, 42862, 41218, 41220, 45800, 45801, 45250, 41221
Instruction Manual
41215

41219

41220

Revised - 06/18/2021

Toll Free: 1-800-465-0234 Fax: 905-607-0234
Email: service@omcan.com www.omcan.com

Table of Contents
Model VR08 / Model VR06 / Model VR12 / Model VR10 / Model G319 HC Model G319 / Model G326 / Model VRD37 / Model VRD43 / Model G372
Model VR1.5 / Model VR04 / Model G372 BLACK / Model VFS24

Section

Page

Disclaimer ---------------------------------------------------------------------------------------------------------- 3

General Information ----------------------------------------------------------------------------------------- 4 - 5

Safety and Warranty ---------------------------------------------------------------------------------------- 5 - 8

Technical Specifications ---------------------------------------------------------------------------------- 8 - 11

Installation -------------------------------------------------------------------------------------------------- 11 - 16

Operation --------------------------------------------------------------------------------------------------- 16 - 22

Maintenance ----------------------------------------------------------------------------------------------- 22 - 23

Troubleshooting ------------------------------------------------------------------------------------------- 24 - 26

Parts Breakdown ----------------------------------------------------------------------------------------- 27 - 85

Electrical Schematics ------------------------------------------------------------------------------------ 86 - 97

Notes -------------------------------------------------------------------------------------------------------------- 98

Warranty Registration ----------------------------------------------------------------------------------------- 99

2

Disclaimer
OMCAN IS NOT RESPONSIBLE FOR ANY DAMAGES DUE TO WATER LEAKS. WARRANTY FOR WATER LEAKS IS VOID IF THE AMBIENT ROOM TEMPERATURE EXCEEDS 75�F AND 55% RELATIVE HUMIDITY,
AND THE APPLIANCE DRAIN IS NOT CONNECTED DIRECTLY TO A FLOOR DRAIN.
3

General Information
Omcan Manufacturing and Distributing Company Inc., Food Machinery of America, Inc. dba Omcan and Omcan Inc. are not responsible for any harm or injury caused due to any person's improper or negligent use of this equipment. The product shall only be operated by someone over the age of 18, of sound mind, and not under the influence of any drugs or alcohol, who has been trained in the correct operation of this machine, and is wearing authorized, proper safety clothing. Any modification to the machine voids any warranty, and may cause harm to individuals using the machine or in the vicinity of the machine while in operation.
CHECK PACKAGE UPON ARRIVAL
Upon receipt of an Omcan shipment please inspect for external damage. If no damage is evident on the external packaging, open carton to ensure all ordered items are within the box, and there is no concealed damage to the machine. If the package has suffered rough handling, bumps or damage (visible or concealed), please note it on the bill of lading before accepting the delivery and contact Omcan within 24 hours, so we may initiate a claim with the carrier. A detailed report on the extent of the damage caused to the machine must be filled out within three days, from the delivery date shown in the shipping documents. Omcan has no recourse for damaged products that were shipped collect or third party.
Before operating any equipment, always read and familiarize yourself with all operation and safety instructions.
Omcan would like to thank you for purchasing this machine. It's of the utmost importance to save these instructions for future reference. Also save the original box and packaging for shipping the equipment if servicing or returning of the machine is required. --------------------------------------------------------------------------------------------------------------------------------------------------Omcan Fabrication et distribution Companie Limit� et Food Machinery d'Amerique, dba Omcan et Omcan Inc. ne sont pas responsables de tout dommage ou blessure caus� du fait que toute personne ait utilis� cet �quipement de fa�on irr�guli�re. Le produit ne doit �tre exploit� que par quelqu'un de plus de 18 ans, saine d'esprit, et pas sous l'influence d'une drogue ou d'acohol, qui a �t� form� pour utiliser cette machine correctement, et est v�tu de v�tements de s�curit� appropri�. Toute modification de la machine annule toute garantie, et peut causer un pr�judice � des personnes utilisant la machine ou des personnes � proximit� de la machine pendant son fonctionnement.
V�RIFIEZ LE COLIS D�S R�CEPTION
D�s r�ception d'une exp�dition d'Omcan veuillez inspecter pour dommages externes. Si aucun dommage n'est visible sur l'emballage externe, ouvrez le carton afin de s'assurer que tous les �l�ments command�s sont dans la bo�te, et il n'y a aucun dommage dissimul� � la machine. Si le colis n'a subi aucune mauvaises manipulations, de bosses ou de dommages (visible ou cach�e), notez-le sur le bond de livraison avant d'accepter la livraison et contactez Omcan dans les 24 heures qui suivent, pour que nous puissions engager une r�clamation aupr�s du transporteur. Un rapport d�taill� sur l'�tendue des dommages caus�s � la machine doit �tre rempli dans un d�lai de trois jours, � compter de la date de livraison indiqu�e dans les documents d'exp�dition. Omcan n'a aucun droit de recours pour les produits endommag�s qui ont �t� exp�di�es ou cueilli par un tiers transporteur.
4

General Information
Avant d'utiliser n'importe quel �quipement, toujours lire et vous familiariser avec toutes les op�rations et les consignes de s�curit�.
Omcan voudrais vous remercier d'avoir choisi cette machine. Il est primordial de conserver ces instructions pour une r�f�rence ult�rieure. �galement conservez la bo�te originale et l'emballage pour l'exp�dition de l'�quipement si l'entretien ou le retour de la machine est n�cessaire. --------------------------------------------------------------------------------------------------------------------------------------------------Omcan Empresa De Fabricacion Y Distribucion Inc. Y Maquinaria De Alimentos De America, Inc. dba Omcan y Omcan Inc. no son responsables de ningun da�o o perjuic�o causado por cualquier persona inadecuada o el uso descuidado de este equipo. El producto solo podra ser operado por una persona mayor de 18 a�os, en su sano juicio y no bajo alguna influencia de droga o alcohol, y que este ha sido entrenado en el correcto funcionamiento de esta m�quina, y �sta usando ropa apropiada y autorizada. Cualquier modificaci�n a la m�quina an�la la garant�a y puede causar da�os a las personas usando la m�quina mientras esta en el funcionamiento.
REVISE EL PAQUETE A SU LLEGADA
Tras la recepcion de un envio Omcan favor inspeccionar da�os externos. Si no hay da�os evidentes en el empaque exterior, Habra el carton para asegurararse que todos los articulos solicitados �sten dentro de la caja y no encuentre da�os ocultos en la m�quina. Si el paquete ha sufrido un manejo de poco cuidado, golpes o da�os (visible o oculto) por favor anote en la factura antes de aceptar la entrega y contacte Omcan dentro de las 24 horas, de modo que podamos iniciar una reclamaci�n con la compa�ia. Un informe detallado sobre los da�os causados a la m�quina debe ser llenado en el plazo de tres d�as, desde la fecha de entrega que se muestra en los documentos de env�o. Omcan no tiene ningun recurso por productos da�ados que se enviaron a recoger por terceros.
Antes de utilizar cualquier equipo, siempre lea y familiarizarse con todas las instrucciones de funcionamiento y seguridad.
Omcan le gustar�a darle las gracias por la compra de esta m�quina. Es de la mayor importancia para salvar estas instrucciones para futuras consultas. Adem�s, guarda la caja original y el embalaje para el env�o del equipo si servicio t�cnico o devoluci�n de la m�quina que se requiere.
Safety and Warranty
READ ALL INSTRUCTIONS BEFORE USING
WARNING! Use this cooler only for the purpose that it was made for as described in this manual. Proper installation, care and maintenance are essential for perfect operation and maximum energy efficiency. In the event you find a problem not described in this manual, do not attempt to solve it by yourself; call Omcan's Technical Support Services for assistance.
5

Safety and Warranty
IMPORTANT We strongly recommend you ask for assistance from our Technical Support Services or from our qualified technicians for any failure, problem or malfunction of this cooler.
SAFETY PRECAUTIONS
� Before using, this cooler must be installed and placed following the instructions contained in this manual. Save these instructions for future reference.
� Do not allow individuals to climb, stand on, or hang from the outer portion of the cooler, on the shelves or inside the cabinet. This may cause the cooler to tip over and damage the device or cause serious injuries or death.
� Do not touch the inner surfaces of the cooler when hands are damp or wet. Skin may adhere to these extremely cold surfaces.
� Do not store or use solvents, flammable vapors or liquids in the vicinity of this or other electrical devices. � Unplug the cooler before cleaning or performing any kind of repair. � Wipe up any spills inside the cabinet immediately. � If the cooler is equipped with power switches, turn the cooler on and off through these buttons. If the
cooler does not have them, shut down directly from the plug, but never pull the cable to do so. For any maintenance you must disconnect it. � Children must be supervised to make sure they do not play with the cooler. � This cooler is not designed to be used by people with physical or intellectual disabilities, children or people with no experience and knowledge of use, unless they are supervised by an adult who has properly read and understood this manual and looks out for their safety. � Do not use or operate this device if its use has been excessive, misused, altered or modified from manufacturer's original specifications. � Be extremely careful when closing doors, keeping fingers out of the clearances between the doors and cabinet, to prevent injury. � This cooler contains a charge of refrigerant at a pressure determined by the type of refrigerant used and the internal volume. The installation and welding of the piping should be treated by a service technician authorized by Omcan who is properly trained in the use and management of refrigerants. � Never stack two or more coolers; leveling feet are not designed for this purpose, and doing so compromises use safety. Stacking of one cooler, only, on top of the same model is approved if using pods, skids or pallets, and supported by the cabinet corners only. � Refrigeration system on this cooler must not be damaged or manipulated by untrained personnel
AVOID RISKS � If power cord or other electronic components are damaged, only the manufacturer or an authorized
technician may repair it to avoid danger.
PRECAUTION � This cooler uses highly flammable HC refrigerant. Do not perforate cooling system tubing. This may cause
fire or explosion. � Do not store explosive substances, such as spray cans with flammable propellant, inside cooler.
6

Safety and Warranty
WARNING � Do not obstruct cooler venting grills, it is important to maintain adequate air flow. � Do not use mechanical devices or other means to speed up deicing process, other than those
recommended by the manufacturer. � Do not damage cooling circuit. � Do not use electrical equipment inside cooler's storage compartment except for types recommended by the
manufacturer. � In order to reduce flammability danger, cooler installation must be performed by qualified personnel only.
DANGER � Fire or explosion risk. This cooler uses highly flammable HC refrigerant. Any cooler repairs must be
performed by qualified personnel.
IMPORTANT � Omcan reserves the right to perform product improvements. Design and specifications are subject to
change without notice.
OMCAN IS NOT RESPONSIBLE FOR ANY DAMAGES DUE TO WATER LEAKS. WARRANTY FOR WATER LEAKS IS VOID IF THE AMBIENT ROOM TEMPERATURE EXCEEDS 75�F AND 55% RELATIVE HUMIDITY, AND THE APPLIANCE DRAIN IS NOT CONNECTED DIRECTLY TO A FLOOR DRAIN.
RESIDENTIAL USERS: Vendor assumes no liability for parts or labor coverage for component failure or other damages resulting from installation in non-commercial or residential applications. The right is reserved to deny shipment for residential usage; if this occurs, you will be notified as soon as possible.
3 YEARS PARTS AND LABOUR WARRANTY & 5 YEARS PARTS WARRANTY ON COMPRESSOR ONLY
Within the warranty period, contact Omcan Inc. at 1-800-465-0234 to schedule an Omcan authorized service technician to repair the equipment locally.
Unauthorized maintenance will void the warranty. Warranty covers electrical and part failures, not improper use.
Please see https://omcan.com/disclaimer for complete info.
WARNING:
The packaging components are classified as normal solid urban waste and can therefore be disposed of without difficulty.
In any case, for suitable recycling, we suggest disposing of the products separately (differentiated waste) according to the current norms.
7

Safety and Warranty

DO NOT DISCARD ANY PACKAGING MATERIALS IN THE ENVIRONMENT!

Technical Specifications

VR SERIES Model Type
Volume
Number of Doors Number of Shelves
Shelf Size
Capacity
Temperature Range Max Ambient Temp Rating Energy Consumption Electrical Power Current
Weight
Item Number

VR08
220 L 7.7 cu. ft.

VR06
144.4 L 5.1 cu. ft.

VR12

VR10

Refrigerator

328.2 L 11.5 cu. ft.

253.4 L 8.9 cu. ft.

1

VR1.5
42.4 L 1.5 cu. ft.

VR04
113.3 L 4 cu. ft.

5
15.1" x 14.6" 384 x 371mm
20 oz. - 100 12 oz. - 200

3
17.7" x 6.2" 450 x 157mm 17.1" x 17.3" 435 x 440mm
20 oz. - 84 12 oz. - 132

4

20.9" x 17.3" 530 x 440mm

20 oz. - 168 12 oz. - 384

20 oz. - 126 12 oz. - 288

0 to 7�C / 32 to 44.6�F

3

9.9" x 11"

15.3" x 14.6"

251 x 279mm 387 x 371mm

20 oz. - 15

20 oz. - 50

32�C - 90�F

2.12 kWh/day* 1.74 kWh/day* 2.39 kWh/day* 1.74 kWh/day* 1.07 kWh/day* 1.21 kWh/day*

1/6 HP 3A
163.1 lbs. 74 kgs. 41215

1/8 HP 2.5A
126.8 lbs. 57.5 kgs.
41214

115V / 60Hz / 1

1/6 HP

1/8 HP

4A

3A

183 lbs. 83 kgs.

166.4 lbs. 82 kgs.

41217

41216

1/10 HP 1.7A 58 lbs.
26.3 kgs. 45800

1/6 HP 2.1A
96.3 lbs. 43.7 kgs.
45801

8

Technical Specifications

G3 SERIES Model Type Volume Number of Doors Number of Shelves
Shelf Size
Capacity
Temperature Range Max Ambient Temp Rating Energy Consumption Electrical Power Current
Weight
Item Number

G319 HC

G319

543.6 L / 19.2 cu. ft. 1

G326 Refrigerator 756 L / 26.7 cu. ft.
2

5
24.8" x 19.6" 630 x 497mm 20 oz. - 240 12 oz. - 630

10
15.9" x 19.4" 404 x 494mm 20 oz. - 300 12 oz. - 840
0 to 7�C / 32 to 44.6�F

32�C - 90�F

1.8 kWh/day*

3.04 kWh/day*

45445

1/4 HP
5.2A
223.8 lbs. 101.5 kgs.

41161

6.174 kWh/day*
115V / 60Hz / 1
7.6A 324.1 lbs. 147 kgs.
41219

G372

G372 BLACK

2004.8 L / 70.8 cu. ft.
3
15
21.5" x 24.1" 546 x 613mm 20 oz. - 840 12 oz. - 1824

9.615 kWh/day*

1/3 HP 13.8A
746.3 lbs. 338.5 kgs. 41220

45250

9

Technical Specifications

VRD SERIES Model Type Volume Number of Doors Number of Shelves Shelf Size
Capacity
Temperature Range Max Ambient Temp Rating Energy Consumption Electrical Power Current Weight Item Number

VRD37 1059.6 L / 37.4 cu. ft.

Refrigerator 2

VRD43 1179.7 L / 41.6 cu. ft.

10

20.5" x 20.6" / 520 x 524mm 20 oz. - 490 12 oz. - 882

24.2" x 19.7" / 615 x 501mm 20 oz. - 560 12 oz. - 1134

0 to 7�C / 32 to 44.6�F

32�C - 90�F

5.17 kWh/day*
445.3 lbs. / 202 kgs. 42862

115V / 60Hz / 1 1/2 HP 10A

5.55 kWh/day*
466.3 lbs. / 211.5 kgs. 41218

10

Technical Specifications

VFS SERIES

Model

VFS24

Type

Freezer

Volume

670.3 L / 23.7 cu. ft.

Number of Doors

1

Number of Shelves

5

Shelf Size

25.7" x 21.3" / 653 x 541mm

Temperature Range

-28 to -23�C / -18.4 to -9.4�F

Max Ambient Temp Rating

32�C - 90�F

Energy Consumption

10.22 kWh/day*

Electrical

115V / 60Hz / 1

Power

3/4 HP

Current

7.0A

Weight

378 lbs. / 171 kgs.

Item Number

41221

*Energy consumption based on ANSI/ASHRAE Standard 72-2005.

Installation

� Install this cooler avoiding direct sunlight. � Do not install this cooler outdoors. � This cooler must not be used or stored where ambient temperature
is under 14�F or greater than 140�F and where relative humidity is greater than 90%. � Never install equipment close to heat sources; otherwise, cooler may consume more energy or function incorrectly. � Do not introduce hot objects or warmer than ambient temperature inside cooler. � Never obstruct or place objects along front grill which may obstruct free air flow; this may cause inefficient cooler operation and will increase the energy consumption.

11

Installation
� Never place objects over the cooler. Consider that the cabinet's structure has been constructed mainly of laminated sheet metal and polyethylene foam that may easily bend or deform when hit, and it may even deform over time due to placement of TV, microwave oven and other objects.
� For adequate cooling, cooler separation on back and sides must be at a minimum distance of 10cm (4") with respect to walls or other nearby objects.
IMPORTANT: do not to use a cutter knife or blade for cooler handling. Inappropriate use may scratch or cut off components.
ACCESSORY INSTALLATION
Before turning the cooler on or connecting to power supply, make sure you use the installation kit, such as wall separators, level supports or other accessories. Depending on your cooler's model, you may have some of the following accessories:
Used to provide support and adequate inclination for door closure.
Some models have optional wheels for easy mobility inside the establishment. If this is the case, wheels are factory-installed, and it is only necessary to remove transport pods.
This accessory is designed to provide adequate separation between cooler back and wall.
TOOLS TO BE USED
12

LEVELING SKID / LEVELING SCREW

Installation

WHEEL

WALL SEPARATOR

13

Installation
SHELVES
These accessories must be used to place products inside the cooler. They are designed to optimize cooler's internal space. Depending on your cooler's model, it may have different types of shelves. These are some types: FLOOR SHELVES
Observe that these shelves have supports to place them over cooler's floor, as well as enough rods to support product load. LEVEL SHELVES
Shelves must have an adequate orientation and position, never to be forced or exert pressure on the cooler walls or any other accessory. All shelves must be firmly supported on all four corners with provided accessories:
14

Installation
Make sure the shelf and the product allow the door to close completely. IMPORTANT: shelves must have an adequate orientation and position, never to be forced or exert pressure on cooler walls or any other accessory.
VISISLIDE (OPTIONAL)
The Visislide system allows placing shelves and product in an angle; thus, bottles will always slide to the front.
BASKETS (OPTIONAL)
Cooler may also have plastic or metal baskets to exhibit product.
ELECTRICAL CONNECTION
WARNING: ELECTRIC SHOCK RISK � Connect to a three-pin outlet. � Do not remove outlet ground pin. � Do not use power adapters. � Do not use extension cords. � If failure occurs when following these instructions, it may cause fire or electric shock.
15

Installation
Omcan coolers with HC refrigerants (R290 / R600) are designed to operate under a specific electric voltage. Check cooler's serial label to make sure that the electrical classification is adequate for installation.
IMPORTANT: ground connection is a protection system for equipment connected to electrical network. It is used in electrical installations to avoid current pass-through to user due to an isolation failure of active conductors.
� This cooler must be connected to physical ground. In case a short circuit occurs, ground connection reduces the risk of electrical shock.
� Cooler is equipped with a power cord with a ground cable with a physical ground connection plug. Plug must be connected to an adequately-installed outlet and ground connected; if you don't have this type of plug, it is your responsibility and obligation to have it installed.
� Please contact a certified electrician or a certified technician if you have questions about ground connections.
� Never use extension cords, as that action will void the warranty. � Under no circumstances cut off or remove the third ground connection pin from power cord. Do not use an
adapter; if this recommendation is not followed, it may cause burns or death to user due to electrical shock. � For optimal operation, it is recommended to have this equipment connected to a dedicated circuit outlet
that is for cooler use only. � Connect plug firmly to electrical outlet making sure it is inserted all the way in.
POWER CORD
Cooler is equipped with a polarized power cord, with ground connection. Do not attempt to eliminate ground connection or use two-terminal adapters.
AVOID RISKS: if the power cord or other electronic components are damaged, only the manufacturer or authorized technician may repair them to avoid danger.
Operation
TURNING ON THE COOLER
After having transported and installed the cooler, let it stand for at least twelve hours to allow compressor oil to fully settle.
Once the installing instructions have been followed, connect the cooler per electrical specifications indicated on serial number label (placed inside cabinet). For your own safety, avoid touching the device with wet hands or damp or feet. You should not handle cooler when barefoot.
16

Operation
STORING PRODUCT INSIDE COOLER
� If a floor shelf is included (Type A, B, C, D), place it directly inside cooler, and right after that, place shelves (Type E, F, G), using metallic clips (make sure they are aligned at the same height). If a floor shelf is not included use clips to place a shelf.
� If the cooler has a plastic rack included, it includes supports for each grill, without using metal clip. � If the cooler has been turned off and it is necessary to turn it on, wait for at least one hour to cool the
interior of the cooler before introducing product. � When the cooler is filled up, arrange and order product inside; do not throw or drop product when placing it
inside as that action will damage.
Airflow inside cabinet is priority for the cooler, thus make sure that: � Product does not exert pressure on internal walls and it does not go beyond perimeter or grill limits. � Avoid introducing containers inside closed boxes, such as carton board, trays, bags or plastic covers. � If your cooler has a bin and fan avoid placing product and other objects against, or in a way that obstructs,
fan air outlets.
IMPORTANT Some models are designed to cool products (i.e. beer), under 0�C. Do not use this type of cooler for other products that may be quality-affected due to these low temperatures. Some products freeze when subjected to these temperatures and the containers may explode. If product containers are made of glass, they may cause cuts and serious wounds to you; thus, always follow recommendations and instructions from your supplier. Do not introduce unauthorized containers or product or, ask the Service Center for further details.
It is recommended that before closing your business, fill up your cooler so that on the next day you have cold product available for your customers; doing so will contribute to energy saving due to the fact that doors will be kept closed overnight and cooling will be more efficient.
IMPORTANT: horizontal shelf maximum load must not exceed equivalent weight of three can trays of 355ml (12oz).
TEMPERATURE CONTROL
All temperature controls are electronic and are previously configured by manufacturer. Thanks to this technology, neither height nor exterior temperature affect the interior environment, thus, no adjustments are necessary.
Your cooler may include one of these controls: � CIF: Intelligent Control Function. � ETC1H: Electronic Controller.
The temperature control display is usually located on the plastic front grill.
In the case of ETC1H control, it is located on the condenser unit. It is protected by the front plastic grill. In smaller coolers, ETC1H is located on the back of cooler. It does not have a display.
17

Operation
If your cooler has a Intelligent Control Function (CIF), follow the instructions attached to cooler for further detail. Each CIF has its own cooling configuration. It may also include energy savings modes and it may transmit information to your suppliers. Energy savings modes may be activated with the display button or automatically when the cooler is not in use. In case of coolers without door, although some versions have CIF, they don't include the savings mode due to lack of a door; however, you must use the night curtain just before closing your business to reduce energy consumption and to allow compressors to rest. If the cooler includes an EMS controller, it will also be preconfigured. It analyzes temperatures inside and outside the cooler for better cooling of product. Temperatures and alarms are shown on integrated display. The ERC controller is preconfigurated and allows the user to set the right temperature for the product. It includes inner temperature sensor and also has sensors for the refrigeration and lighting system that allow a better performance. The LAE control is preconfigured, allowing user to select an adequate temperature for different products. Alarms are shown on the display. It also includes an automatic deicing mode, manual deicing, and lighting control. IMPORTANT: if the cooler has a temperature control issue or, if failure alarms occur on CIF, EMS, LAE or ERC displays, never attempt to make control adjustments; please call the Customer Service Center. You will be assisted by experienced and authorized personnel. The ETC1H control in some models is also preconfigured by the manufacturer to maintain product temperature. It does not include a display that shows temperature or alarms. If you notice malfunctioning, please notify the Customer Service Center. There are many CIF models to provide various solutions for multiple cooling needs for each product.
18

Operation
19

Operation
LIGHTING
Consider that this cooler has been designed with the intention to exhibit products to encourage your and your supplier's sales. For best results, lighting must be turned on during sale hours. Our LED lighting technology allows an improved electric efficiency, reducing and providing more operation years with regard to lighting. LED lighting is located around the door perimeter, on the internal cabinet upper portion, or around the perimeter of the internal cabinet. Your cooler may include a switch that allows you to turn off lighting manually. Use it only when your business is closed. During sale schedule, this lighting technology represents a minimum percentage of the cooler's total energy consumption. If the cooler includes a Intelligent Control Function (CIF), lighting will be tuned off automatically in savings mode. You don't have to worry about this, each control will turn lighting off according to cooler characteristics and the products contained in it. Just open the door to exit savings mode. IMPORTANT: if you notice any lighting malfunction, please contact the Customer Service Center.
HINGED DOOR
Cooler's door is designed to thermally isolate the refrigerated product from the environment. If it gets fractured or broken, do not attempt to repair it; call the Customer Service Center. With a moistened cloth, clean glass solid and glass door internal and external surfaces at least once per week. At least every three months, clean the door's seal, check it for perfect condition, and check whether it makes contact with frame inside cabinet. Door hinges and supports have been designed for an adequate turning radius and a proper seal separation distance. If for any reason you need to replace or adjust, request support from the Omcan Tech Support Department at 1-800-465-0234.
20

Operation
If the cooler includes reversible doors and requires a change at the opening, allow this task to be performed by a knowledgeable authorized technician with regard to the self-closing system and electrical installation.
Keep fingers out of risk areas such as door frame and hinges, always use the handle. Pay special attention when closing doors especially when children are nearby.
Door opening must be free from objects or obstacles as they might fall down or slide down causing injuries or wounds to users.
SELF-CLOSING SYSTEM FOR HINGED DOORS
Door may be equipped with a self-closing system that keeps door from being left open carelessly, forcing it to close by an internal spring part of its mechanism. If you notice that it lacks sufficient force to fully close or it closes with too much force such that damage the to door or refrigerated product may be at risk, call the Omcan Tech Support Department at 1-800-465-0234.
The cooler may include a self-closing system with lock, with two user modes: 1. Automatic closure: thanks to an internal spring in the mechanism, the system closes the door automatically
when it is positioned from 20� to 90� in aperture. 2. Reloading: if aperture is greater than 90�, the door lock will be activated and door will remain open at 90�.
Thus, you can conveniently reload cooler. To release lock, you simply push the door again from 90� to 75� to return to mode 1.
SLIDING DOOR
Just as with hinged doors, sliding doors are designed to provide optimal thermal isolation of refrigerated products, making product display more efficient at the point of sale. If the sliding door is damaged, do not attempt repairing it yourself. Call our Technical Support Service.
Sliding doors are supported by a set of rails, allowing door opening with minimal force, providing access to product.
With a moistened cloth, clean glass solid door internal and external surfaces at least once per week.
At least once per month, clean sliding door rails and check for perfect conditions for adequate door slide.
21

Operation
SELF-CLOSING SYSTEM FOR SLIDING DOORS The cooler may be equipped with an integrated self-closing sliding door system inside the frame, which prevents doors from remaining open carelessly, forcing them to close by an internal spring part of its mechanism. If you notice that it lacks sufficient force to fully close or it closes with too much force, such that it could damage the door or refrigerated product may be at risk, call the Customer Service Center.
To open doors, just slide from left to right on the opposite side where they are located.
To refill cooler, open left door and turn right door lock. Thus, you may keep doors open temporarily, while you fill the cooler with product to be refrigerated.
Maintenance
IMPORTANT: disconnect the cooler from wall outlet before you perform any maintenance or cleaning task.
IMPORTANT: do not perform any cleaning task with water hose or jet wash as it may cause damage to electrical components and cause electric shock.
It is preferable to perform cleaning and maintenance tasks using safety work gloves.
GENERAL CLEANING
� Cleaning the cooler regularly prevents deterioration and reduces malfunctioning that may alter product preservation. Clean with a piece of cloth only, warm water and neutral soap. Dry surfaces using a soft cloth or rag.
� Avoid cleaning surfaces with water hose or jet wash. � Do not use solvent or abrasive products for cleaning tasks as they may damage surface finish. � Do not use sharp points to remove excessive dirt; use brush if required. � Use a broom or mop to clean area under cooler. Avoid splattering water directly under cooler's internal front
area.
CONDENSER CLEANING
� Condenser must be cleaned once per month or when required to prevent dirt from reducing cooling system efficiency.
� To clean condenser, it is necessary to remove the cooler's front grill. � Remove dust, lint and trash with soft bristle brush or broom. � In grease-based locations, such as kitchens and/or food cooking areas, accumulated grease or grime must
22

Maintenance
be cleaned off with water and degreasing agents. � Do not use sharp pointed objects to remove excessive grime, use brush if required.
IMPORTANT: do not use solvent or abrasive products for cleaning as they may damage surface finishing.
EVAPORATOR DEICING
� Cooler has an automatic evaporator deicing system to guarantee adequate interior air flow. � If you notice that the cooler is forming ice and it does not cool properly, report this issue to the Customer
Service Center.
MANUAL DEFROSTING - FOR FREEZER
1. Remove the front grill. 2. Push and hold the button 10 for seconds. Manual defrosting is activated by pressing 10 seconds the night
mode button. To observe that the same temperature remains in the control CIF before the defrost cycle. 3. Check that the red and green LEDs illuminate at the same time. During the defrost cycle, green and red
LED remain on.
IT IS IMPORTANT TO KNOW THAT: It is disabled by time or by temperature, whichever occurs first: - Time limit: 30 minutes. - Temperature at defrost sensor limit: 41�F (5�C).
� Defrost time 12 minutes. � Drip time 5 minutes. � Sweep time 5 minutes (fan turn after 5 minutes have ended the defrost). � After 10 minutes of finishing the defrost compressor kicks in.
TECHNICAL MAINTENANCE
� If your cooler requires major maintenance due to refrigeration, electric or lighting system failure, please contact the Customer Service Center.
� All repairs must be performed by an authorized technician. Attempts to repair this equipment by inexperienced personnel or yourself may create malfunctions, damage to equipment or to yourself. Such attempts will be considered to automatically void the warranty.
� Request and make sure original spare parts are used with the same characteristics to guarantee the cooler's optimal operation.
� Before calling the Customer Service Center, check the Troubleshooting Guides included in this manual.
23

Troubleshooting

Failure Cooler cannot be turned on.
Cooler vibrates and/or makes noises.
Lighting turns off.

Possible Causes Power supply failure.
Cooler is not well connected. Loose connection.
Just connected and no more than 5 minutes have passed. Burned fuse or tripped circuit breaker. It is not correctly leveled on a firm and flat surface.
Level supports are unleveled.
Loose parts vibrate or against surfaces or walls.
Tubing vibration is transmitted.
It is set in energy saving mode.

Check Electric power in the business. Outlet must have electrical power. Plug is well connected.
N/A.
Physical state of fuse or circuit breaker. Cooler stability.
No objects are kept under cooler that might cause instability. Leveling supports are correctly adjusted.
Loose components.
N/A.
It is not necessary to check anything, operation is normal.

Corrective Actions Wait until electricity service is restored.
Correctly connect plug to contact. Wait for at least 5 minutes for compressor to start running. Replace fuse or reset circuit breaker. Make sure you place cooler on a firm and flat surface. Remove any carpeting, carton, or other objects from under cooler. Adjust leveling supports until 4 support points are firm. Locate and tighten loose parts or adjust those that might hit others. Separate parts that due to contact may be vibrating together. When door opens, energy savings mode will be deactivated.

24

Troubleshooting

Equipment works continuously for long periods of time.
Compressor does not start, makes buzzing noises or stops due to thermal protector.

Condenser coil is dirty. N/A.

Evaporator coil blocked by frost or frozen.

Door closure and seals are firm and adequate throughout perimeter.

Doors remain open for a long time or doors don't close.

Doors closed when not used.

Door magnetic seals do Seal wear. not close or seal.

Hot product load in

N/A.

cabinet is excessive.

Voltage variation

If business lamps vary

is excessive or

their intensity.

undervoltage is observed.

Vent motor is protected or burnt. Fan blade is damaged.

Fan rotation without variations and for complete blade.

Condenser coil is dirty. N/A.

Insufficient air flow or blocked.

Clean coil to remove dust, lint and waste. Turn cooler off to defrost coil. Do not to use a cutter knife or blade for handling. Inappropriate use may scratch or cut off components. Do not allow doors to remain open for prolonged periods of time. Adjust door or change seals, if necessary. Allow enough time to cool product. Allow for voltage restore and voltage increase.
Call Customer Service Center if required.
Clean dust, lint and waste from coil. Remove objects that may obstruct air flow or move to provide enough space around it.

25

Troubleshooting

Cooler inside temperature More than three hours

is too high or does not have not passed since

cool product.

cooler was connected.

Condenser coil is dirty.

Evaporator coil blocked by frost or frozen.

Doors remain open for a long time or doors do not close.

Hot product load in cabinet is excessive.
Poor or obstructed air flow.

Temperature inside cooler Product is located too

is too low and freezes

close to evaporator.

product.

N/A.
Door closure and seals are firm and adequate throughout perimeter. Doors closed when not used.
N/A.
Product is not near fan inlet.

Wait for a minimum of 14 hours until cooler recovers its temperature.
Clean dust, lint and waste from coil.
Turn cooler off to defrost coil.
Do not allow doors to remain open for prolonged periods of time.
Allow enough time to cool product.
Arrange product to allow adequate air flow. Ensure load does not exceed max fill height label
Place product at least 2 inches away.

26

Model VR08 41215

Parts Breakdown
General Assembly

27

Parts Breakdown
Model VR08 41215

Evaporator Assembly

28

Model VR08 41215

Parts Breakdown
Condenser Assembly

29

Parts Breakdown
Model VR08 41215

Door Assembly

30

Model VR08 41215

Parts Breakdown
General Assembly

Item No. Description

66438

Controller, ELE BEV 115V N/SEN for 41215

66439

Pilaster, 1046 7B Diam 6.7 for 41215

Position Item No. Description

1

66440

Grill, Wire Rear VL08 for 41215

2

66441

Shelf for 41215

Position 3 4

Item No. Description

Position

66442

Front Grill, THER BK for 41215

5

66443

Leveling Screw, 1/2"-13x1 1/2" for 41215 6

Evaporator Assembly

Item No. 66444

Description
Evaporator 14T 5/16 CU 6FPI FIL299 for 41215

66405

Cap Tube 0.036x96" for 41215

66445

Evaporator Housing ABS N/Slot for 41215

Position Item No. Description

Position

1

66446

ABS Motor Evaporator Support for 41215 4

2

66447

Motor E WEL 1/70HP 115V 50/60HZ 1800RPM for 41215

5

3

66448

Fan Blade, WEL PLA 8" Diam. 28 Deg. for 41215

6

Item No. 66438

Description
Controller, ELE BEV 115V N/SEN for 41215

Position 7

Condenser Assembly

Item No. Description

66449

LED Driver, VB-12030D018 30W 115V 50/60Hz for 41215

Position 1

Item No. Description

66451

Condenser, HEL 13S 5/16 CU SQU for 41215

66402

Rocker Switch, BK for 41215

2

66452

ABS Condenser Pan for 41215

66450

Compressor SEC TTE4.6FK 115V 60Hz for 41215

3

66447

Motor E WEL 1/70HP 115V 50/60Hz 1800RPM for 41215

Position 4 5 6

Item No. Description

Position

66453

Nylon T Motor BOT Support for 41215 7

66454

Fan Blade, WEL PLA 8 3/4 Diam. 25 Deg. for 41215

8

66425

Power Cord 115V 15A 14AWG for 41215 9

Door Assembly

Item No. Description

66455

Module, 6 LEDS 1.2W 12V for 41215

66456

MET Bottom Hinge RIG SCC TR34.5 for 41215

Position Item No. Description

Position

1

66434

MET Top Hinge UNI Slope OPT for 41215 3

2

66457

Door G J Rig LED Standard V10 SCC BDH for 41215

4

Item No. Description

66458

Universal Door Gasket 478x1413mm for 41215

66459

Door Handle, PLA Standard V7.2 for 41215

Position 5 6

31

Parts Breakdown
Model VR06 41214

General Assembly

32

Model VR06 41214

Parts Breakdown
Evaporator Assembly

33

Parts Breakdown
Model VR06 41214

Condenser Assembly

34

Model VR06 41214

Parts Breakdown
Door Assembly

35

Parts Breakdown
Model VR06 41214

General Assembly

Item No. Description

66393

Leveling Screw, 1/2"-13x2" W/PLA UL for 41214

66394

Pilaster, 428 4B Diam 6.7 for 41214

66395

Controller, ELE BEV 115V N/SEN 6T for 41214

66396

Knob, ABS Control for 41214

Position Item No. Description

1

66397

Grill, MET Containment R2 for 41214

2

66398

Grill, MET Containment C02 for 41214

3

72281

Top Shelf for 41214

4

72284

Bottom Shelf for 41214

Position 5 6 7 8

Item No. Description

66399

Clip, F/Pilaster 16G Polished for 41214

66400

Thermometer, Wall MTG for 41214

Position 9 10

Evaporator Assembly

Item No. Description

66401

Temp Sensor, ETC1H 2.0M for 41214

Position 1

Item No. Description

66404

Return Pipe, 1/4" 0.300M R6 UL for 41214

66402

Rocker Switch, BK for 41214

2

66405

Cap Tube 0.036x96" for 41214

66403

Evaporator 156 14T 1/4 AL 6FPI FIL341 PAI for 41214

3

66406

Grill, Wire Fan Blade 200mm 12R WT High for 41214

Position 4 5 6

Item No. Description

66407

Motor, E WEL 13W 100/240V 50/60HZ 1400RPM for 41214

66408

Fan Blade MYF PLA 6" Dia. 31 Deg. for 41214

66409

Nylon Motor Ring for 41214

Position 7 8 9

Condenser Assembly

Item No. Description

66410

Main Harness for 41214

66411

LED Harness for 41214

Position 1

Item No. Description

66416

ABS Condenser Pan for 41214

2

66417

Filter Dryer 0.9 HP DCL for 41214

66412 66413 66414 66415

Compressor Harness for 41214

3

LED Current, Driver 24W R2 S300 W/ CON for 41214

4

Compressor EMB EMU40CLP 115V 60HZ R6 for 41214

5

Condenser 206 NFI 36T 3/16 FE PAI HM for 41214

6

66418 66419 66420 66421

Cond-Filt Pipe 3/16" 0.180M for 41214 Charge Pipe 1/4" 0.180M for 41214 Discharge Pipe 3/16" 1.010M for 41214 Vacuum Pipe 1/4" 0.300M for 41214

Position 7 8 9 10 11 12

Item No. Description

66422

Suction Pipe 1/4" 0.980M for 41214

66423

Motor, E WEL 13W 100/240V 50/60HZ 1400RPM for 41214

66424

Fan Blade, WEL PLA 8" Diam. 28 Deg. for 41214

Position 13 14
15

66425

Power Cord 115V 15A 14AWG for 41214 16

Door Assembly

Item No. Description

66426

Module, 8 LEDS 1.2W 54MA NGD for 41214

66427

F-M Moduled Harness NGD for 41214

66428 66429

F-Driver Moduled Harness NGD for 41214
Reversible Door Stopper ED 3/4" BK for 41214

Position Item No. Description

1

66430

PE BLA NGD Couple for 41214

2

66431

Door G J RHG LED SCTB NGD for 41214

3

66432

Universal Door Gasket 516x866mm for 41214

4

66433

Door Handle for 41214

Position 5 6

Item No. Description

66434

MET Top Hinge UNI Slope OPT for 41214

66435

Hinge Top Cover for 41214

7

66436

Hinge Position Top Cover for 41214

8

66437

MET Top Hinge UNI Slope SCTB for 41214

36

Position 9 10 11 12

Model VR12 41217

Parts Breakdown
General Assembly

37

Parts Breakdown
Model VR12 41217

Evaporator Assembly

38

Model VR12 41217

Parts Breakdown
Condenser Assembly

39

Parts Breakdown
Model VR12 41217

Door Assembly

40

Parts Breakdown

Model VR12 41217

General Assembly

Item No. Description

AD562

Pilaster for 41217

AD563

Anti-Vacuum Moulding for 41217

AD564

Tube Cover for 41217

AD565

Mold Deflector Support for 41217

AD566

Deflector Molding for 41217

AD567

Wire Cover for 41217

AD568 AD569 AD570

Switch for 41217 Temperature Control for 41217 Control Support for 41217

Position 1 2 3 4 5
6
7 8 9

Item No. Description

AD571

Driver 24W for 41217

AD572

Power Cord for 41217

AD573

Back Grill for 41217

AD574

Shelf for 41217

66645

Clip F/Pilaster for 41217

66507

Thermometer, Wall MTG, 3017492 for 41217

AD575

Leveling Leg for 41217

AD576

Wall Spacer for 41217

AD577

Front Grill for 41217

Position 10 11 12 13 14
15
16 17 18

Item No. Description

AD578

Magnetic Support Switch for 41217

AD579

Control Knob for 41217

AD580

Main Harness for 41217

AD581

Harness Motor for 41217

AD582

LED Harness for 41217

AD583

Motor Ground Harness for 41217

AD584

Compressor Harness for 41217

Position 19 20 21

Evaporator Assembly

Item No. Description

AD585

Stopper for 41217

AD586

Evaporator Fan Motor for 41217

66477

Fan Blade Elc Pla 8" Diam. 28 Deg. for 41217

66493

ABS O Motor Evaporator Support for 41217

Position 1 2

Item No. Description

AD587

Hose for 41217

AD588

Temperature Sensor for 41217

3

AD589

Evaporator for 41217

4

AD590

Heat Exchanger for 41217

Position 5 6
7

Item No. Description

AD591

Capillary Tube 0.036"x150" for 41217

AD592

Evaporator Housing for 41217

AD593

Evaporator Housing Grill for 41217

8

Position 9 10
11

Condenser Assembly

Item No. Description

AD594

Compressor Base for 41217

AD595

Condenser for 41217

AD596

Condenser Pan Support for 41217

AD597

Filter Drier for 41217

66419 AD598

Charge Pipe 1/4" 0.180M for 41217 Vacuum Pipe for 41217

Position 1 2 3

Item No. Description

AD599

Pipe Support for 41217

66477

Fan Blade Elc Pla 8" Diam. 28 Deg. for 41217

66476

Nylon T Motor Injected Support for 41217

Position 7 8 9

4

AD600

Motor Stand for 41217

10

5

AD601

Hose for 41217

11

6

AD602

Compressor for 41217

12

Item No. Description

AD603

Condensate Pan for 41217

AD604

Discharge Pipe for 41217

AD605 66668 AD606 AD607

Suction Line for 41217
Condenser Fan Motor, 16W 1850RPM for 41217
Acc Compressor Kit for 41217
Pipe Insulation for 41217

Position 13 14 15 16 17 18

Door Assembly

Item No. Description

AD608

LED Module for 41217

AD609

F-M Module Harness for 41217

AD610

F-M Module Harness for 41217

AD611

Moulding Glass Fixer Cover for 41217

AD612

Moulding Glass Fixer Cover for 41217

AD613

Stopper for 41217

Position 1 2 3 4 5 6

Item No. Description

AD614

Glass Door for 41217

AD615

Gasket for 41217

AD616

Plastic Door Handle for 41217

AD617

Removable Rivet for 41217

66559

Self Closing G319 UL V10 for 41217

AD618

Bottom Hinge for 41217

Position 7 8 9 10 11 12

Item No. Description

AD619

Bottom Hinge for 41217

AD620

Hinge Cover Position for 41217

AD621

Top Hinge for 41217

AD622

Moulding Glass Fixer Cover for 41217

Position 13 14 15 16

41

Parts Breakdown
Model VR10 41216

General Assembly

42

Model VR10 41216

Parts Breakdown
Evaporator Assembly

43

Parts Breakdown
Model VR10 41216

Condenser Assembly

44

Model VR10 41216

Parts Breakdown
Door Assembly

45

Parts Breakdown
Model VR10 41216

General Assembly

Item No. Description

66460

Grill, Wire Rear VR10x12 UL for 41216

66461

Shelf for 41216

66399 66462

Clip, F/Pilaster 16G Polished for 41216 Pilaster 212 3B Diam 6.7 for 41216

Position 1 2
3 4

Item No. Description

66443

Leveling Screw, 1/2"-13x1 1/2" for 41216

66463

Kit Visislide Low 6 FTES CCE V12 for 41216

66464

Front Grill, THER BK V14 L/RHinge PL for 41216

66396

Knob, ABS Control for 41216

Position 5 6
7 8

Item No. Description

66400

Thermometer, Wall MTG for 41216

66438

Controller, ELE BEV 115V N/SEN for 41216

Position 9
10

Evaporator Assembly

Item No. 66465

Description
Evaporator 150 14T 5/16 CU 6FPI FL400 for 41216

Position 1

66405

Cap Tube 0.036x96" for 41216

2

Item No. Description

66466

Evaporator Housing MET 4N for 41216

66467

Motor E WEL 1/70HP 115V 50/60HZ 1800RPM for 41216

Position 3

Item No. Description

66468

Rocker Switch, BK for 41216

4

66469

Temp Sensor, ETC1H 1.0M for 41216

Position 5 6

Condenser Assembly

Item No. Description

Position Item No. Description

Position

66470

Main Harness ETC1H BL for 41216

1

66417

Filter Dryer 0.9 HP DCL for 41216

7

66471 66449 66472 66451 66452

Accumulator CU 1 3/8" Diam.x4" for 41216

2

LED Driver, VB-12030D018 30W 115V 50/60HZ for 41216

3

Compressor EMB EMI55HER 115V 60HZ for 41216

4

Condenser, HEL 13S 5/16 CU SQU for 41216

5

ABS Condenser Pan for 41216

6

66473 66419 66474 66475 66476

Discharge Pipe 1/4" 1.000M for 41216

8

Charge Pipe 1/4" 0.180M for 41216

9

Vacuum Pipe 1/4" 0.450M for 41216

10

Motor, E ELC 16W 115V 50/60HZ 1850RPM for 41216

11

Nylon T Motor Injected Support for 41216 12

Item No. Description

66477

Fan Blade ELC PLA 8" Diam. 28 Deg. for 41216

66478

Arnes Unidas ETC1H UL for 41216

Position 13 14

66425

Power Cord 115V 15A 14AWG for 41216 15

66402

Rocker Switch, BK for 41216

16

Door Assembly

Item No. Description

Position

66479

PVC Drain Curved Coupler for 41216

1

66434 66480 66481

Met Top Hinge UNI Slope OPT for 41216 2

Hinge Top OPT BL Cover for 41216

3

MET Bottom Hinge RIG SCC TR34.5 for 41216

4

Item No. Description

66482

Met Bottom Hinge LEF SCC TR34.5 for 41216

66483

F-M Moduled Harness for 41216

66484

F-Driver Moduled Harness for 41216

66485

Door G J RHG LED SCC BDH for 41216

Position 5 6 7 8

Item No. Description

66486

Universal Door Gasket 628x1098mm for 41216

66455

Module, 6 LEDS 1.2W 12V for 41216

Position 9 10

46

Model G319 HC 45445 Model G319 41161

Parts Breakdown
General Assembly

47

Parts Breakdown
Model G319 HC 45445 Model G319 41161

Evaporator Assembly

48

Model G319 HC 45445 Model G319 41161

Parts Breakdown
Condenser Assembly

49

Parts Breakdown
Model G319 HC 45445 Model G319 41161

Door Assembly

50

Model G319 HC 45445

Parts Breakdown
General Assembly

Item No. Description

62480

Back Grill for 45445

AD560

Shelf G313x16x19 UL Black for 45445

66399

Clip, F/Pilaster 16G Polished for 45445

Position Item No. Description

Position

1

66443

Leveling Screw, 1/2"-13x1 1/2" for 45445 4

2

66504

Front Grill, Ther BK Hole for 45445

5

3

AD561

Kit Visislide Low 8 FTES CCE V12 Black for 45445

6

Item No. Description

66506

Controller ELE BEV 115V N/SEN 6T for 45445

66396

Knob, ABS Control for 45445

66507

Thermometer, Wall MTG, 3017492 for 45445

Position 7 8 9

Evaporator Assembly

Item No. 66508

Description
Evaporator 332 20T 1/4 AL 6FPI FIL490 PAI for 45445

66509

Cap Pipe, 0.049x120" for 45445

66510

Evaporator Housing ABS for 45445

Position 1 2 3

Item No. Description

66511

Cover, PLA CTRL WT G3 for 45445

66512 66513

Motor E WEL 1/70HP 115V 50/60HZ 1800RPM for 45445
Fan Blade, WEL PLA 8" Diam 28 Deg. for 45445

Position 4 5 6

Item No. Description

66402

Rocker Switch, BK for 45445

66514

Temperature Sensor 3M ETC1H for 45445

Position 7 8

Condenser Assembly

Item No. Description

66515

LED Current, Driver 24W R2 S450 W/ CON for 45445

Position Item No. Description

Position

1

66518

ABS Condenser Pan EV46x72 for 45445 5

66425

Power Cord 115V 15A 14AWG for 45445 2

66417

Filter Dryer 0.9 HP DCL for 45445

6

66516 66517

Compressor SEC DEL-6.5CN 115V 60HZ R2 for 45445

3

Condenser 388 NFI 72T 3/16 FE PAI UL HM for 45445

4

66419

Charge Pipe 1/4" 0.180M for 45445

7

66474

Vacuum Pipe 1/4" 0.450M for 45445

8

Item No. Description

66519

Suction Pipe 5/16" 1.400M CCV144 R2 for 45445

66520

Motor E WEL 1/70HP 115V 50/60HZ 1800RPM for 45445

66512

Motor E WEL 1/70HP 115V 50/60HZ 1800RPM for 45445

66454

Fan Blade, WEL PLA 8 3/4 Diam. 25 Deg. for 45445

Position 9 10 11 12

Door Assembly

Item No. Description

66521

Harness, Door HG NGD UL 1DRV for 45445

66522

Module, 8 LEDS 1.2W 54MA V7 Serie for 45445

66523

Harness, F-M Moduled V7 for 45445

Position 1 2 3

Item No. Description

66524

Door G J RHG LED SCC W/Wire BDH for 45445

66525

Door Gasket Universal 748x1627mm for 45445

66526

Self Closing, Steek-TSL BK W/Wire for 45445

Position 4

Item No. Description

Position

69050

Hinge - Met Bot LEF SCC G00 for 45445 7, 8

5

66434

Met Top Hinge UNI Slope OPT for 45445 9

6

51

Parts Breakdown
Model G319 41161

General Assembly

Item No. Description

62480

Back Grill for 41161

66503

Shelf G313x16x19 UL for 41161

66399

Clip, F/Pilaster 16G Polished for 41161

Position Item No. Description

Position

1

66443

Leveling Screw, 1/2"-13x1 1/2" for 41161 4

2

66504

Front Grill, Ther BK Hole for 41161

5

3

66505

Kit Visislide Low 8 FTES CCE V12 for 41161

6

Item No. Description

66506

Controller ELE BEV 115V N/SEN 6T for 41161

66396

Knob, ABS Control for 41161

66507

Thermometer, Wall MTG, 3017492 for 41161

Position 7 8 9

Evaporator Assembly

Item No. 66508

Description
Evaporator 332 20T 1/4 AL 6FPI FIL490 PAI for 41161

66509

Cap Pipe, 0.049x120" for 41161

66510

Evaporator Housing ABS for 41161

Position 1 2 3

Item No. Description

66511

Cover, PLA CTRL WT G3 for 41161

66512 66513

Motor E WEL 1/70HP 115V 50/60HZ 1800RPM for 41161
Fan Blade, WEL PLA 8" Diam 28 Deg. for 41161

Position 4 5 6

Item No. Description

66402

Rocker Switch, BK for 41161

66514

Temperature Sensor 3M ETC1H for 41161

Position 7 8

Condenser Assembly

Item No. Description

66515

LED Current, Driver 24W R2 S450 W/ CON for 41161

Position Item No. Description

Position

1

66518

ABS Condenser Pan EV46x72 for 41161 5

66425

Power Cord 115V 15A 14AWG for 41161 2

66417

Filter Dryer 0.9 HP DCL for 41161

6

66516 66517

Compressor SEC DEL-6.5CN 115V 60HZ R2 for 41161

3

Condenser 388 NFI 72T 3/16 FE PAI UL HM for 41161

4

66419

Charge Pipe 1/4" 0.180M for 41161

7

66474

Vacuum Pipe 1/4" 0.450M for 41161

8

Item No. Description

66519

Suction Pipe 5/16" 1.400M CCV144 R2 for 41161

66520

Motor E WEL 1/70HP 115V 50/60HZ 1800RPM for 41161

66512

Motor E WEL 1/70HP 115V 50/60HZ 1800RPM for 41161

66454

Fan Blade, WEL PLA 8 3/4 Diam. 25 Deg. for 41161

Position 9 10 11 12

Door Assembly

Item No. Description

66521

Harness, Door HG NGD UL 1DRV for 41161

66522

Module, 8 LEDS 1.2W 54MA V7 Serie for 41161

66523

Harness, F-M Moduled V7 for 41161

Position 1 2 3

Item No. Description

66524

Door G J RHG LED SCC W/Wire BDH for 41161

66525

Door Gasket Universal 748x1627mm for 41161

66526

Self Closing, Steek-TSL BK W/Wire for 41161

Position 4

Item No. Description

Position

69050

Hinge - Met Bot LEF SCC G00 for 41161 7, 8

5

66434

Met Top Hinge UNI Slope OPT for 41161 9

6

52

Model G326 41219

Parts Breakdown
General Assembly

53

Parts Breakdown
Model G326 41219

Evaporator Assembly

54

Model G326 41219

Parts Breakdown
Condenser Assembly

55

Parts Breakdown
Model G326 41219

Door Assembly

56

Model G326 41219

Parts Breakdown
General Assembly

Item No. Description

66529

Pilaster, 1268 6B Diam 6.35 for 41219

66530 66531

Controller. ELE BEV 115V N/SEN for 41219
Grill, Wire Rear for 41219

Position Item No. Description

1

66532

Shelf, G322x26 for 41219

2

66399

Clip, F/Pilaster 16G Polished for 41219

3

66533

Baseboard, PE Rail ARG G3 for 41219

Position 4
5 6

Item No. Description

66534

Front Grill, Ther BK VL300 L/R Hinge for 41219

Position 7

Evaporator Assembly

Item No. 66535

Description
Evaporator 20T 3/8 CU 6FPI FIL491 PAH for 41219

Position 1

66469

Temp Sensor, ETC1H 1.0M for 41219

2

Item No. Description

66409

Nylon Motor Ring for 41219

66475

Motor, E ELC 16W 115V 50/60HZ 1850RPM for 41219

Position 3 4

Item No. 66477

Description
Fan Blade ELC PLA 8" Diam. 28 Deg. for 41219

66510

Evaporator Housing ABS for 41219

Position 5 6

Condenser Assembly

Item No. Description

Position

66536

LED Driver, VDM#3017356 for 41219

1

66537 66518

Condenser, NFI 72T 5/16 CU V225 Diam. for 41219

2

ABS Condenser Pan EV46x72 for 41219 3

Item No. Description

66475

Motor, E ELC 16W 115V 50/60HZ 1850RPM for 41219

66477

Fan Blade ELC PLA 8" Diam. 28 Deg. for 41219

66446

ABS Motor Evaporator Support for 41219

Position 4
5 6

Item No. Description

66538

Compressor SEC NF 11FX 115V 60HZ for 41219

Position 7

66425

Power Cord 115V 15A 14AWG for 41219 8

Door Assembly

Item No. 66539 66540

Description Hinge, Met Top UNI Slope for 41219 Hinge, Met Bot UNI SCS TR31 for 41219

Position 1 2

Item No. Description

66541

Door G J LEF LED SCS BDH for 41219

66542

Door G J RIG LED SCS BDH for 41219

Position 3 4

57

Parts Breakdown
Model VRD37 42862

General Assembly

58

Model VRD37 42862

Parts Breakdown
Evaporator Assembly

59

Parts Breakdown
Model VRD37 42862

Condenser Assembly

60

Model VRD37 42862

Parts Breakdown
Door Assembly

61

Parts Breakdown
Model VRD37 42862

General Assembly

Item No. Description

66543

Back Grill for 42862

66443

Leveling Screw, 1/2"-13x1 1/2" for 42862

Position 1 2

Item No. Description

45470

Black Shelf for 42862

66544

Kit Visislide Low for 42862

Position 3 4

Item No. Description

66545

Clip Pilaster Shelf for 42862

45961

Louvered Front Grill for 42862

Position 5 6

Evaporator Assembly

Item No. Description

66546

Right Evaporator Coil for 42862

66547

Left Evaporator Coil for 42862

66548

Cap Tube VR43 for 42862

Position 1 2 3

Item No. Description

66549

Evaporator Housing Cover W/Slot for 42862

66550

Evaporator Housing Cover W/O Slot for 42862

66551

Evaporator Condenser Fan Motor G319 V10 for 42862

Position 4 5 6

Item No. Description

66402

Rocker Switch, BK for 42862

66552

Header Lamp VR43 for 42862

66492

Evaporator Housing ABS for 42862

Position 7 8 9

Condenser Assembly

Item No. Description

66530

Controller. ELE BEV 115V N/SEN for 42862

66449

LED Driver, VB-12030D018 30W 115V 50/60HZ for 42862

66553

Compressor for 42862

64182

Condenser Coil for 42862

Position Item No. Description

1

66554

Condensate Pan 6LT for 42862

Position 5

Item No. Description

66556

Switch Support for 42862

Position 9

2

66555

Filter Drier VAL22TDV for 42862

6

3

66551

Evaporator Condenser Fan Motor G319 V10 for 42862

7

4

66402

Rocker Switch, BK for 42862

8

66425

Power Cord 115V 15A 14AWG for 42862 10

Door Assembly

Item No. Description

66482

Met Bottom Hinge LEF SCC TR34.5 for 42862

66481

Met Bottom Hinge RIG SCC TR34.5 for 42862

66434

Met Top Hinge UNI Slope OPT for 42862

66557

Door Support for 42862

64179

Right Door Black for 42862

Position 1
2 3 4 5

Item No. Description

64180

Left Door Black for 42862

66558
66559 66560 66561

Door Gasket for 42862
Self Closing G319 UL V10 for 42862 LED Module for 42862 Harness H-M LED Modules for 42862

Position 6

Item No. Description

66562

Harness Door for 42862

7

66563

Harness Driver for 42862

8

66564

Front Display Coke for 42862

9

10

Position 11
12 13

62

Model VRD43 41218

Parts Breakdown
General Assembly

63

Parts Breakdown
Model VRD43 41218

Evaporator Assembly

64

Model VRD43 41218

Parts Breakdown
Condenser Assembly

65

Parts Breakdown
Model VRD43 41218

Door Assembly

66

Model VRD43 41218

Parts Breakdown
General Assembly

Item No. Description

66565

Front Grill, Ther BK for 41218

66566 66567

Grill, Wire Rear for 41218 Shelf S/R for 41218

Position Item No. Description

Position

1

66399

Clip, F/Pilaster 16G Polished for 41218 4

2

66530

Controller. ELE BEV 115V N/SEN for 41218

5

3

66443

Leveling Screw, 1/2"-13x1 1/2" for 41218 6

Item No. Description

66568

Kit Visislide Low 7 FTES 2TPUL V12 for 41218

Position 7

Evaporator Assembly

Item No. Description

66569

Evaporator 14T 3/8 CU 6FPI FIL491 RED0.197" for 41218

66570

Evaporator 14T 3/8 CU 6FPI LEF RED0.220" for 41218

66571

Cap Pipe, 0.062x160" N/S N/OM for 41218

Position Item No. Description

1

66510

Evaporator Housing ABS for 41218

2

66475

Motor, E ELC 16W 115V 50/60HZ 1850RPM for 41218

3

66477

Fan Blade ELC PLA 8" Diam. 28 Deg. for 41218

Position 4

Item No. Description

66409

Nylon Motor Ring for 41218

Position 7

5

66402

Rocker Switch, BK for 41218

8

6

66469

Temp Sensor, ETC1H 1.0M for 41218 9

Condenser Assembly

Item No. Description

66553

Compressor for 41218

64182

Condenser Coil Elite for 41218

66554

Condensate Pan 6LT for 41218

Position Item No. Description

1

66417

Filter Dryer 0.9 HP DCL for 41218

2

66475

Motor, E ELC 16W 115V 50/60HZ 1850RPM for 41218

3

66477

Fan Blade ELC PLA 8" Diam. 28 Deg. for 41218

Position 4 5 6

Item No. Description

66493

ABS O Motor Evaporator Support for 41218

Position 7

66425

Power Cord 115V 15A 14AWG for 41218 8

66573

LED Driver, VB-12030D018 30W 115V 50/60HZ for 41218

9

Door Assembly

Item No. Description

66574

Door G J RIG LED SCC BDH for 41218

66575

Door G J LEF LED SCC BDH for 41218

66576

Door Gasket, 640x1567mm for 41218

Position 1 2

Item No. Description

66500

Self Closing, Steel-TSL BK for 41218

69050

Hinge - Met Bot LEF SCC G00 for 41218

Position 4 5, 6

3

66434

Met Top Hinge UNI Slope OPT for 41218 7

Item No. Description

66577

Module, 6 LEDS 1.2W 12V for 41218

66484

F-Driver Moduled Harness for 41218

66578

Lamp, 15 LEDS 3W 12V 455mm UL for 41218

Position 8 9
10

67

Parts Breakdown
Model G372 41220 Model G372 BLACK 45250

General Assembly

68

Model G372 41220 Model G372 BLACK 45250

Parts Breakdown
Evaporator Assembly

69

Parts Breakdown
Model G372 41220 Model G372 BLACK 45250

Condenser Assembly

70

Model G372 41220 Model G372 BLACK 45250

Parts Breakdown
Door Assembly

71

Parts Breakdown
Model G372 41220 Model G372 BLACK 45250

General Assembly

Item No. Description

66545

Clip Pilaster Shelf for 41220 & 45250

66579

Louvered Left Cut for 41220 & 45250

Position 1 2

Item No. Description

66580

Louvered for 41220 & 45250

45247

Black Shelf for 41220 & 45250

Position 3 4

Item No. Description

66581

Back Grill G3T72 for 41220 & 45250

Position 5

Evaporator Assembly

Item No. Description

66582

Evaporator Housing for 41220 & 45250

66583

Evaporator Housing Left for 41220 & 45250

66584

Evaporator Housing Right for 41220 & 45250

Position 1 2
3

Item No. Description

66585

Evaporator Coil for 41220 & 45250

66586

ELCO Evaporator Motor Without Blade for 41220 & 45250

66587

Evaporator Motor Blade for 41220 & 45250

Position 4 5
6

Item No. Description

66588

Cap Tube for 41220 & 45250

66396

Knob, ABS Control for 41220 & 45250

66530

Controller ELE BEV 115V N/SEN for 41220 & 45250

Position 7 8
9

Condenser Assembly

Item No. Description

66536

LED Driver, VDM#3017356 for 41220 & 45250

66538

Compressor SEC NF 11FX 115V 60HZ for 41220 & 45250

64182

Condenser Coil Elite for 41220 & 45250

Position Item No. Description

Position

1

66554

Condensate Pan 6LT for 41220 & 45250 4

2

66555

Filter Drier VAL22TDV for 41220 & 45250 5

3

66551

Evaporator Condenser Fan Motor G319 V10 for 41220 & 45250

6

Item No. 66589

Description
Power Cord 20 AMP 10 FT for 41220 & 45250

Position 7

Door Assembly

Item No. Description

66597

Top Right Hinge Bracket G342 for 41220 & 45250

66598

Bottom Right Hinge Bracket G342 for 41220 & 45250

66599

Bottom Left Hinge Bracket G342 for 41220 & 45250

66600

Top Left Hinge Bracket G342 for 41220 & 45250

66557

Door Support for 41220 & 45250

Position 1 2 3 4 5

Item No. Description

Position

66590

Left Door without LED for 41220 & 45250 6

66591

Right Door without LED for 41220 & 45250

7

66592

Door Gasket for 41220 & 45250

8

66459

Door Handle, PLA Standard V7.2 for 41220 & 45250

9

66593

Self Closing Left for 41220 & 45250

10

Item No. Description

66594

Self Closing Right for 41220 & 45250

66595 66596

LED Series G326 Left Door for 41220 & 45250
LED Series G319x42 Right Door for 41220 & 45250

Position 11 12 13

72

Model VR1.5 45800

Parts Breakdown
General Assembly

73

Parts Breakdown
Model VR1.5 45800

Condenser Assembly

74

Model VR1.5 45800

Parts Breakdown
Door Assembly

75

Parts Breakdown
Model VR1.5 45800

General Assembly

Item No. Description

66530

Controller, ELE BEV 115V N/SEN for 45800

AD623

Grill, Met Unit UL BR for 45800

66399

Clip, F/Pilaster 16G Polished for 45800

Position 1 2 3

Item No. Description

66393

Leveling Screw, 1/2"-13x2" W/PLA UL for 45800

AD624

Shelf, LAR for 45800

AD625

Shelf, SMA for 45800

Position 4 5 6

Item No. Description

66400

Thermometer, Wall MTG, 3017492 for 45800

Position 7

Condenser Assembly

Item No. Description

AD626

Cap Tube, 0.024"x150" N/S for 45800

AD627

Harness, Main UL LED for 45800

AD628

Compressor SEC TF3.5F 115V 60Hz for 45800

AD629

Condenser, STA 11T 3/16 FE for 45800

Position 1

Item No. Description

66417

Filter, Drier 0.9 HP DCL for 45800

Position 5

2

AD630

Harness, Compressor UL LED for 45800 6

3

66402

Rocker Switch, BK for 45800

7

4

66449

LED Driver, VB-12030D018 30W 115V50/60Hz for 45800

8

Item No. Description

66469

Temp Sensor, ETC1H 1.0M for 45800

66425

Power Cord, 115V 15A 14AWG for 45800

Position 9
10

Door Assembly

Item No. Description

66480

Hinge Top OPT BL Cover for 45800

66434

MET Top Hinge UNI Slope OPT for 45800

AD631

Hinge, MET Top RIG SCC for 45800

Position 1

Item No. Description

66455

Module, 6 LEDS 1.2W 12V for 45800

2

AD632

Door G J RIG LED SCC BDH for 45800

3

AD633

Door Gasket, Universal 354x675mm for 45800

Position 4 5
6

Item No. Description

66459

Door Handle, PLA STD V7.2 for 45800

Position 7

76

Model VR04 45801

Parts Breakdown
General Assembly

77

Parts Breakdown
Model VR04 45801

Condenser Assembly

78

Model VR04 45801

Parts Breakdown
Door Assembly

79

Parts Breakdown
Model VR04 45801

General Assembly

Item No. Description

AD634

Temperature Control for 45801

AD635

Control Box for 45801

AD579

Control Knob for 45801

66469

Temp Sensor, ETC1H 1.0M for 45801

AD572

Power Cord for 45801

AD568

Switch for 45801

66449

LED Driver, VB-12030D018 30W 115V 50/60Hz for 45801

Position 1 2 3 4 5 6
7

Item No. Description

AD636

Grommet for 45801

AD637

Back Grill for 45801

AD638

Grommet for 45801

AD639

Shelf for 45801

66645

Clip F/Pilaster for 45801

AD640

Pilaster for 45801

66507

Thermometer, Wall MTG, 3017492 for 45801

Position 8 9 10 11 12 13
14

Item No. Description

AD641

Leveling Leg for 45801

AD642

Front Grill for 45801

AD643

Front Grill Support for 45801

AD644

Clip Molding for 45801

AD645

Main Harness for 45801

AD583

Motor Ground Harness for 45801

AD646

Compressor Harness for 45801

Position 15 16 17 18 19

Condenser Assembly

Item No. Description

AD647

Compressor Base for 45801

AD648

Compressor for 45801

AD649
AD650 AD596 AD651

Condenser for 45801
Condensate Pan for 45801 Condenser Pan Support for 45801 Capillary Tube 0.031"x150" for 45801

Position Item No. Description

1

AD597

Filter Drier for 45801

2

AD652

Discharge Pipe for 45801

3

66419

Charge Pipe 1/4" 0.180M for 45801

4

AD653

Vacuum Pipe for 45801

5

AD654

Suction Line for 45801

6

AD655

Motor Stand for 45801

Position 7
8
9 10 11 12

Item No. Description

66512

Motor E WEL 1/70HP 115V 50/60Hz 1800RPM for 45801

66476

Nylon T Motor Injected Support for 45801

66408

Fan Blade MYF PLA 6" Dia. 31 Deg. for 45801

AD656

ACC Compressor Kit for 45801

Position 13 14 15 16

Door Assembly

Item No. Description

AD657

LED Module for 45801

AD658 AD659

F-M Module Harness for 45801 F-Driver Module Harness for 45801

AD660

Glass Door for 45801

AD661

Gasket for 45801

Position 1 2 3 4 5

Item No. Description

66526

Self Closing, Steel-TSL BK with Wire for 45801

AD616

Plastic Door Handle for 45801

AD617

Removable Rivet for 45801

66456

MET Bottom Hinge RIG SCC TR34.5 for 45801

AD662

Top Hinge for 45801

Position 6 7 8 9 10

Item No. Description

AD663

Hinge Cover for 45801

AD664 AD665

Moulding Glass Fixer Cover for 45801 Moulding Glass Fixer Cover for 45801

Position 11 12 13

80

Model VFS24 41221

Parts Breakdown
General Assembly

81

Parts Breakdown
Model VFS24 41221

Evaporator Assembly

82

Model VFS24 41221

Parts Breakdown
Condenser Assembly

83

Parts Breakdown
Model VFS24 41221

Door Assembly

84

Model VFS24 41221

Parts Breakdown
General Assembly

Item No. Description

62480

Back Grill G3D42 for 41221

66643

Shelf for 41221

66644

Floor Shelf for 41221

Position Item No. Description

1

66645

Clip, F/Pilaster for 41221

2

66646

Pilaster for 41221

3

66393

Leveling Screw, 1/2"-13x2" W/PLA UL for 41221

Position 4 5 6

Item No. Description

66507

Thermometer, Wall MTG, 3017492 for 41221

66647

Metallic Front Grill for 41221

66648

Controller for 41221

Position 7 8 9

Evaporator Assembly

Item No. Description

66649

Evaporator for 41221

66650

Cap Tube for 41221

66651

Return Pipe for 41221

66652

Bimetal Disc for 41221

66653

Evap Pan for 41221

66654

Heater for 41221

Position 1 2 3

Item No. Description

66655

White Evap Housing for 41221

66656

Black Evap Housing for 41221

66657

White Grill, Wire Fan Blade for 41221

4

66658

Black Grill, Wire Fan Blade for 41221

5

66659

White Couple for 41221

6

66660

Black Couple for 41221

Position 7A 7B 8A 8B
9A
9B

Item No. Description

66661

Drain Gasket for 41221

66662

Heater for 41221

66663

Grommet for 41221

66664

Evaporator Fan Motor, 13W 1800RPM for 41221

66424

Fan Blade, Wel Pla 8" Diam. 28 Deg. for 41221

66493

ABS O Motor Evaporator Support for 41221

Position 10 11 12 13
14
15

Condenser Assembly

Item No. Description

64182

Condenser Coil Elite for 41221

66665

Compressor NT2168GKV for 41221

66666

Compressor Accessories for 41221

66518 66555

ABS Condenser Pan EV46x72 for 41221 Filter Drier VAL22TDV for 41221

Position 1 2
3
4 5

Item No. Description

66667

Cap Extension Pipe for 41221

66668

Condenser Fan Motor, 16W 1850RPM for 41221

66477

Fan Blade ELC PLA 8" Diam. 28 Deg. for 41221

66493

ABS O Motor Evaporator Support for 41221

66669

Charge Pipe for 41221

Position 6
7

Item No. Description

66670

Vacuum Pipe for 41221

66671

Discharge Pipe for 41221

8

66672

Suction Pipe for 41221

9

66673

Temperature Sensor for 41221

10

Position 11 12
13
14

Door Assembly

Item No. Description

66674

Glass Door for 41221

66675

Top Hinge for 41221

Position 1 2

Item No. Description

66676

Bottom Hinge for 41221

66577

Module, 6 LEDS 1.2W 12V for 41221

Position 3 4

Item No. Description

66677

Outer Gasket for 41221

66678

Inner Gasket for 41221

Position 5 6

85

Electrical Schematics
Model VR08 41215
86

Model VR06 41214

Electrical Schematics

87

Electrical Schematics
Model VR12 41217
88

Model VR10 41216

Electrical Schematics

89

Electrical Schematics
Model G319 HC 45445 Model G319 41161
90

Model G326 41219

Electrical Schematics

91

Electrical Schematics
Model VRD37 42862
92

Model VRD43 41218

Electrical Schematics

93

Electrical Schematics
Model G372 41220 Model G372 BLACK 45250
94

Model VR1.5 45800

Electrical Schematics

95

Electrical Schematics
Model VR04 45801
96

Model VFS24 41221

Electrical Schematics

97

Notes
________________________________________________________________________________________ ________________________________________________________________________________________ ________________________________________________________________________________________ ________________________________________________________________________________________ ________________________________________________________________________________________ ________________________________________________________________________________________ ________________________________________________________________________________________ ________________________________________________________________________________________ ________________________________________________________________________________________ ________________________________________________________________________________________ ________________________________________________________________________________________ ________________________________________________________________________________________ ________________________________________________________________________________________ ________________________________________________________________________________________ ________________________________________________________________________________________ ________________________________________________________________________________________ ________________________________________________________________________________________ ________________________________________________________________________________________ ________________________________________________________________________________________ ________________________________________________________________________________________ ________________________________________________________________________________________ ________________________________________________________________________________________ ________________________________________________________________________________________ ________________________________________________________________________________________
98

Warranty Registration

Thank you for purchasing an Omcan product. To register your warranty for this product, complete the information below, tear off the card at the perforation and then send to the address specified below. You can also register online by visiting:
Merci d'avoir achet� un produit Omcan. Pour enregistrer votre garantie pour ce produit, compl�tez les informations ci-dessous, d�tachez la carte au niveau de la perforation, puis l'envoyer � l'adresse sp�cifi� ci-dessous. Vous pouvez �galement vous inscrire en ligne en visitant:
Gracias por comprar un producto Omcan usted. Para registrar su garant�a para este producto, complete la informaci�n a continuaci�n, cortar la tarjeta en la perforaci�n y luego enviarlo a la direcci�n indicada a continuaci�n. Tambi�n puede registrarse en l�nea en:
https://omcan.com/warranty-registration/

For mailing in Canada Pour postale au Canada Por correo en Canad�
OMCAN
PRODUCT WARRANTY REGISTRATION 3115 Pepper Mill Court, Mississauga, Ontario Canada, L5L 4X5

For mailing in the US Pour diffusion aux �tats-Unis
Por correo en los EE.UU.
OMCAN
PRODUCT WARRANTY REGISTRATION 4450 Witmer Industrial Estates, Unit 4, Niagara Falls, New York USA, 14305


or email to: service@omcan.com

Purchaser's Information Name: Address:

City: Country:

Province or State:

Postal or Zip:

Dealer from which Purchased: Dealer City: Invoice:

Dealer Province or State:

Company Name:

Telephone:

Email Address:

Type of Company:

Restaurant

Bakery

Butcher

Supermarket

Institution (specify):

Other (specify):

Deli Caterer

Model Name: Machine Description: Date of Purchase (MM/DD/YYYY): Would you like to extend the warranty? Yes No

Model Number:

Serial Number: Date of Installation (MM/DD/YYYY):

Thank you for choosing Omcan | Merci d'avoir choisi Omcan | Gracias por elegir Omcan

99

Since 1951 Omcan has grown to become a leading distributor of equipment and supplies to the North American food service industry. Our success over these many years can be attributed to our commitment to strengthen and develop new and existing relationships with our valued customers and manufacturers. Today with partners in North America, Europe, Asia and South America, we continually work to improve and grow the company. We strive to offer customers exceptional value through our qualified local sales and service representatives who provide convenient access to over 5,000 globally sourced products.
Depuis 1951 Omcan a grandi pour devenir un des "leaders" de la distribution des �quipements et mat�riel pour l'industrie des services alimentaires en Am�rique du Nord. Notre succ�s au cours de ces nombreuses ann�es peut �tre attribu� � notre engagement � renforcer et � d�velopper de nouvelles et existantes relations avec nos clients et les fabricants de valeur. Aujourd'hui avec des partenaires en Am�rique du Nord, Europe, Asie et Am�rique du Sud, nous travaillons continuellement � am�liorer et d�velopper l'entreprise. Nous nous effor�ons d'offrir � nos clients une valeur exceptionnelle gr�ce � nos ventes locales qualifi�es et des repr�sentants de service qui offrent un acc�s facile � plus de 5000 produits provenant du monde entier.
Desde 1951 Omcan ha crecido hasta convertirse en un l�der en la distribuci�n de equipos y suministros de alimentos en Am�rica del Norte industria de servicios. Nuestro �xito en estos a�os se puede atribuir a nuestro compromiso de fortalecer y desarrollar nuevas relaciones existentes con nuestros valiosos clientes y fabricantes. Hoy con socios de Am�rica del Norte, Europa, Asia y Am�rica del Sur, que trabajan continuamente para mejorar y crecer la empresa. Nos esforzamos por ofrecer a nuestros clientes valor excepcional a trav�s de nuestro local de ventas y representantes de los servicios que proporcionan un f�cil acceso a m�s de 5,000 productos con origen a nivel mundial.