Introduction
Thanks for choosing Voweek Vacuum Sealer. Please read this User Guide thoroughly before use and keep it for future reference.
Important Safety Instructions
Important Points for your Safety
When using electrical appliances, basic safety precautions should always be followed to reduce the risk of fire, electric shock, and/or injury to persons including the following:
- Read all instructions before using this product.
- For bag sealers: To reduce the risk of burns, do not touch the sealing strip while using the appliance.
- To protect against electric shock, do not place or immerse cord, plugs, or appliance in water or other liquid.
- This appliance is not to be used by children or by persons with reduced physical, sensory or mental capabilities.
- Close supervision is necessary when any appliance is used near children. Children should not play with the appliance.
- Unplug from outlet when not in use, before putting on or taking off parts and before cleaning. Allow to cool before putting on or taking off parts, and before cleaning. To disconnect, unplug power cord from outlet. Do not disconnect by pulling on cord.
- Do not operate any appliance with a damaged cord or plug or after the appliance malfunctions, or has been damaged in any manner. Do not attempt to replace or splice a damaged cord. Contact Customer service for examination, repair or adjustment.
- The use of an accessory not recommended by the appliance manufacturer for use with this appliance may result in fire, electric shock or injury to persons.
- Do not use in wet locations or leave outdoors. Do not use for commercial purposes. If sealing more than 20 bags continuously, wait at least 25 minutes before resuming use of your appliance.
- Do not let cord hang over edge of table or counter, or touch hot surfaces.
- Place cord where it can not be tripped over, pulled on, cause user to become entangled with, especially by children, or cause the appliance to be overturned.
- Do not place on or near wet surfaces, or heat sources such as a hot gas or electric burner, or heated oven. Always use appliance on a dry, stable, level surface.
- Extreme caution must be used when sealing bags or moving an appliance containing hot liquids.
- Always attach plug to appliance first, then plug cord into outlet (for appliances with detachable cords).
- Use appliance only for its intended use.
- Vacuum packaging is not substitute for the heat process of canning. Perishables still need to be refrigerated or frozen.
- Do not put any foreign objects inside vacuum sealing chamber while in use.
- Do not allow the appliance to be used as a toy.
- Keep the upper lid of the appliance unlocked when not in use.
This appliance is for HOUSEHOLD USE ONLY.
Do not attempt to service this product. Service should be performed by an authorized service representative.
A short power-supply cord is provided to reduce the risk resulting from becoming entangled in or tripping over a longer cord. Extension cords are not prohibited from being used when care is exercised in their use. When an extension cord is used the marked electrical rating of the extension cord shall be no less than the marked electrical rating of the appliance. The longer cord shall be arranged so that it does not drape over the counter-top or tabletop where it is capable of being tripped over, snagged, or pulled on unintentionally, especially by children.
SAVE THESE INSTRUCTIONS
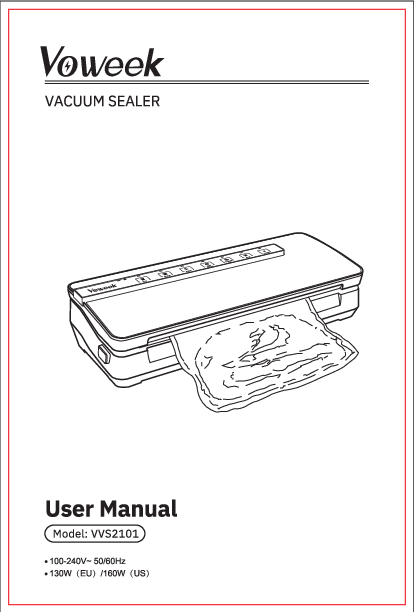
Package Contents
- 1 x Voweek VVS2101 Vacuum Sealer
- 1 x Roll bags
- 1 x External vacuum hose and connectors
- 1 x Owner manual
Product Overview and Parts
Diagram Description: The vacuum sealer has a lid that opens to reveal the internal components. Key parts are labeled:
- J Silicone Sealing Bar: Provides the seal.
- R Built-in Cutter: For cutting custom bag sizes from rolls.
- L Release Buttons: Located on both sides to unlock the lid. Press both to unlock.
- Q Locks: Secure the lid when closed.
- K Sealing Gaskets (up and down): Ensure a proper seal by pressing the lid down.
- P Roll Storage Chamber: Holds the bag roll.
- M Cutter Holder: Stores the cutter.
- N Vacuum Chamber: Where the bag is placed for vacuuming and sealing.
- O Heating Bar Covered by Teflon Tape: This is the sealing element. Do NOT tear the tape away.
Additional Views:
- T Foot Pad: Stabilizes the unit.
- S Power Socket: Where the power cord connects.
Accessories:
- Hose connectors for canisters
- The Hose for external vacuum
- Power cord
- Roll bags
Key Features
- Separate vacuum mode for dry and moist food.
- "Pulse" button to control vacuum time and degree.
- External vacuum button to vacuum seal food in a canister.
- With Roll storage chamber and built-in bag cutter.
- Sealing line up to 0.12 inches, prevents air leakage.
- Seal only function is available.
- Sealing length: MAX 11.8 inches
- Vacuum pressure: -0.50 ~ -0.70bar
- High-end stainless steel cover
- Detachable power cord
Control Panel
Diagram Description: The control panel features several buttons and indicator lights:
- DRY: Press this button to vacuum and seal dry food.
- MOIST: Press this button to vacuum and seal moist food.
- PULSE: This button is used when extreme control of the vacuuming process is needed for soft or delicate foods. Press and hold to vacuum, release to stop.
- SEAL TIME+: Press this button to make longer sealing time.
- EXTERNAL VAC: Press this button to vacuum with a canister.
- SEAL: Press this button to create a seal (without vacuum).
- CANCEL: Press to stop the current operation.
Port for Vacuuming Canister: Insert one end of accessory hose into this port, put the other end onto canister port, and then touch the "External Vac" button to make the canister vacuum fresh.
Operating Instructions
How to Make Custom Sized Bags
This vacuum sealer is equipped with a roll storage chamber compatible with a roll of 5 meters and a built-in cutter.
- Open the lid. Put a bag roll into the roll storage area, pull enough bag material to hold the item to be vacuum packaged, plus 2 inches. Use the embedded cutter on the sealer to cut desired bag length from bag roll. Make sure to cut in a straight line. Plug in power cord.
- Place one end of cut bag onto the heating bar, don't worry if you accidentally place any material onto the gasket area.
- Close the lid by pressing down on both sides until two "click" sounds are heard.
- Now that the lid has been locked, press the "SEAL" button to create a custom sized bag. The indicator light illuminates during the seal process.
REMARK: When the sealer is used for the first time, the sealing line may not be well done, this is because the heating bar needs time to reheat. In this case, just try another time.
- Once completed, the indicator light of the seal button will turn off; press the release buttons on both sides of the machine to take out the newly created bag.
- The custom sized bag is now ready for vacuum sealing.
CAUTION: Make sure you give the appliance time to cool down. Wait at least 20 seconds between seals. Under heavy usage, the appliance will shut off automatically to prevent overheating. If it does, wait 25 minutes to allow the appliance to cool off.
How to Vacuum Seal with the Vacuum Bags
- Place the item(s) to be sealed into the pre-cut or custom sized bag. Leave at least 2 inches between the contents and the top of the bag to allow for bag contraction.
- Open the lid and place the open end of the bag down into the vacuum chamber.
- Close the lid by pressing down on both sides until two "click" sounds are heard.
- Choose dry or moist food. The unit will continue to vacuum and then seal once air has been removed.
- Once the indicator light has turned off, press the lock buttons on both sides of the machine to get the bag.
NOTE: When vacuumizing moist food, please choose the moist food pattern and the “seal time+” button for better sealed performance.
How to Use the Pulse Vacuum Button (PULSE VAC)
Since the pressure under the normal vacuum function is set to be high, it is sometimes easy to destroy delicate items by high pressure in the vacuum bags. In this case, you can use the "PULSE" vacuum function to control the vacuum time and pressure, and prevent crushing delicate items. When packing some juicy foods, you can also use this function and prevent liquid being sucked out.
- Place the item(s) to be sealed into the pre-cut or custom sized bag. Leave at least 2 inches between the contents and the top of the bag to allow for bag contraction.
- Open lid and place the open end of the bag down into the vacuum chamber.
- Close lid by pressing down on both sides.
- Press the "PULSE” button continually, till it reaches the pressure that you want. You can watch the vacuum bag to decide the pressure. During this process, you can stop vacuum by stopping pressing this button; and press it again to vacuum again.
- When the pressure reaches what it needs, press "SEAL ONLY” button to start sealing.
- Once the indicator light has turned off, press the lock buttons on both sides of the machine to release the bag.
How to Vacuum Canisters
NOTE: Canisters are not included.
- Connect the vacuum sealer to the mains and open the lid of the machine.
- Introduce the product you wish to vacuum pack in the canister. Place the lid on top of the canister and close it using the side fasteners. Select the “Vacuum” position of the canister valve.
- Connect the vacuum sealer port and the canister via the connecting vacuum hose. You must connect one of the ends to the canister valve and the other end to the accessory port of the machine.
- Lower the lid of the machine and press the sides to secure it; the system is properly closed when you hear a “click” on each side. If you wish to open the upper lid once it has been closed, press each side again and gently pull the lid up.
- To start the vacuum process, press the “External Vac” button.
- This model of vacuum sealer is designed to operate in automatic mode. The machine is equipped with a vacuum measurement sensor, which stops the vacuum process once the vacuum level is reached within the canister. To cancel the vacuum process, press the "External Vac” button again.
- Once the vacuum process is complete, the machine stops automatically. Select the "CLOSE" position of the canister valve and disconnect the connector gasket from the machine.
Care & Cleaning
- Always unplug the unit before cleaning.
- Do not immerse in water.
- Do not use abrasives to clean the unit.
- Wipe the outer surface with a soft, damp cloth and soap.
- To clean the inside of the unit, wipe away any food or liquid with a paper towel.
- Dry all parts thoroughly before you plug in and operate the unit again.
- The vacuum chamber may trap liquids that were drawn from the bag; it can be removed from the sealer. Use a mild dishwashing soap and a warm, damp cloth to wipe away any liquid left behind from the vacuum chamber. Dry thoroughly.
- Keep the upper lid of the appliance unlocked when not in use.
Vacuum Sealing Guidelines
Food Storage & Safety
IMPORTANT: Vacuum packaging is NOT a substitute for refrigeration or freezing. Any perishable foods that require refrigeration must still be refrigerated or frozen after vacuum packaging.
For best results in extending the life of foods, it is important to vacuum package foods that are fresh. Once food has begun to deteriorate, vacuum packaging may only slow the deterioration process. Vacuum sealing cannot prevent the growth of mold. Other disease-causing microorganisms can still grow in low oxygen environments and may require further measures to be eliminated.
Food Preparation Hints and Tips for Air-tight Vacuum Sealing
Cooking, Thawing and Reheating: Simmering in a vacuum bag helps food retain its flavor and it helps with the clean up as well. No dirty saucepans... When reheating foods in the microwave using your vacuum bags, always puncture open the bag to allow hot air to escape. You can also reheat foods in the vacuum bags by placing them in water at a low simmer below 170°F (75°C).
IMPORTANT: Always thaw foods in either refrigerator or microwave – do not thaw perishable foods at room temperature.
Preparation Hints for Meat and Fish
Try pre-freezing meats and fish for 1-2 hours before vacuum packaging. This helps retain the juice and shape, and provides for a better seal.
Preparation Hints for Cheeses
Vacuum package cheese after each use. If you make your bag just a little longer than needed, you can re-seal the bag after each use.
IMPORTANT: Due to the risk of anaerobic bacteria, soft cheeses should never be vacuum packaged.
Preparation Guidelines for Vegetables
Blanching is a process that should be done before vacuum packaging vegetables. This process stops the enzyme action that could lead to loss of flavor, color and texture. To blanch vegetables, place them in simmering water or in a microwave until they are cooked, but still crisp. Blanching times can range from 1 to 2 minutes for leafy greens and peas; 3 to 4 minutes for snap peas, sliced zucchini or broccoli; give your carrots about 5 minutes; and 7 to 11 minutes for corn on the cob. After blanching, immerse vegetables in cold water to stop the cooking process.
NOTE: All vegetables (including broccoli, Brussels sprouts, cabbage, cauliflower, kale, turnips) naturally emit gases during storage. Therefore, after blanching, it's best if they're stored in the freezer.
More on Vegetables
Vegetables are a great candidate for portion control; when storing vegetables, try pre-freezing them for 1 to 2 hours, then separate them into meal portions within your vacuum bags. After they have been vacuum packaged, return them to the freezer.
IMPORTANT: Due to the risk of anaerobic bacteria, fresh mushrooms, onions & garlic should never be vacuum packaged.
Preparation Hints for Powdery Foods
When vacuum packaging powdery items like flour, it's best to use their original packaging inside of the vacuum bags. The fine powder could get sucked into the machine and cause enough damage to shorten the life of the sealer.
Preparation Hints for Liquids
Before you vacuum package liquid such as soup stock, pre-freeze in a casserole dish, loaf pan or ice cube tray until solid. Remove frozen liquid from pan and vacuum package in the vacuum bags. You can then stack in the freezer. When you're ready to use, just cut the corner of the bag and place in either a microwave dish or drop into water at a low simmer, below 170°F (75°C).
If you can't, place a folded paper towel between the food and top of the bag, but below the seal area. Leave paper towel in bag to absorb excess moisture and juices during vacuum packaging process.
Troubleshooting
| Problem | Solution |
|---|---|
| Nothing happens when I press the "VACUUM" button: |
|
| Air is not vacuumed from the bag: |
|
| Bag melts: |
|
| Air has seeped back into the vacuumed bag: |
|
| Bag will not seal: |
|
Warranty and Service
- This product is covered with Voweek product and labor warranty for 12 months from the date of its original purchase.
- If any problems occur, please contact Voweek support (Support@voweek.com) immediately to launch a warranty claim. Specify the model number and your Amazon order number. Voweek customer service representatives will respond within 24 hours, advise you how to correct the problem yourself, or instruct you on how to return the defective unit back for repair or replacement.
- Voweek can only provide aftersales service for products that are sold by Voweek or Voweek authorized retailers and distributors. If you have purchased your unit from a different place, please contact your seller for return and warranty issues.
Contact Us
If you have any questions or comments, please contact Voweek customer care at any time and they will be able to assist you further. Thank you for choosing Voweek multi-function vacuum sealer.
E-mail: Support@Voweek.com
