Si5338/Si5356 Field Programming Kit User’s Guide -- Si5338/56-PROG-EVB
File info: application/pdf · 12 pages · 1.46MB
Si5338/Si5356 Field Programming Kit User’s Guide -- Si5338/56-PROG-EVB
Clock Generator, Si533x, Si535x
Si5338/Si5356 Field Programming Kit User’s Guide -- Si5338 ...
Replaced ClockBuilder instructions with ClockBuilder Pro instructions. Revision 0.4 June, 2010 Changed "Any Rate Clock Generator" to "ClockBuilder " throughout. Changed "MultiSynth Clock Programmer" to "ClockBuilder " t…
Si5338/Si5356 Field Programming Kit User's Guide -- Si5338 ...
Full PDF Document

If the inline viewer fails, it will open the original document in compatibility mode automatically. You can also open the file directly.
Extracted Text
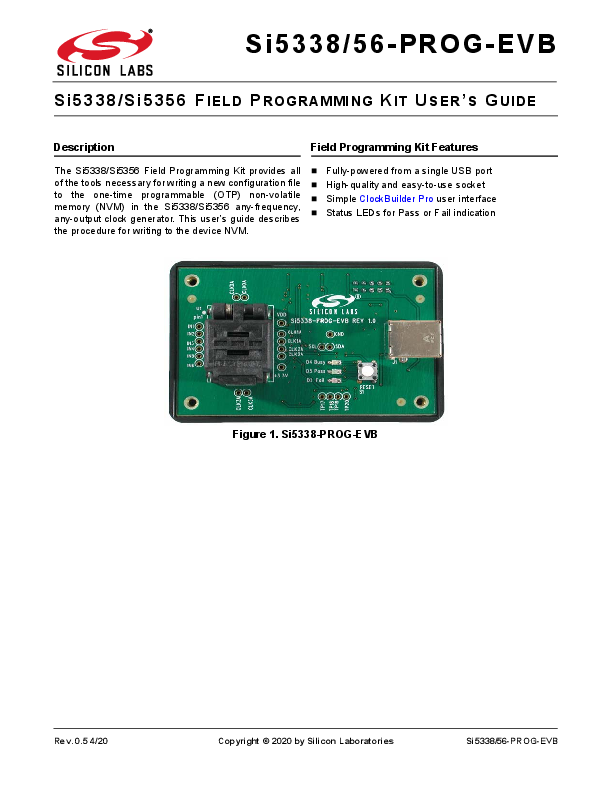
Si5338/56-PROG-EVB

Si5338/Si5356 FIELD PROGRAMMING KIT USER'S GUIDE

Description

Field Programming Kit Features

The Si5338/Si5356 Field Programming Kit provides all of the tools necessary for writing a new configuration file to the one-time programmable (OTP) non-volatile memory (NVM) in the Si5338/Si5356 any-frequency, any-output clock generator. This user's guide describes the procedure for writing to the device NVM.

 Fully-powered from a single USB port  High-quality and easy-to-use socket  Simple ClockBuilder Pro user interface  Status LEDs for Pass or Fail indication

Figure 1. Si5338-PROG-EVB

Rev. 0.5 4/20

Copyright � 2020 by Silicon Laboratories

Si5338/56-PROG-EVB

Si5338/56-PROG-EVB
1. Introduction
The Si5338/Si5356 is a highly-flexible and configurable clock generator/clock buffer. The device has a factory-defined default configuration stored in non-volatile memory (NVM). During powerup, the default configuration is copied into the random access memory (RAM). Having its working configuration stored in RAM allows in-system configuration changes through the I2C port. During a power cycle, any configuration changes stored in RAM are overwritten with the factory default configuration from the NVM. The NVM is a one-time-programmable (OTP) memory that allows a user to define the default configuration. This is a useful feature, especially if the Si5338/Si5356 is providing clocks to devices that require pre-defined clocks at powerup. As its name implies, the OTP NVM can only be written once.
Si5338/Si5356
Power-Up

USB

Field Programmer

(OTP)
Default Configuration

Working Configuration

Write New Default Configuration Si5338-PROG-EVB

In-System Configuration
Changes
I2C

Figure 2. Memory Configuration

The field programming kit allows writing a new default configuration to the Si5338's NVM memory. The kit consists of the Field Programmer (Si5338-PROG-EVB) and a USB cable. This user's guide outlines the steps necessary to write new default values to the NVM.
The NVM file must be created in ClockBuilder Pro before writing it to the Si5338/Si5356. NVM file support for the Si5338 and Si5356 is included in version 2.36 or later of the ClockBuilder Pro Software.

2

Rev. 0.5

Si5338/56-PROG-EVB
2. Overview of Generating and Writing to NVM
The process of generating and writing an NVM file to the device is shown in Figure 3.

Use CBPro to create or update a custom Si 5338 or Si5356
Project

Generating an NVM file using ClockBuilder Pro

Configuration Requires Modification

Optional
Use the Si5338-EVB to verify its configuration

Configuration OK

Generate and save an NVM file using CBPro s Project Export function

Load the NVM file using the Field Programmer software

Writing an NVM File using the Field Programmer software and the
Si5338 -PROG -EVB

Load a blank Si 5338 or Si5356 device in the Si 5338-PROGEVB socket
Write to NVM

Figure 3. Generating and Writing an NVM File to the Device

Rev. 0.5

3

Si5338/56-PROG-EVB
3. Getting Started with the Si5338/Si5356 Field Programmer (Si5338-PROG-EVB)
3.1. Installing the Software
Before connecting the Field Programmer (Si5338-PROG-EVB) to the host PC, please download and install the latest version of ClockBuilder Pro from the Silicon Labs website.
3.2. Connecting the Hardware
Connect a USB cable from the Si5338-PROG-EVB to the host PC. The Field Programmer is fully powered from the USB port, so no other connections are necessary.

Host PC

USB Cable

Si5338-PROG-EVB
3.3. Running the Software
Once installed, open ClockBuilder Pro and connect the Si5338/56-PROG-EVB to the computer with a USB cable. ClockBuilder Pro will recognize the EVB and an option to open the "NVM Program Tool" will show up on the home menu.

Figure 4. Field Programmer in ClockBuilder Pro

4

Rev. 0.5

Si5338/56-PROG-EVB
3.3.1. Setting up Communication 1. Select the desired target device, Si5356 or Si5338. The one that is selected must be placed in the socket when
it is time to program the NVM. 2. Before the software connects with the Field Programmer (Si5338-PROG-EVB), it automatically detects its serial
number. If more than one field programmer is connected to the same PC, use the drop-down box to select one of the field programmers. This feature allows one PC to control several field programmers simultaneously.
Select the target device for writing the NVM
Factory set I2C address Leave as default Automatically selected when a valid field programmer is detected
Click OK to connect
3. All devices shipped from the factory are pre-programmed with an I2C address of 0x70. The field programmer software will automatically use this I2C address when communicating with a device loaded into the socket. If the device has a different I2C address, enter its new address in the box provided.
4. If the PC is connected to a valid field programmer, it will automatically select "Continue and connect to the EVB". If "Continue and do not connect to the EVB" is selected, the software could not find a valid field programmer. Ensure that the field programmer (Si5338-PROG-EVB) is properly connected to the host PC using a cable.
5. Click on OK.

Rev. 0.5

5

Si5338/56-PROG-EVB
4. Getting Ready to Write The NVM File
The NVM File contains all of the information needed to configure the NVM of a blank Si5338 or Si5356. Valid Register Map Files have a .nvm extension and are generated in ClockBuilder Pro's Project Export menu.

Figure 5. NVM Export Screenshot

6

Rev. 0.5

Si5338/56-PROG-EVB
4.1. Loading the NVM File
Click on the Open NVM File button to select the desired .nvm file. The header of the register map file is displayed in the File Header window if the software detects that it is a valid NVM file.
Click to select the NVM file
Displays the file header

Rev. 0.5

7

Si5338/56-PROG-EVB
4.2. Load a Blank Device in the Socket
1. Before writing the NVM, a device must be loaded into the socket as shown below. Pull the lever to unlock the lid. Ensure that there is not another device in the socket before proceeding. Note: Some field programming kits are shipped with a plastic slug loaded in the socket. This plastic slug must be removed before loading a device.
2
1

2. Insert a blank Si5338 or Si5356 device in the socket using a pair of tweezers or a suction tool. It is very important that the Si5338 or Si5356 be inserted into the socket with the correct pin 1 orientation. Pin 1 on the device is marked with a white dot. Pin 1 on the socket is labeled on the PCB as shown below.

Pin 1 Indicator

Pin 1 Indicator

3. Once the device is properly loaded, close the lid. Ensure that the lid is fully closed and in the locked position. Some tension is normal when closing the lid. This ensures proper contact with the device.

8

Rev. 0.5

Si5338/56-PROG-EVB
5. Write to NVM
1. Click on the "Write NVM" button to make a final write to the one-time programmable NVM. Writing to the NVM should only take a few seconds. When writing to the NVM is successful, the green LED will light. If there was an error while writing to the NVM, the red LED will light. See the "Appendix A--Troubleshooting Guide" on page 10 to find the possible causes of an NVM failure.

2. Once the NVM is written, the device is ready for use. 3. Remove the device from the socket. 4. Load a new device into the socket. 5. Press the Write NVM button. 6. Repeat Steps 3 to 5.

Click to write to NVM

Rev. 0.5

9

Si5338/56-PROG-EVB
APPENDIX A--TROUBLESHOOTING GUIDE
Use this guide to help troubleshoot possible sources of errors when an NVM write fails.
Writing to NVM Results in a "Fail" Status

Possible Causes
1. A device can only be programmed once. If the device loaded into the socket has already been programmed (NVM was previously written), it cannot be re-programmed. This will cause a fail status. Load a blank device into the socket.
2. Writing to NVM failed. The device may be defective and should be discarded. Load a new device into the socket.
Writing to NVM Causes the "Busy" LED to Stay On

Possible Causes
1. The device loaded into the socket has incorrect polarity. Refer to "4.2. Load a Blank Device in the Socket" for proper device orientation. Press the reset button on the Si5338-PROG-EVB; discard the device in the socket, and load a blank device into the socket.
2. There is no device loaded in the socket. Press the reset button on the Si5338-PROG-EVB and load a blank device into the socket.

10

Rev. 0.5

Si5338/56-PROG-EVB
REVISION HISTORY
Revision 0.5
April, 2020  Replaced ClockBuilder Desktop instructions with ClockBuilder Pro instructions.
Revision 0.4
June, 2010  Changed "Any Rate Clock Generator" to "ClockBuilder Desktop" throughout.  Changed "MultiSynth Clock Programmer" to "ClockBuilder Desktop" throughout.  Updated Figure 4 on page 12.
Revision 0.3
March, 2010  Changed document title from Si5338-PROG-EVB to Si5338/56-PROG-EVB.  Added the Si5356 to the Field Programming Kit.
Revision 0.2
August, 2009  Changed "Si533x configuration" to "Any Rate Clock Generator" throughout.  Changed "Si5338 Programmer" to "MultiSynth Clock Programmer" throughout.  Updated Figures 3 and 4.
Revision 0.1
March, 2009  Initial release.

Rev. 0.5

11

ClockBuilder Pro
One-click access to Timing tools, documentation, software, source code libraries & more. Available for Windows and iOS (CBGo only).
www.silabs.com/CBPro

Timing Portfolio www.silabs.com/timing

SW/HW www.silabs.com/CBPro

Quality www.silabs.com/quality

Support and Community community.silabs.com

Disclaimer Silicon Labs intends to provide customers with the latest, accurate, and in-depth documentation of all peripherals and modules available for system and software implementers using or intending to use the Silicon Labs products. Characterization data, available modules and peripherals, memory sizes and memory addresses refer to each specific device, and "Typical" parameters provided can and do vary in different applications. Application examples described herein are for illustrative purposes only. Silicon Labs reserves the right to make changes without further notice to the product information, specifications, and descriptions herein, and does not give warranties as to the accuracy or completeness of the included information. Without prior notification, Silicon Labs may update product firmware during the manufacturing process for security or reliability reasons. Such changes will not alter the specifications or the performance of the product. Silicon Labs shall have no liability for the consequences of use of the information supplied in this document. This document does not imply or expressly grant any license to design or fabricate any integrated circuits. The products are not designed or authorized to be used within any FDA Class III devices, applications for which FDA premarket approval is required, or Life Support Systems without the specific written consent of Silicon Labs. A "Life Support System" is any product or system intended to support or sustain life and/or health, which, if it fails, can be reasonably expected to result in significant personal injury or death. Silicon Labs products are not designed or authorized for military applications. Silicon Labs products shall under no circumstances be used in weapons of mass destruction including (but not limited to) nuclear, biological or chemical weapons, or missiles capable of delivering such weapons. Silicon Labs disclaims all express and implied warranties and shall not be responsible or liable for any injuries or damages related to use of a Silicon Labs product in such unauthorized applications.
Trademark Information Silicon Laboratories Inc.�, Silicon Laboratories�, Silicon Labs�, SiLabs� and the Silicon Labs logo�, Bluegiga�, Bluegiga Logo�, ClockBuilder�, CMEMS�, DSPLL�, EFM�, EFM32�, EFR, Ember�, Energy Micro, Energy Micro logo and combinations thereof, "the world's most energy friendly microcontrollers", Ember�, EZLink�, EZRadio�, EZRadioPRO�, Gecko�, Gecko OS, Gecko OS Studio, ISOmodem�, Precision32�, ProSLIC�, Simplicity Studio�, SiPHY�, Telegesis, the Telegesis Logo�, USBXpress� , Zentri, the Zentri logo and Zentri DMS, ZWave�, and others are trademarks or registered trademarks of Silicon Labs. ARM, CORTEX, Cortex-M3 and THUMB are trademarks or registered trademarks of ARM Holdings. Keil is a registered trademark of ARM Limited. Wi-Fi is a registered trademark of the Wi-Fi Alliance. All other products or brand names mentioned herein are trademarks of their respective holders.

Silicon Laboratories Inc. 400 West Cesar Chavez Austin, TX 78701 USA
http://www.silabs.com