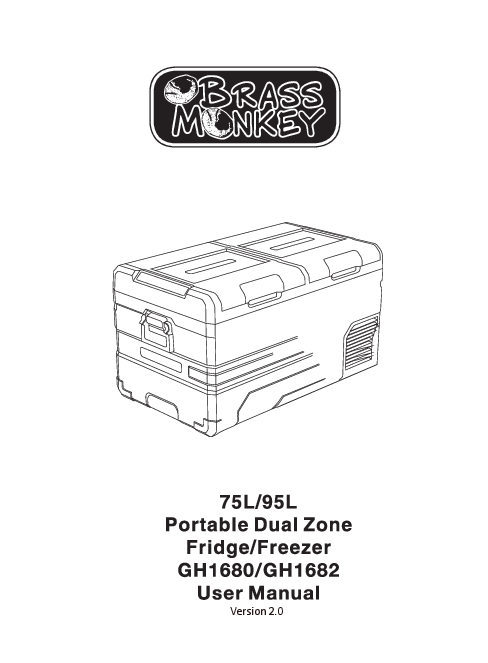
Brass Monkey Portable Dual Zone Fridge/Freezer
Models: GH1680 / GH1682
Version 2.0
Features
- Dual Zone - Fridge / Freezer operation.
- Detachable lids - pivot point reversible.
- DC power connection.
- Power by AC using the AC to DC power adapter.
- High-efficiency DC compressor and conversion module.
- Dual mode operation (Max & Economy).
- Digital temperature display with adjustable control.
- 3 Year Warranty.
- 3-stage low voltage battery protection.
- APP control via Bluetooth.
Box Contents
- 1 x Portable Dual Zone Fridge/Freezer
- 1 x Mains to DC Power Adapter
- 1 x 12/24V Car Cigarette Power Lead
Specifications
| Input Voltage: | 12/24VDC (To power from mains use the included 240VAC to 12VDC power adapter) |
|---|---|
| Average Power Consumption: | 90W |
| Power Consumption: | 0.3kWh/24hr |
| Rated Current for AC (Adaptor): | 1.5A - 0.7A |
| Rated Current for DC: | 6.0A (12V) / 3.0A (24V) |
| Temperature Range: | -20°C to +20°C (with ambient temperature at 25°C) |
| Refrigerant: | R134a |
| Insulation: | 100% CFC & HFC free PU Foam insulation |
Safety Information
- Installation of DC power sources in a boat must be handled by a qualified electrician.
- Ensure power is connected to the suitable voltage socket.
- No electrical devices are to be used inside the product.
- The product can be powered on only after being unpacked and placed on a flat, level surface for over 6 hours.
- Fridge operating angle: The fridge can be operated indefinitely at up to 5 degrees, and at between 6 and 45 degrees for up to 30 minutes.
- Product must be well ventilated. Ensure a minimum of 200mm clearance at the back and 100mm around the sides.
- The product should be in a well-ventilated space, away from heat sources. Avoid direct exposure to sunlight.
- Keep the product stable.
- When water is inside the tank, do not turn the product upside down to empty. Dry the water; do not soak in water.
- Do not place metal objects in the air inlet vent, outlet vent, or gaps.
- Do not connect with power except 12/24VDC or the 240VAC to 12VDC power adapter (included).
- Do not soak the product in water or wash with running water.
- The product should not be repaired by users. If there are any issues, please consult the place of purchase.
- Turn off the product before cleaning to avoid electric shocks or other issues.
- Keep the product away from wet or humid places.
Operation
How to Turn on the Fridge
- Connect to power.
- Press the [power button] to power on or off.
- The internal temperature will display, and the compressor will start.
- Press the [settings button] to enter different modes: ECO (Energy Saving Mode) and MAX (Fast Cooling Mode). Factory setting is Max.
- When the power is on and the dual temperature zone is set to valid, press the [+] or [-] button to enter the left zone temperature setting, and then press the [settings button] to switch between left or right box temperature setting. Press [+] or [-] to adjust the temperature.
- In the power-on state, long press the [+] button and the [settings button] for 3 seconds to turn the left zone on or off. Press and hold the [-] button and the [settings button] for 3 seconds to turn the right zone on or off. Note: You cannot turn both zones off at the same time.
Control Panel Display:
The control panel shows temperature readings for the left and right zones, mode indicators (ECO, MAX), battery voltage (V), and status indicators. It features [+] and [-] buttons for temperature adjustment, a [settings button] (gear icon) for mode selection and zone switching, and a [power button] (circle with line) for turning the unit on/off.
Components
The main components of the portable dual zone fridge/freezer are:
- Lid latch
- Sealing
- Left zone (compartment)
- Right zone (compartment)
- Control panel
- Handle
- Power socket
The diagram shows the lid latches, sealing around the lids, the division between the left and right zones, the control panel on the side, handles for carrying, and the power socket at the base.
Using in Car
The product features a three-level battery protection function to ensure normal operation and protect the vehicle's battery. When the product is powered on, long press the [settings button] for 3 seconds. The display will flash H. Use the SET button to select low voltage protection level: L (low), M (medium), or H (high). The factory default is H (high) protection.
Set to H when connected to car power. Set to M or L when connected to a portable battery or other back-up battery. Due to varying vehicle output voltages, the battery gear can be adjusted from H to M or M to L if a voltage protection code F1 is shown on the panel. Set the battery gear to H if the product should continue working after the car engine is turned off, to prevent draining the battery.
Smart Control - Fridge App Instructions
Download the "BRASS MONKEY" Application:
- Use a QR code scanner on your smart device to scan the QR code found in the manual or on the product carton. Alternatively, search for the "BRASS MONKEY" APP in the iTunes App Store (for Apple devices) or Google Play Store (for Android Devices).
- Start the application and select the "Search" function.
- The application will prompt you to pair the fridge by pressing the "set button" on the fridge's control panel. Once activated, the fridge will be paired with your smart device, and the application will switch to a control panel allowing you to control the fridge's functions.
The app interface allows control over power (ON/OFF), left and right box temperatures, temperature units (Celsius/Fahrenheit), temperature settings, fast cooling mode, energy saving mode, and car battery protection settings.
Cleaning & Maintenance
- Ensure all input power is cut off before cleaning the appliance.
- Clean the appliance inside and out with a damp cloth once a week. If dirty, use sodium bicarbonate dissolved in lukewarm water.
- Never use abrasive products, detergents, or soap. After washing, rinse with clean water and dry carefully. Do not leave the refrigerator shut off, warm inside, with food inside, or lid closed.
- Never clean the appliance under running water or in dishwater. Do not use abrasive cleaning agents or hard objects during cleaning, as these can damage the refrigerator.
Troubleshooting
- The product is not working:
- Check the power supply is working.
- Check if the plug and socket are connected.
- Check the fuse.
- Check the power switch on the control panel is on.
- Compressor starts delay protection for 3 minutes after turning on.
- Food inside the product is frozen:
- Temperature is set too low.
- Water flowing sound inside the tank:
- Refrigerant is flowing; this is normal.
- Code F1 displayed:
- Low voltage protection. This can be resolved by setting the battery protection from H to M or M to L.
- Code F2 displayed:
- Fan overload protection. Turn off the product and restart it after 30 minutes. If the code reappears, contact the place of purchase.
- Code F3 displayed:
- Compressor frequent start protection. Turn off the product and restart it after 30 minutes. If the code reappears, contact the place of purchase.
- Code F4 displayed:
- Compressor is overloaded or working at a low speed. Turn off the product and restart it after 30 minutes. If the code reappears, contact the place of purchase.
- Code F5 displayed:
- High temperature compressor module protection. Move the product to a ventilated area and turn it off for 30 minutes, then restart it. If the code reappears, contact the place of purchase.
- Code F6 displayed:
- No parameter can be detected by the controller. Restart the product. If the code reappears, contact the place of purchase.
- Code F7 / F8 displayed:
- Temperature sensor error protection. Check the sensor terminal.
- Water drops around the case or door gap:
- When moisture in the air meets the lower temperature case, it will naturally become liquefied and condensed. Wipe away with a towel or soft cloth.
Warranty Information
The warranty for this product is 3 years from the date of purchase. During the warranty period, the following are excluded from coverage:
- Intentional damage.
- Damage by fire, flood, etc.
- Damage or malfunction caused by incorrect usage and not following this user manual.
- Damage or malfunction caused by disassembling.
Distributed By
TechBrands by Electus Distribution Pty. Ltd
320 Victoria Rd, Rydalmere, NSW 2116, Australia
Phone: 1300 738 555 (Australia) / +61 2 8832 3200 (International)
Fax: 1300 738 500
Website: www.techbrands.com
Made in China
