Haier HWM80-M826 Top Load Fully Automatic Washing Machine Owner's Manual
File info: application/pdf · 20 pages · 4.13MB
˵Ã÷Êé
TOP LOAD FULLY AUTOMATIC WASHING MACHINE
Safety precautions If power cord or other parts of this machine become damaged or faulty, please contact a echnician to have it repaired. Do not attempt repairs by yourself as this may cause personal harm or void warran…
TOP LOAD FULLY AUTOMATIC WASHING MACHINE ...
Back cover. Front control panel. Please understand the shapes of the washing machine and accessories may be different from the sketch figures in this manual ...
Full PDF Document

If the inline viewer fails, it will open the original document in compatibility mode automatically. You can also open the file directly.
Extracted Text
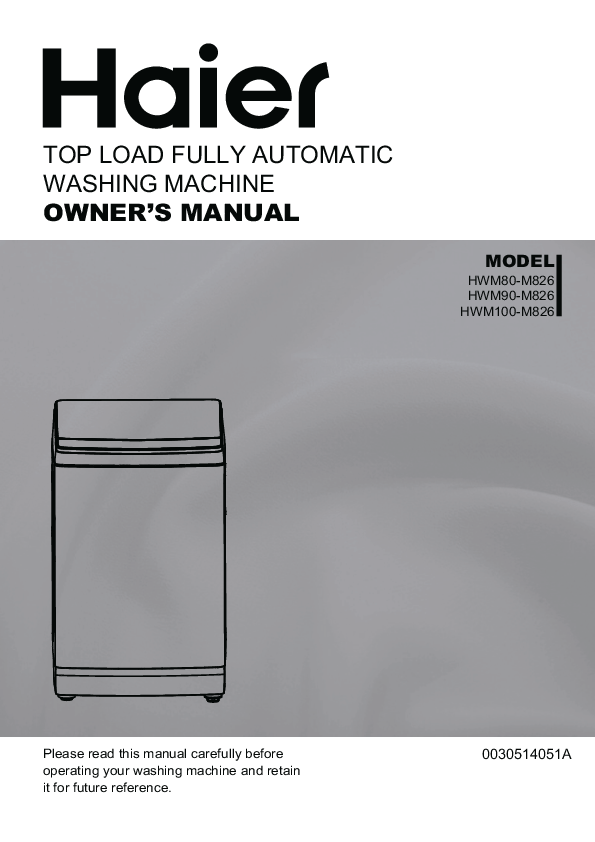
TOP LOAD FULLY AUTOMATIC WASHING MACHINE OWNER'S MANUAL

MODEL
HWM80-M826 HWM90-M826 HWM100-M826

Please read this manual carefully before operating your washing machine and retain it for future reference.

0030514051A

CONTENTS

Product overview

1

Safety precautions

2

Description of symbols

2

Warning

2

Forbidden

3

Safety warning

4

Installation & adjustment

5

Install the bottom plate

5

Balance washing machine

5

Change the direction of the drain hose

5

Usage of the drain hose

6

Inlet pipe connection

6

Before washing

9

Check the following before washing

9

Operation

10

Loading your laundry

10

Usage of the detergent

10

Explanation of buttons

11

Cleaning or Maintenance

14

Trouble-shooting

15

Packing list

17

Specification

18

Product overview

Detergent box Outer tub cover Control panel seat
Cabinet

Top lid component
Inner tub
Lint filter Hook Pulsator Front control panel

Water inlet valve Back cover

Adjustable foot (2 pieces) Handle

Power cord Fixed foot 2 pieces

Drain hose Base frame

Take example for HWM90-M826 Please understand the shapes of the washing machine and accessories may be different from the sketch figures in this manual due to product improvement.

Safety precautions

Description of symbols

Warning sign

Contents marked with this symbol are related to the safe use of the product and the personal safety of the user.
Please operate in accordance to the contents of this manual,to avoid harm to the user or damage to the machine itself.

Forbidden sign

Contents marked with this symbol indicate operations or actions that should not be undertaken by the user.
Performing of such actions may result an injury to the user or damage to machine itself,and void warranty.

Safety warning
Please check power socket condition to ensure it has been earthed correctly prior to installation to ensure your safety

Warning

A separate, earthed power socket is

Ensure the plug is removed and the taps

required for the power supply.

turned off in the following cases.Power

Hold the plug-not the electric cable-when failure, cleaning, moving,installation

unplugging the washing machine.

and when not in use.

Do not insert or remove the power plug with The new hose-sets supplied with the

wet hands.

appliance are to be used and that old

hose-sets should not be reused.

The power plug should be accessible after The rated washing capacity,spinning

the machine installation.

capacity,The max. and min. inlet

water pressure refer to

specification page.

This appliance is intended to be used in

If the supply cord is damaged, it

household and similar applications such as: must be replaced by the manufacturer,

-- staff kitchen areas in shops,office and its service agent or similarly qualified

other working environments;

persons in order to avoid a hazard.

-- farm houses;

CAUTION:If this appliance is supplied

-- by clients in hotels,motels and other

from a cord extension set or electrical

residential type environments;

portable outlet device ,the cord extension

-- bed and breakfast type environments; set or electrical portable outlet device

-- areas for communal use in blocks of flats must be positioned so that it is not

or in launderettes.

subject to splashing or ingress of

moisture.

2

Safety precautions

Forbidden

Do not install this appliance in a damp or wet environment. Do not leave wet laundry on the control panel or spray water directly onto this appliance, as this may cause the washer to malfunction or cause an electrical fault.

Do not connect to hot water higher than 50�C.
The maximum inlet water pressure refer to specification page.

Do not block the ventilation holes with carpet.

Ensure carpet does not obstruct the opening under

the base of the cabinet.

Front

The ventilation holes at the bottom

Back

Do not wash water-proof clothing as this may affect load balance during spin cycle(s).

Bottom plate

Soft object

If you are using an extension cord or a portable electrical outlet device (not recommended), ensure that it is positioned so that it does not come into contact with water or moisture.

The openings must not be obstructed by a carpet.

Do not attempt to move washing or place hands inside washing machine while in operation. Please ensure children are supervised around machine to avoid harm.

Do not take apart, repair or alter the machine by yourself.

Do not leave hot or heavy items on lid or control panel as this may cause damage to the washer or make the washer unsafe to operate.
This appliance is not intended for use by persons (including children) with reduced physical,sensory or mental capabilities, or lack of experience and knowledge, unless they have been given supervision or instruction by a person responsible for their safety.Children should be supervised to ensure that they do not play with the appliance.
3

Do not wash laundry with chemicals or other volatile materials(such as petrol,solvents or thinners) as this cause damage to the machine.
Keep washer away from heat sources such as heater, stoves or direct sunlight.

Safety precautions

Safety warning

The washing machine whose lid can be opened during water extraction, that it takes 15s or more for complete stop of water-extracting chamber tub.
The new hose-sets supplied with the appliance are to be used and that old hose-sets should not be reused

Please remove item such as coins, button, sand and other solid materials from clothing before washing.

Check that water faucets are open after connection to machine, prior to operation and that pipes are connected correctly. Please use low suds/High Efficiency washing powder.

If power cord or other parts of this machine become damaged or faulty, please contact a echnician to have it repaired. Do not attempt repairs by yourself as this may cause personal harm or void warranty.

Smart hinge prevents sudden closing of the door.Door is heavy,be careful while

closing of the door.

Do not let your hands or any other material be caught

below door. It might cause injury or damage.

Smart hinge

Door closing time is dependent on ambient temperature.

Smart hinge

The higher the ambient temperature,the shorter the door

closing time and vice versa. Smart Closing

Door performs best when lid is closed from full open condition.

The washing machine whose lid can be opened during water extraction, that it takes 15s or more for to stop of water-extracting chamber tub. The new hose-sets supplied with the appliance are to be used and that old hose-sets should not be reused.

4

Installation & Adjustment

Please install and adjust the machine according to the directions containedin this manual.It is very important to follow these directions for the safe operation of the machine,and to ensure your machine operates correctly.

Install the bottom plate
The purpose of the bottom plate is to suppress noise from the washing machine during operation. Steps:
1. Lay the washer on its back, on a nonabrasive surface. 2. Place the plate onto the bottom of the machine. 3. Use a screwdriver to tighten the screw ( in accessory bag) securing the panel to bottom of the washer. 4. Once the screw is tight and the panel is secure, return the washer to its standing position.

Screw Bottom plate

Front Back Carpet

Balance washing machine
Do not install this machine on an incline greater than 2� . Installing machine on an angle or on rough ground will result in unstable running or stoppage of the machine. Please adjust it by the following method: 1.Confirm it is level  2.Lift up the side of the leg slightly and twist the adjustable leg. Note: The distance between the washing machine and wall:at least 20 mm.

Change the direction of the drain hose

Applicable model HWM90-M826
5

Installation & Adjustment

Usage of the drain hose

The drainage shall be smooth with the drain hose.

1.The height of the drain hose shall be less 4.If extra drain hose is needed, please

than 10cm, or the drainage will not be smoothand cost such long time that the

make separate purchase.The inner diameter of the extra hose shall not

machine may stop at mid way.

less than 30mm,and the length shall

not exceed 1.5m.

2.Do not trample or press the drain hose.

3.If the drain hose is too long, cut it at mid point. To make smooth drainage,cut the front end of the hose slantingly.

5.If the extra hose is too long, cut it either at A or at B point.

AB
Note: he instructions for appliances connected to the water mains by detachable hose-sets shall state that the new hose-sets supplied with the appliance are to be used and that old hose-sets should not be reused.

Inlet pipe connection
The new hose-sets supplied with the appliance are to be used and that old hose-sets should not be reused.
Confirm the water faucet

water faucet,suitable
The exit end face of the faucet

water faucet, not suitable

It is required that the front end shall be longer than 10mm. The exit end face of the faucet shall be flat and smooth. If not please file it to avoid leakage.
6

Installation & Adjustment
Connection between the water inlet hose jointer and the water faucet
1.Press the lower end of the lock lever and push down the slider. Take off the water inlet hose jointer rom the water inlet hose component. See to Figure 1.
2.Take off the nameplate. Make sure the threading is 4mm above the upper surface of the nut. See to Figure 6. If the threading is less than 4mm above the upper surface of the nut. please loosen the screws.

Lock lever Water inlet hose

Water inlet hose jointer Slider
Screw driver

Screw Nameplate

Bushing

Figure 1

Figure 2

Figure 3

3.Loosen the screw till the water faucet can be accessed. Put the jointer of the water inlet hose on the faucet. See to Figure 2.(If the faucet is too large and the jointer can not be set on the water faucet,please loosen the four screws and take out the bushing in the jointer. The front end of the faucet must be smooth, otherwise it may leak water. See to Figure 3.)
4.Fasten the four screws evenly. See to Figure 4.
5.Twist the fastening nut, See to Figure 5. After installation, the threading is less than 2mm above the upper surface of the nut. See to Figure 6.

Figure 4

Screw nut
Figure 5

About 4mm before twisting About less than 2mm after twisting
Figure 6

Connection between the water inlet hose and the washer

1.Do not take off the water absorption cushion. Please check if the cushion is dropped or damaged before each usage.If it happens please contact our after-sale department immediately.

nut of the water inlet hose

2.Put the nut of the water inlet hose on the valve jointer.

water absorption cushion jointer of the water inlet valve

3.Fasten the nut. Swing it gently to confirm if it's suitable.

7

Installation & Adjustment

Connection between the jointer of the water inlet hose and the water inlet hose

1.Push down the slider. Insert the water inlet hose into the jointer.
2.Hang the lock lever to the jointer. Release the Locking lever slider till a click sound is heard.

the jointer of the water inlet hose
Slider

Check the connection between the jointer of the water inlet hose and the water faucet
1.Swing the hose gently to confirm if it is fastened stable.
2.After installation, open the faucet to check if it leaks.
3.Do not bend the hose with overstrain. 4.Before each usage please check if
the connection between the jointer of the water inlet hose and the water faucet, and the installation of the water inlet hose are firm, so as to prevent dropping from improper installation position.

Dismantle the water inlet hose
1.Close the water faucet. 2.Press the locking lever. Push down the slider.Then
pull off the water inlet hose.If the machine is used frequently, the jointer of the water inlet hosevhose. If the machine is used frequently, the jointer of the water inlet hose

Locking lever Slider

8

Before washing
Preparation before washing 1.Connect the water inlet hose. Open the water faucet. 2.Confirm that the washing machine is earthed reliably. Then insert the power plug into the receptacle. The earth terminal shall not link to gas pipeline and faucet water pipeline. 3.Put down the drain hose.

Check the following before washing

Clear the pockets Tie any long straps and take out loose or strings,fasten items such as coins, buttons and close sand,hairpins,etc. zippers.

The weight of the laundry shall not exceed the rated capacity of your machine,loosen the laundry before placing it evenly in the tub.

When the machine is running,buttons may cause noise.
To reduce the noise, turn clothes inside out or place them in a laundry bag.

a. Check if the laundry has any special washing instructions. b. Divide the laundry into colour fast and non-colour fast items. c. Separate items that do not absorb water easily and wash by hand. d. For heavily soiled items,please first remove loose dirt,then apply detergent directly
(as per instructions on pack) to the stain before washing. e. For those items that may attract lint or are furry or fluffy,please turn inside out before
washing. f. Do not put laundry soiled with chemicals or solvents into the washing machine.
9

Operation

Loading your laundry
The rated washing capacity refers to the largest dry weight of a load that can be washed. The thickness, size and type of clothes will influence the actual capacity. Do not select more than water level "4" for clothes less than 1.0kg, to avoid splashing of water.
It is recommended that low suds/high efficiency washing powder should be used.

Usage of the detergent

Liquid Detergent inlet

Softener inlet

washing powder inlet

(Applicable model HWM90-M826)
How to use liquid detergent
Before washing put the liquid detergent into the liquid detergent box directly by following the volume indication on the liquid detergent package.
How to use softener
The usage and dose of the softener as per the specifications of softener. Before washing put the softener into the detergent box directly. See the above figure. The softener will put into the washer when the last rinsing. After the softener is put in, please don't place for a long time otherwise softener may solidify and cause flowing not smooth. When water pressure is too low, it is possible that softener cannot be washed away effectively, and softener would be agglomerated after a period of time. Please clean the softener box in time. It is recommended to pour the softener into the basket directly after water is filled at the last rinse.

Part 1
How to use washing powder
When washing powder is added, remove part 1 as shown in figure It is suggested to dissolve detergent before adding to the tub,see as below: It is suggested 1.Prepare warm water (<35�C) in a container. 2.Add washing powder,stirring to dissolve it completely.
Adding washing powder Normal Wash
It is recommended that washing powder/liquid is dissolved with water and then directly emptied into the washing machine:
1.Add some water (select the"1" water level) 2.Add washing powder/liquid. Run for about 30 seconds to
fully dissolve the detergent. Then press the"Start/Pause" button to pause the wash cycle. 3.Load laundry. Select suitable water level. Press the "Start/Pause" button again to recommence washing cycle.
If you select "Quick " program, it is recommended to use liquid detergent instead of washing powder to ensure the most effective wash results.
Old or poor quality washing powder may causing caking in tub or detergent dispenser.
Clean the detergent box periodically to ensure washing power is evenly distributed and remove any detergent build up. When water pressure is too low, it is possible that washing powder or washing liquid cannot be washed away effectively, and washing powder or washing liquid would be agglomerated after a period of time. Please clean the detergent box in time. It is recommended to pour the washing powder or liquid into the basket directly.

10

Operation
Explanation of buttons

Indicator display
Off On:Indicates the program is about to run and indicates the seleced cycle and options Flashing:Indicates the program is running and indicates the selected cycle and options

Child Lock function
The function is intended for children's safety and preventing children from accidental changes to washing programs. Press Power button,set the desired washing program,after setting, press Start/Pause button, then press Process button and Set button at the same time and hold for 3 seconds, The digitron displays "CL", The child lock light goes on,the child lock will activate. All of the buttons are locked and have no function. Release the child lock function: In the process of program running, Press Process button and Set button at the same time and hold for more than 3 seconds. After three beep sound,the child lock function is release.The child lock light goes out. NOTIf you open the lid when the "child lock"activate,digital tube display "E2"and beep,you need close the lid and press the "Start/Pause"to cancel,or washing machine will drain after 10 seconds.

Digital tube

During working , it displays the remained reserve

time (minute).In case of trouble, it displays the abnormal symbol (see to page 15)

Page 15

During reserve, it displays the remained reserve time (hour).

Power

"Power" button
Press the " Power " button to switch on the power. Under power-on mode, press it to switch off the power. If the "Start/Pause" button is not pressed, the machine will switch off the power automatically after 10 minutes.

11

Operation

"Start/Pause" button

Start /Pause

After the power is switched on, press it to start the machine. During working, press it to pause. During pause, press this button to restart and go on working.

"Process" button

Process

The user can press process button to select " water level", " wash time", "rinse times", "spin time" and "delay" , after selection, they can press "Set" button to adjust chosen process.

"Set " button

During operation, the digital tube will display the remaining time.Press

Set

the "Set" button. User can adjust " water level", " wash time", "rinse

times"
"Spin time".

"Program" select Program Application Deep Clean Washing the relatively big thick or very dirty laundries.

Hijab

Delicate items that are machine washable.

Delicate
Air Dry Program
Normal

Use this cycle to wash lightiy soiled garments and delicate clothes that need gentle washing.
Use this program for air drying laundries.
Use this cycle for normally soiled cottons and mixed fabric loads.

Heavy Spin Quick

Use this cycle to wash durable,full load,suitable for towels, children clothes,workerwear.
Use this cycle to remove water from clean clothes for certain delicate and cotton clothes that you do not wish to put into the dryer,this is an ideal cycle.
Quick wash suitable for a small amount of slightly soiled clothes .

12

Operation

Tub clean

"Tub clean" function
You can use this function to clean the inner tub and outer tub of washing machine. Spin alternately, and the total soak time is 10hours to make sure better clean effect.
Do not put clothes during tub clean process.

Button Operation and Descriptions

1 1SFTT 2 1SFTT

Power Program

i i

Power Program

After the power is switched on, "Normal" is a default setting. To select other fully-auto program, press the "Program" button till the corresponding indicator is light. Refer to the "Program" button on Page 12. For example:select Deep Clean for Washing the relatively big thick or very dirty laundries.

3 1SFTT

Process

corresponding process

Process

4 1SFTT

Set

adjust water levelwash time

Set

rinse times and other parameters

5 1SFTT
Start/Pause
Cycle completed

Start/Pause

When the machine has completed the selected/current wash cycle an audible selected/current wash cycle an audible alarm will sound and the machine will switch off automatically.

13

Cleaning or Maintenance

Maintenance

Remove the power plug before carrying out any cleaning or maintenance. Clean the lint filter(s) and detergent box after each wash,otherwise it may influence you using the machine.

Clean the detergent box and set it on the The lint filter must be used during washing.

control panel seat.

It must be cleaned in time after each using.

1.The method of dismantle: Push it out The mehods of dismantle and install lint filter

gently.

as follows:

2.The method of clean: Use a brush and 1.Press the spring piece of the top lint

duster cloth to clean it, then flush it with filter to make the claws out of the filter

water.

cover, and then pull out the lint filter to get

3.The method of install : Install it gently it down.(figure 1)

and push it in.

2.Pull the back of the lint filter, and then you

can get down it off the front cover of the

lint filter.(figure 2).

3.Sweep the lint in the lint filter.

4.Put the back of the lint filter into the front

Remove
cApplicable model HWM90-M826

cover.
5.Put the lint filter into filter cover, and make it tight.

The filter at the water inlet valve may become blocked by impurities in the water supply.Clean it with a plastic bristled brush every two months.

6.Make sure the lint filter well installed, or it can influence your use.

Dismantle

Up Install

Dismantle

Up Front cover of lint filter
Down
Install

Down

Back cover of lint filter

Figure 1

Figure 2

If the cabinet is dirty,wipe it with a damp cloth
Do not wash directly with water. Wipe with a neutral detergent(please check directions on detergent bottle first). Do not wipe machine with thinners,petrol, alcohol or other harsh solvents.
1.After washing cycle has finished,turn off the water faucet.(If needed,you can remove the water inlet hose).
2.Do not store water in the washing machine for a long period without completing a wash cycle.Drain the water completely after each wash.
3.Hang up the power cord and drain hose. 4.Wipe off any drops of water on the surface of the machine and inside the tub.Leave
the lid open for about 1 hour after each wash to evaporate any residual water.

14

Trouble-shooting

If there is a fault or the machine does not operate correctly,remove the power plug before checking the machine.Using diagnostic list below,please check if the machine requires repair.If a repair is required,please contact our customer care team,do not try to fix it by yourself.

Problem
The machine does not drain or drain slowly.The display shows E1.
The machine stops running The display shows E2.

Possible causes Is the drain hose blocked?
Is the drain hose set too hight? The top lid is not closed.

What to do
Remove the blockage.Press Start/Pause button once more. The height of the drain hose should be less than 10cm.
Close the top lid.Press the Start/Pause button once more.

The machine does not spin The display shows E3.
The display shows E4.

Has the laundry been placed unevenly in the machine? Is the machine level?

Redistribute the load evenly. Press the Start/Pause button once more. Level the machine.

Is the water tap closed or has the water supply been interrupted? Is the water inlet valve blocked? Is the water pressure too low?

Turn on the water tap. Press Start/Pause button once more. Clean the water inlet valve then press the Start/Pause button once more. Use after the water pressure is normal.

The display shows FA.
Will not wash The machine does not work. Will not spin
There are abnormal sounds inside the machine.

The water level sensor has failed.
Is there a power failure? Is the power plug inserted tightly? Has the water level reached preset position?
Is the power plug inserted tightly? Is the top lid closed? Is the laundry distributed unevenly in the machine?
Is the machine level? Has the laundry been placed unevenly in the machine? Are there any foreign objects inside the bowl?

Please contact Customer Care.
Wait for the power supply to be restored. Insert the power plug tightly Wait for the water to fill to the preset level
Insert the power plug tightly Close the top lidPress the Start/Pause button once more. Redistribute the laundry. Press the Start/Pause button once more.
Level the machine. Redistribute the load evenly. Close the top lid. Press the Start/Pause button once more. Remove the foreign objects.

15

Trouble-shooting

Problem The water tap leaks. The display shows E9.
The display shows F2.

Possible causes

What to do

Is the water inlet hose loose?
Communication failure between display board and power board.

Fasten the inlet hose.
Please contact Customer Care.

Indicates water has reached a critical level

Please contact Customer Care.

Common occurrence

Situation
The spinning is intermittent after it starts. Select spin program,but it does not work.
There may be water in the drain hose when first used.

Cause
Redistribute the load evenly.Close the top lid. The program is setting the drain time,there will be a pause before the spin program starts.
It may be residual water after performance inspection by the factory.

The wash procedure pauses.

The cloth sensor is detecting, it will add water after about 48 seconds.

16

Packing list

Name
Automatic washing machine

Quantity One

Bottom plate

One

Components of the water One inlet hose

User manual

One

Warranty card

One

Screw

One

Storage position
Between the upper cushion of the washing machine package Inside the accessory bag Inside the document bag Inside the document bag Inside the document bag

17

Specification

Type Model Rared voltage/frequency Rated washing power Rated spinning power Net weight Gross weight Dimensions(mm) Water inlet pressure Rated Washing capacity

Fully Automatic Washing Machine HWM80-M826 220-240V~/50Hz 420W 290W 32kg 36kg W 520 D 540 H 910 0.03MPa-1.0MPa 8.0kg

Type Model Rared voltage/frequency Rated washing power Rated spinning power Net weight Gross weight Dimensions(mm) Water inlet pressure Rated Washing capacity

Fully Automatic Washing Machine HWM90-M826 220-240V~/50Hz 455W 385W 36.5kg 41.5kg W 550 D 570 H 940 0.03MPa-1.0MPa 9.0kg

Type Model Rared voltage/frequency Rated washing power Rated spinning power Net weight Gross weight Dimensions(mm) Water inlet pressure Rated Washing capacity

Fully Automatic Washing Machine HWM100-M826 220-240V~/50Hz 465W 395W 42.5kg 48kg W 580 D 590 H 960 0.03MPa-1.0MPa 10.0kg

18