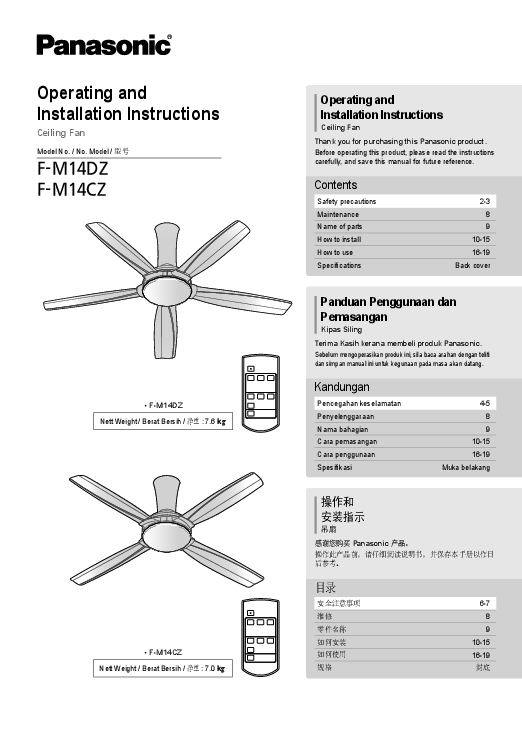
Panasonic Ceiling Fan Operating and Installation Instructions
Models: F-M14DZ, F-M14CZ
Introduction
Thank you for purchasing this Panasonic product. Before operating this product, please read the instructions carefully, and save this manual for future reference.
Safety Precautions
General Safety Instructions:
- Always follow these instructions to avoid injury to users or damage to properties.
- COMPULSORY actions are indicated by a specific symbol.
- PROHIBITED actions are indicated by another symbol.
WARNING: States that may be caused by mishandling, which, if not avoided, may lead to death or serious injury.
CAUTION: States that may be caused by mishandling, which, if not avoided, may result in injury or property damage.
Key Safety Points:
- Installation must be performed by a qualified individual. Improper installation can cause fire, electric shock, injury, or the fan to drop.
- Always switch off the power supply before cleaning or maintenance.
- Ensure the ceiling hook can sustain more than 10 times the fan's weight.
- Stop using the fan if any abnormality occurs and turn off the Miniature Circuit Breaker (MCB).
- Do not install in oily, dusty, flammable, or chemically active areas.
- Do not damage wiring during installation.
- Do not use power supply other than the rated voltage.
- Do not insert metal items into the battery area.
- Do not hang onto the fan.
- Do not disassemble the fan unless instructed.
- Use only supplied parts.
- Do not touch the fan while it is operating.
- Do not sprinkle water on the fan or wet the fan.
- Replace all blades if any are broken or cracked.
- The suspension system should be examined at least once every two years.
- Replacement of safety suspension system parts must be done by the manufacturer or authorized personnel.
- Do not install in wet, high-temperature, or high-humidity areas.
- Children should be supervised to ensure they do not play with the appliance.
- Ensure the fan is mounted at least 2.5m from the floor and 1m from the wall to the blades.
- Ensure the fan does not wobble excessively after installation.
Maintenance
- Check the Ceiling Fan condition annually. If a problem occurs, stop using the fan and refer to an authorized dealer. Check for loosened screws, safety wire condition, and motor shaft damage.
- Ensure the Safety Switch is in good condition. Refer to Step 2 on page 11 for details.
- Keep the fan clean. Wipe with a soft cloth, ordinary soap, and water. Do not use solvents or chemicals. Do not bend the blades while cleaning.
- Do not paint the blades. If damaged, order a new set from an authorized dealer.
- Show these instructions to the authorized dealer for correct maintenance.
- If the product is broken or damaged, remove it and replace with a new one to prevent dropping.
- The suspension system should be examined at least once every two years.
Name of Parts
The following parts are included with the F-M14DZ and F-M14CZ models:
- A Upper Canopy: 2 pieces
- B Motor Unit: 1 piece
- C Blade Assembly (F-M14CZ): 4 pieces
- Blade Assembly (F-M14DZ): 5 pieces
- D Decoration Cap: 1 piece
- E Batteries AAA / R03 / LR03: 2 pieces
- F Remote Control: 1 piece
- G Remote Control Holder Set: 1 piece
Attention: Do not place the fan directly on the floor as it may cause scratches. Do not disassemble or remove the pipe from the motor. Illustrations are for explanation purposes only.
How to Install
General Installation Steps:
- Install to the ceiling: Remove supplied parts (Bolt a, Nut b, Cotter Pin c, Pulley d). Place Pulley d onto the Ceiling Hook a. Fix and tighten Bolt a, Nut b, and Cotter Pin c. Ensure Cotter Pin is fixed into Bolt a and bent.
- Safety Wire Installation: Remove Safety Wire Screw g from the Pipe. Arrange and tie Safety Wire h as shown. Screw Safety Wire h with Screw g and Washer onto the Pipe.
- Wiring Instruction: Connect wires to the house's supply line. Use Splice if necessary. Ensure proper connection of live, neutral, and earth wires.
- Check point after installation: Ensure all bolts and nuts are tightened, the safety wire is correctly fixed, and the fan is securely attached to the ceiling hook.
- Install Upper Canopy: Remove screws i from Upper Canopy A. Align Fixing Rib S1 of Upper Canopy A with Slot S2 of Motor Unit B. Ensure a gap of approximately 5 mm between the canopy and ceiling. Click until a sound is heard, then fix screws i.
- Install Blades: Remove supplied Screw k. Assemble Blade Assembly C towards Hook I. Pull Blade Assembly C to lock. Tighten Blades firmly with Screws k (2 pieces per blade). Tightening torque: 250-300 N•cm.
- Install Decoration Cap: Fix Decoration Cap D, aligning guides on Motor Unit B and the cap. Turn clockwise until a "click" sound is heard. Ensure LED alignment with indications if applicable.
- Final Confirmation: Measure distances L, W, H. Adjust blades for equal distance (±1 mm tolerance).
- Install Remote Control Holder: Fix the holder set to the wall using screws n and wall plugs q. Ensure correct hole diameter and depth. Note: Wall plugs are not needed for wooden walls.
WARNINGS during installation:
- Electrical wiring must be done by a qualified person.
- Do not bypass or short circuit the Safety Switch.
- Ensure the Ceiling Hook can sustain more than 10 times the fan's weight.
- Do not remove Insulock Tie or Pipe Cap.
- The blades must be fixed correctly.
How to Use
Before Use:
- Remove the cover of Remote Control F.
- Insert Batteries E (2 x AAA / R03 / LR03), ensuring correct polarity.
- Close the cover.
Remote Control Coverage:
- The best coverage area is approximately 8m (W), with an ideal ceiling height of 3-4m (H).
- Point the remote control towards the fan.
- Avoid situations where netting, glass, fluorescent lighting, or walls obstruct the signal.
Remote Control Operation:
- OFF/ON Button: Press to switch the fan ON or OFF.
- Speed Button: Select speed 1, 2, or 3.
- OFF TIMER: Sets the fan to turn off automatically after a set time (1, 3, or 6 hours). The indicator lights show the remaining time.
- Timer Cancel: Cancels the OFF TIMER or SLEEP MODE.
- SLEEP MODE: Select speed 2 or 3, and then select a timer (3 or 6 hours). Press the SLEEP MODE button. The indicator light will blink. Refer to the SLEEP MODE FUNCTION chart for details.
Attention:
- Remove all batteries before disposing of the remote control.
- Replace all batteries at the same time.
- The power consumption when the fan is off via remote is about 1W.
- Switch off the wall switch or breaker if the fan is not in use for a long period to ensure zero power consumption.
- If controlling multiple fans with one remote, ensure they are all pointed correctly to avoid unintended changes.
- SLEEP MODE is disabled at Speed 1 and 1-hour setting.
Specifications
| Model | F-M14CZ | F-M14DZ |
|---|---|---|
| Voltage (VAC) | 240 | 240 |
| Frequency (Hz) | 50 | 50 |
| Wattage (W) | 20 / 68 (Speed 1 / Speed 3) | 21 / 69 (Speed 1 / Speed 3) |
| Rotation (RPM) | 102 / 196 (Speed 1 / Speed 3) | 95 / 183 (Speed 1 / Speed 3) |
| Air Velocity (m/min) | 155 | 155 |
| Air Delivery (m³/min) | 215 | 215 |
Attention: Do not expose yourself continuously to direct wind from the Ceiling Fan. It can cause discomfort.