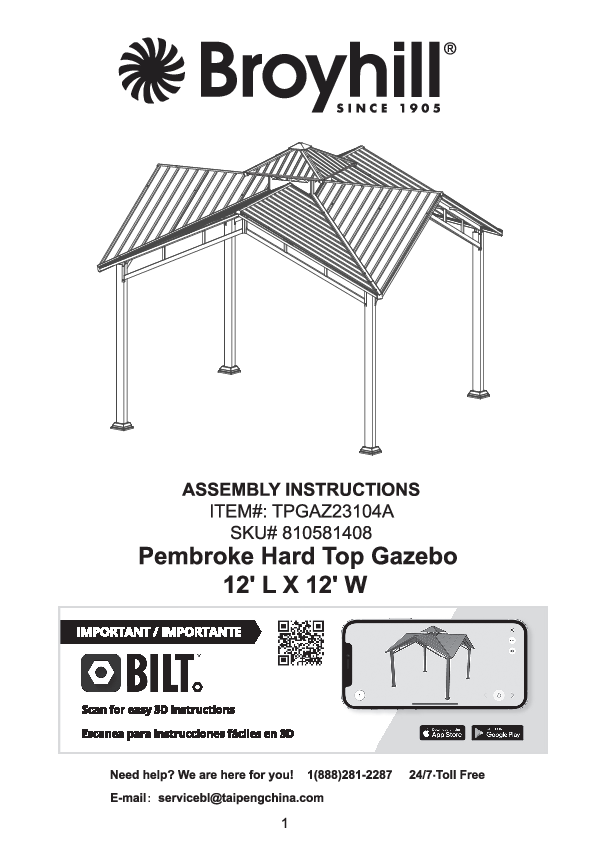
General Best Practices for Assembly
- Read and understand the entire manual before assembly.
- Verify all parts are present against the package and hardware lists before starting. Do not assemble if parts are missing or damaged.
- Assemble the gazebo at least 6 feet from any obstruction (fence, house, branches, wires).
- Some parts may have sharp edges; wear protective gloves if necessary.
- This unit is heavy; assembly requires four people for safety.
- Periodically check and tighten all nuts and bolts.
- Pay attention to part orientation during assembly.
Warnings
- Install the gazebo on level ground. Use provided stakes for securing.
- Do not assemble on sandy, muddy, or loose soil where stakes lack anchorage.
- For wood decks or concrete, use appropriate anchors (not included).
- Clear snow from the roof regularly when it exceeds 2 inches thick, using a plastic snow rake to avoid damage.
- Do not leave the gazebo in high wind conditions, as damage may occur.
- Assembly and maintenance must be performed by adults only.
- Check local regulations for potential permits required for installation.
- Use touch-up paint on any scratches to prevent rust.
- For outdoor use only.
Warranty
What is Covered: The limited warranty extends to the original purchaser and covers material and manufacturer's defects, provided the item is maintained with care and used for personal, residential purposes.
Warranty Period: 1 Year
Maintenance
- Steel components are treated with rust-inhibiting paint. Surface oxidation (rusting) may occur if paint is scratched; this is not a defect.
- To minimize scratching, handle the product with care during assembly.
- If scratches occur, cover them immediately with rust-inhibiting paint (not included).
- Surface rust can be removed with a light application of cooking oil or WD-40.
- If oxidation is not addressed, it may drip and cause stains.
- Do not use bleach, acid, or abrasive cleaners on the roof or frame.
- Keep this manual for future reference.
- Keep original packaging for storage.
- Periodically check and tighten all bolts.
Parts List
| Label | Description | Qty | Part Image Description |
|---|---|---|---|
| A | Post | 4 | Long vertical support element. |
| B | Base | 4 | Footing component for the post. |
| C | Base cover | 4 | Decorative cover for the base. |
| D | Slant beam L | 4 | Left-side angled roof support beam. |
| E | Slant beam R | 4 | Right-side angled roof support beam. |
| F1 | Connector | 4 | Connecting piece for roof structure. |
| F2 | Connector | 4 | Connecting piece for roof structure. |
| G | Long Raingutter | 4 | Long channel for water runoff. |
| H | Short Raingutter | 4 | Short channel for water runoff. |
| I | Short roof support | 4 | Short support for roof panels. |
| J1 | Vented frame | 4 | Frame component for vented roof sections. |
| J2 | Connector | 4 | Connecting piece for roof structure. |
| K | Center Connector | 1 | Central hub for roof supports. |
| L1 | Vented roof support | 4 | Support for vented roof panels. |
| L2 | Connecting Tube | 4 | Tube used for connecting roof elements. |
| M | Vented Roof | 1 | Main vented roof section. |
| N1 | Vented roof connected tube | 1 | Tube connecting vented roof sections. |
| N2 | Hook | 1 | Hook component for the vented roof. |
| O1 | Slant beam L | 4 | Left-side angled roof support beam. |
| O2 | Slant beam R | 4 | Right-side angled roof support beam. |
| P1 | Strut L | 4 | Left-side angled support strut. |
| P2 | Strut R | 4 | Right-side angled support strut. |
| R | Valley End | 4 | End piece for roof valleys. |
| S | Valley | 4 | Valley piece for roof sections. |
| T1 | Ridge | 4 | Ridge piece for the roof peak. |
| T2 | Vented Roof ridge | 4 | Vented ridge piece for the roof peak. |
| U | Vented roof panel | 4 | Panel for the vented roof section. |
| V1 | Roof panel - L | 4 | Left-side roof panel. |
| V2 | Roof panel - L | 4 | Left-side roof panel. |
| V3 | Roof panel - L | 4 | Left-side roof panel. |
| V4 | Roof panel - L | 4 | Left-side roof panel. |
| W1 | Roof panel - R | 4 | Right-side roof panel. |
| W2 | Roof panel - R | 4 | Right-side roof panel. |
| W3 | Roof panel - R | 4 | Right-side roof panel. |
| W4 | Roof panel - R | 4 | Right-side roof panel. |
| X | Vented Roof Panel | 4 | Additional vented roof panel. |
Hardware List
| Label | Description | Qty | Part Image Description |
|---|---|---|---|
| AA | M6*15 mm Bolt | 216 | Standard bolt. |
| BB | M6*65 mm Bolt | 8 | Long bolt. |
| CC | M6*25 mm Bolt | 9 | Medium length bolt. |
| DD | Washer | 193 | Standard flat washer. |
| EE | Nut | 8 | Standard nut. |
| FF | Plastic Washer | 88 | Washer made of plastic. |
| GG | M6*10 mm Bolt | 16 | Short bolt. |
| HH | M6*45 mm Bolt | 16 | Medium-long bolt. |
| II | M8*20 mm Bolt | 12 | Bolt with larger diameter. |
| JJ | M6*15 mm Bolt | 8 | Standard bolt. |
| KK | Washer-M8 | 24 | Washer for M8 bolts. |
| LL | Locking Nut | 12 | Nut designed to prevent loosening. |
| MM | M6*35 mm Bolt | 8 | Medium length bolt. |
| NN | Wrench | 2 | Tool for tightening bolts/nuts. |
| OO | Allen Wrench | 1 | Tool for Allen head bolts. |
| PP | Stake | 16 | Ground anchor stake. |
Helpful Hints
Tools Needed (Not Included):
- [Hammer]
- [Screwdriver]
- [Ladder]
- [Drill]
Tools Provided in Hardware Pack:
- [Wrench] (NN)
- [Allen Wrench] (OO)
People Needed for Installation: 2 people + 3 people (indicated by icons showing 2 filled figures and 3 outlined figures).
Separate parts before starting assembly.
Assembly Steps
Step 1: Assemble Posts
Parts: Post (A) x4, Base Cover (C) x4, Base (B) x4
Hardware: Bolts (AA) x8, Washers (DD) x8
Instructions:
- Slide Base Cover (C) over one end of Post (A).
- Insert Base (B) into the other end of Post (A).
- Secure the Base (B) to the Post (A) using two Bolts (AA) and two Washers (DD). Refer to Figure 1 for a detailed view of this connection.
- Repeat for all four posts.
Figure 1 shows a detailed view of a Post (A) with Base Cover (C) and Base (B) attached, secured by Bolts (AA) and Washers (DD).
Step 2: Assemble Slant Beams and Connectors
Parts: Slant beam L (D) x4, Slant beam R (E) x4, Connector (F1) x4
Hardware: Bolts (II) x12, Washers (KK) x24, Locking Nuts (LL) x12, Bolts (AA) x8, Washers (DD) x8
Instructions:
- Connect Slant beam (D) and Slant beam (E) using Bolts (II), Washers (KK), and Nuts (LL). Refer to Figure 2.1 for details. A Washer (KK) should be used as shown.
- Attach Connector (F1) to the Slant beam (D/E) using Bolts (AA) and Washers (DD). Refer to Figure 2.2 for details.
- Repeat to make a total of four such assemblies.
Figure 2.1 shows the connection of Slant beams (D) and (E) with hardware. Figure 2.2 shows the attachment of Connector (F1) to a Slant beam (D/E) with Bolts (AA) and Washers (DD).
Step 3: Connect Slant Beams to Posts
Parts: Posts (A) x4, Slant beam assemblies (D/E)
Hardware: Bolts (AA) x16, Washers (DD) x16
Instructions:
- Connect the Slant beam assemblies (D/E) to the Posts (A) using Bolts (AA) and Washers (DD). Refer to Figure 3 for the connection points.
Figure 3 shows the connection of the Slant beam assemblies (D/E) to the Posts (A) using Bolts (AA) and Washers (DD).
Step 4: Connect Remaining Slant Beams to Posts
Parts: Posts (A) x4, Slant beam assemblies (D/E)
Hardware: Bolts (AA) x16, Washers (DD) x16
Instructions:
- Connect the remaining two Slant beam assemblies (D/E) to the Posts (A) using Bolts (AA) and Washers (DD). Refer to Figure 4 for details.
Figure 4 illustrates the connection of the second set of Slant beam assemblies (D/E) to the Posts (A) with Bolts (AA) and Washers (DD).
Step 5: Assemble Vented Frames
Parts: Vented frame (J1) x4, Connector (J2) x4
Hardware: Bolts (AA) x16, Washers (DD) x16
Instructions:
- Slide Connectors (J2) into the Vented frames (J1).
- Connect them using Bolts (AA) and Washers (DD). Refer to Figure 5 for the assembly.
- Pay attention to the assembly direction for Vented frame (J1), as shown in Figure 6 ([Correct Assembly] vs [Incorrect Assembly]).
- Repeat for all four assemblies.
Figure 5 shows the connection of Connectors (J2) to Vented frames (J1) with Bolts (AA) and Washers (DD). Figure 6 illustrates the correct and incorrect orientation for Vented frame (J1).
Step 6: Assemble Raingutters
Parts: Long Raingutter (G) x4, Short Raingutter (H) x4
Hardware: Bolts (AA) x16, Washers (DD) x16
Instructions:
- Slide Short Raingutter (H) into Long Raingutter (G).
- Attach them using Bolts (AA) and Washers (DD). Refer to Figure 7 for the connection.
- Repeat to make a total of four assemblies.
Figure 7 shows the process of sliding Short Raingutter (H) into Long Raingutter (G) and securing it with Bolts (AA) and Washers (DD).
Step 7: Attach Raingutters to Frame
Parts: Long Raingutter (G) x4, Short Raingutter (H) x4, Connector (J2) x4, Posts (A) x4
Hardware: Bolts (BB) x8, Washers (DD) x24, Nuts (EE) x8, Bolts (AA) x8, Bolts (JJ) x8
Instructions:
- Connect one end of the Long Raingutter (G) to Connector (J2) using Bolts (BB), Washers (DD), and Nuts (EE). Refer to Figure 8.
- Connect the Short Raingutter (H) to the Post (A) using Bolts (AA) and Washers (DD). Refer to Figure 9.
- Attach the Raingutter assembly (G/H) to the Post (A) using Bolts (JJ). Refer to Figure 10.
- Repeat for all four corners.
Figure 8 shows the connection of Long Raingutter (G) to Connector (J2). Figure 9 illustrates connecting Short Raingutter (H) to Post (A). Figure 10 shows attaching the combined Raingutter (G/H) to Post (A) with Bolts (JJ).
Step 8: Attach Connectors to Short Roof Supports
Parts: Short roof support (I) x4, Connector (F2) x4
Hardware: Bolts (AA) x4, Washers (DD) x4
Instructions:
- Install Connector (F2) onto Short roof support (I) using Bolts (AA) and Washers (DD). Refer to Figure 11 for details.
- Repeat for all four assemblies.
Figure 11 shows the attachment of Connector (F2) to Short roof support (I) with Bolts (AA) and Washers (DD).
Step 9: Connect Short Roof Supports to Frame
Parts: Short roof support (I) x4, Connector (F1) x4, Slant beams (D/E)
Hardware: Bolts (AA) x12, Washers (DD) x12
Instructions:
- Connect one end of the Short roof support (I) to Connector (F1) using Bolt (AA) and Washer (DD). Refer to Figure 12.1.
- Connect the other end of the Short roof support (I) to the Slant beams (D/E) using Bolts (AA) and Washers (DD). Refer to Figure 12.2.
- Repeat for all four sides.
Figure 12.1 shows connecting Short roof support (I) to Connector (F1). Figure 12.2 shows connecting Short roof support (I) to Slant beams (D/E) with Bolts (AA) and Washers (DD).
Step 10: Assemble Vented Roof Supports
Parts: Vented roof support (L1) x4, Connecting Tube (L2) x4, Center Connector (K) x1
Hardware: Bolts (AA) x8, Washers (DD) x8
Instructions:
- Slide Connecting Tubes (L2) into Vented Roof Supports (L1) and secure with Bolts (AA) and Washers (DD). Refer to Figure 13.
- Connect the Vented roof supports (L1) to the Center connector (K) using Bolts (AA) and Washers (DD). Refer to Figure 14 for details.
Figure 13 shows the connection of Connecting Tubes (L2) to Vented Roof Supports (L1). Figure 14 illustrates attaching Vented roof supports (L1) to the Center connector (K).
Step 11: Connect Vented Roof Assembly to Connectors
Parts: Vented roof support assembly (L1/L2), Connectors (J2)
Hardware: Bolts (AA) x4, Washers (DD) x4
Instructions:
- Connect the Vented roof support assembly (L1/L2) to the Connectors (J2) using Bolts (AA) and Washers (DD). Refer to Figure 15.
Figure 15 shows the connection of the Vented roof support assembly to the Connectors (J2) using Bolts (AA) and Washers (DD).
Step 12: Attach Slant Beams to Raingutters and Supports
Parts: Slant beam (O1/O2) x8, Short raingutter (H) x4, Short roof support (I) x4
Hardware: Bolts (AA) x8, Washers (DD) x8
Instructions:
- Insert one end of the Slant beam (O1/O2) into the Short raingutter (H).
- Attach the other end of the Slant beam (O1/O2) onto the Short roof support (I) using a Bolt (AA) and Washer (DD). Refer to Figures 16 and 17.
- Pay attention to the side of the Slant beam (O1/O2) with holes towards the inside of the gazebo frame.
- Repeat for all eight Slant beams (O1/O2).
Figure 16 shows the placement of Slant beams (O1/O2) into Short raingutters (H) and connecting to Short roof supports (I). Figure 17 details the connection using Bolt (AA) and Washer (DD).
Step 13: Attach Struts
Parts: Strut L (P1) x4, Strut R (P2) x4, Slant beams (D/E), Long raingutter (G), Slant beams (O1/O2)
Hardware: Bolts (AA) x24, Washers (DD) x24
Instructions:
- Place one end of the Strut (P1/P2) into the notch in the Slant beam (D/E). Attach the other end onto the Long raingutter (G) with a Bolt (AA) and Washer (DD). Refer to Figures 18 and 19.
- Attach the Strut (P1/P2) onto the Slant beam (O1/O2) with Bolts (AA) and Washers (DD). Refer to Figure 20.
- Repeat for all Struts (P1/P2).
Figure 18 shows placing Struts (P1/P2) into Slant beams (D/E). Figure 19 illustrates attaching Struts (P1/P2) to Long raingutter (G). Figure 20 shows attaching Struts (P1/P2) to Slant beams (O1/O2).
Step 14: Attach Vented Roof Panels
Parts: Vented roof panel (U) x4, Vented roof supports (L1)
Hardware: Bolts (AA) x8, Washers (DD) x8
Instructions:
- Attach the Vented roof panel (U) to the Vented roof Support (L1) using Bolts (AA) and Washers (DD). Refer to Figure 21.
- Repeat for all four Vented roof panels (U).
Figure 21 shows the attachment of Vented roof panels (U) to Vented roof Supports (L1) with Bolts (AA) and Washers (DD).
Step 15: Install Vented Roof Ridge and Vented Roof
Parts: Vented roof ridge (T2) x4, Vented roof (M) x1, Center connector (K)
Hardware: Bolts (CC) x9, Plastic Washers (FF) x8, Bolt (CC) x1, Washer (DD) x1
Instructions:
- Connect the Vented roof ridge (T2) to the Vented roof support (L1) using Bolts (CC) and Plastic washers (FF). Refer to Figure 22.
- Attach the Vented roof (M) onto the Center connector (K) using a Bolt (CC) and Washer (DD). Refer to Figure 23.
Figure 22 shows connecting Vented roof ridge (T2) to Vented roof support (L1) with Bolts (CC) and Plastic washers (FF). Figure 23 illustrates attaching the Vented roof (M) to the Center connector (K) with Bolt (CC) and Washer (DD).
Step 16: Place and Connect Left Roof Panels
Parts: Roof panels L (V1/V2/V3/V4) x1 each, Strut (P1)
Hardware: Bolts (AA) x7, Plastic washers (FF) x7
Instructions:
- Place the roof panels (V1, V2, V3, V4) on top of the frame in order, ensuring edges overlap as shown.
- Connect the roof panels (V1/V2/V3/V4) to the Strut (P1) using Bolts (AA) and Plastic washers (FF). Refer to Figures 24 and 25.
Figure 24 shows the arrangement of roof panels (V1-V4) and indicates overlapping edges. Figure 25 details the connection of these panels to Strut (P1) with Bolts (AA) and Plastic washers (FF).
Step 17: Place and Connect Right Roof Panels
Parts: Roof panels R (W1/W2/W3/W4) x4 each, Strut (P2)
Hardware: Bolts (AA) x49, Plastic washers (FF) x49
Instructions:
- Place the roof panels (W1, W2, W3, W4) on top of the frame in order, ensuring edges overlap as shown.
- Connect the roof panels (W1/W2/W3/W4) to the Strut (P2) using Bolts (AA) and Plastic washers (FF). Refer to Figures 26 and 27.
- Repeat this step for the other three sides.
Figure 26 shows the placement of roof panels (W1-W4) and indicates overlapping edges. Figure 27 details the connection of these panels to Strut (P2) with Bolts (AA) and Plastic washers (FF).
Step 18: Attach Valley and Ridge Pieces
Parts: Valley End (R) x4, Valley (S) x4, Ridge (T1) x4, Long Raingutter (G), Short Roof Support (I)
Hardware: Bolts (HH) x16, Plastic washers (FF) x24, Bolts (MM) x8
Instructions:
- Connect the Valley End (R) and Valley (S) to the Long Raingutters (G) using Bolts (HH) and Plastic washers (FF). Refer to Figure 28. Repeat for the other three sides.
- Connect the Ridge (T1) to the Short Roof support (I) using Bolts (MM) and Plastic washers (FF). Refer to Figure 29. Repeat for the other three sides.
Figure 28 shows the attachment of Valley End (R) and Valley (S) to Long Raingutters (G). Figure 29 illustrates connecting Ridge (T1) to Short Roof support (I).
Step 19: Attach Vented Roof Panels to Connecting Tubes
Parts: Vented Roof Panel (X) x4, Connecting Tube (L2)
Hardware: Bolts (GG) x16, Washers (DD) x16
Instructions:
- Connect the Vented Roof Panel (X) to the Connecting Tube (L2) using Bolts (GG) and Washers (DD). Refer to Figure 30.
- Repeat for all four sides.
Figure 30 shows the connection of Vented Roof Panel (X) to Connecting Tube (L2) with Bolts (GG) and Washers (DD).
Step 20: Connect Vented Roof Connected Tube and Hook
Parts: Vented roof connected tube (N1) x1, Hook (N2) x1, Vented frame (J1)
Hardware: Bolts (AA) x4, Washers (DD) x4
Instructions:
- Connect the ends of the Vented roof connected tube (N1) to the Vented frame (J1) using Bolts (AA) and Washers (DD). Refer to Figure 31.
- Connect the Hook (N2) to the Vented roof connected tube (N1). Refer to Figure 32.
Figure 31 shows the connection of Vented roof connected tube (N1) to Vented frame (J1). Figure 32 illustrates attaching Hook (N2) to Vented roof connected tube (N1).
Step 21: Insert Stakes
Parts: Stakes (PP) x16, Bases (B)
Instructions:
- Insert the Stakes (PP) into the ground through the four Bases (B). Refer to Figure 33.
Figure 33 shows the process of inserting Stakes (PP) into the ground through the Bases (B) of the assembled gazebo.
