BR200 Programming Instructions
File info: application/pdf · 9 pages · 5.08MB
BR200 Programming Instructions
BR200 Programming Instructions - Midland Radio
The available frequencies and codes are listed in your owner’s manual. You will need the BA1 Programming cable and programming software that are available on the Midland website at www.midlandusa.com. TIP: If at any tim…
. BR200 PROGRAMMING INSTRUCTIONS. ... ! TIP: If the radio does not successfully program, go the the Trouble Shooting section of the instructions.
Extracted Text
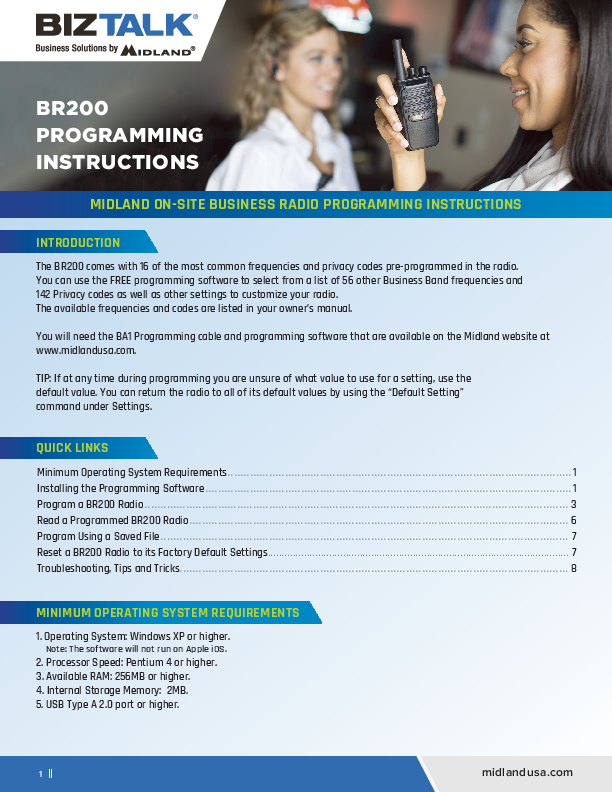
�

BR200 PROGRAMMING INSTRUCTIONS
MIDLAND ON-SITE BUSINESS RADIO PROGRAMMING INSTRUCTIONS
INTRODUCTION
The BR200 comes with 16 of the most common frequencies and privacy codes pre-programmed in the radio. You can use the FREE programming software to select from a list of 56 other Business Band frequencies and 142 Privacy codes as well as other settings to customize your radio. The available frequencies and codes are listed in your owner's manual.
You will need the BA1 Programming cable and programming software that are available on the Midland website at www.midlandusa.com.
TIP: If at any time during programming you are unsure of what value to use for a setting, use the default value. You can return the radio to all of its default values by using the "Default Setting" command under Settings.
QUICK LINKS
Minimum Operating System Requirements. . . . . . . . . . . . . . . . . . . . . . . . . . . . . . . . . . . . . . . . . . . . . . . . . . . . . . . . . . . . . . . . . . . . . . . . . . . . . . . . . . . . . . . . . . . . . . . . . . . . . . . . . . . . . 1 Installing the Programming Software. . . . . . . . . . . . . . . . . . . . . . . . . . . . . . . . . . . . . . . . . . . . . . . . . . . . . . . . . . . . . . . . . . . . . . . . . . . . . . . . . . . . . . . . . . . . . . . . . . . . . . . . . . . . . . . . . . . . 1 Program a BR200 Radio. . . . . . . . . . . . . . . . . . . . . . . . . . . . . . . . . . . . . . . . . . . . . . . . . . . . . . . . . . . . . . . . . . . . . . . . . . . . . . . . . . . . . . . . . . . . . . . . . . . . . . . . . . . . . . . . . . . . . . . . . . . . . . . . . . . . . . 3 Read a Programmed BR200 Radio. . . . . . . . . . . . . . . . . . . . . . . . . . . . . . . . . . . . . . . . . . . . . . . . . . . . . . . . . . . . . . . . . . . . . . . . . . . . . . . . . . . . . . . . . . . . . . . . . . . . . . . . . . . . . . . . . . . . . . . . 6 Program Using a Saved File. . . . . . . . . . . . . . . . . . . . . . . . . . . . . . . . . . . . . . . . . . . . . . . . . . . . . . . . . . . . . . . . . . . . . . . . . . . . . . . . . . . . . . . . . . . . . . . . . . . . . . . . . . . . . . . . . . . . . . . . . . . . . . . . . 7 Reset a BR200 Radio to its Factory Default Settings.. . . . . . . . . . . . . . . . . . . . . . . . . . . . . . . . . . . . . . . . . . . . . . . . . . . . . . . . . . . . . . . . . . . . . . . . . . . . . . . . . . . . . . . . . . . . . . . . . . . . . . . . . . . . 7 Troubleshooting, Tips and Tricks.. . . . . . . . . . . . . . . . . . . . . . . . . . . . . . . . . . . . . . . . . . . . . . . . . . . . . . . . . . . . . . . . . . . . . . . . . . . . . . . . . . . . . . . . . . . . . . . . . . . . . . . . . . . . . . . . . . . . . . . . . . 8
MINIMUM OPERATING SYSTEM REQUIREMENTS
1. Operating System: Windows XP or higher. Note: The software will not run on Apple iOS.
2. Processor Speed: Pentium 4 or higher. 3. Available RAM: 256MB or higher. 4. Internal Storage Memory: 2MB. 5. USB Type A 2.0 port or higher.

1 ||

midlandusa.com

INSTALLING THE PROGRAMMING SOFTWARE
NOTE: The following is using Microsoft Edge and the Winzip application to unzip the programming software. Illustrations may vary with other browsers or applications but the steps will be very similar. The most important step is to save the programming software to your desktop, or create a shortcut on your desktop so that you can return to it easily. 1. Download the FREE BR200 Programming Software
and save it to a designated folder or on your desktop.
a. When asked, click "Save". It will then download the programming software as a .zip file to your downloads folder.
b. Click on "View Downloads"" or go to your downloads folder under documents (recommended).

2. Open the zip file and extract the programming software.
2 ||

midlandusa.com

b. It is recommended you right click on the installation program to create a shortcut or simply drag and drop the folder to your desktop to create the shortcut to the programming software.

Note: Version number shown for illustrative purpose only, be sure to use the latest version from the Midland website."
3. The program is an "auto � run" installation and will automatically open/run upon double clicking the icon or the software program for installation.
PROGRAM A BR200 RADIO
1. Turn the BR200 radio off. 2. Connect the BR200 radio to your computer using the BA1 programming cable.

a. Open the rubber accessory cover on the side of the radio and plug the programming cable into the radio.

Connect to accessory jack on the radio
(Be sure to press the connector in firmly to insure a good connection).

b. Connect the USB plug of the programming cable to a USB port on your computer.
Connect to a USB port on your computer
3. Turn the radio on. a. The red transmit LED will briefly turn on, then off, to confirm the connection.
4. Double click on the shortcut to open the BR200 Programming software.

3 ||

midlandusa.com

!

TIP: The window will automatically populate with the factory default values. You may either leave them and change only the values you need to, or click the "New" icon to clear all the frequency and privacy code settings and program only the channels you need to. The Advanced settings will remain at their default values.

5. Check the COM (Communication) Port setting.
a. Click on "Edit" b. Click on "COM Port" c. Confirm a COM Port has been automatically selected to communicate
with the radio and click "OK" to close the window.

! TIP: Most often, your computer will automatically recognize the radio on COM 3. If the data does not successfully transfer using COM3 in Step 9, try a different COM port assignment from the program.
6. Using the drop down menus on the Channel Screen, select your desired values for; a. RX Frequency: The TX Frequency will automatically change to match your RX selection. b. RX Privacy Code: The TX Privacy code will automatically change to match your RX selection. c. Repeat steps a & b for each channel you want programmed. You do not need to program all 16 channels, selecting "None" in the RX column for unused channels.
Drop down Menu

4 ||

midlandusa.com

7. Click on the Gear icon to program the "Advanced" settings of the radio
Advance Settings Icon
Drop down Menu

a. Use the drop-down menu for each setting and select the value that will give you the desired performance. If you are not sure what value to use, use the default value.

Advance Settings
Time Out Timer (TOT)
Squelch Level
Voice Annunciation
Power Save

Default Value
(Recommended)
120
4
English Off
(Unchecked)

Settings Range
Off - 300
0 - 9 English or Spanish On / Off

8. Proof read and save your program. a. Use the "Save" command under "File". b. Give your program a name and save it in a memorable location. c. Click "Save."
9. Write the program to the radio.

Comments
Lower values help prevent the radio from overheating and reduces channel congestion. "Off" is not recommended.
Lower values increases sensitivity to background noise.
Select the language you desire.
"On" will increase battery life, but may cause a small delay in voice response when transmitting as the radio "wakes up".

File

Save

Program

Save

5 ||

midlandusa.com

a. Click on the green "W" icon. b. The programming data will automatically be sent to the radio. c. Click "OK" to confirm and complete the programming.
W
10. Turn the radio off and disconnect the programming cable. 11. Turn the radio on, and test it with other radios to make sure it is working correctly. 12. Write the program to other BR200 radios, or save and close the program.
! TIP: If the radio does not successfully program, go the the Trouble Shooting section of the instructions.
READ A PROGRAMMED BR200
Read a programmed BR200 so you can: � Use the same programming values for other BR200 radios. � Save the programming file for later use. � Check the settings to make sure they are correct and match other radios.
1. Follow steps 1 through 5 above to connect the radio to the computer and open the software. 2. Click on the red "R" icon. 3. The programming data will automatically be read from the radio and populate the window. 4. Click "OK" to confirm and complete the process. 5. The radio will return to its normal state when complete.
R

6 ||

midlandusa.com

6. The programming data will be displayed on their respective program window. 7. Turn off the radio and disconnect the programming cable. 8. With the programming software still open, connect another BR200 radio follow step 9 above to write the
same data to additional radios. 9. Or, save your file for later use and close the program.
PROGRAM USING A SAVED FILE
1. Follow steps 1 through 5 above to connect the radio to the computer and open the software. 2. Use the "Open Folder" icon to locate and open your file.
Open Folder

3. The file will automatically populate all settings with the data saved in your file 4. Click on the green "W" icon as described in step 9 above to program the radio. 5. Disconnect the radio and test it with other radios to make sure it is operating correctly.
RESET A RADIO TO ITS FACTORY DEFAULT SETTINGS
1. Follow steps 1 through 5 above to connect the radio to the computer and open the software. 2. Set all programming settings to their default values.
a. Click on "Edit". b. Click on "Default Settings". This will automatically populate all settings with the default value.
Edit

3. Click on the green "W" icon as described in step 9 above to program the radio. 4. Disconnect the radio and test it with other radios to make sure it is operating correctly.

7 ||

midlandusa.com

TROUBLESHOOTING, TIPS AND TRICKS
Most problems can be resolved by following these simple steps. However, if you need additional help, call our Customer Service team at 816-241-8500.

Symptom

Solution

The programming data will not transfer to the radio from the computer. I keep getting an error code when I click "start".

- Make sure the radio has a fully charged battery and is turned on. (Do not program a radio while in the charger.)
- Check your COM port. It should be using COM3, but your computer may be set up differently and you may need to try a different COM port.

- Install a USB to Serial Port conversion driver. The programming cable includes this driver and should automatically install on your computer the first time you use it. You can install a standard driver if necessary from: http://www.prolific.com.tw/US/ShowProduct.aspx?p_id=225&pcid=41

- Make sure your programming cable is firmly plugged in to the radio and computer to ensure a good connection. Remove and re-insert if necessary.

The programming software will not install or run on my computer.

- Make sure your computer meets the minimum requirements.
- Software will not work on an Apple (Mac) computer. Use a Windows PC.

- Uninstall and re-install the program.

- Check with your IT administrator.

I am not sure what to use for a certain setting.
I programmed the radio but it still doesn't work with my other radios.

- Use the default value. (See above)
- TIP: Reset the radio to its default values as described above and change ONLY the settings necessary, leave all others as is.
- Use the "Read" function of the software to make sure the data you sent to the radio is correct.
- Check the settings on both radios making sure they are the same, especially the TX/RX frequency and Privacy Codes by channel. These must match for the radios to work together.

8 ||

midlandusa.com

5900 Parretta Drive Kansas City, MO 64120
Call 816.241.8500
We'd love to hear from you! Let us know what you think of your new Midland product at
or by visiting us at
midlandusa.com
Note: Features & Specifications are subject to change without notice. MIDLAND is not responsible for unintentional errors or omissions on its
packaging.