Page 6 www.americanautowire.com 856-933-0801 1968-76 Corvette Classic Update Series 510717 Dash/Main harness installation instructions: 92972159 Rev 3.0 10/5/2020
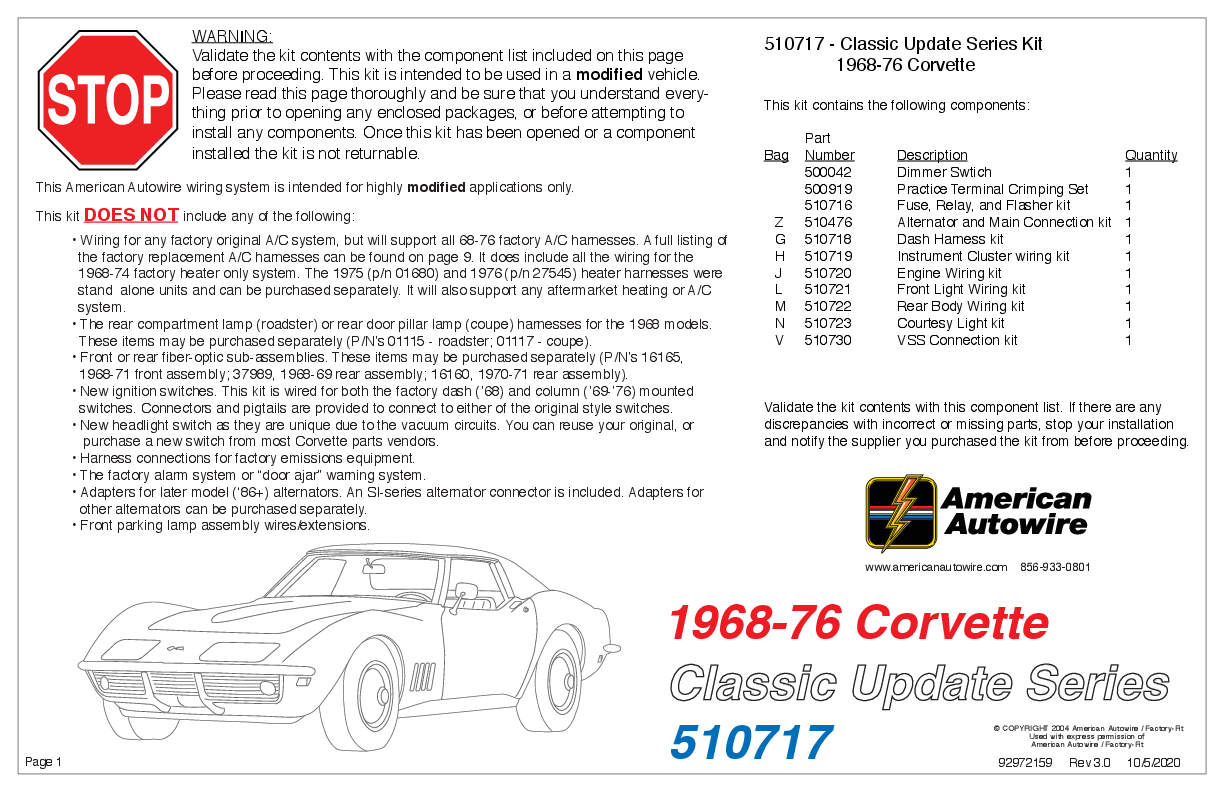
WARNING: Validate the kit contents with the component list included on this page before proceeding. This kit is intended to be used in a modified vehicle. Please read this page thoroughly and be sure that you understand everything prior to opening any enclosed packages, or before attempting to install any components. Once this kit has been opened or a component
installed the kit is not returnable.
This American Autowire wiring system is intended for highly modified applications only.
This kit DOES NOT include any of the following:
· Wiring for any factory original A/C system, but will support all 68-76 factory A/C harnesses. A full listing of the factory replacement A/C harnesses can be found on page 9. It does include all the wiring for the 1968-74 factory heater only system. The 1975 (p/n 01680) and 1976 (p/n 27545) heater harnesses were stand alone units and can be purchased separately. It will also support any aftermarket heating or A/C system. · The rear compartment lamp (roadster) or rear door pillar lamp (coupe) harnesses for the 1968 models. These items may be purchased separately (P/N's 01115 - roadster; 01117 - coupe). · Front or rear fiber-optic sub-assemblies. These items may be purchased separately (P/N's 16165, 1968-71 front assembly; 37989, 1968-69 rear assembly; 16160, 1970-71 rear assembly). · New ignition switches. This kit is wired for both the factory dash ('68) and column ('69-'76) mounted switches. Connectors and pigtails are provided to connect to either of the original style switches. · New headlight switch as they are unique due to the vacuum circuits. You can reuse your original, or purchase a new switch from most Corvette parts vendors. · Harness connections for factory emissions equipment. · The factory alarm system or "door ajar" warning system. · Adapters for later model (`86+) alternators. An SI-series alternator connector is included. Adapters for other alternators can be purchased separately. · Front parking lamp assembly wires/extensions.
510717 - Classic Update Series Kit 1968-76 Corvette
This kit contains the following components:
Part Bag Number
500042 500919 510716 Z 510476 G 510718 H 510719 J 510720 L 510721 M 510722 N 510723 V 510730
Description Dimmer Swtich Practice Terminal Crimping Set Fuse, Relay, and Flasher kit Alternator and Main Connection kit Dash Harness kit Instrument Cluster wiring kit Engine Wiring kit Front Light Wiring kit Rear Body Wiring kit Courtesy Light kit VSS Connection kit
Quantity 1 1 1 1 1 1 1 1 1 1 1
Validate the kit contents with this component list. If there are any discrepancies with incorrect or missing parts, stop your installation and notify the supplier you purchased the kit from before proceeding.
www.americanautowire.com 856-933-0801
Page 1
1968-76 Corvette
Classic Update Series
510717
© COPYRIGHT 2004 American Autowire / Factory-Fit Used with express permission of American Autowire / Factory-Fit
92972159 Rev 3.0 10/5/2020
START HERE!
PLEASE READ THIS BEFORE STARTING INSTALLATION!
This wiring kit is designed for ease of installation. Please read the guidelines below BEFORE STARTING your installation. Use a crimping tool that folds the wings of the open barrel terminals down into the wire as shown on this page. If you use our crimping tools and correctly crimp the included terminals, soldering is not necessary. If you are unsure about a particular crimp, soldering is recommended. Our factory crimped terminations are installed by GM approved five ton presses and soldering these terminations is not necessary.
The terminals that we supply in our kits utilize what is known as an F crimp. When done correctly the F crimp cross section will look like the illustration below.
wire core
end view of un-crimped terminal
end view of properly crimped terminal
We carry the following crimping hand tools to help with your installation. These hand tools are available for purchase or rental.
p/n 510585
OEM small terminal crimping tool (18-14 gauge)
p/n 510586
OEM large terminal crimping tool (12-8 gauge)
AAW offers a great terminal crimping video entitled "Proper Crimping Video". It can be viewed by visiting YouTube.
p/n 510587
Includes Both terminal crimping tools
Type the following address into your web browser, to go directly to the video: www.youtube.com/watch?v=JAgEDoVl-co
We carry many accessories for your 1968-76 Chevrolet Corvette:
Youtube Channel: www.youtube.com/user/WiringHarness
p/n 01993430 (1968-76)
Muncie or T-10 4 speed back-up lamp switch assembly
p/n 01997969 (1968-76) w/o telescopic wheel p/n 01997983 (1968-76) with telescopic wheel
Turn signal switch assembly
p/n 01994169 (1968-76)
Winshield wiper/washer switch assembly
Page 2
www.americanautowire.com 856-933-0801
STEP 1: DISCONNECT YOUR BATTERY: Disconnect the battery before installing the wiring kit to prevent any accidental shorting caused by bare wire ends.
1968-76 Corvette
If you have any questions concerning this or any of our products, please feel free to call us at 1-856-933-0801.
Classic Update Series 510717 92972159 Rev 3.0 10/5/2020
STEP 2: START INSTALLING KIT: This kit is broken into individual sections identified by a letter printed on the enclosed sheets visible through each bag. The order of installation and the pages with their instructions are shown below:
Table of Contents:
Bags: Pages: Sections:
G 4-10 Dash Harness - This is the main harness in the kit and contains:
- Ignition and lighting switch connections. - Wiper switch connections. - Neutral safety and back up lamp switch connections. - Turn Signal switch connections. - Courtesy light connections. - Dimmer switch connection. - Accessory connections.
H 11-14
Gauge Cluster Harness - This Harness contains:
- Gauge connections for aftermarket and factory gauges.
M 15-19
Rear Body Harness - This Harness contains:
- Brake, turn signal, reverse, running and side marker light connections. - Third brake light and license plate lights connections. - rear compartment and dome courtesy connections. - Fuel gauge sender and ground connection. - Chassis grounds.
L 20-23 Front Light Harness - This Harness contains:
- Headlight, turn signal, running and side marker light connections. - Headlight door warning lamp connections. - Brake pressure differential warning connection. - Wiper door limit switch connections. - Electric fan relay trigger. - Horn connections. - Chassis grounds.
J 24-26
Page 3
Engine Harness - This Harness contains:
- Temperature, oil pressure, tachometer wiring. - Blower motor power and ground connections. - Windshield wiper and washer connections. - Ignition and electric tach connections. - `73-'75 cold air hood door connection. - Alternator connections. - Electric Choke connection. - T-400 kickdown connection.
www.americanautowire.com 856-933-0801
PLEASE READ THIS HELPFUL INSTALLATION TIP, BEFORE GOING ANY FURTHER!
Prior to installing the Dash/Main harness in your dashboard, plug all of the fuses, Hazard Flasher and Turn Flasher into the Fuse Block (see
detailed picture below) and the Horn Relay into this harness (see detailed picture below).
Fuse installation locations.
the "LIGHTER" fuse also provides the 12V Battery feed in the Rear Body
10A 15A
DASH LTS
FUEL
15A
HAZ SW BRK/CTSY
30A
IGN
10A
FAN
30A
BAT BAT 2
10A
BAT
CLOCK
GAUGES IGN AC/HEAT
10A
30A
WIPER
10A 20A 20A 30A
LIGHTER BAT 1
IGN 1
ACCY 1
BAT
15A 30A 10A
HAZARD PWR WDO
10A
IGN
RADIO A
A
PARK LT IGN
10A
BAT
TURN
92965838 AAW
IGN
TURN SW
the "FUEL" fuse also provides the Electric
Speedo power
the "GAUGES" fuse also powers the backup lights and Electric Choke
circuits
Horn Relay
1968-76 Corvette Classic Update Series 510717 92972159 Rev 3.0 10/5/2020
Dash/Main harness installation instructions:
Shown below are the supplied misc. terminals, plastic connector bodies, hardware, jumpers and extensions that will be used to complete your 510718 Dash/Main harness connections. They are itemized and referred to on this page, just as they are on the following pages of this Main instruction set.
A
(screw, 3",fuse box, 2 pcs.)
B
(male flat Pack-con terminal, 11 pcs.)
L
(1969-76 ignition switch
connections, 1 pc.)
T
(1975 heat and A/C jumper, 1 pc.)
A B C D E F GH J K L M N P
M
(1969-76 brake light switch extension, 1 pc.)
U
(1976 heat and A/C jumper, 1 pc.)
C
(Pack-con 14-way male connector, 1 pc.)
N
D
(56 series double female
P
and large gauge terminal, 6 pcs.)
E
(56 Series 6-way Q
female conn for
1968 ignition
switch, 1 pc.)
(1970-72 wiper door overide switch ext., 1 pc.)
(1969-73 auto. NSS extension, 1 pc.)
(1974-76 auto. NSS extension, 1 pc.)
F
(56 Series 2-way female
conn for B/U switch, 1 pc.)
R
G
(56 series single female small gauge terminal, 10 pcs.)
H
(56 Series 1-way female connector for 70-76 cigar lighter, 1 pc.)
(1968-74 heater harness, 1 pc.)
V
(cigar lighter and PRNDL lamp extension, 1 pc.)
W
(1968 wiper switch overide warning lamp extension, 1 pc.)
X
(1973-76 wiper switch lamp extension, 1 pc.)
Y
(1973-76 wiper relay jumper, 1 pc.)
J
K
Page 4
(pin grip connector for 68-69 cigar lighter, 1 pc.)
(pin grip terminal for 68-69 cigar lighter, 2 pcs.)
www.americanautowire.com 856-933-0801
S
Z
1968-76 Corvette
(1971 A/C jumper, 1 pc.)
(76 cigar lighter ground terminal, 1 pc.)
Classic Update Series 510717 92972159 Rev 3.0 10/5/2020
Dash/Main harness installation instructions:
NOTE: all 4 of the ground leads shown across the top of this page are to be attched to the upper bird cage crossbar behind the dash.
power accessory (see page 7)
headlight switch (plug onto original headlight switch)
speedo head cluster
(see page 12)
electric speedo cluster
(see page 14)
PACK
CON
PACK
CON
main ground 1
electric speedo ground
tach head cluster
(see page 12)
ABC DEF
ignition capacitor (see page 6)
ignition switch (see page 6)
68 wiper door overide switch warning lamp (see page 8)
CENTER DASH, MAIN
DASH GAUGES AND
WIPER SWITCH AREA
68 wiper door 69-72 wiper solenoid door solenoid
(see page 8) (see page 8)
68-76 wiper switch
(see page 8)
horn relay
main ground 2
main ground 3
73-76 wiper switch lamp (see page 8)
RH courtesy lamp
(see page 10)
backup lamp switch (see page 6)
P NML K J H G F E D
DC BA
rear body (see page 15)
10A 15A
DASH LTS
FUEL
15A
HAZ SW BRK/CTSY
30A
IGN
10A
FAN
30A
BAT BAT 2
10A
BAT
CLOCK
GAUGES IGN AC/HEAT
10A
30A
WIPER
10A 20A 20A 30A
LIGHTER BAT 1
IGN 1
ACCY 1
BAT
15A
30A 10A
HAZARD PWR WDO
10A
IGN
RADIO A
A
PARK LT IGN
10A
BAT
TURN
92965838 AAW
IGN
TURN SW
fuse block
hazard flasher manual
neutral safety switch (see page 6)
LH courtesy lamp
(see page 10)
brake switch (see page 6)
DASH CLUSTER AREA
turn signal switch
(see page 7)
69-72 wiper door overide switch (see page 8)
center console cluster
(see page 13)
RADIO AREA
radio (see page 10)
68 wiper door overide switch (see page 8)
heater control lamp
(plug into heater control)
heat and A/C feed (see page 9)
blower motor (see page 9)
FLOOR CONSOLE AREA
68-72 wiper relay
(see page 8)
KJH
Page 5
www.americanautowire.com 856-933-0801
1968-76 Corvette Classic Update Series 510717 92972159 Rev 3.0 10/5/2020
parking brake switch
(see page 10)
auto. neutral lighter and cigar lighter vehicle speed
safety switch PRNDL lamp feed/ground
sensor
(see page 6) (see page 10) (see page 10) (see 510730)
Dash/Main harness installation instructions:
1968 Ignition switch connection:
Brake light switch connections:
Choose the 1968 ignition switch connector E from page 4. Looking into the back of the connector, install the purple, red, pink and brown ignition switch wires from page 5 of the dash harness into the the selected cavities as shown in the detail drawing below. The completed connector assembly will plug directly onto your original, or new, ignition switch assembly.
plug onto ignition switch (wire entry view)
1968 application: The 1968 Corvette brake light switch had an extension hard-wired into the switch assembly that will plug
directly into the brake switch connector on your dash harness.
Plug your original ignition switch capacitor onto this brown wire with the black connector from page 5.
E
main dash
from brake light
harness
switch assembly
(see page 5)
main dash harness
(see page 5)
1969-76 Ignition switch connection:
Choose the 1969-76 ignition switch connectors L from page 4. Looking into the back of the connectors, install the purple, red, pink and brown ignition switch wires from page 5 of the dash
harness into the the selected cavities as shown in the detail drawing below. The completed connection assembly will plug directly onto your original, or new, ignition switch assembly.
Plug your original ignition switch
capacitor onto this brown wire with the
black connector from page 5.
plug onto ignition switch (wire entry view)
L
1969-76 applications: Choose the 1969-76 brake light switch extension M from page 4, and plug it into the brake switch
connector on your dash harness. Plug the other end onto your 1969-76 brake light switch. to brake light switch
M
Neutral safety switch (NSS) instructions:
1968 w/ manual trans.: There was no NSS on a 1968 Corvette with a manual transmission. If your car has a manual transmission and you are not using an NSS, simply plug the 2 purple wires on page 5 down at the
floor console area together as shown below.
auto. neutral safety switch wires (see page 5)
1968 w/ auto. trans.: Simply plug the 2 purple wires on page 5 down at the floor console area into your original
1968 NSS assembly.
auto. neutral safety switch wires (see page 5)
wires from auto. neutral safety switch
1969-76 w/ manual trans.: There was clutch operated NSS and extension lead on all 1969-76 Corvettes with a manual trans. Plug that extension lead onto the connector with the 2 purple wires in the dash cluster area on page 5 . If your
car has a manual transmission and you are not using an NSS, simply plug the 2 purple wires on page 5 down at the floor console area together as shown above (1968 app.).
manual neutral safety switch wires
(see page 5)
clutch operated NSS and
extension lead
1969-76 w/ auto. trans.: Plug the 2 purple wires on page 5 down at the floor console area into the proper P or Q
extension (from page 4) for your application, then plug that extension onto your 1969-73 or 1974-76 NSS assembly.
auto. neutral safety switch wires (see page 5)
(1969-73 extension P)
OR
Page 6
main dash harness
(see page 5)
main dash harness
(see page 5)
(1974-76 extension Q)
Back-up lamp switch instructions:
Choose the backup lamp switch connector F and terminals G from page 4, crimp terminal G onto each of the pink and light green backup lamp switch wires from page 5 of the dash harness. Looking into the back of the connector, install the two wires into the the selected cavities as shown in the detail
drawing below. 4 speed application: Route this connector out through the firewall and plug it directly into the lead on the 4 speed backup lamp switch assembly. auto. trans. application: Route this connector down to the console area and plug it directly into the lead on the neutral safety/backup lamp switch assembly.
main dash harness
(see page 5)
G
F
(wire entry view)
www.americanautowire.com 856-933-0801
(wire entry view)
from 4 speed backup or NSS switch assemblies
1968-76 Corvette Classic Update Series 510717 92972159 Rev 3.0 10/5/2020
X
P NML K J H G F E D
Dash/Main harness installation instructions:
AMERICAN AUTOWIRE DASH HARNESS TURN SIGNAL SWITCH CONNECTOR
white dk green
yellow purple brown dk blue
STOCK 1968 or AFTERMARKET TURN SIGNAL SWITCH WIRING
C B
lt blue black
A B C D E F GH J K L M N P
This diagram is to connect the AAW turn signal dash harness connection to a stock 1968 or some aftermarket steering columns. If
you have a stock 1969-76 steering column, the AAW Turn Signal switch connector will plug directly into it with no modifications.
Power Accessory Connector
Use the provided 6-way empty connector, which is attached to the 6-way Accessory connector on the Dash Harness, and terminals "G" and "D" to add power wires (not included in kit) for the following optional systems:
Wire Color Tan Dk Blue Orange Pink Yellow
Fuse Block Marking ACCY 1 FUEL BAT 1 IGN 1 PWR WDO
Fuse rating 30A 15A 20A 20A 30A
Description Fused 12 volt ACCESSORY feed. Fused 12 volt IGNITION feed can be used for fuel pump. Fused 12 volt BATTERY feed. Fused 12 volt IGNITION feed. Fused 12 volt ACCESSORY feed can be used for power windows.
Page 7
Required steering column connector modi cation for OEM and some aftermarket steering columns
"Table B"
Dash harness turn signal switch wires to aftermarket or stock 1968 Chevrolet Corvette turn signal switch
AAW Wire Color
AAW Wire Printing
Connector Cavity
Original Wire Color
White
Brake SW
P
Dark Green Right Rear Turn
N
Yellow
Left Rear Turn
M
Purple
Turn Switch Feed
L
Brown
Turn SW Hazard K
Dark Blue
Right Front Turn
J
Light Blue
Left Front Turn
H
Black
Horn Relay Ground G
N/A
None
F
N/A
None
E
N/A
None
D
White Dark Green Yellow Purple Brown Dark Blue Light Blue Black Pink/Black Stripe None None
1. Remove the aftermarket or stock 1968 turn signal switch connector and replace it with the AAW 14-way connector "C" from page 4. Crimp terminal "B" onto each of the original turn signal switch wires, and plug them into connector "C" as shown at left. (see parts kit 92972164).
2. Use "Table B" above to align the wires.
3. Note: the steering column horn button switches ground for the horn relay, which then switches power to the horns.
Power Accessory connector from Dash harness
6-way empty connector (removed from Dash harness connector) and terminals, used to connect your power wires (not
included in kit) to the dash harness
G
D
www.americanautowire.com 856-933-0801
1968-76 Corvette Classic Update Series 510717 92972159 Rev 3.0 10/5/2020
Dash/Main harness installation instructions:
`68-72 wiper door overide switch instructions:
1968 application: Plug the tan 1968 wiper door overide wire from page 5 onto the wiper door overide switch at the
bottom of your dash. Attach the black ground wire under one of the mounting screws at the same location. Plug the
warning lamp extension W onto the dash harness, then plug the lamp socket into your dash assembly.
main dash harness
(see page 5)
Wiper/washer switch instructions:
1968 application: Plug the 2-position connector with the black and brown wires onto the wiper door solenoid
switch that is mounted behind the tach. Plug the 3-position connector with the light blue, light green and
dark blue wires onto your wiper and washer switch. NOTE: the 2-position connector with the light blue and
black wires is not used in the 1968 application.
69-72 wiper
68 wiper door door solenoid
solenoid
connector
connector (NOT USED)
68-76 wiper switch
connector
attach the 68 wiper door overide wires to the dash switch
main dash harness
(see page 5)
W
plug into
dash
assembly
1969 application: Plug the red and red/white 1969 wiper door overide wires from page 5 onto the wiper
door overide switch under the dash of your car.
main dash harness
(see page 5)
attach the 69 wiper door overide wires to the dash
switch
1970-72 applications: Plug the 1970-72 wiper door overide switch extension N from page 4 onto the red and red/white 69 wiper door overide switch wires on the dash harness, then plug the extension onto the wiper door overide switch under the dash of your car.
main dash harness
(see page 5)
Page 8
N
attach the 70-72
wiper door overide
extension N to the
dash switch
main dash harness
(see page 5)
69-72 applications: Plug the 2-position connector with the light blue and black wires onto the wiper door solenoid switch that is mounted behind the tach. Plug the 3-position connector with the light blue, light green and dark blue wires onto your wiper and washer switch.
NOTE: the 2-position connector with the brown and black wires is not used in the 69-72 applications.
68 wiper door solenoid 69-72 wiper connector door solenoid
(NOT USED) connector
68-76 wiper switch
connector
main dash harness
(see page 5)
Wiper/washer switch instructions cont'd:
73-76 applications: Plug the 3-position connector with the light blue, light green and dark blue wires onto your
wiper and washer switch. NOTE: The 2-position connectors with the brown and black wires, and the light blue and black wires are not
be used in the 73-76 applications.
68 wiper door solenoid connector
(NOT USED)
69-72 wiper door solenoid
connector (NOT USED)
68-76 wiper switch
connector
Wiper/washer relay instructions:
73-76 applications: There was no wiper/washer relay used in these applications. The 2-position connector with the light blue and white wires down in the console area will not be used. Choose the wiper relay jumper Y from page 4 and plug it onto the the 3-position connector with the light green and 2 black wires as shown below. This will jump out the wiper switch connector to
work with the stock wiper motor.
main dash harness
(see page 5)
main dash harness
(see page 5)
Wiper/washer relay instructions:
68-72 applications: Plug the 3-position connector with the light green and 2 black wires, and the 2-position
connector with the light blue and white wires onto your wiper and washer relay down in the console area.
main dash harness
(see page 5)
68-72 wiper relay
(NOT USED)
Y 73-76 wiper relay jumper
73-76 Wiper switch lamp instructions:
73-76 applications: Find the gray wire with the single black connector that comes out with the wiper switch connector and wires. Choose the 73-76 wiper switch lamp extension X from page 4 and plug it onto that gray wire to complete the 73-76 wiper switch lamp circuit.
main dash harness
(see page 5)
X 73-76 wiper switch lamp
to 68-72 wiper relay
www.americanautowire.com 856-933-0801
1968-76 Corvette Classic Update Series 510717 92972159 Rev 3.0 10/5/2020
Dash/Main harness installation instructions:
68-74 Heater harness instructions:
1975-76 Heat and A/C feed instructions:
68-74 applications: Choose heater harness assembly R from page 4 and plug it into the brown (heat and A/C
feed) and orange (blower feed) leads from the dash harness as shown below. The 6-postion connector will
then plug onto your heater/blower switch and the 3-position one will plug onto the blower motor resistor.
1975 application: Choose the 1975 heat and A/C jumper T from page 4 and plug it into the brown (heat and A/C feed) lead from the dash harness as shown below. Plug the 2-position connector from jumper T into
your stock heater or A/C harness. If your original heater harness needs to be replaced, you can order our P/N 01680. Attach the ring terminal on the black wire of jumper T to a good known chassis ground.
to heater
T
resistor
to chassis ground
main dash harness
(see page 5) heat and A/C feed
Page 9
x x
main dash harness
(see page 5)
blower motor feed
R
68-74 heater harness assy.
to heater control
lead from 1975 heater or A/C harness assy. (not included)
(1975 heat and A/C jumper P)
1976 application: Choose the 1976 heat and A/C jumper U from page 4 and plug it into the brown (heat and A/C feed) lead from the dash harness as shown below. Plug the other connector from the jumper U into your original heater or A/C harness. If your original heater harness
needs to be replaced, you can order our P/N 27545.
U
lead from 1976 heater or A/C harness assy. (not included)
(1976 heat and A/C jumper U)
1971 A/C feed instructions:
1971 application: Choose the 1971 A/C jumper S from page 4 and plug it into the brown (heat and A/C feed) lead
from the dash harness as shown below. Plug the bare terminal with the blue and pink wires into the power
accessory plug on the dash harness (see pages 5 and 7). Be sure to maintain color continuity with the blue wire in
the power accessory plug on the dash harness. Your factory A/C harness (01030) will plug into the 2-position plug on the 71 A/C jumper harness S as shown below.
main dash harness
(see page 5)
power accessory
plug (see page 5)
lead from 1971 A/C harness assy. (not included)
S
plug additional
12V ignition
71 A/C jumper
main dash
leads into this pigtail as
harness
needed
(see page 5) (see page 7)
68-76 factory A/C instructions:
While this kit DOES NOT include the wiring for any 1968-76 factory A/C systems, it will support their use. All of the factory 1968-76 A/C harnesses were stand alone units, and can be re-used with your new AAW Classic Update Kit if desired. In addition, AAW offers new factory A/C harnesses at an additional cost for each of the individual years covered by this kit (please see the list below). You would simply plug the brown heat and A/C feed wire from page 5 of this instruction set (for the 68, 69, 70, 72, 73 and 74 models) into your factory A/C harness to power it up. For the 71, 75 and 76 models, please refer to the detailed connections to the left on this page. The only additional connection that must be made is to connect the fused red lead on the factory A/C harness to a battery source under the hood of the car.
AAW Factory A/C harnesses:
1. 1968 2. 1969-70 3. 1971 4. 1972-73 5. 1974 6. 1975 7. 1976
AAW P/N 01015 AAW P/N 01020 AAW P/N 01030 AAW P/N 01035 AAW P/N 01045 AAW P/N 01050 AAW P/N 27540
www.americanautowire.com 856-933-0801
1968-76 Corvette Classic Update Series 510717 92972159 Rev 3.0 10/5/2020
Dash/Main harness installation instructions:
Parking brake instructions:
68-76 applications: Route the tan wire from page 5 down to the console area, then over to the parking brake assembly and plug the bullet terminal into the
parking brake switch assembly.
main dash harness
(see page 5)
Cigar lighter instructions:
1968-69 applications: Route the orange cigar lighter power feed wire over to the lighter assembly in the
console, trim it to length, apply terminal K and connector J to the wire, then plug connector J onto
the stud of your cigar lighter assembly.
main dash harness
(see page 5)
K
J
plug into parking brake
switch
cigar lighter feed wire
1970-76 applications: Route the orange cigar lighter power feed wire over to the lighter assembly in the
console, trim it to length, apply terminal G and connector H to the wire, then plug connector H onto
the male blade of your cigar lighter assembly.
main dash harness
(see page 5)
G
H
PRNDL and cigar lighter lamp instructions:
1968-76 applications: Route the gray PRNDL and cigar lighter lamp wire with the black connector from page 5 down to the console area and plug the cigar lighter and PRNDL lamp extension V onto it. Plug the
light socket on extension V into the cigar lighter assembly. Plug the lead from your PRNDL lamp (not
Included) into the black connector on extension V
(cigar lighter and PRNDL lamp extension.)
V
the lead from your 71-75
PRNDL lamp plugs in here (not included)
to cigar lighter assembly.
(not included)
cigar lighter feed wire
Console or lighter ground instructions:
1968-75 applications: Route the black console/cigar lighter ground wire over to the male blade terminal in
the console, trim it to length, apply terminal G and plug it onto that male blade assembly.
main dash
harness
(see page 5)
G
console ground wire
1976 applications: Route the black console/cigar lighter ground wire over to the lighter assembly in the console, trim it to length and apply terminal G to the black wire. Disassemble the lighter socket from the retainer assembly and install lighter ground ring terminal Z and reassemble the socket and retainer. Plug the black wire and terminal G onto terminal Z.
main dash
harness
(see page 5)
G
Page 10
console
ground wire
Z
Underdash courtesy lamp instructions:
1968-76 applications: Plug the LH and RH courtesy lamp connections from the dash harness into the two courtesy lamp assemblies from the 510723 kit. Install the completed courtesy
lamps up under the dash and route the white wires from the assemblies over to the original door jamb switches (not included) and plug the leads onto the switch assemblies.
NOTE: The courtesy lamp connections on this new harness are set up to mate to the later style (74-76) door jamb switch
assemblies. If your car is a 68-73, you will need to purchase 2 new door jamb switches from you favorite Corvette supplier.
LH and RH courtesy lamp assemblies (510723)
main dash harness
(see page 5)
Radio connection instructions:
All applications: We have provided the following wires for you to make connections to
your radio. 1. yellow "radio-battery" feed (12v hot for memory) 2. tan "radio" feed (12v switched on/off) 3. gray "dash lamps" feed (radio dial illumination) 4. black "ground" You will need to splice these wires into your radio connection as needed as we have not provided terminals or connectors.
to LH and RH door jamb switches (not included)
main dash harness
(see page 5)
to radio
www.americanautowire.com 856-933-0801
1968-76 Corvette Classic Update Series 510717 92972159 Rev 3.0 10/5/2020
Dash Cluster harness installation instructions:
Shown below are the supplied misc. terminals, plastic connector bodies and hardware that will be used to complete your 510719 Cluster Kit connections. They are itemized and referred to on this page, just as they are on the following pages of this main instruction set.
A
(single feed lamp socket, 17 pcs.)
How to use the splice clip to join multiple wires.
How to install lamp sockets
B
(lamp socket rivet terminal, 22 pcs.)
Below is just an EXAMPLE of how to use the splice clip and shrink tubing, see your specific application on the
and lamp socket terminals.
C
(dual feed lamp socket, 2 pcs.)
following pages for actual splice information.
1. Pass wire through spring
1. Pass wire through socket
D
(spring for lamp socket C, 3 pcs.)
E
(ground terminal for lamp socket C, 3 pcs.)
EXAMPLE ONLY
After routing wires to be spliced, slide heat shrink tube onto wires
BEFORE installing splice clip.
and socket
2. Crimp terminal to wire
2. Crimp terminal to wire
F
(56 series single female connector, 3 pcs.)
G
(56 series single wire female terminal, 10 pcs.)
1
Shrink Tubing
Splice Clip
1. Crimp terminal to wire
Does not require spring
(56 series 3-postion
H
female connector for temp gauge, 1 pc.)
EXAMPLE ONLY
3. When complete pull wires back through to seat in socket
J
K
L
M N P
Page 11
(56 series 2-postion female connector for
fuel gauge, 1 pc.)
(56 series double wire female terminal, 4 pcs.)
(56 series 3-postion female connector for 74-76 oil gauge, 1 pc.)
splice clip, 5 pcs.)
(shrink tubing, 5 pcs.)
(56 series 3-postion female connector for 76
only tach, 1 pc.)
Shrink Tubing
Splice Clip
* Keep away from heat
Crimp and Solder
while soldering
2
splice clip
EXAMPLE ONLY
When nished, heat the shrink tubing to seal the splice connection.
Shrink Tubing
3
2. Insert into bulb socket
www.americanautowire.com 856-933-0801
1968-76 Corvette Classic Update Series 510717 92972159 Rev 3.0 10/5/2020
Instrument Cluster harness installation instructions:
Stock Tach and Speedo Cluster:
www.americanautowire.com 856-933-0801
Dash Lamp
Brake 75-76 Warning Tach
K
Dash Lamp
CON
PACK
ABC DEF
Dash Lamp
High Beam Indicator
Dash Lamp
Dash Lamp
See Splice Instructions on Page 11
P
76
Tach
G
G
Dash Lamp
RH Turn
Dash Lamp
Ground
P
DETAIL VIEW
wire entry view
NOTE: All stock 75-76 Corvettes used an electric tach and will use the white wire as shown above left. All other applications (68-74)
used a mechancial tach so the white tach wire can be rermoved from the connector and discarded.
Dash Lamp
Ground
(all except 75-76 applications) G or
K (75-76 applications only)
Page 12
LH Turn
Dash Lamp
See Splice Instructions on Page 11
1968-76 Corvette Classic Update Series 510717 92972159 Rev 3.0 10/5/2020
Instrument Cluster harness installation instructions:
Center Console Gauge Cluster:
68-76 Temperature gauge
"W" - referenced on page 4
G G K
wire entry view
68-76 Fuel gauge
G G
wire entry view
SEE DETAIL B
68-76 Temperature gauge
See Splice Instructions on Page 11
Dash Lamp
74-76 Oil Pressure gauge shown. Note: 68-73 oil pressure gauge was mechanical
68-76 Clock
DC BA
SEE DETAIL A 68-76 Fuel gauge
DETAIL A 68-76 Temperature gauge Wiper Switch Override Lamp 1968 Only
W
DETAIL B 68-76 Temperature gauge
Headlight Door Warning Light
1969-76
G
K
G
X
wire entry view
Page 13
Dash Lamp
Dash Lamp
Dash Lamp
Ammeter - not used
74-76 Oil Pressure gauge shown.
Note: 68-73 oil pressure gauge was mechanical
Dash Lamp
68-76 Clock
www.americanautowire.com 856-933-0801
1968-76 Corvette Classic Update Series 510717 92972159 Rev 3.0 10/5/2020
Instrument Cluster harness (aftermarket gauges) installation instructions:
CLOCK
+
TURN SIGNAL AND HI-BEAM LAMP CONNECTIONS
LEFT TURN IND
HIGH BEAM IND
RIGHT TURN IND
lt blue (LH turn ind)
lt green (hign beam ind)
dk blue (RH turn ind)
DC BA
center console cluster
(see page 5) speedo head
cluster (see page 5)
tach head cluster
(see page 5)
electric speedo cluster
(see page 5)
Page 14
ABC DEF
PACK
CON
ABC DEF
H/L DOOR WARNING
LIGHT BRAKE WARNING LIGHT
_
+
S
+
VOLTS
FUEL
S SPEEDO
+
S
OIL
+
S
TEMP
+
TACH
Below are some general instructions for hooking up an electric speedometer. This connector and these instructions will ONLY be used in the event that you are utilizing an aftermarket electric speedometer. If your car does NOT have an electric speedometer, this connection will NOT be used and should not be plugged onto your dash harness. It is best to consult the speedometer manufacturer's instructions if you have any questions.
Yellow
VSS Ground Connect to VSS neg. "--" on speedometer.
Purple
VSS Signal
Connect to VSS input on speedometer.
Purple/White VSS Power Connect to 12V power on speedometer.
Black/White Speedo Grnd Connect to ground on speedometer.
Pink/White Speedo Power Connect to 12v power on speedometer.
NOTE: This wire will double onto the same stud as the purple/white VSS power wire from above.
www.americanautowire.com 856-933-0801
1968-76 Corvette Classic Update Series 510717 92972159 Rev 3.0 10/5/2020
Electric Speedo VSS extension connection:
dash harness connection
VSS Lead Wires from this kit
HJ K
KJH
If you are using an aftermarket electric speedometer in your vehicle, you will need to connect the vehicle speed sensor (VSS) Lead Wires from this kit to the dash side connection of your dash harness. The yellow and solid purple wires must remain twisted together as shown above. These three wires will
need to pass through the firewall or floor of your vehicle down to the vehicle speed sensor unit in the transmission. Generally, the solid purple wire connects to the "signal" lead, the yellow wire connects to the "ground" lead, and the purple/white stripe wire connects to the "12 volt power" lead on the vehicle speed sensor assembly. However, you should consult the directions that came with your gauges, and
connect your vehicle speed sensor per the manufacturer's instructions.
www.americanautowire.com 856-933-0801
bag
V VSS LEAD WIRES
Various Applications
Classic Update Series
510730
92972371 Rev 0.0 4/9/2019
Rear Body harness installation instructions:
Shown below, are the supplied misc. terminals, plastic connector bodies, ground assembly, pigtail extensions and boot and wire extensions that will be used to complete your 510722 Rear Body harness connections. They are itemized and referred to on this page, just as they are on the following pages of this Rear Body instruction set.
A
(male bullet terminal, 4 pcs.)
B
L
(56 series double female terminal, 8 pcs.)
(1974-76 rear body pass through grommet, 1 pc.)
U
(68-73 LH & RH tail and back up ground extension, 2 pcs.)
(68-74 gas gauge ground wire, 1 pc.)
C
(56 series single female conn, 3 pcs.)
(68 LH inner tail lamp extension, 1 pc.)
V
M
D
(56 series single female terminal, 14 pcs.)
(68-73 license tag lamp extension, 1 pc.)
(68-73 LH tail lamp extension, 1 pc.)
E
(56 series single male terminal, 6 pcs.)
N
W
F
(56 series double male terminal, 4 pcs.)
(68 RH inner tail lamp extension, 1 pc.)
(74-76 LH tail lamp extension, 1 pc.)
P
X
G
(56 series 2-position male connector, 2 pcs.)
(68-73 RH tail lamp extension, 1 pc.)
Q
(74-76 RH tail lamp extension, 1 pc.)
H
(56 series 2-position female connector, 1 pc.)
(68 back up lamp extension, 2 pcs.)
Y
R
J
(fuel tank molded rubber connector and lead, 1 pc.)
(69-73 back up lamp extension, 2 pcs.)
(74-76 RH tail lamp extension, 2 pc.)
S
Z
K
Page 15
(1968-73 rear body pass through grommet, 1 pc.)
(68-76 LH side marker lamp extension, 2 pcs.)
T
www.americanautowire.com 856-933-0801
1968-76 Corvette Classic Update Series
510717 92972159 Rev 3.0 10/5/2020
Rear Body harness installation instructions cont'd:
AA
BB
(74-76 license tag lamp extension, 2 pc.)
CC
(75-76 gas gauge extension, 1 pc.)
(68-76 rear body ground assembly, 1 pc.)
E F GH J
GAS GAUGE THIRD BRAKE LIGHT REAR RUNNING LIGHTS BACK UP LT SW - LIGHTS
LEFT REAR TURN RIGHT REAR TURN
CTSY GROUND
12V BATTERY FUSED
GAS GAUGE THIRD BRAKE LIGHT REAR RUNNING LIGHTS BACK UP LT SW - LIGHTS
LEFT REAR TURN RIGHT REAR TURN
CTSY GROUND
12V BATTERY FUSED
Page 16
www.americanautowire.com 856-933-0801
1968-76 Corvette Classic Update Series
510717 92972159 Rev 3.0 10/5/2020
1968 Rear Body harness installation instructions:
NOTE: Plug main RB connector to dash harness in LH kick panel area as seen on page 5 of these instructions
E F GH J
Main Ground Lead
K
to frame rail
D
D
DC
To third brake light To Fuel
Tank Sender
to rear compartment or dome lamp (not included)
H
to glove box switch (not included)
1968-76 Corvette Classic Update Series 510717 92972159 Rev 3.0 10/5/2020
www.americanautowire.com 856-933-0801
x
x
x
x
BRAILGCETKHFHTUTIRRPRDEGELATAABRSRRSWTATGUUKA-RERULNNILGGIGEHHTTS
`68-'76 Side Marker Light Extension
AA
V
`68-'74 Gas Gauge Ground
Wire
J
`68-'74 Gas Gauge Lead
`68-'76 Side Marker Light Extension
T
plug into LH side marker
connector
LH Side Marker
B
N
`68-'73 LH Tail Light Extension
`68-'73 tail and B/U lamp
ground wire
U
M
`68 Inner LH Tail Light Extension
DB
LH Stop/Tail
EE
G
Plug into
Gas Gauge
Connector
`68-'73 tail and B/U lamp
ground wire
plug into RH
T
side marker
connector
U
Gas Gauge
RH Stop/Tail
P
`68 Inner RH Tail Light Extension
Q
`68-'73 RH Tail Light Extension
RH Side Marker
D
DB
D
Page 17
plug into LH back up connector
B
LH B/U
`68 Back Up
R Light Extension A B
B
`68-'73 Tag Light Extension
Tag Light
plug tag into tag light connector
W
tag lamp plugs in here
D
RH B/U
`68 Back Up
Light Extension
A
R
B
plug into RH back up connector
1969-73 Rear Body harness installation instructions:
NOTE: Plug main RB connector to dash harness in LH kick panel area as seen on page 5 of these instructions
E F GH J
A
to rear compartment
or dome lamp
A
(not included)
Main Ground Lead
K
to frame rail
DC
To third brake light
To Fuel Tank Sender
to glove box switch (not included)
1968-76 Corvette Classic Update Series 510717 92972159 Rev 3.0 10/5/2020
www.americanautowire.com 856-933-0801
BRAILGCETKHFHTUTIRRPRDEGELATAABRSRRSWTATGUUKA-RERULNNILGGIGEHHTST
`68-'76 Side Marker Light Extension
T
plug into LH side marker
connector
LH Side Marker
B
AA N
LH Stop/Tail
`68-'73 tail and B/U lamp
ground wire
LH B/U S
U
`68-'73 LH Tail Light Extension
`69-'73 Back Up Light Extension
B DB
V
`68-'74 Gas Gauge Ground
Wire
J
`68-'74 Gas Gauge Lead
EE
G
Plug into
Gas Gauge
Connector
Gas Gauge
D
S RH B/U
RH Stop/Tail
`68-'73 tail and B/U lamp
ground wire
`68-'76 Side Marker Light Extension
plug into RH side marker
T
connector
U
D BD
`69-'73 Back Up Light Extension
Q
`68-'73 RH Tail Light Extension
RH Side Marker
D
Page 18
B
`68-'73 Tag Light Extension
Tag Light
plug tag into tag light connector
W
tag lamp plugs in here
1974-76 Rear Body harness installation instructions:
NOTE: Plug main RB connector to dash harness in LH kick panel area as seen on page 5 of these instructions
E F GH J
A
to rear compartment
or dome lamp
A
(not included)
Main Ground Lead to frame rail
to glove
box switch
To third brake light
D
To Fuel
C
(not included)
K
V
Tank Sender
J
CC
BRAILGCETKHFHTUTIRRPRDEGELATAABRSRRSWTATGUUKA-RERULNNILGGIGEHHTST
`68-'76 Side Marker
AA
Light Extension
T
plug into LH side marker
connector
LH Side Marker
B
LH Stop/Tail
X
LH B/U
Z
`74-'76 RLH Tail Light Extension
`74-'76 B/U Light Extension
`68-'74 Gas Gauge Ground
E
`68-'74 Gas Gauge Lead
E
G
Plug into
Gas Gauge
Connector
or
75-76 Gas Gauge Extension
B
LH Stop/Tail
DB
Gas Gauge
D
D
DB
RH B/U
Z
`74-'76 B/U Light Extension
1968-76 Corvette Classic Update Series 510717 92972159 Rev 3.0 10/5/2020
www.americanautowire.com 856-933-0801
`68-'76 Side Marker Light Extension
RH Stop/Tail
Y
plug into RH
T
side marker
connector
`74-'76 RH
RH Side
Tail Light Extension Marker
D
Page 19
BB
`74-'76 Tag Light Extension
B
Tag Light
G
F
F
BB
`74-'76 Tag Light Extension
Front Light harness installation instructions:
Shown below, are the supplied misc. terminals, plastic connector bodies and extensions that will be used to complete your 510721 Front Light harness connections. They are itemized and referred to on this page, just as they are on the following pages of this Front Light instruction set.
A
(56 series single female terminal, 16 pcs.)
M
B
(56 series large gauge double female terminal, 12 pcs.)
C
(56 series single female connector, 4 pcs.)
N
D
(56 series small gauge double female terminal, 4 pcs.)
(LH & RH parking and side marker
lamp ground pigtails, 2 pcs.)
(69-76 headlight opening warning extensions, 2 pcs)
R
(LH parking/side marker lamp extension, 1 pc.)
E
(59 series single female terminal, 4 pcs.)
F
(59 series double female terminal, 8 pcs.)
G
(56 series double female connector, 1 pc.)
P
(1968 brake warning extension, 1 pc.)
Q
(69-76 brake warning extension, 1 pc.)
S
(RH parking/side marker lamp extension, 1 pc.)
H
(56 series single male terminal, 4 pcs.)
T
J
(56 series double male terminal, 5 pcs.)
U
K
(56 series single female connector with index tab, 1 pc.)
V
W
(1968 wiper motor extension, 1 pc.)
(1968 limit switch wire, 1 pc.) (1968 wiper motor wire, 1 pc.) (1968 wiper motor/limit switch wire, 1 pc.)
Z
(68-76 horn ground wire, 1 pc.)
L
X
(69-72 limit switch wire, 1 pc.)
www.americanautowire.com 856-933-0801
Y
Page 20
(headlight extension, 2 pcs.)
(69-76 headlight opening warning wire, 1 pc.)
1968-76 Corvette Classic Update Series 510717 92972159 Rev 3.0 10/5/2020
1968 Front Light harness installation instructions:
Electric fan
Relay trigger to a fused 12 V ignition source.
orange
AAW universal relay kit 500479 is available, containing all parts and instructions needed to wire your electric fan
pink
red
12 volt battery source.
Fused thru included
in-line fuse.
black
Universal On/O toggle
switch
ELECTRIC FAN RELAY WIRING
Optional fan temp switch sending unit (self grounding or
separate ground terminal type)
Temperature Switch
F/L bulkhead connector
wire entry view
DV DU DT
DS
CU CT
CS
BU BT
BS
AV AU AT AS
1968-76 Corvette Classic Update Series 510717 92972159 Rev 3.0 10/5/2020
1968 Brake Warning Extension
P
www.americanautowire.com 856-933-0801
Brake pressure differential switch connection
Page 21
EE F
RH Headlight Extension
L
to ground
wire entry view
S
wire entry view
RH Parking/Side Marker Extension
CA
to horns C
B
horn ground
Z
A A
Plugs into your existing 1968 RH Parking lamp
(Not Included)
wire entry view
RH Parking/Side Marker Ground Pigtail
M
FF
F
LH Headlight Extension
L
wire entry view
A B
LH Parking/Side Marker Ground Pigtail
M
wire entry view
wire entry view to ground
R
LH Parking/Side Marker Extension
Plugs into your existing 1968 LH Parking lamp
(Not Included)
1969-76 Front Light harness installation instructions:
Electric fan
Relay trigger to a fused 12 V ignition source.
orange
AAW universal relay kit 500479 is available, containing all parts and instructions needed to wire your electric fan
pink
red
12 volt battery source.
Fused thru included
in-line fuse.
black
Universal On/O toggle
switch
ELECTRIC FAN RELAY WIRING
Optional fan temp switch sending unit (self grounding or
separate ground terminal type)
Temperature Switch
F/L bulkhead connector
wire entry view
DV DU DT
DS
CU CT
CS
BU BT
BS
AV AU AT AS
1968-76 Corvette Classic Update Series 510717 92972159 Rev 3.0 8/24/2020
1969-76 Headlight Open Warning Wire
Y
Q www.americanautowire.com 856-933-0801
1969-76 Brake Warning Extension (Brake pressure differential switch connection)
A
to ground
C
EE F
RH Headlight Extension
L
to ground
wire entry view
S
wire entry view
RH Parking/Side Marker Extension
RH 69-76 Headlight Open Warning Extension
N Plugs into your existing
69-76 LH Parking lamp (Not Included)
wire entry view
CA
to horns C
B
horn ground
Z
A A
RH Parking/Side Marker Ground Pigtail
M
Page 22
FF
F
LH Headlight Extension
L
B
to ground
C
wire entry view
A B
LH Parking/Side Marker Ground Pigtail
M
wire entry view
wire entry view to ground
R
LH Parking/Side Marker Extension
LH 69-76 Headlight Open Warning Extension
Plugs into your existing N
69-76 RH Parking lamp (Not Included)
Wiper motor limit switch installation instructions:
Shown below, are the supplied misc. terminals, plastic connector bodies and wires that will be used to complete your wiper motor limit switch
connections. They are itemized and referred to on this page, just as they are on page 20 of this instruction set. 1968 application:
(Route this red wire to your megafuses and using the terminals and shrink tubing
shrink tube
in the 510476 kit, assemble the wire, then
attach it to the Megafuses.
(1968 wiper motor extension T, 1 pc.)
(see page 25 for detailed connections.)
wire entry view
69-72 applications:
(1968 limit switch wire U, 1 pc.)
(1968 wiper motor wire V, 1 pc.)
(1968 wiper motor/limit switch wire W, 1 pc.)
T
V
H (2 places)
W U
D A
DV DU DT
DS
CU CT
CS
BU BT
BS
AV AU AT AS
(Main front light
bulkhead connector from the 510721 front light kit.)
wire entry view
(Plug in to limit switch)
(Main front light bulkhead connector from the
510721 front light kit.)
Page 23
K
B
X
(69-72 limit switch wire, 1 pc.)
X
www.americanautowire.com 856-933-0801
X
DV DU DT
DS
CU CT
CS
BU BT
BS
AV AU AT AS
wire entry view
B
(Plug in to limit switch)
B
510717 92972159 Rev 3.0 10/5/2020
Engine harness installation instructions:
Shown below, are the supplied misc. terminals, sleeves, plastic connector bodies and wires, that will be used to complete your 510720 Engine harness connections. They are itemized and referred to on this page, just as they are on the following pages of this instruction set.
A
(56 series 3-postion
L
female connector, 1 pc.)
(male bullet terminal, 4 pcs.)
W
(blower motor feed wire, 1 pc.)
M
(56 series single female
terminal, 16 pcs.)
X
B
(56 series single female
connector, 2 pcs.)
N
(small ring terminal for
smaller gauge wire, 2 pcs.)
Y
C
(56 series 2-postion
female connector, 1 pc.)
P
(small ring terminal for larger gauge wire, 2 pcs.)
Z
D
(56 series 2-postion
Q
female connector, 1 pc.)
(large rubber sleeve, 1 pc.)
12V IGNITION
12V IGNITION
(12V feed wire for T400 kickdown, 1 pc.)
(73-75 cold air hood door extension, 1 pc.)
(T400 kickdown wire, 1 pc.)
R
(small rubber sleeve, 1 pc.)
AA
(56 series single male terminal, 2 pcs.)
E
(56 series 2-postion
female connector, 2 pcs.)
S
(molded rubber connector for blower motor, 2 pcs.)
F G H J K
Page 24
(56 series single female connector, 1 pc.)
(56 series single female connector, 1 pc.)
(female pin connector, 1 pc.)
(56 series single female connector, 1 pc.)
(56 series double female terminal, 3 pcs.)
T
(female pin terminal, 2 pcs.)
U
(GM "SI" alternator exciter wiring, 1 pc.)
V
GROUND GROUND
GROUND
GROUND GROUND
(wiper and blower motor ground assembly, 1 pc.)
www.americanautowire.com 856-933-0801
1968-76 Corvette Classic Update Series 510717 92972159 Rev 3.0 10/5/2020
shrink tube
C
Engine harness installation instructions:
REF: 1968 only
wiper motor
power feed. (See page 23)
shrink tube
(Use the Mega Fuse, ring terminals, boot and shrink tubing from the 510476 kit.)
shrink tube
to blower motor ground blade
to wiper motor ground blade
`68-'76 Wiper and Blower Motor Grounds
V
LITTLEFUSE
MEGA 175A
to starter
LITTLEFUSE
MEGA 175A
mount bolt
Q
shrink tube
(BUSSBAR
JUMPER FROM 510476 KIT)
P
shrink tube
6 GA. RED
(FROM 510476 KIT)
BAT
R
S
starter solenoid
positive battery cable
(not included with this kit)
to blower motor feed blade
MS
W heater blower wire
Distributor
to BAT location on coil
FK
to TACH location on coil
JM
see Detail A
Electric Choke
6 GA. RED
(FROM 510476 KIT)
SEE DETAIL B
This yellow wire is not supplied.
RN
PQ
from bulkhead connector
coil
QP
RN BAT
R
S
R
starter
solenoid
N
PQ
Ballast Resistor
Detail A (not included) optional connection for points cars
from bulkhead connector
Page 25
From Bulkhead Connection
74-76 oil sending unit. NOTE: 68-73
units are mechanical.
M
B
oil
sending unit
TH MG
temperature sending unit
Detail B temperature and oil sender connections
WA XA YA ZA XB YB ZB XC YC ZC
WD XD YD ZD
engine bulkhead connector
AA or
x xx x
K
X
or
12v feed for T400
M
kickdown wire
wire entry view
M
T400
Z kickdown
extension
E
to T400
kickdown
switch
(not included)
to trans kickdown
switch
NOTE: for 73-75 models with a T400
Y
and cold air door, double the pink
wire from the cold air door harness Y
with the tan power feed X in terminal
K, then plug into connector E. For
manual trans applications, route the
pink wire on the cold air door
harness Y up to the main bulkhead
area, cut to length, apply terminal AA
and plug in as shown above.
73-75 cold air hood
door harness will
plug in here.
M
(not included)
U
AAW offers an "SI" series alternator to "CS"
series alternator conversion kit 37796
(see page 2)
alternator (SI)
www.americanautowire.com 856-933-0801
1968-76 Corvette Classic Update Series 510717 92972159 Rev 3.0 10/5/2020
Wiper motor and washer pump installation instructions:
Shown below, are the supplied misc. terminals, plastic connector bodies and wires, that will be used to complete your wiper and washer connections. They are itemized and referred to on this page, just as they are on page 24 of this instruction set.
C (2 places)
M (3 places) A
1968 & 1970-74 Wiper and Washer
M
M
C
WA XA YA ZA XB YB ZB XC YC ZC
WD XD YD ZD
wire entry view
M
M
D
C
engine bulkhead connector
1969 Wiper and Washer
M (3 places) A
M (3 places) A
Page 26
1975-76 Wiper and Washer
www.americanautowire.com 856-933-0801
1968-76 Corvette Classic Update Series 510717 92972159 Rev 3.0 10/5/2020
STEP 3: RECONNECT YOUR BATTERY: When you have completed the installation and are ready to reconnect the battery, make sure that the following electrical system grounds are in place:
A. Battery is grounded to the ENGINE BLOCK. B. Battery is grounded to the frame. C. Engine block is grounded to the frame. D. Body is grounded to the frame.
STEP 4: CHECK ALL ELECTRICAL FUNCTIONS: Any non-functioning items should be checked for proper installation. Any problems with your wiring and electrical circuit functions, should be addressed to American Autowire Systems, Inc. as soon as possible, to avoid any warranty problems.
If you have any questions concerning this or any of our products, please feel free to call us at 1-856-933-0801.
Page 27
www.americanautowire.com 856-933-0801
1968-76 Corvette Classic Update Series 510717 92972159 Rev 3.0 10/5/2020
THIS PAGE HAS INTENTIONALLY BEEN LEFT BLANK
Page 28
www.americanautowire.com 856-933-0801
1968-76 Corvette Classic Update Series 510717 92972159 Rev 3.0 10/5/2020
A
(1)
(144.0" 6 Gauge charge wire)
Lift This END
B
Sigorta Fuse
1. One this page, you will find the wire, fuse bodies, fuses, boot, ring
(2)
terminals, and shrink tubing (items A through K) that are necessary
to connect your alternator and main power feed for your new AAW
wiring kit. Please be sure that all of the necessary components are
present before starting this portion of your installation. If anything is
missing, stop what you are doing and contact AAW at the number
listed below right away.
2. On page 2, you will find directions for building the 2 Megafuse assemblies (items B,C and D) into one unit.
3. On page 3, you will find an overall concept of how to connect the Megafuse assemblies to your starter solenoid, alternator and main power feed of your new wiring system.
(Megafuse body, cover and two M8 x 1.25 nuts / lock washers)
LITTLEFUSE
C
MEGA 175A
(2)
(175 amp Megafuse)
G
4. On page 4, you will find tips on building your charging circuit wires and assembling them and the main panel power feed wire to the Megafuse assembles.
(2)
D E F
Page 1
(1)
(Megafuse jumper)
H
(1) J
(Alternator boot)
(1)
K
(cut into six 1.0" pieces)
(6Ga. starter ring terminal) (3)
(6Ga. megafuse terminal) (2)
(6Ga. alternator terminal) (2)
(10Ga. megafuse terminal)
www.americanautowire.com 856-933-0801
PART #
510476
Z
DESCRIPTION:
Alternator and Main Power VarCioounsneAGcpMtpiDCoUlAiOncNSLaIHKVUtEMMiiotRNOnSUMAsNLOTUNT
92972153 instruction sheet rev 0.1 6/24/2019
B
D
B
OR C
LITTLEFUSE
MEGA 175A
LITTLEFUSE
MEGA 175A
LITTLEFUSE
MEGA 175A
OR
LITTLEFUSE
MEGA 175A
LITTLEFUSE
MEGA 175A
C
Assembling the (2) Megafuse assemblies
LITTLEFUSE
MEGA 175A
Assembled Megafuses
NOTE: Find a suitable place, as close to the battery power source as possible, under the hood of the your vehicle to mount the completed Megafuse assemblies. Keep in mind that you have 12 feet of 6Ga. charging wire, and that the main power feed coming from your panel or bulkhead connection must also be able to reach the assembly.
1.Take the two Megafuse bodies and covers (items B) and snap them together. Remove the 4 nuts and lock washers from the studs on the fuse body assemblies.
2. Install the Megafuse jumper (item D above) over two of the studs on the Megafuse bodies. It is very important that the jumper MUST BE assembled on the side that is going to connect to your main power connection (starter solenoid or battery feed).
3. Notch top cover to clear jumper D as shown at right.
4. Snap one 175amp fuse (items C) onto the studs of each of the two Megafuse bodies (items B), over the jumper, then loosely re-attach the 4 nuts and lock washers back onto the assembled Megafuses. The fuse assemblies are ready to install into your vehicle.
Page 2
OR
Notched Cover
PART #
510476
Z
DESCRIPTION:
Alternator and Main Power
Connection Kit Various Applications
92972153 instruction sheet rev 0.1 6/24/2019
Page 3
Starter Solenoid G
F
battery cable (not included with this kit)
`-' `+'
Battery
E
6 red gauge wire from this kit
J
1
2
BAT
Delco-Remy
made in U.S.A
H F
LITTLEFUSE
MEGA 175A
H F
LITTLEFUSE
MEGA
10 red gauge wire
175A
K
F
from panel or engine kit
Assembled Megafuses
Main Fuse Panel Feed
NOTE: See page 4 for tips on building the 6 gauge charge wires and connecting them, along with the main panel
power feed wire, to the Megafuse assemblies as
shown above.
510476 Z
DESCRIPTION:
Alternator and Main Power Connection Kit
Various Applications
92972153 instruction sheet rev 0.1 6/24/2019
Building the 6Ga. charge wires and connecting them and the main panel power feed wire to the Megafuse assemblies:
NOTE: Make sure that your battery is disconnected! You will need to install the preassembled Megafuses from page 2 in your vehicle to start this part of the installation.
1. Pre-cut item F shrink tubing into (6) 1.00" - 1.25" pieces.
2. Take the 12-foot piece of 6Ga. red wire from this kit and route it from your starter (or other battery feed) over to the area where you have mounted your Megafuse and cut it to length. Strip the insulation on each end back 1/2". Install 2 pieces of shrink tubing F onto the wire. At the starter end, crimp and solder (1) of terminal G onto the wire. At the Megafuse end, crimp and solder (1) of terminal H onto the wire. Slide the shrink tubing over the terminals and heat it up to shrink it down.
3. Take the remaining portion of the 12-foot piece of 6Ga. red wire from this kit and route it from your alternator over to the area where you have mounted your Megafuse and cut it to length. Strip the insulation on each end back 1/2". Install 1 piece of shrink tubing F onto the wire. At the alternator end, slip on boot E as shown on page 3, then crimp and solder (1) of terminal J onto the wire. At the Megafuse end, crimp and solder (1) of terminal H onto the wire. Slide the shrink tubing over terminal H and heat it up to shrink it down.
4. Take the 10Ga. red main power feed wire from your engine or panel sub-kit and route it over to the area where you have mounted your Megafuse and cut it to length. Strip the insulation back 3/8". Install 1 piece of shrink tubing F onto the wire, then crimp and solder (1) of terminal K onto the wire.
5. Remove the 4 loosely tightened nuts and lock washers from the assembled Megafuses, then using the drawing on page 3 as a guide, install your pre-assembled wires from steps 2-4 above. Re-install the 4 nuts and lock washers onto the assembled Megafuses and tighten them down. This part of your installation is now complete.
Page 4
510476 Z
DESCRIPTION:
Alternator and Main Power Connection Kit
Various Applications
92972153 instruction sheet rev 0.1 6/24/2019
Connect to your headlight low beam
Connect to your headlight switch
Connect to your headlight high beam
Connect the Dimmer Switch wires as shown above.
1. The top center terminal of the Dimmer Switch is connected to the Headlight switch. 2. The terminal on the right side is connected to your headlight high beam terminal. 3. The terminal on the left side is connected to your headlight low beam terminal.
www.americanautowire.com 856-933-0801
PART # 500042
DESCRIPTION:
DIMMGEMRDCAOSSLHUWMMINOTUMCNOTHUNT UNIVERSAL
92964573 Rev 3.1 12/5/2014
www.americanautowire.com 856-933-0801
PART # 500042
DESCRIPTION:
DIMMGEMRDCAOSSLHUWMMINOTUMCNOTHUNT UNIVERSAL
92964573 Rev 3.1 12/5/2014
Adobe Illustrator CS4 Adobe PDF library 9.00