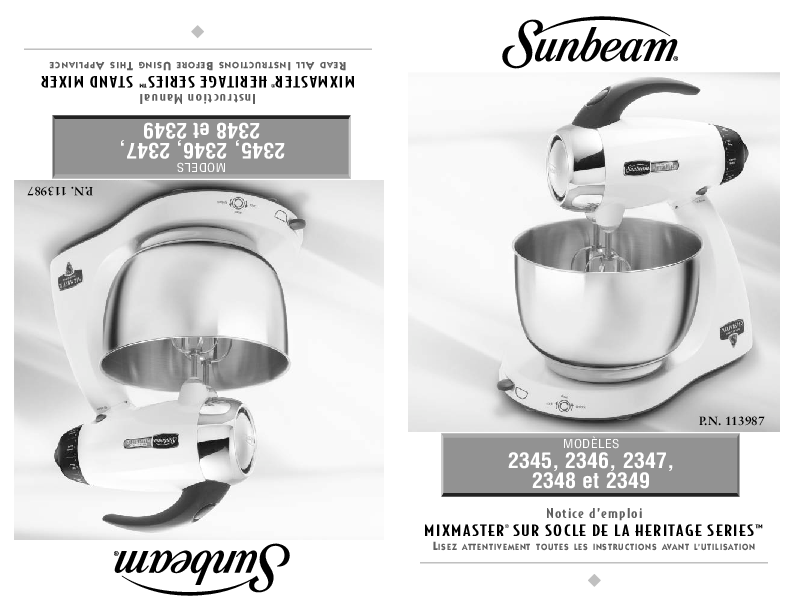
Sunbeam MixMaster Heritage Series Stand Mixer
Instruction Manual
Models: 2345, 2346, 2347, 2348, 2349
Part Number: P.N. 113987
Important Safeguards
- READ ALL INSTRUCTIONS BEFORE USING THE MIXER.
- To protect against risk of electrical shock, do not put mixer in water or other liquid. This may cause personal injury or damage to the product.
- Close supervision is necessary when mixer is used by or near children or incapacitated persons.
- Unplug from outlet while not in use, before putting on or taking off parts, and before cleaning.
- Avoid contacting moving parts. Keep hands, hair, clothing, as well as spatulas and other utensils away from beaters during operation to reduce the risk of injury to persons and/or damage to the mixer.
- Do not operate mixer with a damaged cord or plug or after the appliance malfunctions, or is dropped or damaged in any manner. If the mixer becomes damaged, please contact Consumer Services for assistance. (1-800-458-8407 in the U.S. or 1-800-667-8623 in Canada)
- The use of attachments not recommended or sold by Sunbeam may cause fire, electrical shock or injury.
- Do not use outdoors or for commercial purposes.
- Do not let cord hang over edge of table or countertop or touch hot surfaces, including the stove.
- Remove beaters from mixer before washing.
- Do not place mixer or bowls on or near a hot gas or electric burner, or in a heated oven.
- Do not use mixer for other than intended use.
- Do not leave mixer unattended while it is operating.
- Mixer has an internal safety to prevent overheating. If the mixer shuts down because of overheating, reset the speed control dial to OFF and unplug unit from wall. Wait 1 minute and plug back in. Do not plug unit back in unless speed selection is set to OFF.
- Never carry the mixer by the cord.
Special Instructions for Products Purchased in the U.S. and Canada
To reduce the risk of electrical shock, this appliance is equipped with a 3-prong plug. If you are unable to insert the plug into the outlet, contact a qualified electrician to replace the obsolete outlet. Do not attempt to defeat the safety purpose of the 3-prong plug by modifying it in any way. Also, do not pull, twist or otherwise abuse the power cord; instead, grasp the plug and pull to remove from the outlet.
If the use of an extension cord is necessary, please follow these guidelines:
- Use only 3-wire extension cords which have 3-prong grounding-type plugs and 3-pole cord connectors that accept the plug from the mixer.
- Use only extension cords having an electrical rating not less than the rating of the mixer.
- Examine the extension cord before using and do not use if the extension cord is damaged.
- Do not abuse the extension cord and do not yank on any cord to disconnect.
- Keep extension cord away from heat and sharp edges.
Note on Mixer Operation: The motor is protected by heat-cured insulation. An odor or slight wisp of smoke may occur during initial uses, which is normal and will disappear.
Table of Contents
- Important Safeguards
- Special Instructions
- Welcome
- Features
- Learning About Your Stand Mixer
- Adjusting the Turntable
- The Role of the Dual-Motor 3-Way Beating Action
- Preparing the Stand Mixer for Use
- Operating Instructions
- Mixing Guide
- Caring For Your Mixer
- Recipes
- Warranty Information
Welcome & Features
Congratulations on owning the SUNBEAM® MixMaster® Heritage Series™ Stand Mixer. This manual provides important safety instructions and operating guidance. For generations, Sunbeam has helped families prepare various dishes. This mixer offers 12 variable speeds and a dual-motor 3-way beating action designed for thorough and even mixing.
Learning About Your Stand Mixer
Familiarize yourself with the components of your stand mixer:
Illustrates the stand mixer with labels pointing to:
- Attachment Eject Button: Located on the top of the handle, this button releases the beaters, dough hooks, or wire whisks for easy changing and cleaning.
- Dual-Motor 3-Way Beating Action: A patented design where one motor drives the beaters in opposite directions, and a second motor drives the bowl. This ensures powerful and efficient mixing.
- Variable Bowl Speed: The bowl's rotation speed automatically adjusts with the beater speed.
- Off-Center Head and Beaters: The mixer head and beaters are positioned off-center to the bowl, allowing for easier addition of ingredients during operation.
- Bowl Selector: A lever that slides left to select the small bowl and right to select the large bowl.
Mixer Components and Attachments
Shows the main parts of the mixer and its various attachments:
- Die-Cast Metal Body: A robust metal body with non-slip rubber feet for stable operation.
- Stainless Steel Mixing Bowls: Available in 4.6-quart and 2.2-quart sizes, suitable for mixing various quantities of ingredients.
- Tilt Back Locking Head: The mixer head tilts back and locks securely, allowing for easy removal of bowls and attachments.
- 12 Variable Speeds: Features a powerful torque control motor for superior mixing control and consistent speed regardless of the mixing load.
- Stainless Steel Dough Hooks: Heavy-duty hooks designed to handle kneading dough and other heavy mixtures.
- Stainless Steel "V-Groove" Beaters: Robust beaters ideal for creaming butter and sugar, and mixing heavy cake mixes.
- Stainless Steel Wire Whisks: Used for whipping cream, egg whites, light batters, and cake mixes.
Adjusting the Turntable
The turntable must be adjusted based on the bowl size being used. To adjust, slide the turntable bowl selector lever to the icon corresponding to the small or large bowl.
Illustrates the turntable selector switch and its movement to align with bowl size icons.
The Role of the Dual-Motor 3-Way Beating Action
Sunbeam revolutionized mixing with its 3-way beating action, introduced in the 1930s. This action is achieved by the beaters turning against each other while the bowl also rotates. The latest innovation features a dual-motor system: one motor drives the beaters in opposite directions, while the second motor drives the turntable, rotating the bowl against the direction of the outer beater. The bowl speed is automatically calibrated to the selected mixing speed, ensuring more powerful and thorough mixing. This dual-motor design is patent pending.
Preparing the Stand Mixer for Use
Before operating, ensure the speed control dial is set to OFF and the power cord is unplugged. Wash bowls and attachments before initial use.
Raising and Lowering the Mixing Head
Press the tilt release button (located at the top of the mixer neck). While the button is depressed, hold the handle and ease the mixer head back. It will lock into position. To lower, press the tilt release button again, hold the handle, and ease the head down. A "click" indicates it has locked.
Shows the tilt release button and handle for raising and lowering the mixer head.
Installing the Attachments
Select the appropriate attachments for your task. Take attachment (A) (with a red band) and insert it into the socket nearest the side of the bowl (marked with a red dot). Take attachment (B) (with a white band) and insert it into the socket nearest the center of the bowl. Ensure both attachments click firmly into place; slight twisting may be necessary.
Illustrates the two types of beaters (cone and square) and how to insert them into their respective sockets.
Preparation: Adding the Mixing Bowl
Once the desired bowl is selected, move the turntable bowl selector switch to the appropriate icon (large or small bowl). Gently rotate the bowl counter-clockwise until it drops into place (A). Then, rotate the bowl clockwise to lock it (B). The bowl should feel firm and immobile.
Note: Mixing bowls should NEVER be used in conventional ovens, microwave ovens, on stovetops, or any other heated surface. Do not use if bowls are scratched or chipped.
Shows the correct placement and locking of the mixing bowl onto the turntable.
Operating Instructions: About the Speed Control Dial
The speed control dial turns the mixer ON/OFF and selects one of the 12 mixing speeds. Rotate the dial clockwise to increase speed and counter-clockwise to decrease speed. The indicator on the mixer head aligns with the numbered speed setting.
Shows the speed control dial and the speed indicator on the mixer head.
Mixing Guide
This guide provides recommended speeds and accessories for various mixing tasks. Speeds and tasks may vary slightly by recipe. It is generally best to start mixing at a lower speed until ingredients combine, then increase to the recommended speed. For larger quantities, a higher speed may be needed. When adding dry ingredients like flour, reduce speed to prevent dust clouds, then gradually increase speed as ingredients combine.
| Speed Setting Range | Mixing Task | Recommended Accessory |
|---|---|---|
| LOW 1-3 |
FOLDING & KNEADING Folding Kneading- Doughs (pastry, bread, scones, etc.) |
Standard Beaters |
| MEDIUM 4-6 |
LIGHT MIXING Kneading- Heavy Doughs (large quantities) Beating- Packaged Mixes |
Dough Hooks |
| HIGH 7-9 |
CREAMING & BEATING Beating- creaming sugar and butter Beating- Cake Mixes, Heavy Batters, Icings, etc. |
Standard Beaters |
| VERY HIGH 10-12 |
WHIPPING & AERATING Whisking- Light Batters Whisking- Egg Whites, Cream, etc. |
Wire Whisks |
Caring For Your Mixer
Cleaning Your Mixer
Wipe the mixer head, stand, and turntable with a damp cloth and dry. NEVER immerse the stand mixer in water. Avoid abrasive cleaners. Wash beaters and bowls in hot, soapy water after each use; they are also dishwasher safe.
Storing Your Mixer
Store the mixer in a clean, dry location. Place beaters in sockets, dough hooks and attachments in the mixing bowl. Store bowls on the turntable. Wind the power cord and secure it.
Maintenance
The mixer motor is factory-lubricated and requires no further user maintenance. For service or repairs, contact Consumer Services (1-800-458-8407 in U.S. or 1-800-667-8623 in Canada).
Helpful Hints
- For hot liquids or large batches, use the large mixing bowl or make small quantities to reduce spillage.
- Add ingredients as specified in the recipe.
- Use the mixing speed recommended in the recipe. Refer to the mixing guide.
- Do not overmix; it can make mixtures tough.
- If an object falls into the bowl during operation, immediately turn the mixer OFF and remove the object.
- For easier cleanup, remove and rinse beaters immediately with warm water.
Recipes
The Sunbeam MixMaster® Heritage Series™ offers versatility for various culinary creations. Below is a list of recipes included:
- Make Ahead Mashed Potatoes: A convenient recipe for preparing mashed potatoes in advance.
- Yellow Cake: A classic cake recipe.
- Heavenly Angel Food Cake: A light and airy cake recipe.
- Orange and Cappuccino Cake: A flavorful cake with orange and cappuccino notes.
- Mocha Cheesecake: A rich cheesecake with mocha flavor.
- Chocolate Cookie Crust: A base for pies or cheesecakes.
- Butter Cream Frosting: A classic buttercream frosting.
- Bittersweet Chocolate Frosting: A frosting made with bittersweet chocolate.
- Cream Cheese Frosting: A smooth frosting made with cream cheese.
- Holiday Sugar Cookies: Festive sugar cookies for holidays.
- Double Chocolate Brownies: Rich brownies with double chocolate.
- Orange and Cappuccino Frosting: A complementary frosting for the Orange and Cappuccino Cake.
Warranty Information
2-Year Limited Warranty: Sunbeam warrants this product against defects in material and workmanship for two years from the date of purchase. Sunbeam will repair or replace defective products or components. This warranty is valid for the original retail purchaser and requires proof of purchase. It does not cover normal wear, misuse, or damage from acts of God.
Limits on Liability: Sunbeam is not liable for incidental or consequential damages. Implied warranties are limited to the duration of this warranty.
How to Obtain Warranty Service: For service, contact Consumer Services:
- In the U.S.A.: Call 1-800-458-8407.
- In Canada: Call 1-800-667-8623.
Do not return the product to the place of purchase or the provided addresses.
