DAKOTA MICRO InnoPro HD Industrial Ruggedized IP Camera User Manual
File info: application/pdf · 16 pages · 781.94KB
User Manual InnoPro HD Industrial Ruggedized IP Camera
Go Now
Dakotamicro.com View guide user manual › Url: https://dakotamicro.com/agco/wp-content/uploads/2021/03/UserMan-DMIP-04 05 21
Extracted Text
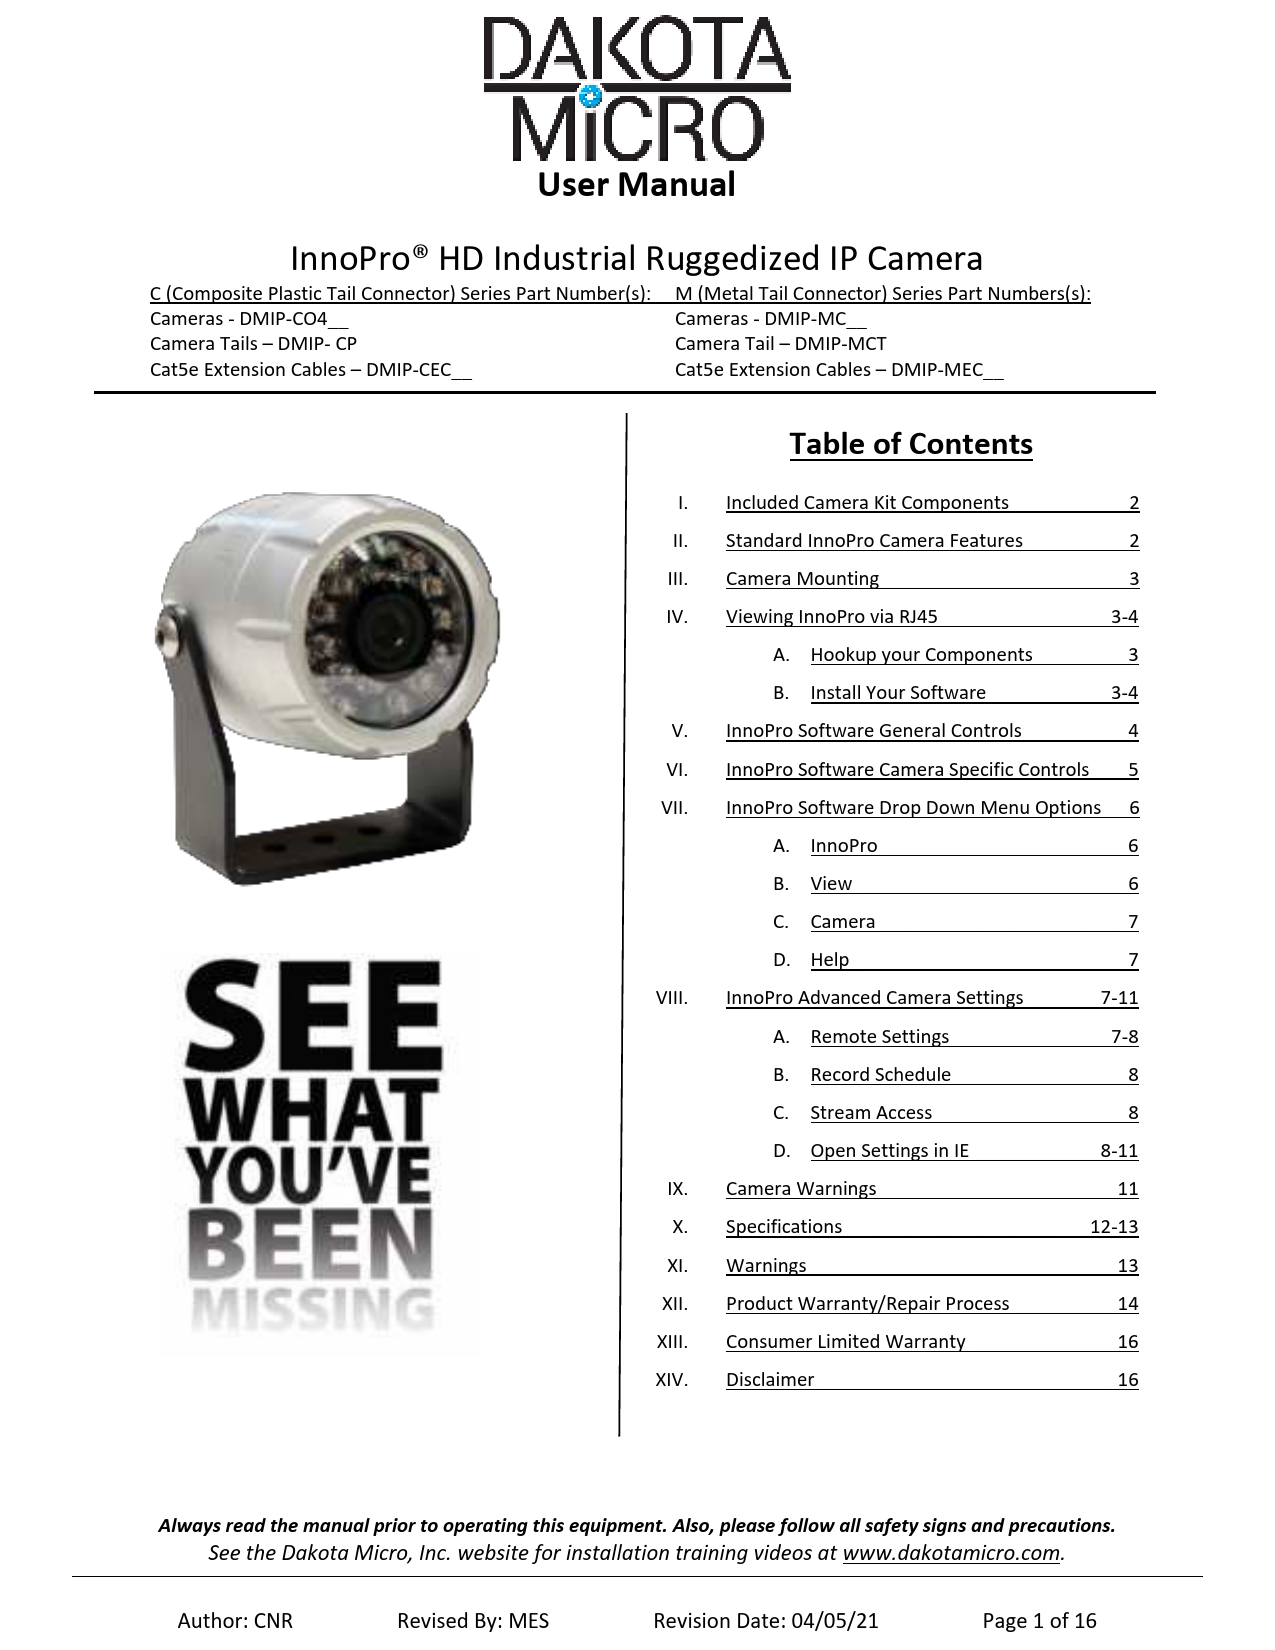
User Manual

InnoPro� HD Industrial Ruggedized IP Camera

C (Composite Plastic Tail Connector) Series Part Number(s): Cameras - DMIP-CO4__ Camera Tails � DMIP- CP Cat5e Extension Cables � DMIP-CEC__

M (Metal Tail Connector) Series Part Numbers(s): Cameras - DMIP-MC__ Camera Tail � DMIP-MCT Cat5e Extension Cables � DMIP-MEC__

Table of Contents

I. Included Camera Kit Components

2

II. Standard InnoPro Camera Features

2

III. Camera Mounting

3

IV. Viewing InnoPro via RJ45

3-4

A. Hookup your Components

3

B. Install Your Software

3-4

V. InnoPro Software General Controls

4

VI. InnoPro Software Camera Specific Controls 5

VII. InnoPro Software Drop Down Menu Options 6

A. InnoPro ______________________ 6

B. View _________________________ 6

C. Camera _______________________ 7

D. Help _________________________ 7

VIII. InnoPro Advanced Camera Settings ______7-11

A. Remote Settings _______________7-8

B. Record Schedule ________________ 8

C. Stream Access__________________ 8

D. Open Settings in IE ____________8-11

IX. Camera Warnings ______________________ 11

X. Specifications _______________________12-13

XI. Warnings _____________________________ 13

XII. Product Warranty/Repair Process _________ 14

XIII. Consumer Limited Warranty _____________ 16

XIV. Disclaimer ____________________________ 16

Always read the manual prior to operating this equipment. Also, please follow all safety signs and precautions. See the Dakota Micro, Inc. website for installation training videos at www.dakotamicro.com.

Author: CNR

Revised By: MES

Revision Date: 04/05/21

Page 1 of 16

User Manual DMIP-___

Thank you for purchasing the InnoPro� Camera from Dakota Micro. The InnoPro camera is a ruggedized IP camera that can survive just about anything the world has to throw at it. Do not expect the InnoPro to be a "fast and easy" way to view a camera from your smart phone. If this camera were easy to access from the outside world then anyone would be able to log in and see what it sees. The InnoPro� is a high security, high durability IP camera.

I. INCLUDED INNOPRO CAMERA KIT COMPONENTS

"C" Composite Plastic Tail Connector Series Kit

Description

Item Picture

InnoPro� Camera

Qty 1 - *InnoPro� Camera

Qty 1 - InnoPro� Camera

Bracket

Qty 2 - Nylon Washers

Qty 2 - � 20 bracket bolts

Qty 1 - � 20 Allen wrench

*Memory Options: 16GB or 64GB

"M" Metal Tail Connector Series Kit

Description

Item Picture

InnoPro� Camera

Qty 1 - *InnoPro� Camera

Qty 1 - InnoPro� Camera

Bracket

Qty 2 - Nylon Washers

Qty 2 - � 20 bracket bolts

Qty 1 - � 20 Allen wrench

*Memory Options: 16GB

InnoPro� camera pigtail with Audio input

InnoPro� camera pigtail with Audio input

AC Power Adaptor > 2000mA

AC Power Adaptor > 2000mA

STANDARD INNOPCAMERA FEATURES II. STANDARD INNOPRO� CAMERA FEATURES
� IP69 Anodized Aluminum camera body - Waterproof, shockproof, and suitable for nearly any use
� Self-adapting H.264 Video compression allows for reduced video file size without compromising video image quality
� Fully adjustable mainstream and substream resolution allows for complete control of video quality and size
� 4mm on board camera lens provides true 82-degree horizontal field of view at 4MP
� Minimum focal distance of 3 inches � Available with optional onboard memory of 16GB or 64GB
(64GB only available on C series) allows for local storage of recorded video and image snapshots � 4 Megapixel CMOS sensor with progressive scan � Video Stream options include RTSP, H264, H265 & MJPG � 50HZ/60HZ selectable video format allows easy camera integration � IR has effective range of 50'+ in complete darkness. � Built-in CDS light-source sensor automatically turns the IR's on/off by detecting the light intensity in the environment � Removable/replaceable camera tail includes audio in/out

Author: CNR

Revised By: MES

Revision Date: 03/24/21

Page 2 of 16

User Manual DMIP-___
III. CAMERA MOUNTING Once the camera is securely mounted, plug the camera pigtail into rear of InnoPro� camera. You can now plug the remaining end of the pigtail into your CAT5 w/ RJ45 and power supply. Make sure all connections points are securely attached.
IV. VIEWING INNOPRO CAMERA VIA CAT5 w/ RJ45
Items that are required but are not included:  Networking Knowledge  Open Ethernet Connection (available on your Router, Switch, hub, etc.)  Ethernet cable (Cat5 or greater) with RJ45 connections  Viewing Device: options you can utilize are: � Computer (Windows 7 or later) � NVR (Network Video Recorder, not sold by Dakota Micro) � Tablet or Smart Phone � Dakota Micro does not provide an app for viewing the InnoPro camera. There are many free apps available for all platforms (we have had success with "OnVifer", "IP Camera Viewer Lite" and "Tiny Cam"). Use the "scan Camera" function when you add a camera to the app to find your InnoPro camera. Dakota Micro does not provide support for this function. If you are not an advanced network user, consult a network provider for assistance. � Default InnoPro Camera Username: Admin � Default InnoPro Camera Password: 123456
 External Microphone
A. Connect Your Components and plug in your power adaptor to a wall outlet (if not using 12V POE)

NOTE: Depending upon how the InnoPro camera is hooked up, camera can take up to 90 seconds to fully boot. B. Install Your Software
1. Download the InnoPro Software at: http://dakotamicro.com/software/InnoPro/ o Both32-bit and 64-bit versions are available.
2. Install the software and follow the on-screen install prompts
3. Once the software has completed installation process, open the InnoPro� Application by double clicking the "InnoPro" icon on your desktop
4. The "InnoPro� Authentication" box will appear asking that you set your Admin Password. If you would like, you can assign a password. Note: If you leave the boxes empty, you will be able to log into the software in the future without entering a password. You can add or change your password at any time in the future.

Author: CNR

Revised By: MES

Revision Date: 03/24/21

Page 3 of 16

5. Once your InnoPro� software is open, click on the search icon ( ) to "Search Devices". This will identify all the available IP devices on your network.
6. Devices that are available on your system should appear below the words "Found Devices" in black. Select a device by single clicking on it. NOTE: Additional devices may appear in red. These are devices that utilize a different protocol and will not be able to be accessed by this software.
7. Your InnoPro� software will automatically determine any required setting adjustments. If you see all green checks next to your network settings, all you need to do is name your camera.
8. Click "Add Camera". The camera name will appear at the top of the screen when the camera is selected.
NOTE: Networking is beyond the scope of this guide. Please contact a networking professional for assistance if necessary.
9. If your InnoPro� camera requires updated Network Settings, a yellow exclamation mark will appear next to those settings.
10. Click the blue Arrow to the left of "Recommended Network Settings" to update your settings.
11. Click "Apply Settings" 12. Now you can Name your camera and click "Add Camera"

User Manual DMIP-___

13. Your Camera(s) will appear in a box in your InnoPro� software screen.

Author: CNR

Revised By: MES

Revision Date: 03/24/21

Page 4 of 16

User Manual DMIP-___

V. InnoPro� Software General Controls/Menu Bar Options

Icon

Title

Description

Playback Recorded Video

Opens folder where recorded videos are stored Double click files to play back Right click file name to delete Once video is playing, right click video for menu options or use menu toolbar on top of screen

Add Camera Manually

Click icon in upper left corner to return to live view Allows users to manually add new camera. Requires user to input IP Address & Port

Search Devices

Allows users to search for new devices on network

Options

Allows users to manually set settings for recording, performance, security, whether the InnoPro icon will display in the system tray and auto toggle settings

VI. InnoPro� Software Camera Specific Controls/Menu Bar Options � Applicable ONLY to selected camera

Also available by right clicking on live camera image or selecting "Camera" drop down

Icon

Title

Function

Full screen Multi window view Tile Sub windows

Brings selected camera to full screen. Click on the icon to return to minimized view. Allows users to tile all cameras in a selectable grid. Alternatively (click again) it will display user adjustable windows, the below icon (Tile Sub windows) only appears in the alternate view.
Automatically tiles cameras into a grid using all available space.

Settings Toggle Substream

Allows access to advanced Camera settings (see pg. 7 for further details).
Toggles video stream between main and substream (Users also can set stream in Camera settings).

/

Start/stop record Video Allows users to record live video feed

Take Snapshot

Allows users to take a snapshot of live video feed

Open Snapshot Folder Allows users access to snapshot library

Zoom In

Allows users to zoom in on video

Restore Zoom

Restores original full screen video view

Zoom Out

Allow users to zoom out of video (when zoomed in)

Toggle Zoom/Move Tool Allows users to zoom in to a specific section of video. /

Author: CNR

Revised By: MES

Revision Date: 03/24/21

Page 5 of 16

VII. INNOPRO SOFTWARE DROP DOWN MENU OPTIONS INNOPRO Drop Down Menu

Function

User Manual DMIP-___

Add Camera Manually Search Devices Export Config Import Config
Options
Exit

Allows users to manually add a new camera. Requires camera IP Address & Port
Allows users to search for new devices on network
Allows users to Export custom software configuration Allows users to import custom software configuration � Allows users to set administrator password and to choose whether program
will require password on quit � Allows users to set record storage location as well as storage recording space
limitations and recording duration � Allows users to set RTSP Stream Performance (advanced users only) � Allows users to select whether program icon appears in system tray � Allows users the option to auto toggle video stream to be mainstream when
displayed in full screen, but substream when in windowed mode Allows users to shut down program

View

VIEW Drop Down Menu

Playback Recorded Video
Devices List Touch Interface
Multi window View Tile Sub Windows

Function

Opens folder where recorded videos are stored Double click files to play back Right click file name to delete Once video is playing, right click video for menu options or use menu toolbar on top of screen

Click

icon in upper left corner to return to live view

Allows users to view ONLY cameras (removes device tree on left hand side of screen)

Allows application to be suitable for touch screen applications

Allows users to tile all cameras in a selectable grid. Alternatively (click a second time) it will display user adjustable windows, the

below icon (Tile Sub windows) only appears in the alternate view.

Automatically tiles cameras into a grid using all available space.

Author: CNR

Revised By: MES

Revision Date: 03/24/21

Page 6 of 16

Camera

CAMERA Drop Down Menu

Settings

Toggle Substream / Start/stop record Video
Take Snapshot

Open Snapshot Folder Zoom In Restore Zoom

Zoom Out

/

Toggle Zoom/Move Tool

Change Camera Name

X Remove Camera

User Manual DMIP-___
Function
Allows access to advanced Camera settings Toggles video stream between high and low stream (Users can set stream in Camera settings). Allows users to record live video feed Allows users to take a snapshot of live video feed Allows users access to snapshot library Allows users to zoom in on video Restores original full screen video view
Allow users to zoom out of video (when zoomed in) Allows users to zoom in to a specific section of video. Allows users to change camera title/name Allows users to remove camera from devices list

Help HELP Drop Down Menu
Check for Updates
About

Function
Allows users to check for software updates
Provides users with software details including version and build date.

VIII. INNOPRO� ADVANCED CAMERA SETTINGS � ADVANCED NETWORK USERS To access, right click on the camera you would like to access and select "settings". a. Remote Settings 1. NETWORK tab allows for manual adjustment of: i. IP Address ii. Gateway iii. Netmask iv. DNS1 & DNS2 v. Port vi. RTSP Media Port 2. DATE AND TIME

Author: CNR

Revised By: MES

Revision Date: 03/24/21

Page 7 of 16

User Manual DMIP-___
i. Update Mode ii. Time Zone (including daylight saving time option) iii. Time (including synchronize with local time) 3. VIDEO ENCODE tab allows for Main and Substream video adjustment of: i. Resolution
� Mainstream: Will display all the available mainstream settings available from the camera � Substream: Will display all the available substream settings available from the camera ii. I Frame Interval: 1-200 iii. Bitrate � Mainstream: 1-8,000 � Substream: 1-2,000 iv. Frame Rate: 1-30 4. OSD (On Screen Display) i. Show Date & Date Position ii. Show Title, Title Position & Title Text. The title text is the text that displays on the screen. This is different than the camera name. 5. System i. Camera Serial Number ii. Firmware Version iii. Manufacturer Protocol iv. Model Number - Hardware ID v. Direct URL Link to advanced camera settings appears at the bottom of the screen and is titled "Open settings in IE". Instructions to access advanced settings in this location are listed in the next section of this manual. b. Record Schedule 1. Click on the schedule times you would like for recording to occur and choose your settings c. Stream Access 1. Camera Name: If no camera name is entered, the camera address will display. You can change the camera name in this location if it has defaulted to the IP address. 2. Connection Type: RTSP or MJPEG 3. Quality: High (Mainstream) or Low (Substream): allows users to select primary feed 4. FPS: Allows users to view FPS in lower left corner of live video feed
d. ADVANCED USERS� allows for direct camera access. Open settings in IE by: 1. Right click on camera and select "settings" 2. Under "remote settings" there is a hyper-link on the lower left-hand corner that reads "Open settings in Internet Explorer, click to open. Or right click and select "copy link location" and paste into an IE browser window. 3. Factory default username is: admin (case sensitive) default password is: 123456 4. If, while using this section the camera settings become inaccessible or stops responding, remove the camera from your device group and re-search for it. Default username: admin default password: 123456
Click on CONFIG button in upper right-hand corner
i. Network � Network Status � Ethernet Setup � ADSL Setup � DDNS Setup � Cloudhost Config

Author: CNR

Revised By: MES

Revision Date: 03/24/21

Page 8 of 16

User Manual DMIP-___
� FTPA Account Setup � SMTP Account Setup � Media Stream Setup � Platform Setup � PPTP Setup ii. Media � Video Capture
a. IR Cut mode b. Keep color c. Sensitivity d. Start time of night e. End time of night f. Brightness g. Saturation h. Sharpness i. Contrast j. Backlight control k. Video format l. Day or night m. White balance n. Auto E W o. Binning or Skip p. Horizontal Flip q. Vertical Flip � Time and Title i. OSD (On Screen Display) ii. Overlap Information (Shows bitrate and/or resolution near camera title) iii. Time Position iv. Time Format v. Title Position vi. Title Message � Video Encode (both Mainstream and Substream) i. Encode Format ii. Resolution (changing the resolution will change the viewing angle of the camera)
 1080P = 56� true horizontal field of view  3MP = 61� true horizontal field of view  3MP Wide = 70� true horizontal field of view  4MP = 82� true horizontal field of view iii. Bitrate Control iv. I Frame Interval v. Bitrate vi. Frame Rate vii. Base Profile viii. Private Data ix. Default stream (main or sub) � Capture Picture a. Snap picture b. Picture source (main or sub steam) c. Picture quality (20-100)

Author: CNR

Revised By: MES

Revision Date: 03/24/21

Page 9 of 16

User Manual DMIP-___
d. Capture speed (1-2) � Privacy Mask
a. Mainstream � Area(s) 1-4 b. Substream � Area(s) 1-4 � Media Info (Info only) a. Resolution b. Encode Format c. Bitrate Control d. I Frame Interval e. Bitrate f. Frame Rate iii. Storage � Storage Manage a. SD1/SD2/USB Storage Device � Information regarding on board memory storage
availability � Storage Setting
a. Storage Setting b. Motion Alarm Record c. Motion Alarm Snap d. Link Down Record e. Link Down Capture f. Schedule Record � Storage Device Information iv. Alarm � Motion Alarm a. Motion Alarm b. Sensitivity c. Alarm Threshold d. Block Count e. Enable Night Time f. Night Start Time g. Night End Time h. Night Sensitivity i. Night Alarm Threshold � Motion Detect Alarm Schedule a. Period b. From � To � Video Lost Alarm v. System � Account Manage a. Add/Modify/Delete User Username b. Add/Modify/Delete User Password c. Add/Modify/Delete User group d. Add/Modify/Delete User Status � Time Setup a. Update Mode b. Time Zone c. Time d. Enable DST

Author: CNR

Revised By: MES

Revision Date: 03/24/21

Page 10 of 16

User Manual DMIP-___
� Log Setup a. Output Log Type (Debug, Run, Error, Operation, Alarm, Statistic, Common, All) b. Save Days (1-30) c. Storage Media (Flash) d. Storage Strategy (Overwrite when full or Stop when full) e. Auto Backup (Enable/Disable) f. Backup Type
� Log File Manage � System Maintenance
a. Config File Manage b. System Update c. System Restore � Regular Maintenance � Devices Language � Version Info
To playback video, Click on PLAYBACK button in upper right-hand corner
This brings up a screen called "Record file play back". This section allows users to playback and save your video files that are stored on the memory device on the inside of your InnoPro camera.
i. Record Type � Choice of Motion, Scheduled, Alarm, All ii. Media Type � Choice of Audio & Video, Only Video, Picture iii. Start Time iv. Stream Type � Choice of Mainstream, Substream, All Stream v. End Time � Search Button will search for videos that are within the parameters you set with the above options � Download Button allows for download of the video that you have selected on by "clicking on it" to select. � Delete button will allows for deletion of the video that you have selected by clicking on it to select.
IMPORANT NOTE: A video file may not appear to have been downloaded in the location selected. This is an issue with windows versions. Simply select a different location, preferably with a different type of storage and try again.
IX. CAMERA WARNINGS
� NEVER RELY ON YOUR InnoPro� Camera AS A SAFETY FEATURE. It is up to your discretion to keep your road travel and other operations safe. Your InnoPro� Camera will provide you with information only based on what it sees. Operation of machinery safety guidelines still apply.
� Keep in mind that the InnoPro camera is a digital camera that has a slight delay, resulting in a video feed that may not reflect real time events. (Short Delay also present at analog output)
� The InnoPro� Camera is equipped with an array of infrared light emitters which are invisible to the human eye. This feature will aid in low light conditions but has limitations. The effective range of the night vision feature is 1 to 50+ feet and will produce a monochrome image only.
� DO NOT ATTEMPT TO DRIVE MACHINERY USING THIS FEATURE.

Author: CNR

Revised By: MES

Revision Date: 03/24/21

Page 11 of 16

X. SPECIFICATIONS A. Camera Mainstream Resolution Substream Resolution Frame Rate Stream On Board Memory (Optional)
On Board Memory Record Duration
Lens Furnished
Audio Processing Minimum Illumination Video Processing Bitrate Control Video System Video Format Auto Electronic Shutter Auto White Balance Auto Gain Control Auto Iris Control Scanning System Gamma Characteristic Camera Front Glass Back Light Compensation Construction

User Manual DMIP-___
Selectable Mainstream: 4MP (25FPS), 3MP/3MP wide 1920x1080(30FPS)
Selectable Substream: VGA/640x360, CIF, QVGA
5MP@15FPS, 4MP@25FPS, 3MP@30FPS; supports 1-30 FPS adjustable
RTSP, H264, H265, MJPG, 16GB or 64GB (64GB only for C Series; engraved on camera body if present) Recording durations are variable based on the type of images being recorded (more movement will use up more memory faster as will recording of audio and video together) as well as the record settings. There are MANY variables and the below times listed are basic guidelines for reference.
4MP (Highest setting w/audio) � � Hour per GB of Memory 1080P � 2 hours per GB of Memory D1 Substream � 4 hours per GB of Memory QVGA (Lowest setting without audio) � 7.5 hours per GB of Memory Board Lens 4mm/F2.0, fixed board lens; minimum/close focus of 3" (changing the resolution will change the viewing angle of the camera)
1080P = 56� true horizontal field of view 3MP = 61� true horizontal field of view 3MP Wide = 70� true horizontal field of view 4MP = 82� true horizontal field of view x1 Audio input and output interface, automatic gain adjustment, high frequency filtering. External audio input requires separate power 0 LUX @ F2.0 / Auto Day-Night / Passive IR 3D noise reduction, supported digital Wide Dynamic Range, self-adapting H.264 image compression, adjustable frame rate, JPEG snapshot capable Selectable VBR (Variable Bitrate) or CBR (Constant Bitrate)
NTSC / PAL switchable via web browser settings section
Selectable Frequency - 60hz (North American / 50hz (European)
1/60s~1/100,000s, ON/OFF Switch-able
Color Temperature: 2500K~9500K
High/Low Switch-able
Software
Progressive
0.45 adjustable
Optical Grade Triple Hardened Glass lens
On/Off Switch-able
Milled Anodized 6061 Aluminum Case

Author: CNR

Revised By: MES

Revision Date: 03/24/21

Page 12 of 16

Waterproofing criteria Dimensions Environmental Rating Operating Temp Network Connector Control Power

IP 69 53x58 (L) mm (Body Only) IP69+ -45�F~150�F (-42�C~66�C) RJ45, 10/100M Onvif Compatible (Profile S) 12V 800mA (10 - 15 V Min/Max) Note: for POE use only 12V

User Manual DMIP-___

XI. WARNINGS � When selecting a camera system from Dakota Micro, be sure to utilize the appropriate system for your use. InnoPro, AgCam and EnduraCam cameras are designed for high impact, moisture, vibration, and a variety of other rough conditions. OverView cameras and kit components are designed for light use, low vibration, and low moisture. OverView equipment is not warranted when used in situations outside of the above-mentioned parameters. We always request that customers keep in mind that our less expensive OverView product line is cheaper because it does not feature the reliability and durability of our InnoPro, AgCam and EnduraCam lines. The warranty available on these products reflects that durability. � To avoid electrical shock and maintain optimal functionality, do not open the enclosures. High voltage may be present and there are no user serviceable parts inside. All warranties will be void should any enclosures be tampered with in any way. � Do not use any harsh chemical solvents, cleaning agents or corrosive detergent to clean away dirt on the surface of the screen or lens. � On AgCam and EnduraCam products, the photo-chromic camera lenses have been made impact-resistant and have been drop-ball tested according to Sec. 3.84,21 CRF BUT ARE NOT UNBREAKABLE. Because they have been hardened chemically, they show no stress pattern. Inspect your lenses frequently. Chipped or scratched surfaces will reduce protection. Such lenses should be replaced only by the manufacturer. � Power to cameras is not interrupted by turning off monitor; 12v power source must be terminated when not in use to avoid battery drain. To avoid this problem be sure when hard wiring a unit, use a fused circuit. � Do not use your Dakota Micro camera system for anything other than legal surveillance and observation uses. Dakota Micro, Inc. is not liable for any illegal or nefarious usage.

Author: CNR

Revised By: MES

Revision Date: 03/24/21

Page 13 of 16

User Manual DMIP-___
XII. PRODUCT WARRANTY/REPAIR PROCESS 1. For Technical Support call 1 701-538-4403 OR email techsupport@dakotamicro.com 2. Technician will assist in troubleshooting product malfunction. 3. If product malfunction cannot be remedied and a repair is deemed necessary, Technician will issue a Repair Authorization (RA) number.
IMPORTANT NOTE: The Technician will note on the RA form if the repair APPEARS to be a warranty or non-warranty issue based on customer description of the issues at hand. No final determination can be made until inspection and testing of the equipment is completed at the factory.
4. To ensure fast and effective repairs, customer is required to send: � Dakota Micro Product that Technician has requested/deemed necessary in the proper diagnosis and repair of malfunction. This may include some or all components of the kit. � Original/Copy of purchase receipt. � For serialized items ONLY: If a copy of the original purchase receipt cannot be provided, then DAKOTA MICRO will use the product manufacture date. � Customer information, including return address & phone number. If the phone number is not included, the customer will be sent a letter requesting the needed information. � RA Number provided by Dakota Micro Technical Support � Shipping and associated costs to ship product to DM factory to be borne by the customer unless otherwise specified.
5. Customer should mail product to: Dakota Micro, Inc. RA # XXXXX 8659 148th � Ave. SE Cayuga, ND 58013
6. Upon receipt and evaluation of product at Dakota Micro Factory, it will be established if the repair is warranty or nonwarranty. If requested, customer will be called and notified of any applicable charges.
7. If the repairs are deemed non-warranty and require a service/repair fee of any kind, a credit card number will be requested by Order Processing after the repair is completed.
8. If customer is unable to be contacted over the course of 3 weeks regarding required non-warranty repairs, product will be returned, unrepaired, to the customer.
9. Any product returned without proper documentation may be returned at customer's expense. 10. Product returned with unconfirmed problems will be assessed a $60 evaluation fee per unit 11. Return shipping costs will be borne by the party at fault; in other words, if Dakota Micro determines that the defective
product was covered under warranty, Dakota Micro pays the shipping charges. If Dakota Micro determines that it was the customer caused, the customer will pay shipping charges. If a particular circumstance cannot be determined than the cost of shipping charges will be decided on a discretionary basis depending on the situation at hand.

Author: CNR

Revised By: MES

Revision Date: 03/24/21

Page 14 of 16

User Manual DMIP-___

THIS PAGE INTENTIONALLY
LEFT BLANK

Author: CNR

Revised By: MES

Revision Date: 03/24/21

Page 15 of 16

User Manual DMIP-___
XIII. CONSUMER LIMITED WARRANTY
LIMITED WARRANTY
Subject to the disclaimer, limitations and other directions stated hereafter, Dakota Micro, Inc. warrants that the Product will be free from defects in material and workmanship for periods as stated hereafter from the date of original purchase. THIS WARRANTY IS EXPRESSLY MADE IN LIEU OF ANY AND ALL OTHER WARRANTIES, EXPRESS OR IMPLIED, INCLUDING THE IMPLIED WARRANTIES OF MERCHANTABILITY OR FITNESS. THE EXCLUSIVE REMEDY OF THE BUYER IS LIMITED TO REPAIR OR REPLACEMENT OF THE PRODUCT. EXCEPT AS STATED IN THIS WARRANTY, DAKOTA MICRO SHALL NOT BE LIABLE FOR ANY LOSS, INCONVENIENCE, OR DAMAGE, INCLUDING DIRECT, SPECIAL, INCIDENTAL, OR CONSEQUENTIAL DAMAGES, RESULTING FROM THE USE OR INABILITY TO USE THE PRODUCT, WHETHER RESULTING FROM BREACH OF WARRANTY, NEGLIGENCE, STRICT LIABILITY OF ANY OTHER LEGAL THEORY. Any oral statements or representations made by anyone which are contrary to or at variance with the terms stated in this LIMITED WARRANTY are void.
Dakota Micro will, at its option, either repair the defect or replace the defective Product or part thereof with a new or remanufactured equivalent at no charge to the purchaser for parts or labor for the period of three (3) years for AgCam� /EnduraCam� and InnoPro� cameras; two (2) years for AgCam�/ EnduraCam� monitors, and Wireless components; Twelve Months (12) for all Overview Cameras & Monitors, cables and all other accessories.
The Dakota Micro limited warranty periods outlined above apply throughout the United States and Canada only. A one (1) year maximum limited warranty for all Products applies to all other geographic locations unless otherwise stated in writing by Dakota Micro.
This limited warranty does not apply to any issues connected with appearance that have no relation to the performance of the Product nor to any Product the exterior of which has been damaged or defaced, which has been subjected to improper voltage or other misuse, abnormal service or handling, or which has been altered or modified in design or construction.
In order to enforce the rights under this limited warranty, the purchaser should follow the steps set forth in the complete Dakota Micro "Product Warranty & Repair Process" listed on page 15 - section XIII , and provide proof of purchase to Dakota Micro. Neither the sales personnel of Dakota Micro nor any dealer or any other person is authorized to make any warranties other than those described herein, or to extend the duration of any warranties beyond the time periods described herein.
The warranties described herein shall be the sole and exclusive warranties and remedies provided by Dakota Micro. Correction of defects, in the manner and for the period of time described herein, shall constitute complete fulfillment of all liabilities and responsibilities of Dakota Micro to the purchaser with respect to the Product, and shall constitute full satisfaction of all claims. In no event shall Dakota Micro be liable or in any way responsible for any damages or defects in the Product which were caused by repairs or attempted repairs performed by anyone other than Dakota Micro.
Some states do not allow the limitation or exclusion of incidental or consequential damages, so said limitation may not apply to you.
Any action at law, suit in equity, or other judicial proceeding for the enforcement of any right provided for herein or otherwise, or with respect to any claim that a purchaser may have against Dakota Micro shall be instituted only in the Courts of the State of North Dakota, either in the state district court located in Wahpeton, North Dakota or in Federal District Court location in Fargo, North Dakota. Without regard to conflicts of law principles, the laws of the state of North Dakota shall govern the interpretation and enforcement of the terms of this Limited Warranty and all aspects of the relationship between Dakota Micro and the purchaser.
This warranty gives you specific legal rights and you may also have other rights, which may vary from state to state.
XIV. DISCLAIMER
Dakota Micro Inc. products, specifications, pricing, and programs are subject to change without prior notice. Dakota Micro Inc. reserves the right to make design changes at any time without obligation to retroactively install them on previously sold units.
XV. CONTACT US
Dakota Micro, Inc.
8659 148th � Ave. SE. Cayuga, ND 58013
Management System Registered to ISO 9001
www.dakotamicro.com

Author: CNR

Revised By: MES

Revision Date: 03/24/21

Page 16 of 16