SMITH & NOBLE
Smith & Noble Smart Shades
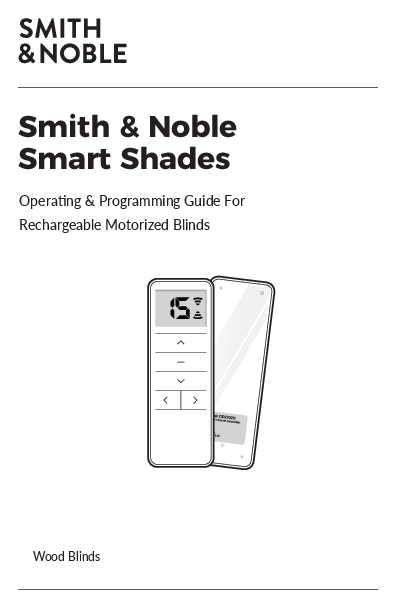
Operating & Programming Guide For Rechargeable Motorized Blinds
Wood Blinds
Everything You Need
A Smooth Set-Up
We want you to love your new blinds and that includes having a smooth installation experience. We recommend saving this guide. If you encounter any difficulties or questions, please reach out to us for help. It's why we're here. Call us at 800.248.8888 for more info on installation.
We recommend you hold on to all packaging until your blinds are fully installed. Should something go wrong (we strongly doubt it), we want any potential returns to be a painless as possible.
Customer Service Hours
- Monday - Friday: 6am - 6pm PT
- Saturday - Sunday: 7am - 4pm PT
Website: smithandnoble.com
Remote Pre-programming
Your remote should come pre-programmed to your blind. The following instructions are to be used if your remote needs to be re-programmed.
CAUTION: When setting limits on tilt & lift products, be advised that setting the closure of the slats too tight can result in the breaking of the strings/ladders. Please use caution when adjusting the limits.
BEFORE YOU START THE PAIRING PROCESS
- Take the blind off of the brackets to be able to do the "pairing"
- Select in the remote the Channel number associated with this blind
Remote Front View:
[15] CHANNEL DISPLAY
⬆️ UP
⏹️ STOP/FAVORITES
⬇️ DOWN
◀️ CHANNEL UP
▶️ CHANNEL DOWN
Table of Contents
- Pair Remote: Page 2
- Remote Operation: Page 3
- Setting Blinds Limits: Pages 4-5
- Setting & Using Favorites: Page 6
- Unpair Remote: Page 7
- Disable Unused Channels: Page 7
- Add or Remove Remote: Page 8
- Adjusting Jog Function: Page 9
- Switch Direction: Page 10
- Adjusting Speed: Page 10
- Resetting Factory Mode: Page 11
- Charging the Blinds: Page 13
- Replacing Battery in Remote: Page 13
- Install Solar Panel (optional): Pages 14-17
- Remove Blind: Page 17
- Shortcuts: Page 18
- Troubleshooting: Page 19
- Safety: Page 20
- Warranty: Back Cover
PAIRING THE REMOTE
Your blinds will need to be paired to the remote prior to operating your blinds. See Pair the Remote below.
Pair The Remote
This remote control has 15 channels. Before pairing the remote, determine which blind(s) you want on which channel. All blinds paired to a remote will also automatically be programmed to the "ALL" channel.
It is recommended to only pair one blind per channel unless it is absolutely necessary to group blinds other than the "ALL" channel. This simplifies adjusting limits and setting favorites.
If a battery is not already installed in the remote, follow the instructions REPLACE BATTERY IN REMOTE.
- Press SETTING (⚙️) button on the motor for 2 seconds. The blind will jog once and sound a long beep.
- Press the STOP (⏹️) button for 2 seconds. The blind will jog twice and sound 3 beeps. The motor has been paired successfully.
NOTE: If the STOP button is not pressed within 10 seconds, the blind will exit the paring mode automatically.
Repeat steps 1-2 to pair remaining blinds to the rest of the channels.
Remote Front View:
[15] CHANNEL DISPLAY
⬆️ UP
⏹️ STOP/FAVORITES
⬇️ DOWN
◀️ CHANNEL UP
▶️ CHANNEL DOWN
Remote Back View:
P2 BUTTON
Battery: CR2450 3V ?
[Diagram showing remote back with P2 button and battery compartment]
[Diagram showing blind motor with battery and connection points]
OPERATING THE REMOTE
Remove Plastic from Battery
Before operating the remote, remove the plastic in back of remote to engage battery.
Remote Back View:
Back Cover On
[Diagram showing remote back with cover on]
Back Cover Off
[Diagram showing remote back with cover off, battery visible]
Plastic Removed (Battery Exposed)
[Diagram showing remote back with plastic covering battery removed]
Components: PLASTIC, PLASTIC COVERING BATTERY, BATTERY (CR2450 3.0V ?), PLASTIC
Raise and Lower Blind
Select the desired channel with the CHANNEL button.
Press the UP (⬆️) or DOWN (⬇️) buttons to raise or lower the blind.
Press the STOP (⏹️) button to stop the blind at the desired position.
Open and Close the Slats
- Select a channel using the CHANNEL button. (Press right or left side of button to scroll through the channels.)
- Tapping the UP (⬆️) or DOWN (⬇️) button for less than 2 seconds will move the slats in short steps. This allows precise control of the slat open/close position.
Alignment
After installing the blinds, tilt the slats to the open position. Then raise and lower the blind several times. This motion will allow the cords and slats to properly align themselves.
Remote Front View:
[15] CHANNEL DISPLAY
⬆️ UP
⏹️ STOP/FAVORITES
⬇️ DOWN
◀️ CHANNEL UP
▶️ CHANNEL DOWN
SETTING BLIND LIMITS
Adjust Blind Limits (If Desired)
The lower and upper limits have been set at the factory. If you need to make adjustments to the limits, follow the instructions below.
Use the CHANNEL buttons to select the channel for the blind that needs to be adjusted. Then follow the directions below.
When adjusting one blind, the other blinds on that channel need to be temporarily unpaired from the remote (see UNPAIR THE REMOTE). Once limits are adjusted, the other blinds will need to be re-paired to the channel (see PAIR THE REMOTE).
If there is a single blind on the channel, proceed to SETTING LIMITS.
Remote Front View:
[15] CHANNEL DISPLAY
⬆️ UP
⏹️ STOP/FAVORITES
⬇️ DOWN
◀️ CHANNEL UP
▶️ CHANNEL DOWN
Diagram: Slats Movement
1 - QUICK, SHORT DOWN MOVEMENT ⬇️
2 - QUICK, SHORT UP MOVEMENT ⬆️
What does jog mean?
The blind jogs by making a short but quick down and up movement. This signifies that the blind has received the programming that you have just set up.
Jogging takes place in programming mode only. If your blind is jogging when you are not programming, you will need to do some troubleshooting or call a representative, also refer to our Motivia® Motorization Guide for Wood Blinds online.
SETTING BLIND LIMITS
Lower Limit
- Press and hold DOWN (⬇️) and STOP (⏹️) buttons for 5 seconds. The blind will jog once and sound a long beep.
- Press the DOWN (⬇️) button to lower the blind.
- Press the STOP (⏹️) button when the blind is at the desired position.
WARNING: The motor will not stop until the STOP button is pressed. If the blind is not stopped, the motor will continue to work past the operable limit and will cause damage to the blind.
- Press and hold the DOWN (⬇️) and STOP (⏹️) buttons for 2 seconds. The blind will jog twice and sound 3 beeps. The new lower limit is now set.
Upper Limit
The Upper Limit is the point where the motor must stop automatically to avoid breaking the blind cords and making the blind inoperable. This is a very critical operation and must be made very carefully.
- Press and hold UP (⬆️) and STOP (⏹️) buttons for 5 seconds. The blind will jog once and sound a long beep.
- Press the UP (⬆️) button to raise the blind.
- Press the STOP (⏹️) button when the blind is at the desired position.
WARNING: The motor will not stop until the STOP button is pressed. If the blind is not stopped, the motor will continue to work past the operable limit and will cause damage to the blind.
- Press and hold the UP (⬆️) and STOP (⏹️) buttons for 2 seconds. The blind will jog twice and sound 3 beeps. The new upper limit is now set.
NOTE: When setting new limits, your previously programmed Favorite Position will not be deleted.
SETTING & USING A FAVORITE POSITION
Remote Front View:
[15] CHANNEL DISPLAY
⬆️ UP
⏹️ STOP/FAVORITES
⬇️ DOWN
◀️ CHANNEL UP
▶️ CHANNEL DOWN
If there is only a single blind on the channel, proceed to SETTING A FAVORITE POSITION below.
If there is more than one blind on the channel, before setting a favorite position, all blinds on that channel will need to be unpaired from the remote (see UNPAIR THE REMOTE). Next, pair only the blind that needs a favorite position set (see PAIR THE REMOTE). Then follow the steps below to set a favorite position.
Setting a Favorite Position
- Check both upper and lower limits are set.
- Use the UP (⬆️) or DOWN (⬇️) buttons to position the blind at the desired "favorite" position.
- Press P2 on the back of the remote until the blind jogs once and beeps.
- Press the STOP (⏹️) button until the blind jogs once and beeps once then release.
- Press the STOP (⏹️) button again and the blind will jog twice and sound 3 beeps. Your "favorite" position is now set.
Using a Favorite Position
Press the STOP/FAVORITE (⭐) button for 2 seconds. The blind will automatically move to the set "favorite" position.
Removing a Favorite Position
- Press the P2 button on the back of the remote until the blind jogs once and beeps.
- Press the STOP (⏹️) button until the blind jogs once and beeps then release.
- Press the STOP (⏹️) button again and the blind will jog once and sound a long beep. Your "favorite" position has now been removed.
Remote Back View:
P2 BUTTON
Battery: CR2450 3V ?
[Diagram showing remote back with P2 button and battery compartment]
UNPAIR THE REMOTE
- Press SETTING (⚙️) Button (P1) on the motor for 2 seconds. The blind will jog once and sound a long beep.
- Press the STOP (⏹️) button for 2 seconds. The blind will jog twice and sound 3 beeps. The motor has been unpaired successfully.
NOTE: If the STOP button is not pressed within 10 seconds, the blind will exit the unparing mode automatically.
Remote Front View:
[15] CHANNEL DISPLAY
⬆️ UP
⏹️ STOP/FAVORITES
⬇️ DOWN
◀️ CHANNEL UP
▶️ CHANNEL DOWN
DISABLING UNUSED CHANNELS
The 15 channel remote has the option of turning off unused channels, making channel selection easier.
- Press and hold both Channel UP (▶️) and Channel DOWN (◀️) buttons until the LED screen displays the number 15.
- Scroll through the channels to select the required number of channels (between 1-15).
- Press the STOP (⏹️) button once to confirm selection. The remote will now only display the number of channels selected.
Follow the same process if you need to re-add channels.
Remote Front View:
[15] CHANNEL DISPLAY
⬆️ UP
⏹️ STOP/FAVORITES
⬇️ DOWN
◀️ CHANNEL UP
▶️ CHANNEL DOWN
ADD OR REMOVE REMOTE OR CHANNEL
Adding a remote
Start with a remote that is already paired to the blind.
- Press P2 on the paired remote once, the blind will beep once and jog once.
- Press P2 on the paired remote once again, the blind will beep once and jog once.
- Press P2 on the new remote once, the blind will beep 3 times and jog twice. The new remote is now paired to the blind.
Remote Front View:
[15] CHANNEL DISPLAY
⬆️ UP
⏹️ STOP/FAVORITES
⬇️ DOWN
◀️ CHANNEL UP
▶️ CHANNEL DOWN
Removing a remote
Remote (a) and remote (b) are both paired to the blind.
- Press P2 on the remote (a) once, the blind will beep once and jog once.
- Press P2 on the remote (a) once again, the blind will beep once and jog once.
- Press P2 on the remote (b) once, the blind will beep 3 times and jog twice. Remote (b) is no longer paired with the blind.
Remote Back View:
P2 BUTTON
Battery: CR2450 3V ?
[Diagram showing remote back with P2 button and battery compartment]
[Diagram showing blind motor with battery and connection points]
ADJUSTING THE JOG FUNCTION
When the jog function is activated, tapping the UP (⬆️) or DOWN (⬇️) buttons for less than 2 seconds will move the blind in short 'jogs' while holding the UP (⬆️) or DOWN (⬇️) button for longer than 2 seconds before releasing will operate the blind at normal speed to its set limits.
When the jog function is de-activated, the blind will operate at normal speed to its set limits when the UP (⬆️) or DOWN (⬇️) buttons are pressed and released.
To Activate Jog Function
Press and hold the UP (⬆️) and DOWN (⬇️) buttons simultaneously for 5 seconds until the blind jogs once. Press and hold the STOP (⏹️) button until the blind jogs once and sounds a long beep. The blind is now in jog mode.
To De-Activate Jog Function
Press and hold the UP (⬆️) and DOWN (⬇️) buttons simultaneously for 5 seconds until the blind jogs once. Press and hold the STOP (⏹️) button until the blind jogs twice and sounds 3 beeps. The blind is now in running mode.
Remote Front View:
[15] CHANNEL DISPLAY
⬆️ UP
⏹️ STOP/FAVORITES
⬇️ DOWN
◀️ CHANNEL UP
▶️ CHANNEL DOWN
SWITCHING DIRECTION / ADJUSTING SPEED
Switching Direction (Polarity)
If the blind goes up when pressing the DOWN (⬇️) button and down when pressing the UP (⬆️) button, the direction needs to be switched.
Press and hold the SETTING (⚙️) (P1) button on the motor until the blind jogs three times. Release the SETTING (⚙️) (P1) button and the motor will sound three beeps. The direction has been switched successfully.
Adjusting the Blind Speed
ACCELERATION:
- Press P2 button on the back of the remote until the blind jogs once and beeps once.
- Press the UP (⬆️) button until the blind jogs once and beeps once.
- Press the UP (⬆️) button again until the blind jogs twice and beeps once. The blind speed is now accelerated.
DECELERATION:
- Press P2 button on the back of the remote until the blind jogs once and beeps once.
- Press the DOWN (⬇️) button until the blind jogs once and beeps once.
- Press the DOWN (⬇️) button again until the blind jogs twice and beeps once. The blind speed is now decelerated.
Remote Front View:
[15] CHANNEL DISPLAY
⬆️ UP
⏹️ STOP/FAVORITES
⬇️ DOWN
◀️ CHANNEL UP
▶️ CHANNEL DOWN
Remote Back View:
P2 BUTTON
Battery: CR2450 3V ?
[Diagram showing remote back with P2 button and battery compartment]
RESETTING FACTORY MODE
Resetting to Factory Mode
WARNING: RESETTING TO FACTORY MODE WILL UNPAIR ALL PREVIOUSLY PAIRED CONTROLLERS AND WILL ERASE ALL PREVIOUSLY SET LIMITS.
Reset to Factory Mode:
- Press and hold SETTING (⚙️) button on the motor for 14 seconds until the motor jogs 4 times.
- Release button and the shade will beep 4 times. The motor has been reset to factory mode. All settings have been cleared.
NOTE: Once in factory mode, the motor will go to sleep. The motor must be taken out of sleep mode to operate and reset limits. Press the SETTING (⚙️) button on the motor for 2 seconds to wake up. Once the motor is out of sleep mode, it can be paired to controller and limits can be set.
Pairing after Factory Reset:
- Select the channel on the remote you would like to pair the shade to.
- Press and hold the SETTING (⚙️) button on the motor for 5 seconds. The shade will jog once and sound a long beep.
- Press and hold the STOP (⏹️) button for 5 seconds. The shade will jog twice and sound 6 beeps. The motor has been paired successfully.
Once the motor has been paired to the remote, the upper and lower limits must be set. See RESETTING FACTORY LIMITS.
Confirm Shade Operation Direction
Before resetting factory limits, confirm the shade is operating in the correct direction. Tap the UP (⬆️) button to check if shade is moving in the correct direction.
If the shade goes up when pressing the DOWN (⬇️) button and down when pressing the UP (⬆️) button; the direction needs to be switched. See SWITCHING DIRECTION POLARITY. The shades operation direction needs to be corrected before resetting limits.
WARNING: There are no stop limits set on the motor after being reset to Factory Mode, you MUST PRESS STOP (⏹️) if the shade is in continuous motion or the motor will continue to work past the operable limit and will cause damage to the shade.
RESETTING FACTORY LIMITS
Diagram: Motor and Battery
BATTERY ?
BLIND MOTOR ⚙️
Remote Front View:
[15] CHANNEL DISPLAY
⬆️ UP
⏹️ STOP/FAVORITES
⬇️ DOWN
◀️ CHANNEL UP
▶️ CHANNEL DOWN
Upper Limit
- Press the UP (⬆️) button to move the shade to the desired upper position.
- Press STOP (⏹️) once the shade is at the desired position.
- Press and hold the UP (⬆️) and STOP (⏹️) buttons for 5 seconds. The shade will jog twice and beep three times. The upper limit is now set.
WARNING: The motor will not stop until the STOP button is pressed. If the shade is not stopped, the motor will continue to work past the operable limit and will cause damage to the shade.
Lower Limit
- Press the DOWN (⬇️) button to move the shade to the desired lower position.
- Press STOP (⏹️) once the shade is at the desired position.
- Press and hold the DOWN (⬇️) and STOP (⏹️) button for 5 seconds. The shade will jog twice and beep three times. The new lower limit is now set.
WARNING: The motor will not stop until the STOP button is pressed. If the shade is not stopped, the motor will continue to work past the operable limit and will cause damage to the shade.
Note: When in limit setting mode, tapping the UP (⬆️) or Down (⬇️) button on the remote will move the shade in small increments for precise positioning. Holding the UP (⬆️) or DOWN (⬇️) button for 2 seconds will move the shade in bigger increments.
Remote Back View:
P2 BUTTON
Battery: CR2450 3V ?
[Diagram showing remote back with P2 button and battery compartment]
CHARGING BLIND
When the blind begins to operate slower than normal and beeps when operated it is time to charge the battery.
- Plug the 5v charger into the port on the motor.
- Plug the charger into an electrical outlet.
A typical charge cycle can take between 4-6 hours.
Do not leave the charger plugged in for more than 24 hours. This could prematurely damage the battery.
Diagram: Charging Components
CHARGER
CHARGE PORT
USB CABLE
REPLACE BATTERY IN REMOTE
Slide the back cover off the remote.
Remove the battery and replace it with a new battery (CR2450). The new battery should be inserted with the writing facing up (positive side up).
Replace the back cover of the remote.
NOTE: When installing the battery for the first time, you will need to remove the film packing sheet.
Remote Back View:
ACCESS DOOR
BATTERY INSET
Battery: CR2450 3V ?
[Diagram showing remote back with battery access]
SOLAR PANEL (OPTIONAL)
Determine Solar Panel Placement
The solar panel should be placed where it gets the maximum amount of sunlight per day.
In most cases this can be achieved by mounting the unit directly to the glass with double sided adhesive. Brackets are provided if attaching to the glass is not possible. The brackets may be mounted several different ways depending on the application (window depth, window width, etc.).
The unit requires 19" minimum window width to mount horizontally.
See below for window types and scenarios best for proper solar panel use.
Do NOT use the solar panel for the following windows.
- Single & Double paned OK ✔️
- Light transmission > 65%
- Clear
- Tinted
Do NOT use the solar panel under the following conditions.
- Awning
- Deep Eaves
- North Facing ⬆️
- Vegetation Blocking Light ?
- Insect Screen ?
INSTALL SOLAR PANEL
Tape Method
Choose the location to mount the solar panel.
Clean the ends of the solar panel where the tape will go with rubbing alcohol. When dry, remove the backing from one side of the double sided adhesive strip and adhere to the face of the solar panel. Put one adhesive strip on each end of the solar panel. Make sure to put the tape on the face (black side) of the panel.
Clean the window surface with rubbing alcohol. When dry, remove the backing on the adhesive strip and attach the solar panel to the inside of the glass, pressing firmly to adhere.
Diagram: Solar Panel Recharge Unit & Double Sided Tape
SOLAR PANEL RECHARGE UNIT
DOUBLE SIDED TAPE
Diagram: Mounting Locations
OPTION 1: Horizontal mount inside or outside of window frame.
OPTION 2: Vertical mount inside or outside of window frame.
OPTION 3: Any other location that works for your specific needs.
Diagram: Mounting Examples
INSIDE MOUNT
INSIDE MOUNT WITH TOP REVERSED
INSIDE MOUNT EXTENDED
OUTSIDE MOUNT
Bracket Method
Connect the sliding bracket and the L-shape bracket using the two screws and nuts. Do not overtighten to allow for easy adjustment to the solar panel mounting height if needed.
Ceiling mount the L-shape bracket to the window frame between the glass and the blind.
Adjust the mounting height by moving the sliding bracket up and down. Once positioned at the desired height, tighten the two screws to fix the position.
Click the solar panel to the bottom of the sliding bracket.
If space is limited it may be easier to attach the brackets to the solar unit before screwing the brackets in place.
CONNECT SOLAR PANEL TO MOTOR
Connect Solar Panel to Motor
Before the blind is installed, plug the solar panel into the side battery port located inside the headrail.
Install the headrail into bracket making sure the charging cord is dropping behind the headrail close to the window.
Diagram: Motor Connections
USB CABLE
CHARGE PORT
BRACKET
MOTOR ⚙️
FRONT OF BLIND/ HEADRAIL
USB CABLE
REMOVE BLIND
Blind Removal
Remove the valance, then raise the slats to the headrail and lock them into place. Open both side mounting bracket door latches and pull forward to remove the blind.
SHORTCUTS
| SETTINGS | STEPS |
|---|---|
| Pairing Remote | SETTING button (P1) for 2 seconds (1 jog & 1 beep) → STOP for 2 seconds (2 jogs & 3 beeps) |
| Adjusting Upper Limit | UP & STOP 5 seconds (1 jog & 1 beep) → adjust to new limit & STOP → UP & STOP 2 seconds (2 jogs & 3 beeps) |
| Adjusting Lower Limit | DOWN & STOP 5 seconds (1 jog & 1 beep) → adjust to new limit & STOP → DOWN & STOP 2 seconds (2 jogs & 3 beeps) |
| Add / Remove Favorite Position | P2 for 2 seconds (1 jog & 1 beep) → STOP (1 jog & 1 beep) → STOP (2 jogs & 3 beeps) |
| Unpairing Remote | SETTING button (P1) for 2 seconds (1 jog & 1 long beep) → STOP for 2 seconds (2 jogs & 3 beeps) |
| Add Additional Remote | P2 on paired remote once (1 jog & 1 beep) → P2 on paired remote once again (1 jog & 1 beep) → P2 on new remote once (2 jogs & 3 beeps) |
| Remove Additional Remote | P2 on main remote once (1 jog & 1 beep) → P2 on main remote once again (1 jog & 1 beep) → P2 on remote to remove (2 jogs & 3 beeps) |
| Activate Jog Function | UP & DOWN for 5 seconds (1 jog) → STOP (1 jog & 1 beep) |
| De-Activate Jog Function | UP & DOWN for 5 seconds (1 jog) → STOP (2 jogs & 3 beeps) |
| Switch Rotating Direction | SETTING button (P1) until 3 jogs → release SETTING button (3 beeps) |
| Adjust Speed - Acceleration | P2 (1 jog & 1 beep) → UP (1 jog & 1 beep) → UP (2 jogs & 1 beep) |
| Adjust Speed - Deceleration | P2 (1 jog & 1 beep) → DOWN (1 jog & 1 beep) → DOWN (2 jogs & 1 beep) |
| Wake Motor | SETTING button (P1) for 2 seconds |
| Resetting to Factory Mode | SETTING button (P1) for 14 seconds (4 jogs) → release button (4 beeps) |
| Pairing After Factory Reset | SETTING button (P1) for 2 seconds (1 jog & 1 beep) → STOP for 2 seconds (2 jogs & 3 beeps) |
| Resetting Factory Limits | UPPER LIMIT: UP to position → STOP → UP & STOP 5 seconds (2 jogs & 3 beeps) LOWER LIMIT: DOWN to position → STOP → DOWN & STOP 5 seconds (2 jogs & 3 beeps) |
TROUBLESHOOTING
| PROBLEM | SOLUTION |
|---|---|
| My blind will raise and lower, but will not tilt. | Your brackets may be mounted too close to the top of the window casement causing the tilt mechanism to bind. If your blind has decorative cloth tapes, use the shims provided to more the blind away from the casement. —Or— Check inside the headrail for obstructions. Make sure all of the slats are laying properly on the ladders. |
| My blind raises unevenly. | Raise blind to the -up- position, open the tassel, untie the knots on the cords. even out the cords. then re-tie the knots and reassemble the tassel |
| My slats are hanging out of alignment. | Lower the blind completely. While firmly holding the bottom rail, gently tug on the lift cords until the slats are even. |
| My inside mounted blind slides back and forth between brackets when operated. | Using a screwdriver, bend out the adjustable end tabs on the sides of the head rail. |
| The cords are hanging out of the bottom rail. | The bottom rail buttons may be broken or missing. If broken, you can remove the broken pieces with needle nose pliers; call customer service for replacement buttons. |
| One side of the blind does not raise. | Make sure the lift cords are still fastened to the bottom rail. if they are not please call customer service for assistance. —Or— Look inside the headrail to make sure that cords are not caught on or under something. |
| The motor does not work. | 1. Check that the power source and motor are connected properly. 2. If using a battery pack - confirm that the batteries are fresh. |
| The indicator light on the remote does not shine or the remote controlling range becomes shorter. | Replace the battery in the remote. |
For more trouble shooting help, call us at 800.248.8888 or visit us online at smithandnoble.com to connect with a live chat assistant, 6am - 6pm Monday - Friday PT, 7am-4pm Saturday & Sunday PT
SAFETY
Safety First. Style Second To None.®
Great style should never come at the cost of safety. Every Smith & Noble window treatment conforms strictly to today's safety standards, including permanent tie-down devices and built-in cord stops. To protect young children and pets, there's no better way to eliminate risk than to use one of our cordless products.
Warranty Service
The enjoyment of your window coverings should be everlasting, which is why our products come with a limited lifetime warranty. The warranty applies to the original owner, requires a proof of purchase (hang on to your receipt!) and covers defects in material or craftsmanship. Blinds or blinds must have been properly installed. We reserve the right to determine if your window covering warrants a repair or a replacement. Visit smithandnoble.com/guarantee to see full details. In need of warranty service? Call us at 800.248.8888 and we'll arrange for a repair or replacement ASAP.
© 2020 Smith & Noble Home, Inc. All Rights Reserved
