File info: application/pdf · 12 pages · 1.33MB
Installation Manual - B&D Garage Doors
Green Resources Material Australia Pty Ltd ABN 49 145 128 927 Unit 2 / 74-80 Helen Street, Sefton NSW 2162 Australia | P 61 (2) 9644 6766 | F 61 (2) 9644 5633 grmaustralia.com.au INSTALLATION GUIDE
WPO18035 Installation Manual
Congratulations on the choice you have made in the selection of this. Biowood product. Biowood castellated wall panels profile will give you.
INSTALLATION GUIDE
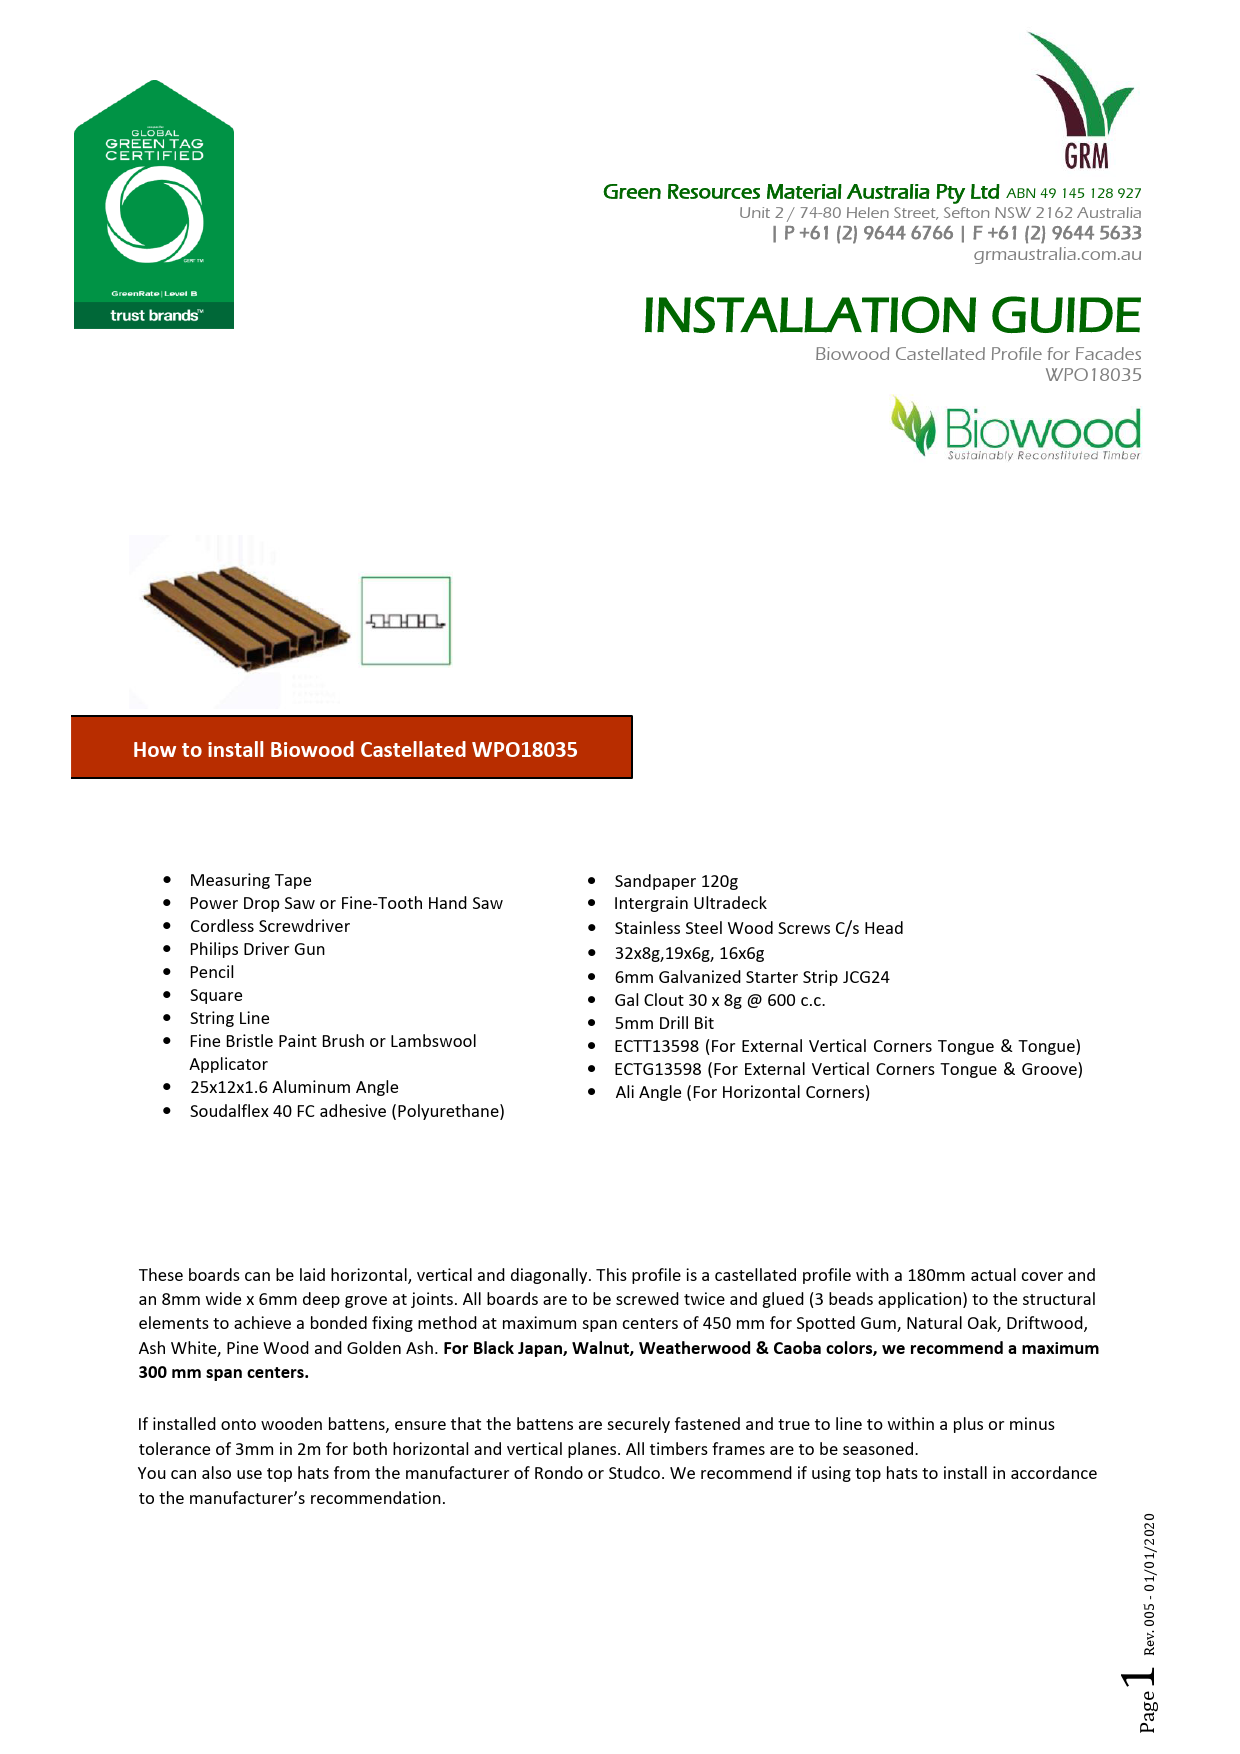
INSTALLATION GUIDE. Biowood Castellated Profile for Facades WPO18035. Congratulations on the choice you have made in the selection of this Biowood product. Go to site
Full PDF Document

If the inline viewer fails, it will open the original document in compatibility mode automatically. You can also open the file directly.
Extracted Text
Green Resources Material Australia Pty Ltd ABN 49 145 128 927
Unit 2 / 74-80 Helen Street, Sefton NSW 2162 Australia | P +61 (2) 9644 6766 | F +61 (2) 9644 5633 grmaustralia.com.au
INSTALLATION GUIDE
Biowood Castellated Profile for Facades WPO18035

Congratulations on the choice you have made in the selection of this Biowood product. Biowood castellated wall panels profile will give you many years of lower maintenance. When installed in areas exposed to UV light, it must be coated with an Intergrain uv sealer range to prolong the colour of Biowood. Biowood will not move in thickness and width. Unlike timber, it will move in length depending on the length of the board.

How to install Biowood Castellated WPO18035

You will need:
 Measuring Tape  Power Drop Saw or Fine-Tooth Hand Saw  Cordless Screwdriver  Philips Driver Gun  Pencil  Square  String Line  Fine Bristle Paint Brush or Lambswool
Applicator  25x12x1.6 Aluminum Angle  Soudalflex 40 FC adhesive (Polyurethane)

 Sandpaper 120g  Intergrain Ultradeck  Stainless Steel Wood Screws C/s Head
 32x8g,19x6g, 16x6g  6mm Galvanized Starter Strip JCG24  Gal Clout 30 x 8g @ 600 c.c.  5mm Drill Bit  ECTT13598 (For External Vertical Corners Tongue & Tongue)  ECTG13598 (For External Vertical Corners Tongue & Groove)  Ali Angle (For Horizontal Corners)

Setting Out
These boards can be laid horizontal, vertical and diagonally. This profile is a castellated profile with a 180mm actual cover and an 8mm wide x 6mm deep grove at joints. All boards are to be screwed twice and glued (3 beads application) to the structural elements to achieve a bonded fixing method at maximum span centers of 450 mm for Spotted Gum, Natural Oak, Driftwood, Ash White, Pine Wood and Golden Ash. For Black Japan, Walnut, Weatherwood & Caoba colors, we recommend a maximum 300 mm span centers.
If installed onto wooden battens, ensure that the battens are securely fastened and true to line to within a plus or minus tolerance of 3mm in 2m for both horizontal and vertical planes. All timbers frames are to be seasoned. You can also use top hats from the manufacturer of Rondo or Studco. We recommend if using top hats to install in accordance to the manufacturer's recommendation.

Page Rev. 005 - 01/01/2020 1

Green Resources Material Australia Pty Ltd ABN 49 145 128 927
Unit 2 / 74-80 Helen Street, Sefton NSW 2162 Australia | P +61 (2) 9644 6766 | F +61 (2) 9644 5633 grmaustralia.com.au
INSTALLATION GUIDE
Biowood Castellated Profile for Facades WPO18035

Colours and Finishes
Biowood prides itself in being able to achieve a natural wood appearances and finishes, textures, venations, colors and hues. Biowood Castellated Facade has a slight visible colour tone and hue difference across and along Biowood Castellated Facade Composite profiles simulating the grain, growth rings, and other natural wood features. Similar to natural timber, exact colour and pattern matches are virtually impossible
Biowood Castellated Fa�ade WPO1803 profile is supplied linished finished appearance and must be uv sealed with an Intergrain UV Seal range to maximize the uv lasting once installed onsite. Biowood Castellated Fa�ade WPO18035 is available in five standard natural wood grain colors.

Weather Wood

Spotted Gum

Driftwood

Deep Walnut

Natural Oak

Black Japan

*Colours and patterns shown are accurate within the limits of printing
Site Storage and Handling  Biowood Castellated Facade boards should not be dumped or dropped when unloading  Biowood Castellated Facade boards should be unpacked, stored on a flat surface and supported at 600mm centers  Biowood Castellated Facade boards should be stored under cover out of the weather and in the shade, until ready to install  Biowood Castellated Facade boards should not be stored in the rain if covered with plastic cover sheets  Biowood Castellated Facade boards should be carried on the edge for better support

Tools Biowood Castellated Facade can be worked with ordinary woodworking tools.

 Circular saw  Level and chalk line

 Cordless drill anddriver  Carpenters square

 Cross miter saw  Tape measure

Cutting and drilling will produce some dust and it is good practice to work in well ventilated place and to wear protective safety equipment.

Page Rev. 005 - 01/01/2020 2

Green Resources Material Australia Pty Ltd ABN 49 145 128 927
Unit 2 / 74-80 Helen Street, Sefton NSW 2162 Australia | P +61 (2) 9644 6766 | F +61 (2) 9644 5633 grmaustralia.com.au
INSTALLATION GUIDE
Biowood Castellated Profile for Facades WPO18035

Board Set Out-Horizontal laid boards
 Battens must be firmly fixed and true. Biowood panels will follow any unevenness against battens.  Install vertical odd leg channel screw 38.7 mm (J track) to batten if abutting a vertical wall. (See Diagram 7. Detail A)  Start laying boards from the base of the wall.  Install a 6mm Galvanized starter strip JCG24 at base of wall to support and lock the first board place.  Fix the starter strip using Gal Clout 30 x 8g at 600mm c.c., a minimum of 5mm from the edge and to straight
line.  Position the base of the starter strip 11mm above the bottom of the first board. (See Diagram 1/18035)  Cut the first board and reminder of the boards to be fixed to this wall to desired length. The temperature of the boards should
be about 18�c when cutting of lengths. It is most important that all boards are cut to length and installed at the same temperature when cut. If this is not observed the boards may expand and contract at different rates resulting in uneven board lengths. Leave a 5mm gap at the end of each o f e a c h b o a r d .  Apply 3 beads application of Soudalflex 40 FC adhesive to the face of every stud for the full length of the board.  Lay the first board with groove facing down and insert the inner leg into the starter strip.  Fix the tongue in the countersunk groove with 32mm x 8g Stainless Steel screws through a 3mm pilot hole. Position the screws 10mm in from the stud edge. Do not over tighten the screws. Best results are between 0.5mm and 1mm of adhesive bed is achieved.  Repeat this process for the remainder of the wall.  If sarking is used, we recommend using double battens in order to apply the two screws and 3 beads of adhesive application.  Spacing of battens at 450 mm c's is recommended when using Spotted Gum, Natural Oak, Driftwood and Golden Ash  Spacing of battens at 300mm c's is recommended when using Black Japan, Weather Wood, Caoba and Deep Walnut.

DIAGRAM 1 / 18035.

Biowood WPO18035 laid horizontal - Starter strip detail Vertical section.

90x45 Stud H2 Timber stud

Breather Sisalation Vapor Barrier
32x8g Ss C/s Wood Screws through a 3mm pilot hole. Do not overtighten. Obtain 0.5 -
1mm of glue thickness for
best result

CONCRETE FLOOR

70 x 35mm H2 Timber Pine Batten nailed to studs @ 450mm c.c.
Face fix with Pan head screw or
Gal Clout 30 x 8g @ 600mm c.c. 6 mm Galvanized Starter Strip JCG24

Biowood WPO18035
Page Rev. 005 - 01/01/2020 3

Green Resources Material Australia Pty Ltd ABN 49 145 128 927
Unit 2 / 74-80 Helen Street, Sefton NSW 2162 Australia | P +61 (2) 9644 6766 | F +61 (2) 9644 5633 grmaustralia.com.au
INSTALLATION GUIDE
Biowood Castellated Profile for Facades WPO18035

Board Set Out-Vertical laid boards
 Battens must be firmly fixed and true. Biowood panels will follow any unevenness against battens.  Install vertical odd leg channel 38.7 mm screw to batten if abutting a vertical wall. (See Diagram 7. Detail B)  Start laying boards from the base of the wall.  Install a 3mm J-Track odd leg channel at base of wall to support and lock the first board place.  Fix the J-Track using 32mm x 8g Stainless steel screws at 120mm frequency, at the center of the taller side of the J-Track and to
straight line.  Cut the first board and reminder of the boards to be fixed to this wall to desired length. The temperature of the
boards should be about 18�c when cutting of lengths. It is most important that all boards are cut to length and installed at the same temperature when cut. If this is not observed the boards may expand and contract at different rates resulting in uneven board lengths. Leave a 5mm gap at the end of each board.  Apply 3 beads of Soudal 40 FC adhesive to the face of every stud for the full length of the board.  Install the first board vertically, insert the panel inside the J-Track. (See Diagram 2 / 18035)  Fix the tongue in the countersunk grove with 32mm x 8g Stainless Steel screws per board through a 3mm pilot hole. Position the screws 10mm in from the horizontal stud edge. Do not over tighten the screws. Best results are between 0.5mm and 1mm of adhesive bed is achieved.  Repeat this process for the remainder of the wall.  If sarking is used, we recommend using double battens in order to apply the two screws and 3 beads of adhesive application.  Spacing of battens at 450 mm c's is recommended when using Spotted Gum, Natural Oak, Driftwood and Golden Ash  Spacing of battens at 300mm c's is recommended when using Black Japan and Deep Walnut.

DIAGRAM 2 / 18035.

Biowood WPO18035 laid vertical - J Track detail Horizontal section.

Biowood WPO18035

90x45 Stud H2 Timber stud

32x8g Ss C/s Wood Screws through a 3mm pilot hole. Do not
overtighten. Obtain 0.5 - 1mm of glue thickness for best result

Breather Sisalation Vapor Barrier
70 x 35mm H2 Timber Pine Batten screw fix to studs @ 450mm c.c.

Drill 6mm� weeper holes @ 1.20m c's

CONCRETE FLOOR

32x8g Ss C/S Wood Screws J-Track Odd leg channel 3mm

Page Rev. 005 - 01/01/2020 4

Green Resources Material Australia Pty Ltd ABN 49 145 128 927
Unit 2 / 74-80 Helen Street, Sefton NSW 2162 Australia | P +61 (2) 9644 6766 | F +61 (2) 9644 5633 grmaustralia.com.au
INSTALLATION GUIDE
Biowood Castellated Profile for Facades WPO18035
External Corner - Horizontal Laid Boards  Diagram 3/18035 shows the recommended method of creating an external corner for horizontal laid boards.  Install the WPO18035 cut to size & mitered out corners first as set out in diagram 3/18035.  When mitered cutting, with the hollow core , you are able to insert pine for better cover area when applying our recommended adhesive.  Fix the ali angle to the board using pan head & 50 x 8g to match ali angle.
DIAGRAM 3 / 18035. Vertical Section - External Corner Detail for WPO18035 for Horizontal laid boards.

Biowood WPO18035
Breather Sisalation Vapor Barrier
70 x 35mm H2 Timber Pine Batten nailed to studs @ 450mm c.c.
Screw fix Pan Head 50 x 8g to match
Ali Angle Colour.
WPO18035 cut to size & mitered out corners with pine inserts. Glued together using Soudalflex 40 FC adhesive

90x45 Stud H2 Timber stud
Biowood WPO18035

Page Rev. 005 - 01/01/2020 5

Green Resources Material Australia Pty Ltd ABN 49 145 128 927
Unit 2 / 74-80 Helen Street, Sefton NSW 2162 Australia | P +61 (2) 9644 6766 | F +61 (2) 9644 5633 grmaustralia.com.au
INSTALLATION GUIDE
Biowood Castellated Profile for Facades WPO18035

DIAGRAM 4 / 18035. External Corner (ECTG13598) Detail for WPO18035 for Vertical laid boards.

Biowood WPO18035

90x45 Stud H2 Timber stud
Breather Sisalation Vapor Barrier

70 x 35mm H2 Timber Pine Batten screw fix to studs @ 450mm c.c.

32x8g Ss C/s Wood Screws through a 3mm pilot hole. Do not
overtighten. Obtain 0.5 - 1mm of glue thickness for best result

Biowood External Corner
ECTG13598

Biowood WPO18035

Page Rev. 005 - 01/01/2020 6

Green Resources Material Australia Pty Ltd ABN 49 145 128 927
Unit 2 / 74-80 Helen Street, Sefton NSW 2162 Australia | P +61 (2) 9644 6766 | F +61 (2) 9644 5633 grmaustralia.com.au
INSTALLATION GUIDE
Biowood Castellated Profile for Facades WPO18035

Window Reveals - Vertical & Horizontal laid boards  For reveals, fix the J Track (odd leg channel 38.7 mm) over the Colourbond Z Flashing on to the H2 Timber stud.  Use 32 x 8g Ss C/s screws. See Diagram 5 / 18035.
DIAGRAM 5 / 18035. Window Reveals - Detail Typical
Breather Sisalation Vapor Barrier

Biowood WPO18035
32x8g Ss C/s Wood Screws through a 3mm pilot hole. Do not
overtighten. Obtain 0.5 - 1mm of glue thickness for best result
J-Track Odd leg channel 3mm
Colourbond Z - Flashing over window 50x35x20
Window Section

90x45 Stud H2 Timber stud

Specified Interior Lining

Page Rev. 005 - 01/01/2020 7

Green Resources Material Australia Pty Ltd ABN 49 145 128 927
Unit 2 / 74-80 Helen Street, Sefton NSW 2162 Australia | P +61 (2) 9644 6766 | F +61 (2) 9644 5633 grmaustralia.com.au
INSTALLATION GUIDE
Biowood Castellated Profile for Facades WPO18035

Internal Corner - Vertical & Horizontal laid boards  Butt Joint of WPO18035 is recommended for an internal corner laid horizontal or vertical.
 See Diagram 6 /18035: Detail A & B.

DIAGRAM 6 / 18035. Horizontal & Vertically Laid WPO18035 Butt Joint Detail

DETAIL A
90x45 Stud H2 Timber stud

70 x 35mm H2 Timber Pine Batten screw fix to studs @ 450mm c.c.
Biowood WPO18035
Alcor Flashing full length in height 32x8g Ss C/s Wood Screws through a 3mm pilot hole. Do not overtighten. Obtain 0.5 - 1mm of glue thickness for best result

DETAIL B
90x45 Stud H2 Timber stud

70 x 35mm H2 Timber Pine Batten screw fix to studs @ 450mm c.c.
Biowood WPO18035
Alcor Flashing 110 full length in height Soudal 40 FC adhesive

Page Rev. 005 - 01/01/2020 8

Green Resources Material Australia Pty Ltd ABN 49 145 128 927
Unit 2 / 74-80 Helen Street, Sefton NSW 2162 Australia | P +61 (2) 9644 6766 | F +61 (2) 9644 5633 grmaustralia.com.au
INSTALLATION GUIDE
Biowood Castellated Profile for Facades WPO18035

DIAGRAM 7 / 18035. Edge & end details Soffit & Ceiling Lining The installation of Biowood WPO18035 as a soffit or ceiling lining is carried out in the same method as the wall installation. We recommend Studco or Rondo framing systems for commercial ceiling or soffits lining application. We recommend if using top hats to install in accordance with the manufacturer's recommendation.
End of profile detail  Where the end or the long edge of Biowood WPO18035 will be inside and covered by the Biowood J-Track (Odd leg channel).  See Diagram 7 / 18035 A & B.

DETAIL A

Breather Sisalation Vapor Barrier
Soudal 40 FC adhesive

Biowood WPO18035(Laid Horizontally)

DETAIL B

Breather Sisalation Vapor Barrier
Soudal 40 FC adhesive

Biowood WPO18035 (Laid Vertically)

70 x 35mm H2 Timber PineBatten screw fix to studs @ 450mm c.c.
J-Track (Odd leg channel)
70 x 35mm H2 Timber PineBatten screw fix to studs @ 450mm c.c.
J-Track (Odd leg channel)

Page Rev. 005 - 01/01/2020 9

Green Resources Material Australia Pty Ltd ABN 49 145 128 927
Unit 2 / 74-80 Helen Street, Sefton NSW 2162 Australia | P +61 (2) 9644 6766 | F +61 (2) 9644 5633 grmaustralia.com.au
INSTALLATION GUIDE
Biowood Castellated Profile for Facades WPO18035

Butt joints and control joints
Biowood will expand and contract in length due to weather conditions. Although this movement will be minor, it is important to make allowances in your design to accommodate this movement.

At each end of every board an expansion gap must be allowed of widths varying from a minimum of 3mm to a maximum of 6mm. See below tables 1 and 2.

TABLE 1. Single Board Run Expansion Gaps

TABLE 2. Expansion joint of multiple board run

BOARD LENGTH

GAP AT EACH END

MAXIMUM BOARD LENGTH GAP AT BUTT JOINT

1000mm to 3000mm

3mm

5850mm

6mm

3001mm to 4500mm

4mm

4501mm to 5850mm

5mm

DIAGRAM 8 / 18035. Cross Section: Typical Expansion Joint

90x45 Stud H2 Timber stud
70 x 35mm H2 Timber Pine Batten screw fix to studs @ 450mm c.c.

Biowood Outdoor Wall Panel BWWPO18035

Biowood Horizontal Control Joint (H-Mould)
Biowood Outdoor Wall Panel BWWPO18035

Rev. 005 - 01/01/2020

Page1 0

Green Resources Material Australia Pty Ltd ABN 49 145 128 927
Unit 2 / 74-80 Helen Street, Sefton NSW 2162 Australia | P +61 (2) 9644 6766 | F +61 (2) 9644 5633 grmaustralia.com.au
INSTALLATION GUIDE
Biowood Castellated Profile for Facades WPO18035
Detailed plan of acceptable tolerance of WPO18035: DETAIL A: Acceptable cupping tolerance across 180mm Biowood WPO18035
DETAIL B: Acceptable bowing tolerance over the entire length of 5850mm Biowood WPO18035
DETAIL C: Acceptable deflection over the entire length of 5850mm Biowood WPO18035

Rev. 005 - 01/01/2020

Page1 1

Green Resources Material Australia Pty Ltd ABN 49 145 128 927
Unit 2 / 74-80 Helen Street, Sefton NSW 2162 Australia | P +61 (2) 9644 6766 | F +61 (2) 9644 5633 grmaustralia.com.au
INSTALLATION GUIDE
Biowood Castellated Profile for Facades WPO18035

UV sealing of boards When exposed to UV light, Biowood must be uv sealed to control colour fading. Biowood product consist of 70% wood fiber and will turn grey if left unsealed with uv.
In order to maintain the best appearance of your wall panels, Biowood must be uv sealed once installed onsite with Intergrain uv seal range in Natural for Spotted Gum, Charcoal Stain for Black Japan, Grey Stain for Weather Wood, Light Grey Stain for Driftwood, Golden Oak Stain for Natural Oak, Natural for Deep Walnut and Rich Chocolate Stain for Caoba.
When two coats are applied in the correct thickness or microns, it is to be expected 5% colour reduction within 3 to 5 years for cladding or fa�ade application depending on exposure. Apply Intergrain range uv sealing in accordance with instructions on the can and printed literature.

Maintenance

DIAGRAM 9 / 18035.

Your Biowood castellated profile will deliver

many years of carefree maintenance. To maintain

your pride in the beauty of this product. It is

recommended the whole wall is washed down

with clean tap water and lightly brushed with a soft hair, brush or broom every three months.

OUTSIDE FACE

This action will remover dust, dirt, debris and

atmospheric fall out which accumulate on the

shiplap shoulder where board have been laid

horizontal (see diagram G).

Vertically laid boards are naturally self-cleaning.

Wash every 6 months.

Dirt will accumulate here Wash thoroughly

Cross Section: Joint

HORIZONTAL JOINT IN BOARDS

Some grime will accumulate on the face of the boards

STUD

Rev. 005 - 01/01/2020

Page1 2