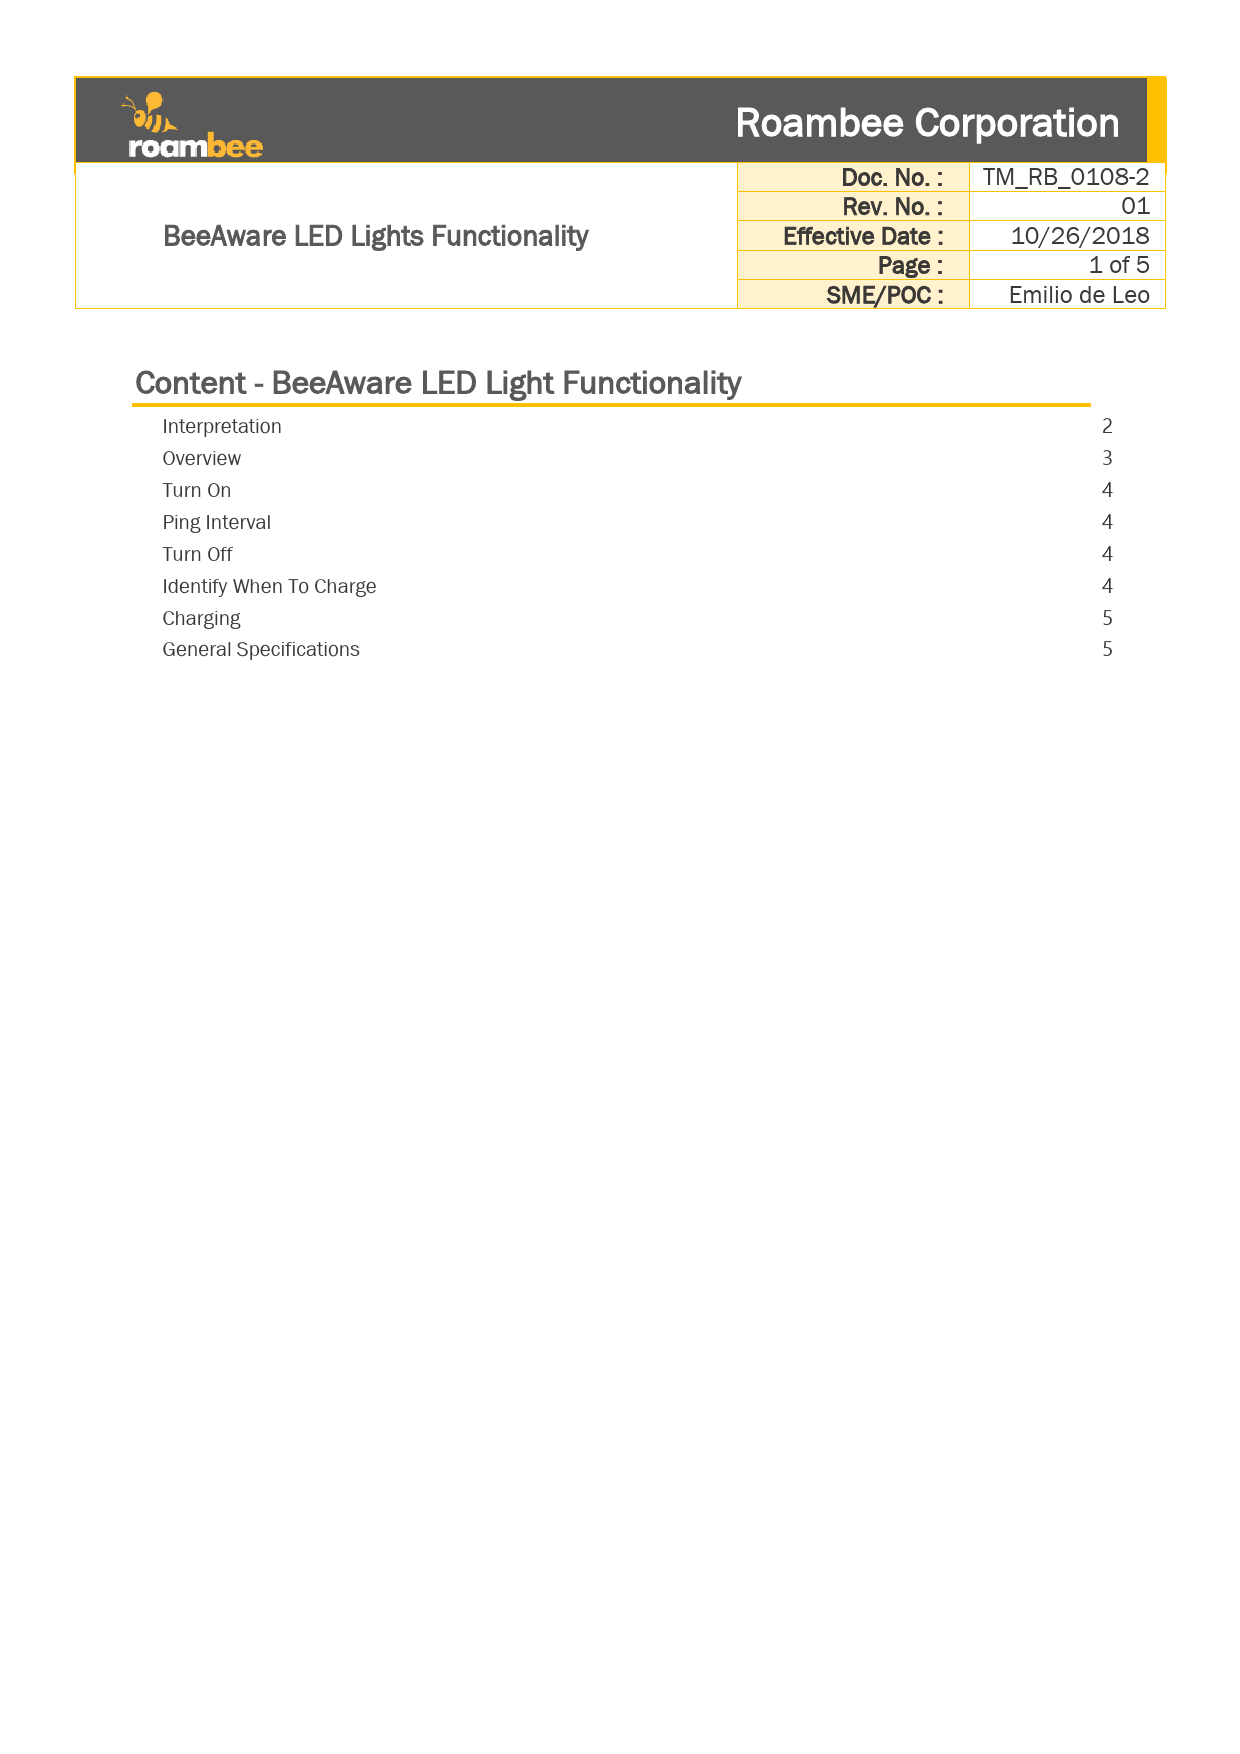
Interpretation
The Roambee BeeAware device is shown. Key components are labeled:
- 1. GPS LED: Yellow color
- 2. Battery LED: Red color
- 3. Network LED: Green color
- 4. Power Button
- 5. Charging Port
Overview
There are five modes which describe the control and state of the device:
- Turning on
- Broadcasting at ping interval
- Turning off
- Identify when to charge
- Charging
| LED | Event | Status |
|---|---|---|
| NETWORK LED | Searching network | Fast Flash |
| The device has been registered on network | Slow Flash | |
| Power Off or device is sleeping | Dark | |
| GPS LED | GPS has fixed a position | Solid |
| GPS in the process of fixing | Fast Flash | |
| GPS is off or device is sleeping | Dark | |
| BATTERY LED | Power on and operating normal | Dark |
| Charger inserted and charging completed | Solid | |
| Charger inserted and charging | Fast Flash | |
| Power key is pressed to power OFF the device | Fast Flash | |
| Power low alert | Slow Flash |
Turn On
The device is turned on by holding the power button located on the side for 3 seconds until the Battery LED comes on, then letting it go. The device will proceed doing the following:
- The Battery LED will turn on solid indicating the device is on.
- The GPS LED will go to “fast flash” meaning the device is searching for a GPS position fix.
- The Network LED will go to "fast flash” meaning the device is searching for network.
- The device will acknowledge finding the network by showing a slow blink with the Network LED.
- Once the device completes transmission of its message(s), the LEDs will turn off and device will go to sleep.
Ping Interval
The device will broadcast according to frequency programmed in the configuration of the device (1 hour default configuration).
- The GPS LED will go to “fast flash” indicating search for a GPS position fix.
- The Network LED will go to "fast flash” indicating establishing network connection.
- The LEDs will turn off after transmitting the data and go to sleep.
Turn Off
The device is turned off by holding the power button on the side for 3 seconds, the device will acknowledge by flashing the Battery LED. Let go of the button at that time and device will go through power down operation with all LED's flashing. When the LED's are all turned off, device has powered down.
Identify When To Charge
The device will indicate charging is needed when approximately 10% battery capacity is left and will start “slow flash” on the Battery LED.
Charging
When the device is connected to the USB charger to charge it, the following sequence will proceed:
- The device will confirm it's starting to charge by displaying an initial Battery LED solid lasting one second.
- The Battery LED will then blink during charging.
- The Battery LED will turn on solid when fully charged.
General Specifications
| ITEM | SPECIFICATIONS | NOTES |
|---|---|---|
| Dimensions | 92H x 42W x 33D mm | |
| Weight | 102 g | |
| Water Resistance | Yes | IP50 rating |
| Battery | 2600 LiON Rechargeable | Up to 45 days on a 1-hour interval report |
| Certifications | CE, FCC Part 15, PTCRB T-Mobile | |
| Operating Range | -20°C to +55°C | |
| Motion Detection | Motion alarm based on internal 3-axis accelerometer | |
| Locate Mode | GPS (Ublox) with 5 meter accuracy | |
| Transmission Mode | TCP, SMS, NBIoT (Bands 2, 4, 12), GPRS | |
| Alarm Mode | Motion, Timed Interval, Power On |
A diagram shows the device dimensions: 1.65 inches (42mm) height, 3.62 inches (92mm) width, 1.3 inches (33mm) depth. The weight is indicated as 3.6 oz / 102g.
