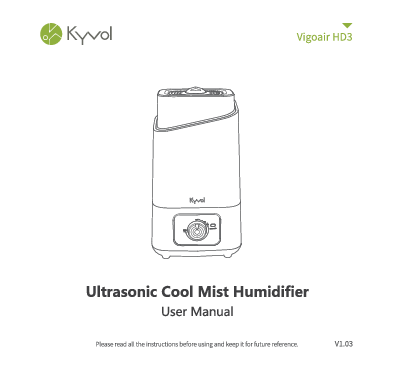
Kyvol Vigoair HD3 Ultrasonic Cool Mist Humidifier
User Manual
Version: V1.03
Contents
Important Safety Instructions
Please read these IMPORTANT SAFETY INSTRUCTIONS before using Vigoair HD3. Following these instructions completely will help you avoid some issues during use and ensure proper operation of the humidifier.
Before Using the Humidifier
-
Power Cord Check: Check the Power Cord for any signs of damage. If damaged, do not use the humidifier. [?]
Textual Description of Diagram: Shows a humidifier with a power cord plugged in, with a prohibition symbol indicating it's not allowed.
-
Environment: DO NOT place the humidifier in a wet environment. [?]
Textual Description of Diagram: Shows a humidifier on a wet surface with puddles, with a prohibition symbol.
-
Reach of Children and Pets: Please always keep the humidifier out of the reach of patients, children, and pets. [?]
Textual Description of Diagram: Shows a baby and a dog near the humidifier, with prohibition symbols.
-
Surface and Sunlight: Please always place the humidifier on a smooth, flat, lint-free, non-metallic, waterproof, and level surface. Avoid direct sunlight. [?]
Textual Description of Diagram: Shows a humidifier in direct sunlight, with a prohibition symbol.
-
Placement Clearance: Always place the humidifier ≥ 2 feet (60 cm) above the floor and ≥ 12 inches (30 cm) away from the wall, other appliances, or wooden furniture. [?]
Textual Description of Diagram: Shows a humidifier on a table with distance indicators (60cm from floor, 30cm from wall).
When Using the Humidifier
-
Surface Type: DO NOT place the humidifier on a carpet, towel, or wood surface; otherwise, it will block the vent and may damage the product. [?]
Textual Description of Diagram: Shows a humidifier on a carpet, with a prohibition symbol.
-
Heat Sources: DO NOT place the humidifier near open flames and heat sources, such as stoves, ovens, radiators, or computers. [?]
Textual Description of Diagram: Shows a humidifier near flames and heat sources, with a prohibition symbol.
-
Power Connection: DO NOT plug the power cord into an outlet with wet hands. [?]
Textual Description of Diagram: Shows wet hands plugging in a power cord, with a prohibition symbol.
-
Nozzle Direction: DO NOT make the Nozzle facing towards the wall. [?]
Textual Description of Diagram: Shows the humidifier's nozzle pointing at a wall, with a prohibition symbol.
-
Covering Nozzle: DO NOT cover the Nozzle with your hand or any other objects when the humidifier is on to avoid damage to the product or injury. [?]
Textual Description of Diagram: Shows a hand covering the nozzle, with a prohibition symbol.
-
Cleaning While On: DO NOT clean the humidifier when it is connected to a power source or when it is turned on. [?]
Textual Description of Diagram: Shows cleaning the humidifier while plugged in, with a prohibition symbol.
-
Moving/Tilting: DO NOT move or tilt the humidifier during operation. [?]
Textual Description of Diagram: Shows hands tilting the humidifier, with a prohibition symbol.
-
Humidity Level: The recommended comfortable environment humidity is between 40% - 60%. Please adjust the mist as needed. [?]
Textual Description of Diagram: Graphic indicating ideal humidity levels between 40% and 60%.
After Using the Humidifier
-
Unplugging: Always disconnect the power supply by unplugging it when the humidifier is not in use. [?]
Textual Description of Diagram: Shows unplugging the power cord from the socket.
-
Cleaning Reminder: The humidifier requires regular cleaning. Please refer to the instructions mentioned in the section of Maintenance and Care. [?]
Textual Description of Diagram: Shows cleaning tools (bottle, sponge) with an exclamation mark indicating importance.
-
Cooling Before Cleaning: DO NOT clean the humidifier immediately after turning it off. Allow the humidifier to cool down completely before cleaning. [?]
Textual Description of Diagram: Shows hands touching a hot humidifier, with a prohibition symbol.
-
Self-Repair: DO NOT attempt to repair, or adjust any electrical/mechanical functions of the humidifier by yourself. [?]
Textual Description of Diagram: Shows tools attempting to repair the humidifier, with a prohibition symbol.
Packing List
- Humidifier Vigoair HD3 ×1
- Cleaning Brush ×1
- Dustproof Sponge ×1
- User Manual ×1
Specifications
| Model | Vigoair HD3 |
|---|---|
| Operating Voltage | AC220-240V; 50/60Hz |
| Rated Power | Min.:15W/Max.:30W |
| Water Tank Capacity | 4.5L/1.18Gal |
| Dimensions | 375x208x168mm / 14.76x8.19x6.61inches |
| Net Weight | 1555g/54.8oz |
Product Overview
The Vigoair HD3 humidifier consists of the following main parts:
- Nozzle: The outlet for the cool mist.
- Water Tank: Holds the water for humidification.
- Power Cord: Connects the humidifier to the power source.
- Water Level Indicator: Shows the current water level.
- Control Knob: Used to turn the humidifier on/off and adjust mist intensity.
- Base: Houses the water reservoir and internal components.
Other components include:
- Tank Cap: Seals the water tank.
- Odor Filter: Helps reduce odors.
- Handle: For carrying the water tank.
- Air Outlet: Where air enters the base.
- Water Reservoir: Part of the base that receives water from the tank.
- Dustproof Sponge: Located at the bottom of the base, filters air.
- Atomizer: Vibrates to create mist.
- Water Floater: Indicates water level and may interact with the atomizer.
Operation Guide
Add Water
- Remove the Nozzle first, then separate the Water Tank from the Base. Turn the Water Tank upside down, loosen the Tank Cap, and fill the tank with clean cool water.
Textual Description of Diagram Sequence:
- Step 1: Humidifier base and water tank separated. Nozzle removed from tank.
- Step 2: Water tank is upside down, Tank Cap is being loosened.
- Step 3: Water is being poured into the tank.
- Tighten the Tank Cap, then put the Water Tank upright and back onto the Base.
Textual Description of Diagram Sequence:
- Step 1: Tank Cap is tightened.
- Step 2: Water tank is placed back onto the base.
Tip: Make sure that the Water Tank and the Base are well fitted so that the water can flow into the Water Reservoir.
Important:
- If the tap water is too hard, it is recommended to use filtered or distilled water to avoid white dust. DO NOT use hot water. [?]
- DO NOT add any essential oils or medicinal tablets into the Water Tank. [?]
- DO NOT add water into the Base or through the Nozzle. [?]
- DO NOT move the humidifier while the Water Tank is full of water to avoid leakage or Base overfilling. [?]
Power ON/OFF And Mist Adjustment
- Plug the Power Cord into a socket. [?]
- Rotate the Control Knob clockwise to ON/MIN to turn on the humidifier. The Water Level Indicator will turn solid green, and the mist will be at the minimum level. [▶️]
- Continue rotating the Control Knob clockwise from ON/MIN to MAX to steplessly increase the intensity of mist. [⬆️]
- Rotate the Control Knob counterclockwise from MAX to ON/MIN to reduce the intensity of mist. [⬇️]
- Rotate the Control Knob counterclockwise to OFF to turn off the humidifier. The Water Level Indicator will be off. [⏹️]
Low Water Protection
When there is not enough water in the Water Reservoir, the Water Level Indicator will turn red. The humidifier stops misting to prevent it from overheating and damaging the Atomizer. [❗]
Maintenance and Care
Important:
- DO NOT submerge the Base in water. [?]
- Make sure the water does not enter the Base through the Air Outlet, Air Inlet, or Control Knob. [?]
- DO NOT wash any part of this humidifier in the dishwasher; otherwise, it will damage the humidifier. [?]
Textual Description of Diagram: Shows the humidifier's base submerged in water, with a prohibition symbol.
Daily Maintenance
- Step 1: Turn off the humidifier and unplug the Power Cord from the socket.
- Step 2: Drain water from the Water Tank, Water Reservoir, and Base.
Weekly Maintenance
- To properly clean your humidifier, it is recommended to remove scale and disinfect it separately.
- DO NOT mix vinegar and bleach solution together. To avoid damage to the humidifier, do not use more than 1 teaspoon of bleach per gallon of water.
- Please ensure the white sealing ring on the Tank Cap is installed correctly after cleaning to prevent water leakage.
Scale Removal Instructions
- Step 1: Turn off and unplug the humidifier.
- Step 2:
- Separate the Water Tank from the Base, then remove the Tank Cap. Ensure the white sealing ring does not come off.
- Drain water from the Water Tank and Base, then remove all accessories and set them aside.
- Step 3:
- Fill the Water Tank halfway.
- Add 1 teaspoon of undiluted distilled white vinegar.
- Attach the Tank Cap and shake for 15 seconds.
- Step 4:
- Place the Water Tank back onto the Base.
- The vinegar solution will enter the Water Reservoir to loosen mineral scale on the Atomizer, Water Floater, and the bottom of the Water Tank. Leave it for 15-20 minutes.
- Step 5:
- Uncap the Tank Cap and drain the solution.
- Wipe the Atomizer and floater with a soft cloth to remove loose mineral deposits.
- Step 6: Flush both the Water Reservoir and Water Tank until the smell of vinegar (for scale removal) or bleach solution (for disinfection) is gone.
Textual Description of Diagram Sequence: Images illustrate the steps for scale removal, including disassembly, adding solution, shaking, and flushing.
Disinfection Instructions
- Step 1: Follow steps 1 to 2 in the previous section for scale removal.
- Step 2:
- Fill the Water Tank halfway.
- Add ½ teaspoon of bleach.
- Attach the Tank Cap and shake for 15 seconds.
- Place the Water Tank back onto the Base. The bleach solution will enter and disinfect the Water Reservoir and other components. Leave it for 15-20 minutes.
- Step 3: Follow steps 4 to 6 of the previous section for scale removal to complete the disinfection of the humidifier.
Dustproof Sponge Cleaning
Clean the Dustproof Sponge (located at the bottom of the Base) with water or detergent once a month, then put it back in place after cleaning.
Textual Description of Diagram: Shows the dustproof sponge being removed from the humidifier's base and cleaned.
End-Of-Season Care and Storage
- Follow the cleaning instructions when the humidifier will not be used for at least one week, or at the end of the season. Remove all accessories used in the humidifier. Allow the humidifier and accessories to dry completely before storing it.
- DO NOT store water in the Base, Water Reservoir, or Water Tank.
- Pack the humidifier safely and store it in a cool, dry place.
Troubleshooting Guide
If you need any further assistance, please feel free to contact Kyvol Customer Support at support@kyvol.com.
Failure to keep the humidifier clean and free of mineral deposits may affect its operation.
| Issue | Possible Cause | Solution |
|---|---|---|
| The Water Level Indicator is off. | The humidifier is not plugged in. | Make sure the humidifier is properly plugged into a socket. |
| No power from the power outlet. | Try to use other power outlets. | |
| The humidifier is not turned on. | Check if the Control Knob is turned to ON/MIN. | |
| The Water Level Indicator stays red. | No water in the Water Reservoir. | Make sure the Spring is fixed correctly to the bottom of the tank so that water can pass through to the Base. |
| Water Floater was stuck. | Adjust the Water Floater to a horizontal position and make sure it can rise with water. | |
| The Water Level Indicator is green but there is no or little mist produced. | No enough water inside the tank. | Refill and re-install the Water Tank. |
| Mist level is set too low. | Adjust the humidifier to the maximum mist. | |
| Mineral buildup on the Atomizer. | Check if any air comes out from the Nozzle. If not, clean water scale on the Atomizer as instructed. | |
| The Base might be overfilled. | Remove the tank, empty the Base, then place the filled tank on the empty Base. | |
| Tank leakage | Tank may be damaged. | Check for possible cracks in the tank. If yes, please replace it. |
| Tank Cap is not tightened securely. | Tighten the Tank Cap. | |
| Spring was stuck. | Make sure the Spring is fixed correctly to the bottom of the tank so that water can pass through to the Base. | |
| Sealing Ring was not installed on Tank Cap. | Make sure the Sealing Ring has been installed on the Tank Cap. Please contact support if it is lost. | |
| The mist makes the surrounding tables or floors damp. Condensation occurs around humidifier or on windows/walls. | Mist level is set too high for the room size. | 1. Check if the room is too humid and adjust the humidifier to a lower mist (40%-60% works best). 2. Open door and windows, or change to a larger room. |
| Air Inlet was blocked. | Make sure the humidifier is placed on a hard flat surface of ≥2 feet above the floor and ≥12 inches away from the wall. Make sure the Nozzle is not facing the wall or window. | |
| Low indoor temperature leads to liquefaction. | Adjust the room temperature to 25°C / 77°F. | |
| The humidification is too poor. | Mist level is set too low for the room size. | 1. Adjust the humidifier to the maximum mist. 2. Close door or windows to reduce air ventilation, or change to a smaller room. |
| Air Inlet was blocked. | Make sure the humidifier is placed on a hard flat surface of ≥2 feet above the floor and ≥12 inches away from the wall. Make sure the Nozzle is not facing the wall or window. | |
| Low indoor temperature leads to liquefaction. | Adjust the room temperature to 25°C / 77°F. | |
| White dust appears or the black coating on the Base flakes off. | The tap water may contain too much minerals. | Please replace it with filtered or distilled water. |
| Strange odor | Please clean the humidifier. | 1. Please make sure to clean the humidifier according to the instructions. 2. Leave the empty Water Tank in a cool place for 12 hours without covering the Tank Cap. |
| Strange water noise | Water is going down to the Water Reservoir. | This is normal while it is working. |
| Humidifier is getting too hot. | The humidifier works for too long. | Please power it off and put it in a well-ventilated place for 10 minutes. |
Caution
RISK OF EXPLOSION IF BATTERY IS REPLACED BY AN INCORRECT TYPE. DISPOSE OF USED BATTERIES ACCORDING TO THE INSTRUCTIONS.
The symbol [〰️] indicates AC voltage.
RECYCLING: This product bears the selective sorting symbol for Waste electrical and electronic equipment (WEEE). This means that this product must be handled pursuant to European directive 2012/19/EU in order to be recycled or dismantled to minimize its impact on the environment. The user has the choice to give their product to a competent recycling organization or to the retailer when buying new electrical or electronic equipment.
This product can be used across EU member states.
EU Compliance Statement: Shenzhen VanTop Technology & Innovation Co., Ltd. hereby declares that this device is in compliance with the essential requirements and other relevant provisions of the Low Voltage Directive 2014/35/EU and EMC Directive 2014/30/EU. A copy of the EU Declaration of Conformity is available online at https://doc.vantop.com/.
Users should only operate the Vigoair HD3 once they have understood all the following important safety instructions.
Users who have a disability and need assistance are responsible for seeking support and ensuring their own safety in line with the instructions given in this manual.
- Children should be supervised to ensure that they do not play with the appliance.
- Unplug the appliance during filling and cleaning.
- Please confirm the composition and quantity of solution to be used during maintenance. If salt is included, it is recommended not to use excessive amounts of solution.
- The appliance is not to be operated from a d.c supply. If the supply cord is damaged, it must be replaced by the manufacturer, its service agent, or similarly qualified persons in order to avoid a hazard.
Customer Support
For any further assistance, please contact Kyvol:
- North America: support@kyvol.com
- United Kingdom: support.uk@kyvol.com
Visit our website: www.kyvol.com
Follow us on social media:
- Facebook: @kyvolglobal
- Instagram: @kyvol_global