INSTALLATION INSTRUCTIONS Prepare the wall or unit to which the toilet will be installed against, to create access for connection to the water pipe, cable, flush pipe and waste pipe. Prepare the water supply pipe with a 1/2" female connector and electrical 3 core cable
This manual must be read and fully understood before installing or using the appliance. This product must not be operated without a connected water supply. Installation must be in accordance with all relevant local regulations applicable at the time of installation. It must be installed by a qualified professional to in accordance with BS
9 INSTALLATION INSTRUCTIONS Prepare the wall or unit to which the toilet will be installed against, to create access for connection to the water pipe, cable, flush pipe and waste pipe.
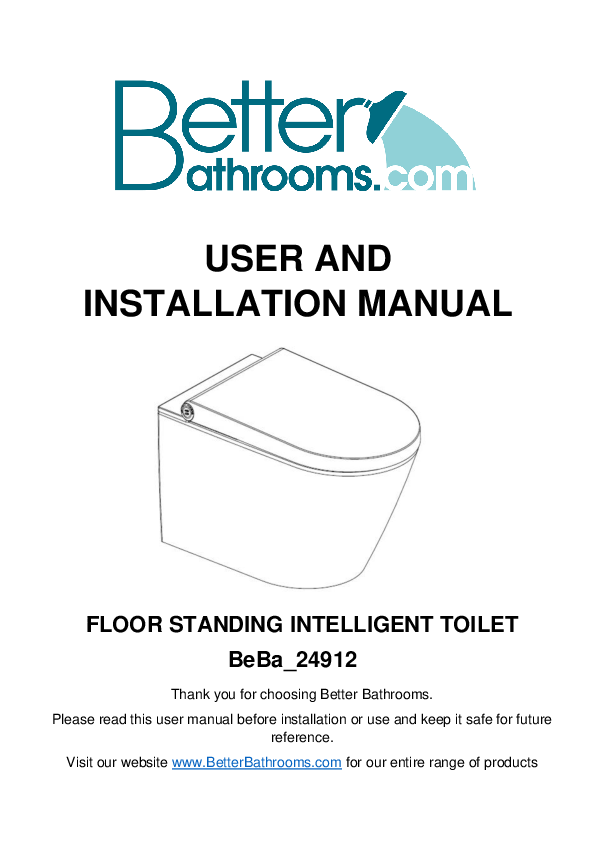
USER AND INSTALLATION MANUAL
FLOOR STANDING INTELLIGENT TOILET BeBa_24912
Thank you for choosing Better Bathrooms. Please read this user manual before installation or use and keep it safe for future
reference. Visit our website www.BetterBathrooms.com for our entire range of products
CONTENTS
SAFETY INFORMATION
3
UNIT MEASUREMENTS
4
PARTS LIST
6
PRODUCT OVERVIEW
7
BEFORE INSTALLATION
8
INSTALLATION
9
REMOTE CONTROL
15
OPERATION
16
CLEANING AND MAINTENANCE
21
REPLACING THE FILTER
22
DRAINING THE WATER TANK
23
TROUBLESHOOTING
24
SUPPORT
25
TECHNICAL SPECIFICATIONS
26
2
SAFETY INFORMATION
This manual must be read and fully understood before installing or using the appliance.
This product must not be operated without a connected water supply. Installation must be in accordance with all relevant local regulations
applicable at the time of installation. It must be installed by a qualified professional to in accordance with BS
7671. If electrical work is carried out within the bathroom which involves addition or
alteration of existing circuits, it may be notifiable to your local building control department (Part P). If unsure, professional advice should be sought. The toilet must be fitted in accordance with the Water Supply (Water Fittings) Regulations and Water Supply (Water Fittings) (Scotland) Byelaws. If the power cable or RCD are damaged in any way, the power must be disconnected until the part is replaced. Contact the retailer or manufacturer. The toilet must be fitted in a well-ventilated bathroom. The toilet must not be sprayed with liquid, or placed in a position it is likely to be sprayed. The toilet must not be installed in a location where it may be subject to high temperatures. The toilet must be stored in an upright position before installation. Do not over bend or kink the water supply hose as this could cause leaks Only use this product for its intended use. Only use attachments recommended by the manufacturer. Do not use this product in an outdoor environment. Children and people with limited physical, sensory or capabilities must be supervised when using this device or have been told the proper procedure for use beforehand. Do not climb or stand on the toilet. If the product is not working properly, disconnect from the mains and close the water supply valve immediately before contacting the supplier or a qualified professional. This is a Class I electrical appliance and must be correctly earthed. Make sure the earth cable is connected first during the electrical connection. In case of any damage to the supply cable, you must arrange for a certified and qualified electrician to replace the cable for you. This appliance is designed for fixed connection to the power supply. Connecting this appliance to the power supply must be performed by a qualified and authorised electrician. Incorrect repairs are dangerous. Repairs must only be carried out by trained and qualified engineers.
3
The Supplier and Manufacturer are not responsible for any injury and/or damage caused by incorrect installation, maintenance or operation of the product.
Do not force the soft close toilet seat down as this may damage the mechanism.
A defective appliance may cause electric shock. Never switch on a defective appliance. The power must be disconnected before seeking assistance.
This product is IPX4 rated, and so no part of the installation is allowed to be within bathroom Zones 0 or 1. Installation is permitted within Zone 2 and outside of the bathroom zones as long as it is not in a position where it is likely to be sprayed with water.
Zone 0: The interior of the bathtub or shower basin.
Zone 1:
The area around the bathtub or shower basin up to a height of 2.25m above the floor
Zone 2:
The area stretching to 0.6m outside the bath or shower and above the bath or shower if over 2.25m
4
459
410
355
180
INSTALLATION DIAGRAMS
384 370 215
5
933
593 290
PARTS LIST
Toilet
Remote (Batteries Not Included)
Remote Control Holder
Electrical Cable Coupler
G3/8" ½" Flexi Hose
Stop Valve
Filter
Flush Pipe and Seal
Waste Pipe and Seal
Hexagonal Floor Screws
Floor Fixing Brackets
Wall Plug
Side Fixing Screw
Screw Cover Holder Decorative Screw Cover
6
TOOLS REQUIRED
Tape Measure
Pencil
Phillips Screwdriver Flat Head Screwdriver
Knife
File
Adjustable Wrench
Wire Strippers
12mm Drill bit
Hacksaw
Drill
PRODUCT OVERVIEW
7
BEFORE INSTALLATION
Recommended installation area.
IMPORTANT !
Before commencing installation the water and electrical supplies should be turned OFF.
Please note with your floor mounted back to wall toilet, a Flush Pipe and Waste Pipe are supplied, these may not be required as it will be dependant on the cistern to which the toilet is being connected and the position of the soil stack.
If you are fitting the toilet to a Better Bathrooms concealed cistern, the flush pipe supplied with the toilet will not be required, as this is supplied within the concealed cistern package and can be cut to fit.
If your current soil stack comes up from the floor, the waste pipe supplied with the toilet will not be suitable. A waste pipe to suit your application should be purchased.
Before attempting installation, ensure that you are in possession of all the required tools and fittings to ensure successful installation.
8
INSTALLATION INSTRUCTIONS
Prepare the wall or unit to which the toilet will be installed against, to create access for connection to the water pipe, cable, flush pipe and waste pipe. Prepare the water supply pipe with a 1/2" female connector and electrical 3 core cable (which should be connected to a 13 amp fused spur or isolation switch outside the bathroom) as per below, allowing for 200mm of water supply pipe and 400mm of electrical cable to extend beyond the surface against which the toilet will sit, to allow connection to the toilet unit.
The installation shown is for a back to wall toilet with a WC unit. For which you will remove the front panel of the unit and cut out to accommodate the pipe and cable using the "Recommended Installation Area" shown on the previous page.
Connect the stop valve to the pipe end, ensuring to fit an adequate seal and tighten using a spanner. Once connected and fully tightened, place a bucket under the stop valve, open the stop valve and flush the pipe for at least 10 seconds to remove any debris in the system.
Once flushed through, turn the stop valve to the closed position.
9
Using a 12mm drill bit, drill two holes in the floor using the dimensions shown below. If drilling into a tiled surface, it is recommended to use tape in the location being drilled to prevent the drill bit from slipping. Ensure no pipes/cables are running under the floor, in the drilling location.
Insert the 2 wall plugs into the holes drilled in the previous step. Attach a floor fixing bracket to either side using a hexagonal screw through the hole on its base.
Tighten the hexagonal screws with an adjustable wrench.
Connect the 1/2" female threaded end of the Filter to the Stop Valve, ensuring to fit the seal provided and tighten. 10
Connect the 3/8"" - 1/2" Flexi Pipe to the Filter, ensuring to fit the seal provided and tighten using a spanner, do not over tighten as this could crack the plastic body of the Filter.
Remove the screws on the seat, using a cross head screwdriver, ensuring not to lose the screws once removed.
Pull the seat from the toilet pan (Ensure the seat is not turned upside down).
Push the toilet base into position against the wall, ensuring that the waste and flush pipes on the rear are fully engaged to create a full seal.
11
Pull through the flexi pipe and electrical cable, to allow connection to be made with the seat unit.
Insert the side fixing screws through the cover holder, before inserting the screws through the side of the toilet ensuring it engages with the fixing bracket secured to the floor. Tighten until secure, then push on the cover cap.
Strip the end of the household cable to expose the wires for connection to the coupler. When stripped, tidy the ends and connect to the coupler as shown, ensuring the screws are tightened and the wire ends are fully secured.
Follow the same process for the cable attached to the toilet, then connect the coupler sections together.
12
Connect the end of the water supply flexi pipe to the tank inlet on the underside of the toilet lid, this will require a firm push to connect the flexi to the inlet. Once fully inserted and secure, tighten the nut. Before replacing the seat, turn on the water supply, the stop valve and the electrical supply. After turning on the water and electrical supplies you MUST carry out the RCD test, instructions for this are printed on the rear of the RCD. A leak check must also be conducted on all water connections.
When checks are satisfactorily completed the lid assembly can be re-fitted to the pan, feed the flexi pipe and cables carefully under the pan. While doing this be careful not to trap or kink the pipe or cable.
Locate the seat onto the pan and push down at the rear (not in the middle), as this could crack the seat.
When the seat is located, re-fit the seat screws and tighten until secure, then fit the cover caps.
13
INSTALLATION OF THE REMOTE HOLDER
Clean the wall surface in the area in which the remote control holder will be located Dry fully before attempting the installation
From the rear of the holder, peel off the adhesive strip cover.
Place the holder with the adhesive side to the wall, ensuring this is level, press to the wall firmly and hold for a couple of seconds.
Once located and secure, place the remote control against the holder. The magnet within the holder will retain the remote in position.
14
REMOTE CONTROL
Rear Wash
Dry/ Stop
Decrease Flow
Retract Nozzle/ Night Light Decrease Temperature/ shift
Front Wash
Indicator Lights Increase Flow/ Massage Extend Nozzle
Increase Temperature/ Shift
FITTING / REPLACING BATTERIES
Different types of batteries or new and used batteries should not be mixed
Batteries should be inserted using the correct polarity Exhausted batteries should be removed and disposed of safely If the appliance is not to be used for a long period, batteries should be
removed
NOTE: Batteries are not included. The remote requires 2 x 3v CR2032 batteries.
When the light flashes continuously, the batteries need to be replaced
15
OPERATION
REAR WASH/ FRONT WASH
While seated, press the rear wash or front wash button on the remote and the toilet will begin wash mode.
Alternatively the dial on the side of the toilet can be turned clockwise to activate front wash or anticlockwise to activate rear wash. The washing function will run for 3 minutes.
NOTE: When the wash mode is activated, after a 10 second delay the nozzle will move for 18 seconds before staying in the set position for the rest of the wash.
While in wash mode, you can adjust the following settings:
MASSAGE
Change between "OSCILLATING", "PULSATING" AND "OSCILLATING AND PULSATING" functions.
To access massage mode, keep pressing the + or temperature buttons. Then, press the + water flow button to change between the different massage functions.
The Indicator lights on the remote will show the massage mode selected. 1 Light Oscillating Mode 2 Lights Pulsating Mode 3 Lights Oscillating and Pulsating Mode Please Note: The massage mode can only be adjusted using the remote control.
16
WATER FLOW
Change between LOW, MEDIUM or HIGH
To adjust the water flow, press the + or water flow buttons on the remote. The indicator will show the rate that the water is flowing between LOW, MEDIUM and HIGH.
You can also adjust the water flow using the dial located on the side of the toilet. Turn the dial clockwise to increase the flow or anticlockwise to decrease.
WATER TEMPERATURE ADJUSTMENT
The water temperature can be adjusted.
Use the temperature adjustment Press the dial on the side of the
buttons on the remote. Press the + toilet. The temperature can then
or to increase or decrease the be increased by turning clockwise
temperature.
or decreased by turning it
anticlockwise.
STOP
Stops all functions immediately no matter where they are in their cycle.
To stop any of the functions at any time, press the stop button on the remote control.
ADJUST NOZZLE
The nozle position controls where the water is sprayed during washing mode.
Change the nozzle position by using the + and nozzle buttons on the remote to retract or extend the nozzle. Please Note: The nozzle position can only be adjusted using the remote control.
17
AIR DRY MODE
When seated, press the Dry button on the remote and air dry mode will operate for 3 minutes.
While the air dry mode is operating, you can change the following settings:
AIR TEMPERATURE ADJUSTMENT
Adjust the temperature of the air flow by using the + and - adjust temperature buttons on the remote.
Turn the dial on the side of the seat clockwise to increase the air temperature or anticlockwise to reduce it.
STOP The stop button stops all functions immediately no matter where they
are in their cycle.
To stop any of the functions at any time, press the stop button.
18
OTHER FEATURES
The intelligent toilet comes with other features that improve its ease of use. These can be adjusted when no other function is in operation.
NIGHT LIGHT
The night light defaults to always Alternatively the night light can be
on. Press the + or temperature adjusted by lifting the toilet lid and
buttons on the remote at the same seat. Then turn the control dial on
time before pressing the nozzle the side of the seat anti clockwise
button. Keep pressing the
to change the mode.
nozzle button to change between
OFF, ON and SMART modes.
(Light will operate in dark
conditions).
AUDIO
The toilet will bleep when settings are changed. To turn this alert off press and hold the "+" or "-" temperature button. Then release and press the Front Wash Button. The sound/beeps will turn off. Press the Front Wash button again and the sound will be activated. Or Open the cover and seat, keep pressing the control dial then rotate, the sound will activate when turned clockwise and deactivate when turned anti-clockwise STANDBY
Without sitting press and hold the control dial on the side of the seat for 6 seconds, the seat will go into "Standby Mode" Press and hold the button again for 6 seconds to restart the seat.
19
INDICATOR LIGHT
The indicator light on the control dial is on by default. To turn it off press and hold the "+" or "-" temperature button. Then press the "Rear Wash" button. The Indicator light will illuminate when the "Rear Wash" button is pressed again. Or Open the cover and sit, without washing or drying, keep pressing the control dial for 6 seconds, the lamp will turn off, if pressed again for 6 seconds, the light will turn on.
MULTIPLE INSTALLATION REMOTE SETTING
If you are installing multiple units in one area and want to avoid controller interference between units. You can set each controller to be connected to an individual unit. Open both the cover and seat, do not sit on the seat and set the "Night Light" to the "Close" mode (Refer to Night Light Setting) Press the STOP button and the "+" or "-" temperature button together. The first indicator will flash. Release the STOP button, but continue to press the temperature button Press the "+" or "-" flow rate button then releases the temperature button the fifth indicator will flash. Press "+" or "-" flow rate buttons to switch to a different remote/product ID code and the corresponding indicator lights will illuminate. The first code is the default code and the light "-" lights up.
20
CLEANING AND MAINTENANCE
Daily
Remove water drops with a soft lint free
cloth to avoid limescale build-up.
Weekly
Clean all surfaces and corners. Clean
the spray nozzle is necessary (see
Nozzle cleaning)
Monthly
Clean the ceramic with low acidic
cleaning agents.
Every 6 months
Replace the filter if required. (see
replacing the filter)
NOTE: Do not use strong abrasive cleaning agents or materials, as this can damage
the product and will invalidate your guarantee.
TANK SELF-CLEAN
If the product is not used for more than 72 hours, the next time it is used, and the wash function is activated, the unit will carry out a self-clean for approximately 3 minutes. All functions will be de-activated during this time.
CLEANING THE NOZZLE
It is recommended that regular cleaning of the nozzle takes place to prevent blockages.
To manually clean the nozzle, follow the below:
Open the seat cover and seat, then rotate the control dial clockwise. The nozzle will extend, rub clean with a brush to clean the nozzle holes and then wipe clean.
The nozzle will return after a 5-minute period or you can press the Stop button.
21
REPLACING THE FILTER The filter supplied has a life of 6 months and should be replaced to prevent reduced flow. This can be affected by the water type i.e. Hard Water areas.
To replace the filter, you will need to turn off the power supply and the water supply and the seat will need to be removed. Once the power has been cut to the unit, unscrew the seat from the toilet, do not turn the seat upside down. Once removed, access the filter and the stop valve.
Turn the stop valve to the closed position.
Disconnect the filter and replace with the new part, ensuring to refit the seals.
Feed the pipes back into the toilet base, turn the power back on and re-set the RCD Re-open the stop valve. Re-fit the seat and secure into position.
22
DRAINING THE WATER TANK The water and power must be cut to the unit before work is started Do not invert the seat. Ensure a water holding container is in place prior to draining
Using pliers hold the plug on the tank turn the plug to OPEN and pull out Water will start to drain. After draining is completed, insert the plug and turn to CLOSE.
23
TROUBLESHOOTING
Problem
Potential cause The power supply may not be connected The water supply may be disconnected
The washing function The filter may be blocked
not operating
Seat detector not activated
Toilet lid is closed
Function not used for more than 72 hours
Washing function suddenly stops and nozzle retracts.
Low water flow rate
The washing cycle is 3mins. The nozzle will stop spraying after 3mins, and then retract. Water supply interrupted The seat detector has sensed the user left the seat The toilet lid is not fully open The water flow rate may be set at low grades The water supply pressure may be too low The filter may be blocked
Low water temperature
The nozzle may be blocked The water temperature may be set at low grades The temperature of water supply is too low
The nozzle comes out slowly The water flows out but the nozzle does not come out The dryer cannot work
Low air temperature
Night light is always off
Night light is always on.
Upon starting the washing function, the nozzle will be in self-cleaning mode before coming out. The toilet is not used for more than 72 hours
The power supply may not be opened Not correctly seated The cover is closed The air temperature may be set at low grades
The air heater is not working normally To much light in the surrounding environment.
The night light function may be closed. Something may be covering the control dial. The night light is set at always on mode The nozzle goes back after washing 5 minutes.
Suggested action Ensure the power switch is in the on position and the RCD has been reset. Ensure the inlet water valve is in the open position, and ensure there is adequate water flow to the unit. Please replace a new filter. It has a service life of approx. 6 months. Ensure the seat is occupied to activate the function. Lift the toilet seat. The self-cleaning function will activate, which takes around 3 minutes. During self-cleaning all the buttons are deactivated until the function has completed.
This is normal and please press the "wash" button to start another wash cycle.
Please check if there is a water outage
Please adjust sitting position
Ensure the lid remains upright during the function. Please increase the flow rate as per "adjusting water flow rate" of operating instructions Please check and ensure the water supply pressure is 0.07Mpa Replace the filter. It has a service life of approx. half a year Please replace the nozzle Please set the water temperature at high grade as per "adjusting temperature "of the operating instructions Please set the water temperature at high grade as per "adjusting temperature "of operating instructions, or decrease the flow rate as per "adjusting water flow rate".
This is normal
This is normal. If not used for more than 72 hours, when the unit starts it will begin the self-cleaning for about 3 minutes
Please turn on the power
Please sit on the seat and adjust sitting position Please open the cover and sit on the seat Please set the air temperature at high grade as per "adjusting temperature "of operating instructions
Please contact local distributor
When the night light is set at smart mode, the night light will not work when in the bright environment. Please open the night light function and adjust the night light mode as per "Light Setting". When the night light is set at smart mode, the night light will be always on when in a dark environment
Remove the obstructions around the control dial
Please adjust the night light mode as per "Light Setting" of operating instructions
24
The nozzle goes back automatically when manual cleaning
The remote control is not functioning
There are BEEP sounds when the bidet is working The bidet cannot work normally The light around the control dial flash twice with constantly BEEP
Press the "stop" button
The seat detector senses that the seat is closing
There are no batteries in the remote control Maybe the battery power is too low Maybe the code of the bidet and remote control is not the same There is a short BEEP when you are sitting down, and a long BEEP when you leave. Also, there is a short BEEP when the bidet has received commands.
This is normal Manual cleaning will be stopped if you press the control dial or press the "stop" button on the remote control. Change the batteries
Please install the correct batteries in the remote control Please set the code of the remote control to the correct one. See "One-On-One Setting"
This is normal. You can turn off the sound. See "Sound Setting"
Maybe there is something abnormal
Please shut off the power and turn on after one minute. If the bidet still cannot work, please contact local distributor
The water supply temperature Check the temperature settings on the remote. If
may be too high
nothing changes, contact the retailer.
There may be something wrong with the product
Please shut off the power and water supply, stop using the product, and then contact local distributor.
Recycling facilities are now available for all customers at which you can deposit your old electrical products. Customers will be able to take any old electrical equipment to participating sites run by their local councils. Please remember that this equipment will be further handled during the recycling process, so please be considerate when depositing your equipment. Please contact the local council for details of your local household waste recycling centers.
At the time of printing the product contains no substances listed within Annex XIV of the Reach Regulations (EC) 1907/2006. In accordance with Article 59 of the same regulation the following substances are contained within the product at permitted levels: Lead & Cadmium. As a responsible manufacturer the regulations are monitored to ensure continued compliance. Further information can be provided upon request.
UK SUPPORT Call: 0871 244 0935
Office hours: 9AM - 5PM Monday to Friday
www.BetterBathrooms.com Unit J6, Lowfields Business Park
Lowfields Way, Elland West Yorkshire, HX5 9DA
25
TECHNICAL SPECIFICATIONS
MODEL
Wash
Rear Wash Front Wash Oscillating Spray Pulsating Spray
Oscillating and Pulsating Spray Adjustable Water Temperature Adjustable Flow Rate
Adjustable Spray Position
Warm Air
Air Drying Adjustable Dryer Temperature
Hygiene
Nozzle Self Cleaning Nozzle Manually Cleaning
Night Light
Breathing Lamp
Soft Closing Seat and Cover
Body Control dial
Remote Control
Rimless Toilet
Installation of the toilet
Water Supply Connector
Rated Voltage
Power
Length of Power Cord
Water Supply Pressure
Water Supply Temperature
Ambient Temperature
Protection Degree
Flow Rate
wash Device
Water Temperature Wash Cycle Time Heating Mode
Maximum Heater Power
Safety Device
Dry Device
Backflow Prevention Maximum Speed Of Air Maximum Dryer Power Dry Cycle Time Warm Air Temperature
Safety Device
Frequency Range
Remote Control
Maximum RF Output Power Type of batteries
Number of batteries
Net Weight
Dimensions
BeBa_24912
5 Steps (Default 3rd) 5 Steps (Default 3rd) 5 Steps (Default 3rd) 5 Steps (Default 3rd) Floor Mounted/Elevated
G 3/8" ½" AC220240V, 50/60HZ
950W 1.8m 0.07~0.75MPa (0.7~7.5Bar) 4~35 C 4~40 C IPX4 350~650mL/min 31~39 C 3 Minutes Tank 1200W
Thermal Cutoff/ Fuses\Liquid Level Switch\Thermostat
Air Gap 5m/S 280W
3 Minutes 35~50 C
Thermal Cutoff/ fuse>\Thermostat 2460MHz 10dBm
3V CR2032 Two pieces
32 Kg 593 x 370 x 380 mm
26
EU DECLARATION OF CONFORMITY
Company Name: Postal Address:
Postcode Telephone Number E-mail Address
Buy It Direct Unit J6, Lowfields Way Elland, West Yorkshire HX5 9DA 0871 620 1057 Compliance@BuyItDirect.co.uk
This declaration of conformity is issued under our sole responsibility and belongs to the following product:
Type of product: Model Number: Brand: Object of Declaration
Floor Mounted Intelligent toilet BeBa_24912 Better Bathrooms BeBa_24912 Floor Mounted Intelligent Toilet
The object of the declaration described above is in conformity with the relevant Union harmonisation legislation:
Low Voltage Directive 2014/35/EU EMC Directive 2014/30/EU RoHS Directive 2011/65/EU Radio Equipment Directive 2014/53/EU
Relevant harmonised standards used or other technical specifications in relation to which conformity is declared:
SAFETY EMC
RED RoHS
EN 60335-1:2012 +A13:2017 EN 60335-2-84:2003 + A1:2008 EN 62233:2008 EN 55014-1:2006 + A2:2011 EN 55014-2:2015 EN 61000-3-2:2014 EN 61000-3-3:2013 EN 300440 V2.1.1:2017 EN 301489 -1 V2.1.1:2017 EN 301489 -3 V2.1.1:2017 EU 2015/863
Authorised Signature
Richard Leach Compliance and Quality Lead 11th August 2019
27
DECLARATION OF PERFORMANCE
Company Name: Postal Address:
Postcode Telephone Number E-mail Address
DOP BB-34-24912
Buy It Direct Unit J6, Lowfields Way Elland, West Yorkshire HX5 9DA 0871 620 1057 Compliance@BuyItDirect.co.uk
This declaration of performance is issued under our sole responsibility and belongs to the following product:
Type of product: Model Number: Brand: Object of Declaration
Floor Mounted Intelligent toilet BeBa_24912 Better Bathrooms BeBa_24912 Floor Mounted Intelligent Toilet
The object of the declaration described above is in conformity with the relevant Union harmonisation legislation:
Construction Product Regulations
Relevant harmonised standards used or other technical specifications in relation to which performance is declared:
BS EN997:2012+A1:2015
Personal Hygiene AVCP System 4
Essential Characteristics CL 1 -6A Class 1 product/ Flushing cistern WL Water Tightness / Leak Tightness BP Back Flow Prevention CA - Cleanability LR Load Resistance DA Durability
PASS PASS PASS PASS PASS PASS
Authorised Signature
Craig Watson Technical Manager 11th August 2019
28
Microsoft Word 2010 Microsoft Word 2010