MAGiCARD Pronto 100 ID Card Printer User Manual
File info: application/pdf · 30 pages · 3.59MB
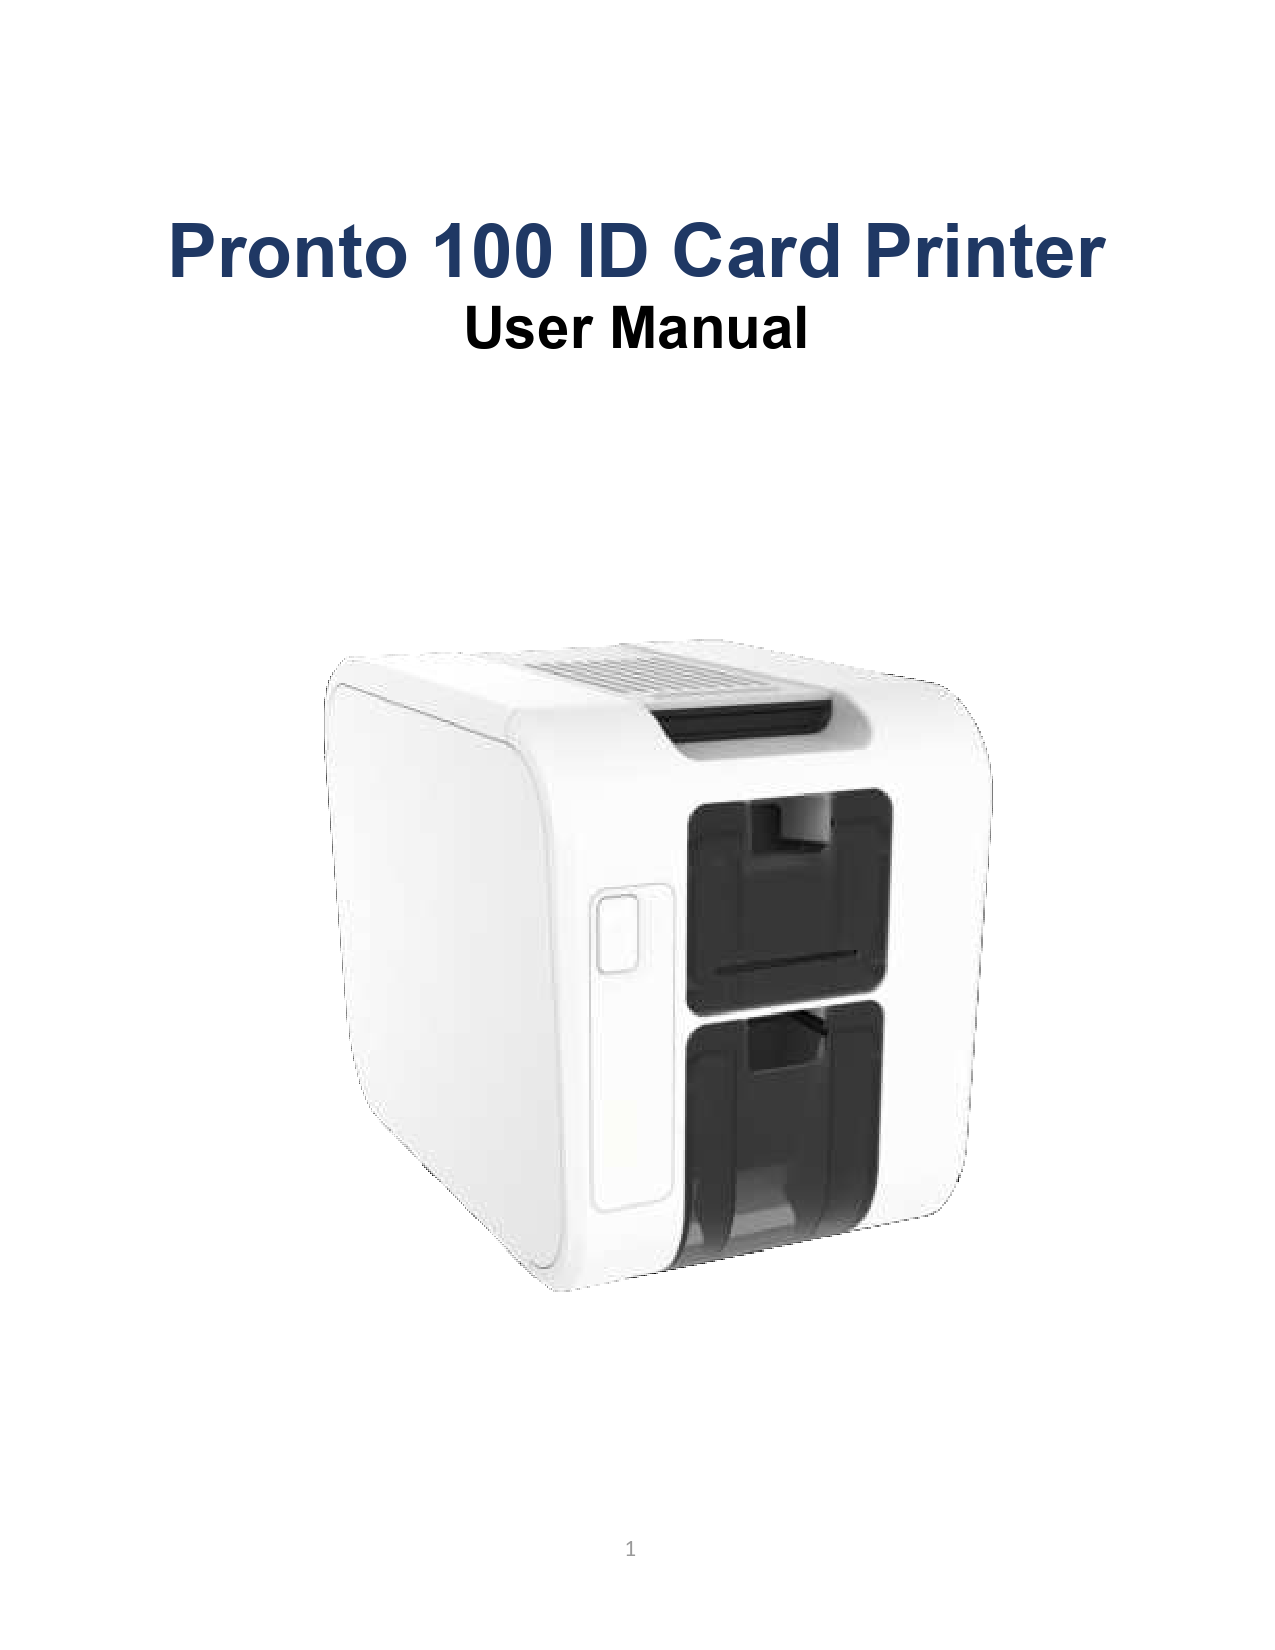
Pronto 100 ID Card Printer
Note: The Quick Start Guide is printed on Printers Packing Please retain this packaging for future reference and transportation in the event the printer develops a fault and needs to be returned to the dealer or factory.
Pronto 100 ID Card Printer - m.media-amazon.com
No: 5380 Issue 1.00 – 06/04/2021 . ... ID Card Printer – User Manual . 12 • You will be prompted for a printer to be connected via USB.
Extracted Text
Pronto 100 ID Card Printer
User Manual
1

ID Card Printer � User Manual
CONTENTS
General Information: ............................................................................................................................................. 3
Safety Instructions:................................................................................................................................................ 3
Caution .................................................................................................................................................................. 3
Printer installation................................................................................................................................................. 4 Welcome ..................................................................................................................................................... 4 Printer and Dye Film Environmental requirements:......................................................................................... 5 Printer Key Components ............................................................................................................................... 6 Installing the Dye Film .................................................................................................................................. 7 Connecting the Power Supply........................................................................................................................ 8
Installing the Driver ............................................................................................................................................... 9 USB Installation.......................................................................................................................................... 11 Ethernet Installation ................................................................................................................................... 14
Accessing the Driver Settings ............................................................................................................................... 18
Printer Front Display Menu Options .................................................................................................................... 19
Maintaining your printer ..................................................................................................................................... 23 Caring for your Printer ................................................................................................................................ 23 Cleaning Supplies ....................................................................................................................................... 23 How to Clean your Printer........................................................................................................................... 24 Using the Cleaning Pen ............................................................................................................................... 25
Choosing the Correct Dye Film ............................................................................................................................. 26
Choosing the correct Cards .................................................................................................................................. 27 Card size .................................................................................................................................................... 27 Card thickness............................................................................................................................................ 27 Card requirements necessary for good quality prints .................................................................................... 27 Printable area of the Card ........................................................................................................................... 27
General Data Protection Regulation (GDPR) ........................................................................................................ 28
FCC Declaration: ............................................................................................................................................ ....- 2 -
CE Declaration: .................................................................................................................................................. - 3 -

Document No: 5380 Issue 1.00 � 06/04/2021

2

ID Card Printer � User Manual
GENERAL INFORMATION:
This document contains proprietary information belonging to Magicard Ltd. and may not be wholly or partially copied, stored in a data retrieval system, or used for any purpose other than that for which it was supplied, without the express written authority of Magicard Ltd. All rights are reserved. Microsoft and Windows Vista and Windows 7, 8 and 10 are trademarks of Microsoft Corporation. Copyright � 2011 Magicard Ltd. Magicard Ltd. shall not be liable for errors contained herein or for incidental consequential damages in connection with the furnishing, performance or use of this material. Magicard Ltd. reserves the right to change the content of this document without prior notification.
SAFETY INSTRUCTIONS:
� To prevent electric shock do not remove covers. � Do not attempt to service the printer yourself. � There are no user serviceable parts inside (either printer or dye film). In the event of malfunction, contact your
printer/consumable supplier. � This product is only to be used with the Power Source supplied at point of purchase. � Take care not to spill any liquid on the printer. � When handling the printer avoid touching the printing edge of the Thermal Print Head. Any grease and
contamination will shorten its life. � Before transporting the printer, remove dye film & card hoppers and pack the printer in its original packaging to
reduce the likelihood of damage in transit. Magicard is not responsible for printers/items inadequately packaged.
If using this printer in Germany: To provide adequate short-circuit protection and over-current protection for this printer, the building installation must be protected by a 16 Amp circuit breaker. Bei Anschlu� des Druckers an die Stromversorgung mu� sichergestellt werden, da� die Geb�udeinstallation mit einem 16 A-�berstromschalter abgesichert ist.
CAUTION
Unapproved changes or modifications to the equipment could void the User's authority to operate the printer and affect any related warranty claim.
3

ID Card Printer � User Manual
PRINTER INSTALLATION Welcome
Thank you for choosing your ID Card Printer. This guide will help you make your printing experience more enjoyable and cost effective. Please ensure you have the following items outlines in the Quick Start Guide below before you begin the installation:
Note: The Quick Start Guide is printed on Printers Packing Please retain this packaging for future reference and transportation in the event the printer develops a fault and needs to be returned to the dealer or factory.
4

ID Card Printer � User Manual
Printer and Dye Film Environmental requirements:
See Below
Normal Office environment with: � Ambient temperature +10 to 30oC (50 to 86oF). � Protection from direct sunlight and chemicals. � Protection from sudden temperature changes. � Relative Humidity 20 - 70% � Sufficient space for: - Opening the printer's Lid. - Cable access at the rear.
5

ID Card Printer � User Manual
Printer Key Components
Print Head Assembly

Front Display Panel

Front Hopper (50 Card capacity)
Front Stacker (50 Card capacity)

Ethernet

Aux USB

DC Power

USB

Rear Connector Panel
Printer Rear View 6

Printer Rear Connector Panel

ID Card Printer � User Manual
Installing the Dye Film
Open the printer's Lid and insert the dye film as shown in the diagram below. If the printer's lid is closed (with the printer powered on and the dye film fitted), the printer will begin to initialize. As part of this process, the printer will read an identification tag in the Film which contains information about the film type and capacity.
7

ID Card Printer � User Manual
Connecting the Power Supply
Connect Mains Power Supply lead as shown below but do not connect the USB lead at the stage (the USB is connected after the Driver has successfully been installed).

Do not connect the USB lead at this stage. 8


ID Card Printer � User Manual
INSTALLING THE DRIVER
The latest version of Driver for your Pronto 100 printer can be downloaded using the following weblink: https://start.magicard.com.
The Driver installation software will guide you through the installation process. This website provides complete End User support covering:
� Unboxing and setting up your printer. � Updating the printer's firmware. � Card Design software. � The option to Register your printer.

Pronto100 Series

Printer Model Variants
� 3100-0001/* Pronto 100
*Region codes: 2- USA, 3 � Europe, Japan, South Korea and Australasia.

9

ID Card Printer � User Manual
Installer Guide: � Click on the "setup.exe" icon. � Select the relevant language.
� Click "Install".
10

USB Installation

ID Card Printer � User Manual

� Select the port type for the installation. � Select "USB" and click "Next". � Agree to the license agreement.

11

ID Card Printer � User Manual
� Wait for the installation progress bar to finish.
� You will be prompted for a printer to be connected via USB.
� If no printer is connected, you will be asked to reconnect and retry.
NOTE: If "Cancel" is clicked, you will be asked to confirm this. The Installer will then end. The installation will be completed but the printer will not be connected. This will happen when the printer is physically connected via the USB.
12

ID Card Printer � User Manual
� After completion of the installation, you will be prompted with the following dialog to signal the installation is complete:
� Finally register your printer to validate your full warranty:
13

ID Card Printer � User Manual
Ethernet Installation
� First the printer must be installed via USB as described in the previous steps. � Ensure that the printer is connected via the Ethernet connector at the rear to an active
network. � To obtain the IP address of the printer go to Printer Properties and click Query in the
Network Configuration section.
� Go to the "Start" menu and navigate to "Printers & Scanners" � Click on "Add a printer or scanner" � Scroll down and click "The Printer that I want isn't listed"
14

ID Card Printer � User Manual
� From the Add Printer menu select "Add a printer using a TCP/IP address or hostname" � Under "Hostname or IP address:" type in the IP address obtained in the earlier step. Note
the Port name should auto populate. Click Next
15

ID Card Printer � User Manual
� After the system finished searching you may be prompted with "Additional port information require". Click "Standard" (default) and Next
� You will now be prompted to "Install the printer driver" In the left-hand column scroll through manufacturers to "Magicard Ltd". Once selected the right-hand column will update. Scroll through until you find the Pronto 100. Select and click Next.
16

ID Card Printer � User Manual
� You may be prompted to select version of driver. Select "Use current (recommended)"
� You may be prompted to name the printer � leave as default and click Next � At the "Printer Sharing" prompt � select "do not share" (default) and click Next � You will now be presented with "You've successfully added Magicard Pronto 100 (V2)"
and have the option to set as the default printer and print a test image. Click Finish to complete.
17

ID Card Printer � User Manual
ACCESSING THE DRIVER SETTINGS
Accessing the Driver "Printing Preferences" Settings (Windows 10 (64 bit) shown for information purposes).
The printer's Driver settings (Printing Preferences) can be accessed as follows: � Right-click on the "Start" menu icon (bottom left of PC screen) and select the "Search" option. � Search for "Control Panel and select the "Devices and Printers" option (you may need to set your "View by:" option to "Small icons" depending on your PC setup). � In the "Devices and Printers" window, right-click on the printer thumbnail image and select "Printing Preferences".
P100 (V2)
18

ID Card Printer � User Manual

Printing Preferences
Driver Tabs
Printer This is the default tab and offers the User the option to change card orientation, size, and print resolution.
Card Front Options to change the colour format, Image rotation and Security layer image.
Image Image manipulation options including colour correction, print head power (density) and colour adjustment. Colour Profiles also supported.
Advanced Re-writeable card support including the option for User defined areas on card.
Save Specific User settings can be saved and restored later. Factory Restore option available.

Help with Driver Settings
The Printer Driver contains a built-in help file (in HTML format) � this file gives an excellent, clear explanation of each Driver setting.
To view the Driver's help file, go to the Printing Preferences (as described above), and click on the "Help" Button.

PRINTER FRONT DISPLAY OPTIONS & STATUS INDICATORS
Each error type is indicated by illuminating the appropriate indicator from the 3 available LEDs shown below. Each LED can be off, steady on, or flashing at controlled intervals (set within software and therefore modifiable).

Power LED

Media LED Cleaning LED Information LED

19

ID Card Printer � User Manual

LED CONFIGURATION LED BEHAVIOUR

ERROR CATEGORY

INFORMATION LED STEADY

GENERAL_ERROR

ERROR CODES
01:XX 08:XX 10:XX 11:XX 12:XX 15:XX 16:XX 17:XX 18:XX 19:XX 31:XX 32:XX

MEDIA LED STEADY

MEDIA_CARDS

MEDIA LED FLASHING

MEDIA_FILM

INFORMATION LED FLASHING

CRITICAL_ERROR

CLEANING LED EQUAL FLASH EVERY 1.3sec
(0.77Hz)

CLEAN_REQUIRED

20

02:XX 04:XX
05:XX 06:XX 07:XX 24:XX 25:XX 33:XX 34:XX 13:XX 14:XX 20:XX 21:XX 26:XX 28:XX 29:XX
27:XX

ID Card Printer � User Manual

LED CONFIGURATION

POWER LED BEHAVIOUR

STATUS LED BEHAVIOUR

PRINTER STATUS

OFF

OFF

OFF

Every 6sec Every 1sec

STEADY

OFF

SHORT PULSE EVERY 6sec (0.167Hz)

OFF

EQUAL FLASH EVERY 1sec (1Hz)

OFF

IDLE STANDBY
BUSY

EQUAL FLASH EVERY 1sec (1Hz)

EQUAL FLASH 3Hz

WAITING FOR CLEANING CARD

21

ID Card Printer � User Manual

Every 1sec Every 1sec

EQUAL FLASH EVERY 1sec (1Hz)

STEADY ON

CLEANING

HEARTBEAT DOUBLE

PULSE EVERY 1sec

OFF

(1Hz)

SOAKING

EQUAL FLASH EVERY EQUAL FLASH EVERY 1sec

1sec (1Hz)

(1Hz)

UPGRADING

22

ID Card Printer � User Manual
ADDITIONAL USEFUL INFORMATION Caring for your Printer MAINTAINING YOUR PRINTER IS IMPORTANT!
� Maintenance is an important factor of your printer's good operation and longevity. � Maintaining a regular cleaning routine will give you optimum print quality and prevent down
time. We recommend that you clean the printer's rollers and Print Head each time you change Dye Films. � A clean printer will produce superior quality ID Cards and is less likely to require factory maintenance and/or repair. � In normal environments, regular maintenance should improve the longevity of the Print Head itself. (Remember... foreign particles can lodge under the Head and cause permanent damage!)
Cleaning Supplies
10x Cleaning Cards & 1x Cleaning Pen (Pt. E9100)
Note: Cleaning supplies can be purchased from you printer supplier.
23

ID Card Printer � User Manual
How to Clean your Printer
1. Remove Dye Film 2. With the lid open, press twice on the power button in quick succession to begin a cleaning routine. 3. Insert the cleaning card when prompted. 4. Once cycle is complete, we recommended repeating once more with the other (clean side) of the cleaning card to
maximize cleaning effect.
24

ID Card Printer � User Manual
Using the Cleaning Pen
The Cleaning Pen (supplied with the Cleaning Kit (E9100 � see page 23) is used to clean the face of the print head. The pen contains Isopropyl Alcohol (IPA) and is very effective at removing light grease (such as finger grease etc.) which would otherwise spoil a printed card. To use, simply run the tip of the pen across the print face several times as shown in the diagram below. Once clean, do not touch the print face!
25

ID Card Printer � User Manual

CHOOSING THE CORRECT DYE FILM
Below is a general guide to selecting the most suitable Film for any typical application.

Dye Film Part Number

Film Panel Layout

Print Capacity (Cards)

MD100YMCKO/2,3 MD50YMCKO/2,3

YMCKO YMCKO

100 (Printing color one side only).
50 (Printing color on one side only).

Typical Images
Single Sided Color Side 1 only
Single Sided Color Side 1 only

Film Panel Key:

Yellow (Y)

Magenta (M)

Cyan (C)

Resin (K) black

Overcoat (O) clear

26

ID Card Printer � User Manual
CHOOSING THE CORRECT CARDS
Not all white PVC Cards are the same. For best image quality always use high grade PVC Cards. Pure PVC Card stock or laminated PVC/Polyester Cards are available. The latter are more durable and better suited to heavy use and heat lamination when required. For access control and Smart Card applications, your supplier should provide the appropriate type for "direct to card" printing. For consistent results, stick to a single variety of good quality Cards.
Card size
CR80 (Standard) = 3.375" x 2.125" (86.5 mm x 53.98 mm). (w x h)
Card thickness
Standard � 0.020" (0.50 mm). Maximum � 0.040" (1.00 mm).

Card requirements necessary for good quality prints

� Glossy white. � Free from contamination. � Free from surface irregularities. � Free from burrs at Card edges.

Printable area of the Card
The printable area of a standard CR80 Card is size of 1013 x 642 pixels to obtain "over the edge" print quality.

85.60 mm 3.375 inches 1013 pixels

Available Card Types:

M9006-793 M9007-011 M3610-054 M9006-796

Premium blank white cards � CR80 Self-adhesive blank white cards � CR80 Self-adhesive blank white cards � CR80 (USA) HoloPatch� blank white cards with gold seal � CR80

54.0 mm 2.125 inches
642 pixels

27

ID Card Printer � User Manual
Using Self Adhesive Cards
There are many types of self-adhesive cards. Thorough investigation and testing have shown that poor quality or incorrect card types will cause:
� Poor image quality. � Card feed failures. � Cutting or snapping dye film. � Cards jamming during printing. We recommend only using self-adhesive cards supplied by your ID card supplier.
GENERAL DATA PROTECTION REGULATION (GDPR)
Digital shredding - Once data has been used for the print job, it is fragmented, rendering it irrecoverable, helping to ensure the Pronto 100 is not a repository for data.
28

ID Card Printer � User Manual

FCC DECLARATION:
Note: This equipment has been tested and found to comply with the limits for a Class B digital device, pursuant to part 15 of the FCC Rules. These limits are designed to provide reasonable protection against harmful interference in a residential installation. This equipment generates, uses and can radiate radio frequency energy and, if not installed and used in accordance with the instructions, may cause harmful interference to radio communications. However, there is no guarantee that interference will not occur in a particular installation. If this equipment does cause harmful interference to radio or television reception, which can be determined by turning the equipment off and on, the user is encouraged to try to correct the interference by one or more of the following measures:

�

Re-orient or relocate the receiving antenna.

�

Increase the separation between the equipment and receiver.

�

Connect the equipment into an outlet on a circuit different from that to which the receiver is connected.

�

Consult the dealer or an experienced Radio/TV technician for help.

CAUTION:

Unapproved changes or modifications could void the Users authority to operate the equipment and affect any related warranty claim.

FCC SDOC:
Supplier's Declaration of Conformity 47 CFR � 2.1077 Compliance Information
Unique Identifier: Pronto 100, 3100-0001
Responsible Party: Magicard Inc.
12919 � NE 126th Place, Suite B244, Kirkland, WA, 98034, USA
FCC Compliance Statement:
This device complies with Part 15 of the FCC Rules. Operation is subject to the following two conditions: (1) This device may not cause harmful interference, and (2) this device must accept any interference received, including interference that may cause undesired operation.

- 2 -

CE DECLARATION:

ID Card Printer � User Manual

- 3 -