ECI Satellite Communication A S RTU4120A Iridium Telephone System User Manual B4150GB0 0 p65
ECI Satellite Communication A/S Iridium Telephone System B4150GB0 0 p65
UserManual.wiki
>
ECI Satellite Communication A S
>
RTU4120A User Manual
>
User manual Sailor
Contents
1.
User manual Sailor
2.
User manual Skanti
3.
User manual Iridium
4.
Installation manual Sailor
5.
Installation manual Skanti
User manual Sailor
Navigation menu
Upload a User Manual
Namespaces
Wiki Guide
HTML
PDF
Info
Views
User Manual
Discussion / Help
Navigation


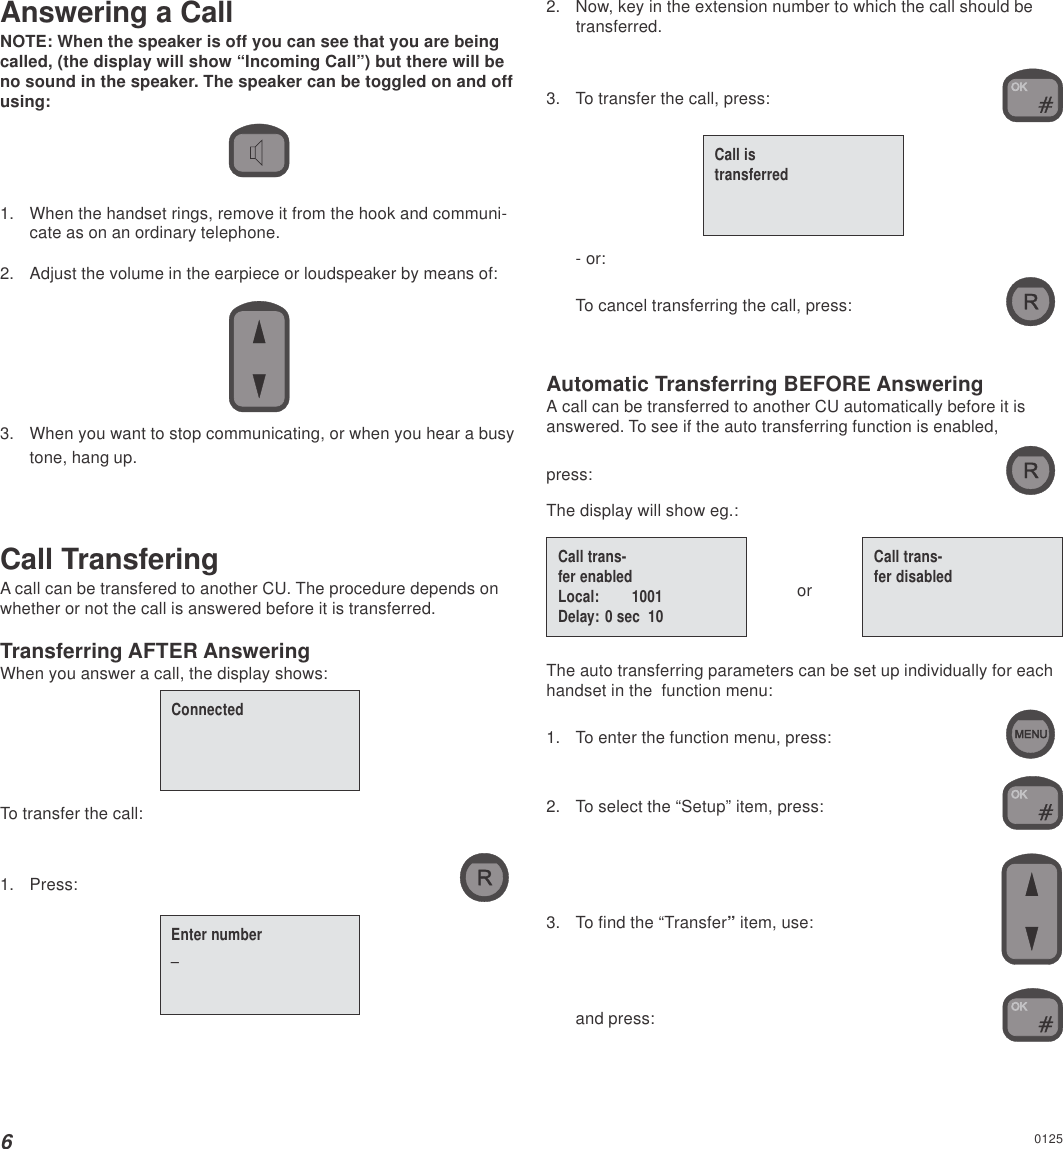

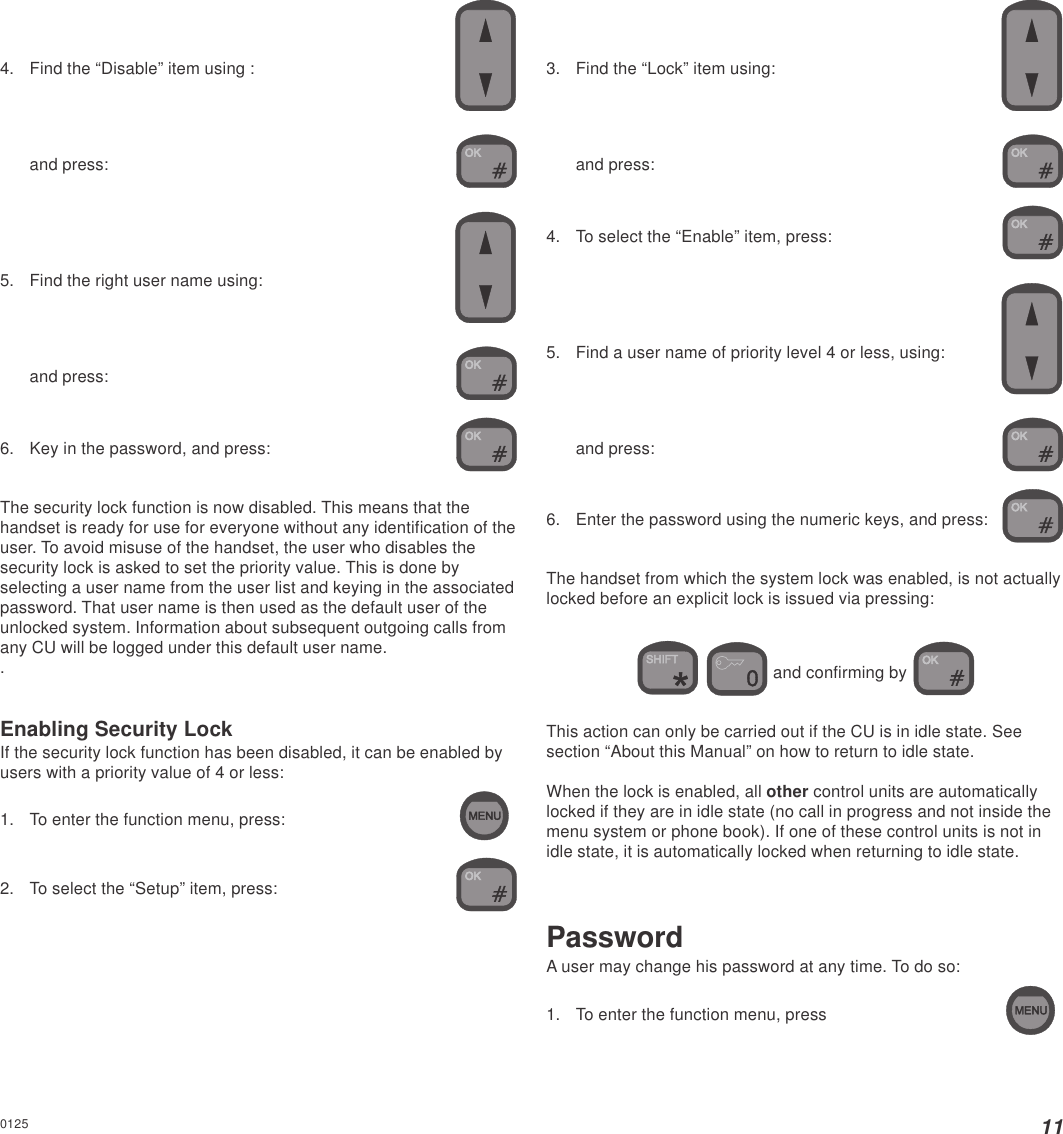
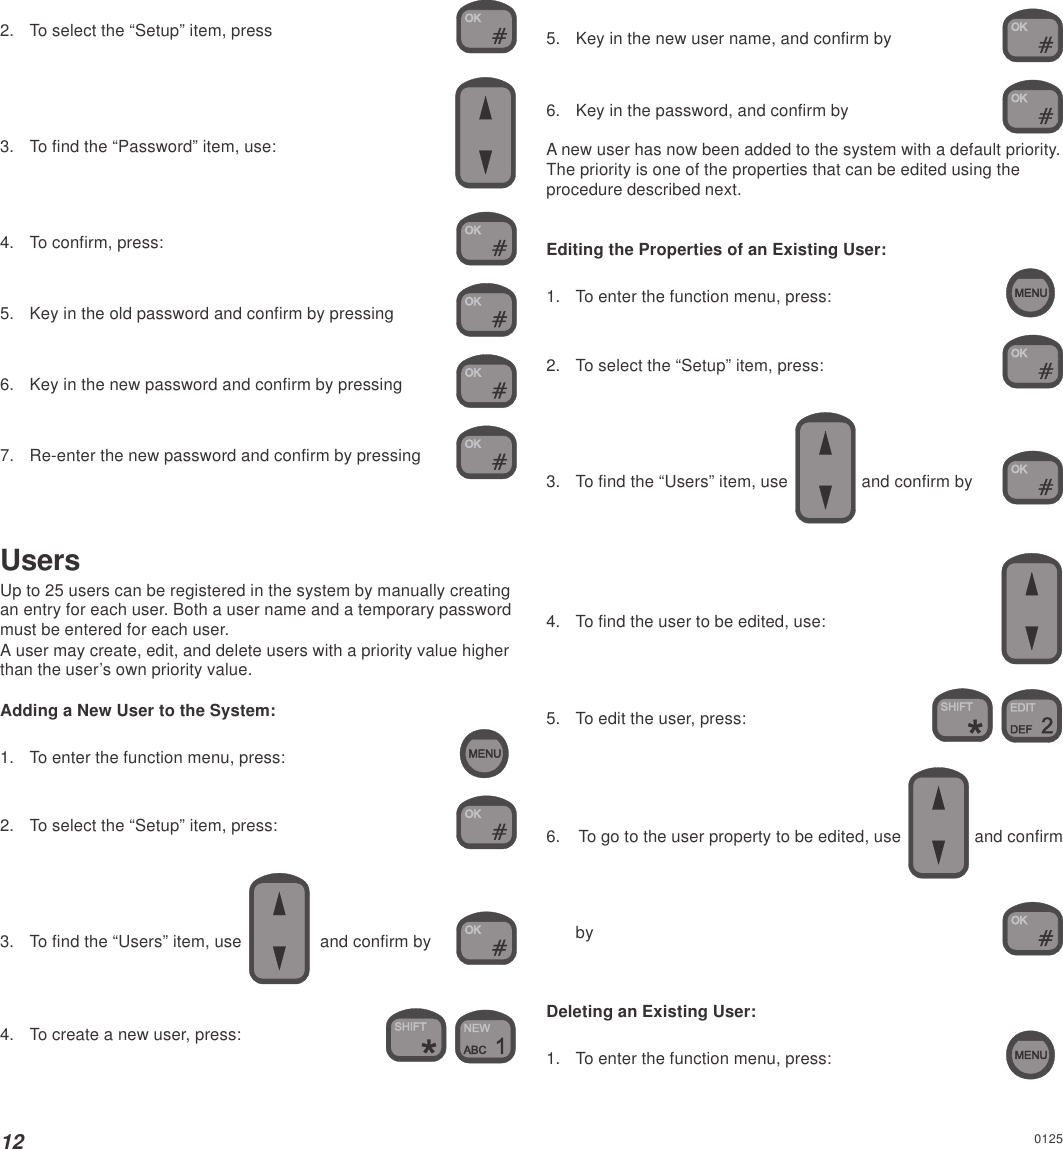
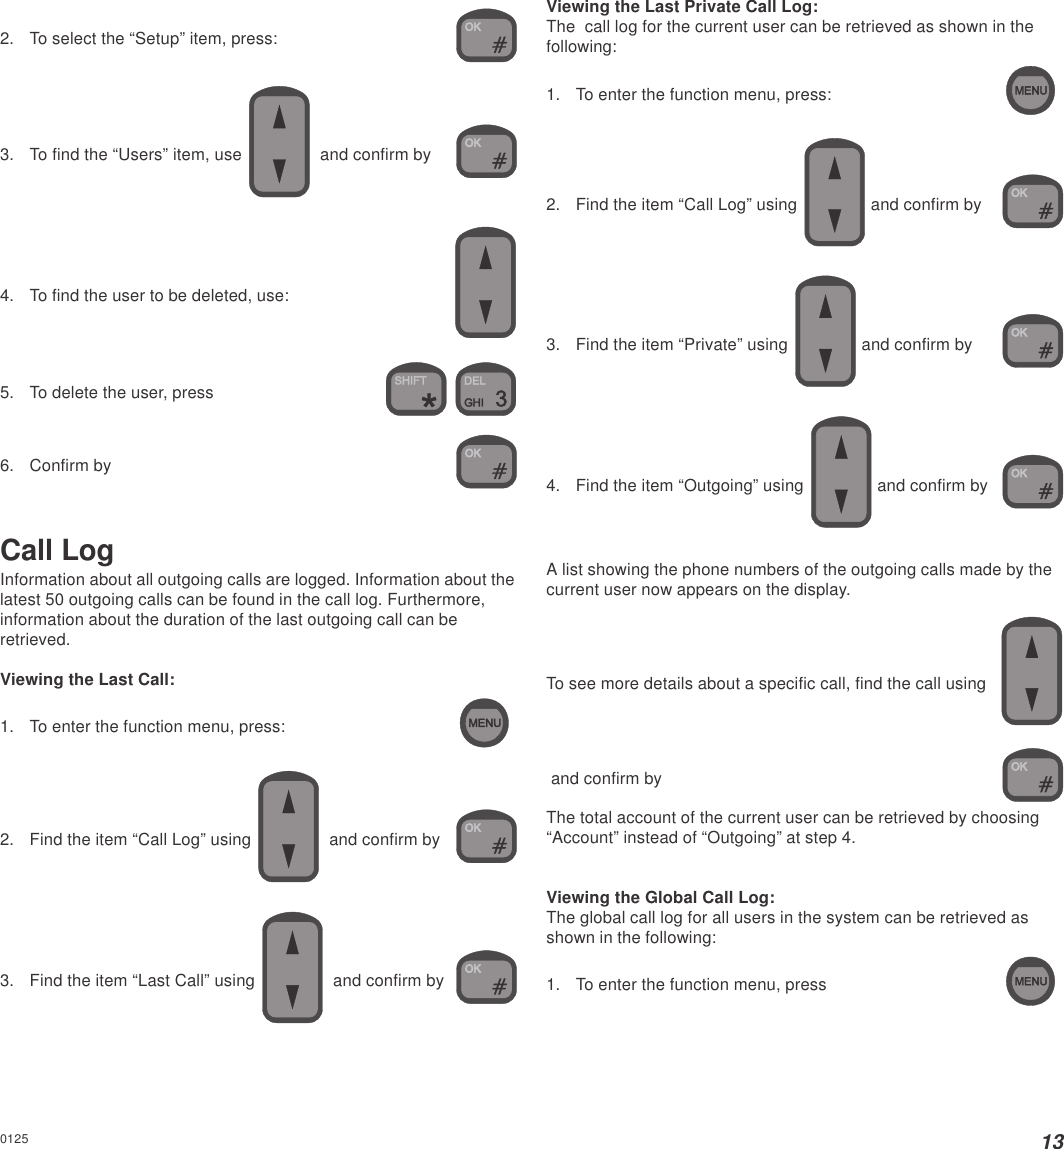
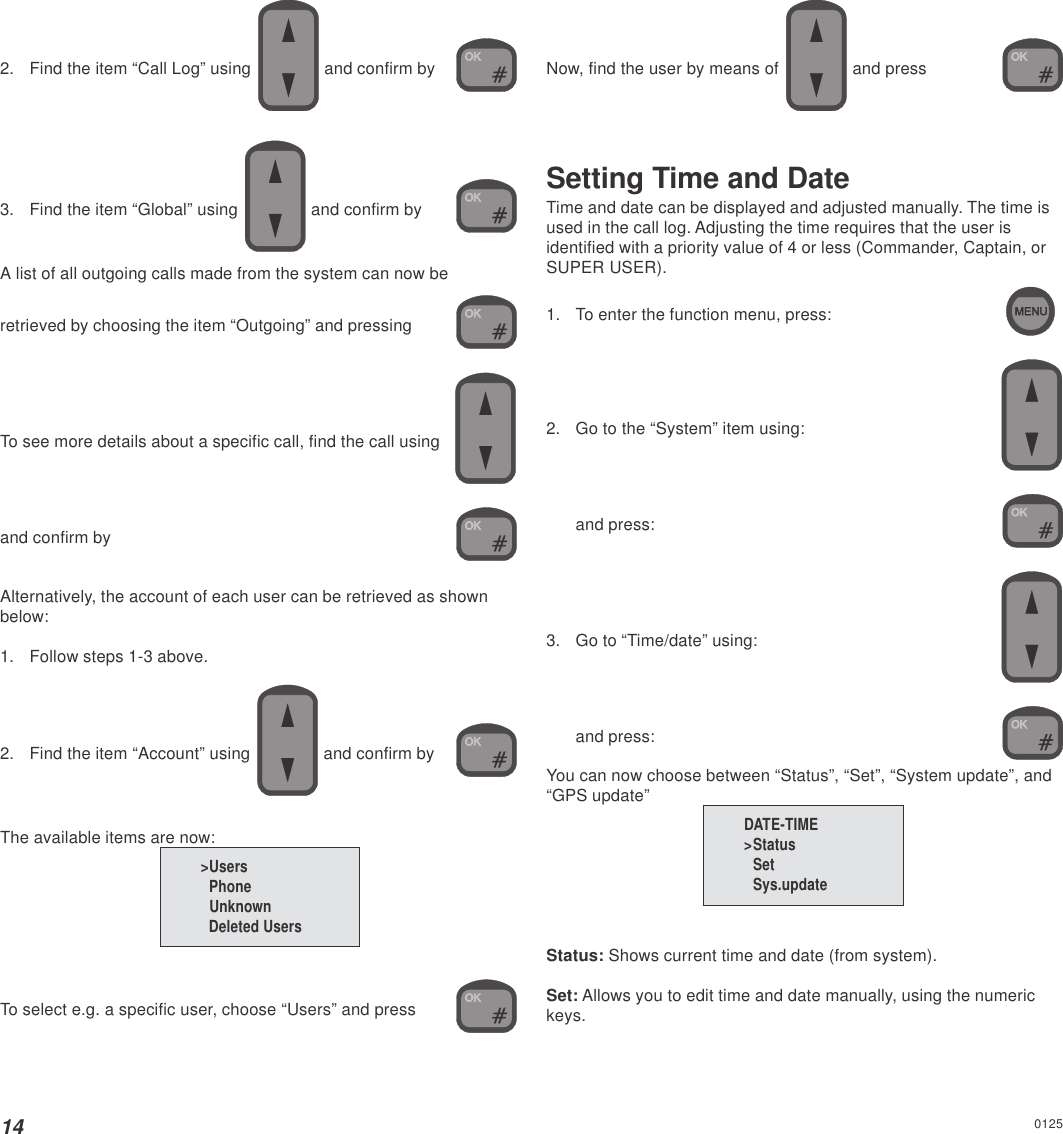
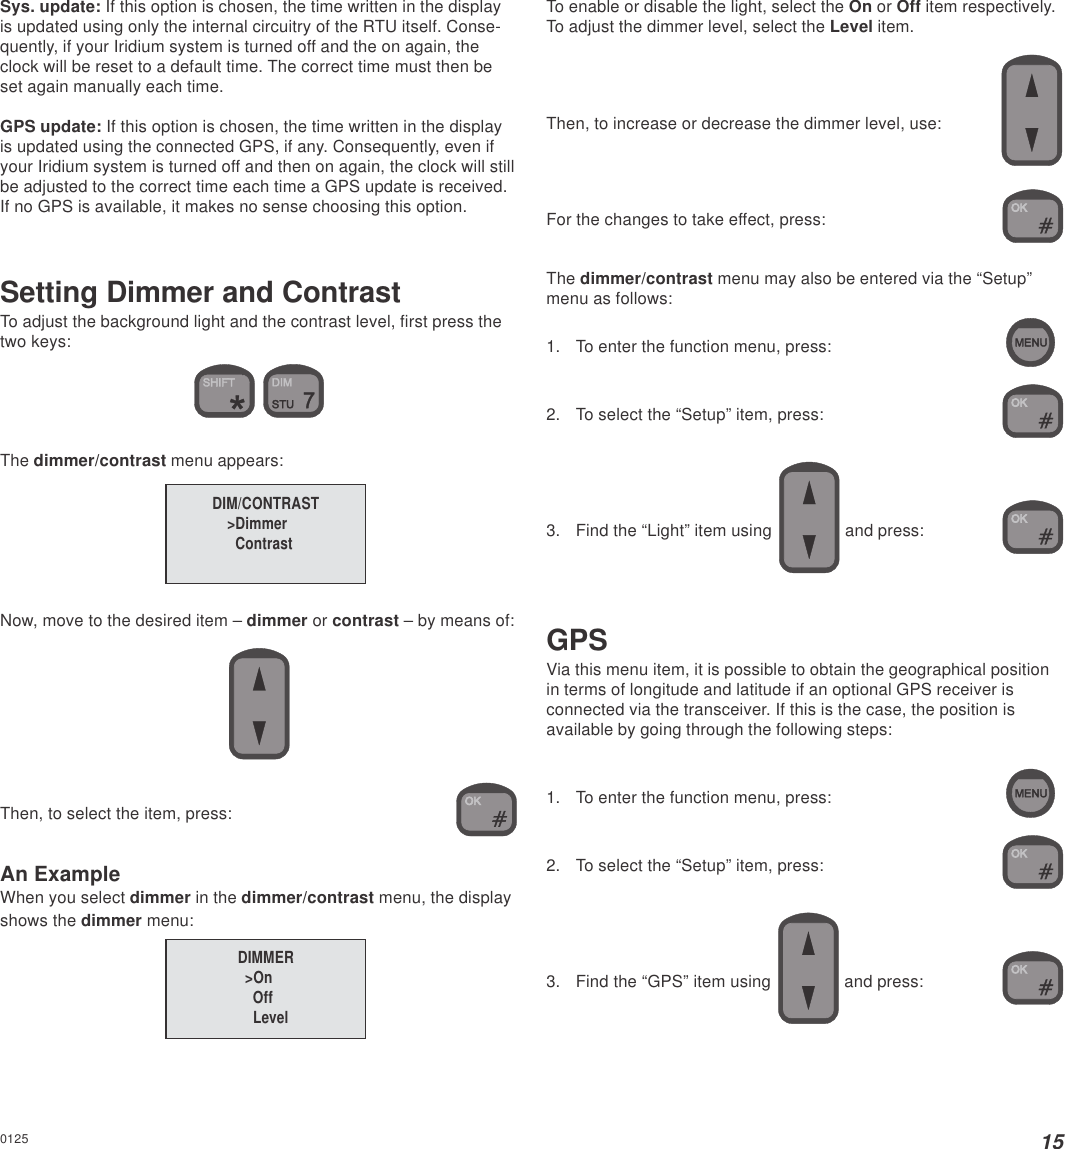
![20•Forward all calls: All external incoming calls will immediately beforwarded to the number you specify when you activate thiscategory.•Forward on not reachable: When your Iridium equipment hasbeen turned off or cannot for some reason be contacted by thenetwork or when the line of your Iridium equipment is occupied,either by an internal or an external call, external incoming callswill be forwarded to the number you specify when you activatethis category.Note: By default, the above two categories of calls will all beforwarded to your personal mailbox. When you activate a category,the calls in this category will be forwarded to the number that youspecify and no longer to your personal mailbox.In the following, the procedures for activating, restoring and review-ing settings for the above two categories are described. As usual,when manually dialing a number to call, this must be done from idlestate.Forwarding all CallsActivate:1. Hook off2. [country code] [telephone number] Deactivate:1. Hook off2. Forwarding on no AnswerSetting a new number to forward to:1. Hook off2 [country code] [telephone number] Reactivaiting forwarding to personal mailbox:1. Hook off2. [personal mailbox retrieval number] Reviewing the number to forward to:1. Hook off2. Voice MailNOTE: This feature is only available with RTU softwareversion 3.0.0 and higher.Voice mail allows callers to leave a voice message in your personalmailbox. As described in section “Call Forwarding”, by defaultexternal incoming calls are forwarded to your personal mailbox if thecall is not answered, if your equipment is switched off, if your Iridiumsystem is occupied by an internal or external call or cannot, for somereason, be contacted by the Iridium network. Therefore these callswill be forwarded to your personal mailbox unless you set a newtelephone number to transfer to.0125](https://usermanual.wiki/ECI-Satellite-Communication-A-S/RTU4120A.User-manual-Sailor/User-Guide-318787-Page-24.png)
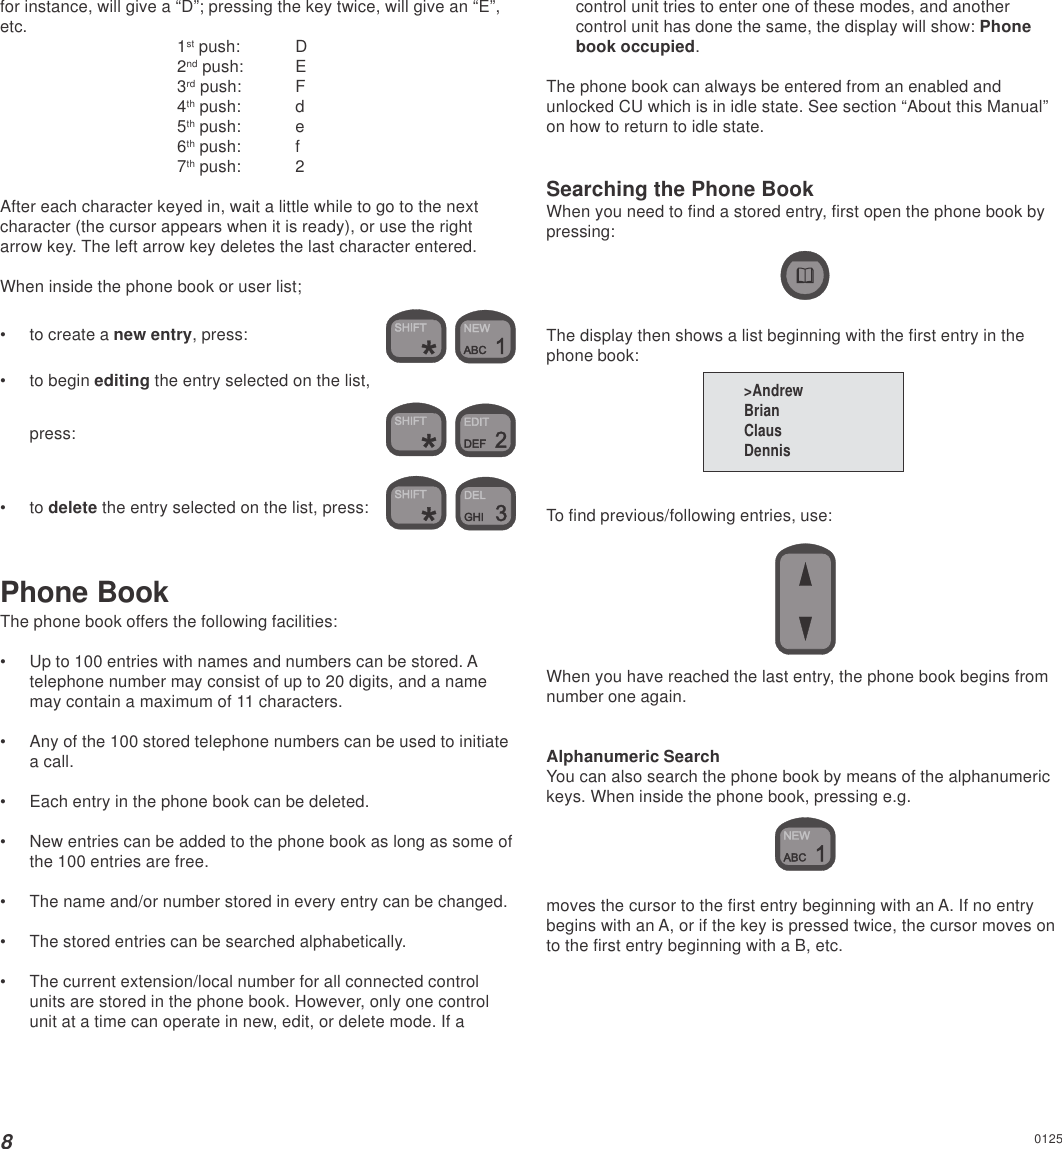
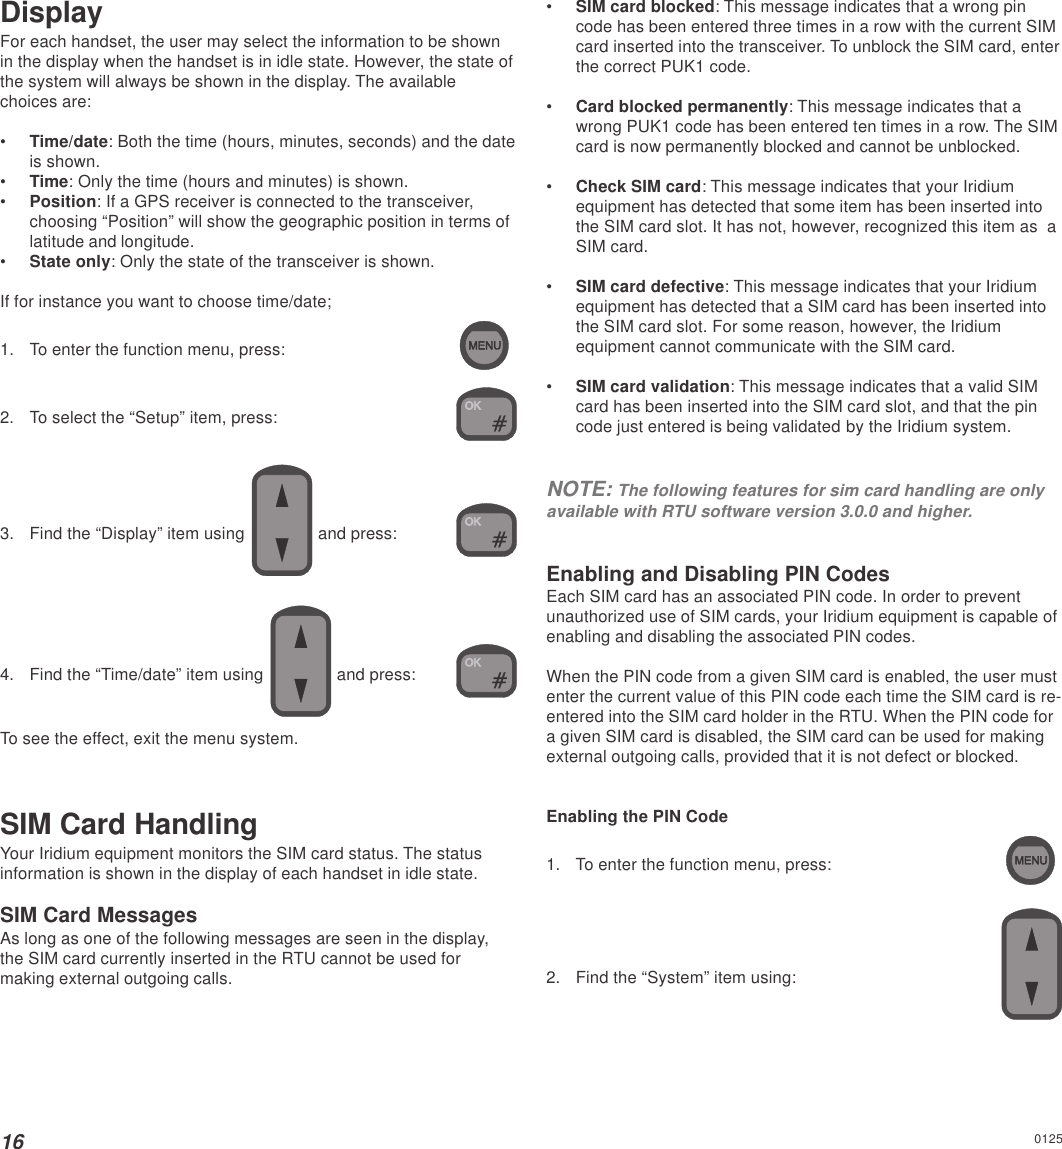
![21You may record a personal greeting which the callers will hear whenthey are forwarded to your mailbox. After hearing your personalgreeting, callers can leave a voice mail message which is stored inyour mailbox.Your personal mailbox has a lot of features which can be configuredby you. The caller also has a number of facilities to choose betweenwhen forwarded to your mailbox. See the “Iridium Services UserGuide” that comes together with your Iridium equipment.Call BarringNOTE: This feature is only available with RTU softwareversion 3.0.0 and higher.Call barring allows you to bar either all external incoming or allexternal outgoing calls. If you bar external incoming calls, yourIridium equipment will not receive external incoming calls. If you barexternal outgoing calls, nobody will be able to place externaloutgoing calls from your Iridium equipmentNote: External incoming calls will not be sent to your personalmailbox if call barring of external incoming calls is active.Before activating call barring, disable all types of call forwarding:1. Hook off2. Reactivating call forwarding and restoring your previous settings:1. Hook off2. Barring external incoming calls:Activate:1. Hook off2. [password] Deactivate:1. Hook off2. [password] Barring external outgoing calls:Activate:1. Hook off2. [password] Deactivate:1. Hook off2. [password] If you want to change the call barring setting you must enter yourpassword. The initial password will be supplied by your serviceprovider.Changing Your password :1. Hook off0125](https://usermanual.wiki/ECI-Satellite-Communication-A-S/RTU4120A.User-manual-Sailor/User-Guide-318787-Page-25.png)
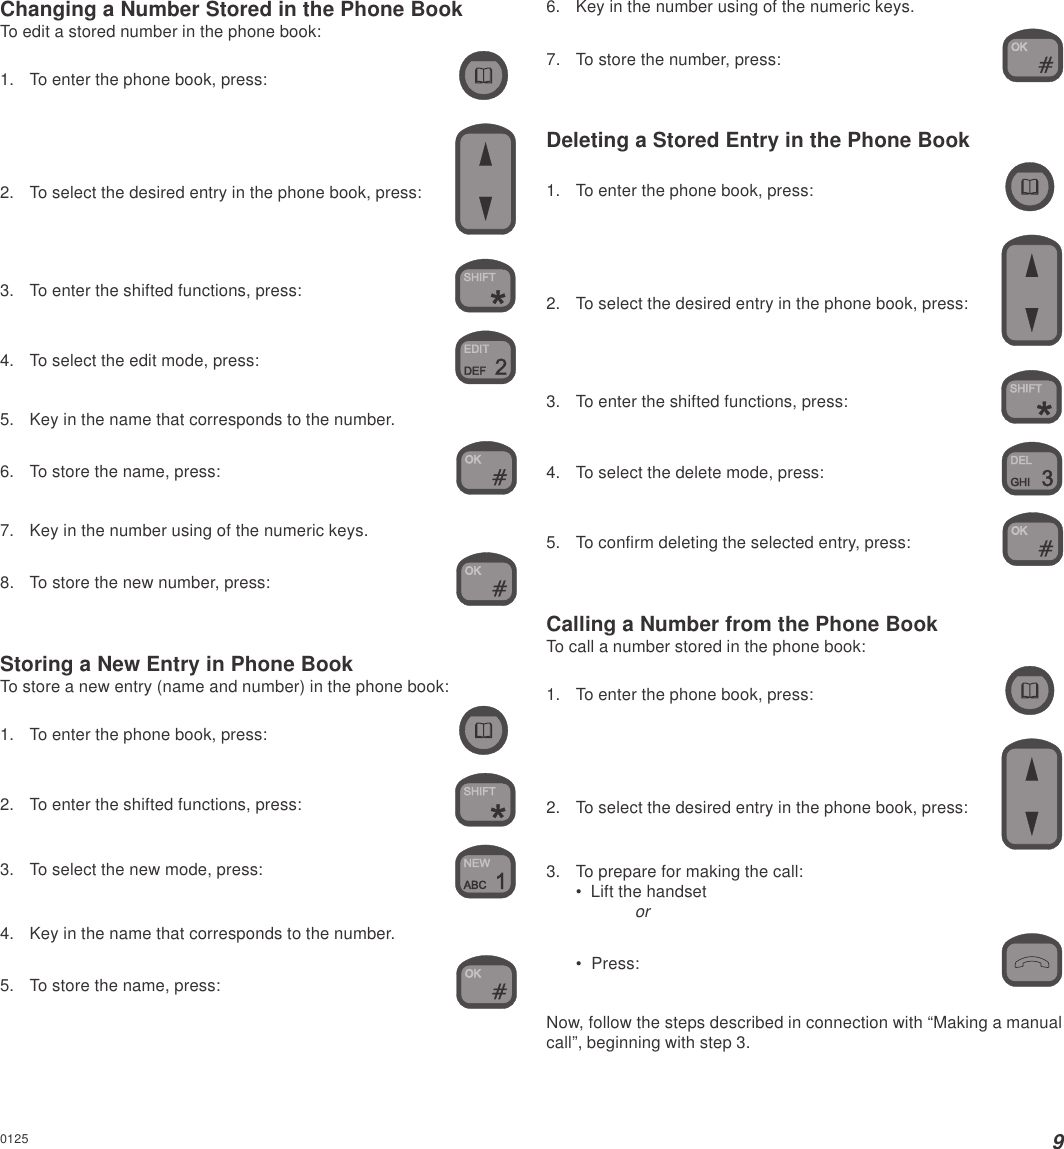
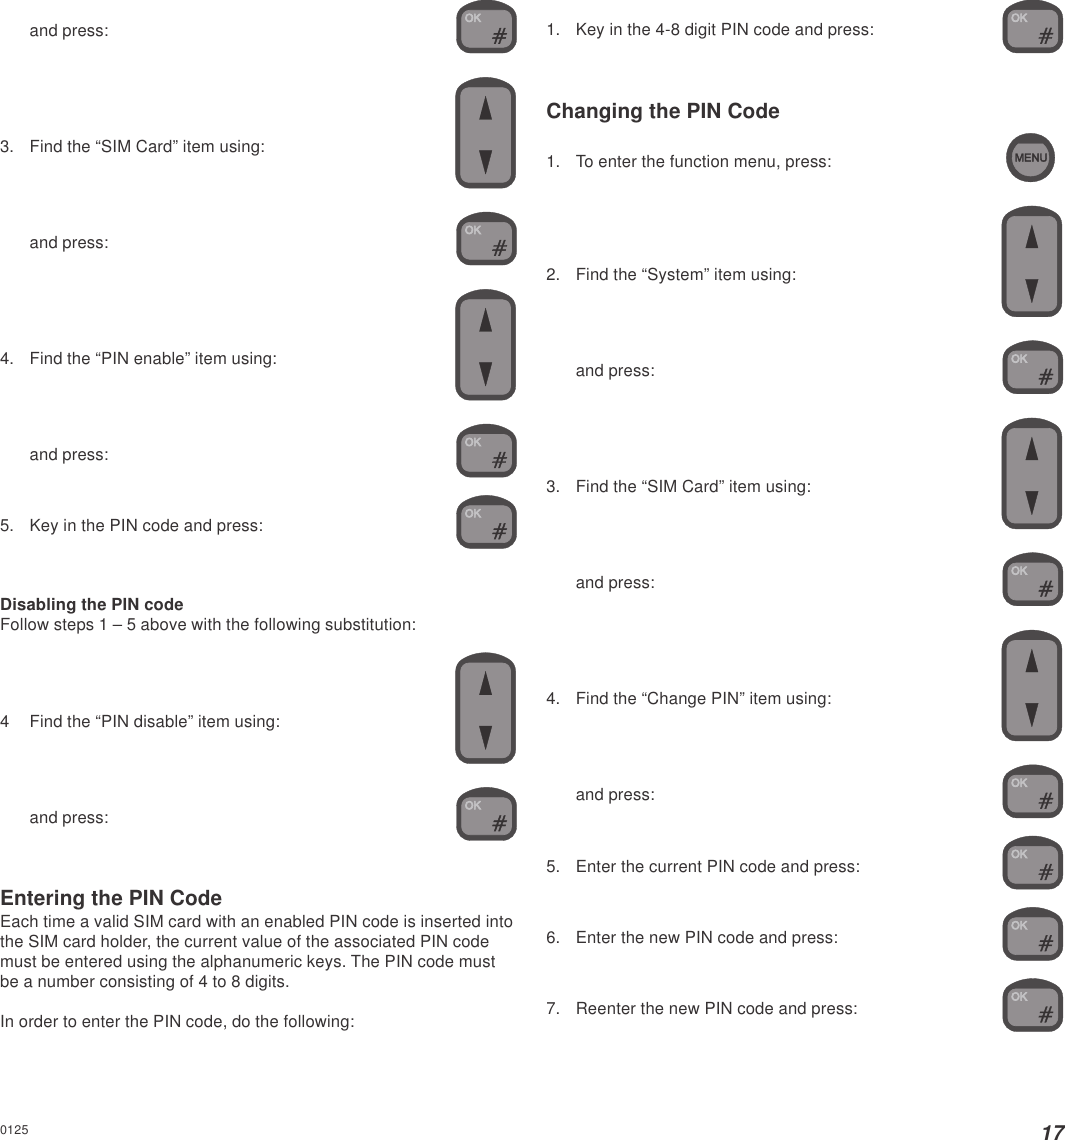
![222. [ old password] [new password] [new password] Call WaitingNOTE: This feature is only available with RTU softwareversion 3.0.0 and higher. Contact your service provider to findout when this feature will become available.Call waiting allows you to answer an external incoming call while youare connected to another external number.Activate:1. Hook off2. Deactivate:1. Hook off2. To put the current call on hold and answer a second call: To switch between two calls: Call HoldNOTE: This feature is only available with RTU softwareversion 3.0.0 and higher. Contact your service provider to findout when this feature will become available.Putting a call on hold allows you to place a second call withoutending the first.To put the current call on hold and place a second call:Put the current call on hold: Place the second call: [telephone number to call] To switch between two calls: To end the current call and return to the held call: To end both calls:To combine both calls creating a conference call: Conference CallingNOTE: This feature is only available with RTU softwareversion 3.0.0 and higher. Contact your service provider to findout when this feature will become available.You can link up to 6 parties, including yourself, to a conference call.To create a conference call:0125](https://usermanual.wiki/ECI-Satellite-Communication-A-S/RTU4120A.User-manual-Sailor/User-Guide-318787-Page-26.png)
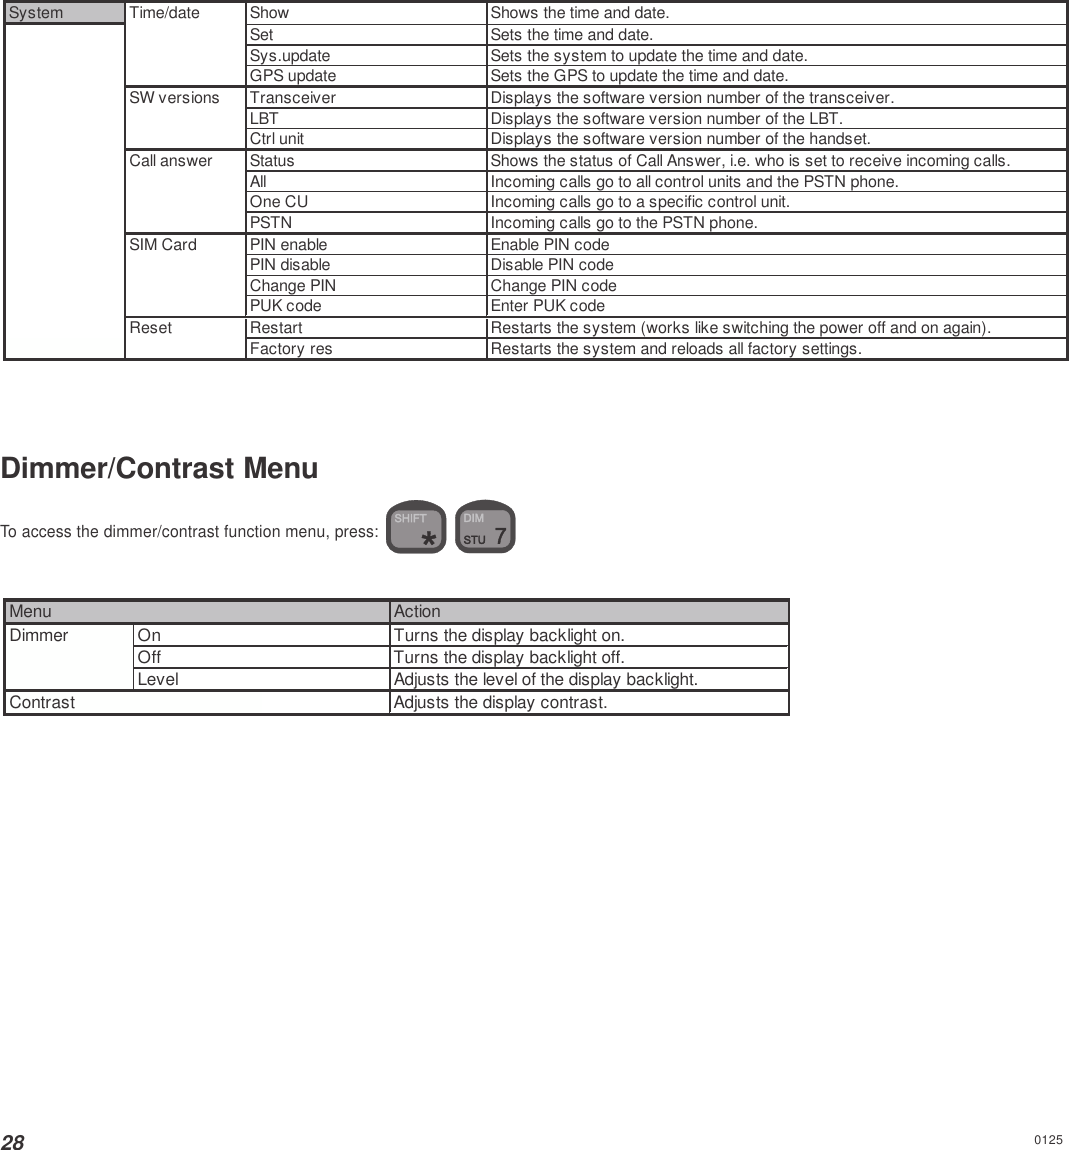
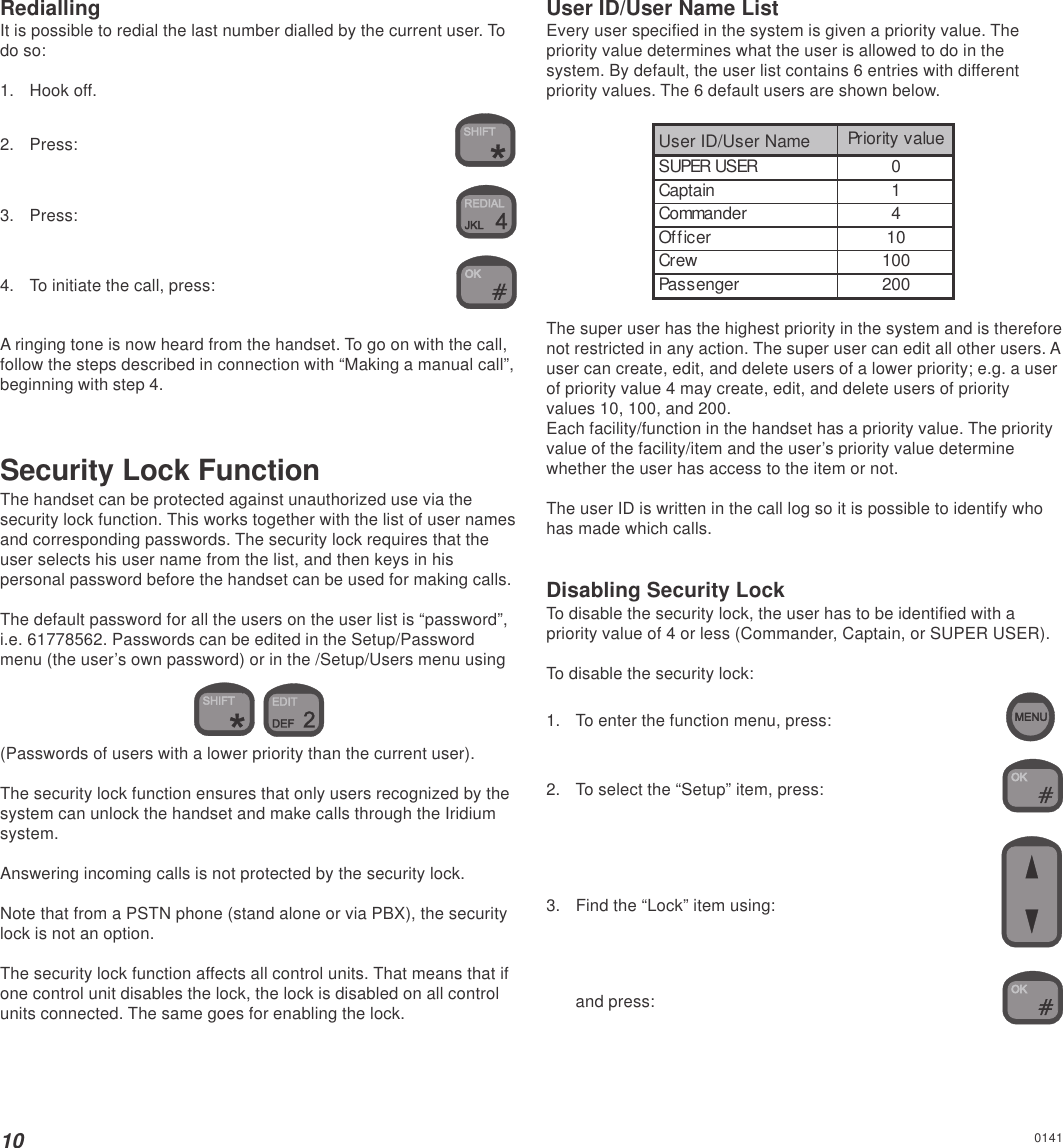
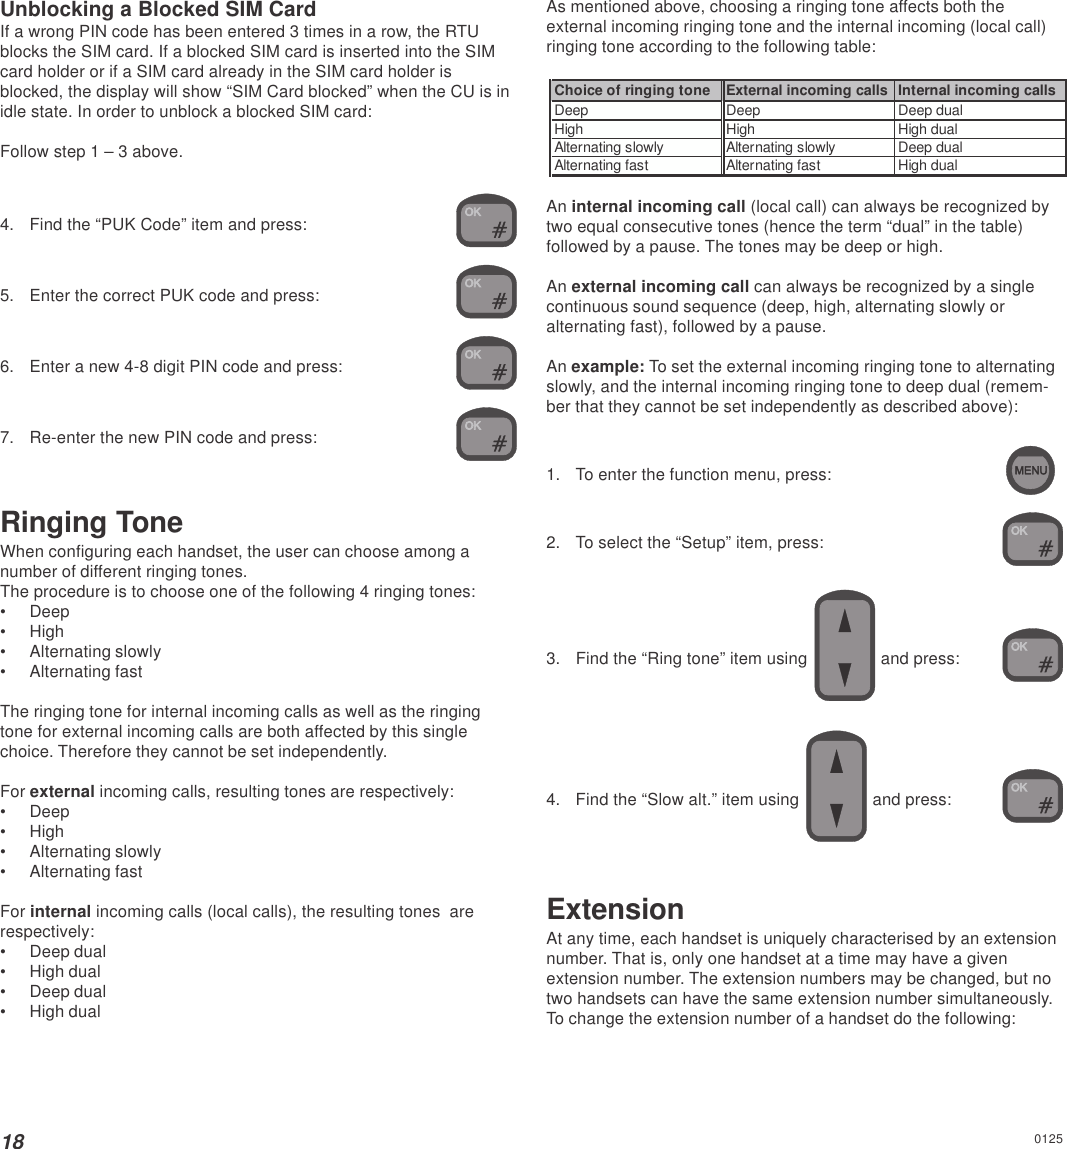
![23Activate:1. Hook off2. Establish a call to the first party.For each new party to add to the conference call, do the following:3. [telephone number of next party] To end the conference call, press:Software VersionPrimarily for service purposes, it is possible to get information aboutthe version of the software for the following pieces of hardware inyour Iridium equipment:•Transceiver: This software handles the configuration of yourIridium equipment, audio routing, the information to be shown onthe displays, communication with your SIM card, etc.•LBT: This software handles the communication between theglobal Iridium network and your Iridium equipment.•Control Unit (CU): This software consists of low level drivers(for each control unit) that control the dot matrix display, the keypad, the status indicator lamps, and the microphone, earpieceand speaker.To get information on these software modules, go through thefollowing steps:1. To enter the function menu, press:2. Find the item “System” using and press:3. Find the item “SW version” using and press:4. Choose the hardware whose software version you want informa-tion on, using and press:ResettingPrimarily for service and test purposes, it is possible to reset yourIridium equipment to force it into a well-defined state. The followingtwo different levels of resetting are available:•Restart: No configuration information or user data (call log, userlist, phone book) are deleted. When this command is issued/chosen, all control units are forced back to idle state regardlessof their current state.•Factory reset: NOTE! ALL (!) configuration information AND(!) user data (call log, user list, phone book) are deleted. Whenthis command is issued, your Iridium equipment returns to thestate it was in when leaving the factory.To restart your system:1. To enter the function menu, press:2. Find the item “System” using and press:3. Find the item “Reset” using and press:0125](https://usermanual.wiki/ECI-Satellite-Communication-A-S/RTU4120A.User-manual-Sailor/User-Guide-318787-Page-27.png)