Iridium Satellite 9575 9575 Satellite Phone User Manual Manual part 1
Iridium Satellite LLC 9575 Satellite Phone Manual part 1
UserManual.wiki
>
Iridium Satellite
>
9575 User Manual
>
Manual part 1
Contents
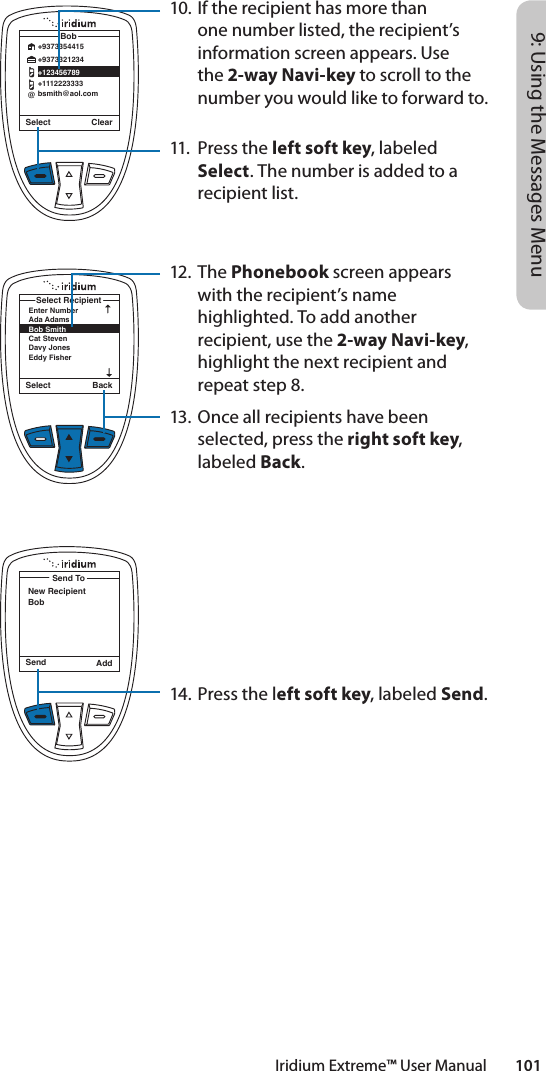
1.
Manual part 1
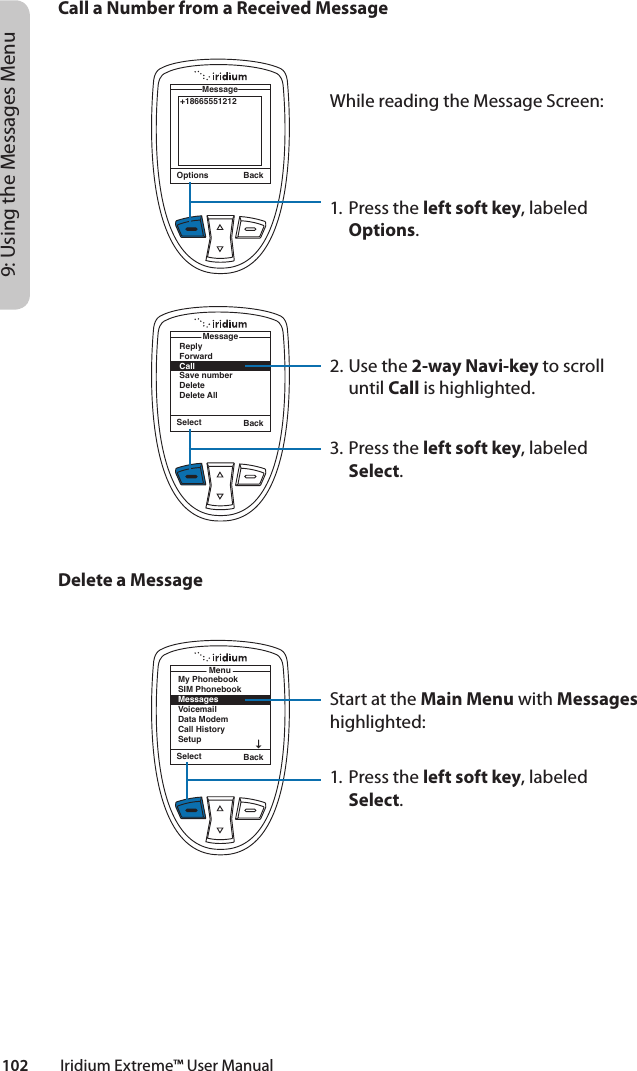
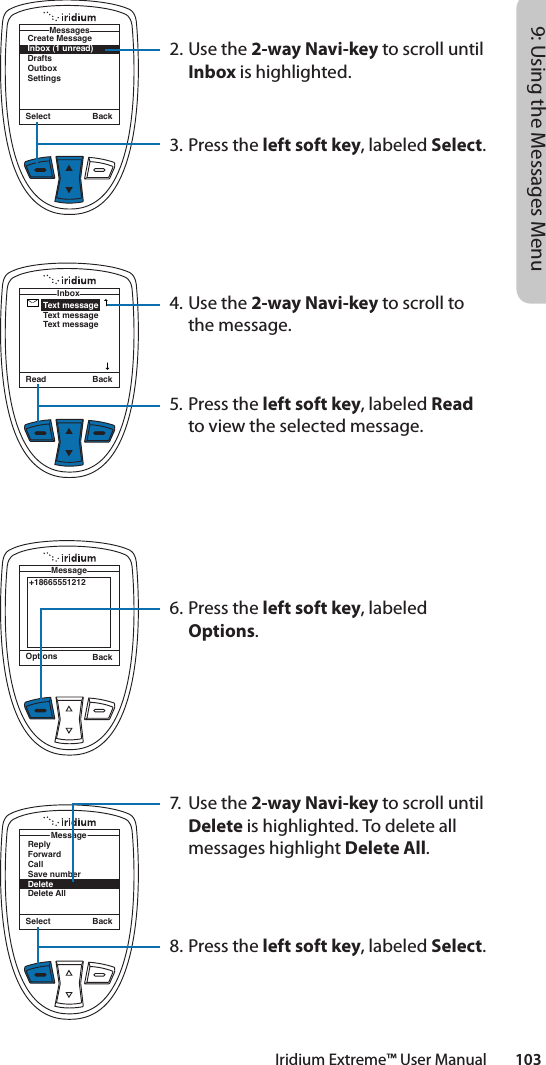
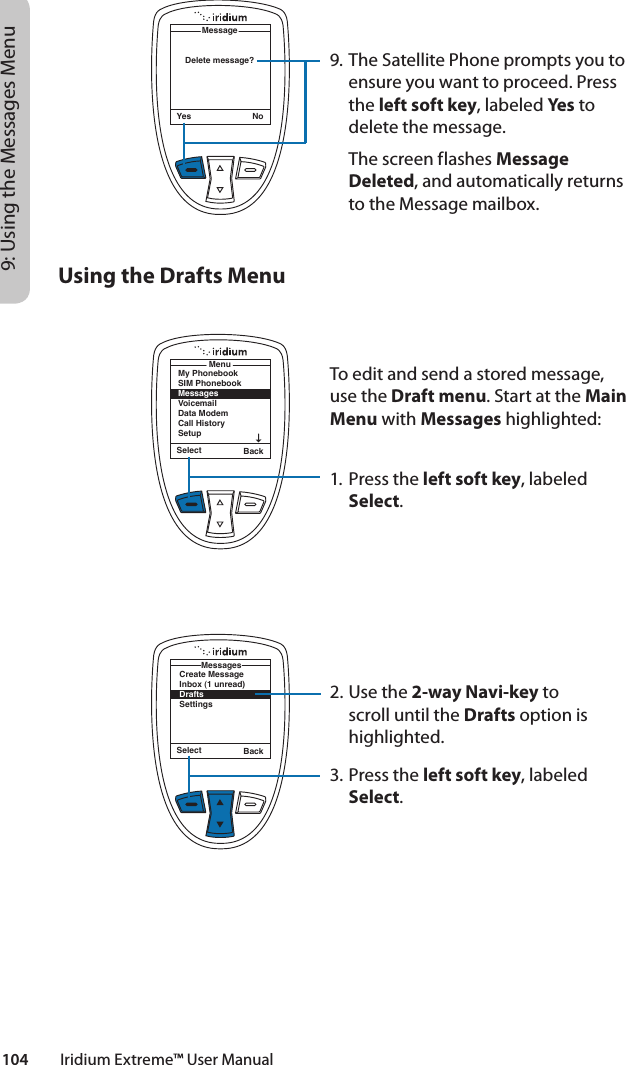
2.
Manual part 2
Manual part 1
Navigation menu
Upload a User Manual
Namespaces
Wiki Guide
HTML
PDF
Info
Views
User Manual
Discussion / Help
Navigation

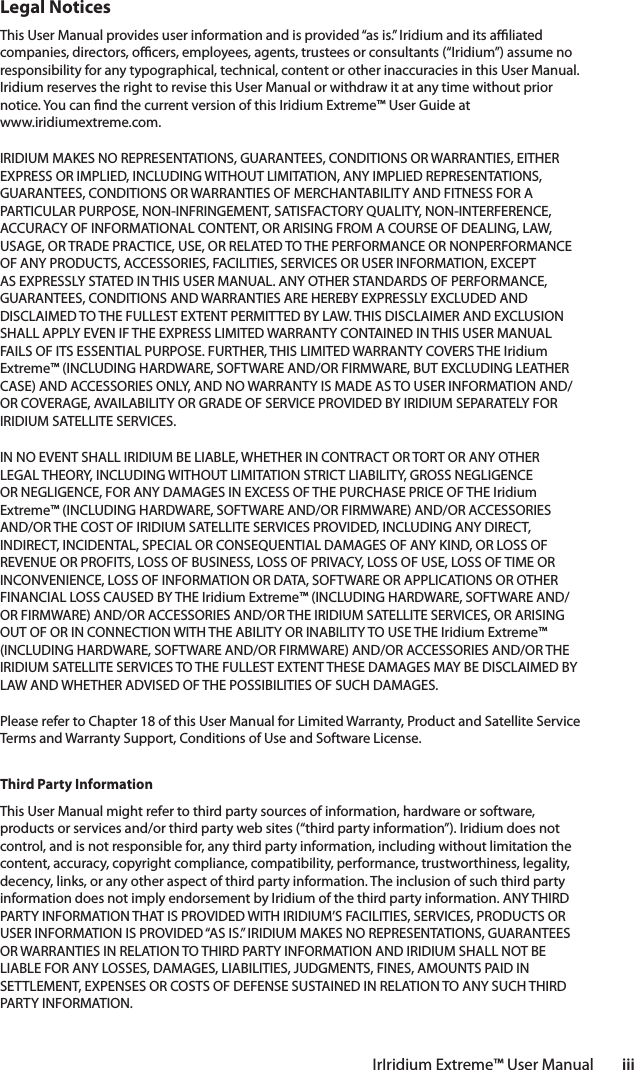
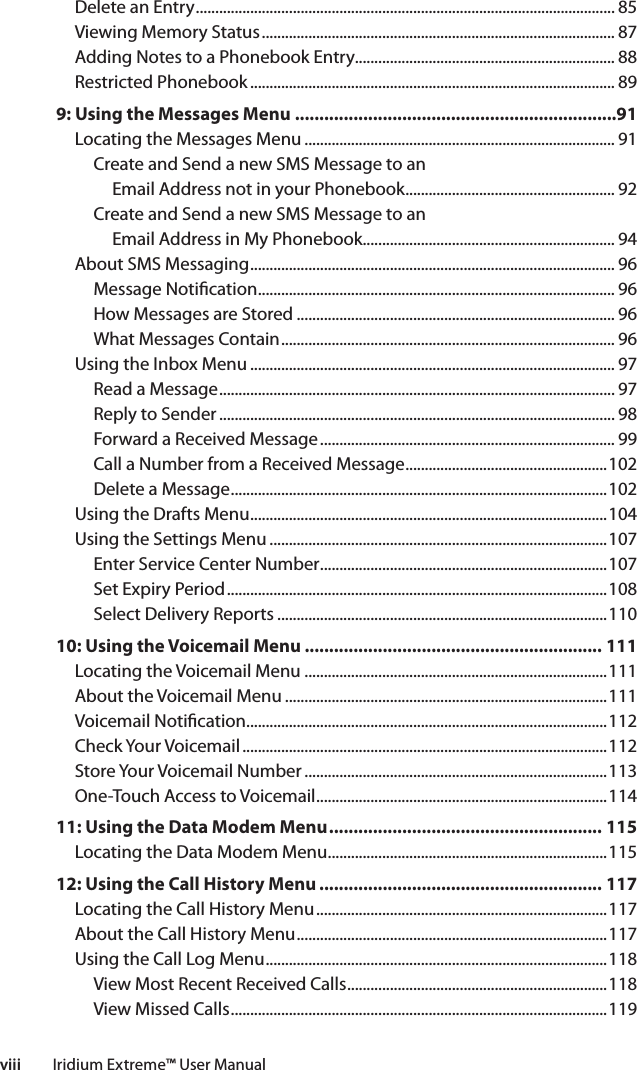


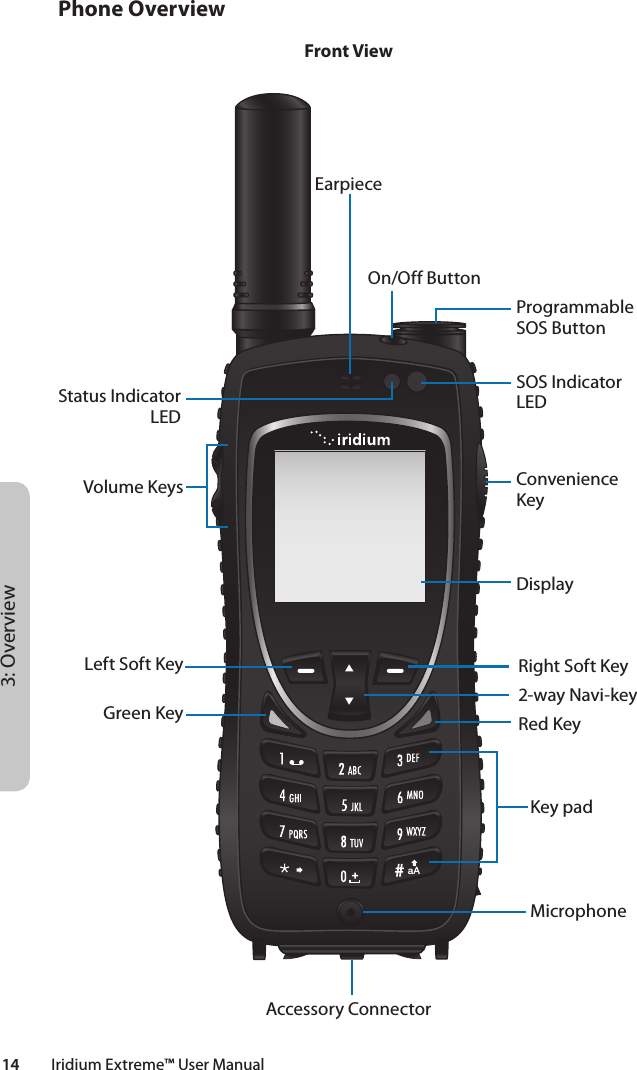
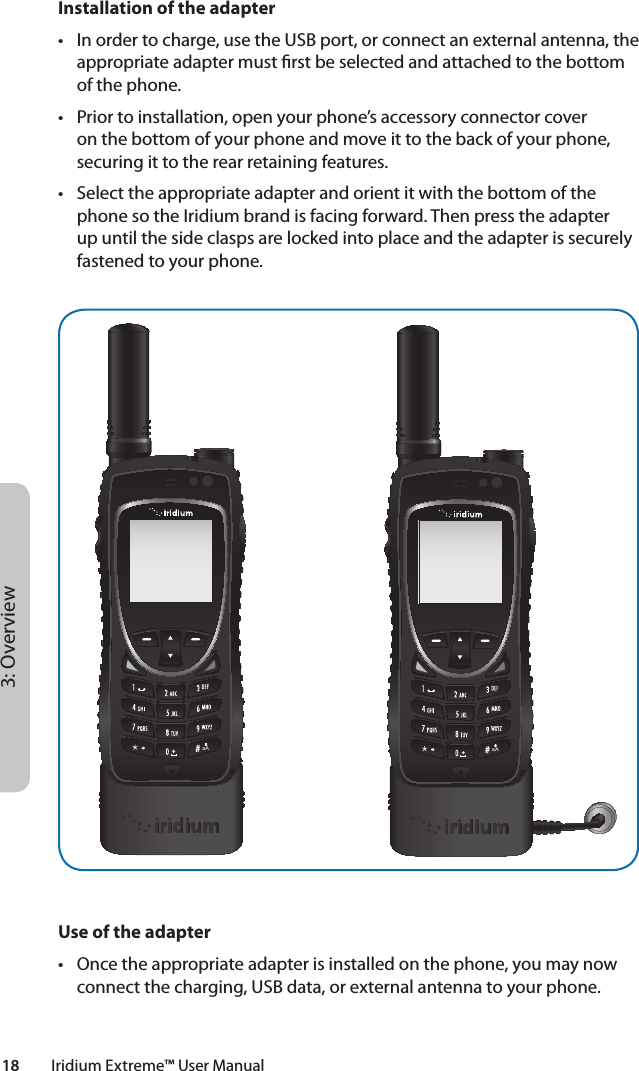

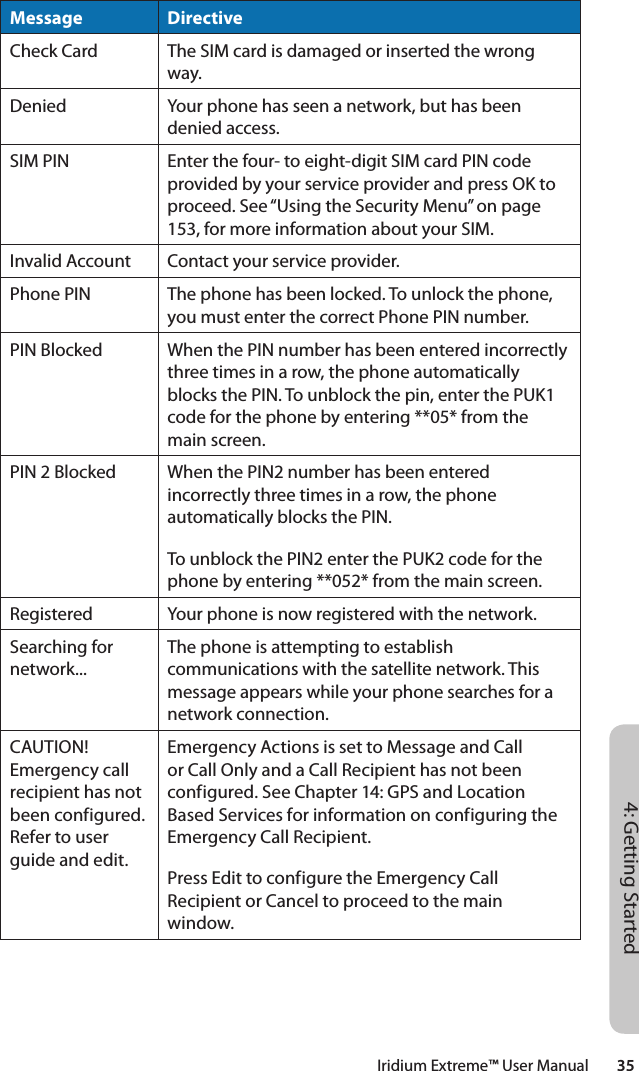
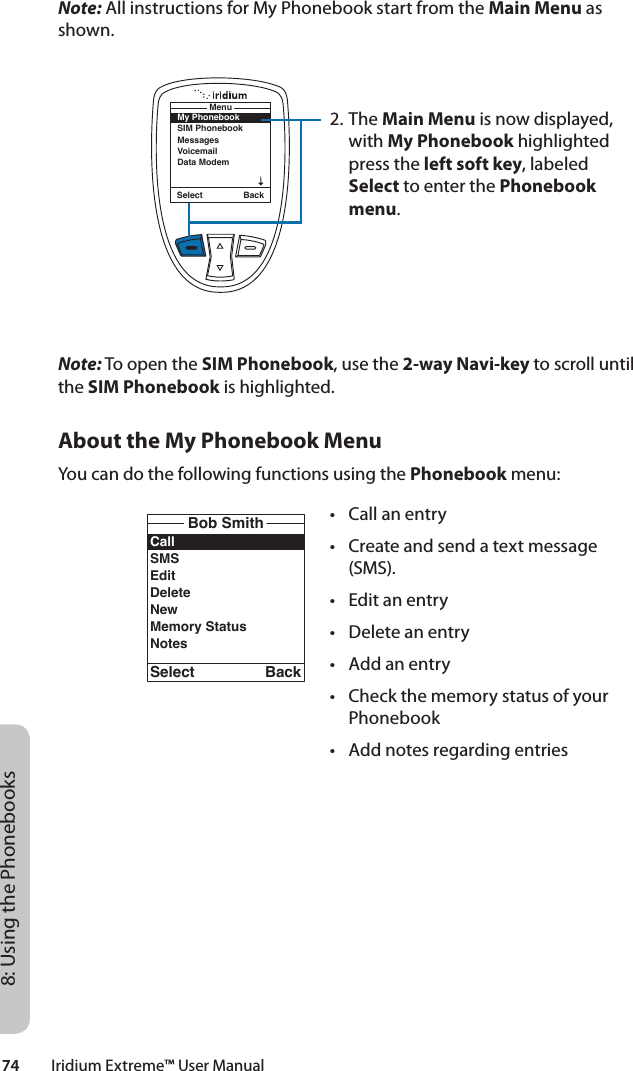
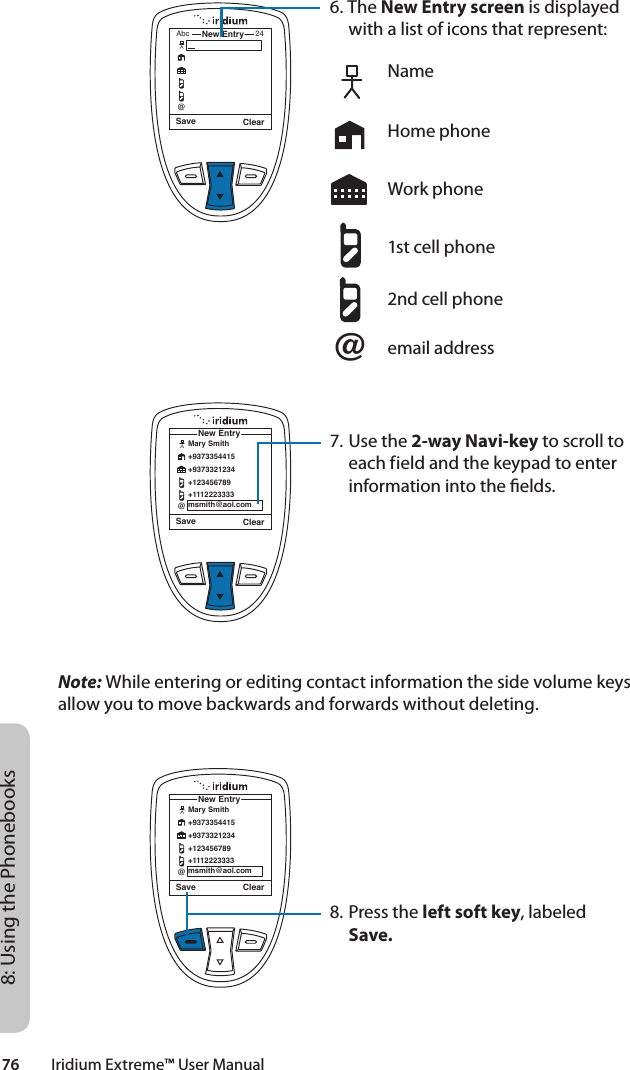
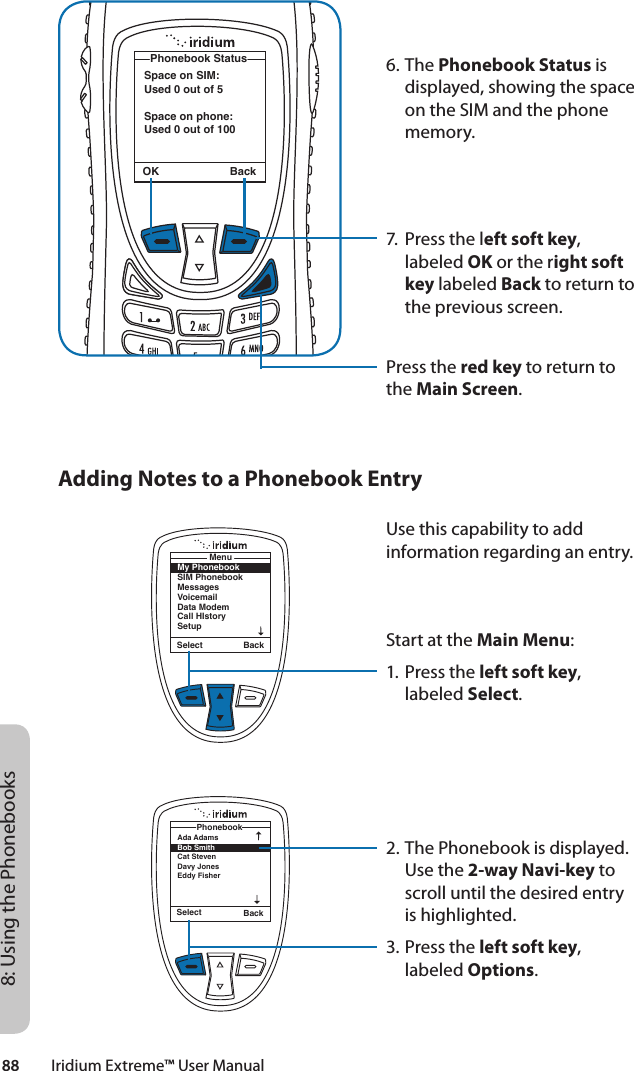
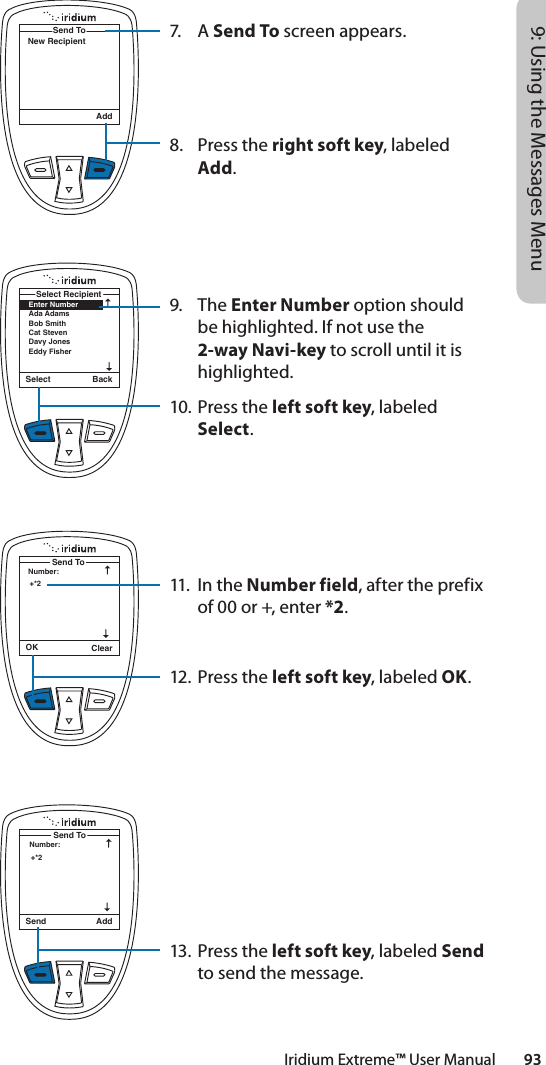
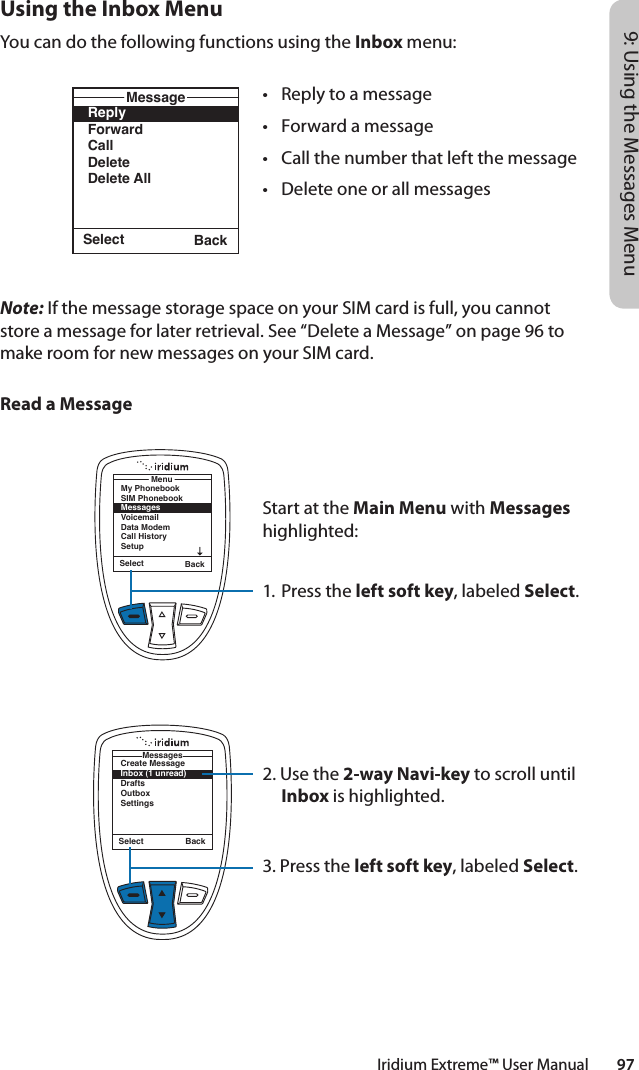
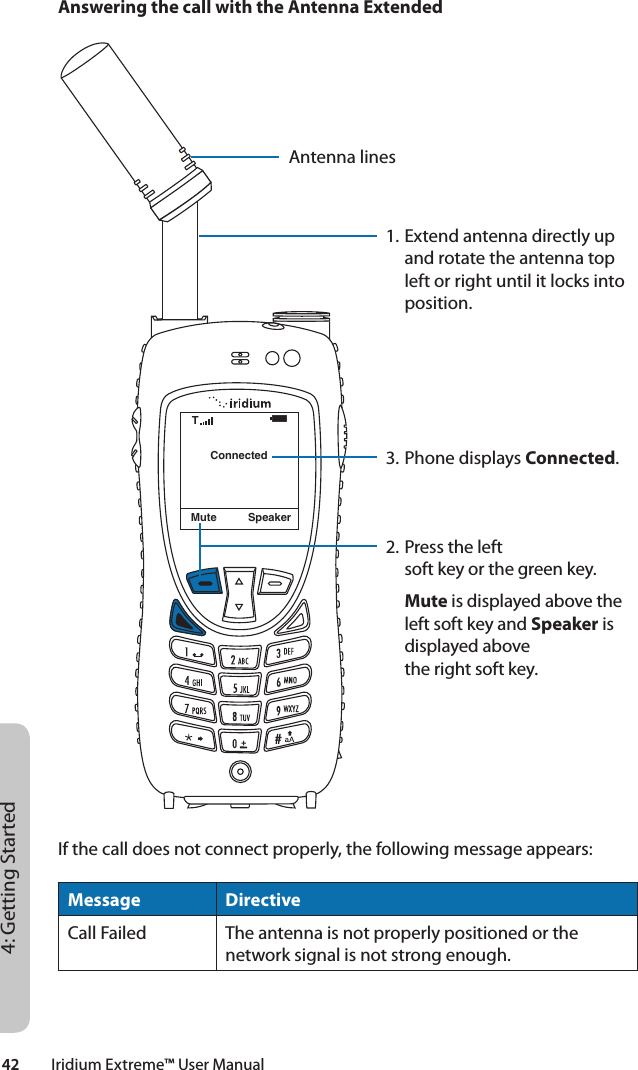
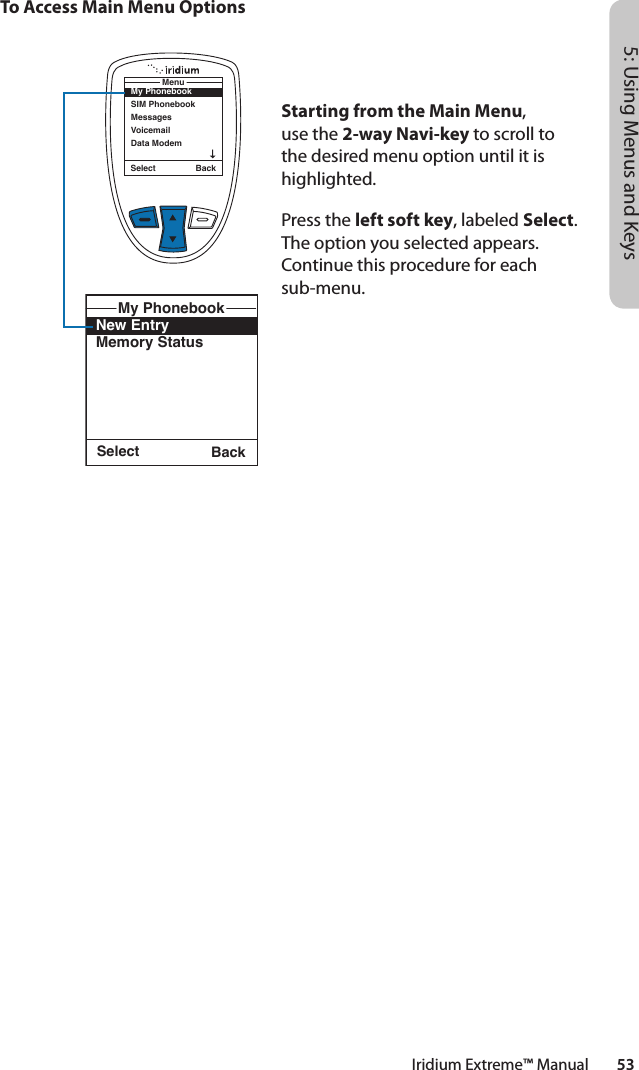
![+ 1 215 555 1212Options ClearTCountry codePhone number including area codeIridium Extreme™ User Manual 374: Getting StartedPlacing a CallBefore you place a call:1. The phone must be powered on.2. SIM card inserted.3. Phone is unlocked.4. Have a clear direct view of the sky to be in contact with the network.5. Antenna should be extended and pointed up towards the sky.Dial the NumberAs you enter a phone number, the digits are displayed on a single line that scrolls across the display.1. Enter the number using the key pad. As you begin entering digits, you see Options displayed above the left soft key and Clear displayed above the right soft key. The phone number must be entered in international format: + or 00 [country code][phone number]. Your Iridium Extreme™ will automatically enter a + for the international access code so the only numbers that are required to add are the country code and phone number.Note: All Iridium subscriber numbers begin with county code of 8816 unless an alternative access number has been issued by your service provider.](https://usermanual.wiki/Iridium-Satellite/9575.Manual-part-1/User-Guide-1508151-Page-47.png)


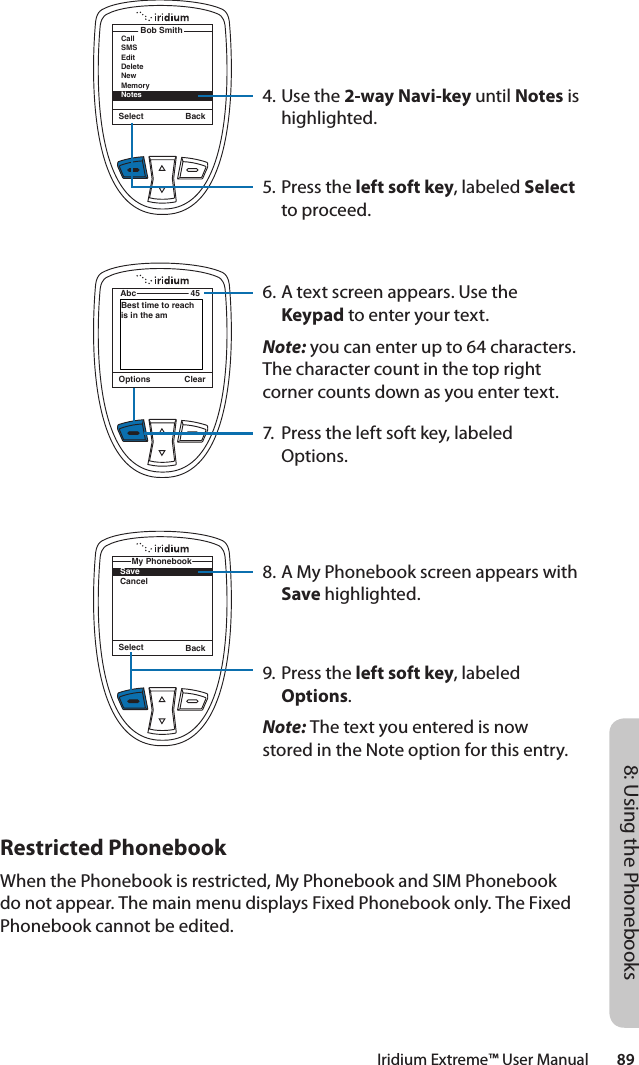
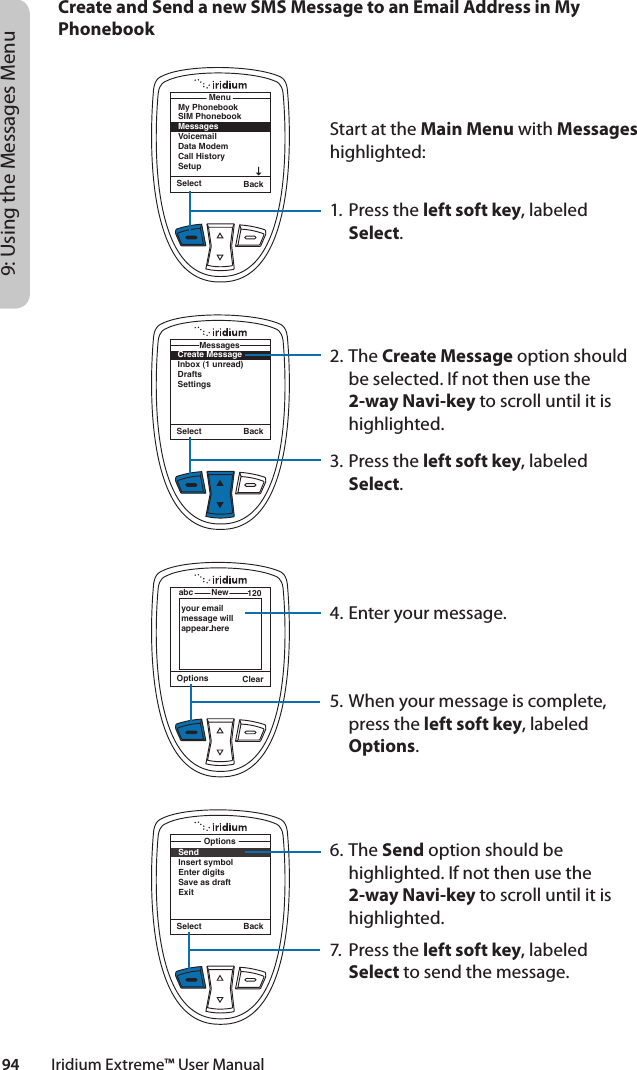
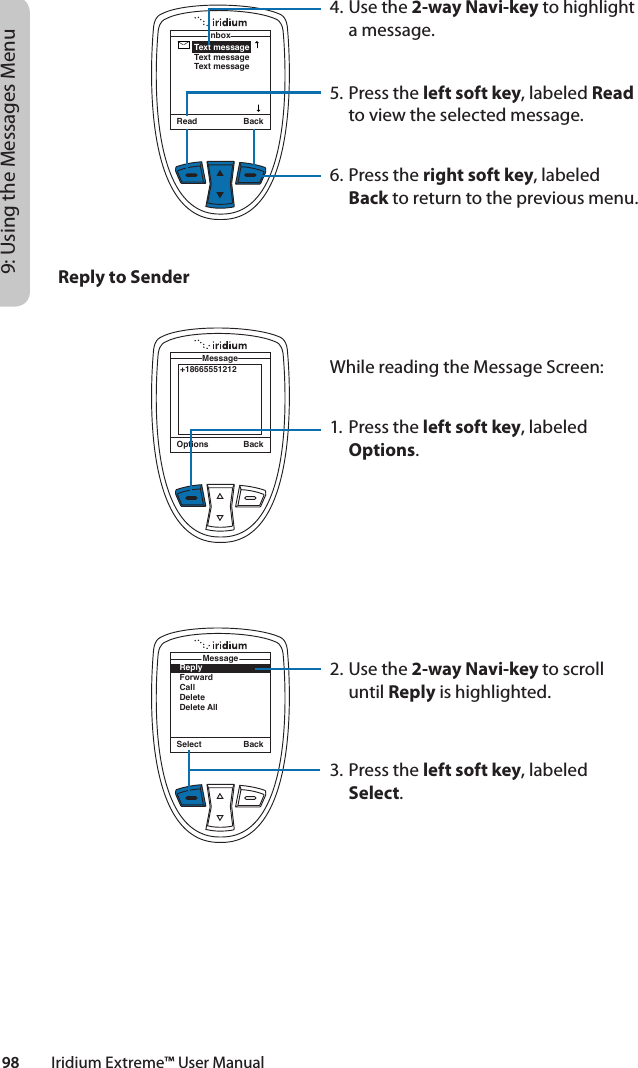
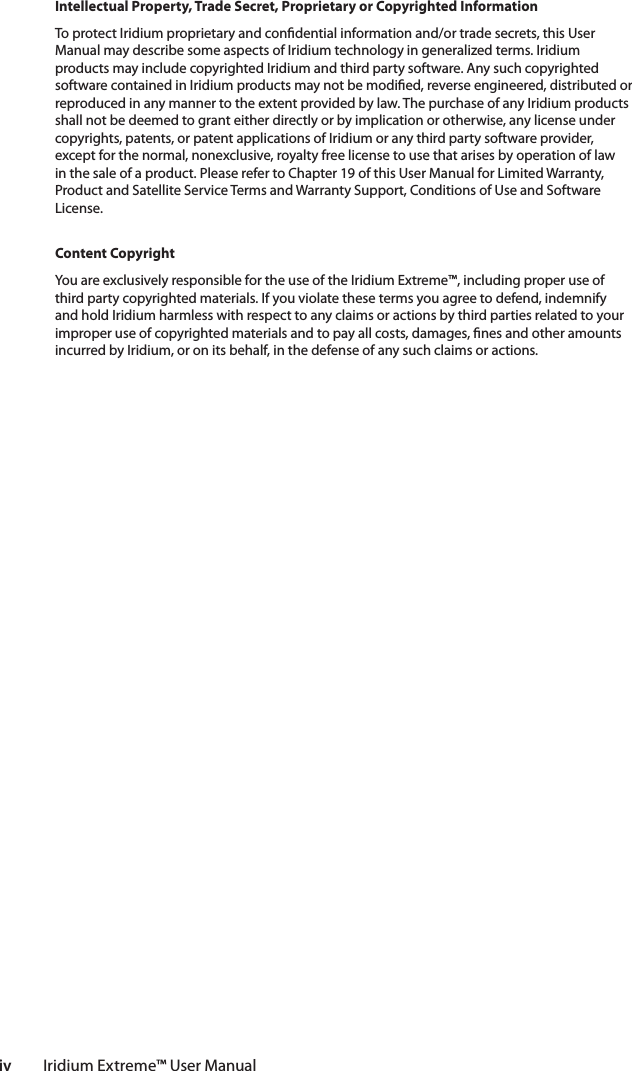
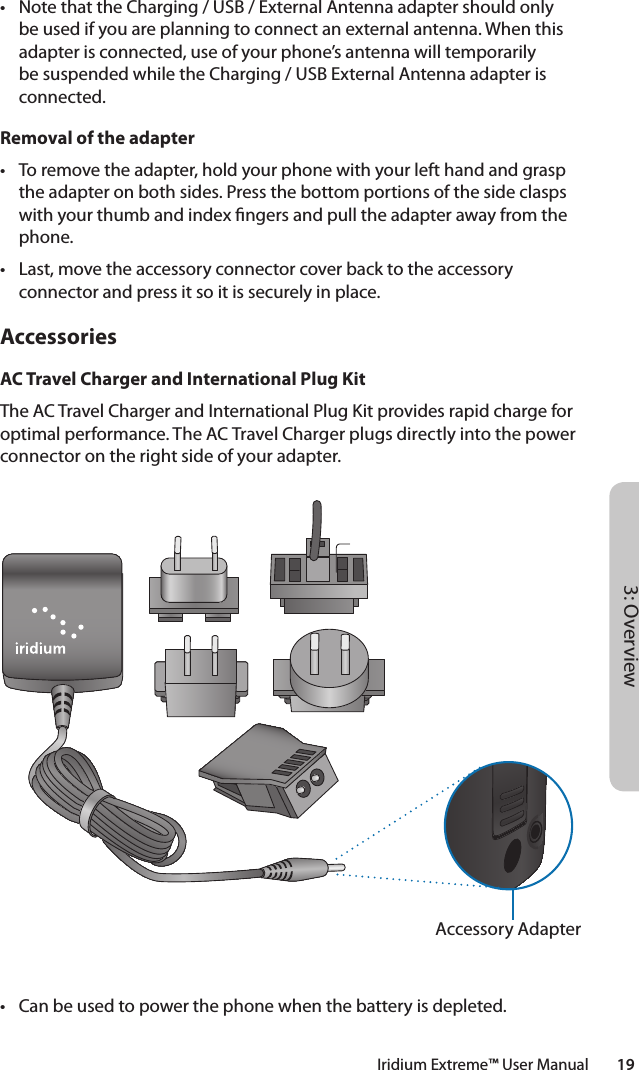
![6: Traditional Text EntryIridium Extreme™ User Manual 59Entering PunctuationPressing * (star) key takes you to a symbols menu with a list of the most commonly used punctuation marks and symbols.Select BackEdit.@/,!?;ʻ$?*%&()[]{}:˜-\-“#I<çèėêëòóöùú>+=àáUsing the 2-way Navi key, cycle through the screen until you reach the desired symbol.Press the Left Soft Key labeled Select.Press the Star key to open the symbols menu.](https://usermanual.wiki/Iridium-Satellite/9575.Manual-part-1/User-Guide-1508151-Page-69.png)

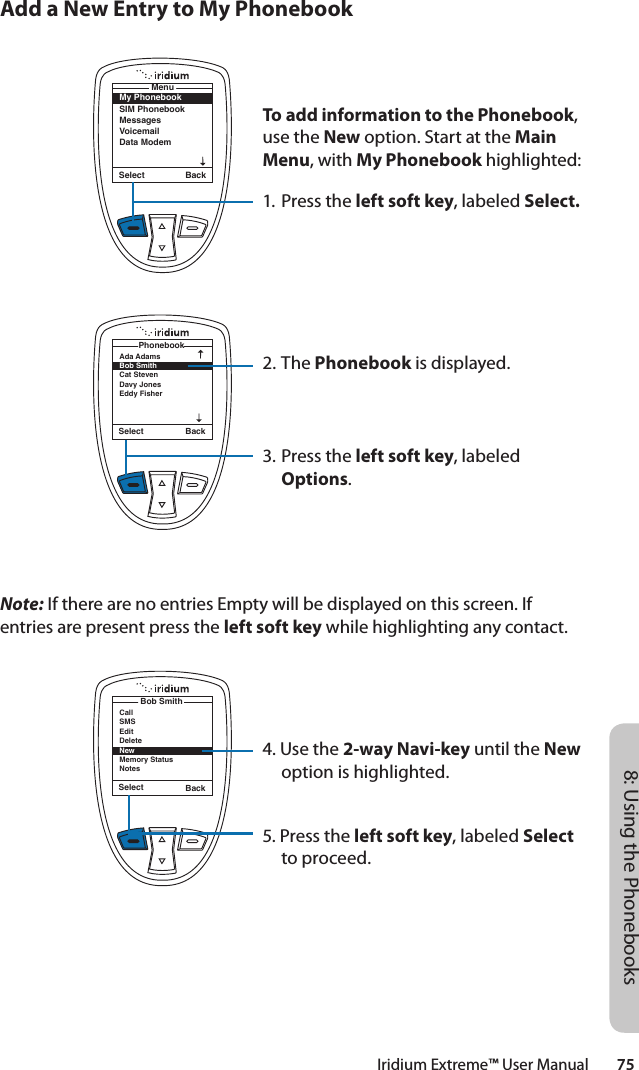
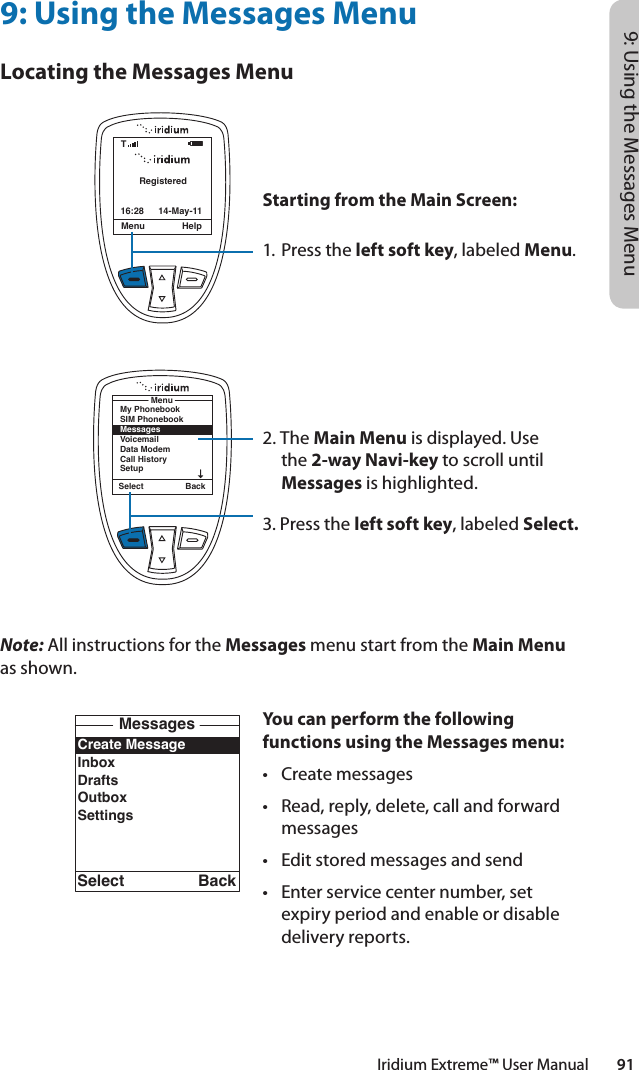
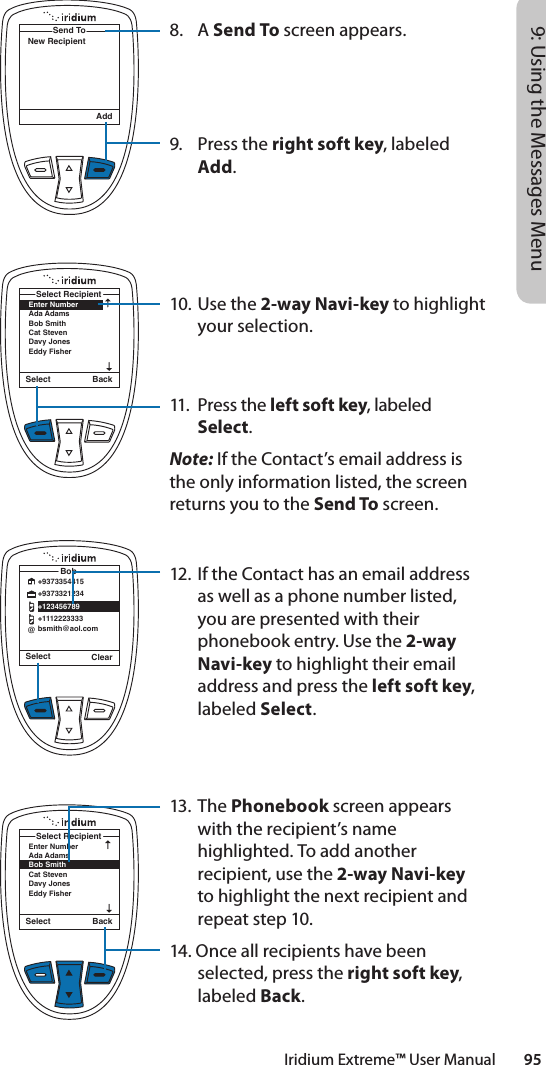
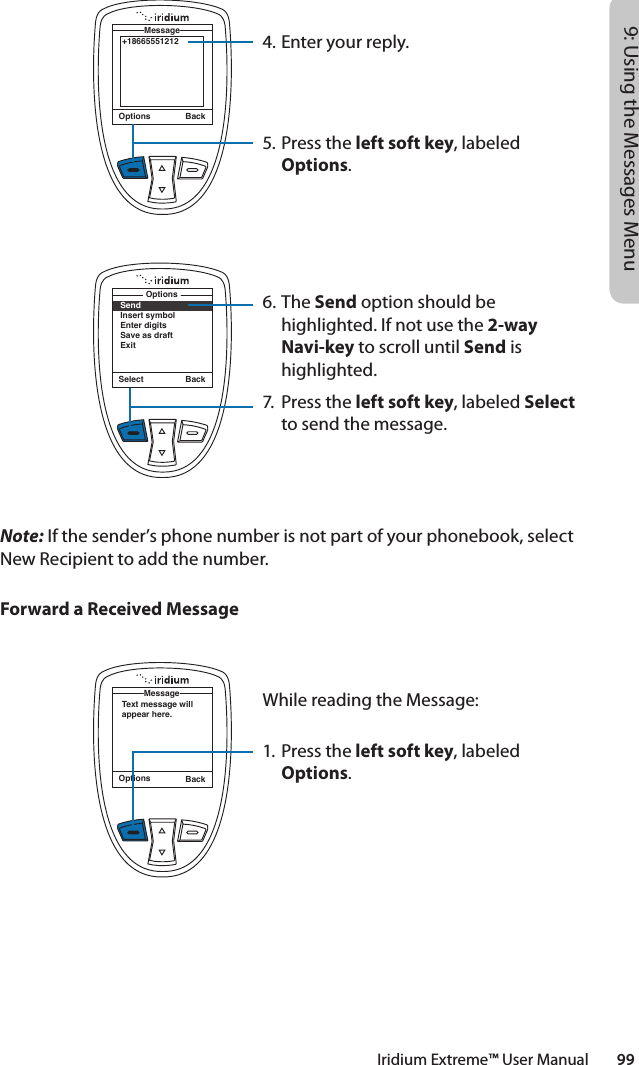
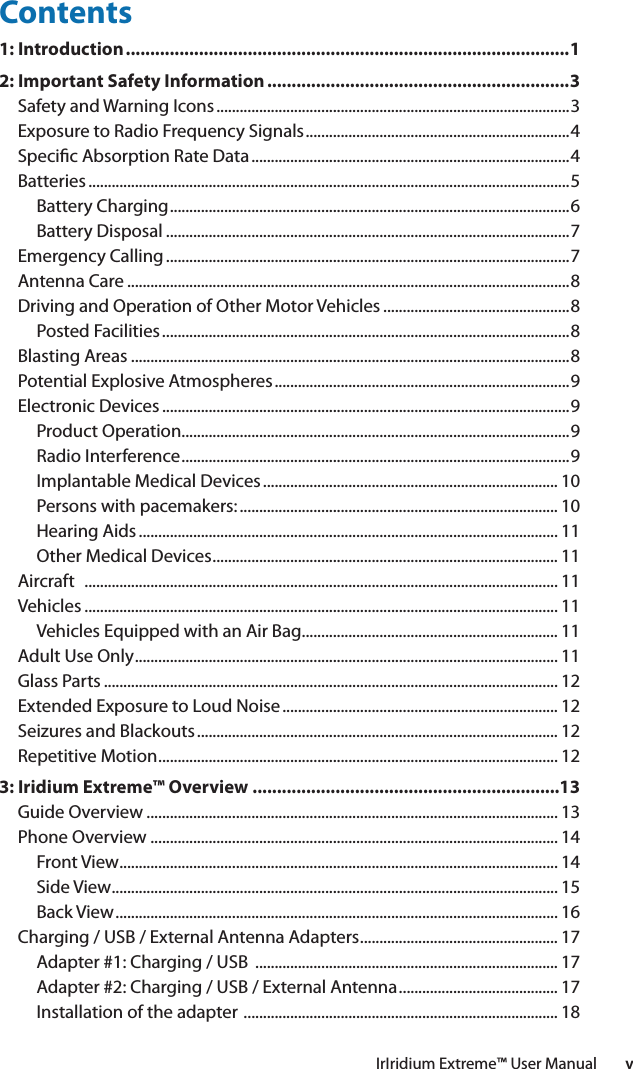
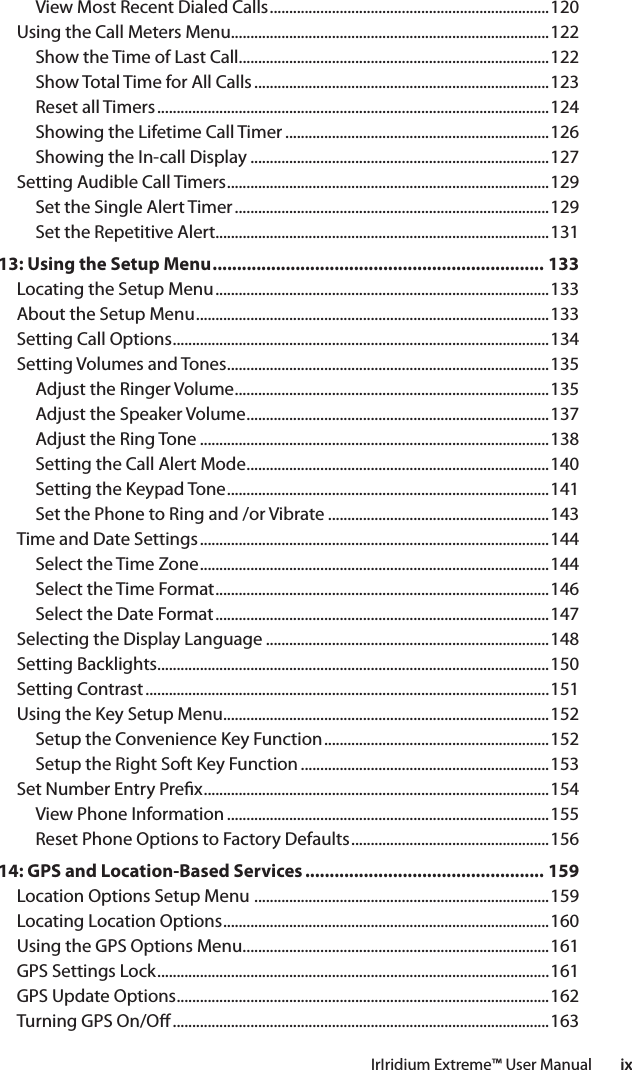
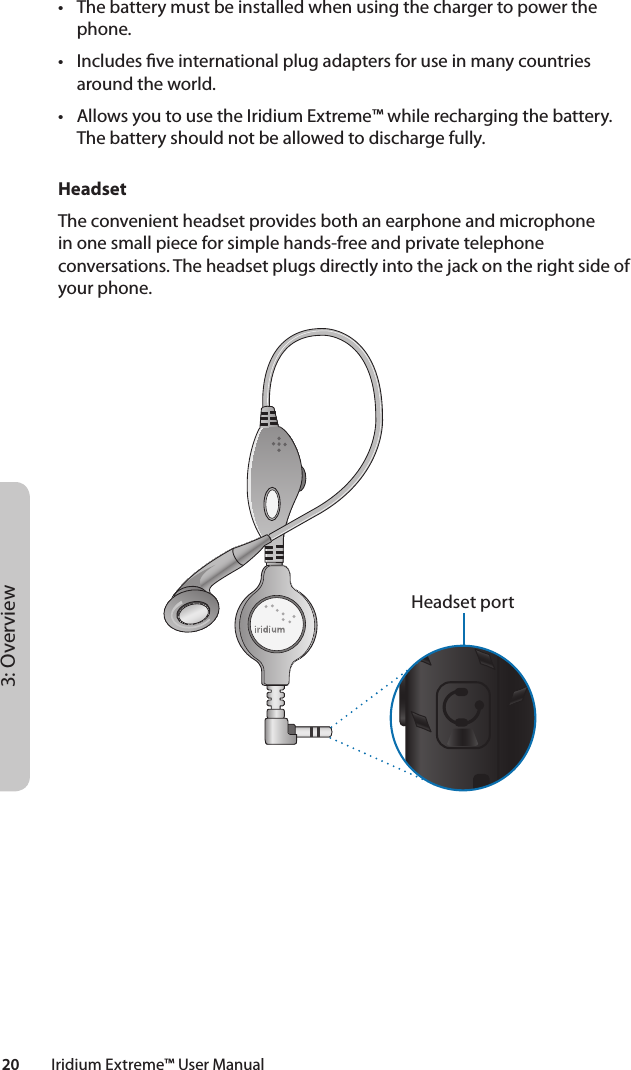
![70 Iridium Extreme™ User Manual7: Predictive Text EntryDigit mode (123)There may be times when you need to add numbers into a message that you are composing. Digit mode allows you to use the number keys to enter digits, similar to dialing a phone call. To enter digit mode, press the Convenience key until the 123 indicator appears on the upper left corner of the screen. Enter the numbers required for your message and then use the Convenience key to return to the desired text entry mode to complete the rest of the message.Digit mode may be entered either by pressing the Convenience key on the side of the phone, or with the Options menu in the Create Message editor to “Enter digits”. During use of WordWise, the 1 key can be used to insert punctuation without changing text entry modes.Punctuation mode (#?@)Punctuation mode may be entered either by pressing the Convenience key on the side of the phone, or with the Options menu in the Create Message editor to “Insert symbol”. During use of WordWise, the 1 key can be used to insert punctuation without changing text entry modes.In Punctuation mode, symbols are spread across all keys based on their shape to help you remember which symbol is on each key (see table on following page). For example: ! is on 1 key, ? is on key 2If there is more than one symbol on a key, press the Next key () to get the others.Key English/French/Russian/Spanish*0 . , @ °1 !2 ?3 % $ € £4 _ ~5 - + = “ ^6 ( [ { <7 / \8 : ; &9 ) ] } >* Spanish includes inverted versions of ! and ?.](https://usermanual.wiki/Iridium-Satellite/9575.Manual-part-1/User-Guide-1508151-Page-80.png)