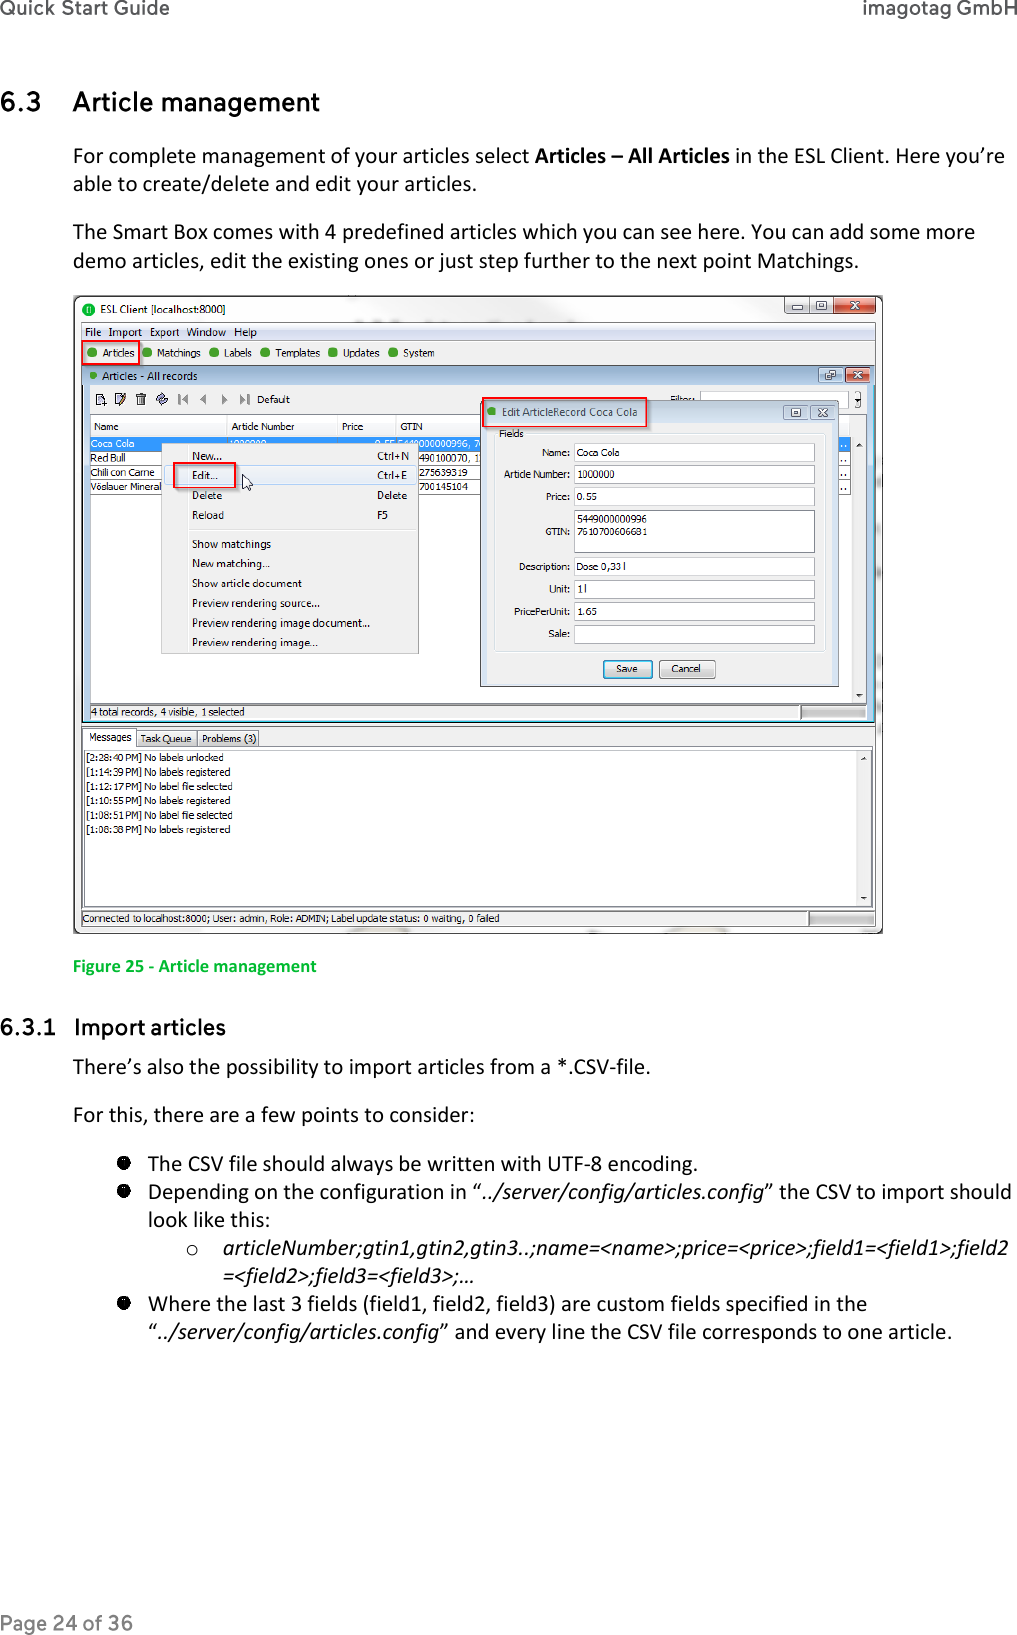
SES imagotag E00001 digital network transceiver User Manual Quick Start Guide
imagotag GmbH digital network transceiver Quick Start Guide
UserManual.wiki
>
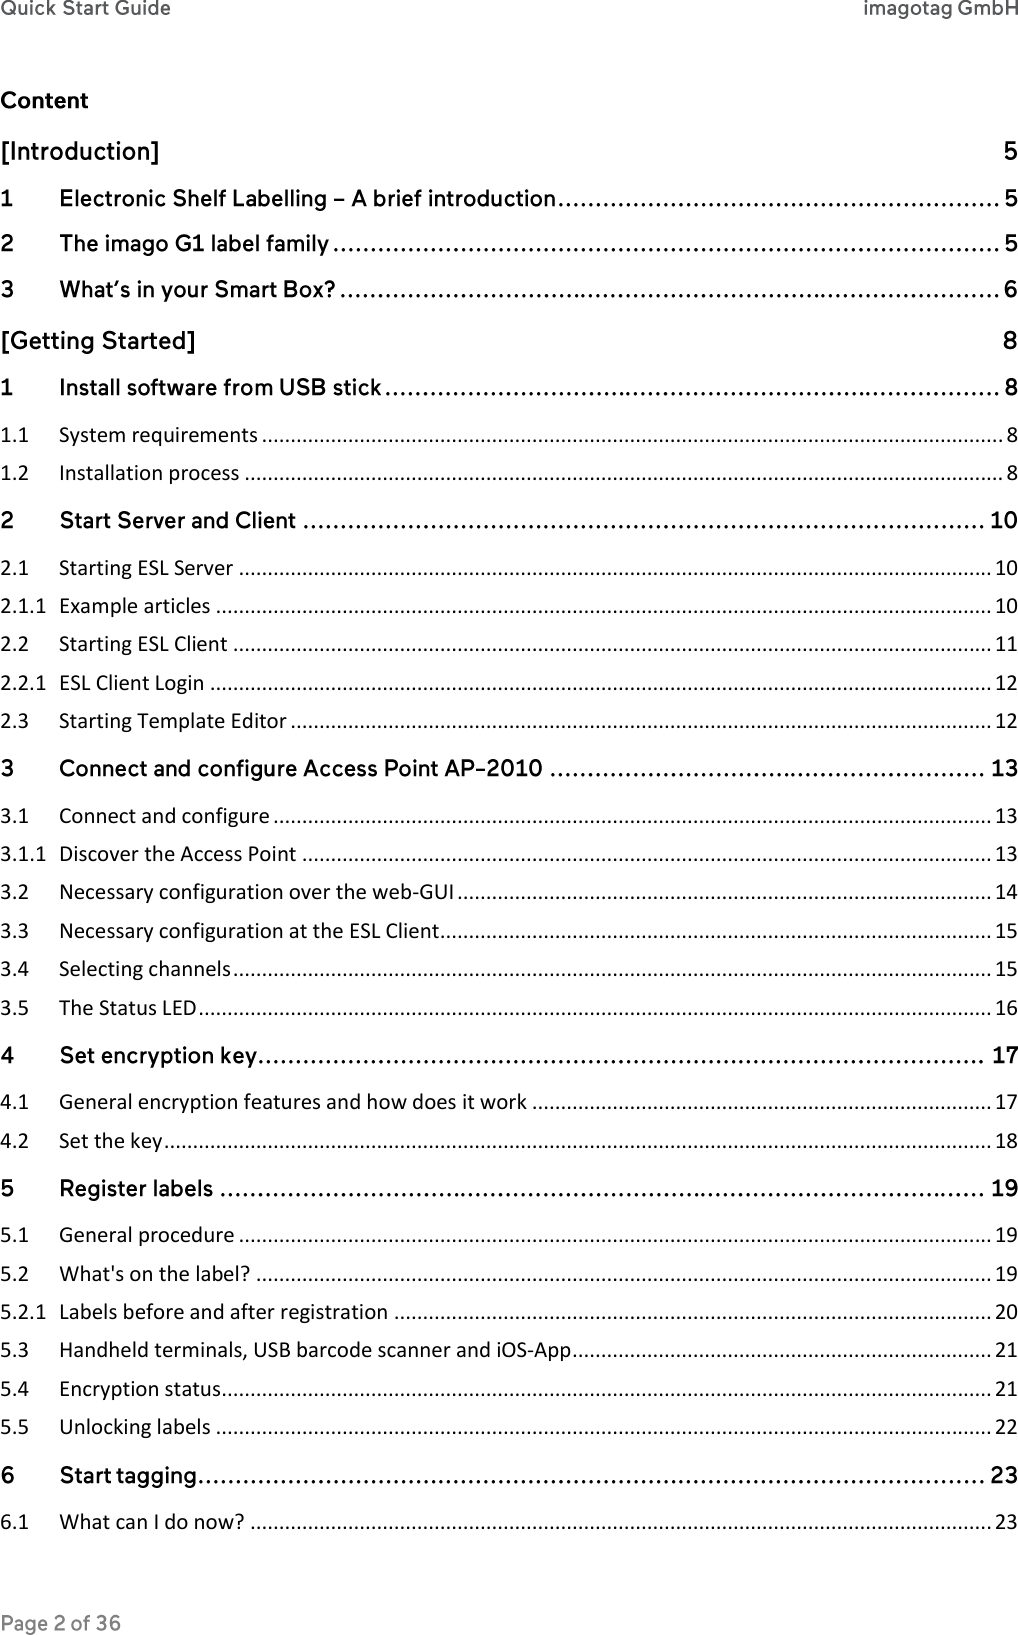
SES imagotag
>
E00001 User Manual
>
Quick start guide
Contents
1.
Quick start guide
2.
User manual
Quick start guide
Navigation menu
Upload a User Manual
Namespaces
Wiki Guide
HTML
PDF
Info
Views
User Manual
Discussion / Help
Navigation
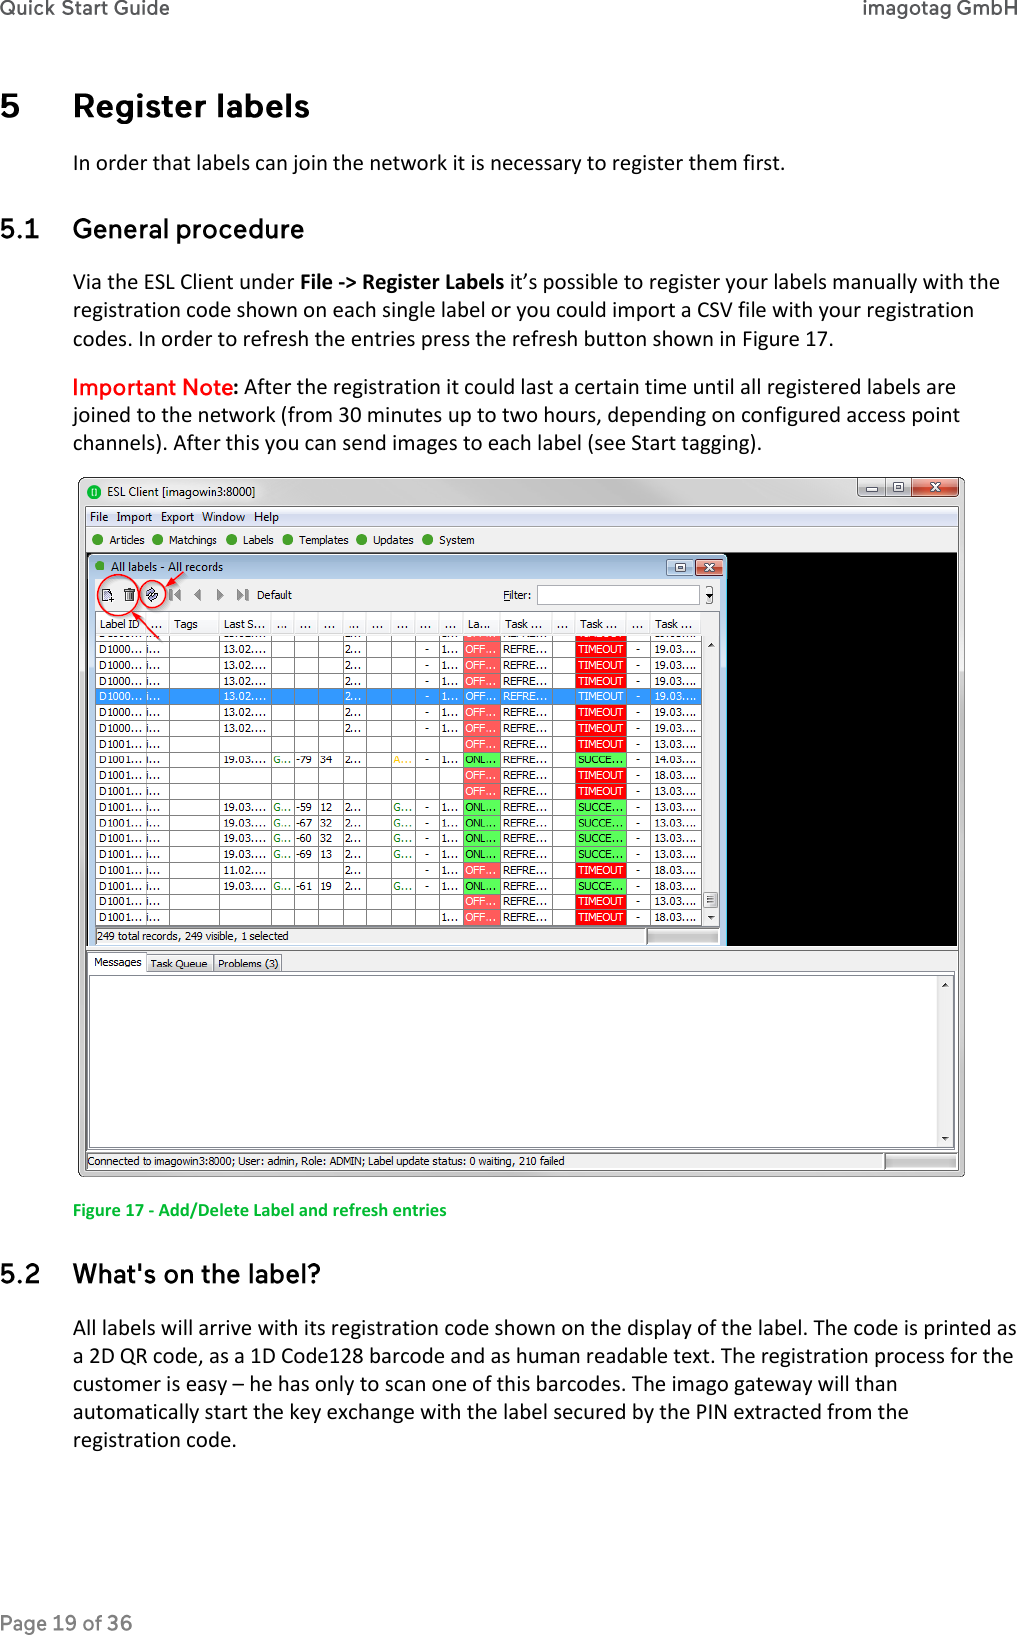
![In order to start the ESL Service with the default configuration, just execute the jar file “server.jar” as described in [Troubleshooting] 2 - Starting Java applications and wait for the small service GUI to show up (if the window doesn’t show up after all, make sure your Java installation and configuration is correct). Figure 7 - ESL Service GUI The service will listen to TCP connections on Port 8000 and 8001 and UDP connections on Port 8000. Please make sure that there is no firewall issue and/or interference with other systems. After start of the service you can check the web-GUI of the server: URL: http://<IP-address>:8000/ Login: admin/admin During the first start the ESL Server will automatically create a Derby1 database. If another database connection is needed or preferred, the connection parameters should be validated by imagotag. : As you can see there are several level numbers, by default the server instance will start in level 3. You can find the description of the different levels in the Developer Reference (which is also included on the USB stick) under “Integration Levels”. For easier usage some example articles will be preloaded at the time you start the ESL Server. You can find them here: C:\imagotag\server\data\fixtures\. : The article records are based on the XML-standard. 1 Apache Derby, an Apache DB subproject, is an open source relational database implemented entirely in Java](https://usermanual.wiki/SES-imagotag/E00001.Quick-start-guide/User-Guide-2454006-Page-10.png)
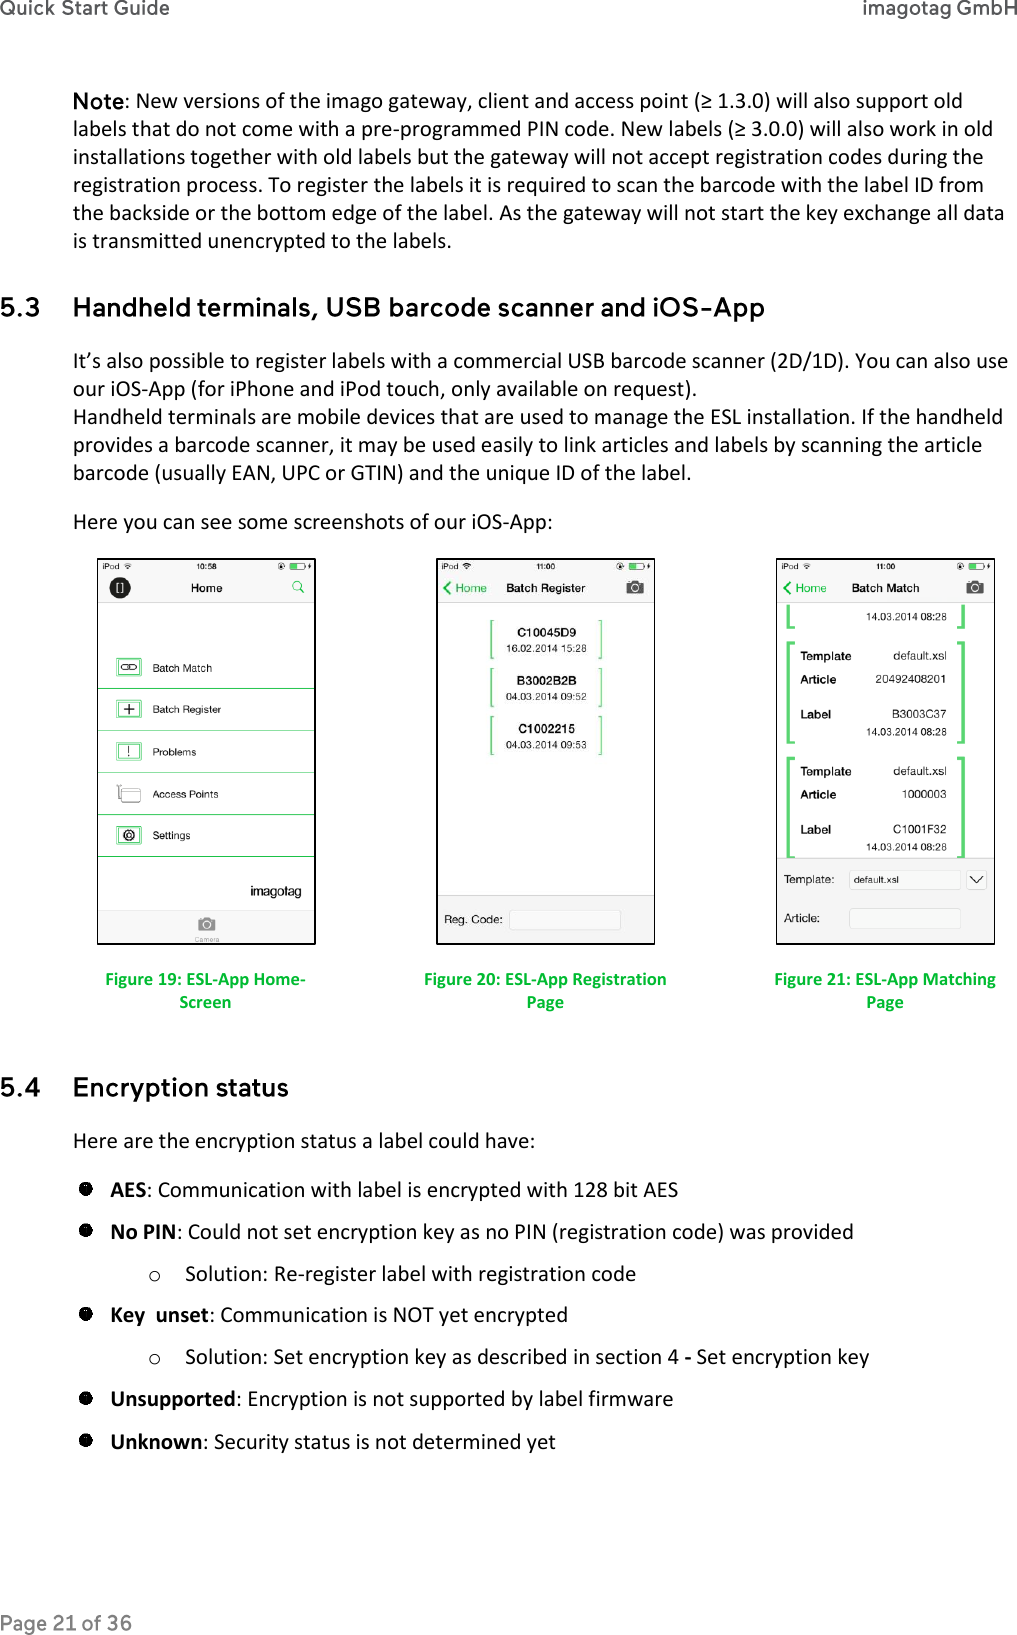
![Navigate to the unpacked client directory (see point 1.2 on how to unpack the software package) and execute the “client.jar” file (see [Troubleshooting] point 2 on how to start a jar file). Figure 8 - Starting ESL Client The client is configured to connect to a server on the local machine per default. In order to change this to a remote machine in a network you have to start the client with an additional parameter: Windows Create a shortcut/Edit existing short cut Append “ --host hostnameOrIPAddress” at the end of the “Target” field. ( : The text to append starts with an space and there are 2 hyphens to add!) Linux Append “ --host hostnameOrIPAddress” at the end of command (e.g. “java -jar client.jar --host 192.168.1.100” : The text to append starts with an space and there are 2 hyphens to add!) Figure 9 - Starting ESL Client with parameter](https://usermanual.wiki/SES-imagotag/E00001.Quick-start-guide/User-Guide-2454006-Page-11.png)
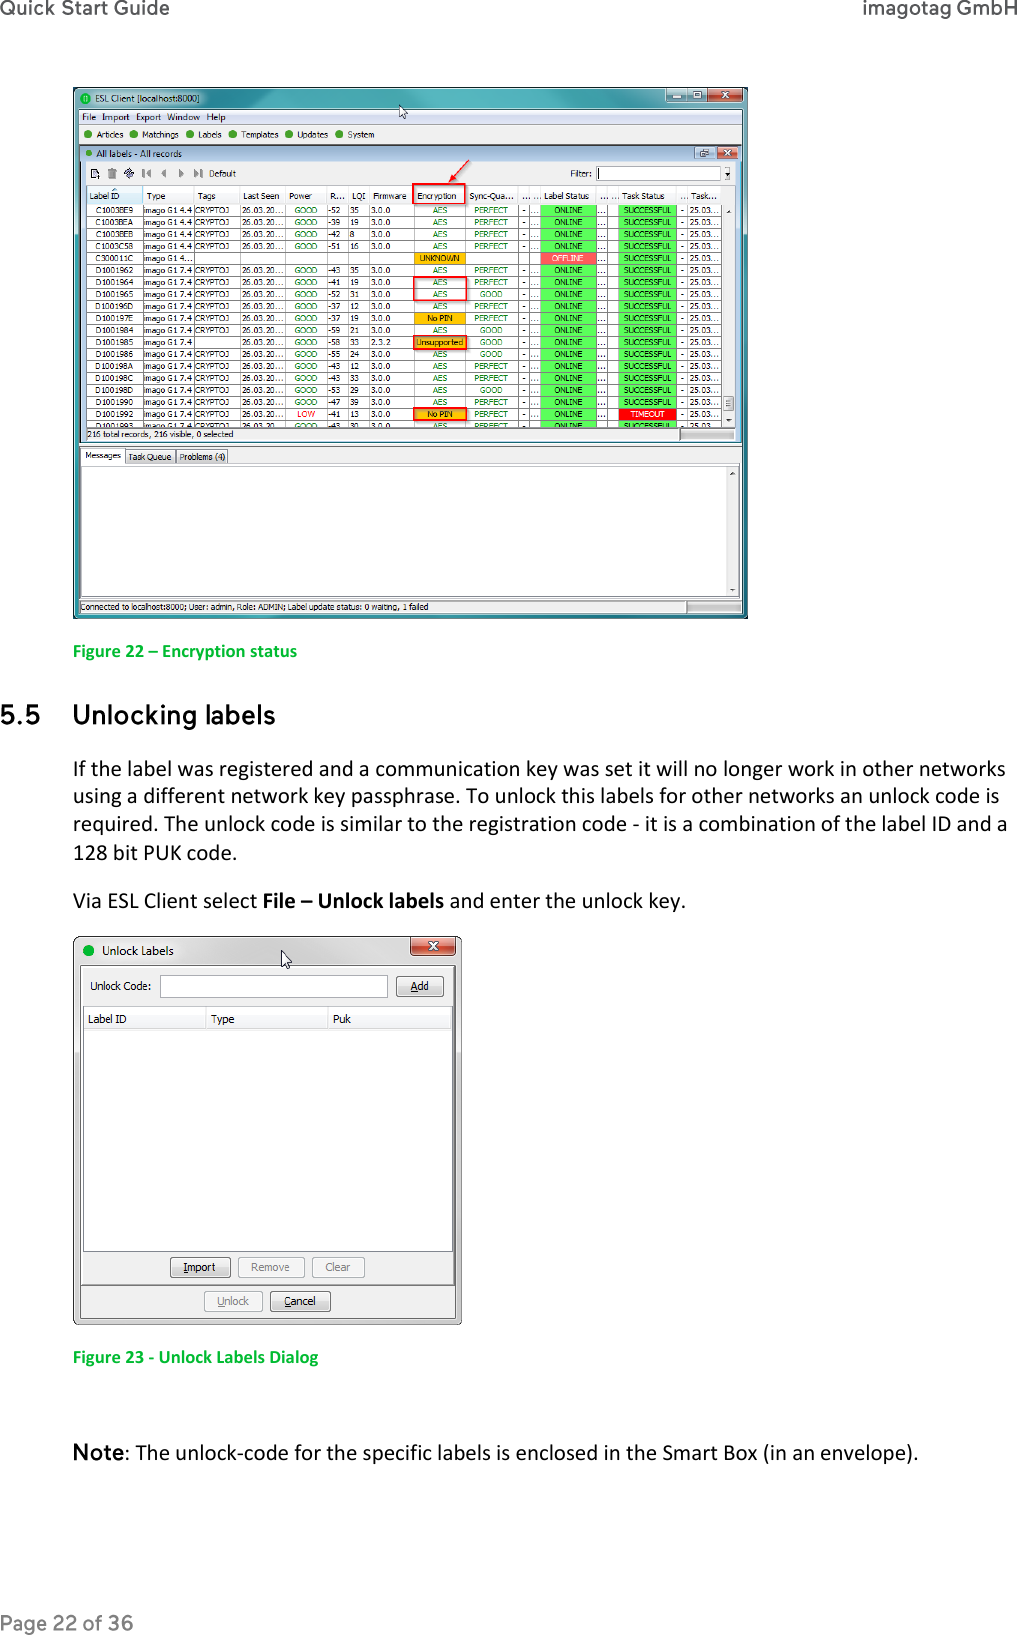
![Username: admin Password: admin Figure 10 - ESL Client Login Navigate to the unpacked template directory (see point 1.2 on how to unpack the software package) and execute the “template.jar” file (see [Troubleshooting] point 2 on how to start a jar file). Figure 11 - Starting the Template Editor](https://usermanual.wiki/SES-imagotag/E00001.Quick-start-guide/User-Guide-2454006-Page-12.png)
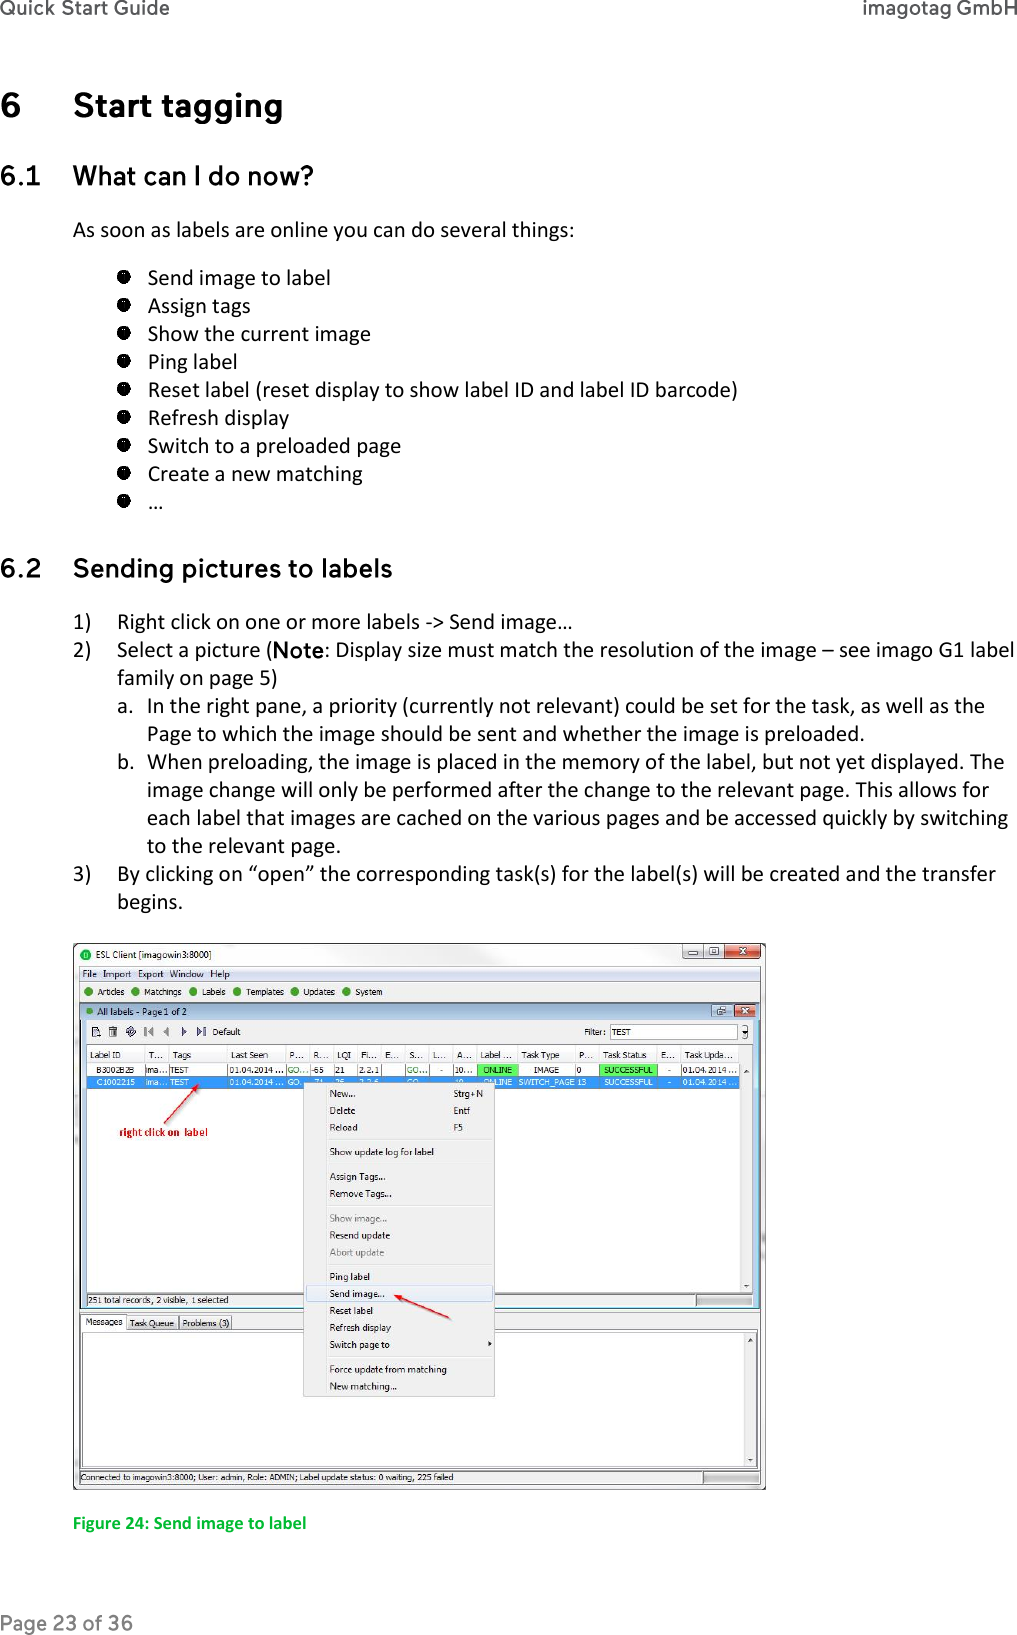
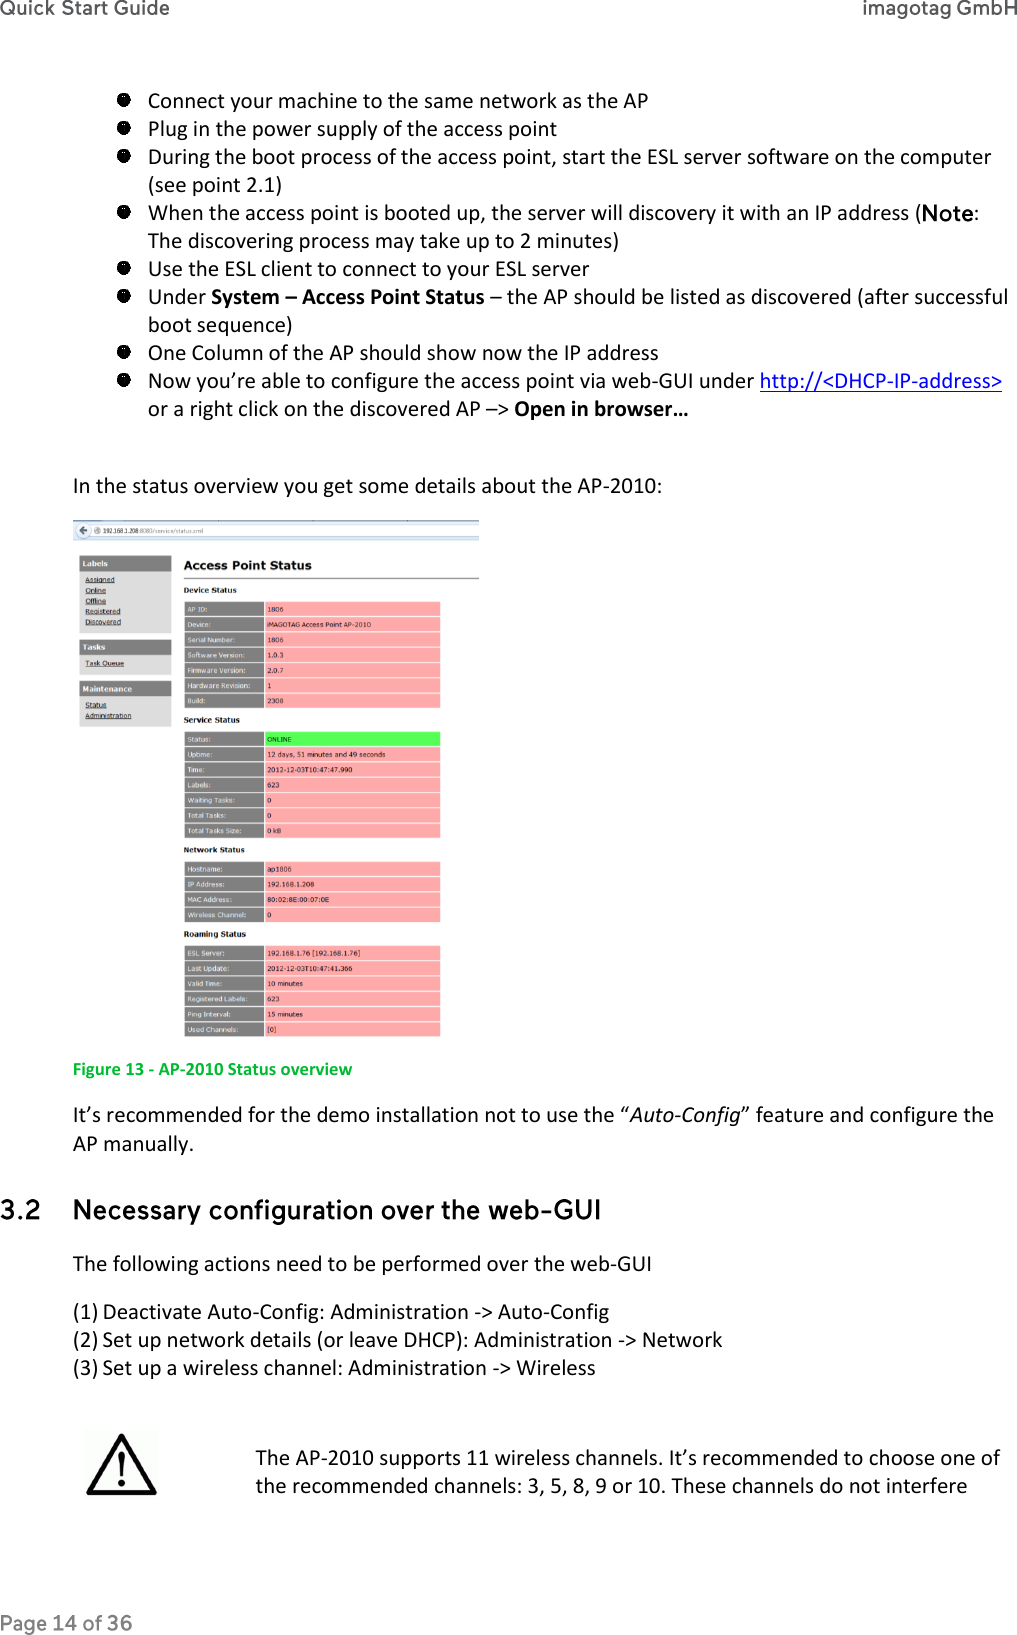
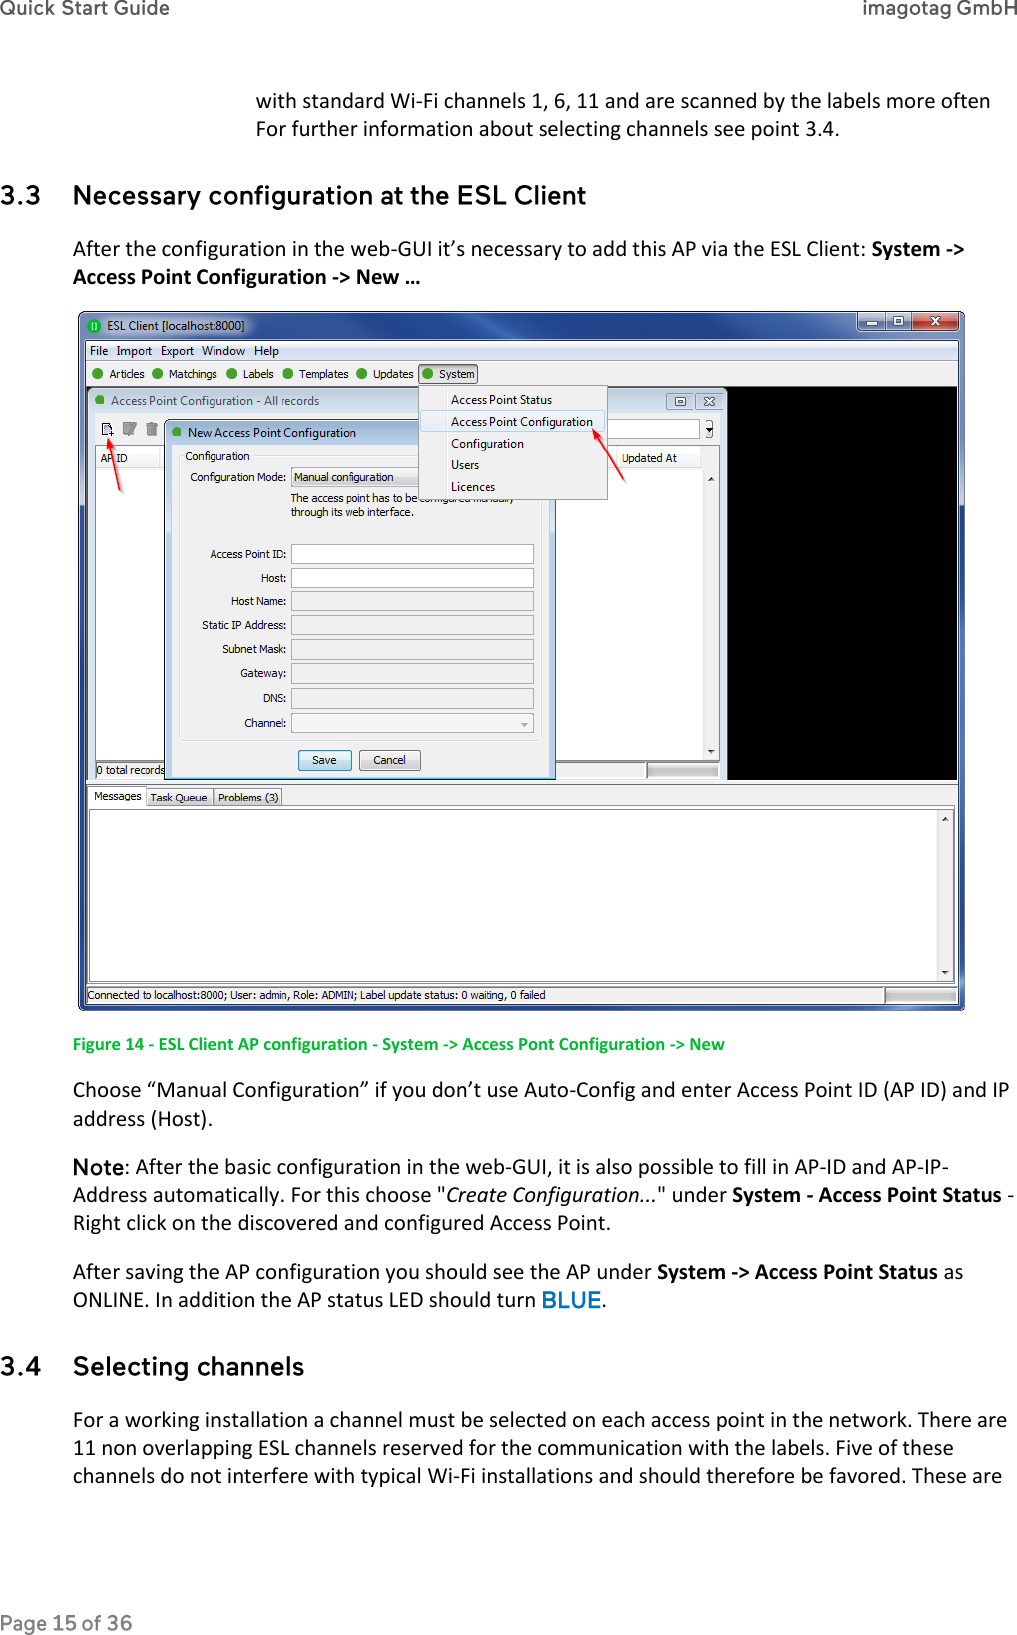
![The AP-2010 by imagotag is the communication center in the store that transmits price information to the labels. In order to ensure the communication between ESL server, access point AP-2010 and the labels the access point has to be configured at the start of the ESL Server. One way to configure the access point is on the client. Figure 12 - ESL Client Access Point Configuration Before labels are able to communication with the server at least one access point needs to be configured. In standard configuration the AP-2010 should get an IP-address via DHCP (recommended) and is accessible via web-GUI: URL: http://<DHCP-IP-address> Login: admin/admin : In this part of the Quick Start Guide it is assumed that a DHCP server is present (you can find the steps to discover the access point without DHCP in the [Troubleshooting] section at points 1.3 and 1.4). Before you can configure the access point it’s necessary that the server will discover it. The following points have to be observed:](https://usermanual.wiki/SES-imagotag/E00001.Quick-start-guide/User-Guide-2454006-Page-13.png)
![the ESL channels 3, 5, 8, 9 and 10 and they should be selected if there is a Wi-Fi installation on the Wi-Fi channels 1, 6 and 11. Figure 15 - Visualization of used channels of the imagotag AP-2010 If there is a Wi-Fi installation operating at 2.4 GHz (IEEE 802.11b/g/n) or any other radio frequency (RF) technology that uses the 2.4 GHz ISM band make sure to select the ESL channels that are least overlapping with the existing installation. If there is no ESL channel without any overlapping both the ESL and existing installation should still work but there might be a reduced overall speed in both installations. Warning: Do not select the same channel on two access points within one area. This will cause interferences and avoids labels from joining the network. The same channel may only be selected on two access points if it can be guaranteed that every label is within the range of only one of these access points. There are several LED colors that indicates the main status of the access point. Color Description Note Red Boot process Can take about 2 minutes, if it takes much longer, the device is defective and there is a need for service. Blue Normal mode --- Yellow Operational, but not connected to any server or no channel selected --- Red (blinking) Running Firmware Update During this time there is no connection to the electronic label If there are any problems regarding the access point please see point 1.5 in [Troubleshooting] section.](https://usermanual.wiki/SES-imagotag/E00001.Quick-start-guide/User-Guide-2454006-Page-16.png)
![First step is to set the parameter “encryptionPassphrase“ under System – Configuration (you can choose the encryption Passphrase on your own). Figure 16 - Set encryption key : Do not change encryption passphrase if labels are already connected and encrypted (if you want to change the encryption passphrase you’ll first have to unlock all labels – see [Troubleshooting] point 1.8).](https://usermanual.wiki/SES-imagotag/E00001.Quick-start-guide/User-Guide-2454006-Page-18.png)