Sonicwall 034 TA 170 User Manual SonicOS Standard
Sonicwall, Inc. TA 170 SonicOS Standard
UserManual.wiki
>
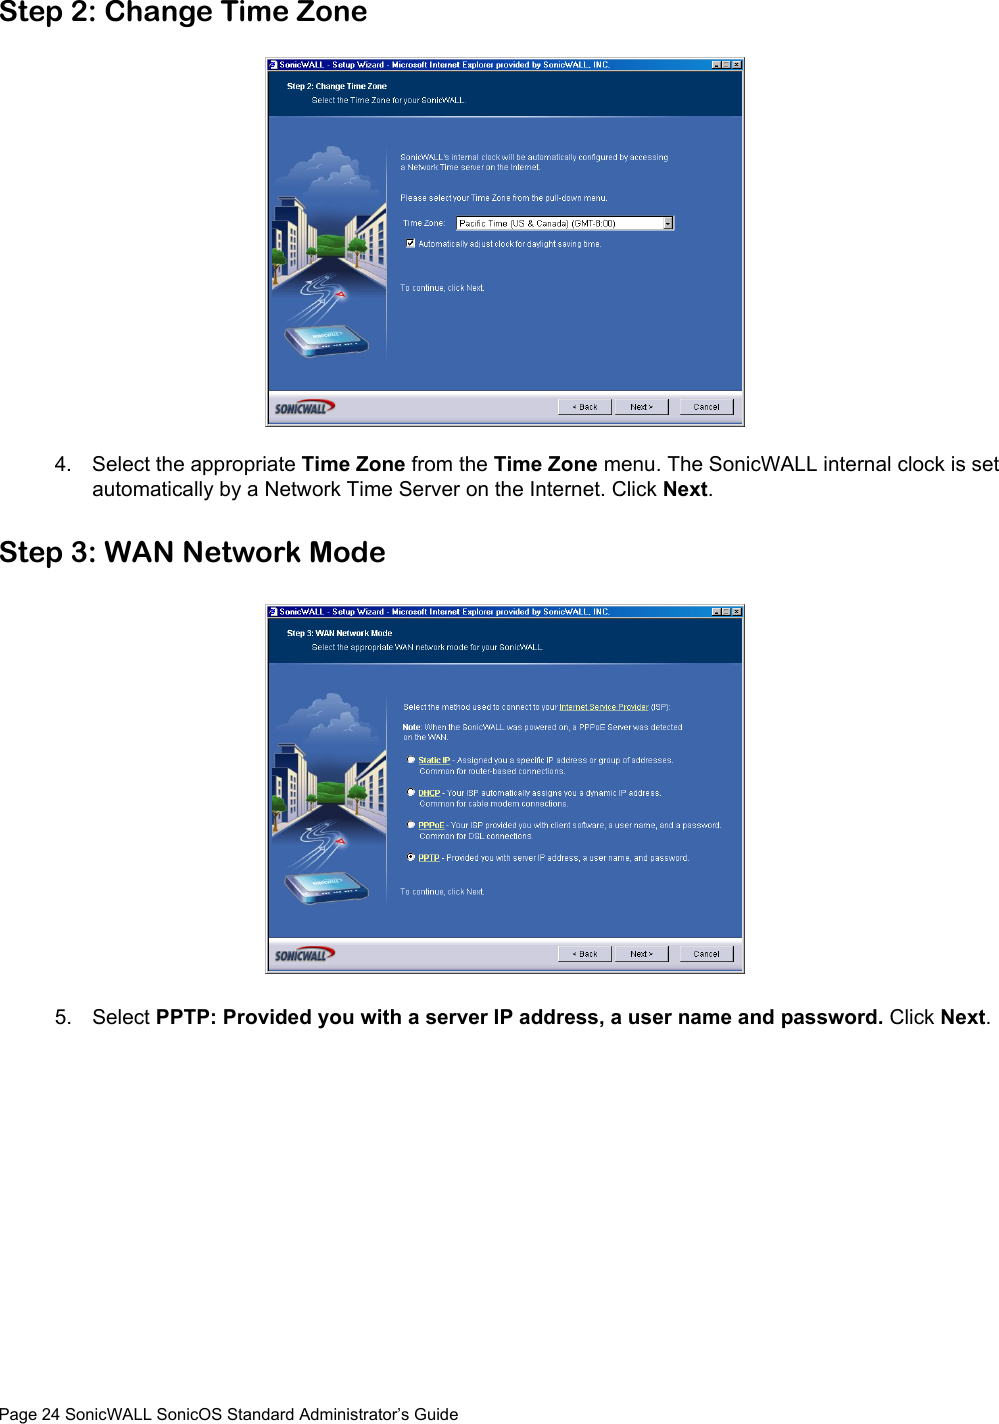
Sonicwall
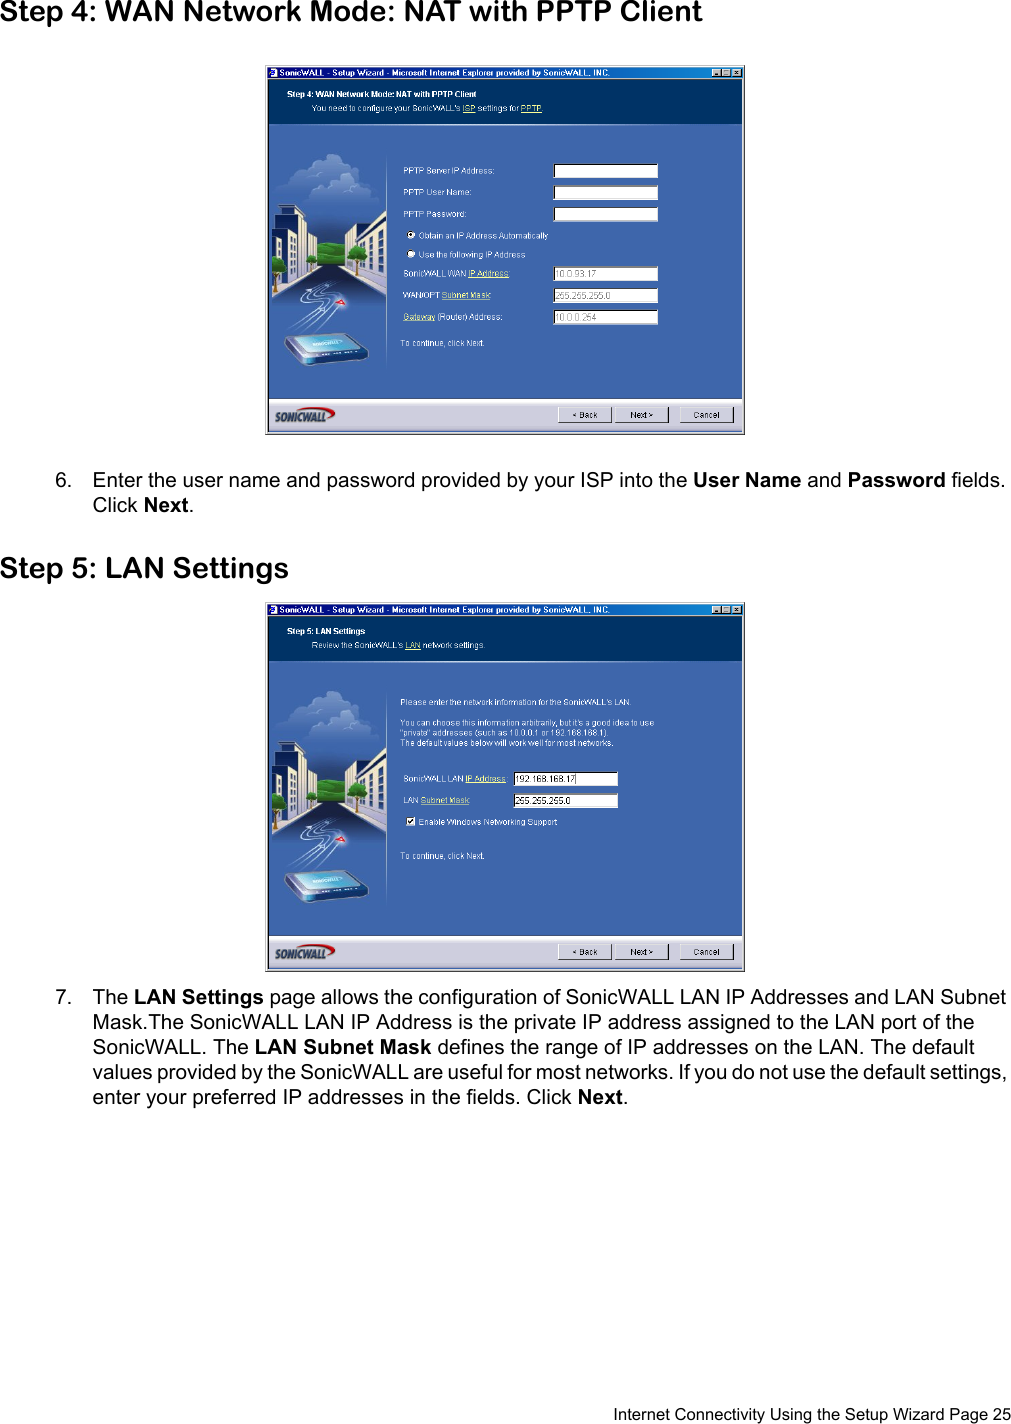
>
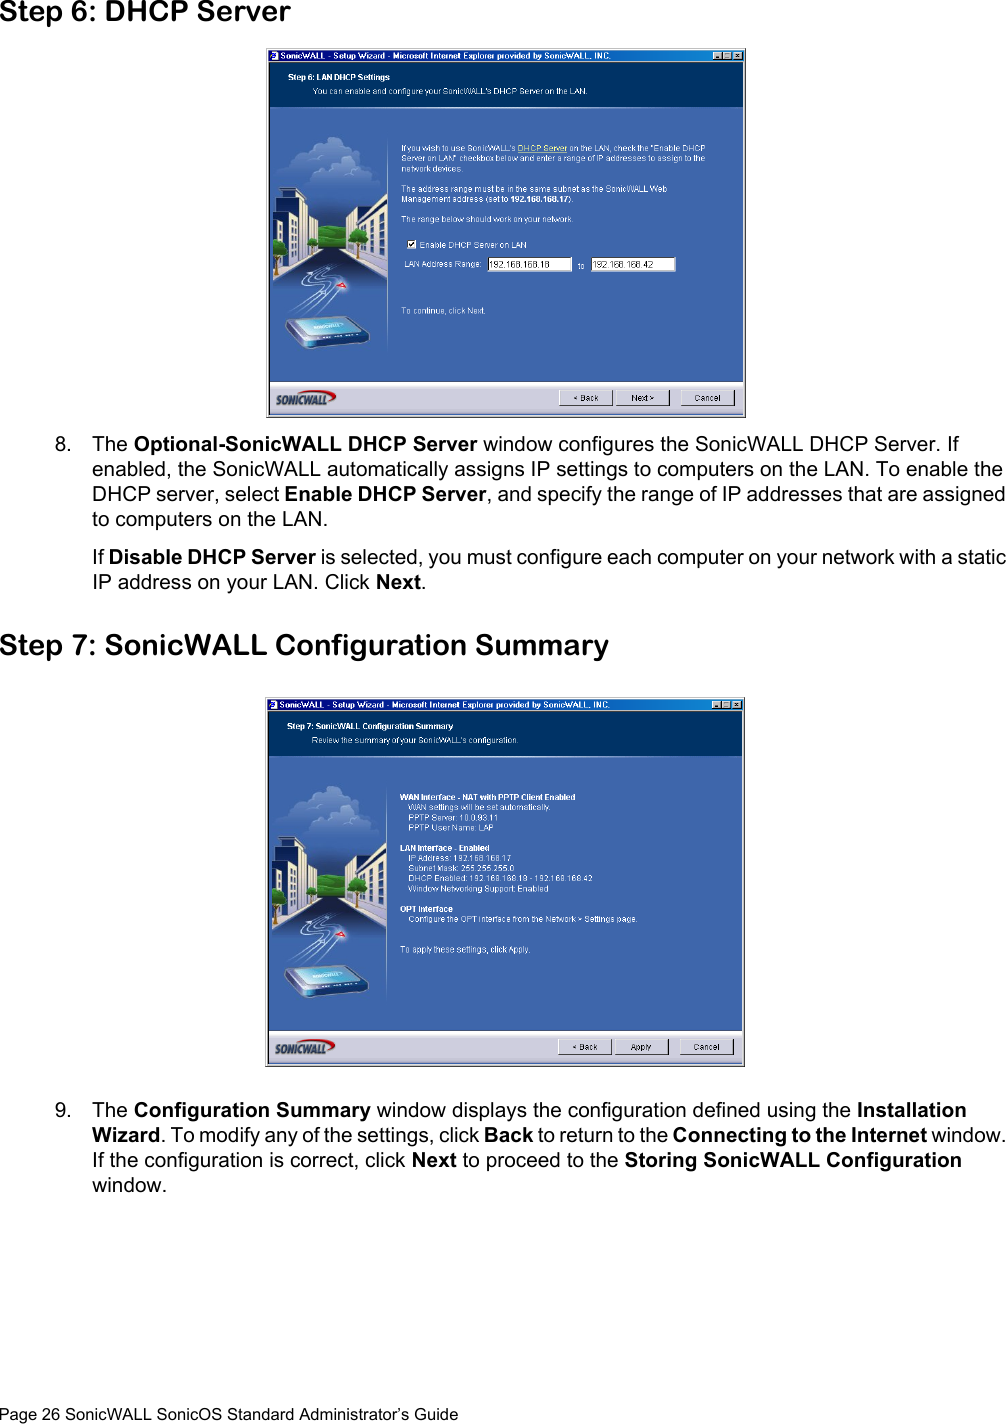
034 User Manual
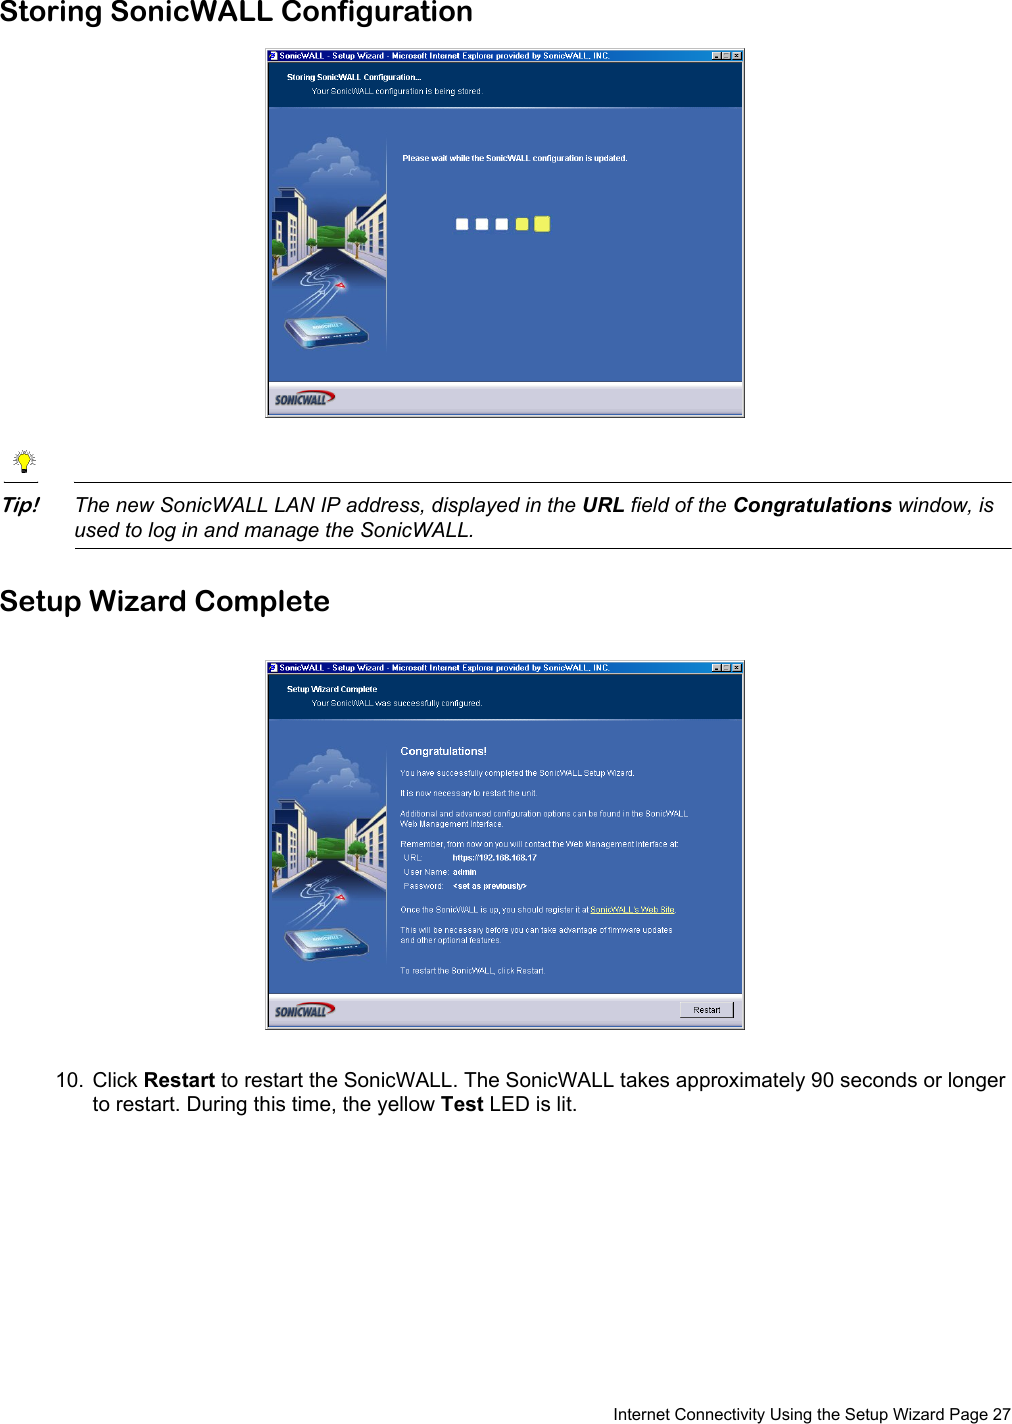
>
Users Manual Part 1
Contents
1.
Users Manual Part 1
2.
Users Manual Part 2
3.
Users Manual Part 3
4.
Users Manual Part 4
5.
Users Manual Part 5
Users Manual Part 1
Navigation menu
Upload a User Manual
Namespaces
Wiki Guide
HTML
PDF
Info
Views
User Manual
Discussion / Help
Navigation


![Page 42 SonicWALL SonicOS Standard Administrator’s GuidePingThe Ping test bounces a packet off a machine on the Internet and returns it to the sender. This test shows if the SonicWALL is able to contact the remote host. If users on the LAN are having problems accessing services on the Internet, try pinging the DNS server, or another machine at the ISP location. If the test is unsuccessful, try pinging devices outside the ISP. If you can ping devices outside of the ISP, then the problem lies with the ISP connection.1. Select Ping from the Diagnostic Tool menu. 2. Enter the IP address or host name of the target device and click Go. 3. If the test is successful, the SonicWALL returns a message saying the IP address is alive and the time to return in milliseconds (ms).Packet TraceThe Packet Trace tool tracks the status of a communications stream as it moves from source to destination. This is a useful tool to determine if a communications stream is being stopped at the SonicWALL, or is lost on the Internet.To interpret this tool, it is necessary to understand the three-way handshake that occurs for every TCP connection. The following displays a typical three-way handshake initiated by a host on the SonicWALL LAN to a remote host on the WAN.1. TCP received on LAN [SYN]From 192.168.168.158 / 1282 (00:a0:4b:05:96:4a)To 204.71.200.74 / 80 (02:00:cf:58:d3:6a)The SonicWALL receives SYN from LAN client.2. TCP sent on WAN [SYN]From 207.88.211.116 / 1937 (00:40:10:0c:01:4e)To 204.71.200.74 / 80 (02:00:cf:58:d3:6a)The SonicWALL forwards SYN from LAN client to remote host.3. TCP received on WAN [SYN,ACK]From 204.71.200.74 / 80 (02:00:cf:58:d3:6a)To 207.88.211.116 / 1937 (00:40:10:0c:01:4e)The SonicWALL receives SYN,ACK from remote host.4. TCP sent on LAN [SYN,ACK]From 204.71.200.74 / 80 (02:00:cf:58:d3:6a)To 192.168.168.158 / 1282 (00:a0:4b:05:96:4a)The SonicWALL forwards SYN,ACK to LAN client.5. TCP received on LAN [ACK]From 192.168.168.158 / 1282 (00:a0:4b:05:96:4a)To 204.71.200.74 / 80 (02:00:cf:58:d3:6a)Client sends a final ACK, and waits for start of data transfer.6. TCP sent on WAN [ACK]From 207.88.211.116 / 1937 (00:40:10:0c:01:4eTo 204.71.200.74 / 80 (02:00:cf:58:d3:6a)](https://usermanual.wiki/Sonicwall/034.Users-Manual-Part-1/User-Guide-441555-Page-57.png)