Texas Instruments TINAVAP3 TI-Nspire CX Navigator Access Point User Manual My
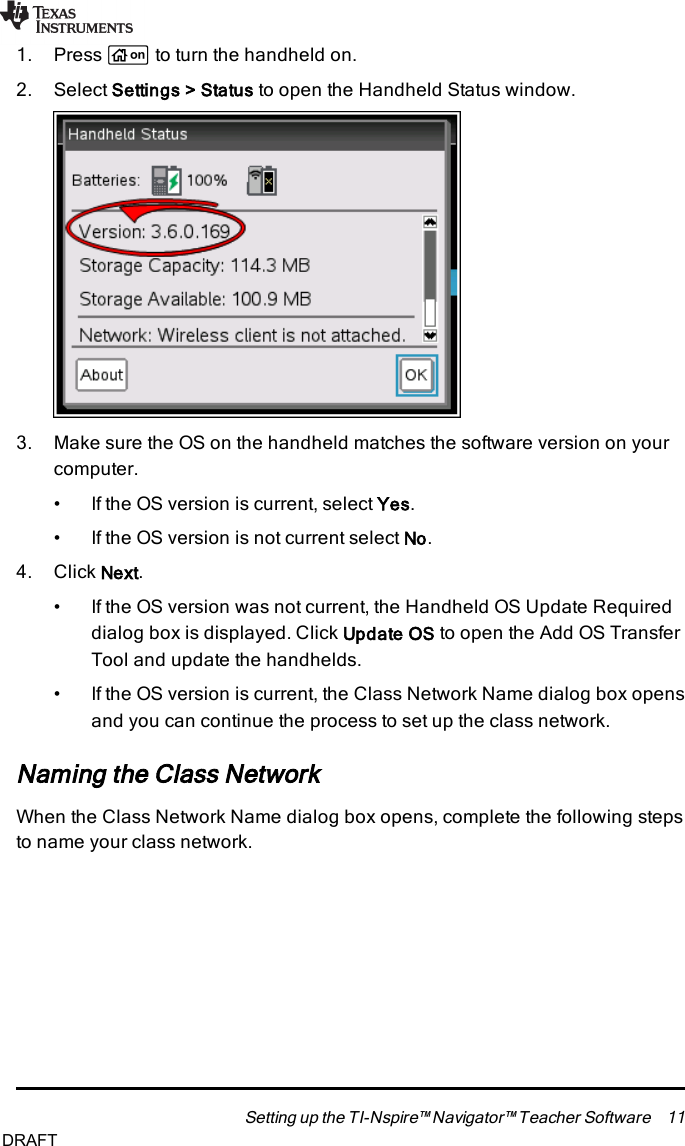
Texas Instruments Inc. TI-Nspire CX Navigator Access Point My
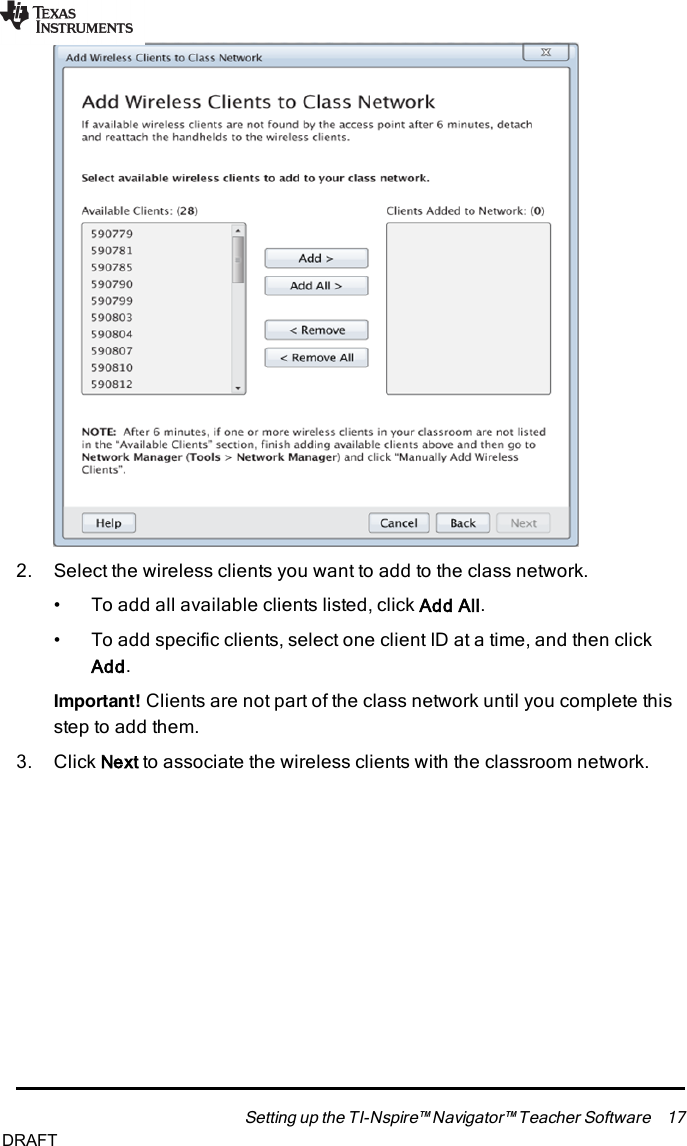
UserManual.wiki
>
Texas Instruments
>
TINAVAP3 User Manual
TempConfidential_TINAVAP3-UserGuide_Revised3
Navigation menu
Upload a User Manual
Namespaces
Wiki Guide
HTML
PDF
Info
Views
User Manual
Discussion / Help
Navigation
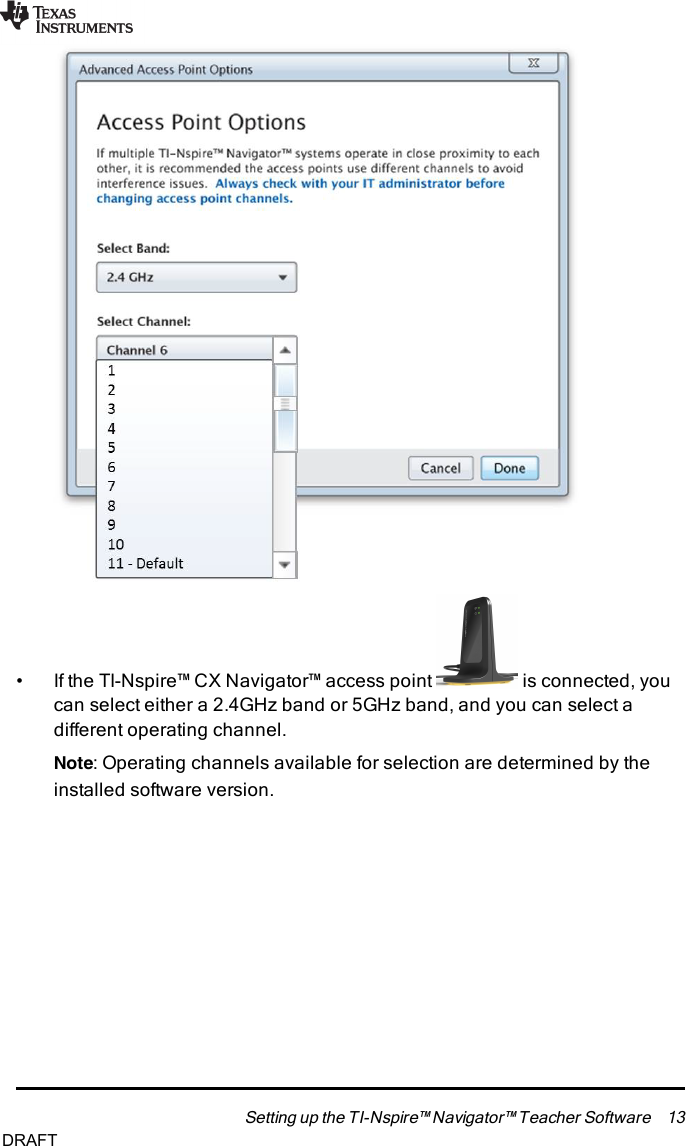
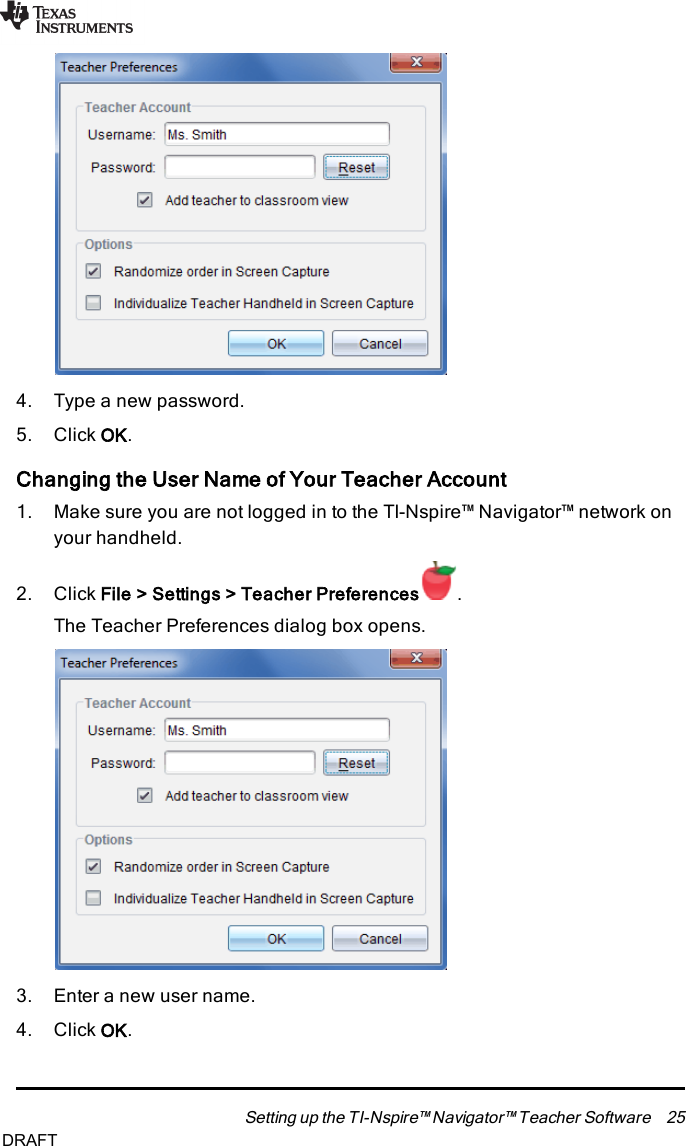
![12 Setting up the TI-Nspire™ Navigator™ Teacher Software1. Type the name you want to assign to the class network in the TI-NAV-Nfield.Use a name that is unique, easy to remember, and easy for you to identify.The class network name can be up to 22 characters long. Names canconsist of letters, numbers, and spaces; but cannot contain specialcharacters such as ?"$\![]+.2. Click Next to configure the access point with no changes.—or —3. Click Advanced to select a different band or operating channel.• If the TI-Nspire™ Navigator™ access point isconnected, you can select a different operating channel.DRAFT](https://usermanual.wiki/Texas-Instruments/TINAVAP3/User-Guide-1991917-Page-12.png)