Vertex Wireless VW340 CDMA EV-DO Rev.A Mini Wi-Fi Hotspot User Manual VW300 EN V1 5
Vertex Wireless Co., Ltd. CDMA EV-DO Rev.A Mini Wi-Fi Hotspot VW300 EN V1 5
UserManual.wiki
>
Vertex Wireless
>
VW340 User Manual
>
user manual
Contents
1.
user manual
2.
User manual
user manual
Navigation menu
Upload a User Manual
Namespaces
Wiki Guide
HTML
PDF
Info
Views
User Manual
Discussion / Help
Navigation

![3.Configuration 11 Web-based Configuration Please open a web-browser and enter the IP address of the router (192.168.200.1) You will see the Router’s login page in your browser window. Enter login password and press “Login” button to log in. ** Note: The Router ships with no password entered. In the login screen, leave the password blank and click the “Login” button to log in. Basic setup □▶Connection Setting [Internet Setting] Basic setting Enter your PPP user name, password and Dial (Provided by operator. Default dial: #777) System Selection Select the CDMA system from the drop-down menu:1x and EVDO, 1x, and EVDO](https://usermanual.wiki/Vertex-Wireless/VW340.user-manual/User-Guide-1371700-Page-11.png)
![CDMA EV-DO Rev.A Mini Wi-Fi Hotspot VW300 series 12 [Wireless Setting] Wireless Mode Select enabled to use Wi-Fi feature otherwise select disabled. If you select Enabled, SSID and Wireless Security will be displayed below SSID Service Set Identifier is the name of your wireless network. Create a name using up to 32 characters. Wireless Security Select Enabled to use Wireless Security otherwise select Disabled. If you select Enabled, Wireless Code will be displayed below (Default security option is WPA-PSK TKIP. If you want to have more option, go to Wireless Setup under Advanced Setup) Wireless Code Enter security code for WPA-PSK TKIP encryption if you want to use Wi-Fi security option □▶Status You can check current Router status via this menu.](https://usermanual.wiki/Vertex-Wireless/VW340.user-manual/User-Guide-1371700-Page-12.png)
![3.Configuration 13 Advanced Setup This menu provides various enhanced network function configuration and recommend to expert user. It’s not necessary for all users. -IP Setup □▶Internet Setting [Internet Setting] Basic setting Enter your PPP user name, password and Dial (Provided by operator. Default dial: #777) System Selection Select a CDMA system from the drop-down menu: 1x and EVDO, 1x, and EVDO [Dynamic IP] DNS Server Select either Manual or Auto select for DNS server. Primary DNS Address Enter the Primary DNS server IP assigned by your ISP Secondary DNS Address Enter the Secondary DNS server IP assigned by your ISP (optional)](https://usermanual.wiki/Vertex-Wireless/VW340.user-manual/User-Guide-1371700-Page-13.png)
![3.Configuration 15 -Wireless Setup □▶ Wireless Basic Setting [Wireless Router Mode] Select a Wireless Router mode from list : Disabled / AP / WDS Master/ WDS Slave [Wireless Network] Wireless Mode Select a Wireless Mode from the drop-down menu: ◎ Mixed(B+G) Mode – Select if you are using both 802.11b and 802.11g wireless clients. ◎ G only Mode – Select if you are using 802.11g wireless clients only. ◎ B only Mode – Select if you are using 802.11b wireless clients only. WMM Wireless Multimedia Extension (WMM) mode is Power Save uses mechanisms from 802.11e and](https://usermanual.wiki/Vertex-Wireless/VW340.user-manual/User-Guide-1371700-Page-15.png)
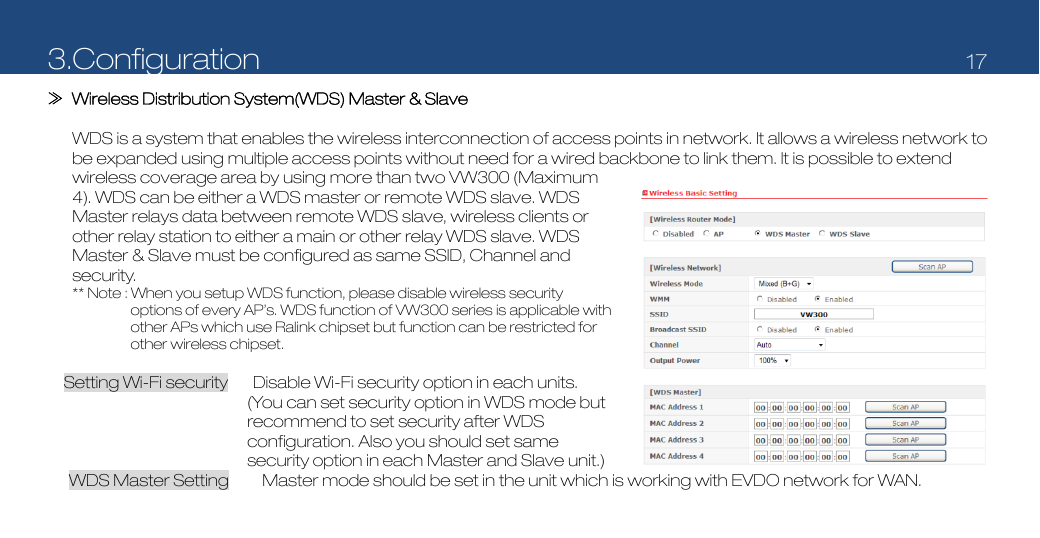
![CDMA EV-DO Rev.A Mini Wi-Fi Hotspot VW300 series 18 Connect to WEB UI using IP address, “192.168.200.1” → Go to [Advanced Set up] → [Wireless Set up] → [Basic setting] → Click [WDS Master] → Set desired SSID and Channel. (These SSID and Channel should be same with WDS slave device.) → Click “Scan AP” in WDS Master section → Choose AP that you want to use as WDS Slave → Click “Apply” to apply your configuration. WDS Slave Setting Connect to WEB UI using IP address, “192.168.200.1” which you want to use as WDS slave. Go to [Advanced Set up] → [Wireless Set up] → [Basic setting] → Click [WDS Slave] → Set desired SSID and Channel.(These SSID and Channel should be same with WDS Master device.) Set desired IP address of WEB UI.(Once device is operated as WDS slave, you can access WEB UI via this address.) → Click “Scan AP” in WDS Slave section → Choose AP that you want to use as WDS Master → Click “Apply” to apply your configuration.](https://usermanual.wiki/Vertex-Wireless/VW340.user-manual/User-Guide-1371700-Page-18.png)
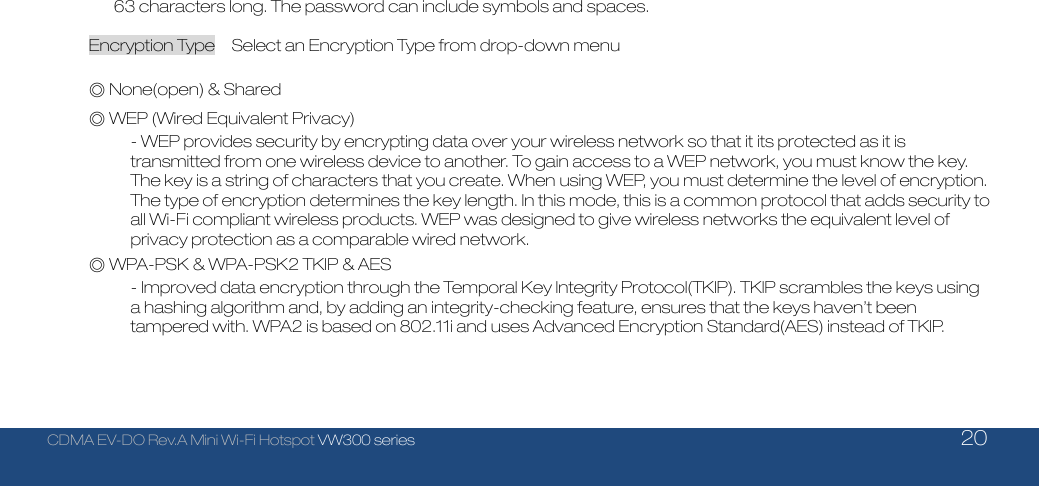
![3.Configuration 19 □▶ Security Setting Here are a few different ways you can maximize the security of your wireless network and protect your data from prying eyes and ears. This section is intended for the home, home office, and small office user. At the time of this User Manual’s publication, there are two encryption methods available. [Security Using Password] Security Type Select a Security Type from drop-down menu. ◎ None(open) & Shared – In this mode, a wireless device must know the WEP key to join the network. ◎ WPA-PSK & WPA-PSK2 – In this mode, Wi-Fi protected access with Pre-Shared Key (WPA-PSK and WPA-PSK2) data encryption provides extremely strong data security, very effectively blocking eaves dropping. Uses a pass phrase or key to authenticate your wireless connection. The key is an alpha-numeric password between 8 and](https://usermanual.wiki/Vertex-Wireless/VW340.user-manual/User-Guide-1371700-Page-19.png)
![3.Configuration 21 [Security using Mac Address] The MAC address security is a powerful security feature that allows you to specify which computers are allowed on the network. When you use this feature, you must enter the MAC address of each client (computer) on your network to allow network access to each. Policy Select a Policy from the three different modes: ◎ Open – In this mode, there is no restriction to any device connected to the Modem whether it is through Wi-Fi or Ethernet ports. ◎ Deny – In this mode, the service table shows the client \MAC address being blocked by the Modem. ◎ Allow – In this mode, the service table shows the client MAC address allowed by the Modem. ** Note: You will not be able to delete the MAC address of the computer you are using to access the Router’s administrative functions (the computer you are using now).](https://usermanual.wiki/Vertex-Wireless/VW340.user-manual/User-Guide-1371700-Page-21.png)
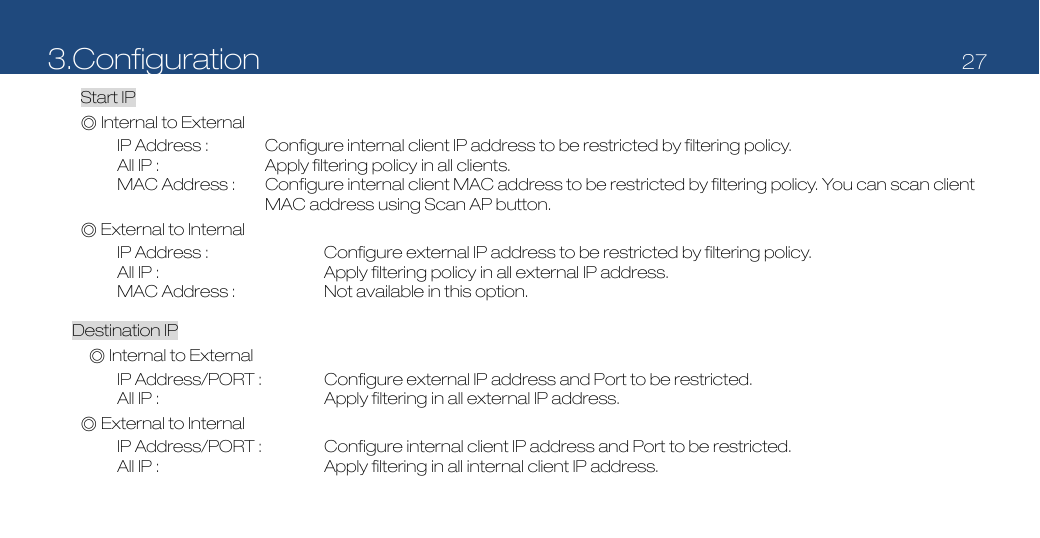
![CDMA EV-DO Rev.A Mini Wi-Fi Hotspot VW300 series 26 [Client IP/MAC Address Filtering] Policy Select filtering policy Deny or Allow Direction ◎ Internal to External : Select if you want to apply filtering policy in the outgoing communication. (All clients are allowed in case of outgoing communication by default) ◎ External to Internal : Select if you want to apply filtering policy in the incoming communication. (All clients are restricted in case of incoming communication by default. Hence this option is valid in case of DMZ or IP Forwarding) Protocol Select one among of TCP / UDP / ALL. If you select ALL option, filtering policy will be applied in all protocol.](https://usermanual.wiki/Vertex-Wireless/VW340.user-manual/User-Guide-1371700-Page-26.png)