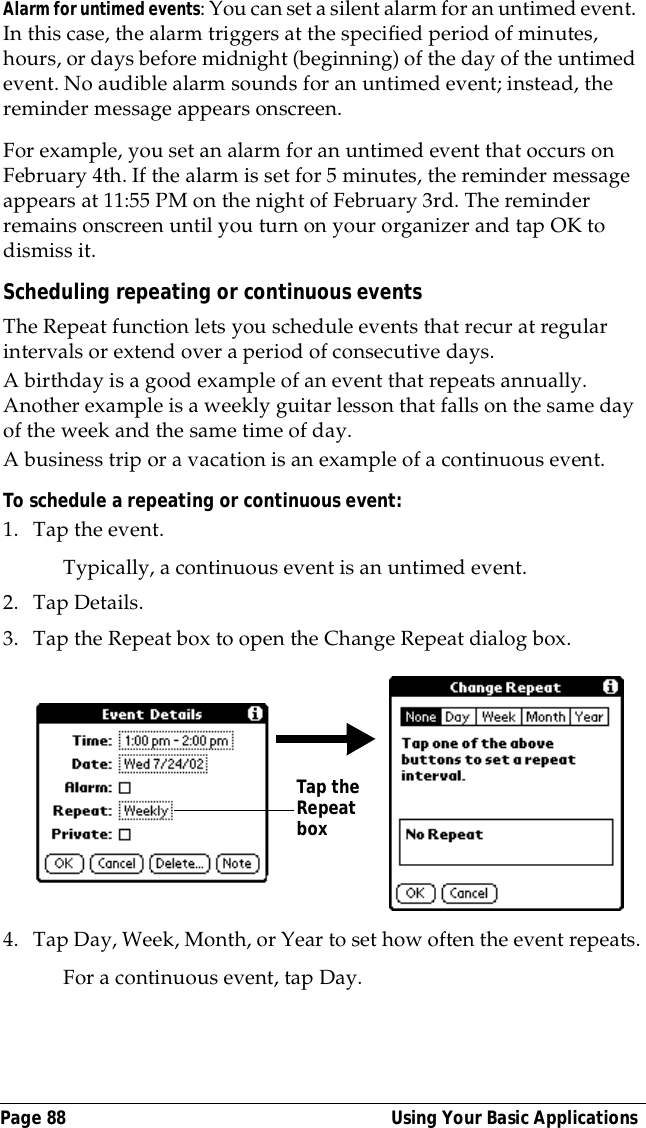
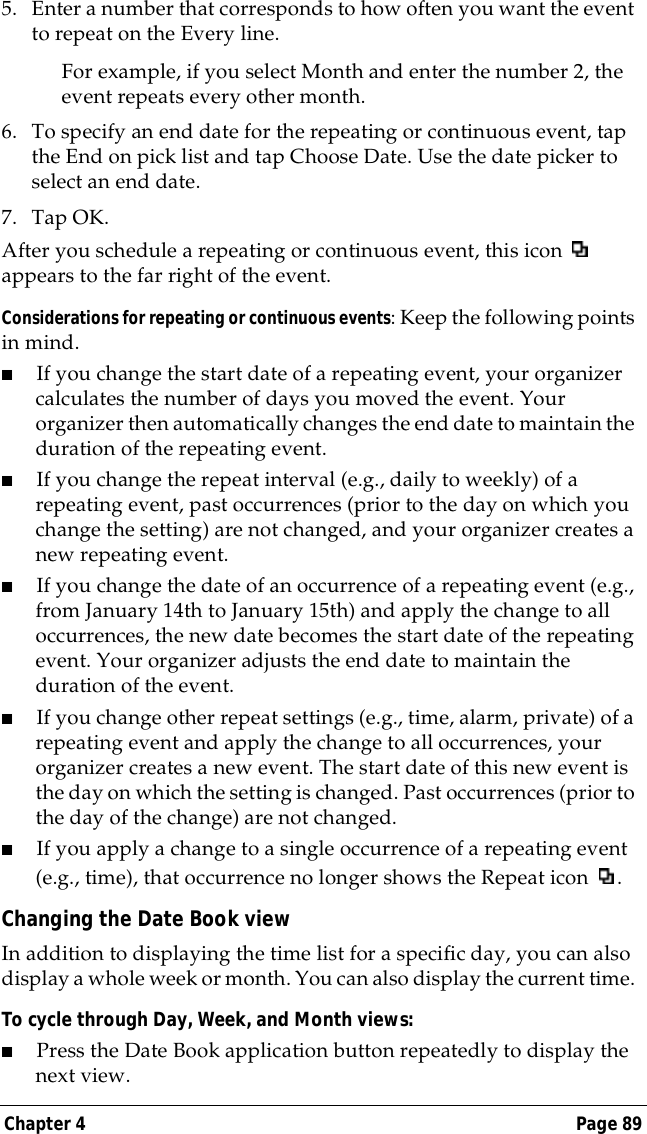
3Com 3C80500 Handheld PDA with low duty cycle packet data User Manual PCPLOGO BLK EPS
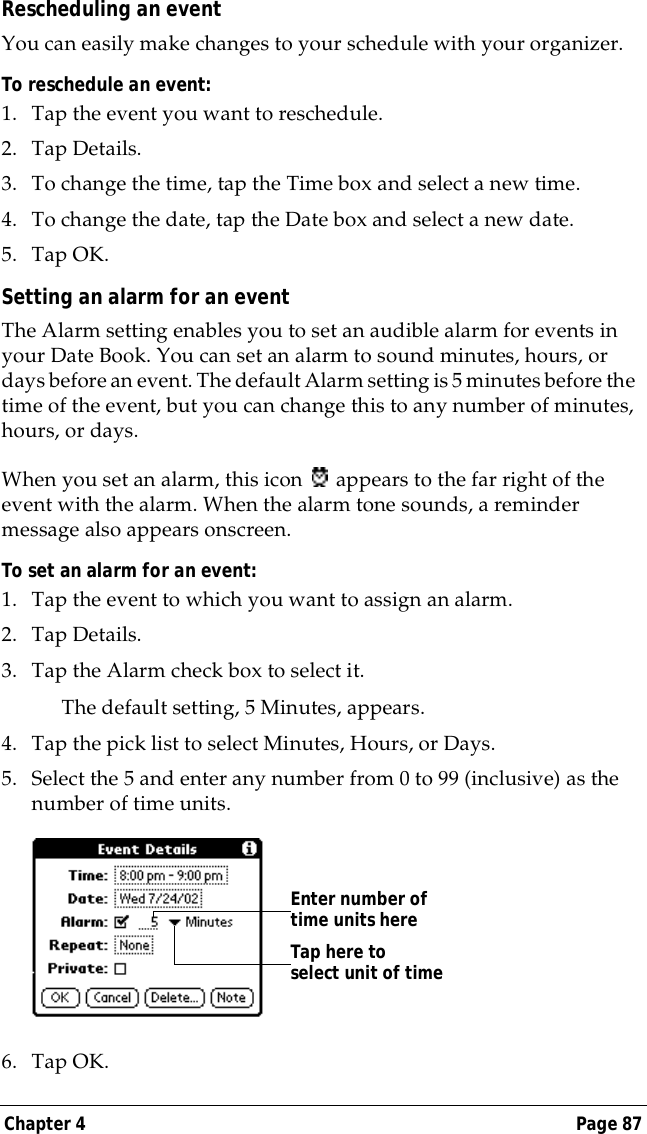
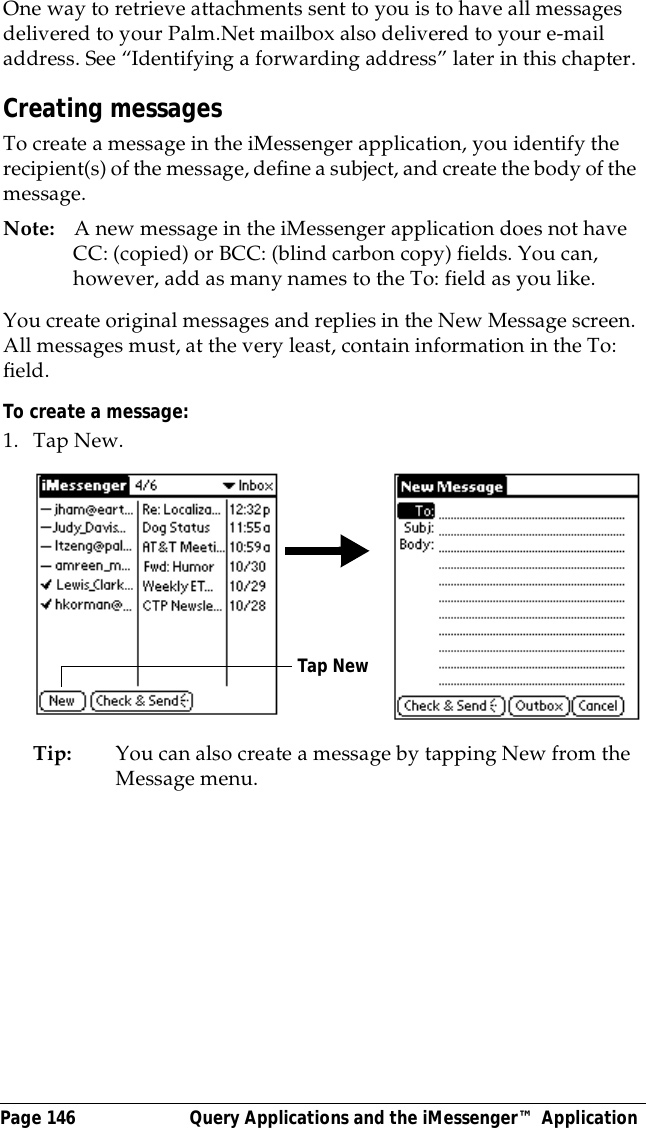
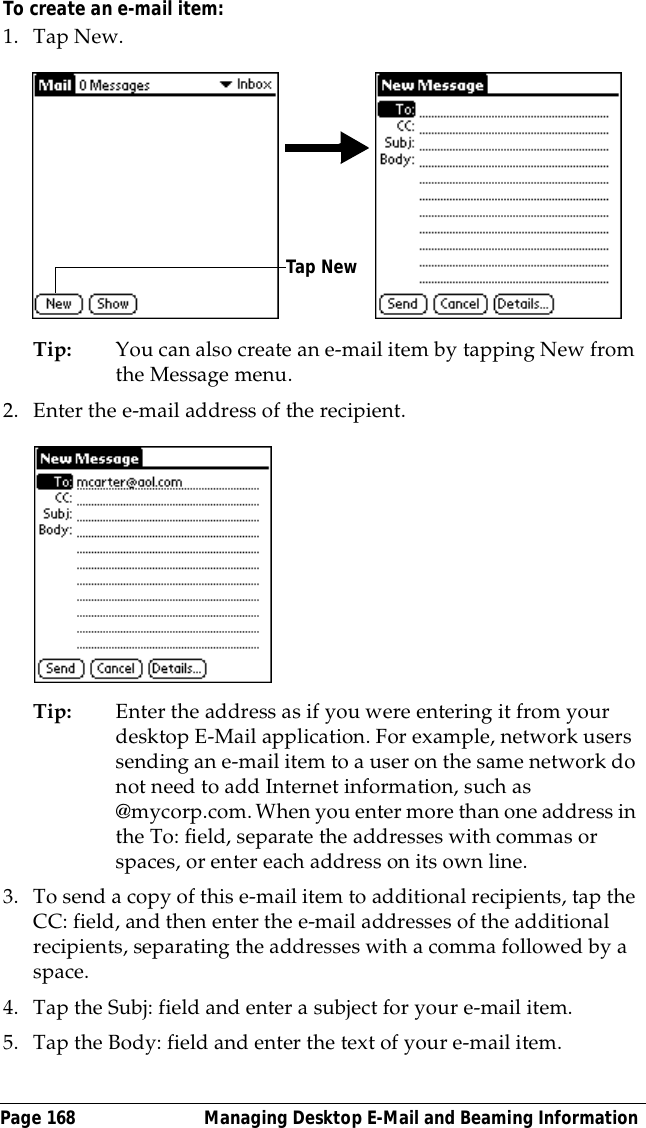
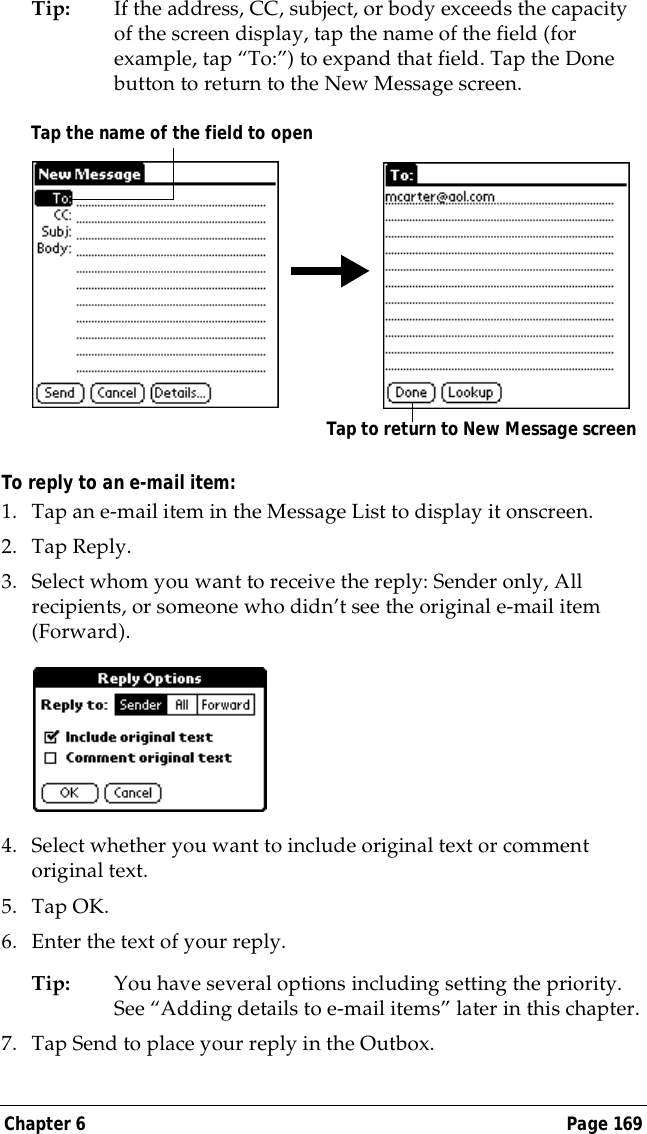
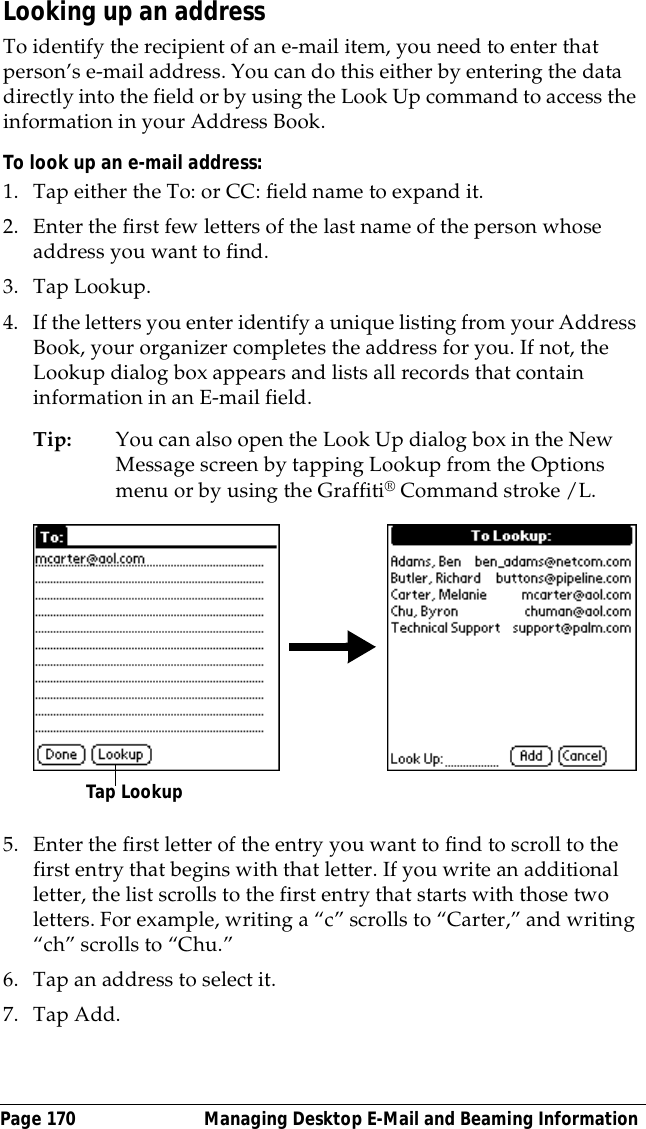
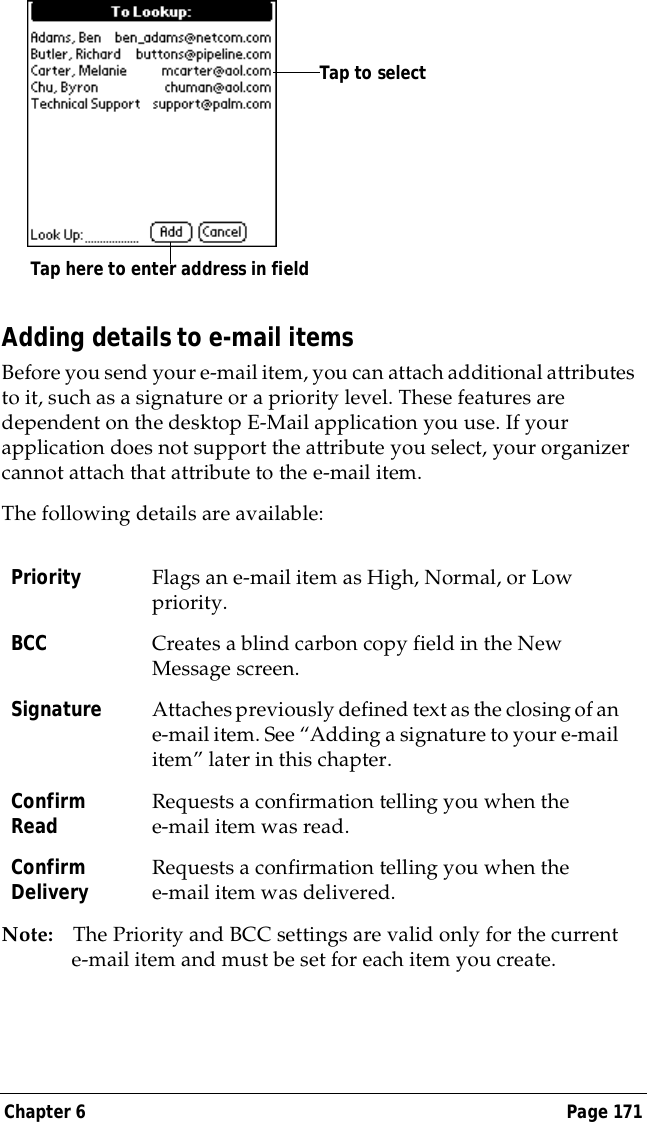
3Com Corporation Handheld PDA with low duty cycle packet data PCPLOGO BLK EPS
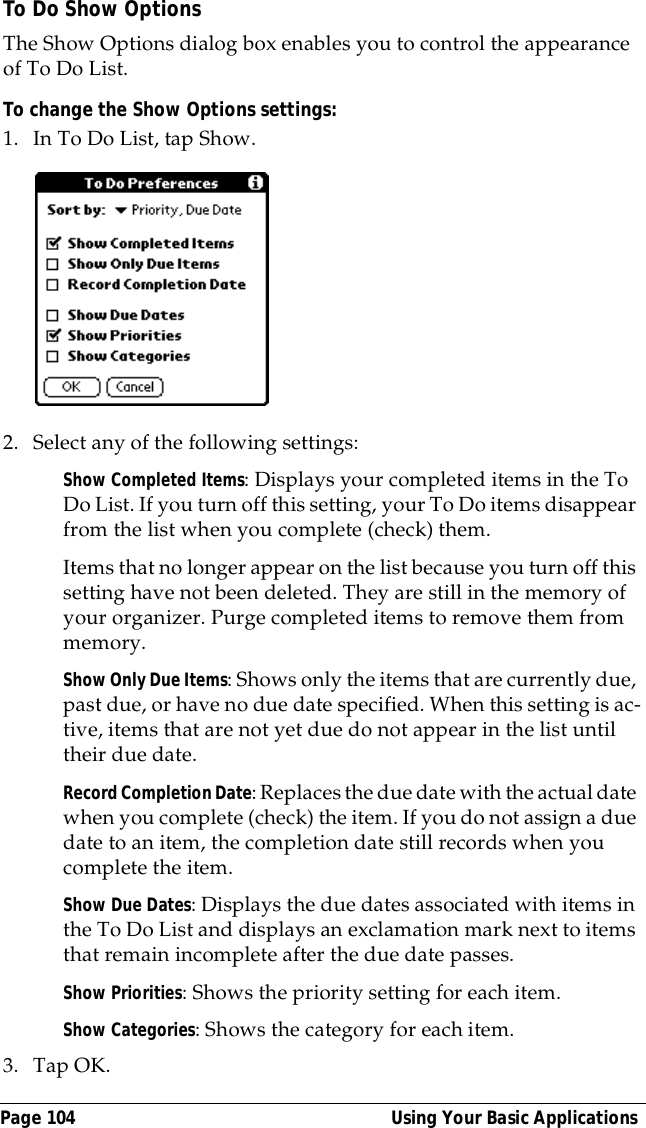
3Com >
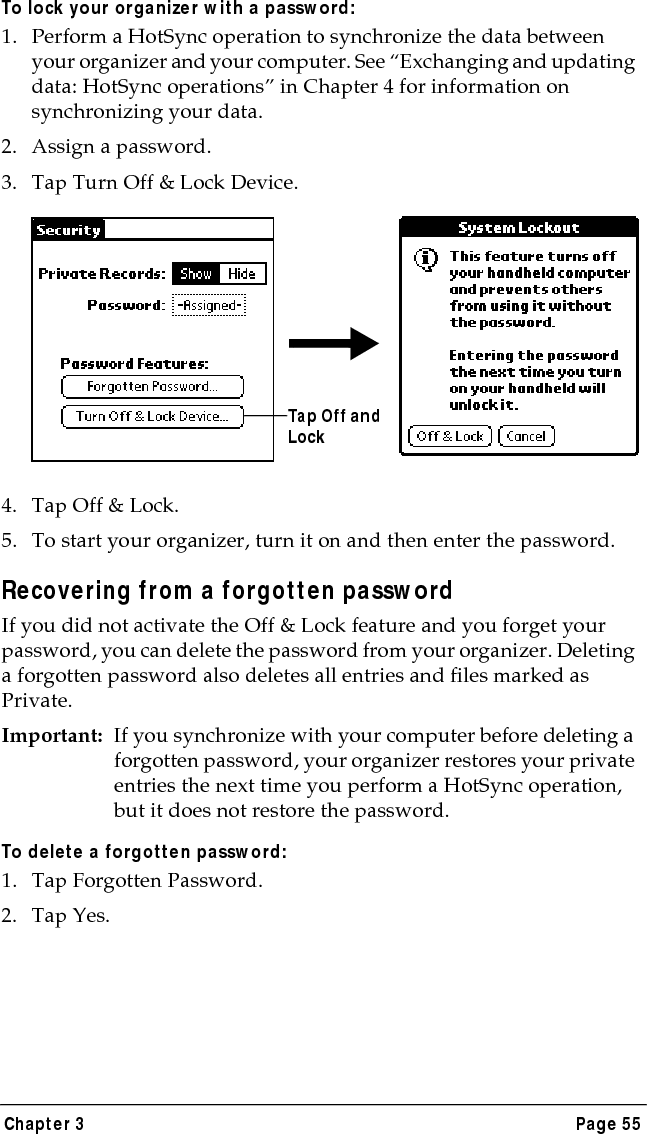
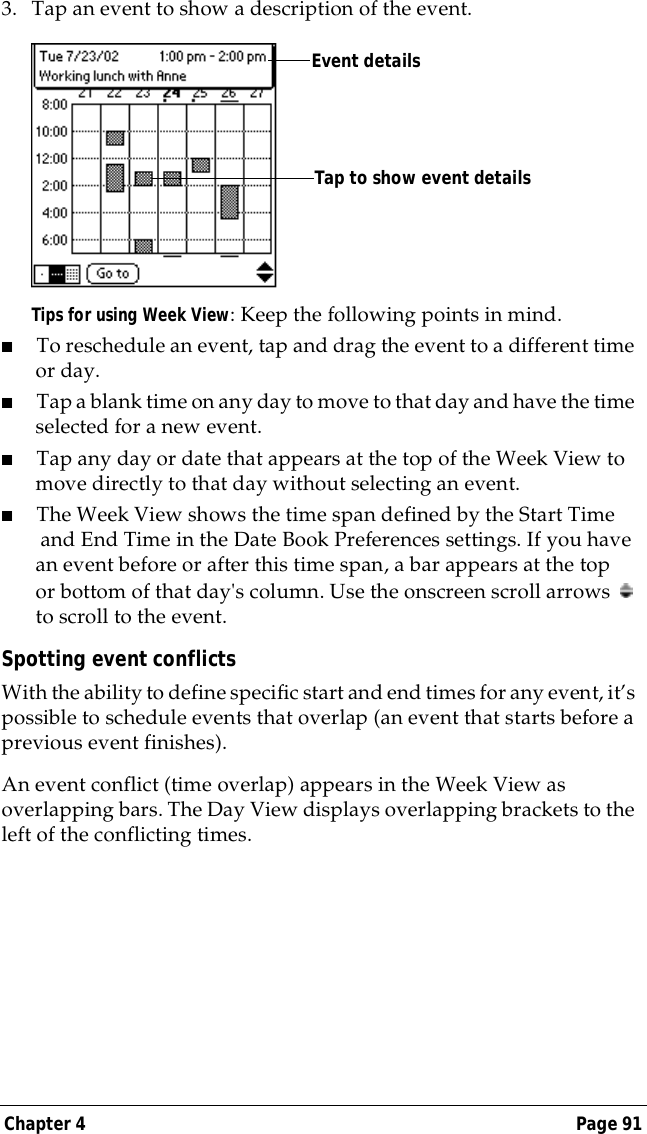
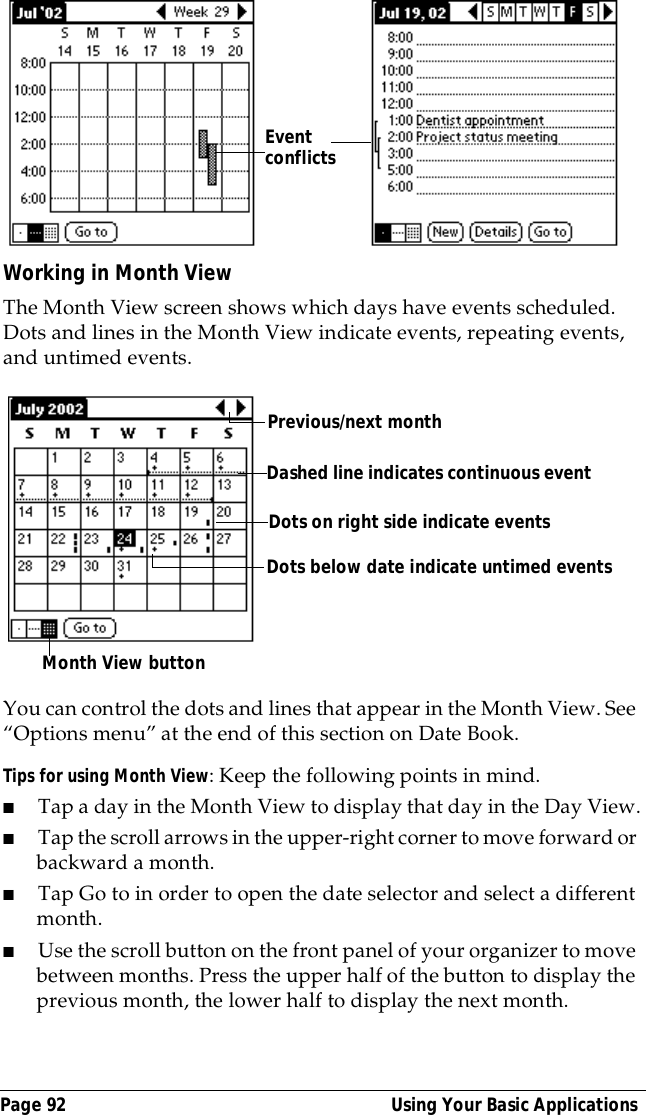
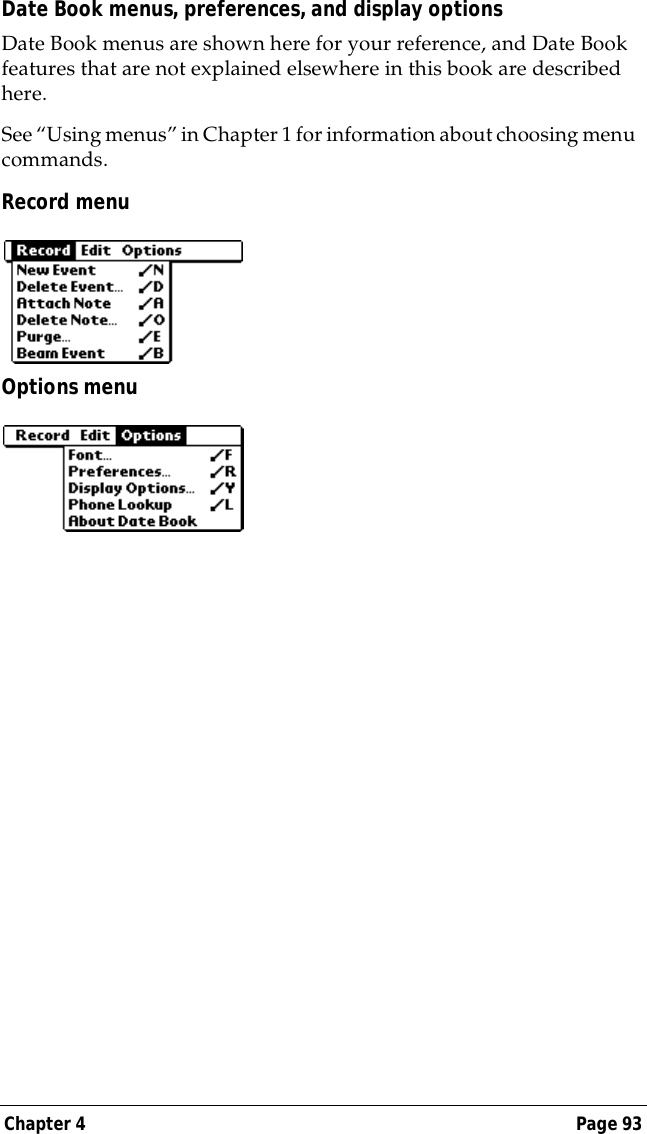
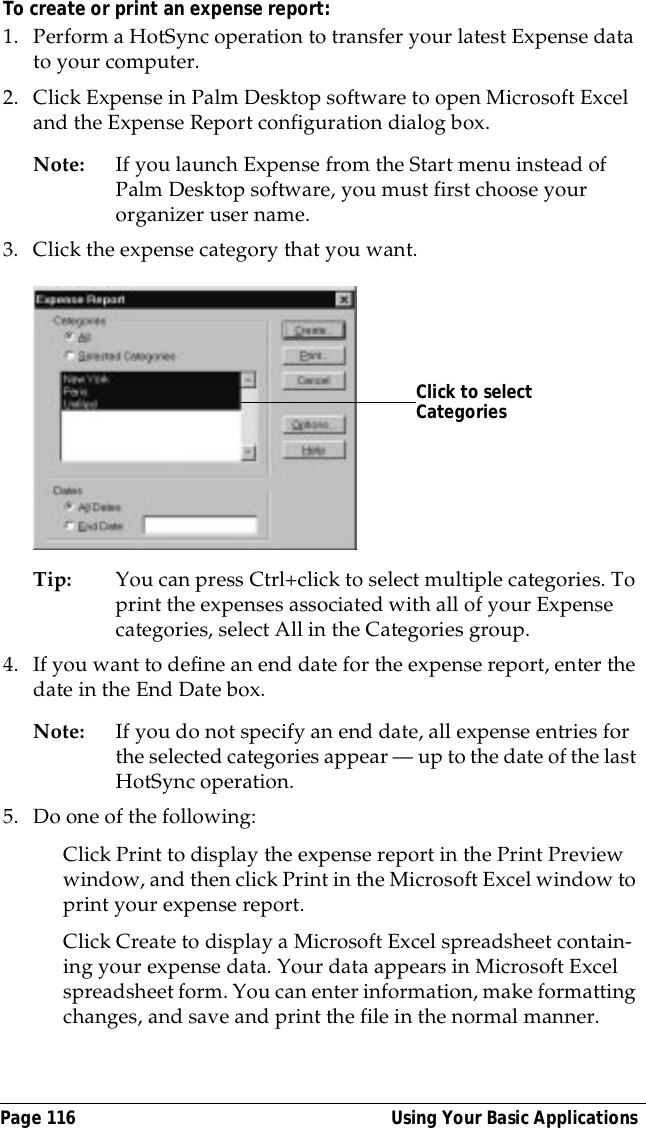
Contents
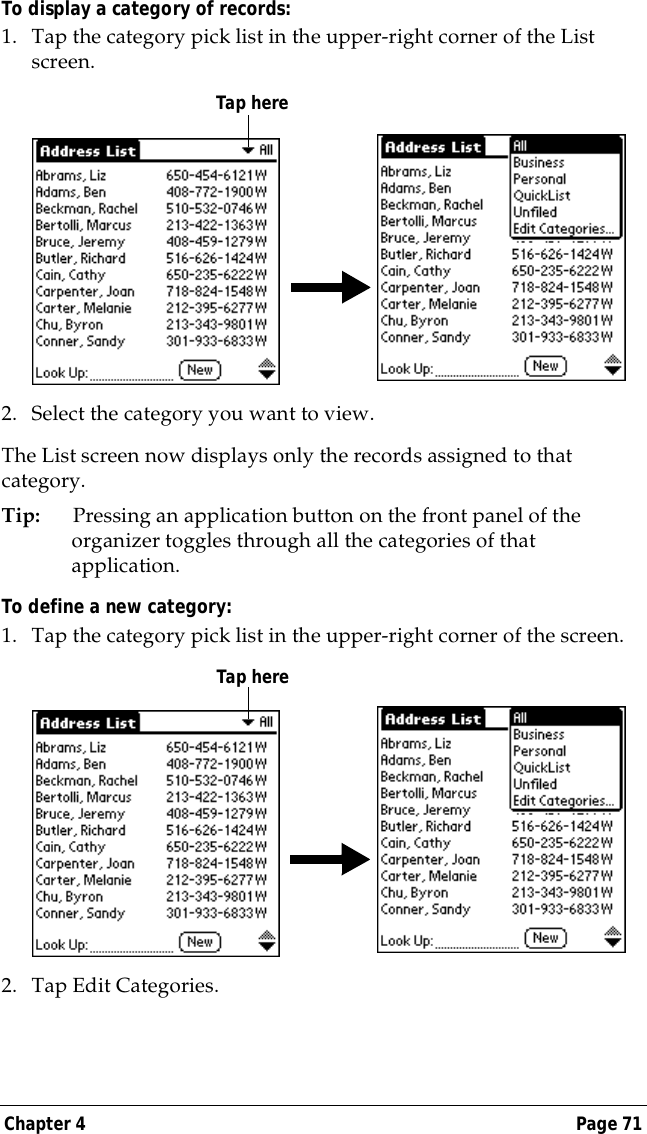
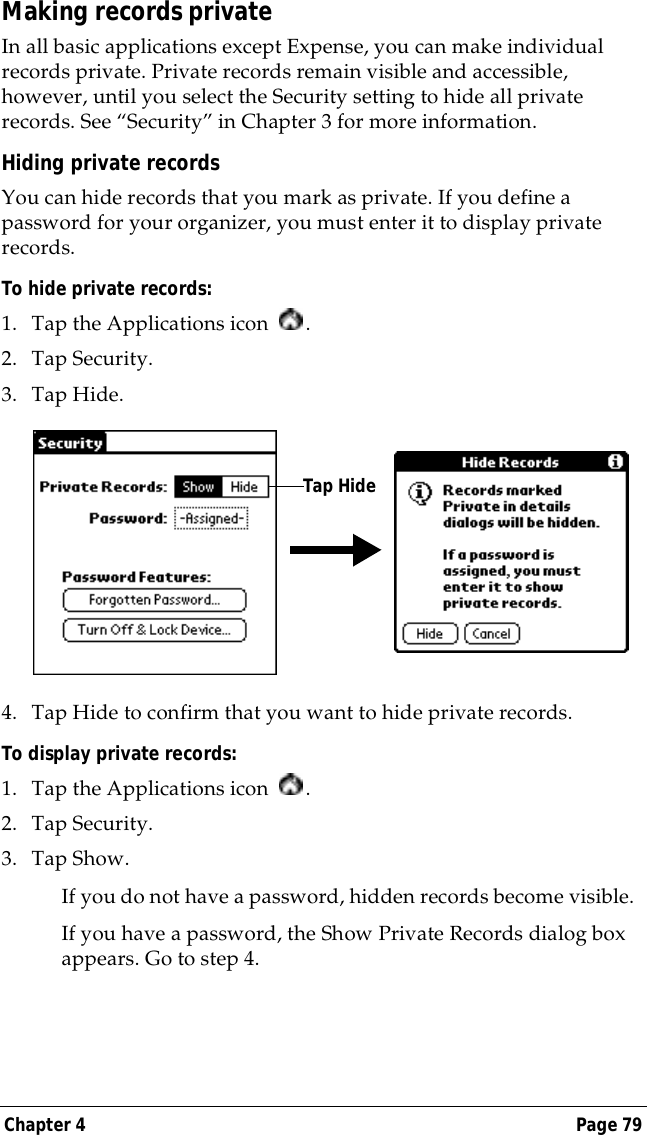
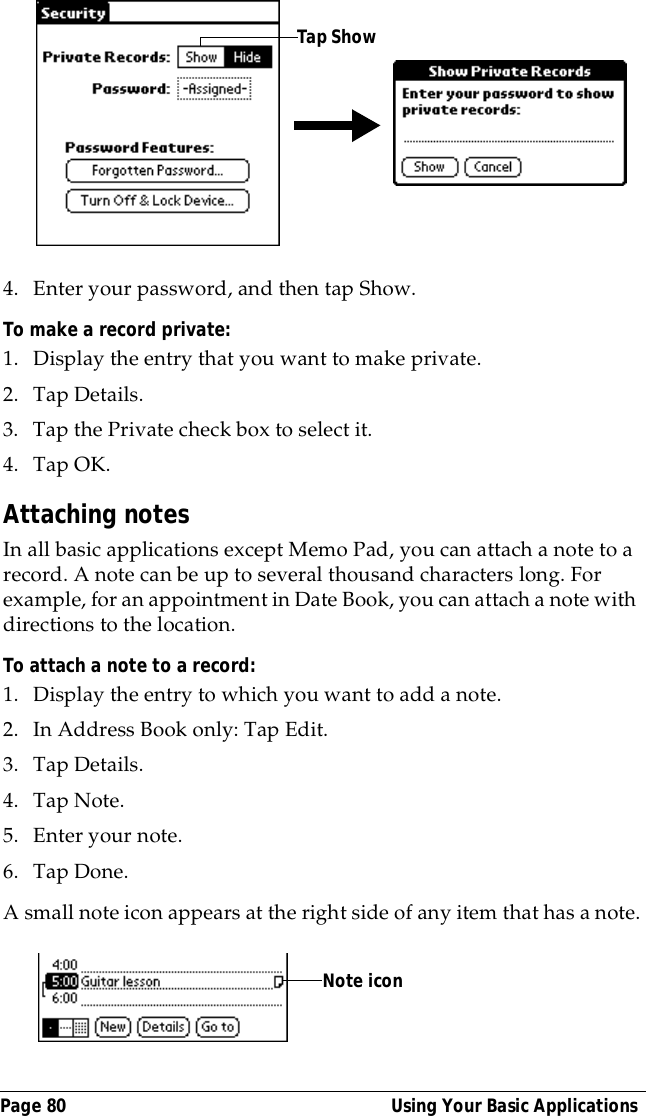
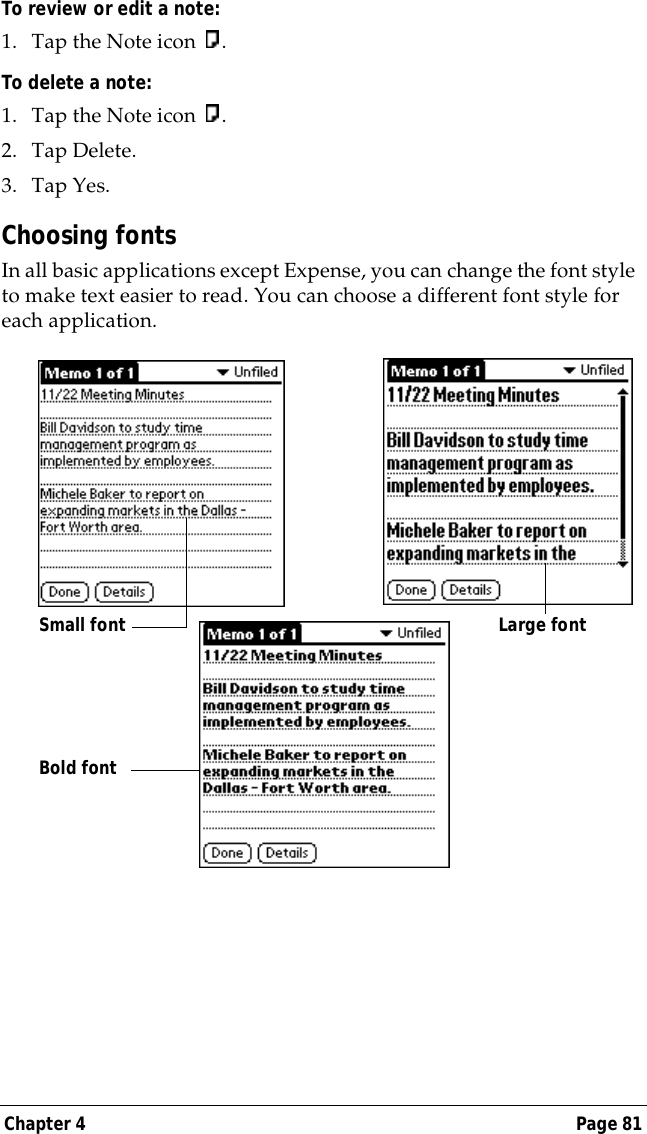
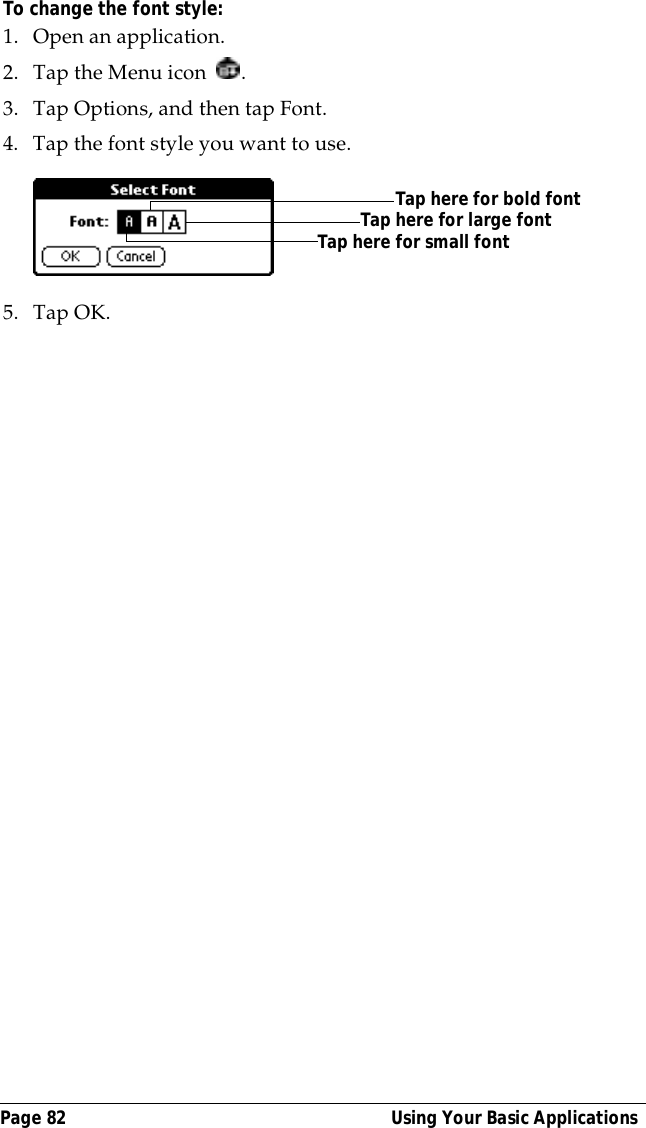
- 1. J11 J13 user manual same
- 2. additional insert due to SAR
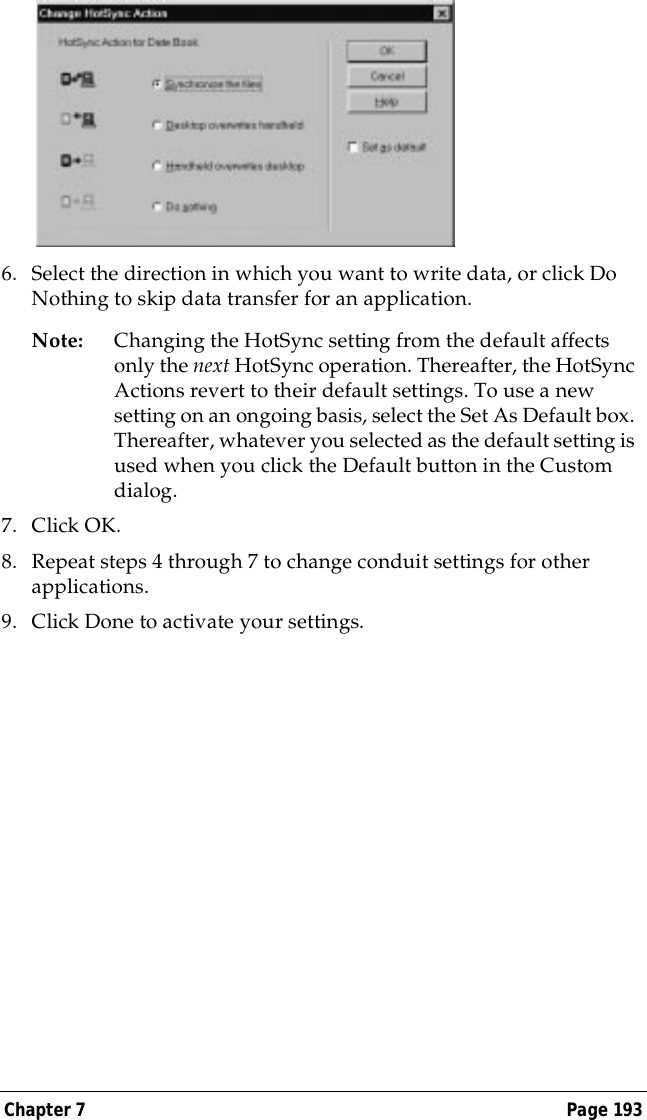
- 3. retransmission of users manual
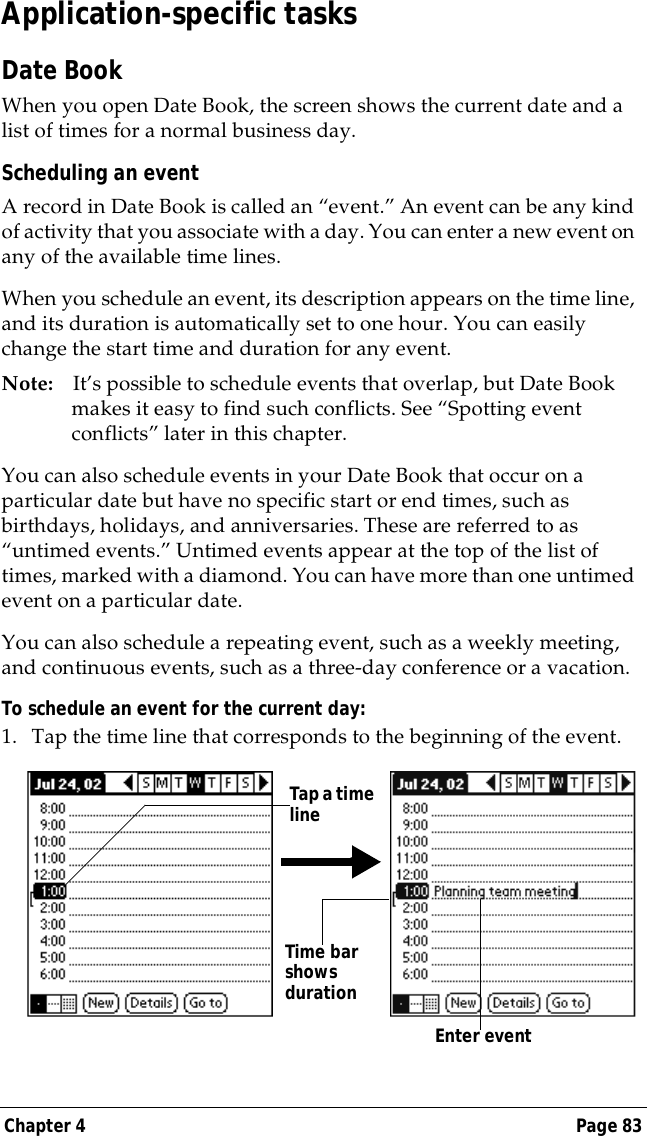
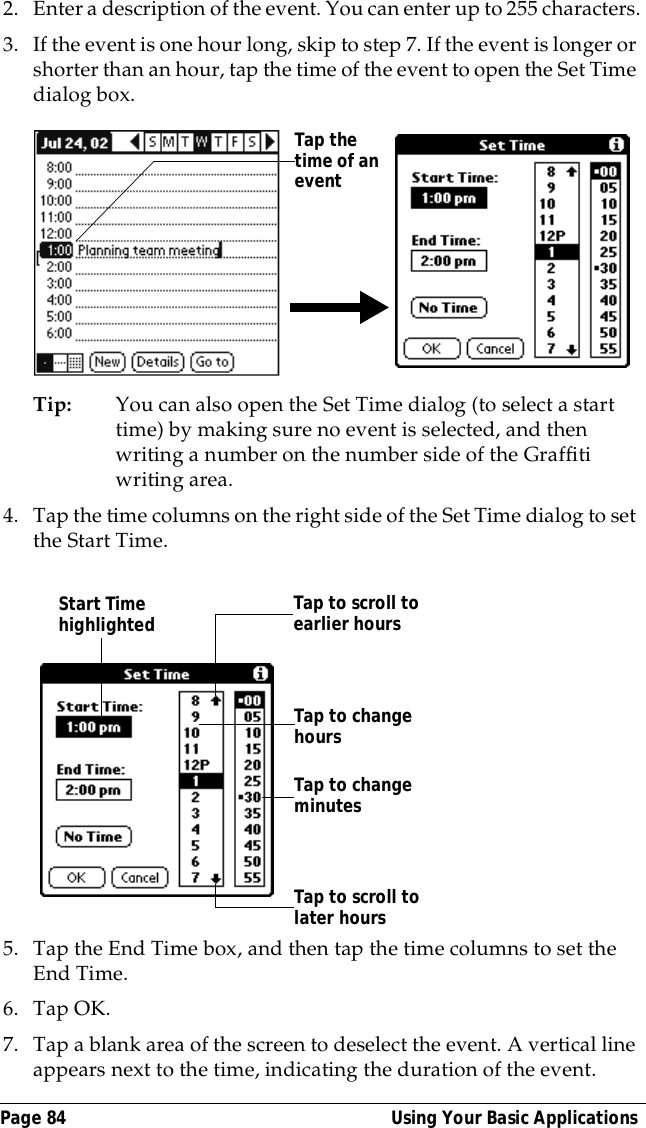
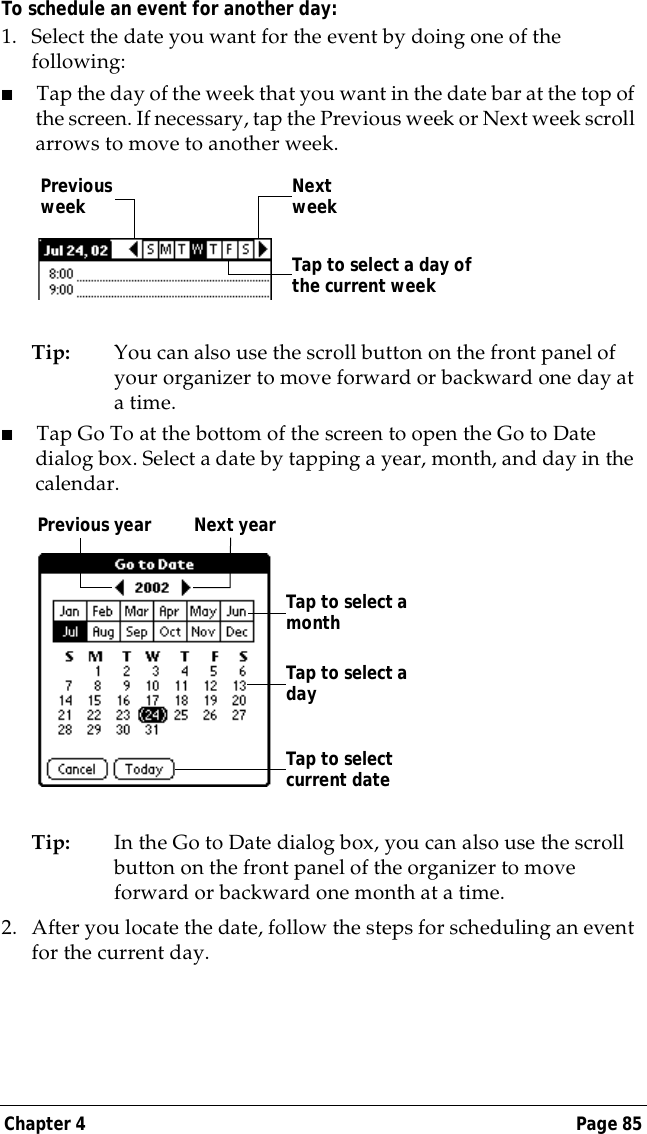
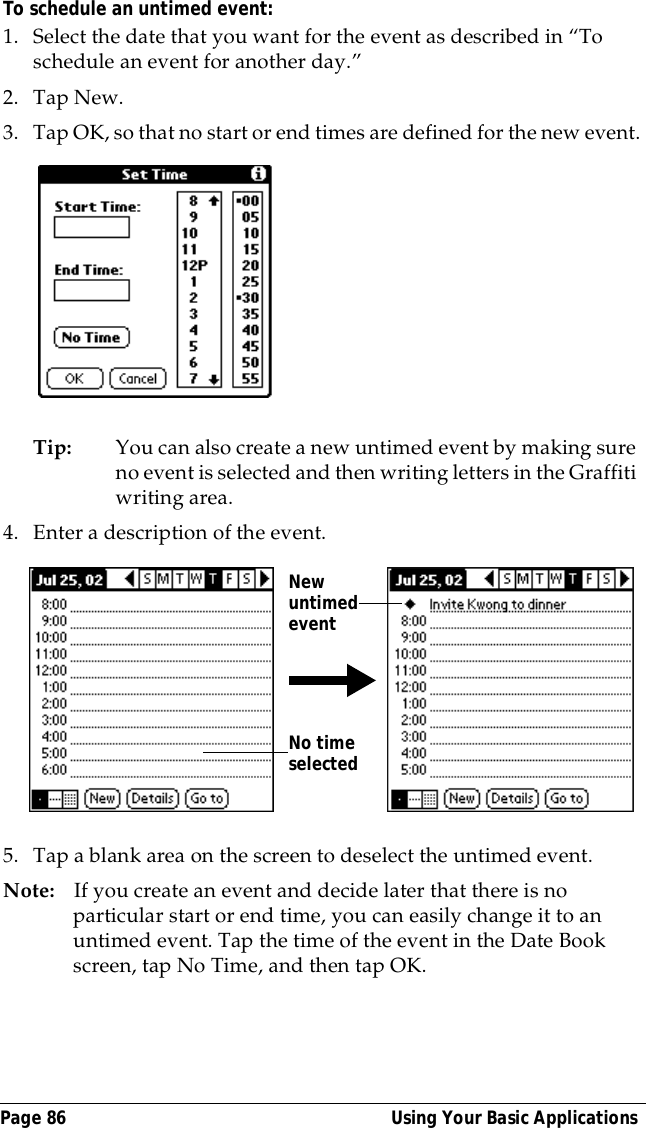
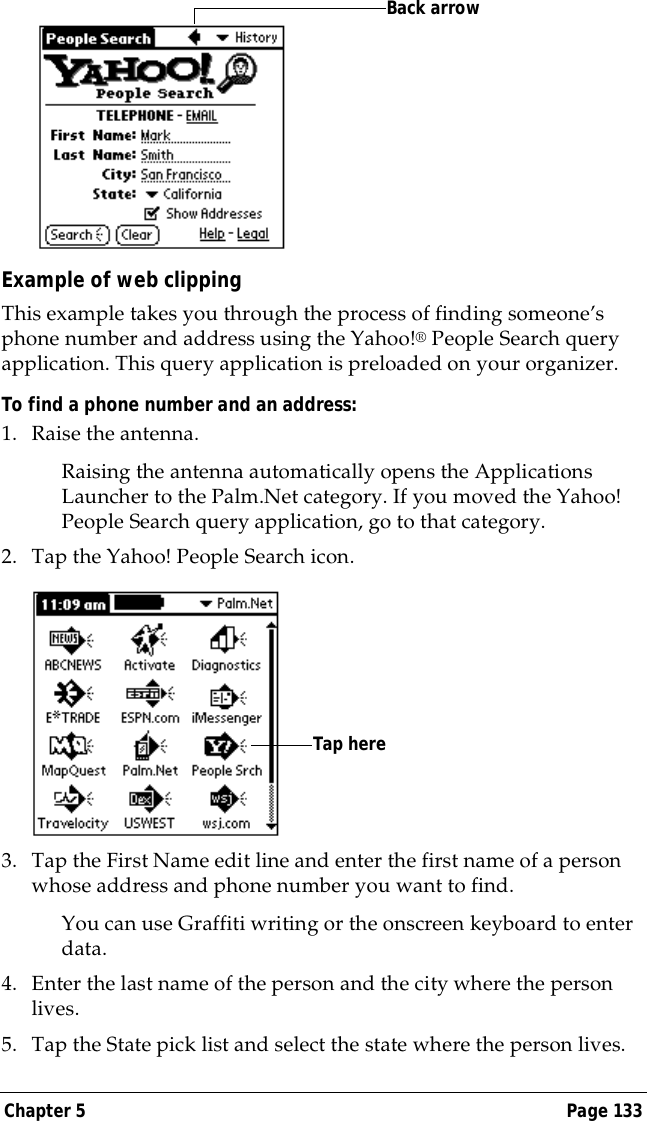
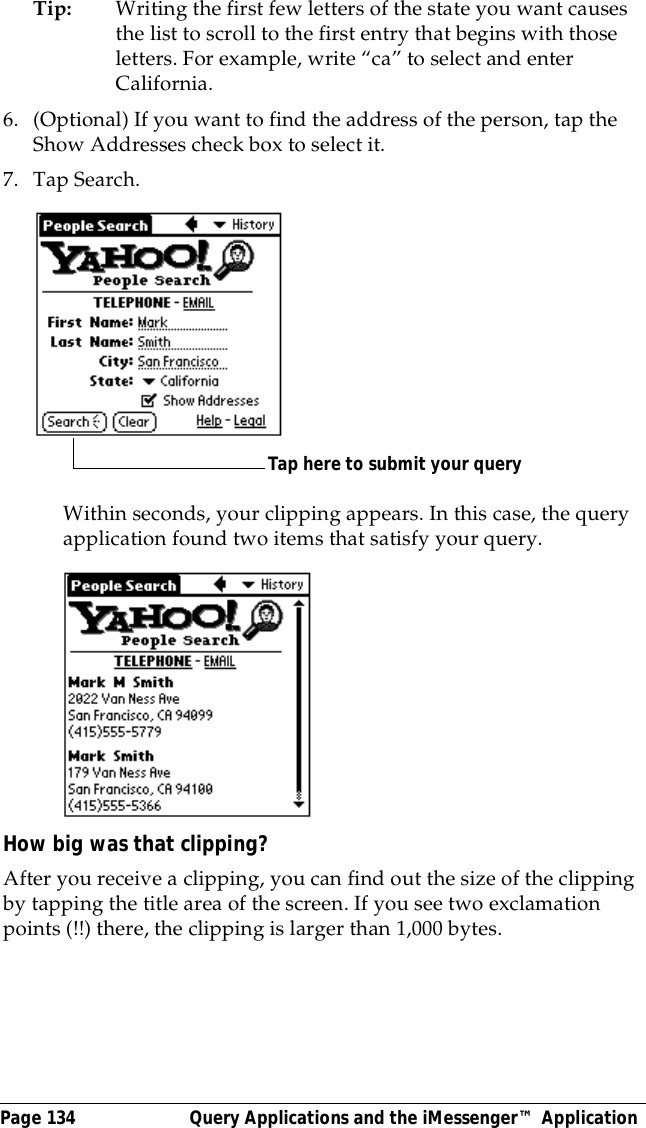
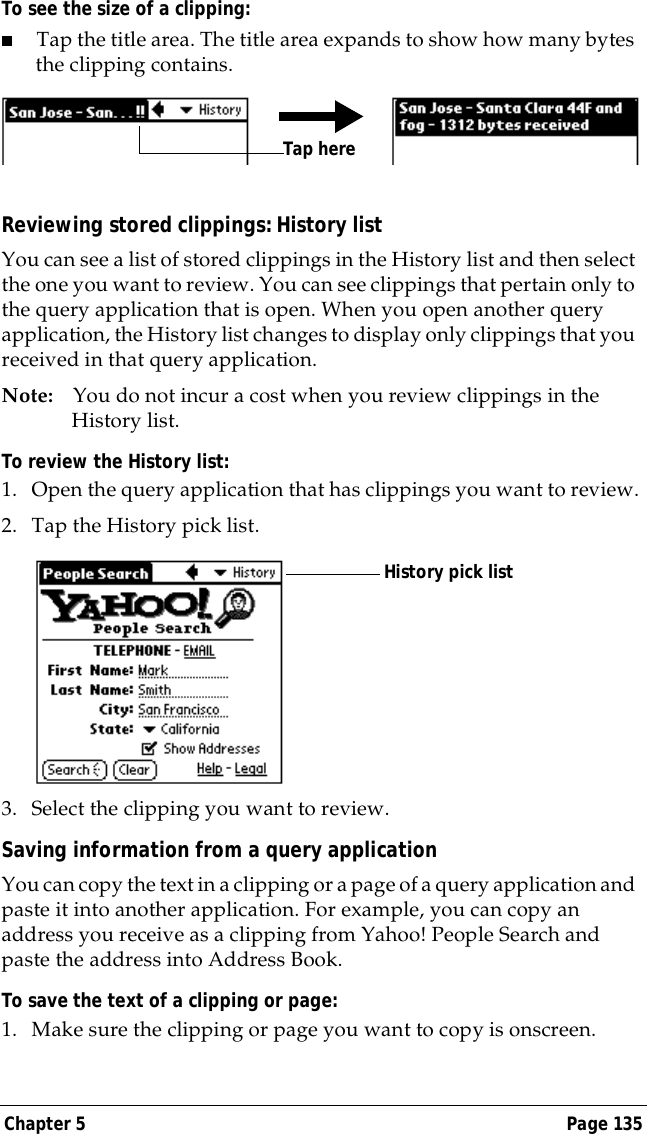
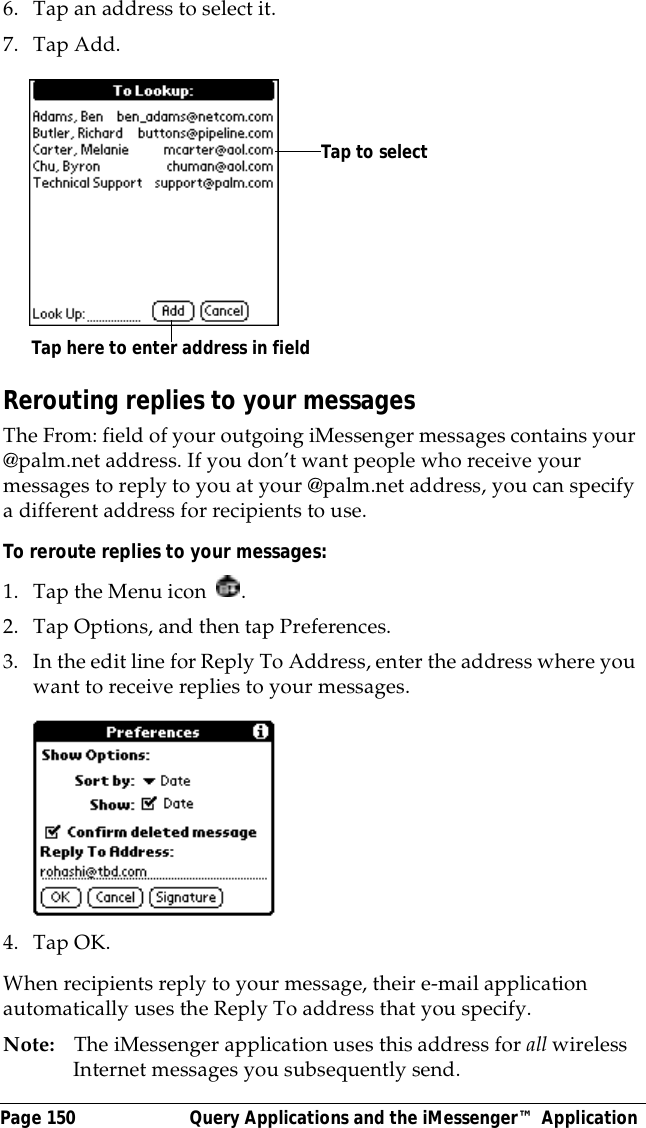
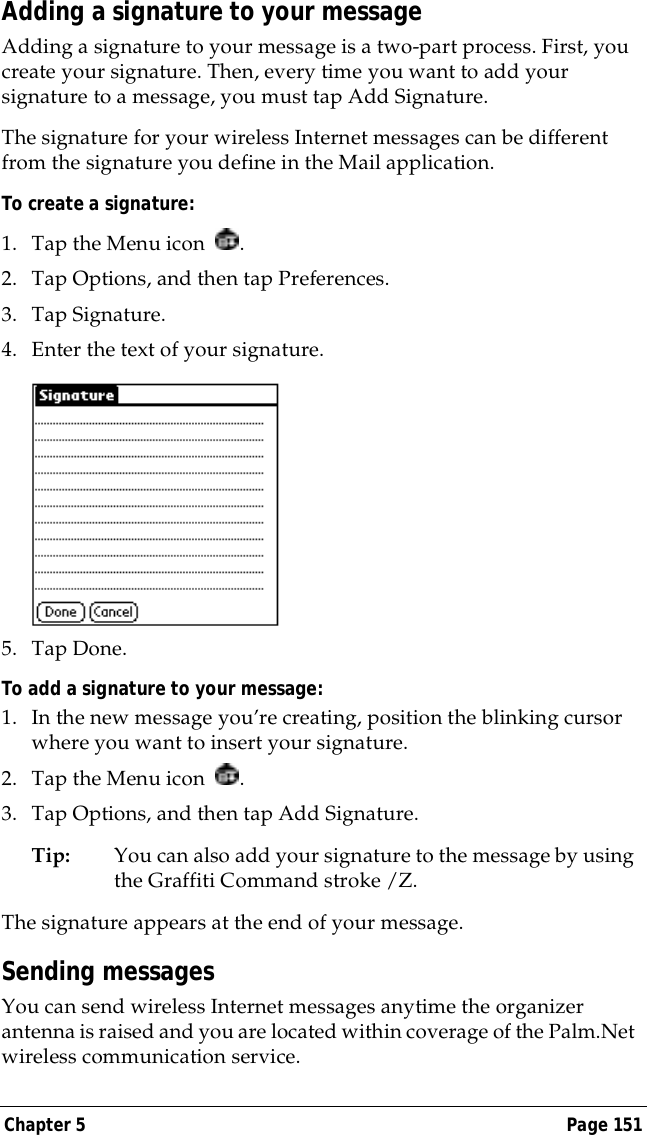
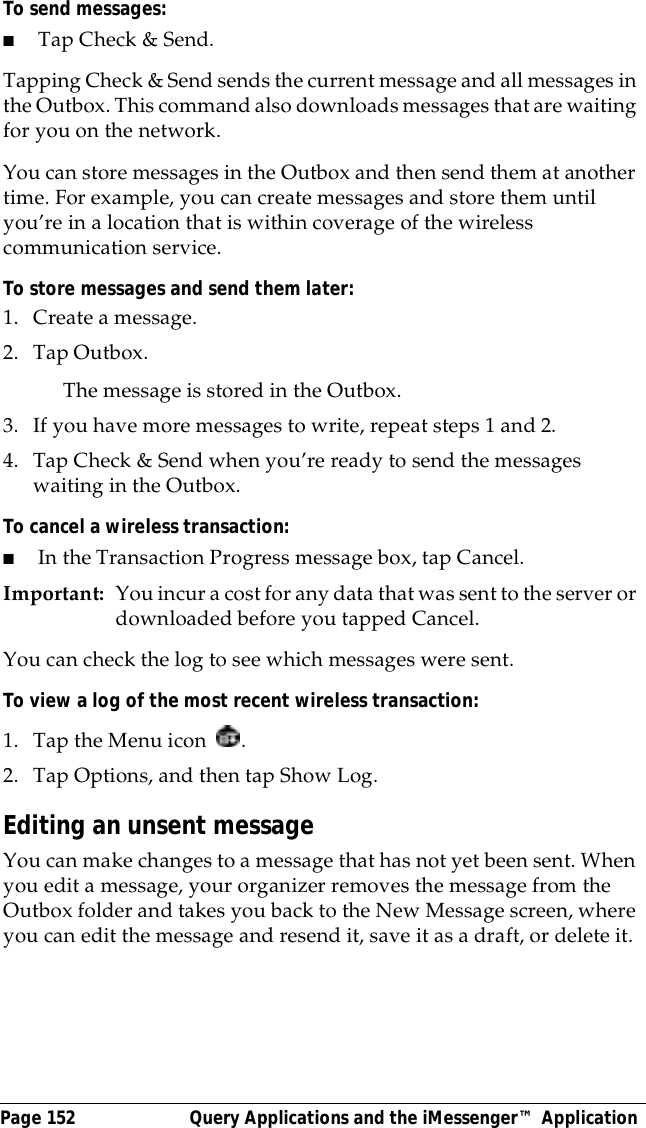
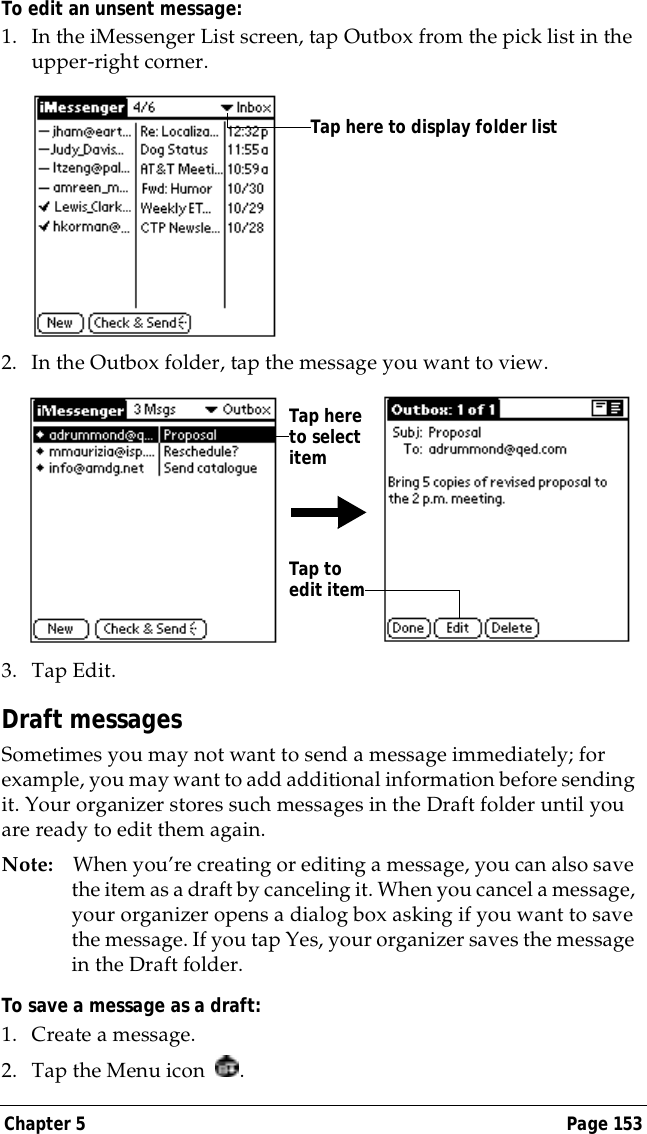
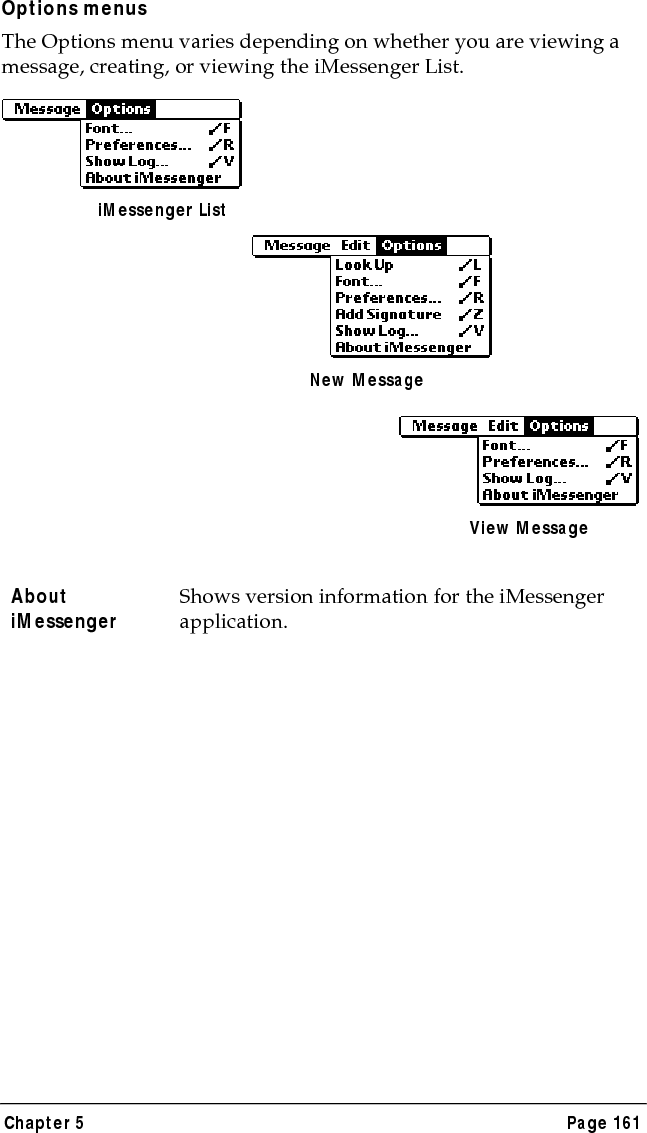
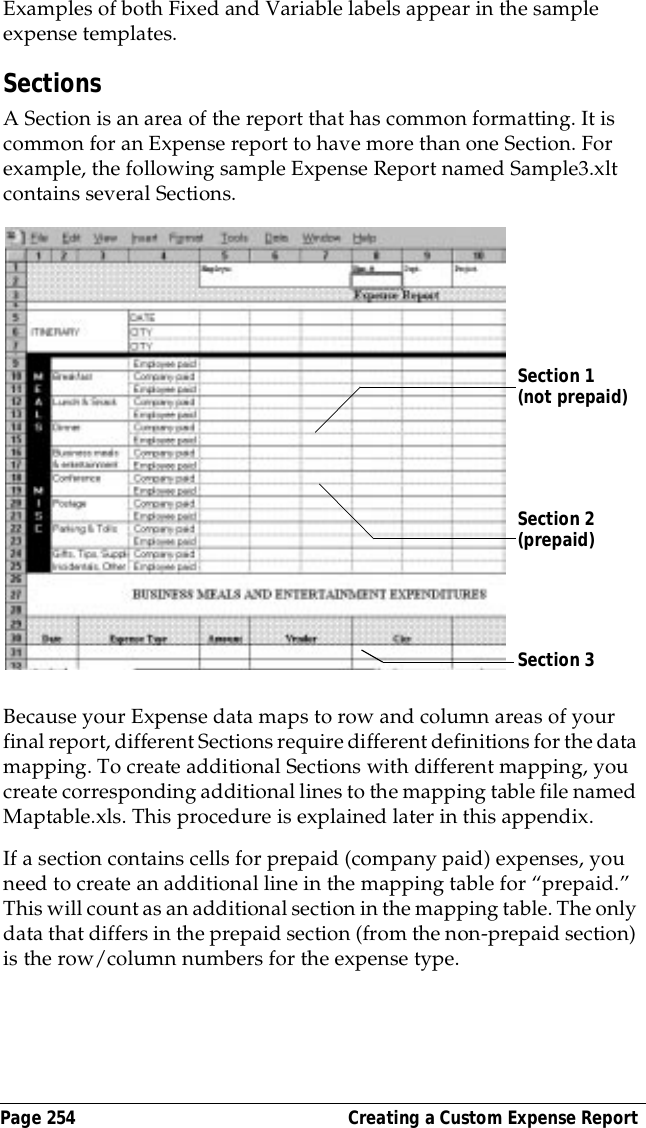
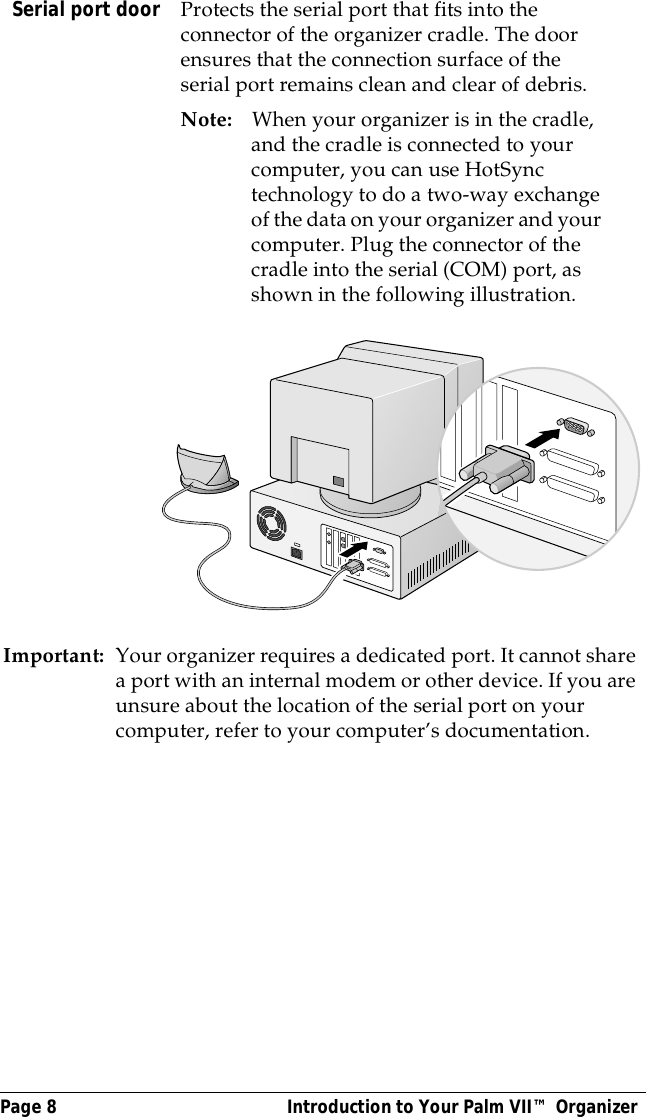
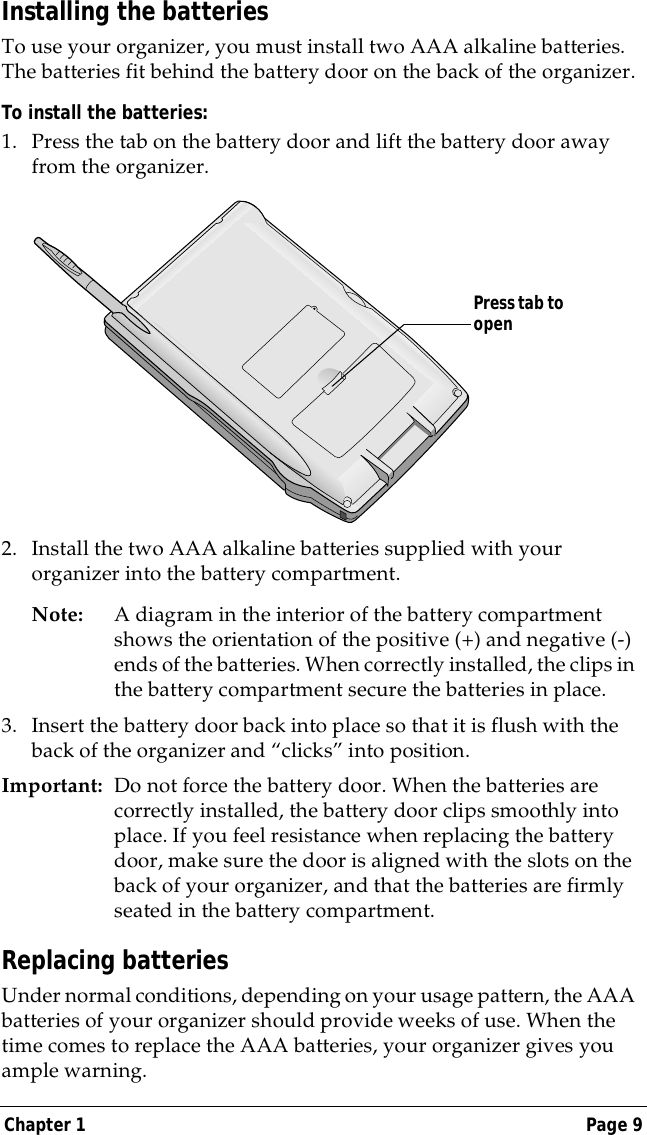
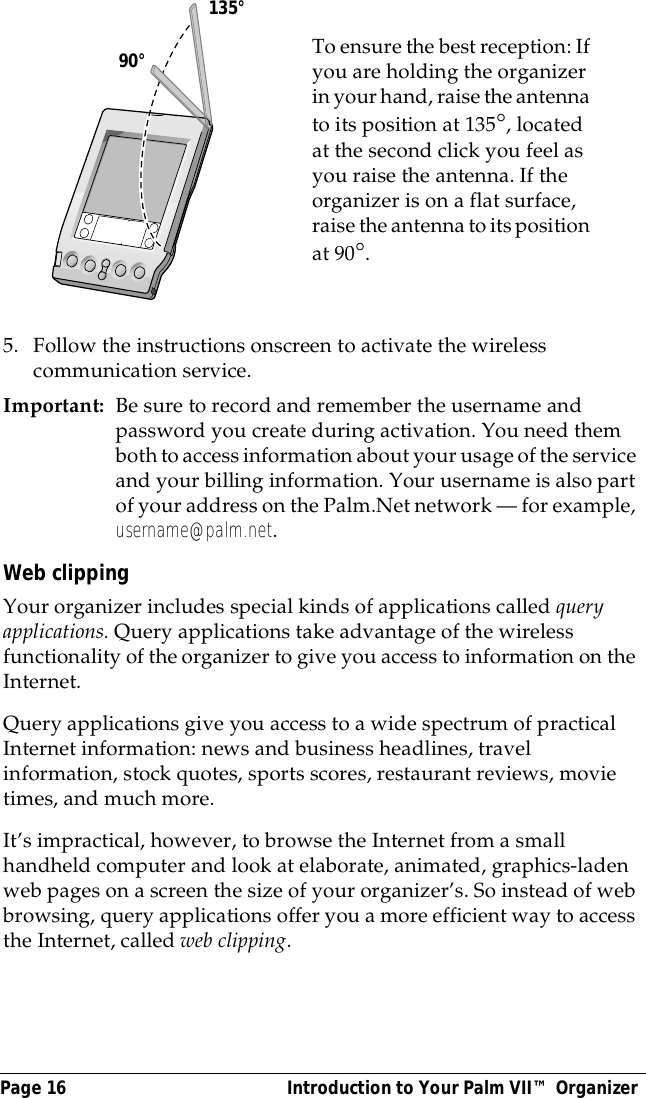
J11 J13 user manual same

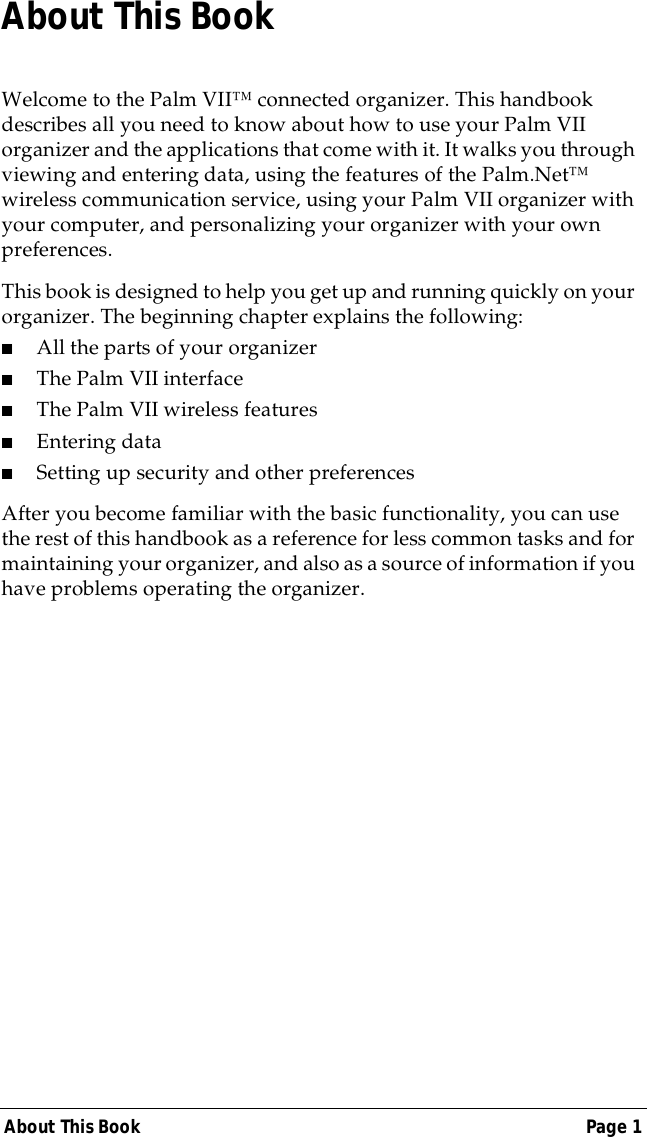


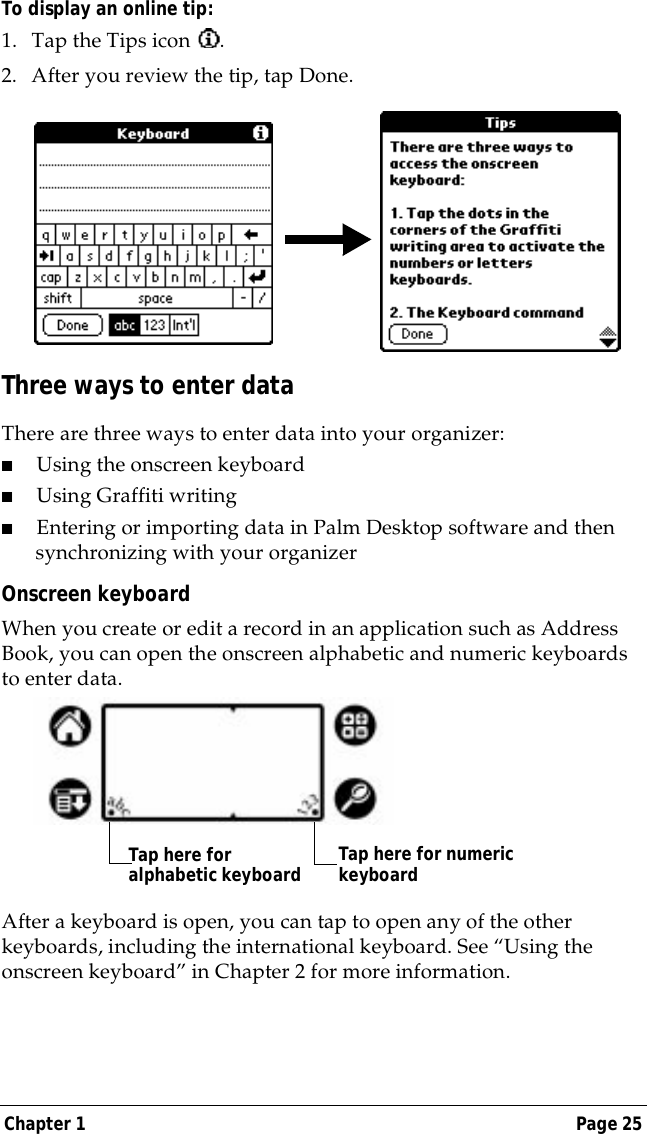

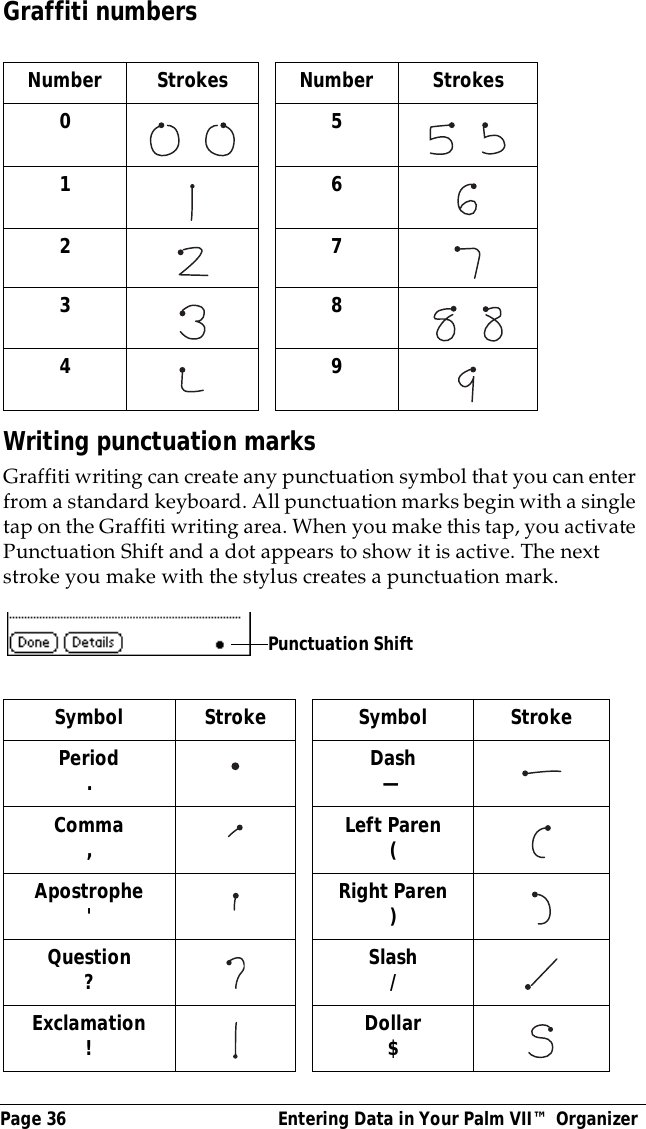
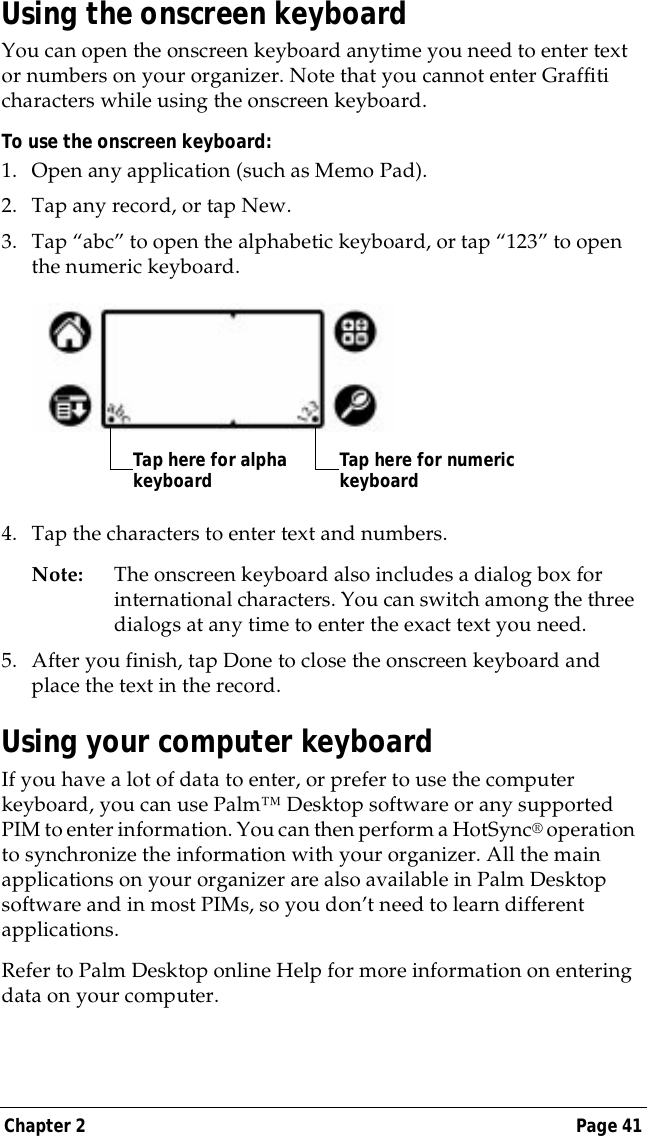
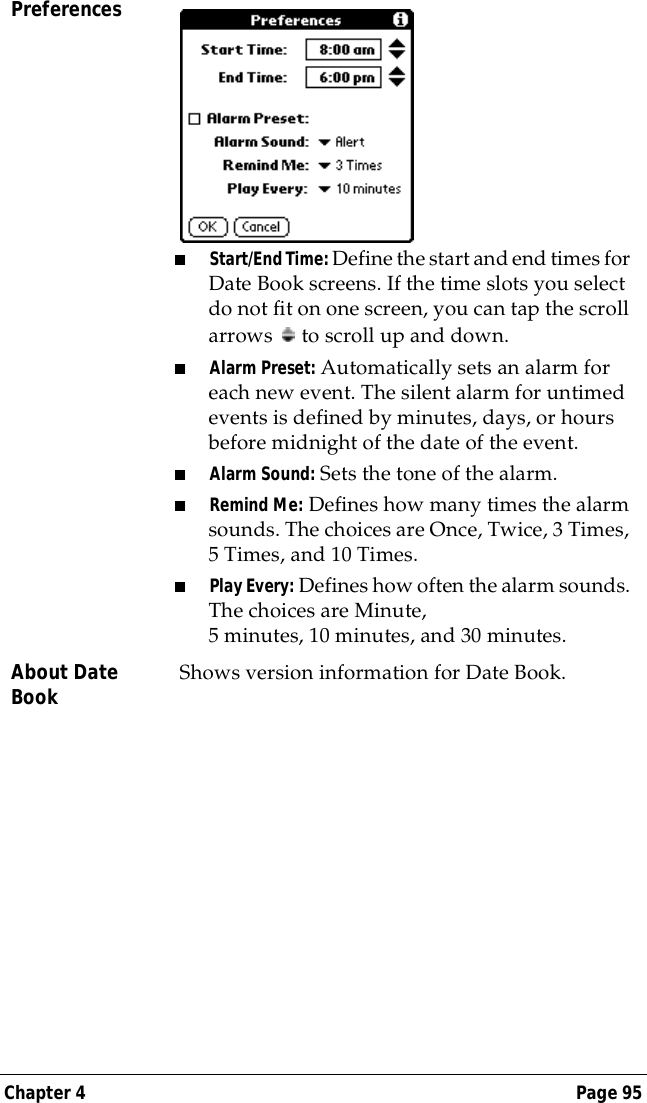
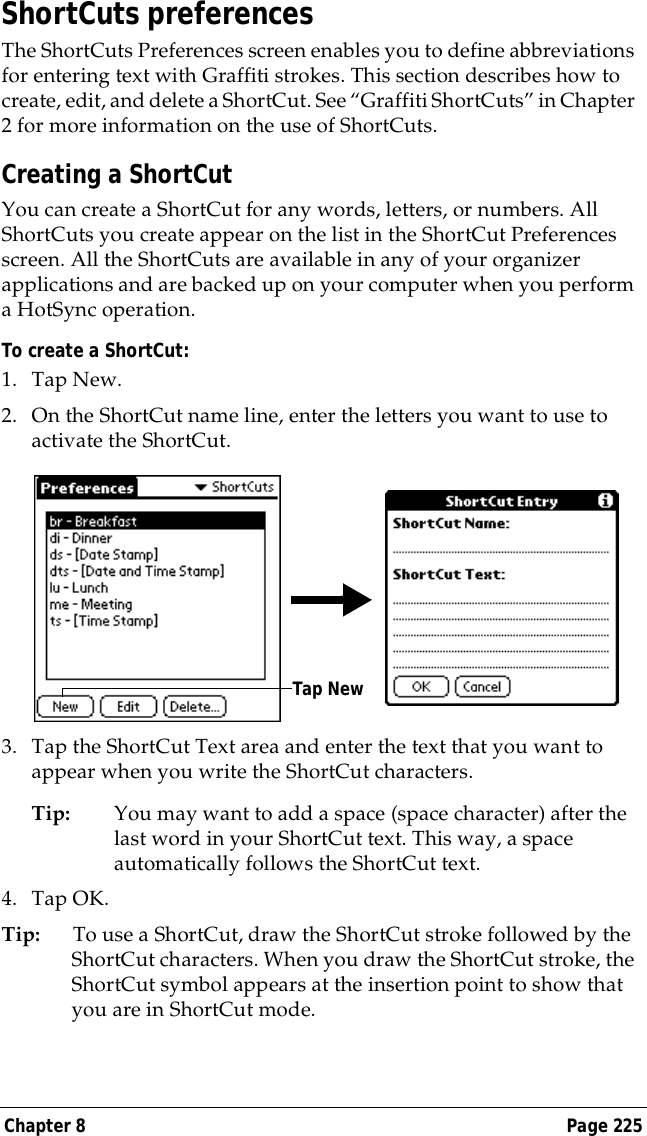
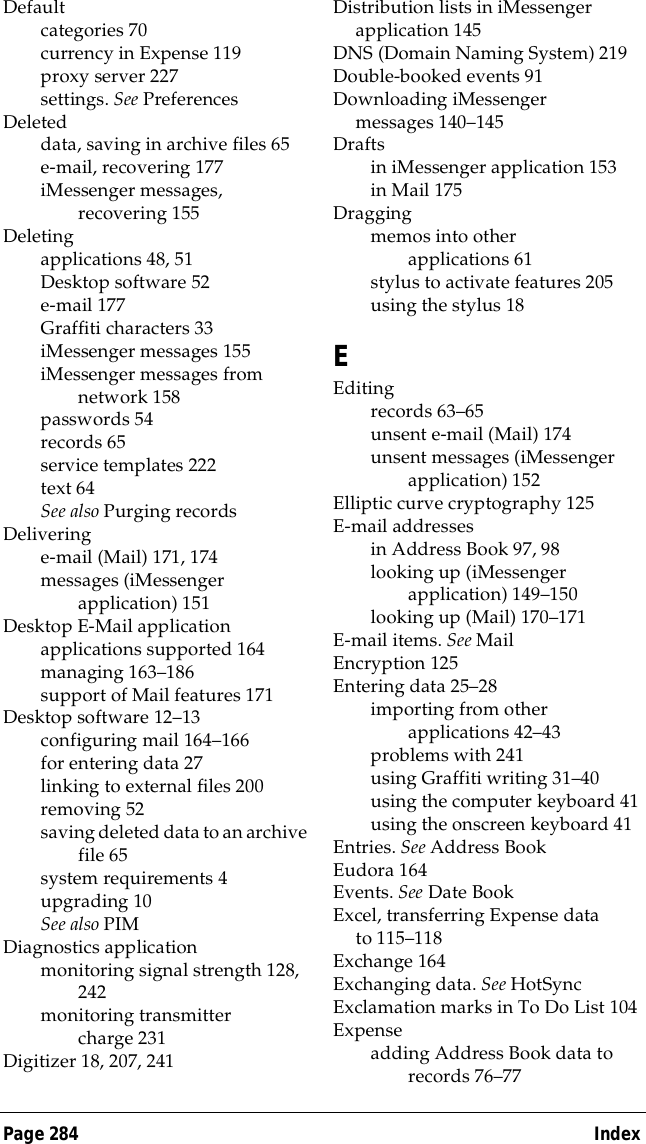
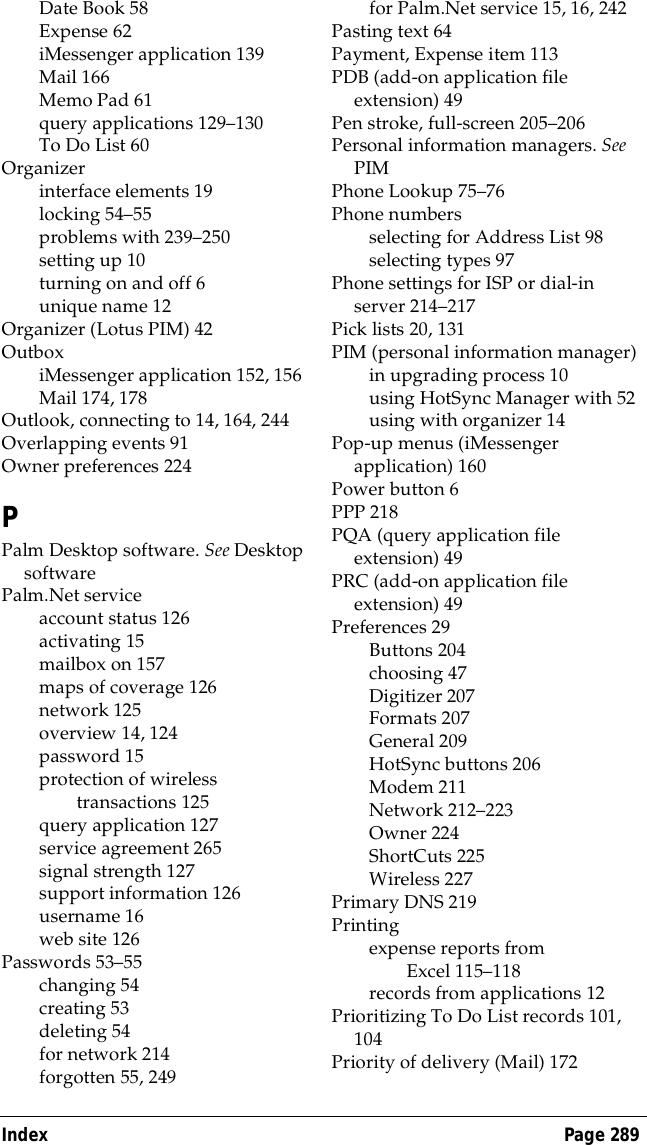
![Chapter 2 Page 37Additional Graffiti punctuationTip: When Punctuation Shift is active, you can make a symbol stroke anywhere in the Graffiti writing area (the letters or numbers side).Writing symbols and extended charactersAll symbols and extended characters begin with the stroke in the Graffiti writing area of your organizer:When the Symbol Shift is active, a slanted shift symbol appears in the lower-right corner of the screen. The next stroke that you make creates the symbol or extended character.SymbolShift @ # % ^ & * < > + = | —\ { } [ ] ~ ` ; : " tabSymbol Shift• ,,,,,°,+—X:==cY?!ƒ∅](https://usermanual.wiki/3Com/3C80500.J11-J13-user-manual-same/User-Guide-29963-Page-45.png)