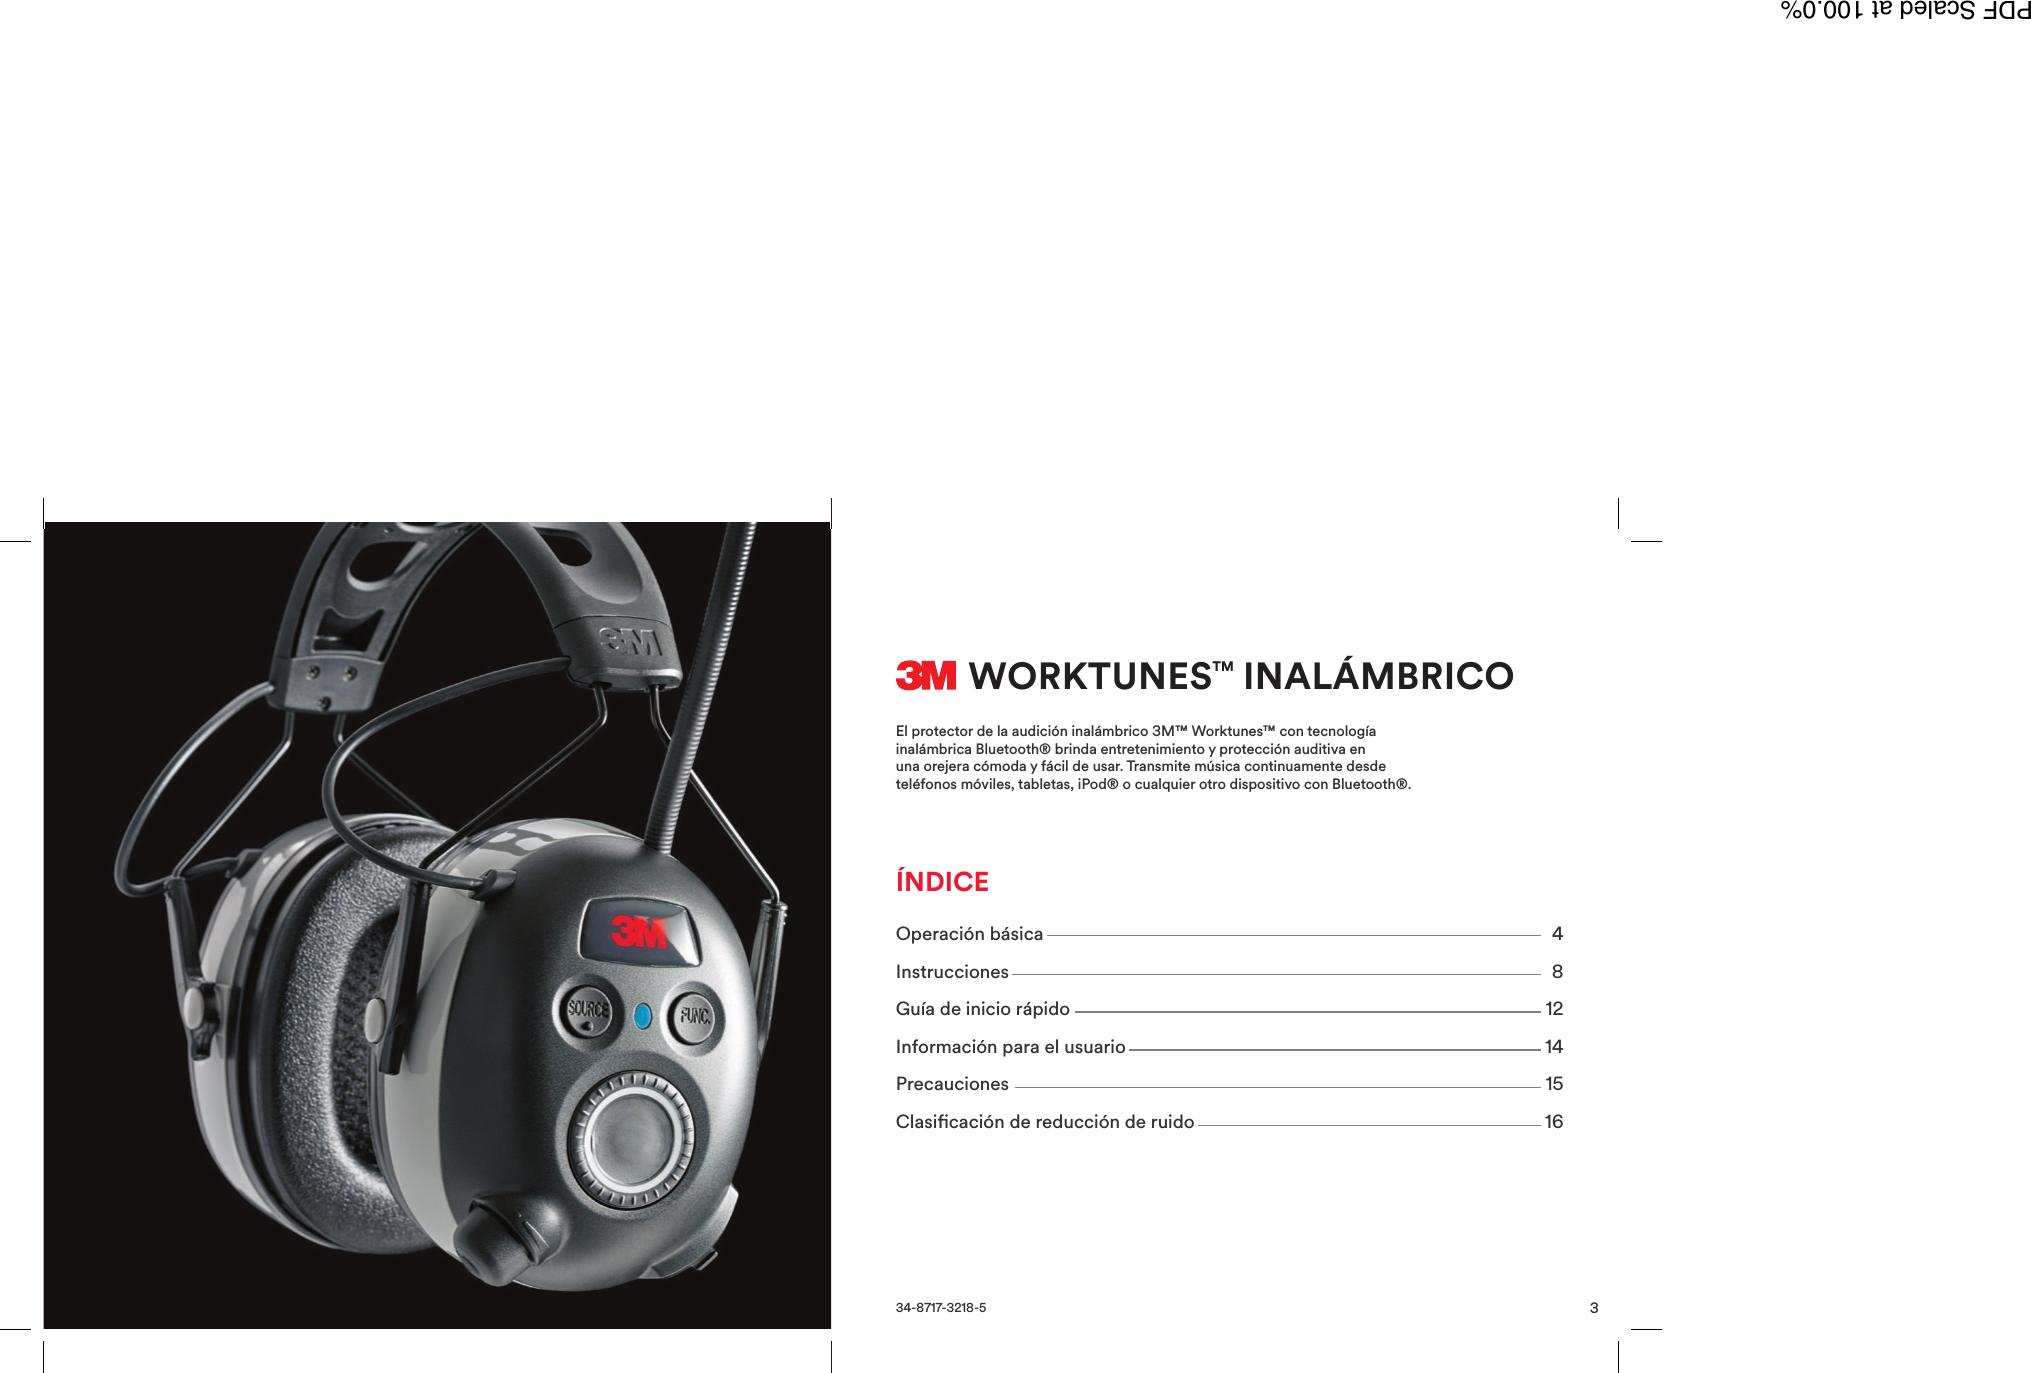
3M CONSTRUCTION and HOME IMPROVEMENT MARKETS DIVISION WTW90542 WorkTunes Wireless Hearing Protector User Manual
3M CONSTRUCTION & HOME IMPROVEMENT MARKETS DIVISION WorkTunes Wireless Hearing Protector Users Manual
UserManual.wiki
>
3M CONSTRUCTION and HOME IMPROVEMENT MARKETS DIVISION
>
WTW90542 User Manual
Users Manual
Navigation menu
Upload a User Manual
Namespaces
Wiki Guide
HTML
PDF
Info
Views
User Manual
Discussion / Help
Navigation
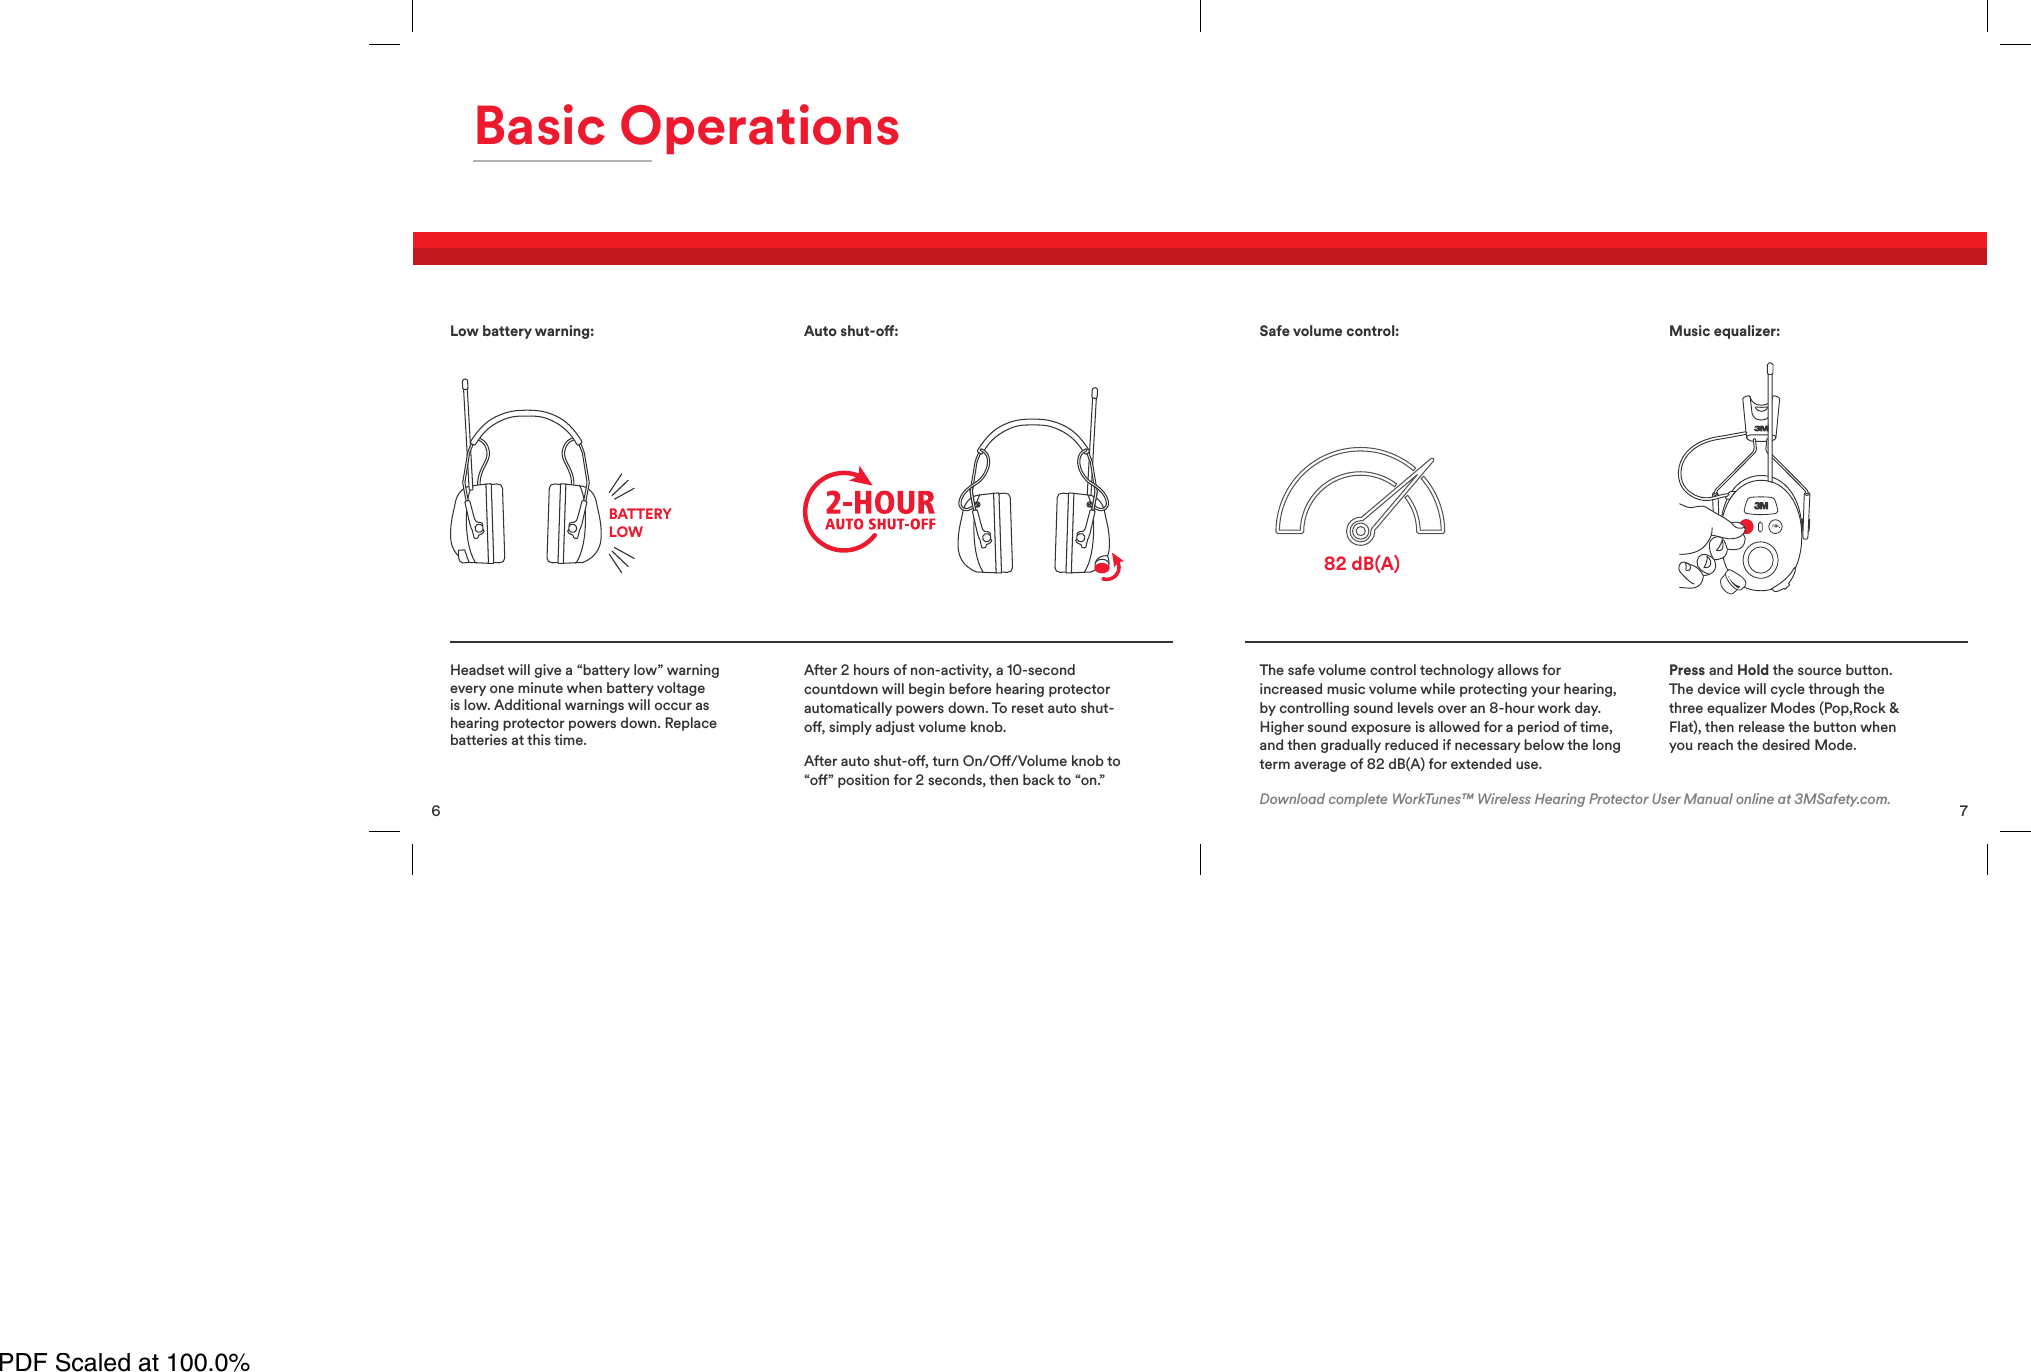

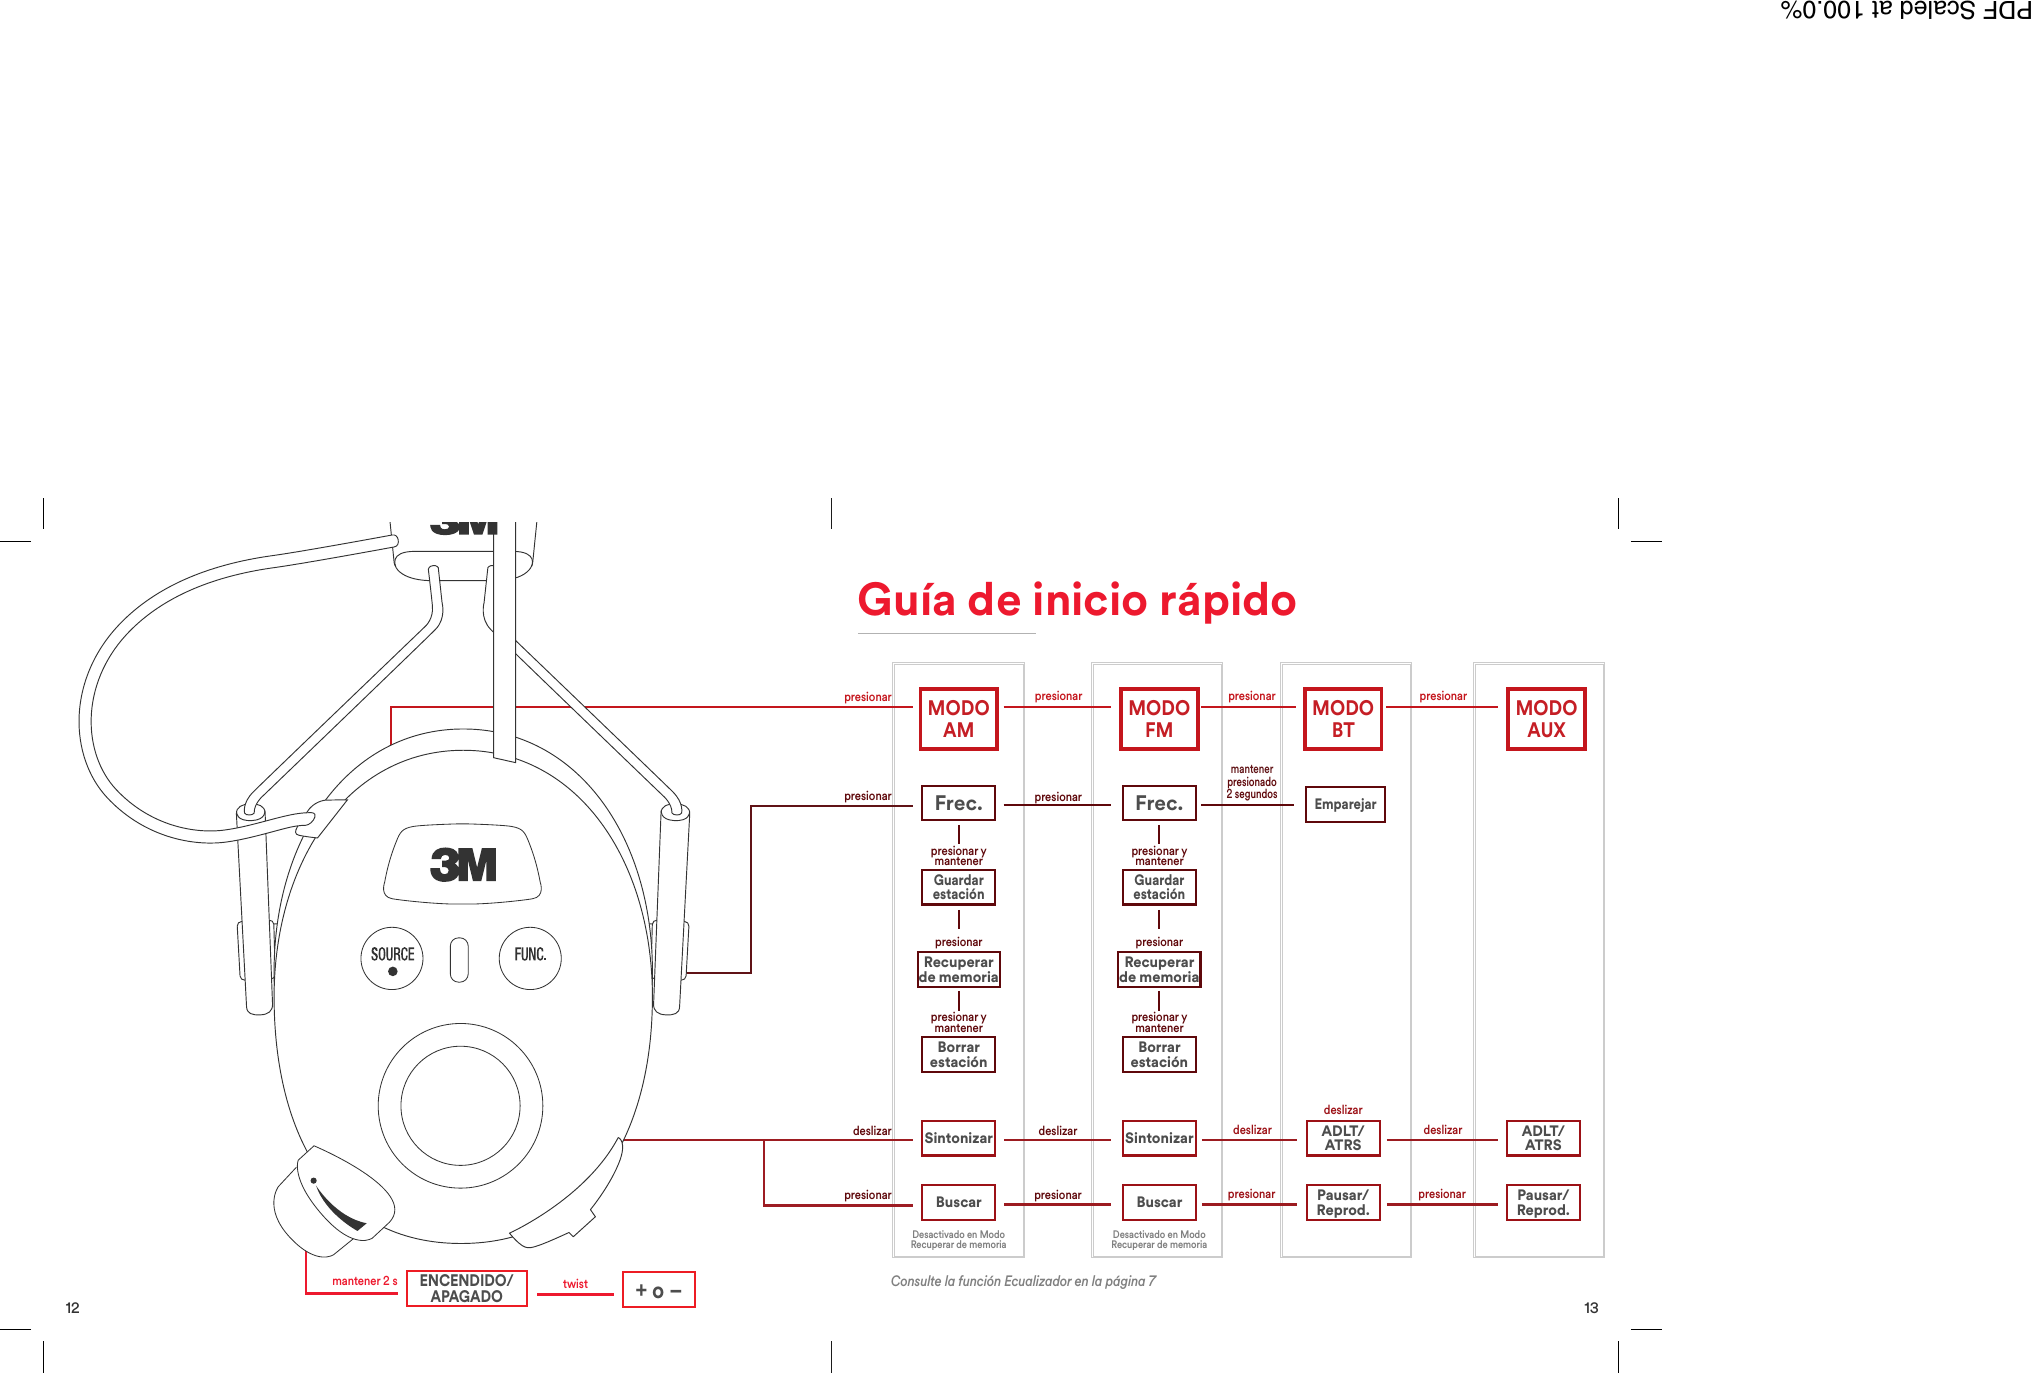
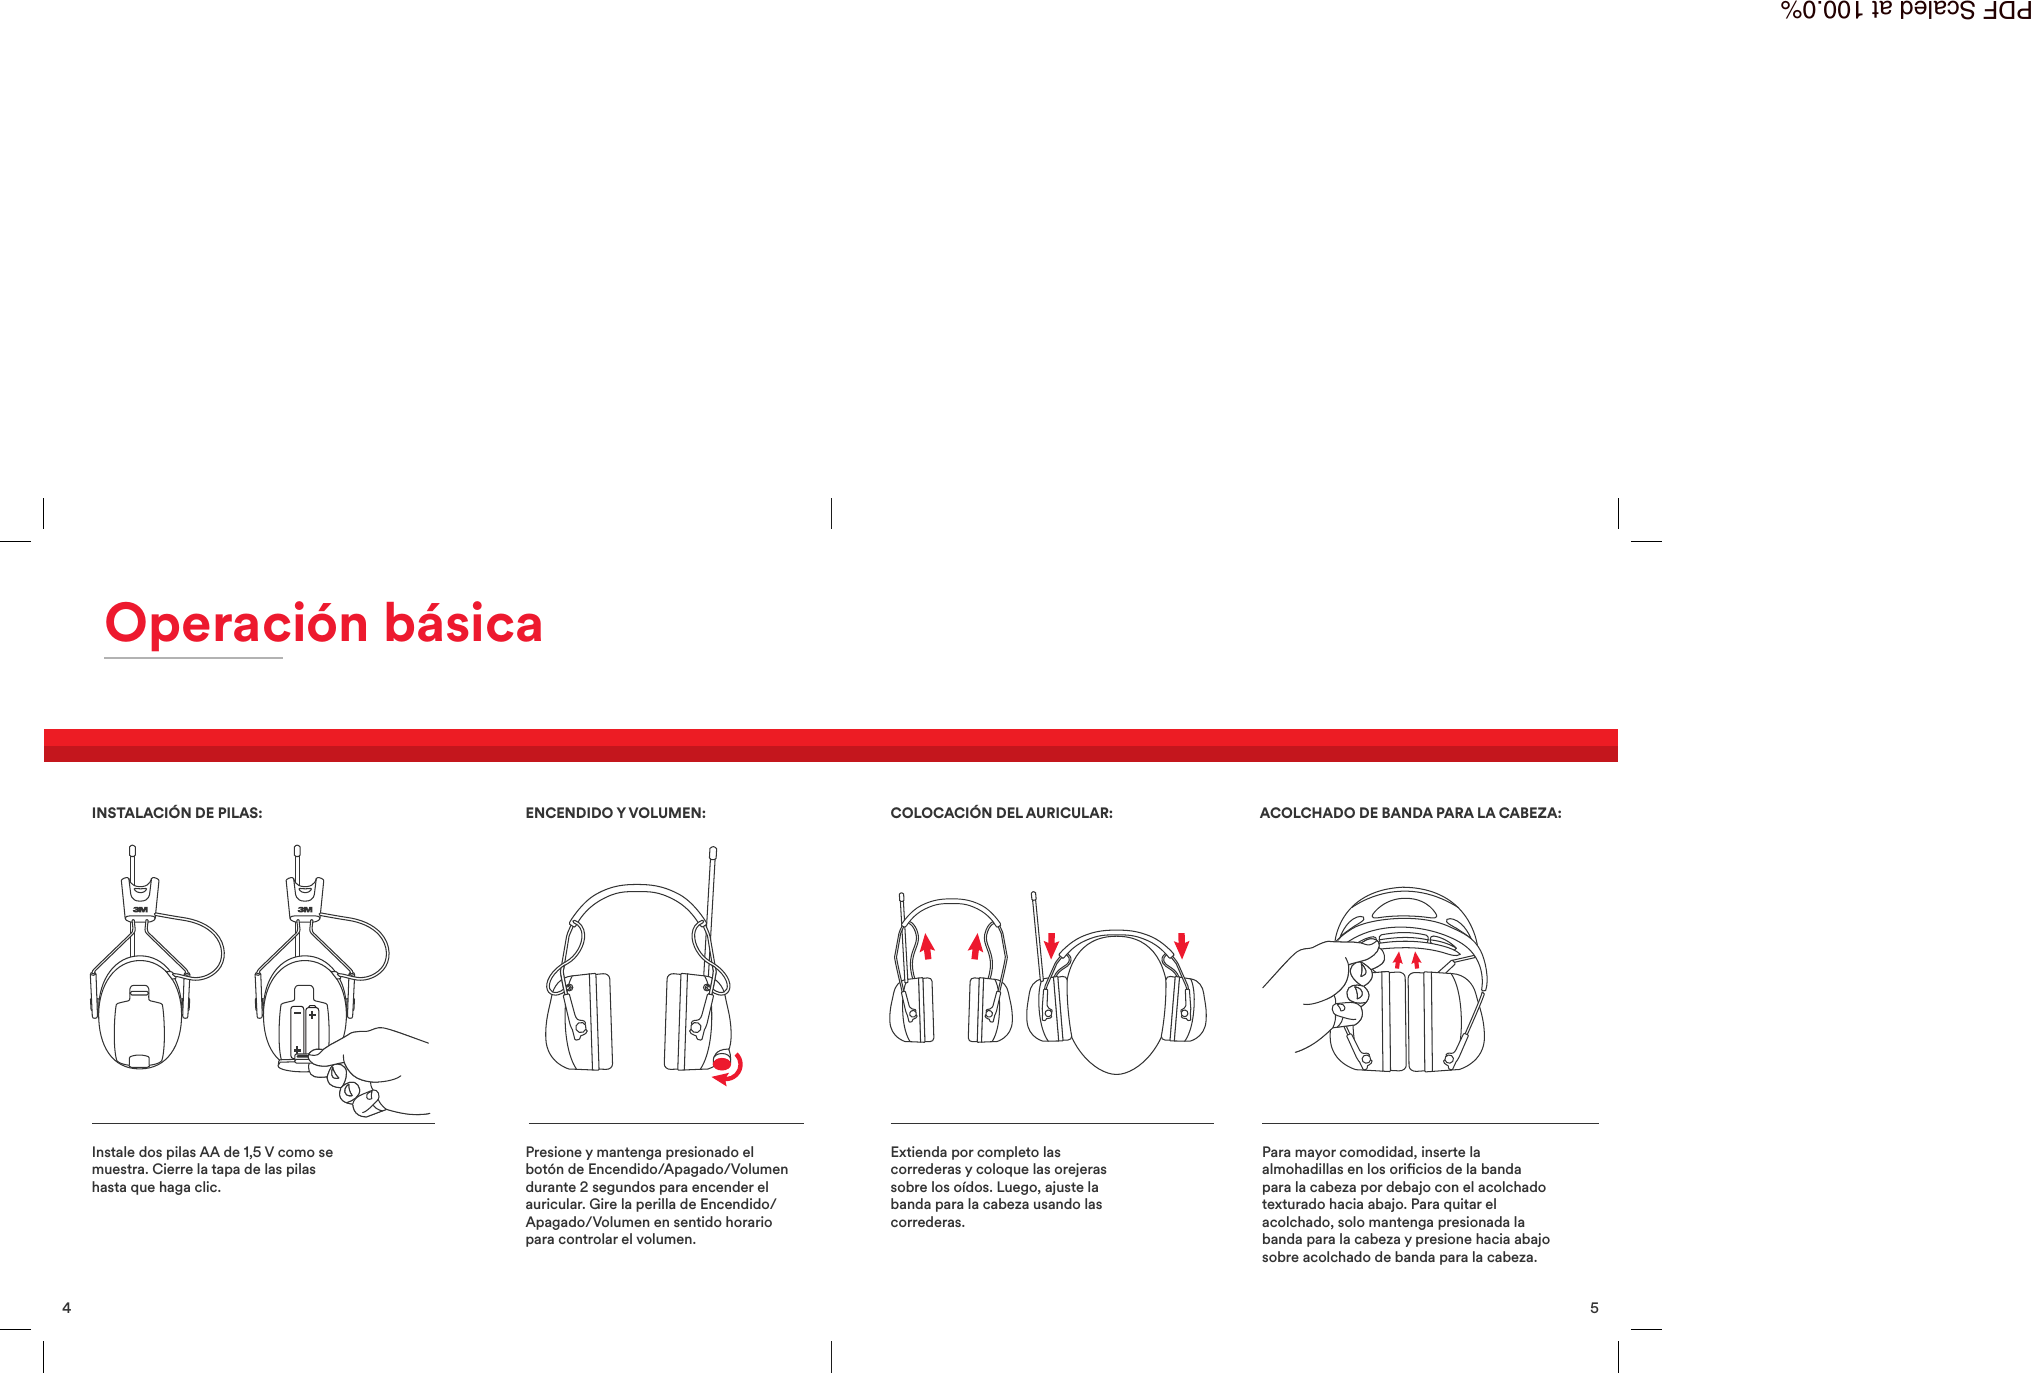
![La tecnología de control de volumen seguro le permiteaumentar el volumen de la música a la vez que protege suaudición, dado que controla los niveles de sonido duranteuna jornada laboral de 8 horas. Se permite la exposición aun sonido más alto durante un tiempo, y luego se lo reducegradualmente, si es necesario, por debajo del promedio delargo plazo de los 82 dB(A) para un uso extendido.Presione el botón source(alimentación) y manténgalopresionado. El dispositivo alternaráentres los tres modos de ecualizador(Pop, Rock y Flat [Fijo]); cuandollegue al modo deseado, deje depresionar el botón.CONTROL DE VOLUMEN SEGURO: ECUALIZADOR DE MÚSICA:Descargue el Manual del usuario del Protector auditivo inalámbrico WorkTunes™ en línea en 3MSafety.com.82 dB(A)7 6Operación básicaEl auricular emitirá una advertencia“battery low” (batería baja) a cada minutocuando el voltaje de la batería sea bajo.Se emitirán otras advertencias a medidaque el protector de la audición se vayaapagando. Cambie las pilas en este punto.Luego de 2 horas de inactividad, comenzará una cuentaregresiva de 10 segundos antes de que el protector dela audición se apague automáticamente. Para reiniciarel apagado automático, simplemente ajuste la perilla delvolumen.Luego del apagado automático, gire la perilla deEncendido/Apagado/Volumen a la posición “o” (apagado)durante 2 segundos y luego regrésela a “on” (encendido).ADVERTENCIA DE BATERÍA BAJA: APAGADO AUTOMÁTICO:BATERÍABAJAAPAGADOAUTOMÁTICO EN2 HORASPDF Scaled at 100.0%](https://usermanual.wiki/3M-CONSTRUCTION-and-HOME-IMPROVEMENT-MARKETS-DIVISION/WTW90542/User-Guide-2757462-Page-16.png)