4IPNET 150002 Enterprise Access Point User Manual QIG
4IPNET, INC. Enterprise Access Point QIG
4IPNET >
Contents
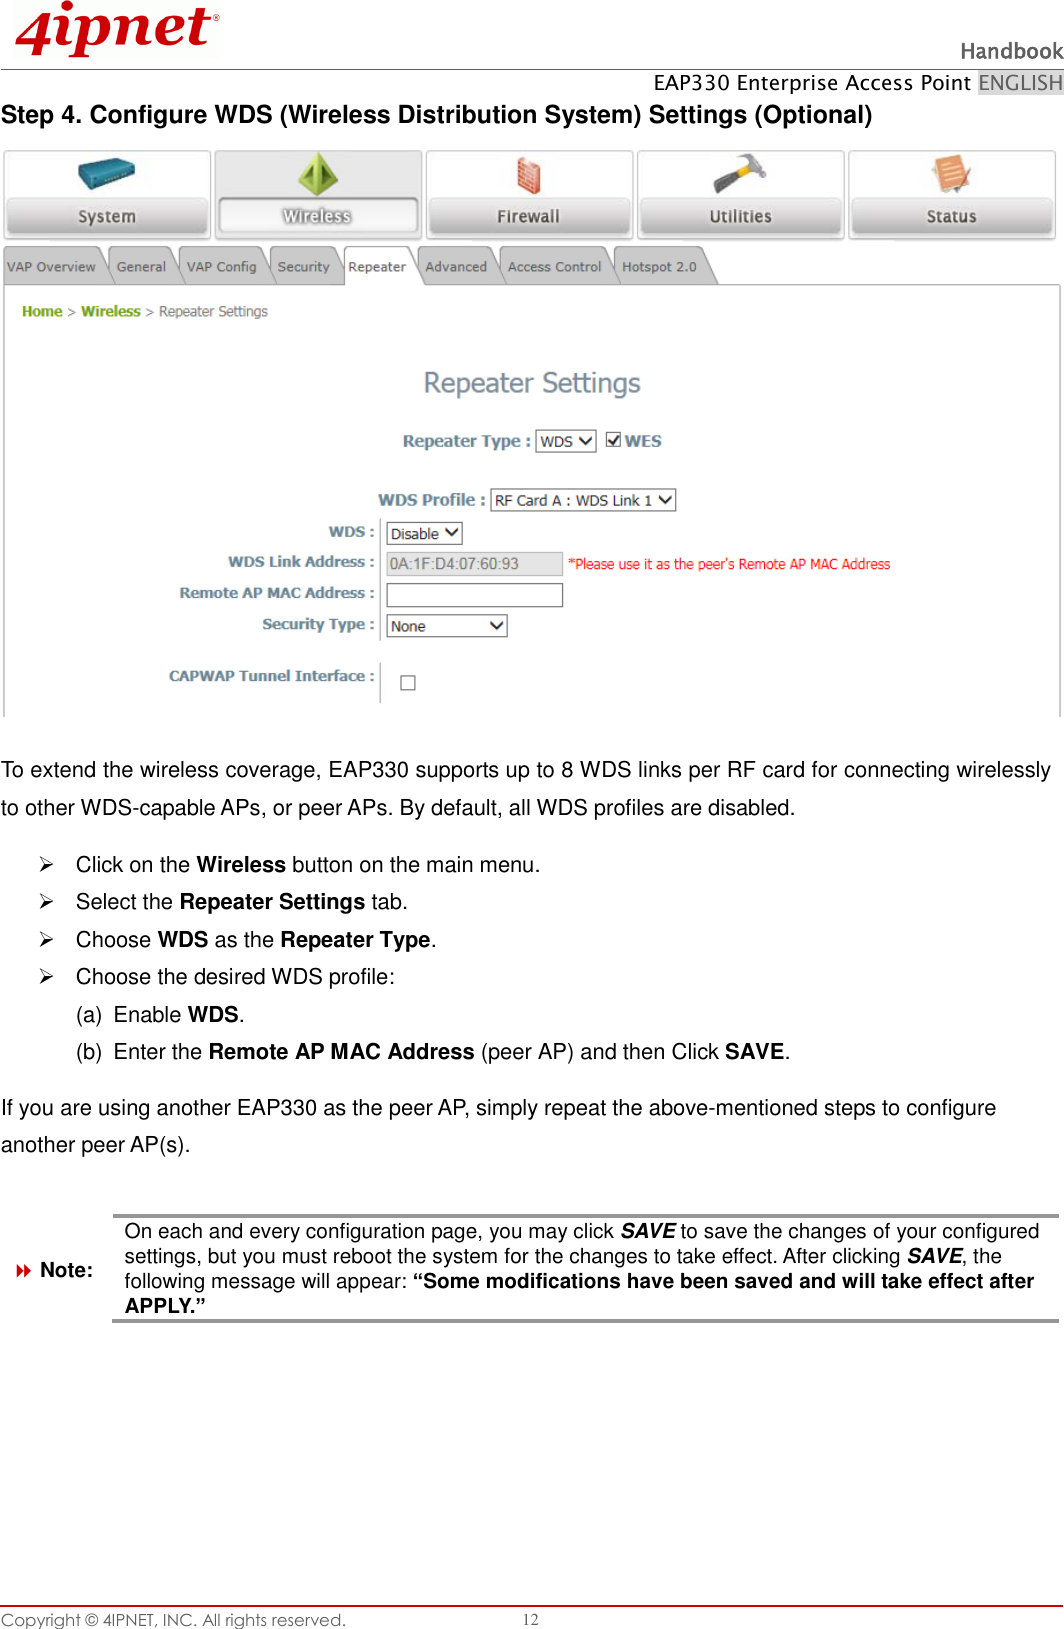
- 1. User Manual (for EAP330)
- 2. User Manual (for model-OWL630)
- 3. User Manual - Model EAP330
- 4. User Manual - Model OWL630
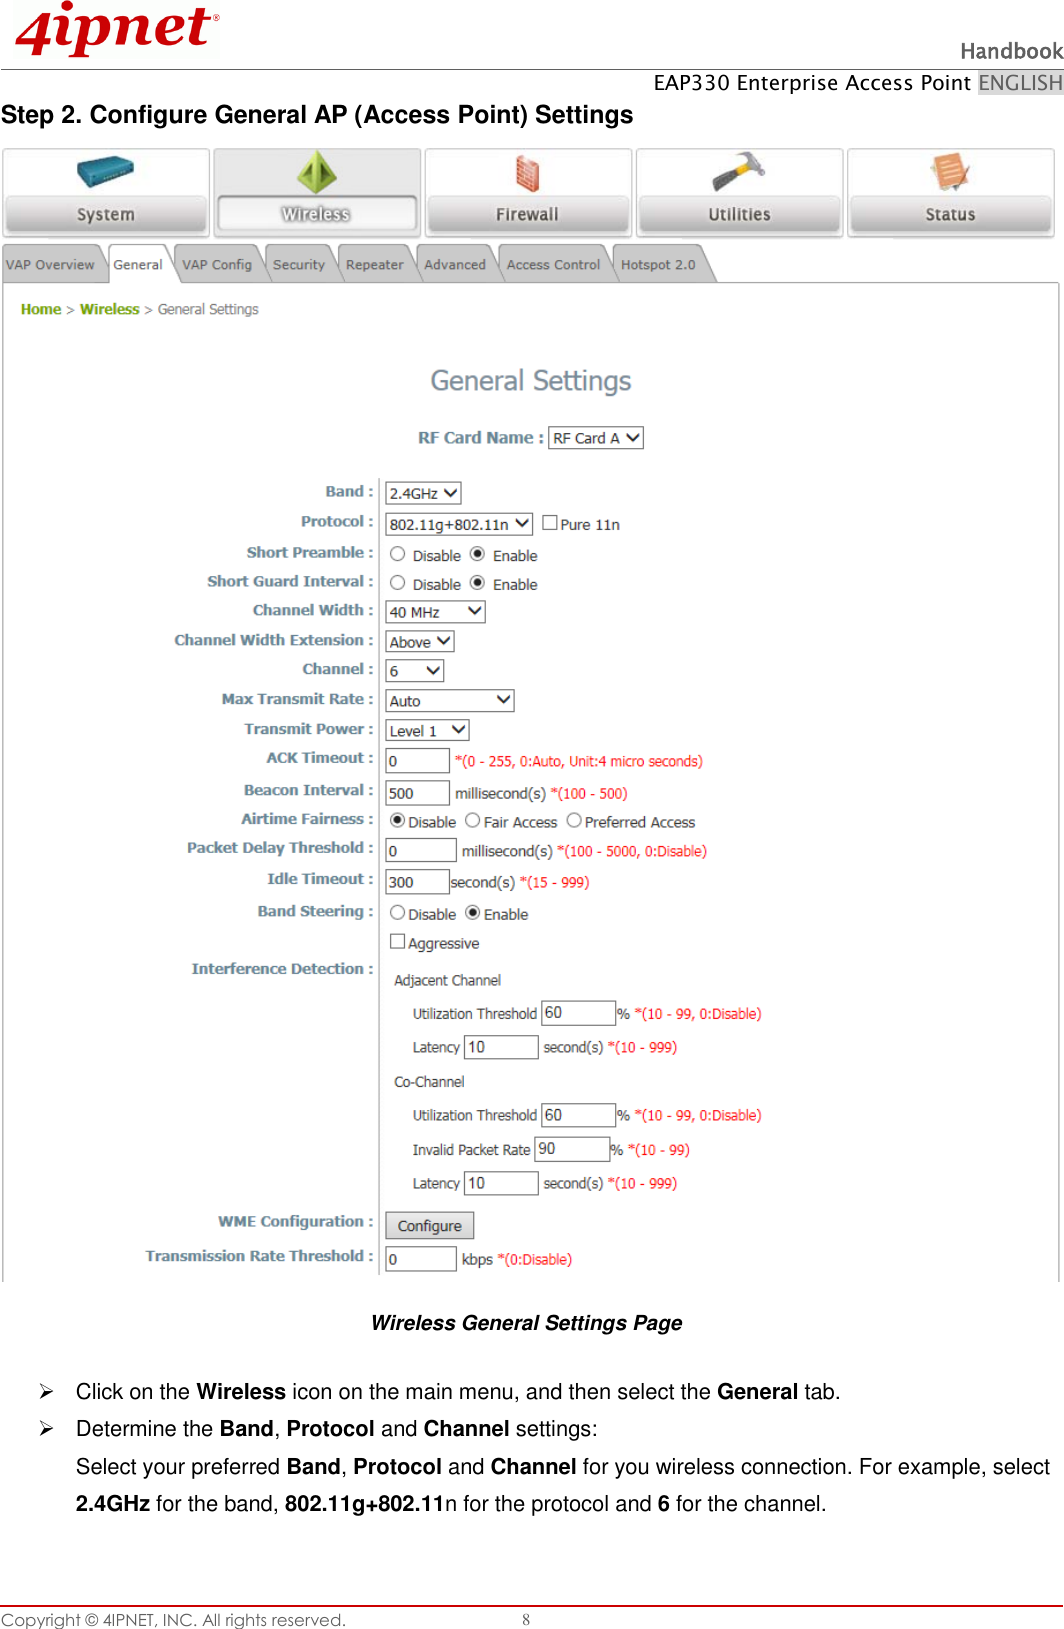
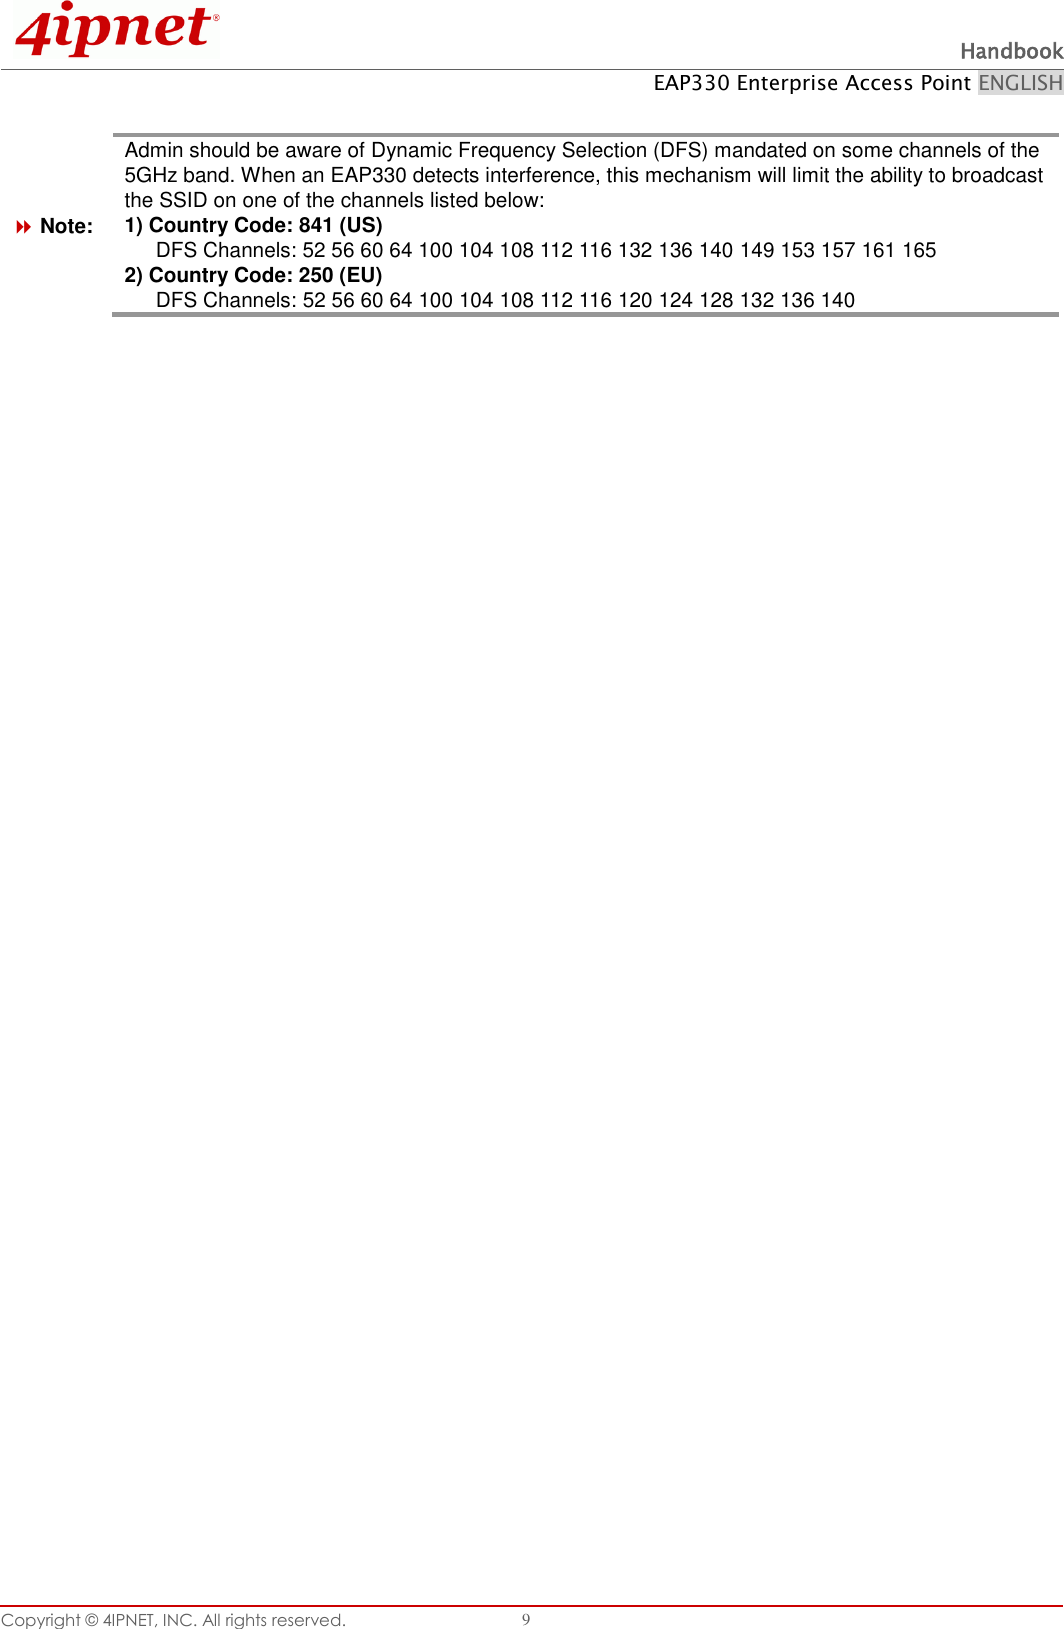
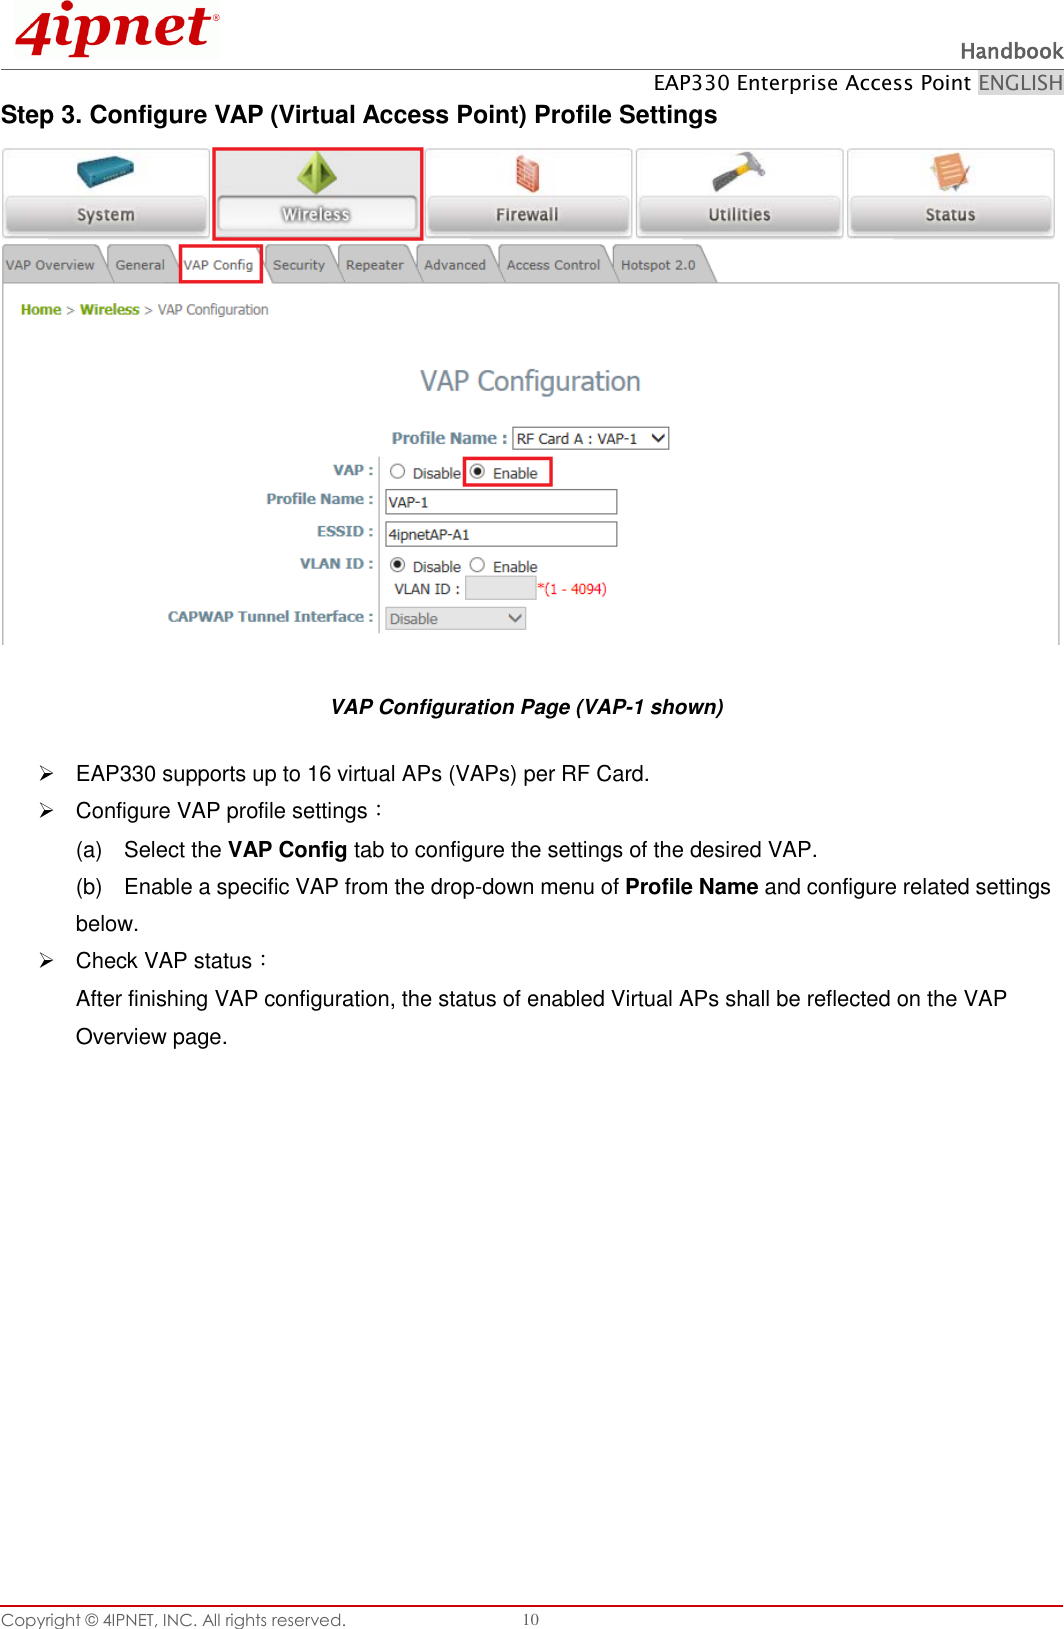
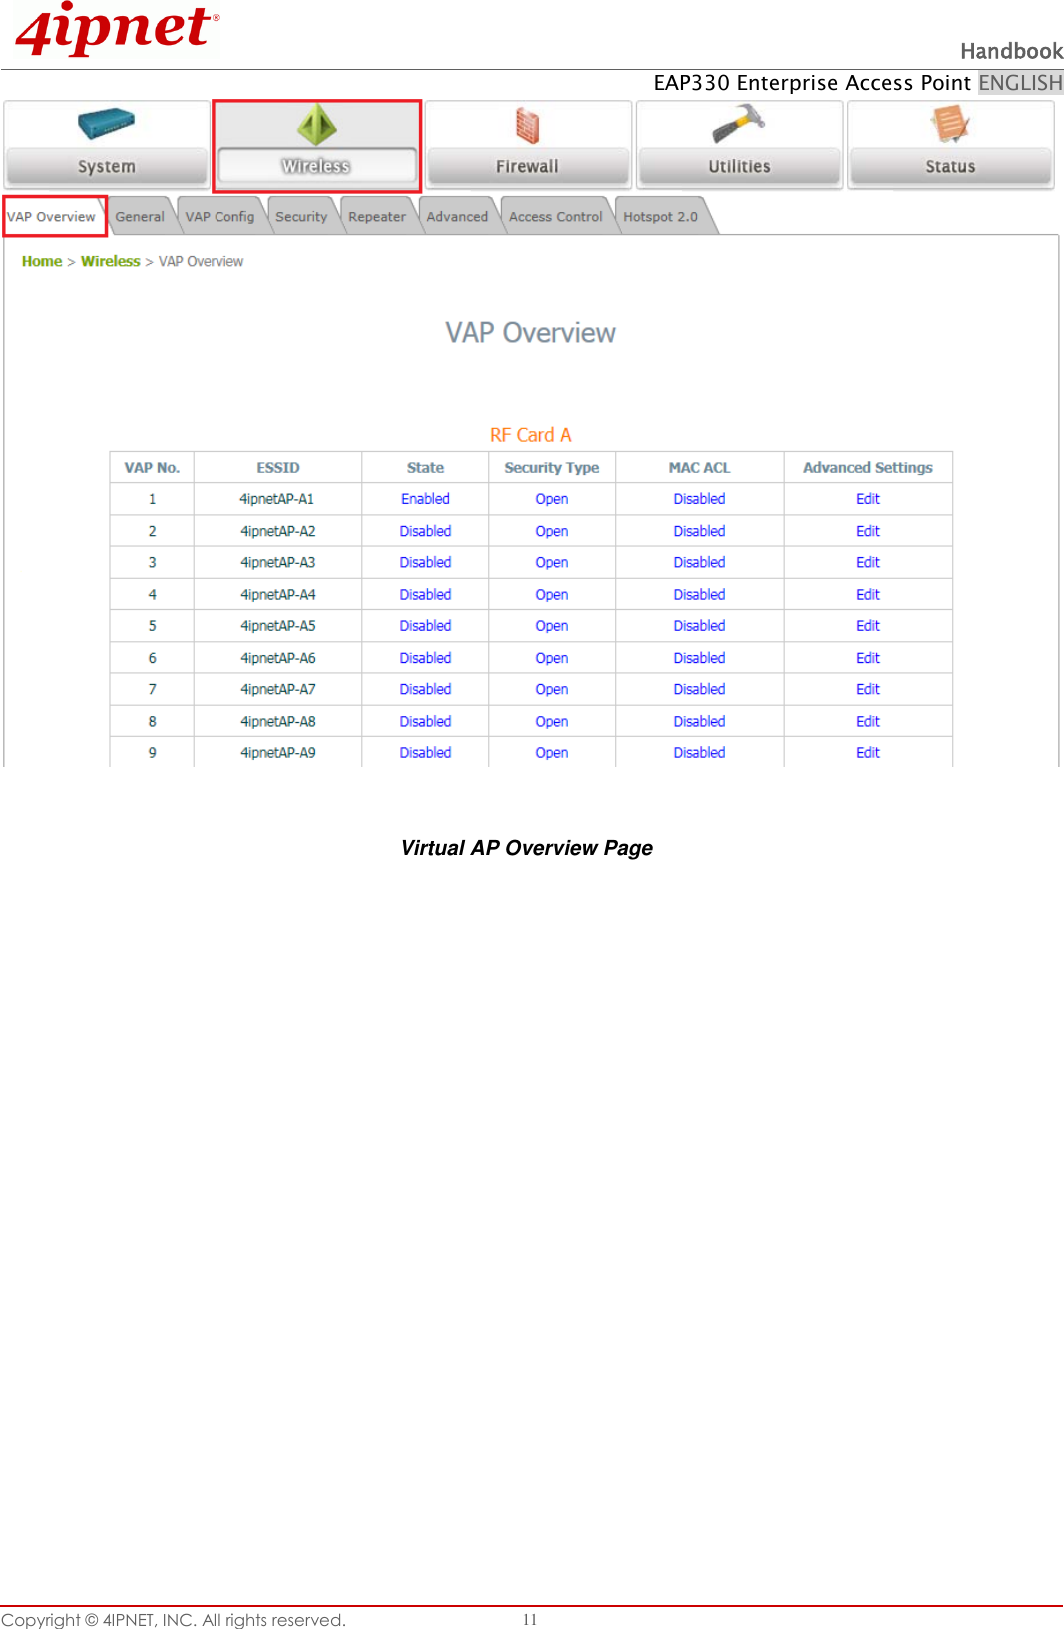
User Manual (for EAP330)