A Four Tech Co RFKB8 Wireless Keyboard User Manual START 2
A Four Tech Co Ltd Wireless Keyboard START 2
UserManual.wiki
>
A Four Tech Co
>
RFKB8 User Manual
users manual
Navigation menu
Upload a User Manual
Namespaces
Wiki Guide
HTML
PDF
Info
Views
User Manual
Discussion / Help
Navigation

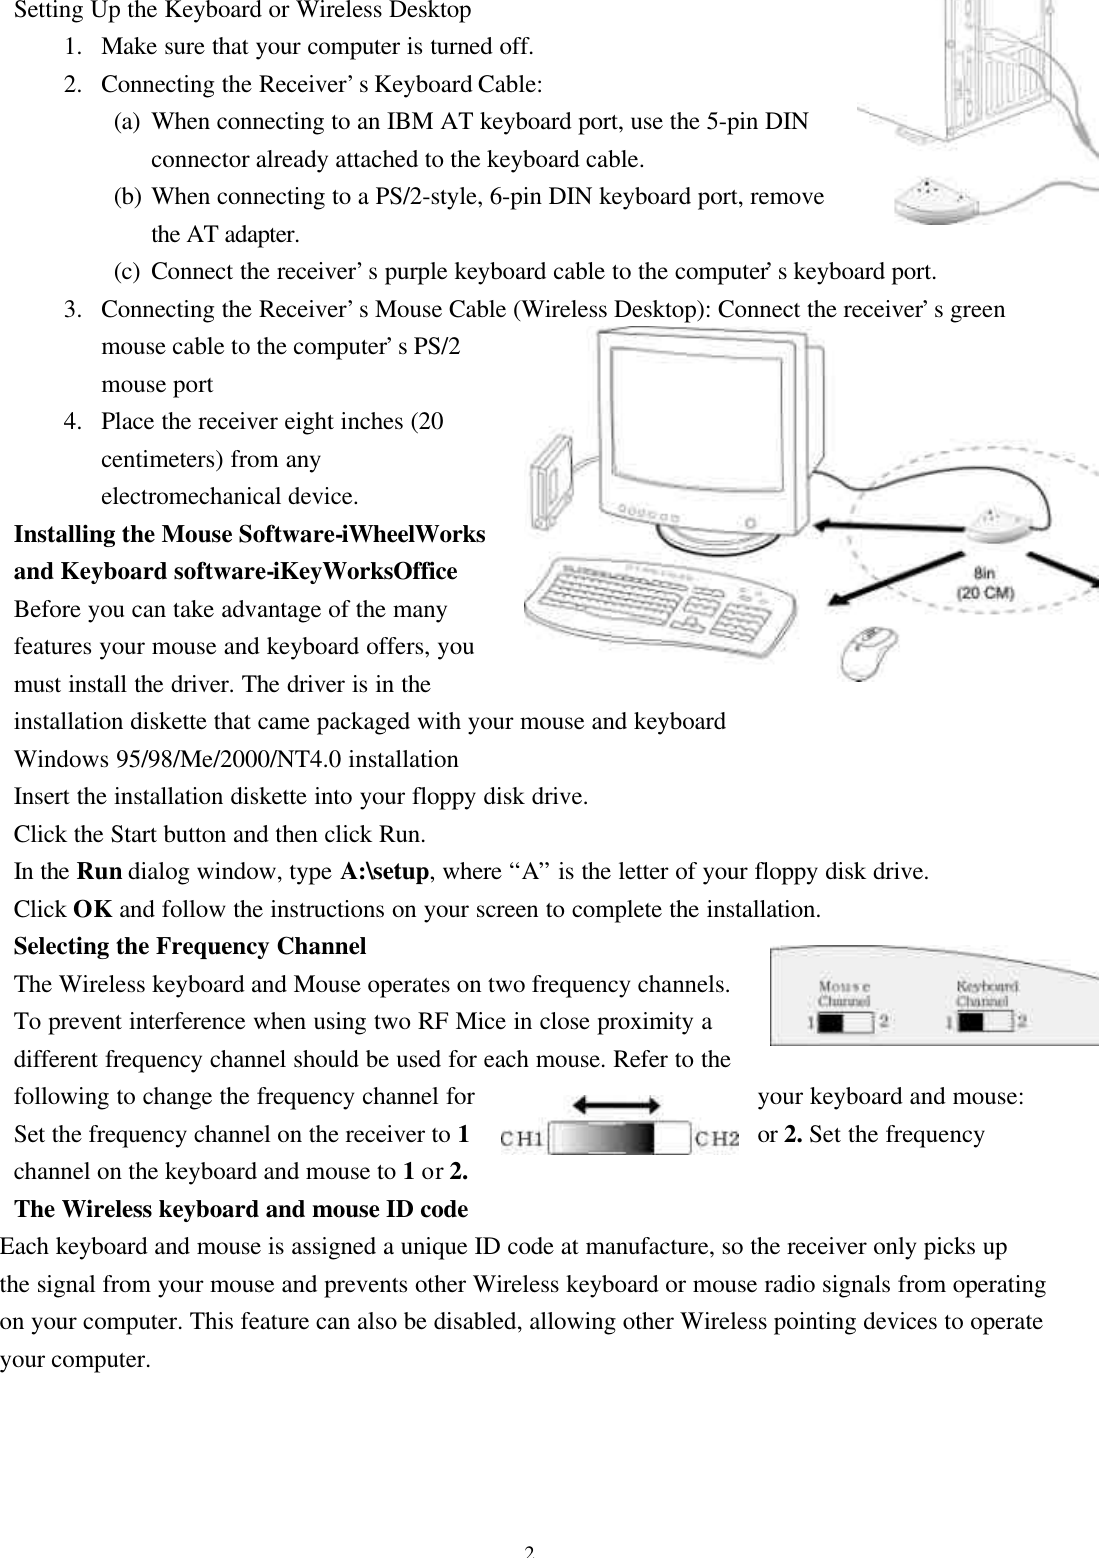

![4Changing the Wireless Mouse ID CodeYou can use a new Wireless Mouse on your computer without changing the Radio receiver; you justneed to change the ID code. Refer to the following:1. Press [Shift + Alt + F11] or [Shift + Alt + F12] to call up the Wireless Mouse ID Code window.2. Move the Wireless Mouse for a few seconds to establish a connection, then click Connect ID.3. The new ID code is connected and the Wireless Mouse windowcloses.4. Click Exit to close the Wireless Mouse ID code window.Connecting the Wireless Keyboard ID CodeManually establish communication between the receiver and keyboard.(a) Press any key from the keyboard(b) Press the ID Connect button on the receiver the green LED lightwill show you the keyboard ID be connect. If the green LED light isoff then keyboard ID is disconnect.](https://usermanual.wiki/A-Four-Tech-Co/RFKB8/User-Guide-247753-Page-4.png)


![8Using the MouseWith the iWheelWorks software, you have all the advantages of the Microsoft IntelliMouse wheel, andbut you can also scroll in Windows 95/98/Me/2000/NT.Your mouse has a wheel; the wheel functions as both a wheel and a button. Simply click the wheel asyou would a programmable standard Third button.Scrolling and Zooming with the MouseTask What is it? How to do it?Wheel Scroll Use wheel Scroll for precise up anddown movement. To scroll up, move the wheel forward; to scrolldown, move the wheel back.Zoom Use Zoom to either magnify ordemagnify the view of a document inan application that supports it.Place the cursor in an application that is MicrosoftOffice 97/2000 compatible. Press and hold the Ctrlkey on the keyboard, then to zoom in, move thewheel forward; to zoom out, move the wheelbackwards.AutoScroll Use AutoScroll in Windows95/98/Me/2000/NT and MicrosoftOffice97/2000 compatibleapplications to scroll through largedocuments.AutoScroll allows you scroll adocument automatically withouthaving to move the mousecontinuously.Assign AutoScroll to a button on the mouse if it isnot already assigned.Place the cursor in an application, Press the mousebutton assigned to AutoScroll. The AutoScroll iconappears.Move the mouse once in the direction you want toscroll. The farther you move the pointer from thestarting point, the faster the scrolling.To stop AutoScroll, press any mouse button.Mouse Properties SettingsFrom the Mouse Properties window you can customize many settings for your mouse including buttonassignments, scroll wheels and cursor movement. To open the Mouse Properties window double-clickon the mouse icon in the system tray. The Mouse Properties window has six tabs that are describedbelow.Buttons TabButton Assignments: Click the down arrow to select the preferred function for each button.Double Click Speed: Increase the speed for executing a double-click.Button Configuration: Configure your mouse for left- or right-hand use. The default setting forbuttons 1 and 2 will be reversed.Pointers TabThe Pointers tab lets you change the way the cursor appears. Click the down arrow under Scheme andchoose the setting you want. The available pointers for each scheme are shown in the pane below. Youcan browse to additional pointers, then create your own scheme using the Save As button.Motion TabPointer Speed: Lets you adjust how fast the cursor moves on the screen.Snap to Button: Check this box to automatically have the cursor move to the default button in each newdialog box or window.Sonar: When this box is checked, pressing and releasing the [Ctrl] key will highlight the cursor.Trails: Check this box when you want your cursor to display pointer trails. This option is useful whenusing an LCD display that can make the cursor difficult to see.Settings TabCommand List: Shows all the available commands (including User-defined Command Menus) that youcan assign to either the NetJump or LuckyJump grids.NetJump (top grid): The NetJump grid groups commonly used Web-browsing commands. To change acommand, select a new one from the Command List and click on the icon in the grid that you want to](https://usermanual.wiki/A-Four-Tech-Co/RFKB8/User-Guide-247753-Page-8.png)