A Four Tech Co RSOP19 Radio Wireless Wheel Mouse User Manual
A Four Tech Co Ltd Radio Wireless Wheel Mouse
UserManual.wiki
>
A Four Tech Co
>
RSOP19 User Manual
Users Manual
Navigation menu
Upload a User Manual
Namespaces
Wiki Guide
HTML
PDF
Info
Views
User Manual
Discussion / Help
Navigation


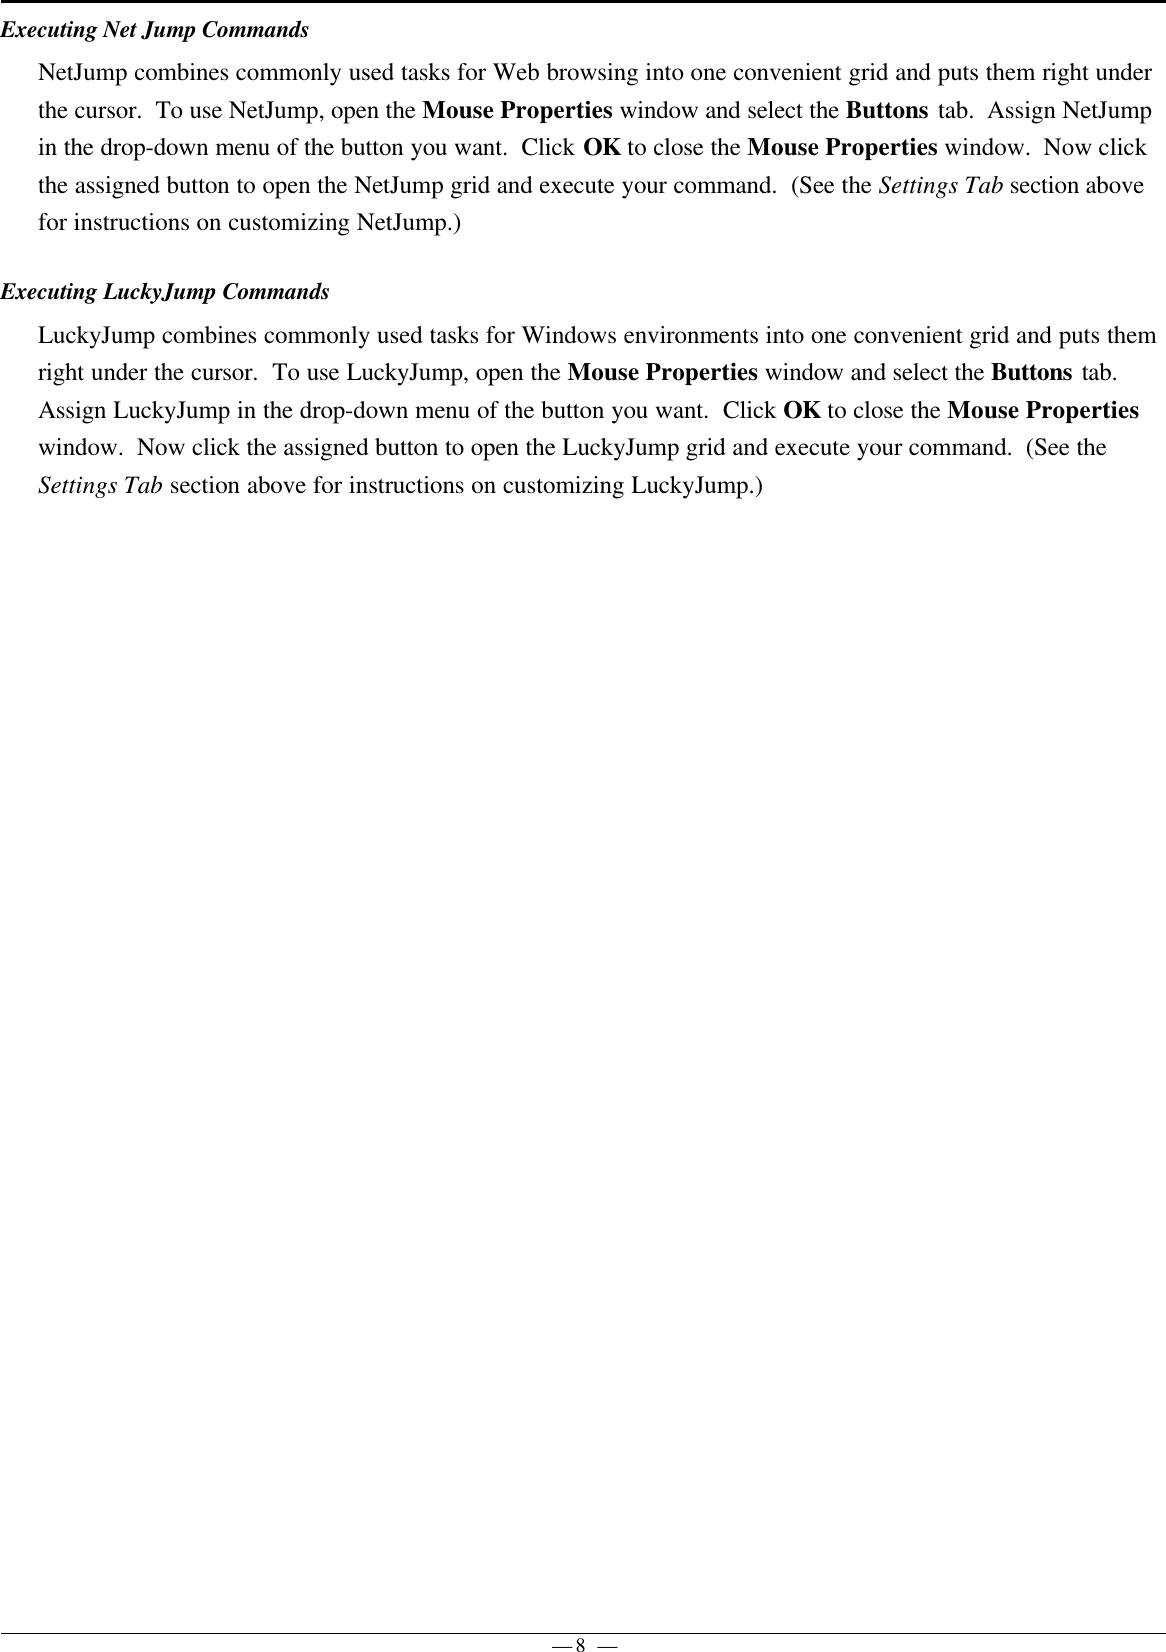
![— 5 —Changing the RF-Mouse ID CodeYou can use a new RF-Mouse on your computer without changing the Radio receiver; you just need to change theID code. Refer to the following:1. Press [Shift + Alt + F11] or [Shift + Alt + F12] to call up the RF-Mouse ID Code window.2. Move the RF-Mouse for a few seconds to establish a connection, then click Connect ID.3. The new ID code is Connected and the RF-Mouse window closes.4. Click Exit to close the RF-Mouse ID code window.Identifying ComponentsThe mouse is designed to fit snugly into your hand. The scroll wheel ispositioned on the top allowing for easy operation with the index finger.Standard mouse buttons are positioned to either side of the scroll wheelsand can be reached comfortably with the index and ring fingers. A thirdbutton is placed under the vertical wheel and can be easily clicked bypushing down on the wheel.The following pages will tell you how to configure the scroll wheels andbuttons to suit your specific needs.Cleaning the MouseClean the mouse regularly to ensure efficient operation. Refer to the following:1. Rotate the housing cover counterclockwise until it unlocks andremove it.2. Remove the tracking ball.3. Wash the tracking ball with warm water and soap then allow it todry.4. Use a cotton swab and alcohol to clean the tracking rollers in thehousing.5. Replace the tracking ball and the housing cover.6. Rotate the housing cover clockwise until it locks in place.](https://usermanual.wiki/A-Four-Tech-Co/RSOP19/User-Guide-271508-Page-6.png)
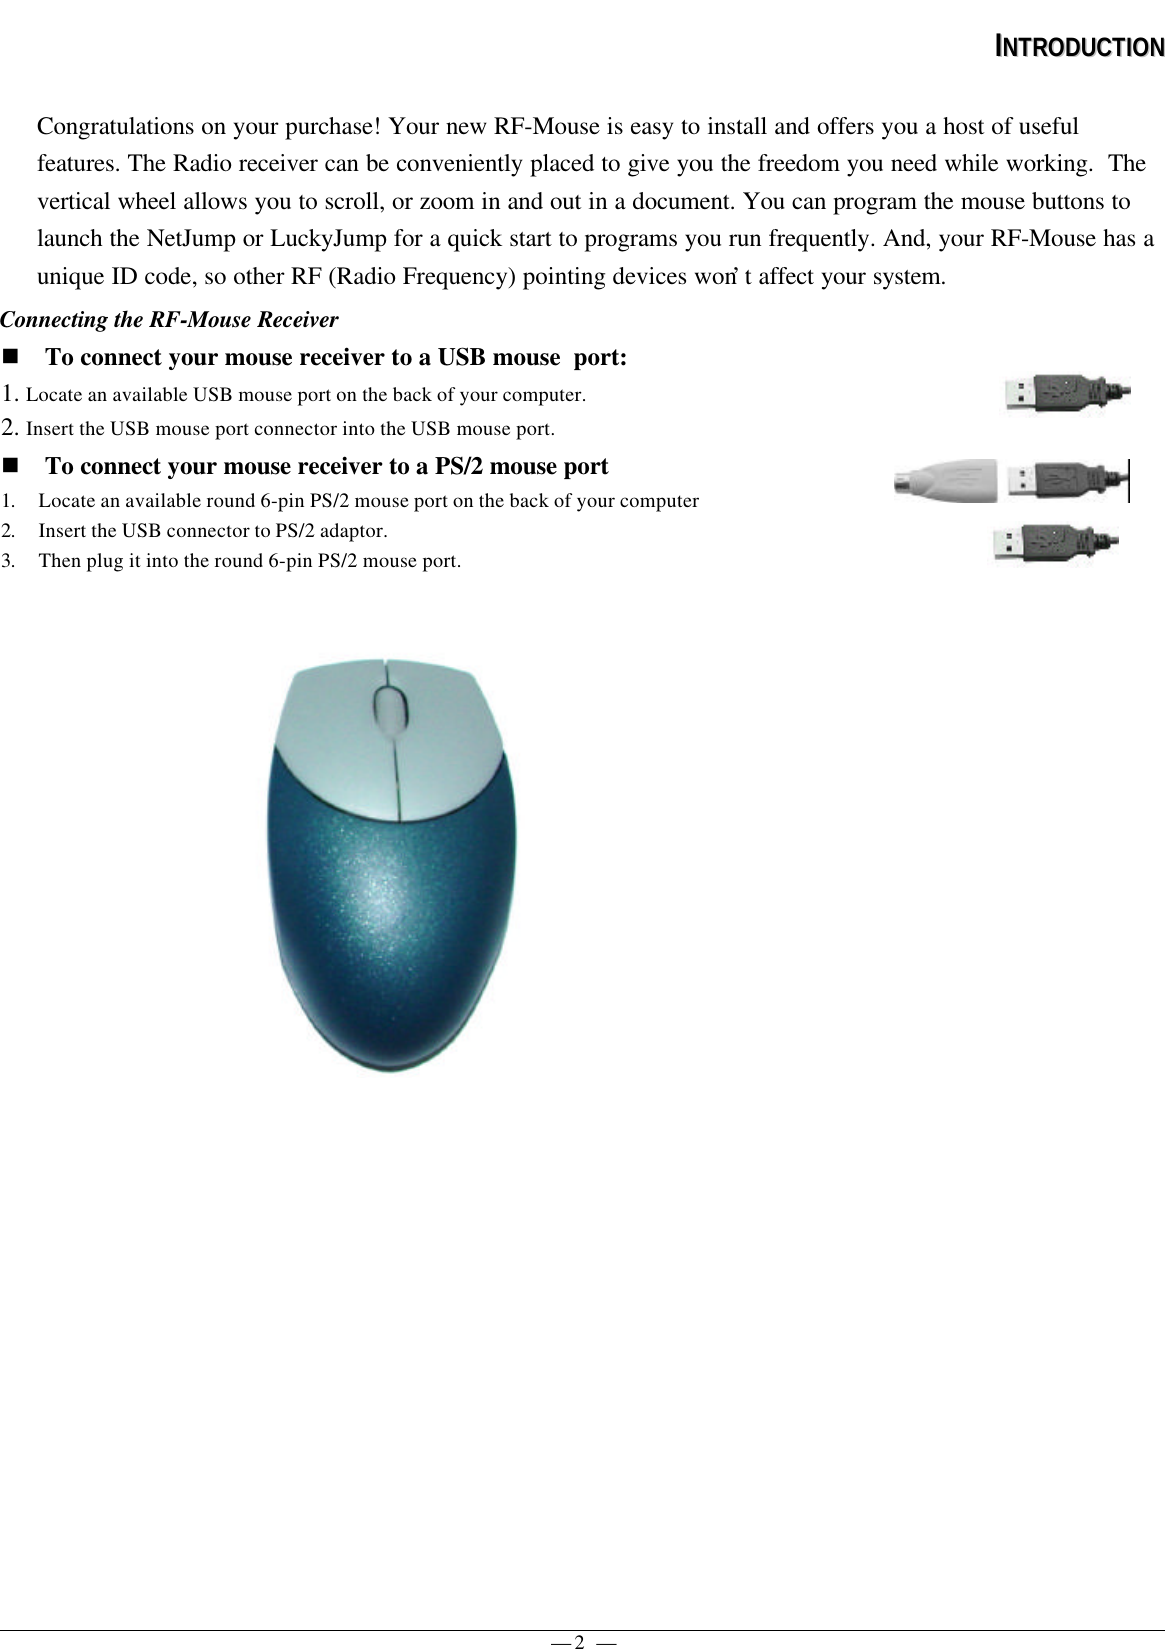
![— 7 —MMOOUUSSEE PPRROOPPEERRTTIIEESS SSEETTTTIINNGGSSFrom the Mouse Properties window you can customizemany settings for your mouse including buttonassignments, scroll wheels and cursor movement. Toopen the Mouse Properties window double-click on themouse icon in the system tray. The Mouse Propertieswindow has six tabs that are described below.SystemTrayButtons TabButton Assignments: Click the down arrow to select the preferred functionfor each button. (See the Settings Tab for more information.)Double Click Speed: Increase the speed for executing a double-click.Button Configuration: Configure your mouse for left- or right-hand use.The default setting for buttons 1 and 2 will be reversed.Pointers TabThe Pointers tab lets you change the way the cursor appears. Click thedown arrow under Scheme and choose the setting you want. Theavailable pointers for each scheme are shown in the pane below. Youcan browse to additional pointers, then create your own scheme usingthe Save As button.Motion TabPointer Speed: Lets you adjust how fast the cursor moves on the screen.SnapTo Button: Check this box to automatically have the cursor move tothe default button in each new dialog box or window.Sonar: When this box is checked, pressing and releasing the [Ctrl] keywill highlight the cursor.Trails: Check this box when you want your cursor to display pointertrails. This option is useful when using an LCD display that can makethe cursor difficult to see.Settings TabCommand List: Shows all the available commands (including User-definedCommand Menus) that you can assign to either the NetJump orLuckyJump grids.NetJump (top grid): The NetJump grid groups commonly used Web-browsing commands. To change a command, select a new one from theCommand List and click on the icon in the grid that you want tochange.LuckyJump (bottom grid): The LuckyJump grid groups all-purposecommands. To change a command, select a new one from theCommand List and click on the icon in the grid that you want tochange.Wheel: Check the Reverse scrolling direction box to change the scrollingdirection when you turn the scroll wheel. Select the Scroll or Scroll one“page” per scroll unit radio button to set the scrolling speed to suit yourwork habits.](https://usermanual.wiki/A-Four-Tech-Co/RSOP19/User-Guide-271508-Page-8.png)