A and H Design Group TRC-021RX THE COUPLES RABBIT User Manual
A&H; Design Group, Ltd. THE COUPLES RABBIT Users Manual
Users Manual


2
OVERVIEW
All products by The Rabbit CompanyTM are made from
soft, smooth, body safe materials.
Our easy to use interface allows users to easily find the
right stimulation and intensity. Get ready for sensual
satisfaction that can not be matched and will have you
craving for more.
3
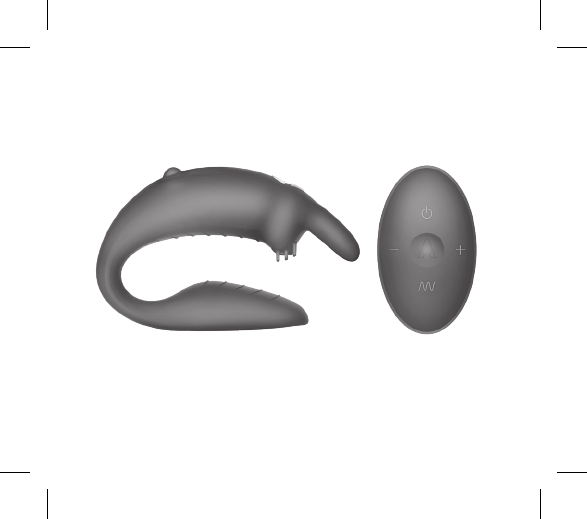
The Couples RabbitTM
4
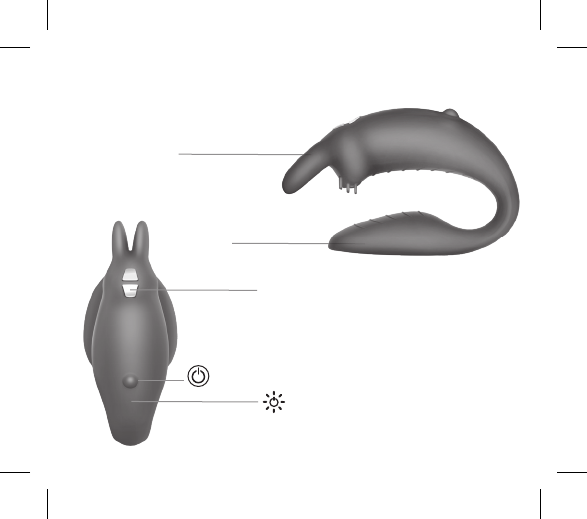
THE COUPLES RABBIT
G-Spot
Stimulator
Magnetic
Charging
Contact
Clitoral
Stimulator
Power
Button LED
Indicator
5
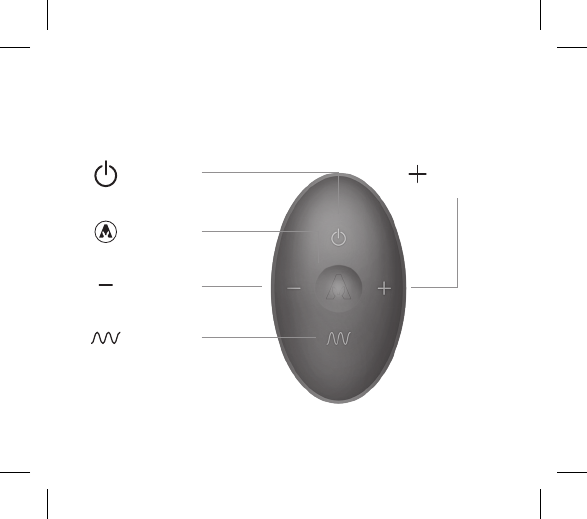
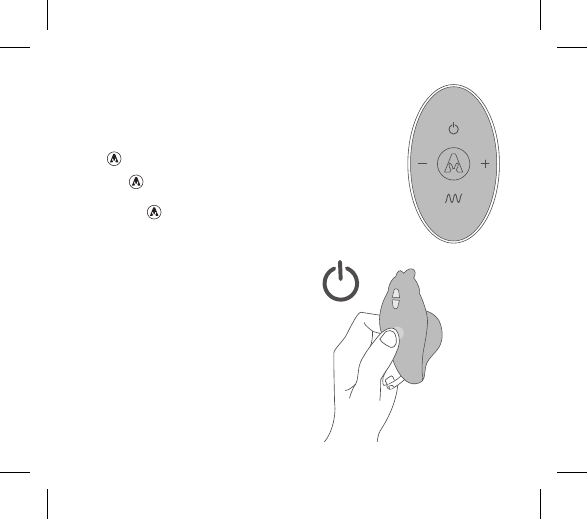
WIRELESS REMOTE CONTROL
Power
Button
Vibration
Function Button
Decrease
Intensity
Increase
Intensity
Rabbit
Function
Control
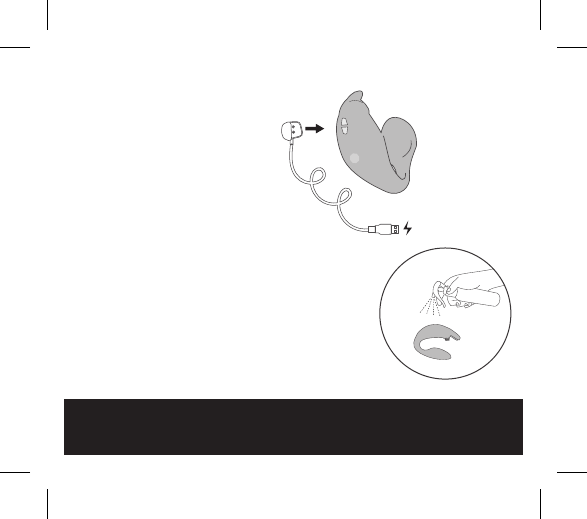
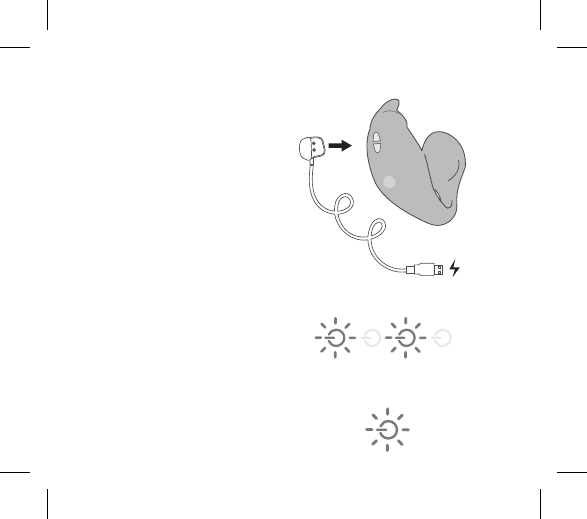
1. Before first use, charge your
rabbit for approximately 2 hours.
The USB charging cable can
be plugged into any USB port
or USB/AC power adapter (not
included).
• Flashing Light = Charging
• Solid Light = Fully Charged
• Rapid Flashing Light = Low
battery, charge is needed
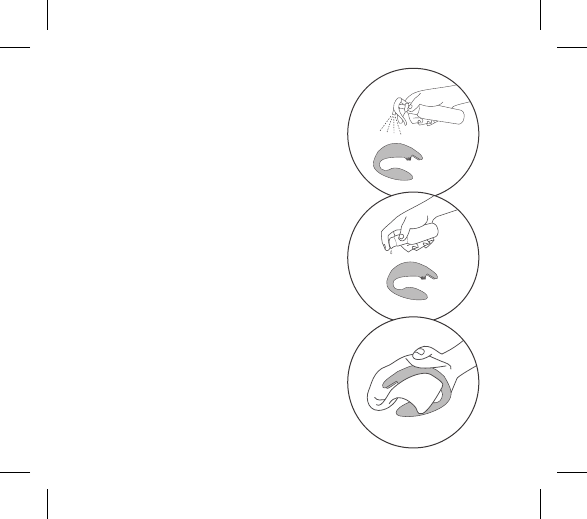
2. Wash your rabbit with soap
and water, or toy cleaner suitable
for use with silicone items.
FAQs can be found at
www.TheRabbitCompany.com
Email us at
customercare@TheRabbitCompany.com
for any unanswered questions
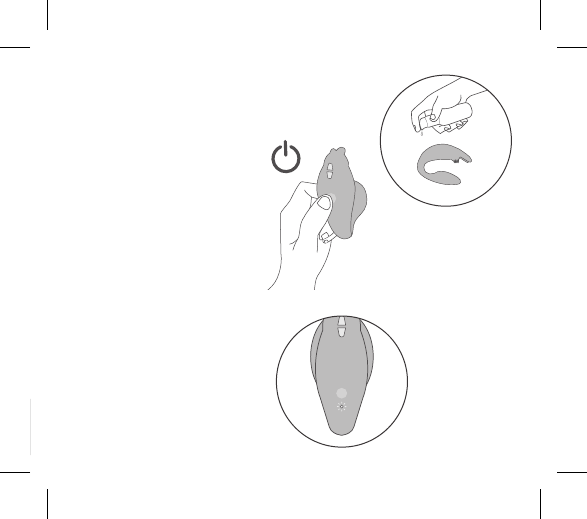
GETTING STARTED
TOY CLEANER
7
3. Lubricate your rabbit (if
needed) with a water based,
silicone compatible lubricant.
4. Turn ON your rabbit by
pressing A quickly at the
bottom of your rabbit. The
light will flash, indicating
the power is on and in
standby mode.
Push A again on your rabbit to
use the manual mode, or push
A on the remote to pair the
remote & rabbit.
Once in use, the base light will
change from flashing to solid.
LUBE
8
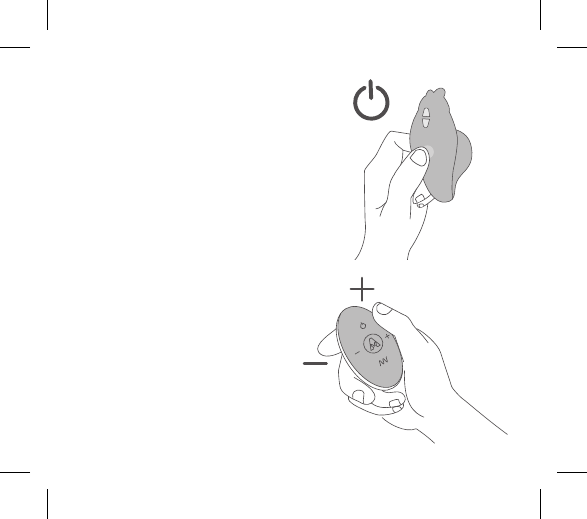
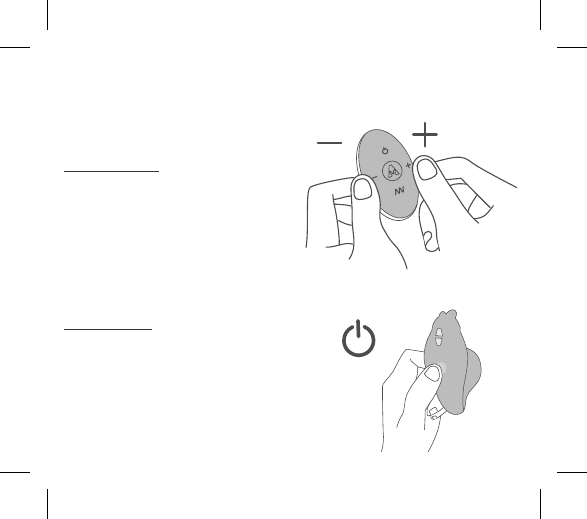
MANUAL CONTROL
5. To change the vibration pattern
via manual control, press the A.
6. To change the vibration intensity
via the remote control press and
release A (Increase Intensity) and A
(Decrease Intensity).
9
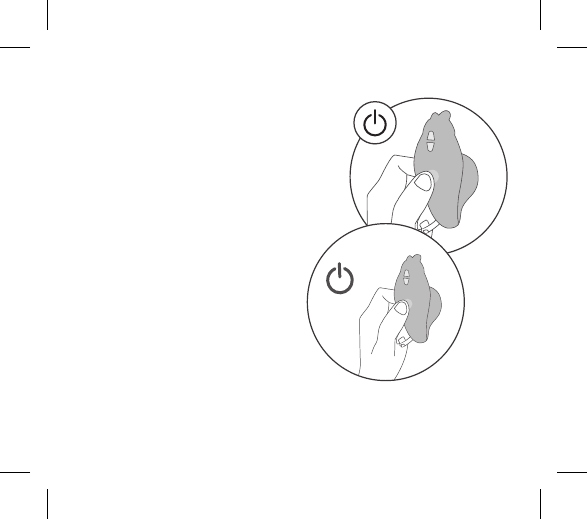
MANUAL CONTROL
1. To turn the item ON quickly press
A on your rabbit. The A will flash to
indicate the power is on. Push A again
to change the vibration pattern.
There are a total of 6 modes using the
manual control.
2. To power OFF your rabbit press A
and hold for 2 seconds. LED will turn o
to indicate the power is OFF.
1
2
10
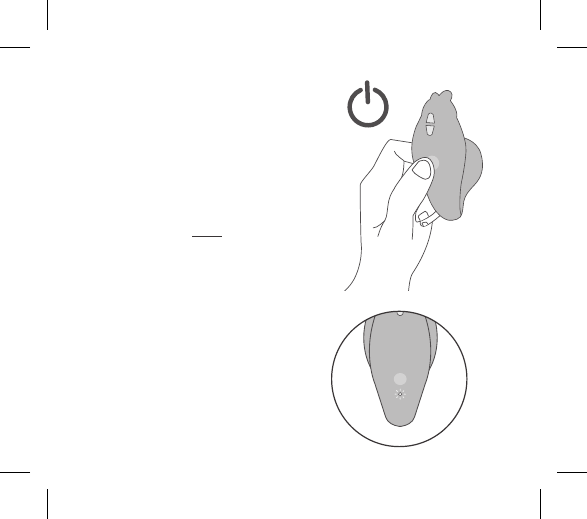
REMOTE CONTROL
1. First turn your rabbit on in standby
mode by quickly pressing A on the
bottom of your rabbit.
2. While the baselight is flashing, press
A to power on your remote to pair the
remote & rabbit.
3. Once the item is paired the base
light A will become solid and you can
control your rabbit by remote.
4. Press and release A on the remote to
increase vibration intensity.
5. Press and release A on the remote to
decrease vibration intensity.
6. To change the independent vibrator in
the g-spot massager, press and release
A.
7. Holding A for 3 seconds will turn
off the independent g-spot massager.
Holding A for 3 seconds will turn on
A A A A A A A
11
the independent G-Spot massager.
8. To change the individual vibrator in
the rabbit attachment clitoris, press and
release .
9. Holding for 3 seconds will turn OFF
the independant rabbit vibrator. Pressing
and releasing will turn it back ON.
10. To turn the item ON/OFF press and
release A on the remote.
11. To completely turn off your rabbit,
press and hold A on your rabbit.
12
• Insert the charging plug into
the designated charging area
• Flashing light indicates item
is charging
• Solid light indicates item is
fully charged
• Rabbits require approximately
2 hours for full charge
CHARGING
Flashing light = Charging
Solid light = Fully Charged
13
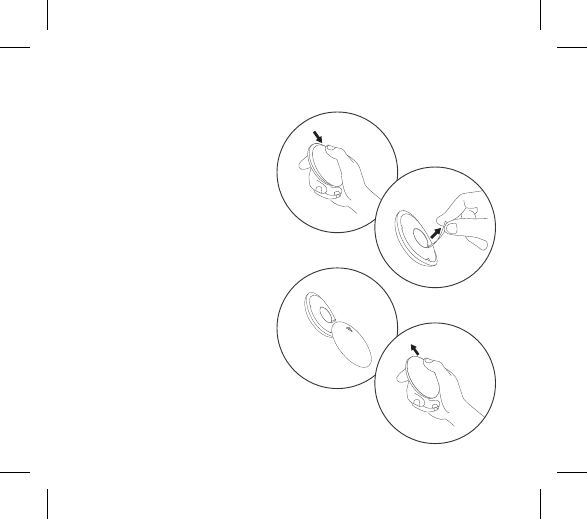
CHANGING YOUR REMOTE CONTROL BATTERY
• Slide open the remote
control battery compartment
as shown.
• Button cell CR 2032 has
been preinstalled into the
remote control.
• Remove the paper slip inside
the battery compartment
to activate the power in the
remote control.
• Suggested to remove the
battery from the remote
control for extended stroage.
Store the remote control and
the battery seperately.
OPEN
14
TRAVEL LOCK
12
3
123
45
The Rabbit Company™ items include
a travel lock for safe and convenient
travel.
For the remote:
Simultaneously press and hold the A
and A buttons for 3 seconds. Flashing
light will indicate the item is locked.
To unlock simply press and hold A
and A again for 3 seconds. Flashing
light will indicate lock is disabled.
For the rabbit:
Hold A for 5 seconds, flashing
light will indicate the item is locked.
For unlocking, hold A again for 5
seconds, flashing light will indicate the
item is unlocked.
15
TRAVEL LOCK
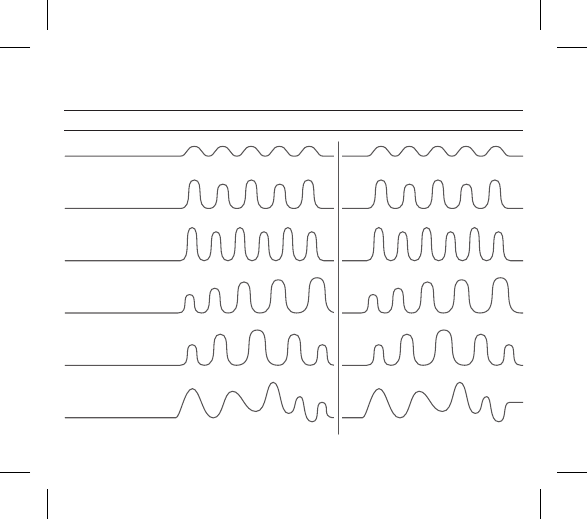
Internal Stimulators External Stimulators
1. Constant
2. Wave
3. Pulse
4. Ascend
5. Oscillate
6. Random
VIBRATING MODES
16
1. Always clean your rabbit
thoroughly before and after
each use.
2. We recommend using a premium
water-based lubricant when needed.
Silicone-based lubricants are not
recommended and can cause
damage to the product. Never use
hand cream, or massage oils as
lubricants for your intimate areas.
3. To properly clean your rabbit,
use a suitable silicone-compatible
cleanser. If this is not available, wash
the silicone area of your rabbit with
luke-warm water and a respected
antibacterial soap. Rinse clean and
pat dry using a lint-free cloth or
HARE CARETM
Cleaning, Storage & Safety
TOY CLEANER
LUBE
17
HARE CARETM
towel. Do not use cleaners containing
alcohol, petrol or acetone.
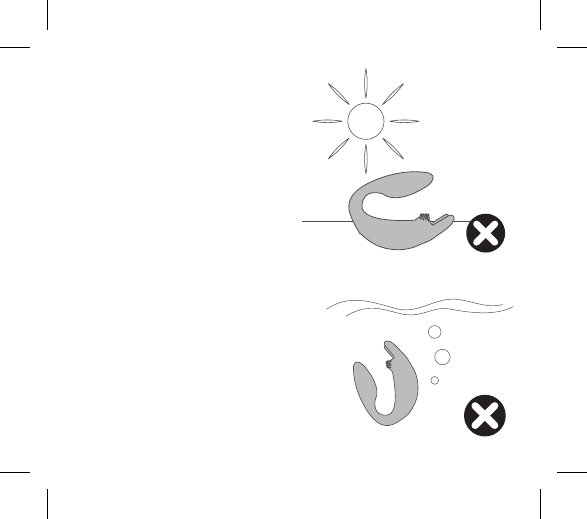
4. Avoid leaving your rabbit in direct
sunlight and never expose it to
extreme heat.
5. Our products are designed to be
splash-proof. Never immerse your
rabbit in water.
If your rabbit appears to function
abnormally, turn OFF and consult
our customer care section on
TheRabbitCompany.com where you
will find help tips. Should
you require further assistance
please contact:
customercare@TheRabbitCompany.com

18
Materials
Size
Weight
Battery
Charging
Use Time
Max Noise Level
Interface
Modes
Body Safe Abs / Silicone
32 x 85 x 58 mm
64 g
150 mAh
2 hours
1 hour
< 68 dB
Single Button Manual Control
5 Button Remote Control
12
SPECIFICATIONS
19
The crossed-out dustbin symbol indicates that these items should not be
treated as household waste, but rather brought to the appropriate collection
point for recycling electrical and electronic equipment.
Disposal of old electronic equipment (applicable in the EU and other European
countries with separate waste collection systems):
DISPOSAL INFORMATION

FAQs can be found at
www.TheRabbitCompany.com
Email us at
customercare@TheRabbitCompany.com
for any unanswered questions
Complete user instructions in additional
languages can be found at:
www.TheRabbitCompany.com

21
Sold as a novelty only. Made and packed in China. All rights
reserved. The shape and appearance of the products in this guide
are a trademark and trade dress of B.C.B.V.I © 2018
Visit www.trcpatents.com for more info.

22
Warning: This product is for adults only. To avoid injury or
aggravation of pre-existing conditions, this device should not be
used on swollen or inflamed areas, or skin lacerations. No medical
claims are warranted or implied by the use of this product.

23
Made in China
© 2018 The Rabbit CompanyTM
Designed and Developed by
The Rabbit CompanyTM

TheRabbitCompany.com
v1.0
FCC STATEMENT
1. This device complies with Part 15 of the FCC Rules. Operation is subject to the following two
conditions:
(1) This device may not cause harmful interference, and
(2) This device must accept any interference received, including interference that may cause
undesired operation.
2. Changes or modifications not expressly approved by the party responsible for compliance could
void the user’s authority to operate the equipment.
This equipment has been tested and found to comply with the limits for a Class B digital device,
pursuant to part 15 of the FCC Rules. These limits are designed to provide reasonable protection
against harmful interference in a residential installation. This equipment generates, uses and can
radiate radio frequency energy and, if not installed and used in accordance with the instructions,
may cause harmful interference to radio communications. However, there is no guarantee that
interference will not occur in a particular installation. If this equipment does cause harmful
interference to radio or television reception, which can be determined by turning the equipment off
and on, the user is encouraged to try to correct the interference by one or more of the following
measures:
—Reorient or relocate the receiving antenna.
—Increase the separation between the equipment and receiver.
—Connect the equipment into an outlet on a circuit different from that to which the receiver is
connected.
—Consult the dealer or an experienced radio/ TV technician for help.