ACE BAYOU DUAL21D X ROCKER CHAIR User Manual
ACE BAYOU CORP. X ROCKER CHAIR Users Manual
UserManual.wiki
>
ACE BAYOU
>
DUAL21D User Manual
Users Manual
Navigation menu
Upload a User Manual
Namespaces
Wiki Guide
HTML
PDF
Info
Views
User Manual
Discussion / Help
Navigation

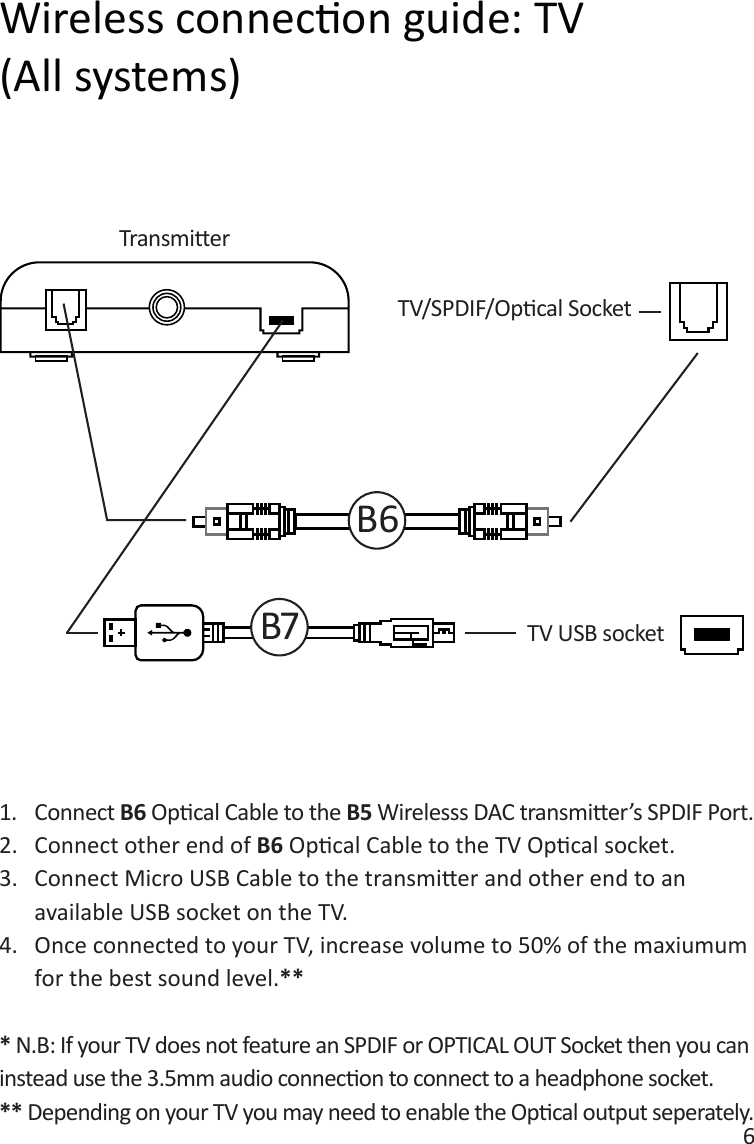
![5Step 1: Make sure that the Xbox One™ system is switched OFF. Insert the micro USB cable into the X Rocker DAC converter and the other end into one of the back USB ports on the Xbox One™ system. Remove the clear Step 2: Turn the Xbox One™ system back on. Select one of the wireless bands (1,2,3) on the wireless DAC and then switch to the corresponding band on the chair. Step 3:> [Display and Sound] > [Audio Output] > under [Digital Audio], select ISave, exit and enjoy!](https://usermanual.wiki/ACE-BAYOU/DUAL21D/User-Guide-4114325-Page-5.png)
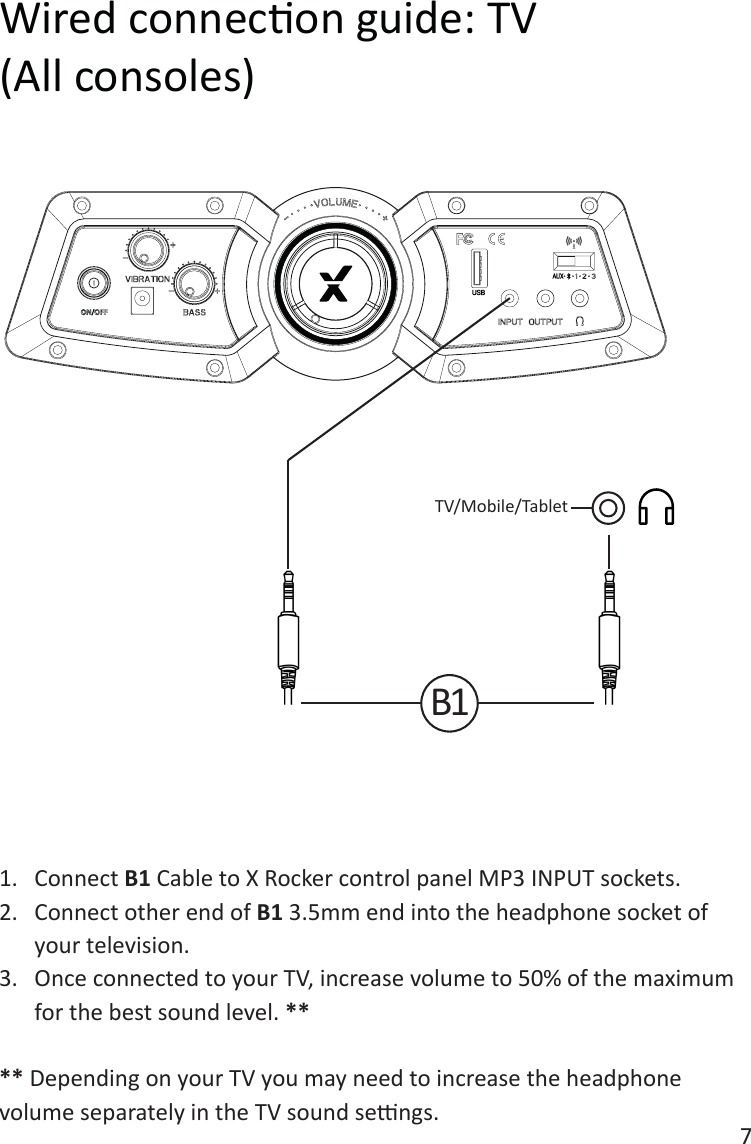
![8Wired connecon guide: PS4 Controller only1. Connect the B1 cable to the boom of the PS4 controller via the headset socket.2. Connect the other end of the B1 cable to the chair via the green port.3. With the PS4 turned on, go to the main menu (or locate the main menu screen). Press and hold the PS buon on the PS4 controller unl the quick menu appears on screen.4. In this menu select [Adjust sound and devices]5. Then select [output to headphones]6. Change the seng from [Chat Only] to [All audio]7. Make sure the volume in the previous menu is set to the maximum.8. Set the control panel Wireless switch to the ‘OFF’ posion.B1](https://usermanual.wiki/ACE-BAYOU/DUAL21D/User-Guide-4114325-Page-8.png)