ADI ADIUSB10 USB Flash Driver User Manual New spec of eUstick
ADI USB Flash Driver New spec of eUstick
UserManual.wiki
>
ADI
>
ADIUSB10 User Manual
Users Manual
Navigation menu
Upload a User Manual
Namespaces
Wiki Guide
HTML
PDF
Info
Views
User Manual
Discussion / Help
Navigation
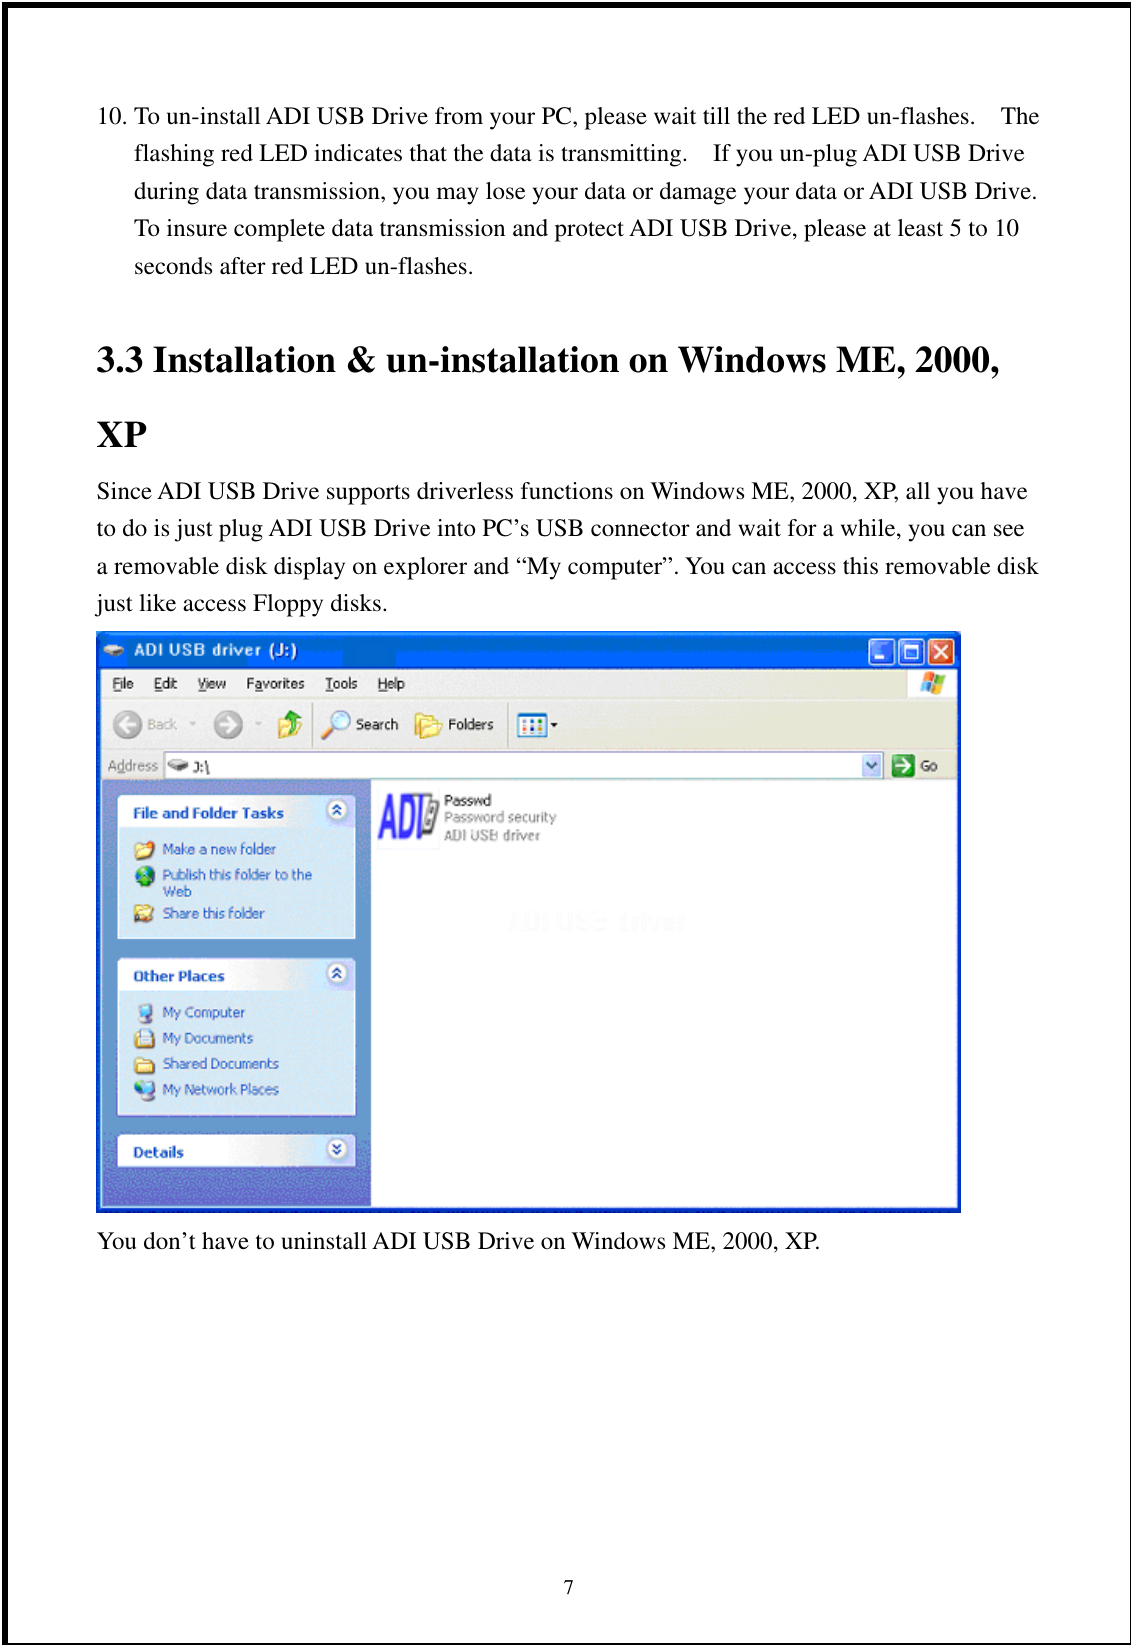
![3. How to install & uninstall In this section, we will show you how to attach ADI USB Drive USB disk to PC, install & uninstall its software utility in your PC. Because USB disk is driverless in most OS except Windows 98, we will explain how to install driver in this OS. Software utility of ADI USB Drive is installed automatically, but when you don’t need this utility any more, you have to uninstall it manually by yourself. You can find out this uninstall program on the CD come with ADI USB Drive or download from vendor’s WEB site. 3.1 Hardware Installation USB had became a standard equipment of PC for more than two years, if your PC is older than 2 years, you should call your PC vendor to make sure that there are USB hosts on your computer. ADI USB Drive is a device with “male” USB connector; you can find out “female” connectors at the back-end of your PC, some PCs place their USB connectors in the front-end of PCs, or both. All you have to do is simply plug your ADI USB Drive into PC’s USB connector; PC will detect ADI USB Drive automatically. It’s a good idea to attach an extended USB connector cable to prevent attrition of host connectors on PC. 3.2 Driver Installation & un-installation on Windows 98 If your operation system is Windows 98, you will see a pop up “detected new device” wizard as soon as you plug ADI USB Drive into PC. The message tells you that PC had detected the ADI USB Drive but Windows doesn’t know what it is. Please follow install steps below: 1. Plug ADI USB Drive into PC, Windows will display Add new device wizard. 2. Click [Next] button. 3. Choose [search for new device driver] option than click [next] button. 4. Put the CD come with ADI USB Drive into CD-ROM drive. 5. Choose [search CD-ROM Disk] option than click [next] button. 6. Windows will find out and install ADI USB Drive automatically. 7. If installation succeed, click [Next] button than click [Finish] button, the installation is completed. 8. If error messages occur, click [cancel] many times to leave wizard. Maybe you put wrong CD in PC, eject CD-ROM and check it. Or repeat step 1 to 7 again. 69. If installation was successful, you may find “removable disk” icon on your “My Computer” folder.](https://usermanual.wiki/ADI/ADIUSB10/User-Guide-313686-Page-7.png)
![3.6 Install & Uninstall software utility Software utility is only supported in Windows. When you plug a new ADI USB Drive into your PC, double click on “My computer” icon or launch an explorer, browse into ADI USB Drive, you will find out an executable file named: “passwd.exe ”. Passwd.exe is the key of password security as well as the installer of ADI USB Drive software utilities. Install software utility: 1. Double click on Passwd.exe to launch this program. 2. When passwd.exe was launched, it will check if the software utility is already installed. If not, passwd.exe will install the software utility automatically. Un-install software utility: You can uninstall software utilities for ADI USB Drive, as you normally would do when un-install other programs in your PC according to appropriate manual of Microsoft Windows operating system. [EX : Windows 2000. Other Windows operating systems are similar to bellow.] *For more detailed information consult with your Windows manual from Microsoft Corporation. 1. Click “Start”, point to “Settings” and click “Control Panel” to open “Control Panel” window. 2. Double click “Add/Remove Programs” icon. 3. Click “Change or Remove Programs”, then among the installed program lists of your PC, choose “ADI USB Utility” to uninstall ADI software utilities. 94. But remember that when you execute passwd.exe next time, software utility will install to you PC again automatically.](https://usermanual.wiki/ADI/ADIUSB10/User-Guide-313686-Page-10.png)
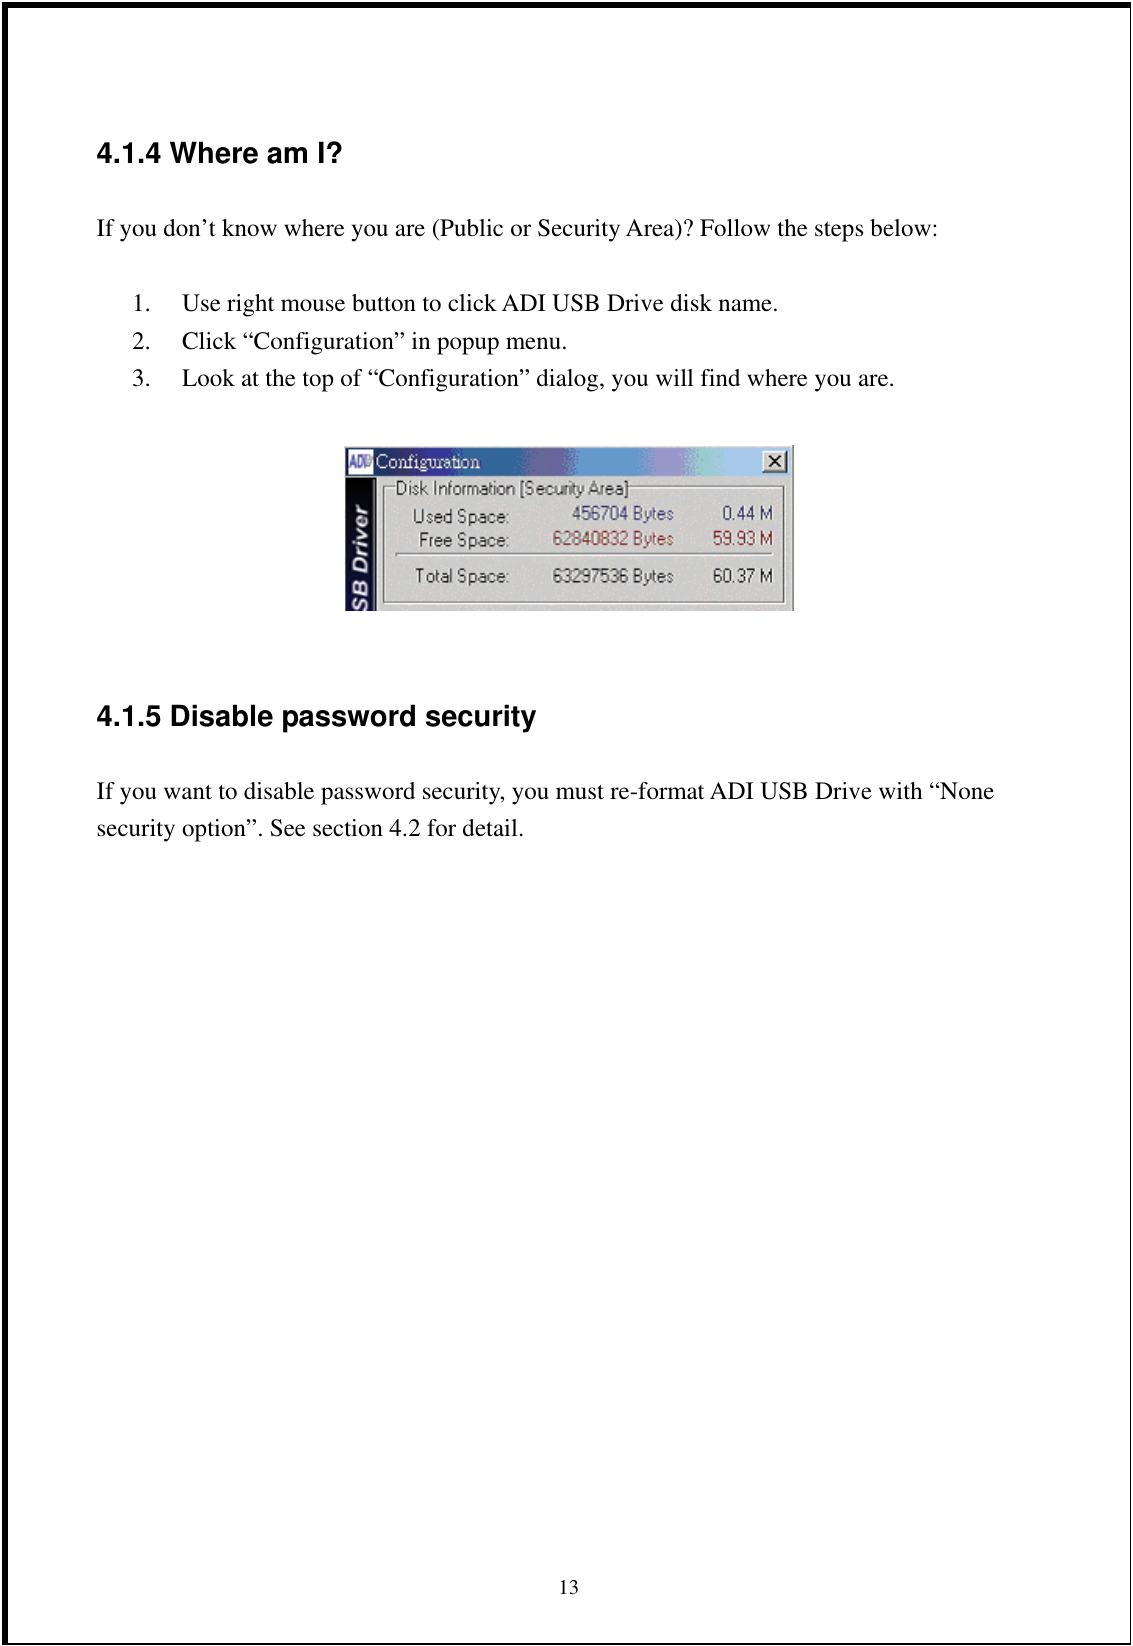
![4.1 Password Security Documents stored in ADI USB Drive maybe very import for you or your company. Once you lost ADI USB Drive, to make sure nobody can access the documents stored in ADI USB Drive could be major concern of you. Password security is the default setting of ADI USB Drive, you can re-format ADI USB Drive to disable it. By the way, we suggest that your password should have 8-characters, combination of uppercased and lowercased alphabetical and digits, this is a good way to prevent someone happen to find out your password by guess. 4.1.1 Login If password security options are enabled, you will have two disk partitions on ADI USB Drive. The first partition is [Public Area] and the other is [Security Area]. When you plug ADI USB Drive into PC, all you can see is nothing but public area. “passwd.exe ” is the key to switch to [Security Area]. The login procedure is: 1. Launch passwd.exe. 2. Input correct password, please notice that password is case-sensitive. 3. Click “Login” button. 4. If login failed, maybe you key in wrong password, please repeat step 1 ~ 3. 5. If login successfully, you can see files in [Security Area]. 11](https://usermanual.wiki/ADI/ADIUSB10/User-Guide-313686-Page-12.png)
![4.1.2 Security Logout You can use logout function to switch back to [Public Area], the logout procedure is: 1. Use right mouse button click on ADI USB Drive disk name. 2. From the popup menu, use left mouse button click on “Security Logout”. Note: If you had enabled PC lock, you will see “PC is locked” message appears for about two seconds when doing “Security Logout” in Windows ME. This is not a software bug, because PC lock can’t find USB disk during the transition state of “Security Logout”. 4.1.3 Change Password The default password of ADI USB Drive is “0000”, it’s better for you to change password as soon as you know how to change it. “passwd.exe ” is still the key to change password. The procedure of changing password is: 1. Launch passwd.exe. 2. Click “Change Password” button. 3. Passwd.exe will popup a message told you to input old password first, click “OK”. 4. Input old password, click “OK” button. 5. Now, input new password in [New password] Column, and re-type password in [Confirm] to make sure new password is correct. Click “OK” button. 6. If password is successfully changed, passwd.exe will popup a successful message, otherwise you should repeat step 1~5 to change password again. 7. After password is changed, ADI USB Drive is switched to [Security Area] automatically. 12](https://usermanual.wiki/ADI/ADIUSB10/User-Guide-313686-Page-13.png)
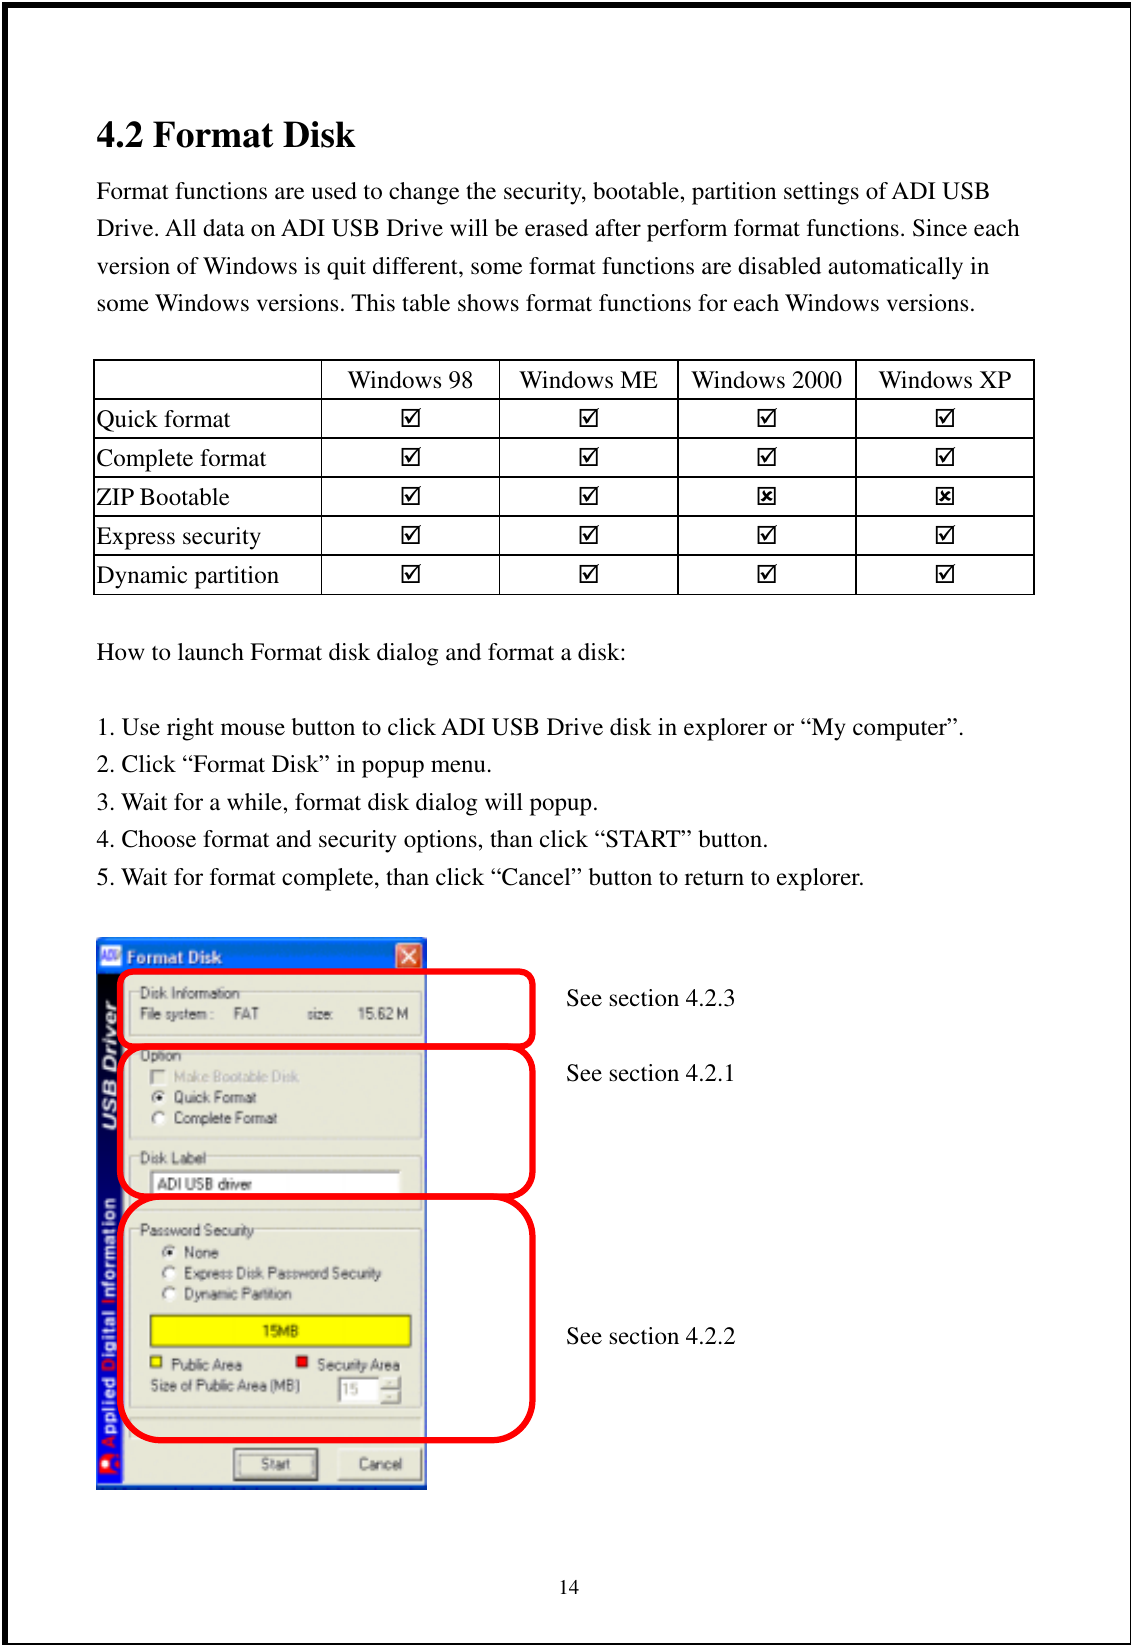
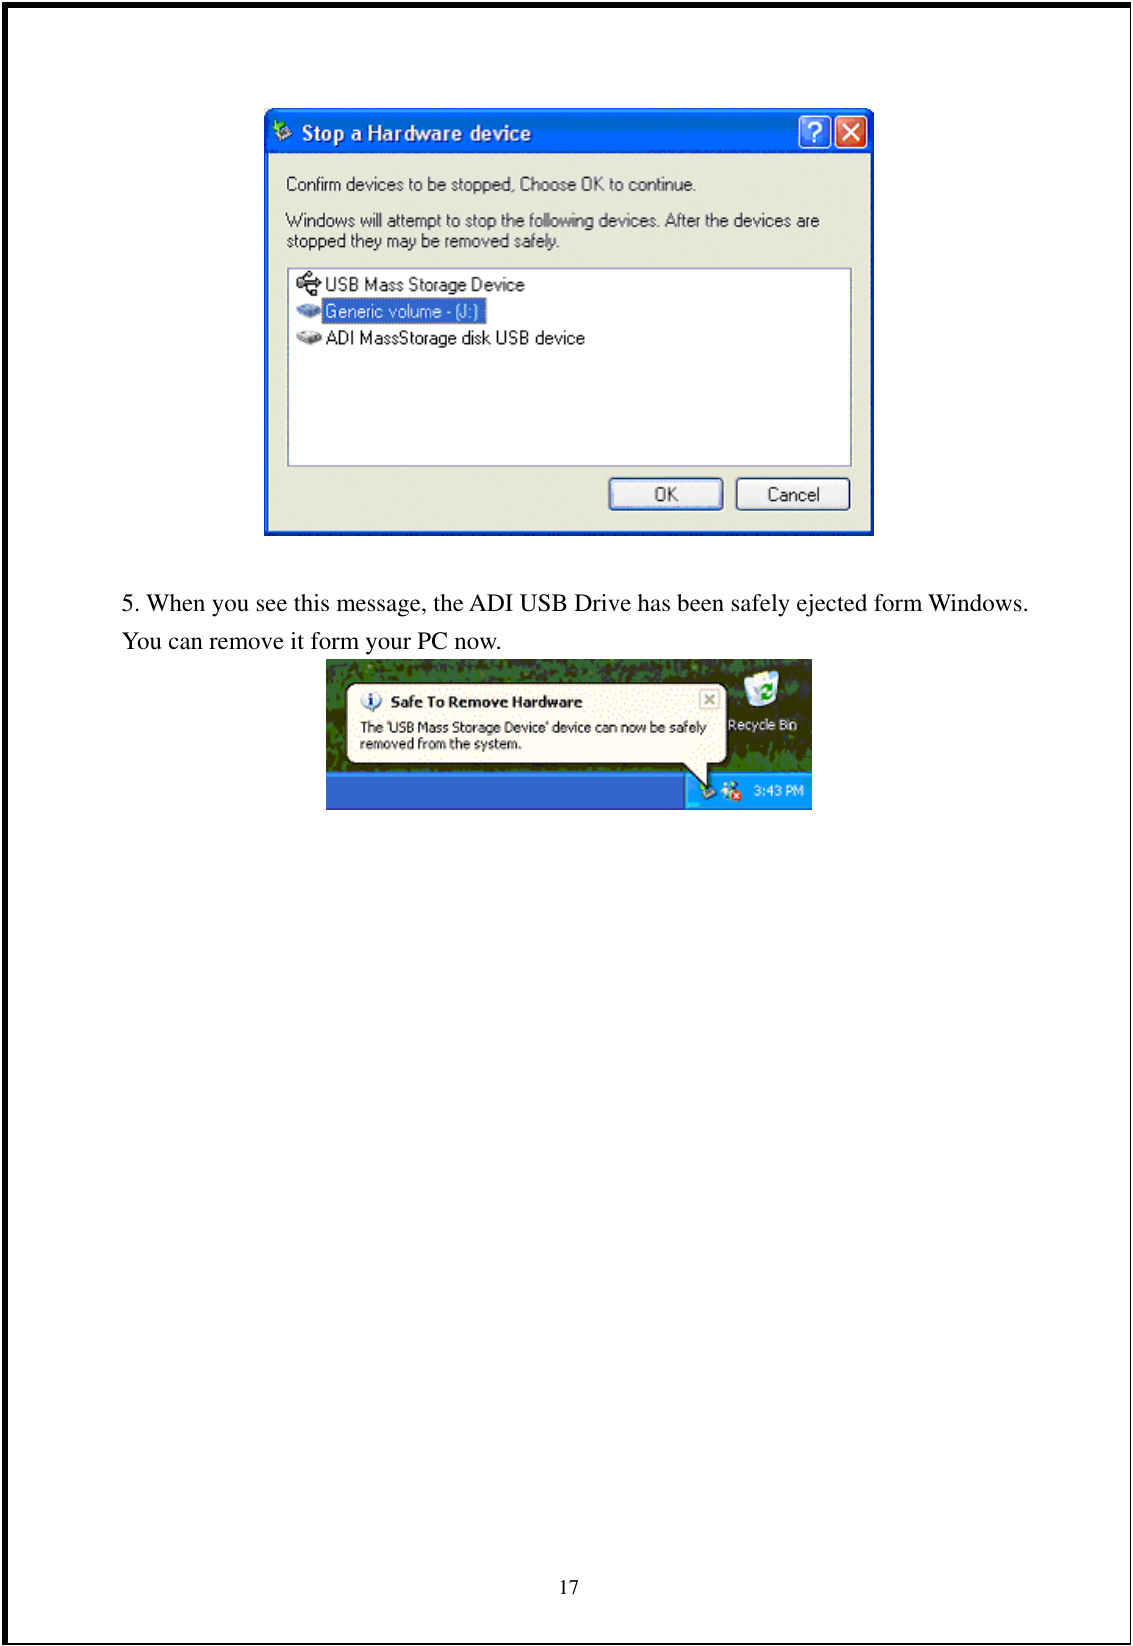
![enabled. We discuss the procedure of bootable function below: USB ZIP bootable 1. Format ADI USB Drive. 2. Change the “boot from” setting of BIOS to “USB ZIP”. 3. Plug ADI USB Drive into PC and reboot. 4.3 Safety Eject Many users complain about USB disk may cause data loss, because they don’t “eject” USB disk before remove it form PC. When you copy files from or to ADI USB Drive, operation systems (ex: Windows 2000) will create a memory area called “buffer” to manage file I/O on ADI USB Drive. If you suddenly remove ADI USB Drive from PC, data in “buffer” would be lost because there is no time for Windows to flush the data in buffer into ADI USB Drive. To avoid data loss, “Safety Eject” is a good solution. The procedure of safety eject is: 1. Use right mouse button to click ADI USB Drive disk in explorer or “My computer”. 2. Click “Safety Eject” in popup menu. 3. In “Remove or Eject hardware” dialog, click [Stop] button 164. Choose the device you want to stop, than click [OK] button.](https://usermanual.wiki/ADI/ADIUSB10/User-Guide-313686-Page-17.png)
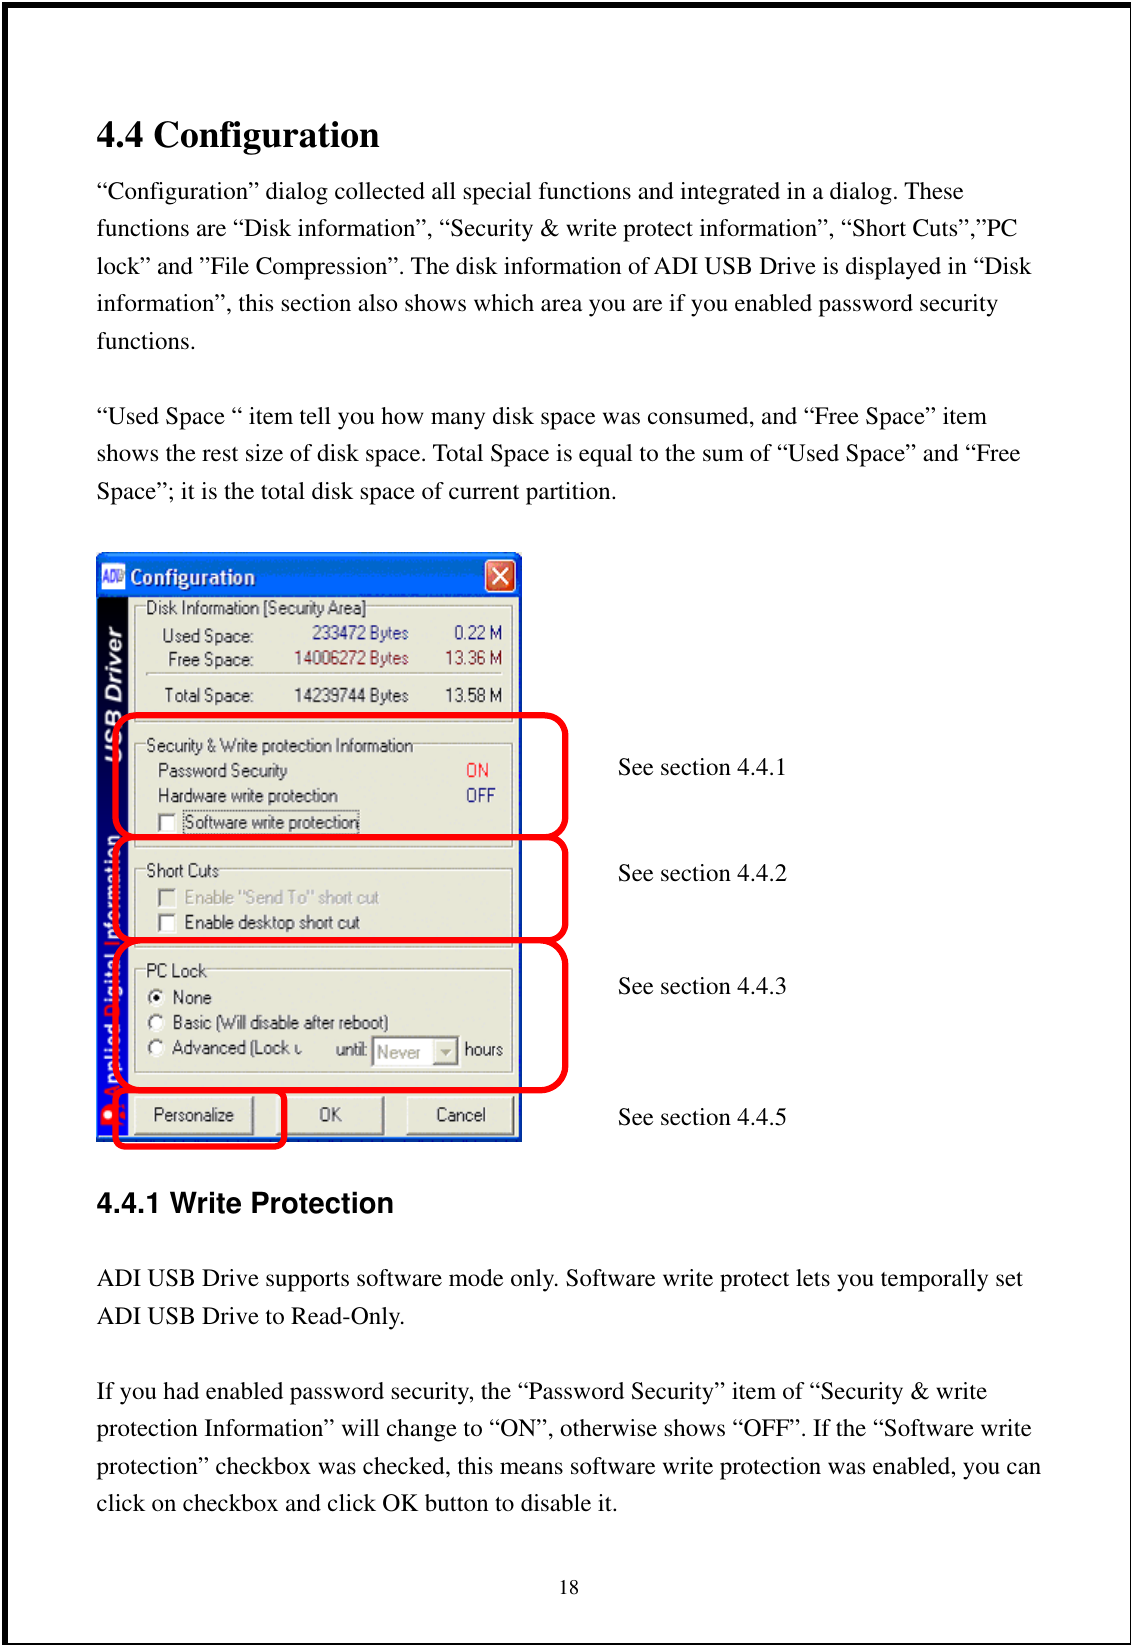
![4.4.4 Personalize ADI USB Drive ADI USB Drive supports personalization setting, you can change the background image of folder, text color, background color or even use a HTML file as folder background. Please notice that this function doesn’t support in Windows XP. The procedure of launching personalization wizard is: 1. Click [Personalize] button to launch personalization wizard. 2. Choose customization items, click [Next]. 3. Choose background image, text color and text background color. You can import your own background by clicking [Browsing] button. Click [Next] to enable your settings. 20](https://usermanual.wiki/ADI/ADIUSB10/User-Guide-313686-Page-21.png)