ADOBEAIR Evaporative Cooler Manual L9070129
User Manual: ADOBEAIR ADOBEAIR Evaporative Cooler Manual ADOBEAIR Evaporative Cooler Owner's Manual, ADOBEAIR Evaporative Cooler installation guides
Open the PDF directly: View PDF ![]() .
.
Page Count: 8
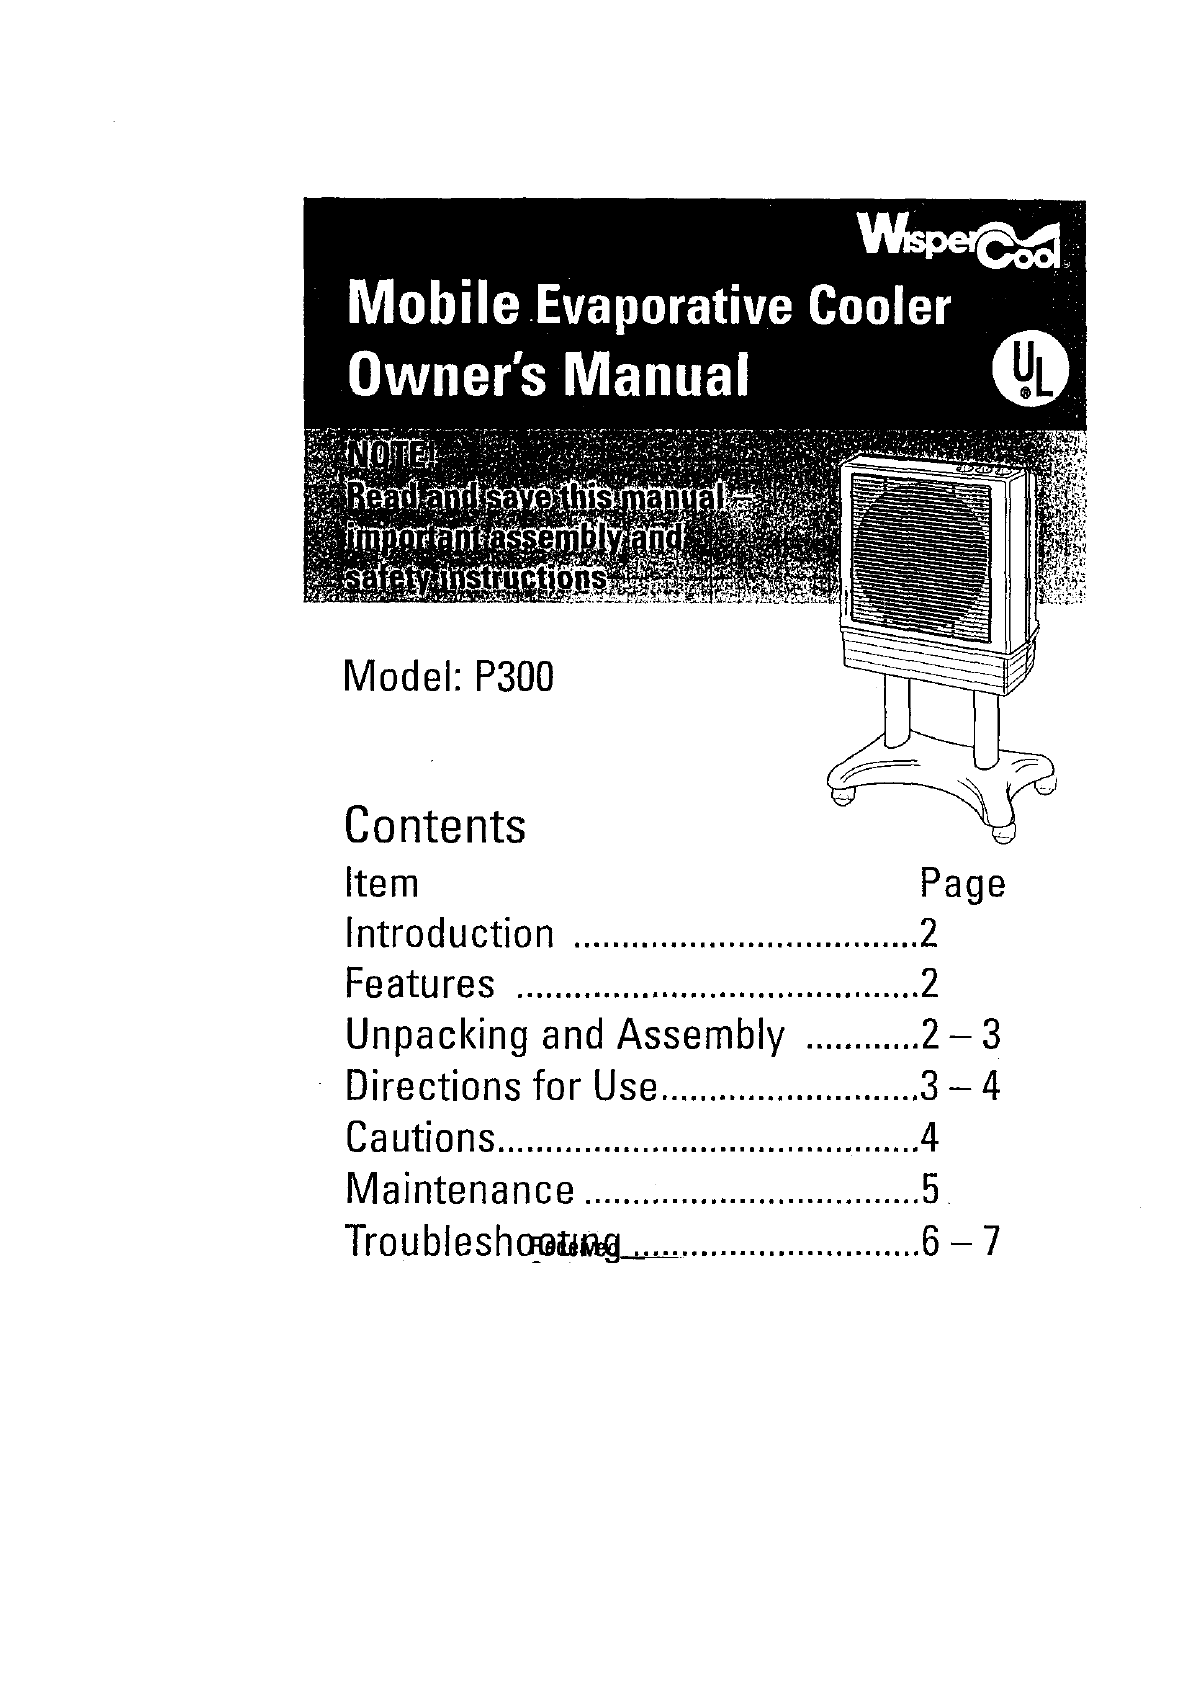
Model: P300
Contents
Item
Introduction
Features ..........................................2
Unpacking and Assembly ............2- 3
Directions for Use...........................3 - 4
Cautions............................................4
Maintenance ...................................5
Troublesh_a_ ...............................6 - 7
INTRODUCTION
Please read this OWNER'S MANUAL carefully. It will show you how
to assemble, maintain, and operate the cooler safely and efficiently
obtain full benefit from its many built-in features.
Safety Caution:
ALWAYSUNPLUGTHECOOLERFROMTHEELECTRICALRECEPTACLE
BEFOREATTEMPTINGTOASSEMBLE,OPEN,ORSERVICETHISCOOLER.
FORMAXIMUM SAFETYALWAYSPLUGTHIS COOLERINTOAN
ELECTRICALRECEPTACLEPROVIDEDBYA GROUNDFAULTCIRCUIT
INTERRUPTER(GFCI).
®
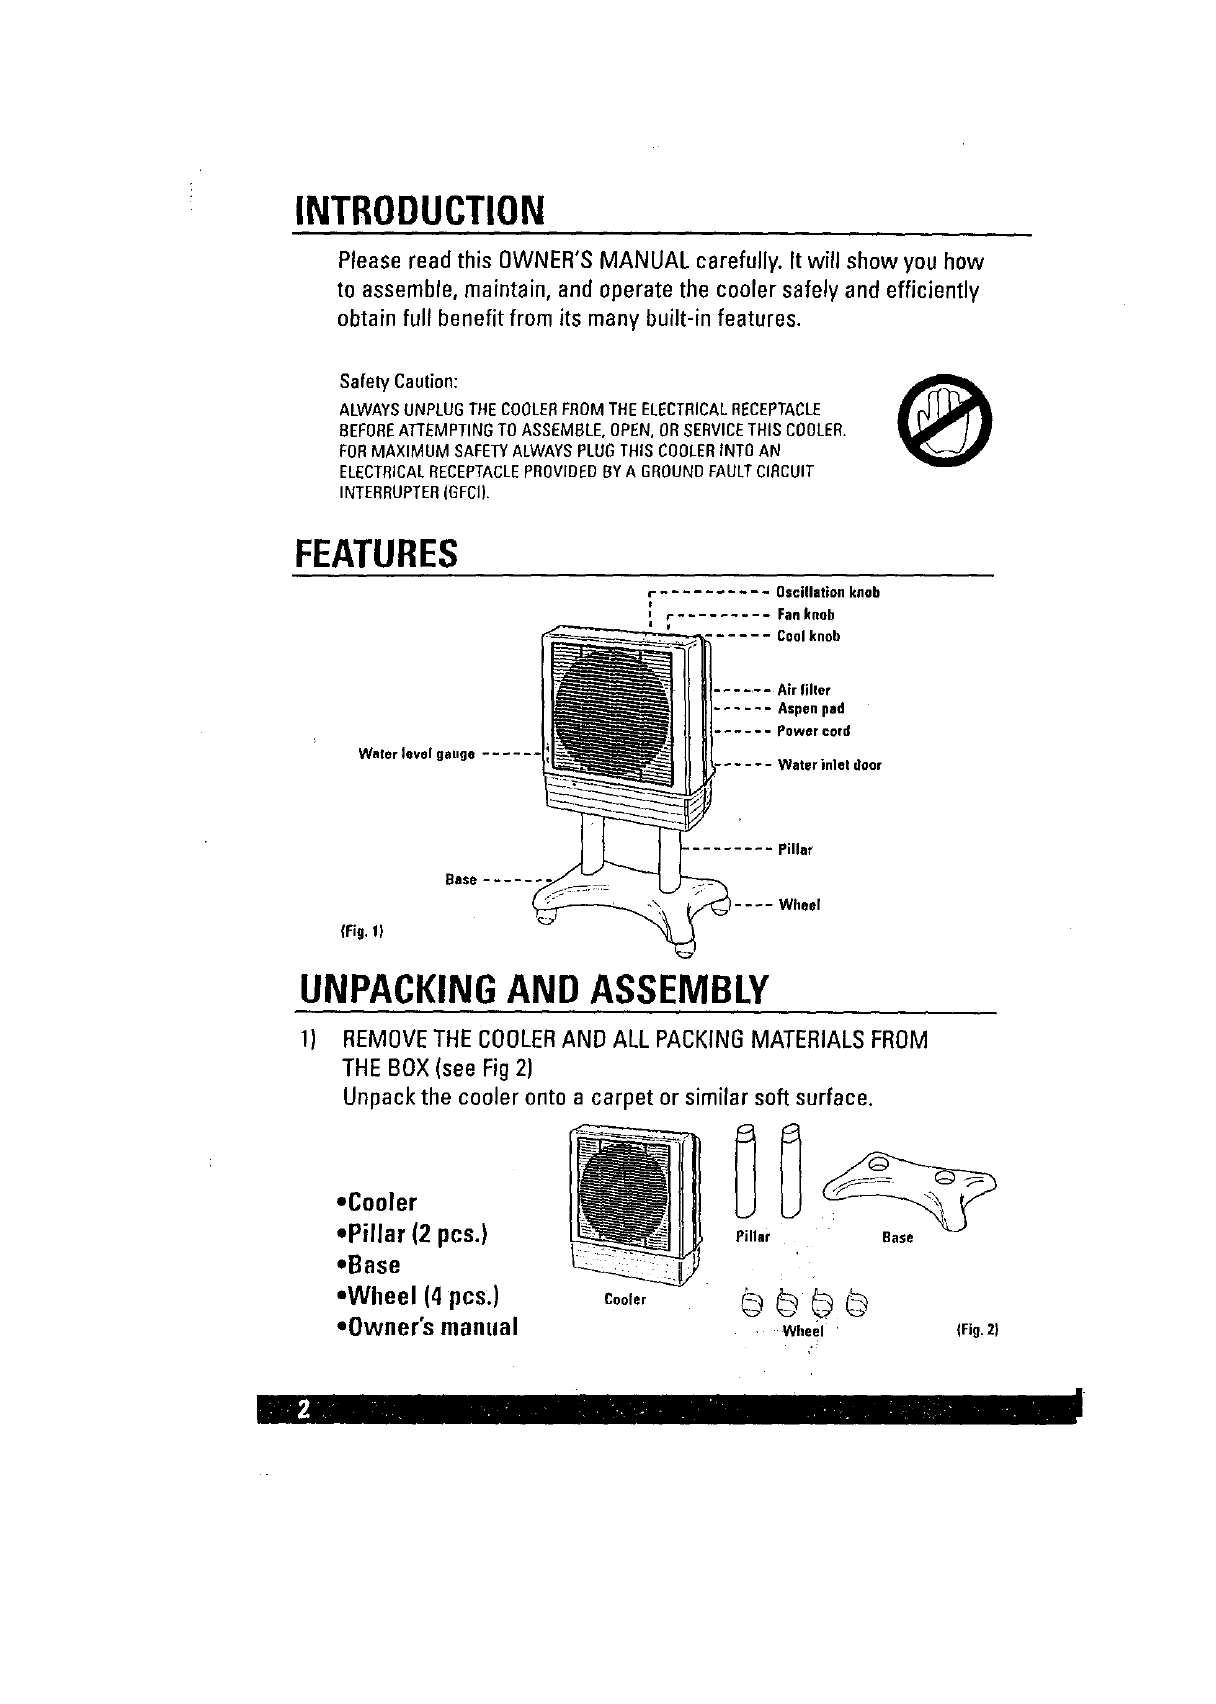
FEATURES
fOscillationknob
e
i f Fan knob
I u ...... Cool knob
Wnter level gange ......
....... Air filler
...... Aspenpad
...... Powercord
..... Waterinletdeor
{Fig.l)
_ase .....
Pillar
Wheel
UNPACKINGAND ASSEMBLY
1) REMOVE THE COOLERAND ALL PACKING MATERIALS FROM
THE BOX (see Fig 2)
Unpack the cooler onto a carpet or similar soft surface.
=Cooler
=Pillar (2 pcs.)
.Base
°Wheel (4 pcs.)
=Owner's manual
Cooler
Pillar Base
co@@
Wheel ' (Fig.Z}
i_ii" - IV,_-
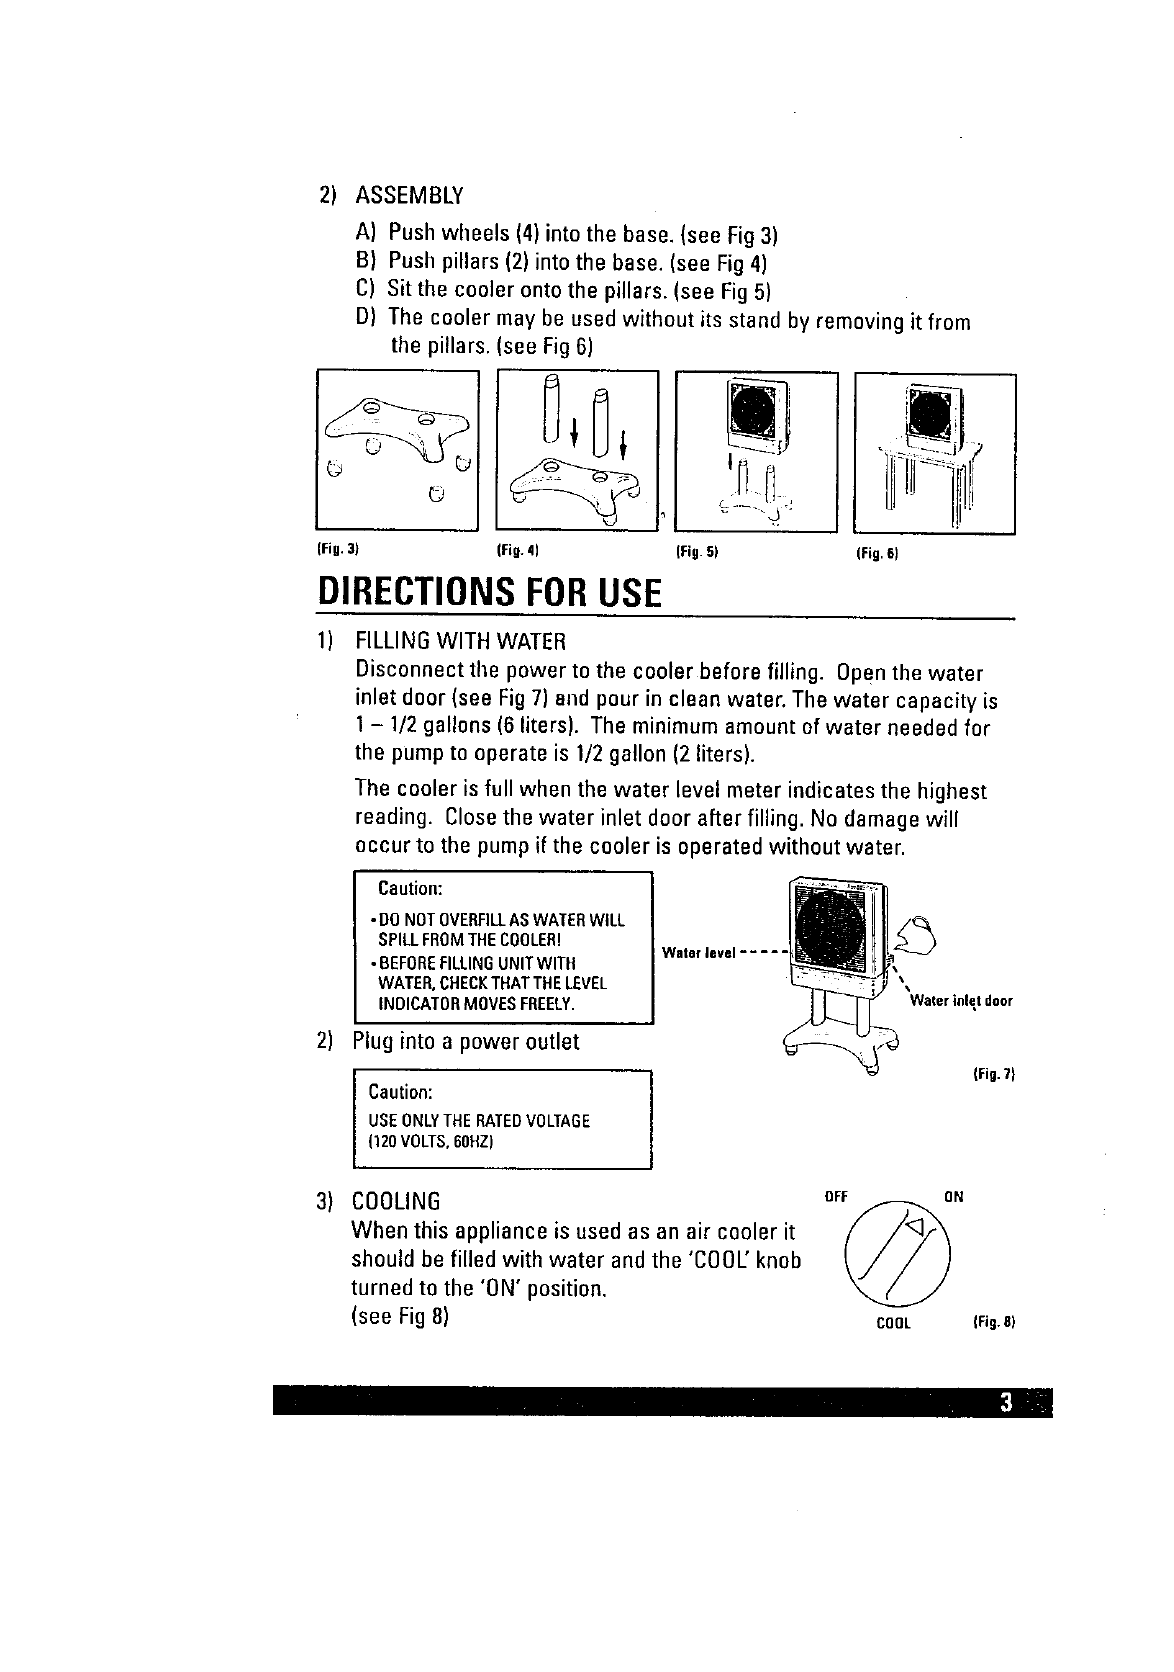
2) ASSEMBLY
A) Push wheels (4) into the base. (see Fig 3)
B) Push pillars (2) into the base. (see Fig 4)
C) Sitthe cooler onto the pillars. (see Fig 5)
D) The cooler may be used without its stand by removing it from
the pillars. (see Fig 6)
©
(Fig.3) (Fig. 4) (Fig.5) (Fig.6)
DIRECTIONSFORUSE
1)
2)
3)
FILLING WITH WATER
Disconnect the power to the cooler before filling. Open the water
inlet door (see Fig 7) and pour in clean water. The water capacity is
1- 1/2 gallons (6 liters). The minimum amount of water needed for
the pump to operate is 1/2 gallon (2 liters).
The cooler is full when the water level meter indicates the highest
reading. Close the water inlet door after filling. No damage will
occur to the pump if the cooler is operated without water.
Caution:
•DONOTOVERFILLASWATERWILL
SPILLFROMTHECOOLER!
• BEFOREFILLINGUNITWITH
WATER,CHECKTHATTHELEVEL
INDICATORMOVESFREELY.
Waterievel .....
'Water inlet door
Plug into a power outlet
Caution: j
USEONLYTHERATEDVOLTAGE
(120VOLTS,60HZ)
(Fig.T}
COOLING
When this appliance is used as an air cooler it
should be filled with water and the 'COOL' knob
turned to the 'ON' position.
(see Fig 8)
OFF ON
COOL IFig.81
_;] .i
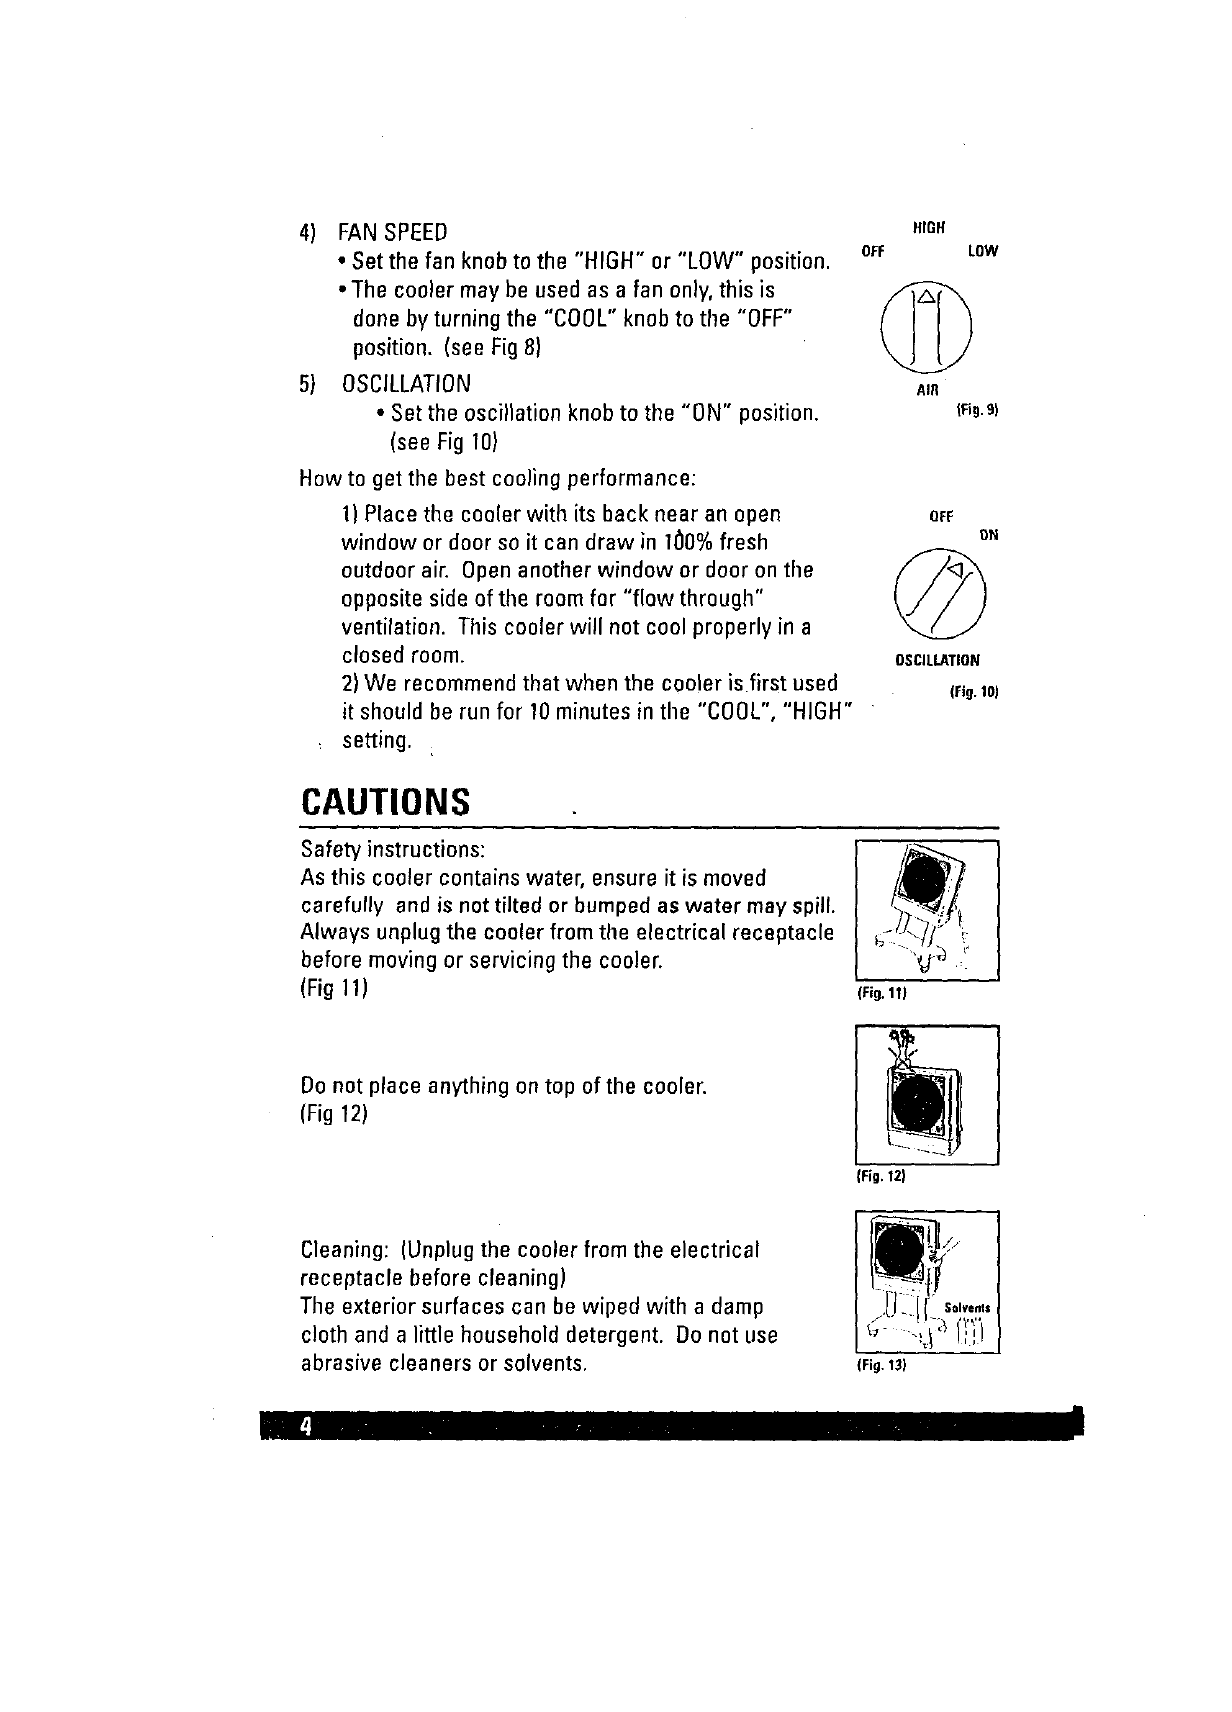
4) FAN SPEED
•Set the fan knob to the "HIGH" or "LOW" position.
• The cooler may be used as a fan only, this is
done by turning the "COOL" knob to the "OFF"
position. (see Fig 8)
5) OSCILLATION
• Set the oscillation knob to the "ON" position.
(see Fig 10)
How to get the best cooling performance:
1) Place the cooler with its back near an open
window or door so it can draw in 100% fresh
outdoor air. Open another window or door on the
opposite side of the room for "flow through"
ventilation. This cooler will not cool properly in a
closed room.
2) We recommend that when the cooler is first used
it should be run for 10 minutes in the "COOL", "HIGH"
setting.
HIGH
OFF LOW
©
AIR
(Fig.9)
OFF OH
©
OSCILLATION
(Fig.10J
CAUTIONS
Safety instructions:
As this cooler contains water, ensure it is moved
carefully and is not tilted or bumped as water may spill.
Always unplug the cooler from the electrical receptacle
before moving or servicing the cooler.
(Fig 11) (Fig.11|
Do not place anything on top of the ceole_
(Fig 12)
(Fig. 12)
(Fig. 13)
Cleaning: (Unplug the cooler from the electrical
receptacle before cleaning)
The exterior surfaces can be wiped with a damp
cloth and a little household detergent. Do not use
abrasive cleaners or solvents,
MAINTENANCE
Uoplug the cooler from the power supply before serviciog.
At least once a year, at the end of summer, it is advisable to
perform some simple cleaning on your cooler to maintain its
high efficiency. This involves cleaning the water systemand
filters. (Air filter and Aspen filter pad)
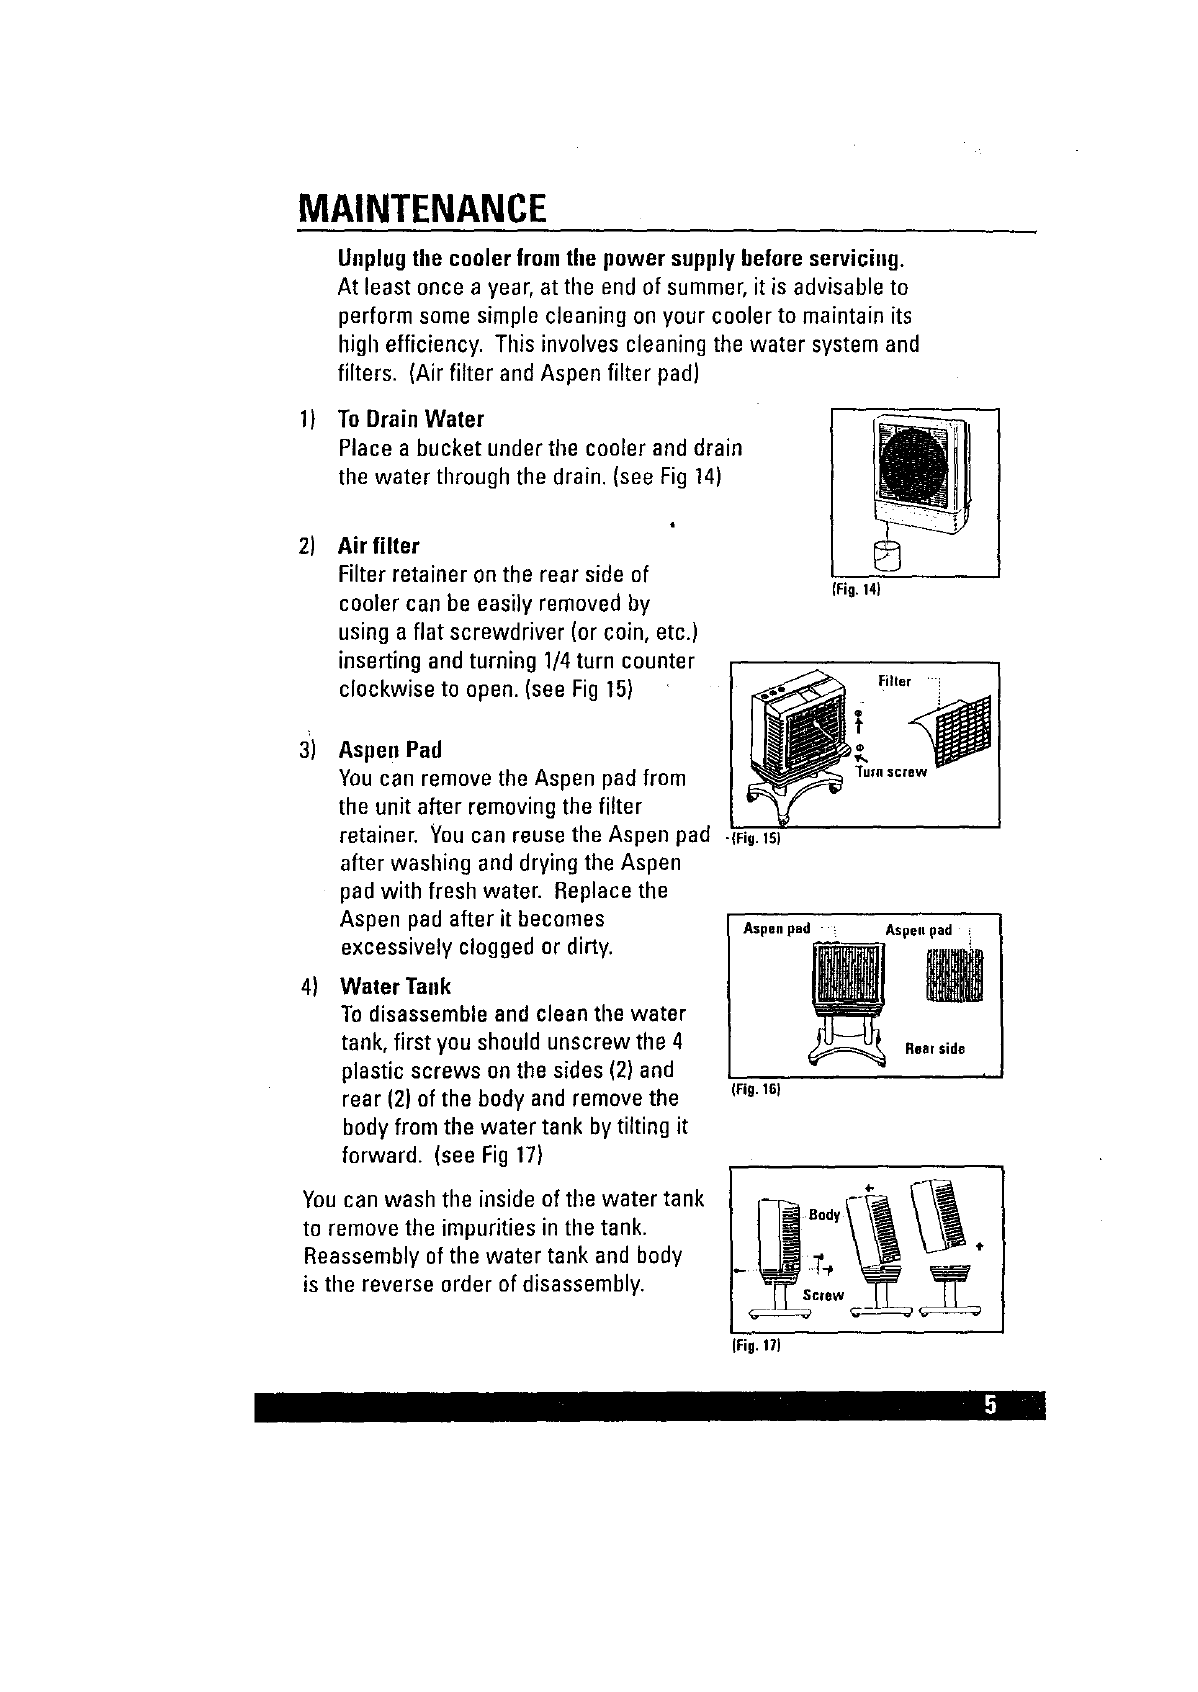
1) To Drain Water
Place a bucket under the cooler and drain
the water through the drain. (see Fig 14)
2) Air filter
Filter retainer on the rear side of
cooler can be easily removed by
using a flat screwdriver (or coin, etc.)
inserting and turning 1/4 turn counter
clockwise to open. (see Fig 15)
3)
4)
Aspen Pad
You can remove the Aspen pad from
the unit after removing the filter
retainer. Youcan reuse the Aspen pad -{Fig.Is)
after washing and drying the Aspen
pad with fresh water. Replace the
Aspen pad after it becomes
excessively clogged or dirty.
Water "lauk
To disassemble and clean the water
tank, first you should unscrew the 4
plastic screws on the sides (2) and
rear (2) of the body and remove the
body from the water tank by tilting it
forward. (see Fig 17)
fFi9.14)
You can wash the inside of tile water tank
to remove the impurities in the tank.
Reassembly of the water tank and body
is the reverse order of disassembly.
Filter i
Aspen pad Aspell pad
(Fig. 16)
(Fig.17)
TROUBLESHOOTINGGUIDE
CONDITION PROBABLECAUSE
1. Cooler will not operate at first. 1. Power outlet or supply faulty.
1.2 Wrongvoltage.
2. Cooler stopsoperatingafter 2.1 Motoroverheated.(safetycutout)
runningfor sometime.
3. No cooling. ,3.1 Coolingcontrolisoff.
3.2 Reservoiris empty.
3.3
3.4
3.5
Weather is too humid.
Aspen filter pad and/or pump inlet
screen blocked or dirty,
Pump is not working properly.
3.6 Fan/pumpnotrunningfast enough
onrow speed.
4. Coolersmellsbad. 4.1 Reservoirorfilter paddirty,
4.2 Water quality is poor.
5. Coolermakesscrapingorrattling 5.1 Dirthasaccumulatedinsidepump.
noiseon new seasonstart-up.
6. Water overflowsfrom resePvoir. 6.1 Toomuchwater has accumulated
insidepump,
6,2 Water levelindicatorstuck.
7. Coolerwillnot operateat all. 7.1 Electricalfault.
8. Damagedpowersupplycord.
REMEDY
1.1.1
1.1.2
1.1.3
1.2.1
Switch onpoweroutlet.
Check powersupply.
Checkpoweroutlet.
Checkthat powersupplyisthe sareeas specifiedon the ratinglabel.
2.1.1 Wait 30-45 minutes for motor to cool down and it will restart automatically. If condition persists
take the cooler to aservice agent.
.Q
3,1.1 Turn "COOL" control on. (see Fig8 page 3)
3,2.1
3.3.1
3.4.1
Fillwith water again until water level meter is at the full position. Water capacity =
I 1/2 gallous (6 liters).
Turn"COOL"controloff(seeFig8 page3) andusecooleras a fan.
Cleanparts- seemaintenancepage.
3.5.1
3.6.1
3.6.2
The pinup is NOT a separate electric pump, tt is connected to the fen motor and is driven
mechanically. Turn tile cooler off and completely drain tile reservoir
(see page 5}. Then refill with water (see page 5). Switch "FAN" to high speed (2). Turn the
"C00L" (cooling) control on (see Fig 8 page 3) and run the cooler for 10-15 minutes non-stop.
The Aspen filter pad should now be wet. If the pad is notvisibly wet and there is no cooling,
have Ihe cooler checked by a service agent.
Check that supply voltage is up to correct level.
Fan and pump wig pick-up speed slightly as the motor reaches normal operating temperature.
Allow the cooler to run for 30.60 minutes and check again. If there is no improvement, have
the cooler chocked by a service agent,
4.1.1 {)rainreservoirandfill thecoolerwithcleanwaten If it stillsmells,cleanthe tank andreplace
theAspenfilterpador proceedto 4.2.1.
4.2.1 Addelittlevanillaessenceorperfumeto thewater.
5.1.1 Proceedas in3.5.1.
6.1.1 Drainsomewater out(see Fig14page6 )
6.2.1 Slidetheindicatorup to the full positionthenlet itdrop. if it failsto operate,haveit checked
bya serviceagent.
7.1,1 Electricalpartsmustonly be repairedand replacedbyauthorizedserviceagents.
8.1.1 If thepower supplycordof thisapplianceis damaged,it shouldbe replaced by an authorized
serviceagentas specialpurposetoolsare required.
==
PORTABLE EVAPORATIVE COOLER LIMITED WARRANTY
AdobeAir. inc., warrants to its customersand/or consumerpurchasers of this portablecoolerthat the coolerandthe parLsthereof, exceptthe evaporative cooler
pad media,wig be free from defectsin material and workmanshipfor a periodof one year from the date of initialpurchase.
I. What this warranty does notcover:.
A. Thiswarrant,/does not cover anyfailure, damage or defect that resultsfrom unauthorizedmodification or service; or fromthe use of products or replacement
parts other than those from AdobeAir;inducing,but not limitedto, motorsandpumps.
B. Thiswarranty doesnot cover any damage or malfunctionunlesscaused by a defect in materialor workmanship.Damageor malfunction which is not covered
by this warranty includes,but is not limitedto, water damageto the motor,abuse,misuse,alteration,improperinstallation/maintenance/operationor
transportationdamage.
C.This warranty does not cover replacement of coolerpads.Coolerpads are disposableitemsandtheir life expectancydepends on local conditions.
D. Thiswarranty doesnot coverthe cost of a service call atthe site of installationto diagnose cause of trouble,the cost of labor to installthe part, or mileage
allowance to or from the site.AdobeAir does notpaythe freighVpostage on any exchange.
E. Thiswarranty doesnot cover evaporative coolers installedend operated outsidethe continentalUnited States.
II. DO NOT USE COOLERCLEANERS.COOLERTREATMENTS.OROTHERADDITIVESIN THIS EVAPORATIVECOOLER.THEUSE OFANY OFTHESEPRODUCTSWILL
V01D YOURWARRANTYAND MAY IMPAIR THE UFE OFYOURCOOLER..
IlL To obtain service under this warranty, contact the Customer Service Department,AdobeAir.Inc., 500 South 15thStreet, Phoenix, Arizona 85034,or
phone 602/257-0060.Thiswarranty is the onlywarranty extended byAdobeAirto suppliersand/or purchasersof thisevaporativecooler.AdobeAir disclaims all
other warranties, express or implied, that arise bythe operation of the law. exceptthat implied warranties of merchantability or fitness for aparticular purpose
are limited to the duration of the warranty period. AdobeAirshall not be liablefor any incidentalor consequentialdamagewhich may have resultedfrom any
alleged breach of warranty. Somestates do not allow limitations on how long animpliedwarranty lasts orthe exclusionorlimitationof incidental or
consequentialdamages,sothe limitations or exclusionsstated above maynot applyto you. Thiswarranty givesyouspecificlegal rights,and you mayhave
other rights which vary from stateto state. Since AdobeAir,Inc. follows a policyof continuousproduct improvement, it reservesthe right to change design
and specification without prior notice or liability.
Replacement Parts
Your cooler is a high-quality evaporative cooler designed to giveyears of trouble-free service when it is properly
maintained. However, should replacement parts be required, they are available through AdobeAir customer service at 602-257-0060.
Item Part Number Item Part Number
DustFilter P918201A Knobs Control P918701A
AspenPad P401604A WaterDistributor Pg18801A
InletPanel P918301A PumpBasket Pg18901A
Casters P918401A WaterRll Door P919001A
DrainPlug Pg18501A WaterLevel IndicatorAssembly P619701A
Water ValveKnob PglS601A PumpDriveAssembty P619801A
